The office wellness challenge was in three days and I’d completely forgotten. Everyone else would be bringing elaborate smoothie bowls with acai swirls, homemade granola clusters that took hours, and chia puddings layered like edible art. I had a bunch of spotty bananas, a jar of peanut butter that was down to the last few scoops, and a carton of milk I’d bought on a whim. Honestly, I almost just brought a bag of apples and called it a day. But then I remembered this trick I’d seen online—overnight oats. I figured I could throw something together, hide it in the back of the fridge, and at least show up with something edible.
I grabbed a mason jar from the back of the cabinet—the one with the lid that didn’t quite screw on straight—and started tossing things in. Mashed the banana with a fork, globbed in the peanut butter, splashed in the milk, and shook it like a polaroid picture. It looked like a mess. A lumpy, brownish mess. I shoved it behind the leftover takeout and forgot about it. The morning of the challenge, I pulled it out, gave it a stir, and took a bite. I mean, I was just tasting it to see if it was even edible. And then I took another bite. And another. It was actually, genuinely, unexpectedly good. The banana had softened overnight, the peanut butter had melded into this creamy, dreamy swirl, and the oats had absorbed just enough liquid to be tender but not mushy. It was like dessert for breakfast, and I’d made it in less than five minutes.
So I brought my wonky mason jar to the challenge, feeling a little sheepish next to the Instagram-worthy creations. And you know what? People kept coming back to my jar. They wanted the recipe. They couldn’t believe something so simple could taste that good. The smoothie bowls were pretty, but my quick peanut butter banana overnight oats were the ones people actually wanted to eat. Maybe you’ve been there—the panic of needing something fast, the surprise when it actually works out. That’s this recipe. It’s the underdog that wins, the shortcut that tastes like you planned it all along. And honestly, that’s why I’ve been making it every Sunday night ever since.
Why You’ll Love This Recipe
Let me tell you why this particular recipe has become a staple in my kitchen, and why I think it’ll become one in yours too. I’ve tested this exact method at least a dozen times, tweaking the ratios and the timing to get it just right. What I landed on is the perfect balance of creamy, nutty, and sweet, with absolutely zero fuss.
- Quick & Easy: This comes together in under 5 minutes. I’m not exaggerating. You can make it while your coffee is brewing. It’s the ultimate set-it-and-forget-it breakfast for busy weeknights when you’re already thinking about tomorrow’s chaos.
- Simple Ingredients: You likely already have everything in your kitchen. Bananas, peanut butter, oats, milk. No fancy grocery trips, no obscure superfood powders. Just real, honest food.
- Perfect for Meal Prep: This is the weeknight warrior’s dream. Make four jars on Sunday, and you have breakfast sorted until Thursday. Grab one from the fridge on your way out the door, and you’re set.
- Crowd-Pleaser: I’ve served these to picky kids, health-conscious friends, and skeptical in-laws. Every single person has asked for the recipe. It’s that universal appeal of peanut butter and banana—a combo that never fails.
- Unbelievably Delicious: The texture is the real star here. The oats soften just enough, the banana melts into a natural sweetener, and the peanut butter creates this rich, creamy base. It’s comfort food that happens to be good for you.
What makes this different from every other overnight oats recipe out there? It’s the technique. Most recipes have you just dump everything in a jar and hope for the best. But I’ve learned that mashing the banana first makes all the difference—it distributes the sweetness evenly and creates a silkier texture. Plus, using a slightly riper banana (the kind with brown spots) gives you that deep, caramel-like flavor without needing any added sugar. This isn’t just another version of overnight oats. It’s the best version I’ve ever made, and I’ve made a lot of them.
This recipe is the kind that makes you close your eyes after the first bite. It’s comfort food reimagined—faster, simpler, but with the same soul-soothing satisfaction. Perfect for those mornings when you need a win before the day even starts.
What Ingredients You Will Need
This recipe uses simple, wholesome ingredients to deliver bold flavor and satisfying texture without the fuss. Everything here is a pantry staple, which is exactly what you need on a busy weeknight when you’re already planning for tomorrow.
- Rolled Oats, 1 cup (90g): Also called old-fashioned oats. These are the key to the perfect texture. They soften overnight but still have a little chew. I personally prefer the Quaker Old Fashioned Oats for consistent results. Don’t use steel-cut oats—they won’t soften enough—and avoid instant oats, which turn into mush. (Use certified gluten-free oats if needed)
- Ripe Banana, 1 large (about 120g mashed): The riper, the better. Look for bananas with plenty of brown spots. They’re sweeter and mash more easily, which means you can skip any added sweeteners. If your banana is still a bit green, you might want to add a teaspoon of maple syrup or honey.
- Creamy Peanut Butter, ¼ cup (64g): I recommend using a natural peanut butter with no added sugar or oil for the cleanest flavor. Brands like Smucker’s Natural or Justin’s work beautifully. The peanut butter provides healthy fats and protein, which keeps you full until lunch. If you only have crunchy, go for it—it adds a nice texture.
- Milk of Choice, 1 cup (240ml): Any milk works here. I usually use whole milk for creaminess, but almond milk, oat milk, or soy milk are all great options. If you use a thinner milk like unsweetened almond milk, the oats will be a bit less creamy, so you might want to add an extra tablespoon of yogurt or peanut butter.
- Plain Greek Yogurt, ½ cup (120g): This is my secret ingredient. It adds a tangy creaminess that balances the sweetness of the banana and peanut butter. It also boosts the protein content significantly. I use Fage Total 2% for the best texture. For a dairy-free option, use a thick coconut yogurt. (Optional, but highly recommended)
- Chia Seeds, 2 tablespoons (20g): These little guys are optional, but I never skip them. They absorb liquid and create a pudding-like texture, plus they add fiber and omega-3s. They also help thicken the oats overnight. (Adds thickness and nutrition)
- Maple Syrup or Honey, 1-2 tablespoons (15-30ml): Only if you have a sweet tooth or your banana isn’t super ripe. I usually don’t need it, but taste your mixture before refrigerating and adjust. (Use agave for vegan option)
- Pinch of Salt: Just a tiny pinch. It sounds weird, but salt enhances the sweetness and balances the flavors. Trust me on this one.
- Optional Toppings: Sliced banana, a drizzle of extra peanut butter, a sprinkle of cinnamon, or some chopped nuts for crunch. These are for serving, not for the overnight mixture.
That’s it. Seven ingredients, most of which you probably already have. No weird substitutions, no expensive specialty items. Just honest, good food that works.
Equipment Needed
You don’t need a fancy kitchen for this recipe. In fact, the simpler, the better. Here’s what you’ll need:
- Mason Jars or Airtight Containers (4, 8-ounce or 12-ounce size): Wide-mouth mason jars are my go-to. They’re cheap, reusable, and the perfect portion size. I’ve been using the same set of Ball Mason Jars for years. If you don’t have jars, any airtight container works—just make sure the lid seals well to keep the oats from drying out.
- Fork or Potato Masher: For mashing the banana. A fork works fine, but a potato masher makes it faster and smoother. I’ve used both, and honestly, a fork does the job perfectly well.
- Measuring Cups and Spoons: For accuracy. I know eyeballing is tempting, but for the best texture, measure your oats and milk. You can eyeball the peanut butter—I always do.
- Spoon or Small Whisk: For stirring everything together. A spoon is fine, but a small whisk helps break up any peanut butter clumps. I use a chopstick sometimes—whatever’s clean.
- Cutting Board and Knife: For slicing the banana, if you’re adding toppings. Not strictly necessary for the base recipe.
That’s it. Five pieces of equipment, most of which you already own. No blender, no food processor, no special gadgets. This is low-fuss cooking at its finest.
Preparation Method
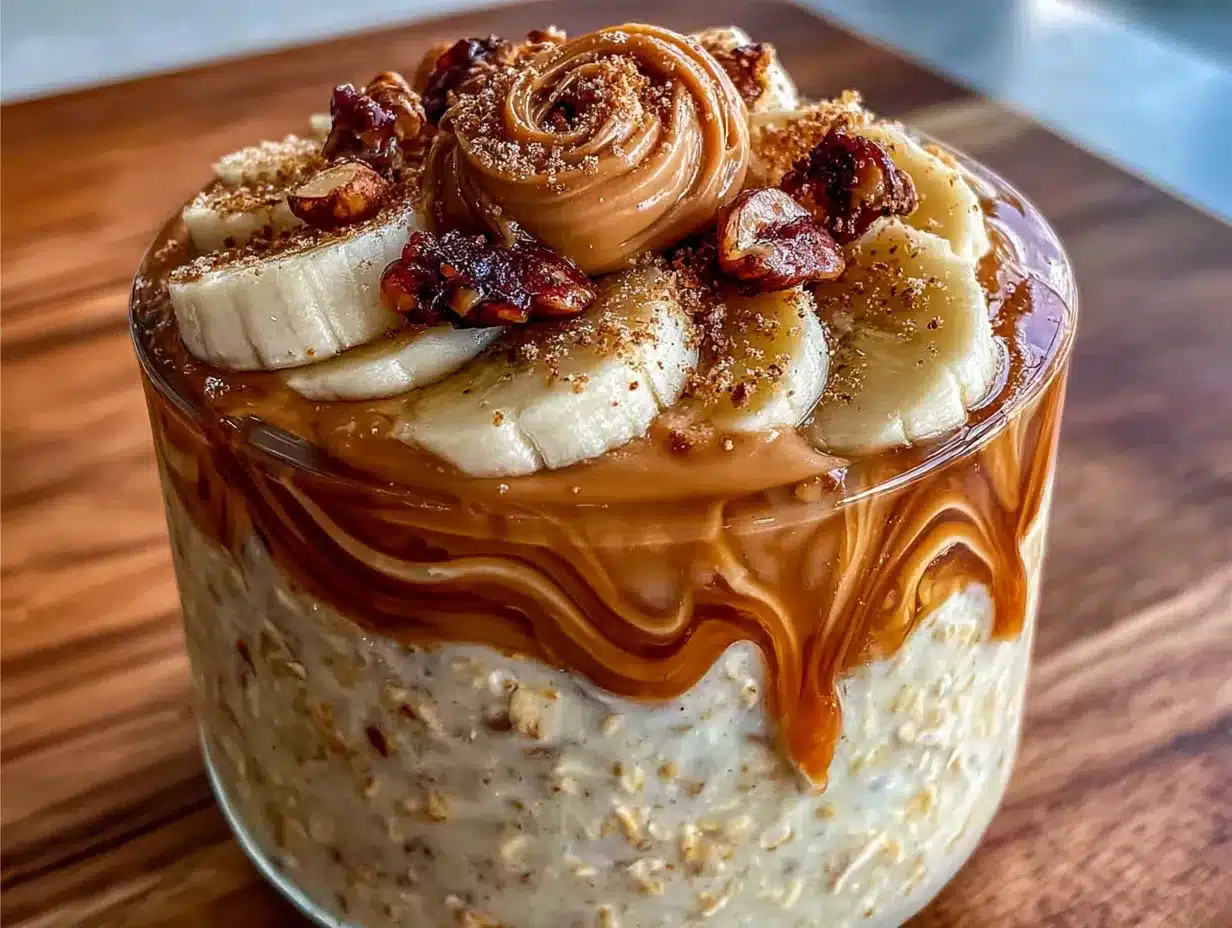
Alright, let’s get to it. This method is foolproof, but I’ll walk you through every step with the little tricks I’ve learned along the way. The total active time is about 5 minutes. I promise.
- Mash the banana. Peel your ripe banana and place it in a medium bowl. Use a fork to mash it until it’s mostly smooth with just a few small lumps. You want it to be the consistency of a thick puree. If you have a really ripe banana, it’ll practically mash itself. This step is crucial—don’t skip it. Mashing the banana first means the sweetness distributes evenly throughout the oats, rather than staying in one big chunk. (Time: 1 minute)
- Add the wet ingredients. To the mashed banana, add the peanut butter, milk, and Greek yogurt (if using). Whisk or stir vigorously until the peanut butter is fully incorporated and the mixture is smooth. This is where a whisk really helps—peanut butter can be stubborn. If you see small clumps of peanut butter, keep stirring. They’ll break down eventually. The mixture should look like a thick, creamy smoothie at this point. (Time: 1 minute)
- Stir in the dry ingredients. Add the rolled oats, chia seeds (if using), and a tiny pinch of salt. Stir until everything is well combined. The oats should be fully coated in the liquid mixture. Don’t worry if it looks a bit thin—the oats and chia seeds will absorb the liquid overnight and thicken up beautifully. (Time: 30 seconds)
- Taste and adjust. This is my favorite step. Lick the spoon (yes, really). Is it sweet enough for you? If not, add a tablespoon of maple syrup or honey. Does it need more peanut butter? Go for it. This is your breakfast—make it yours. I usually find it perfect as is, but sometimes I add an extra drizzle of maple syrup if the banana wasn’t super ripe. (Time: 15 seconds)
- Divide into jars. Pour the mixture evenly into your four jars or containers. I use a ladle for this, but a measuring cup with a spout works great too. Leave about half an inch of space at the top of each jar to allow for expansion. The oats will puff up slightly overnight. (Time: 30 seconds)
- Seal and refrigerate. Screw the lids on tightly and place the jars in the refrigerator. Let them sit for at least 6 hours, but overnight is best (8-12 hours). The longer they sit, the softer and more pudding-like the texture becomes. I usually make mine right after dinner and they’re perfect by morning. (Time: 5 seconds)
- Serve and enjoy. In the morning, grab a jar from the fridge. Give it a good stir—the chia seeds sometimes settle at the bottom. If the oats seem too thick, stir in a splash of milk to loosen them up. Top with sliced banana, a drizzle of extra peanut butter, a sprinkle of cinnamon, or some chopped peanuts for crunch. Eat cold, or microwave for 30-60 seconds if you prefer warm oats. I like mine cold straight from the jar, but my husband always microwaves his. (Time: 1 minute)
And that’s it. Seven simple steps, about five minutes of active time, and you have breakfast for four days. The texture should be creamy, slightly thick, and perfectly sweet. If it’s too thin, you might have used too much milk—add a few more oats next time. If it’s too thick, add a splash of milk before serving. You’ll get the hang of it after the first batch.
One more thing: don’t be tempted to use quick oats. They’ll turn into a sad, mushy paste. Rolled oats are the sweet spot. Trust the process.
Cooking Tips & Techniques
I’ve made this recipe more times than I can count, and I’ve learned a few things the hard way. Let me save you some trouble.
The Banana Is Your Sweetener: The riper the banana, the sweeter your oats will be. If your banana is still a bit yellow with no brown spots, you’ll probably want to add that tablespoon of maple syrup. I’ve made this mistake before—used a barely ripe banana and ended up with bland oats. Now I keep a stash of overripe bananas in the freezer specifically for this recipe. Just thaw them in the microwave for 30 seconds before mashing.
Don’t Overmix the Oats: I know it’s tempting to stir vigorously, but you don’t want to break down the oats too much. Gentle folding is enough. Overmixing can lead to a gummy texture, especially if you’re using a particularly starchy brand of oats. Just stir until everything is combined, then stop.
The Chia Seed Factor: Chia seeds are powerful thickeners. If you’re using them, you might notice your oats are very thick in the morning. That’s normal. Just stir in a splash of milk before eating. If you skip the chia seeds, the oats will be slightly thinner but still delicious. I usually add them for the extra fiber and omega-3s, but they’re not essential.
Jar Size Matters: I learned this the hard way. Use 8-ounce or 12-ounce jars. Anything smaller and you won’t have room for toppings. Anything larger and you’ll be tempted to overfill. The wide-mouth mason jars from Ball are my absolute favorite—they’re cheap, durable, and the perfect size.
Make-Ahead Timing: These oats are best between 8 and 48 hours after making them. After that, they start to get a bit too soft. So if you’re meal prepping for the whole week, make two batches—one on Sunday for Monday through Wednesday, and another on Wednesday for Thursday and Friday. That way, they’re always at their peak texture.
One Common Mistake: Adding too much liquid. I know it looks thin when you first mix it, but resist the urge to add more milk. The oats and chia seeds will absorb a surprising amount of liquid overnight. If you add too much, you’ll end up with soup. Stick to the measurements, and you’ll be fine.
Multitasking Strategy: Make these while you’re cleaning up after dinner. It takes less than five minutes, and you’re already in the kitchen. I do mine while my coffee is brewing in the morning sometimes, but evenings are better because they have all night to set up.
Variations & Adaptations
This recipe is incredibly forgiving, and I’ve tried more variations than I can count. Here are a few of my favorites:
Chocolate Peanut Butter Version: Add 1 tablespoon of unsweetened cocoa powder to the mixture before stirring in the oats. It turns into a chocolatey, peanut buttery dream. I add a few dark chocolate chips on top in the morning for extra indulgence. My kids call this “dessert breakfast” and honestly, they’re not wrong.
Vegan Option: Use a plant-based milk (oat milk is my favorite for creaminess) and swap the Greek yogurt for a thick coconut yogurt or just omit it entirely. Use maple syrup instead of honey. The texture will be slightly less creamy, but still delicious. I’ve made this version for my vegan sister-in-law, and she requests it every time she visits.
High-Protein Boost: Add a scoop of vanilla or unflavored protein powder to the mixture. You’ll need to add an extra 2-3 tablespoons of milk to keep the texture right. I use a collagen peptide powder, which dissolves easily and doesn’t change the flavor. This version keeps me full until lunch, no problem.
Seasonal Berry Swirl: In summer, I love adding a layer of fresh berries to the jars. Just spoon in some oats, add a layer of mashed raspberries or blueberries, then top with more oats. In the morning, stir it all together for a beautiful berry swirl. It’s like a parfait in a jar.
Warm Spice Variation: Add ½ teaspoon of cinnamon, ¼ teaspoon of nutmeg, and a pinch of ginger to the mixture. It gives the oats a cozy, fall-inspired flavor. I make this version all winter long. Sometimes I add a tablespoon of pumpkin puree for extra richness.
Nut-Free Option: Swap the peanut butter for sunflower seed butter or tahini. The flavor will be different, but still delicious. Sunflower seed butter can turn a bit green when mixed with baking soda (which isn’t in this recipe), so you’re safe. I’ve used tahini before, and it adds a lovely nutty, slightly bitter note that balances the sweetness perfectly.
Don’t be afraid to experiment. This recipe is a canvas, not a rigid formula. The only rule is to keep the ratio of oats to liquid roughly the same, and you can change almost everything else.
Serving & Storage Suggestions
These oats are best served cold, straight from the fridge. There’s something about that chilled, creamy texture that just hits right on a busy morning. But if you prefer warm oats, microwave your jar for 30-60 seconds, stirring halfway through. Just make sure to use a microwave-safe jar and remove the lid first. I’ve had a few close calls with metal lids in the microwave—learn from my mistakes.
Toppings Make the Difference: A plain jar of overnight oats is good. A topped jar is great. I always add a few slices of fresh banana, a drizzle of warm peanut butter (microwave it for 10 seconds to make it pourable), and a sprinkle of cinnamon. Sometimes I add a tablespoon of chopped peanuts for crunch, or a few dark chocolate chips for a touch of sweetness. The toppings add texture and visual appeal, which makes the whole experience feel more special.
What to Serve With It: These oats are a complete meal on their own, but if you’re feeding a hungry family, pair them with a side of scrambled eggs or a piece of whole-grain toast. A cup of coffee or a glass of cold milk rounds it out perfectly. For a quick breakfast on the go, just grab a jar and a spoon—that’s it.
Storage Instructions: Store the jars in the refrigerator for up to 5 days. Keep the lids tightly sealed to prevent the oats from drying out or absorbing other fridge odors. I don’t recommend freezing these—the texture of the thawed oats is watery and unappealing. Trust me, I tried it once. Just make a fresh batch each week.
How Flavors Develop: The oats are at their best between 8 and 48 hours after making. The flavors meld together beautifully, and the texture becomes perfectly creamy. After day 3, the oats start to soften a bit more, and the banana flavor becomes more pronounced. Some people prefer them softer—my mom likes them best on day 4. It’s really a matter of personal preference.
Reheating Tips: If you prefer warm oats, microwave for 30-60 seconds. Stir well before eating, as the chia seeds tend to settle at the bottom. Add a splash of milk if the oats seem too thick after reheating. For a stovetop method, empty the jar into a small saucepan and warm over medium-low heat for 2-3 minutes, stirring frequently.
Nutritional Information & Benefits
Here’s the approximate nutritional breakdown for one serving (based on the recipe as written, without optional toppings):
Per Serving: Approximately 380 calories, 15g protein, 45g carbohydrates, 18g fat, 8g fiber, 12g sugar. These values will vary based on the exact ingredients you use, especially the type of milk and peanut butter.
Health Benefits: This recipe is packed with good-for-you ingredients. The rolled oats provide complex carbohydrates and soluble fiber, which helps keep your blood sugar stable and your digestion regular. The peanut butter adds healthy monounsaturated fats and plant-based protein, which keeps you feeling full and satisfied. The banana contributes potassium and natural sweetness, while the Greek yogurt (if used) adds probiotics for gut health and extra protein. The chia seeds are a powerhouse of omega-3 fatty acids, fiber, and antioxidants.
Dietary Considerations: This recipe is naturally vegetarian. To make it vegan, use plant-based milk and yogurt, and swap honey for maple syrup. To make it gluten-free, use certified gluten-free rolled oats. To make it nut-free, swap the peanut butter for sunflower seed butter. The recipe is naturally low in added sugar, with most of the sweetness coming from the banana. If you’re watching your sugar intake, use a very ripe banana and skip the maple syrup entirely.
Potential Allergens: This recipe contains peanuts (from the peanut butter), dairy (from the milk and yogurt), and gluten (from the oats, unless certified gluten-free). Adjust as needed for your dietary needs. I’ve made a nut-free, dairy-free version for a friend’s kids, and it was still a hit.
From a wellness perspective, this is the kind of breakfast that sets you up for a good day. It’s balanced, satisfying, and gives you steady energy without the crash. I love that I can feel good about eating it, and my body thanks me for it.
Conclusion
This quick peanut butter banana overnight oats recipe has genuinely changed my mornings. It’s the kind of recipe that makes you wonder why you ever stressed about breakfast in the first place. Five minutes of effort, zero cooking, and you have a week’s worth of delicious, satisfying breakfasts ready to go. It’s the ultimate weeknight win.
I encourage you to make this recipe your own. Add chocolate chips if that’s your thing, swap in almond butter if you’re feeling fancy, or throw in some berries when they’re in season. The beauty of this recipe is its flexibility. It works with whatever you have, and it always delivers.
Honestly, this recipe has become a little ritual for me. Sunday evenings, after the kitchen is cleaned up from dinner, I pull out my jars and make a batch. It feels like a small act of kindness to my future self—the version of me that’s rushing around on a Tuesday morning, trying to get out the door. That version of me deserves a good breakfast. And honestly, so do you.
I’d love to hear how these turn out for you. Did you try any fun variations? Did your kids love them? Drop a comment below and let me know. And if you’re feeling generous, share this recipe with a friend who needs an easier morning. We all deserve a little less stress and a little more peanut butter.
Happy prepping, friends. You’ve got this.
Frequently Asked Questions
Can I use steel-cut oats instead of rolled oats?
I wouldn’t recommend it. Steel-cut oats are much harder and won’t soften enough overnight, even with a long soak. You’ll end up with a crunchy, unpleasant texture. Stick with rolled oats (old-fashioned oats) for the best results. If you only have quick oats, you can use them, but the texture will be much softer—almost like a porridge.
How long do these overnight oats last in the fridge?
They’ll keep for up to 5 days in an airtight container in the refrigerator. I find they’re best between days 1 and 3, when the texture is still perfectly creamy. After day 4, the oats start to soften a bit more, and the banana flavor becomes stronger. Some people prefer them that way, so it’s really up to you. Just give them a good stir before eating.
Can I make these without yogurt?
Absolutely. The yogurt adds creaminess and protein, but it’s not essential. If you skip it, just add an extra ¼ cup of milk to keep the liquid-to-oats ratio balanced. The texture will be slightly less rich, but still delicious. I’ve made it this way many times when I’ve run out of yogurt, and it’s always been good.
Can I freeze these overnight oats?
I don’t recommend freezing them. The texture of thawed overnight oats is watery and unappealing, and the banana can become mushy and discolored. These are best made fresh and stored in the fridge. If you want to meal prep for longer than a week, I’d suggest making a fresh batch every 5 days. It only takes 5 minutes, so it’s not a big time commitment.
How do I make these oats sweeter without adding sugar?
The easiest way is to use a very ripe banana—the kind with lots of brown spots. The riper the banana, the sweeter it is naturally. You can also add a tablespoon of unsweetened applesauce or a few chopped dates to the mixture before refrigerating. Both add sweetness without refined sugar. If you still want a little extra sweetness, a drizzle of maple syrup or honey works beautifully.
Pin This Recipe!
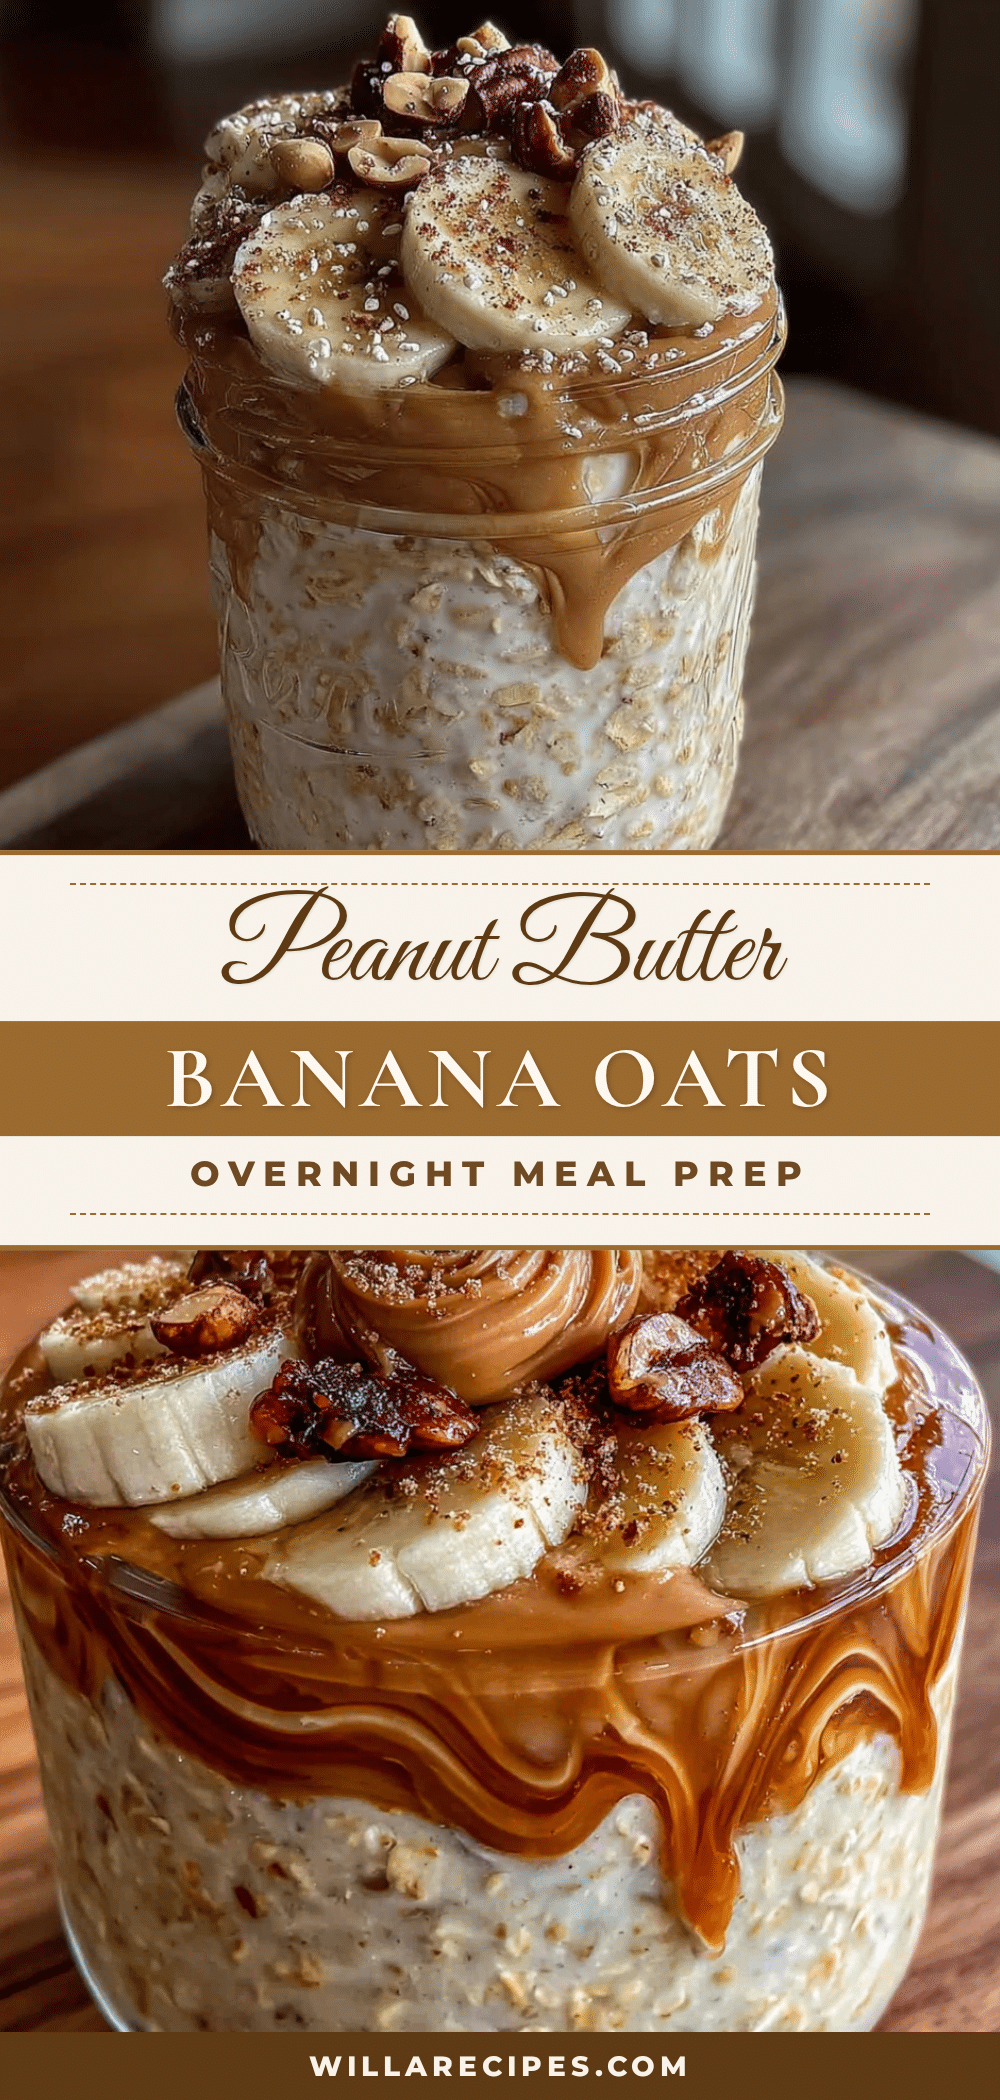
Quick Peanut Butter Banana Overnight Oats – Easy Meal Prep
Creamy, no-cook overnight oats with ripe banana and peanut butter. A 5-minute meal prep breakfast that tastes like dessert but is packed with protein and fiber.
- Prep Time: 5 minutes
- Cook Time: 0 minutes
- Total Time: 5 minutes (plus 6-12 hours refrigeration)
- Yield: 4 servings 1x
- Category: Breakfast
- Cuisine: American
Ingredients
- 1 cup (90g) rolled oats (old-fashioned oats)
- 1 large ripe banana (about 120g mashed)
- ¼ cup (64g) creamy peanut butter
- 1 cup (240ml) milk of choice
- ½ cup (120g) plain Greek yogurt (optional, but recommended)
- 2 tablespoons (20g) chia seeds (optional)
- 1–2 tablespoons (15-30ml) maple syrup or honey (optional, adjust to taste)
- Pinch of salt
- Optional toppings: sliced banana, extra peanut butter drizzle, cinnamon, chopped nuts
Instructions
- Mash the banana: Peel the ripe banana and mash it in a medium bowl with a fork until mostly smooth with a few small lumps.
- Add wet ingredients: To the mashed banana, add peanut butter, milk, and Greek yogurt (if using). Whisk or stir vigorously until the peanut butter is fully incorporated and the mixture is smooth.
- Stir in dry ingredients: Add rolled oats, chia seeds (if using), and a tiny pinch of salt. Stir until everything is well combined.
- Taste and adjust: Taste the mixture and add maple syrup or honey if needed for sweetness.
- Divide into jars: Pour the mixture evenly into four 8-ounce or 12-ounce jars or airtight containers, leaving about half an inch of space at the top.
- Seal and refrigerate: Screw the lids on tightly and refrigerate for at least 6 hours, preferably overnight (8-12 hours).
- Serve and enjoy: In the morning, stir the oats. If too thick, add a splash of milk. Top with desired toppings and enjoy cold or microwave for 30-60 seconds for warm oats.
Notes
Mashing the banana first is crucial for even sweetness. Use very ripe bananas (with brown spots) for natural sweetness. The oats are best between 8 and 48 hours after making. For meal prep, make two batches per week for optimal texture. Do not freeze.
Nutrition
- Serving Size: 1 jar (about 1 cup)
- Calories: 380
- Sugar: 12
- Sodium: 180
- Fat: 18
- Saturated Fat: 3.5
- Carbohydrates: 45
- Fiber: 8
- Protein: 15
Keywords: overnight oats, peanut butter banana, meal prep breakfast, no-cook breakfast, healthy breakfast, easy breakfast, make-ahead breakfast