I wasn’t expecting cooking advice from my accountant, honestly. There I was, sitting in his cramped office during tax season, buried in receipts and stressing about quarterly estimates, when he started describing exactly how to make the most incredible garlic butter chicken and rice I’d ever tasted. His name is Gary, and he’s this quiet, numbers-obsessed guy who wears suspenders and talks about depreciation schedules with more passion than anyone should. But that day, he leaned back in his squeaky chair, looked me dead in the eye, and said, “You know what my wife makes when we have people over? This chicken and rice thing. It’s the only dish I’ve ever requested for my birthday.”
I mean, I was stunned. Gary? The guy who eats a plain turkey sandwich every single day for lunch? He was raving about a recipe. He scribbled the ingredients on the back of a tax form — I still have that crumpled piece of paper somewhere — and told me the trick was to not rush the garlic. “Let it get all golden and sticky,” he said, miming a sizzle with his hands. I went home that night, made it for a small dinner party, and let me tell you, my friends nearly licked the pan clean. I’ve tweaked it over the years, added a few of my own touches, but the soul of it? That’s all Gary, the accountant who apparently moonlights as a secret culinary genius.
Maybe you’ve been there — you find a recipe in the most unexpected place, and it becomes your go-to. This garlic butter chicken and rice is that dish for me. It’s the one I pull out when I need to impress but don’t want to spend hours in the kitchen. The rice comes out fluffy, the chicken is juicy, and that garlic butter sauce? Honestly, it’s the kind of thing you want to drink with a straw. I’ve been making it for years now, and it never gets old. Every time I serve it, someone asks for the recipe, and I get to smile and say, “Funny story — I got it from my accountant.”
Why You’ll Love This Recipe
Let me be straight with you — I’ve tested this garlic butter chicken and rice more times than I can count. I’ve made it for picky eaters, for my in-laws, for a crowd of twenty at a potluck, and even for a last-minute dinner when I had zero energy left. Every single time, it delivers. Here’s why this version is different from the dozens of other one-pan chicken and rice recipes floating around out there:
- One-Pan Wonder: Everything cooks in a single skillet or Dutch oven. Less cleanup means more time with your guests. You can even prep the ingredients the night before and have it on the table in under an hour.
- Simple Ingredients, Big Flavor: No fancy grocery store trips required. You probably have garlic, butter, chicken, and rice in your kitchen right now. The magic is in how they come together.
- Perfect for Hosting: This dish was made for dinner parties and potlucks. It scales up beautifully — just double the ingredients and use a larger pan. Serve it straight from the skillet for that rustic, “I made this from scratch” vibe.
- Crowd-Pleaser Guaranteed: I’ve served this to kids who “don’t like rice” and adults who claim they’re “not chicken people.” Empty plates all around. It’s comfort food that appeals to everyone.
- Unbelievably Delicious: The rice absorbs all that garlic butter goodness, and the chicken gets this golden, crispy skin that’s just perfection. Close-your-eyes-after-the-first-bite good.
What makes this recipe stand out from the rest? It’s the technique. Most one-pan chicken and rice recipes end up with mushy rice or dry chicken. Not this one. I’ve figured out the exact ratio of liquid to rice, the perfect cooking temperature, and the secret to keeping the chicken juicy while the rice gets fluffy. It’s not just another version — it’s the best version I’ve ever made, and I’ve made a lot.
If you’re hosting a gathering and want to serve something that feels special without making you sweat, this is it. It’s the dish that makes people think you spent hours in the kitchen when really, you just let the oven do the work. And honestly? That’s the kind of cooking I love most.
What Ingredients You Will Need
This recipe uses simple, wholesome ingredients to deliver bold flavor and satisfying texture without the fuss. Most of these are pantry staples, which makes it perfect for last-minute hosting or a cozy weeknight dinner. Here’s everything you’ll need:
For the Chicken
- 4 bone-in, skin-on chicken thighs (about 1.5 pounds) — The bone keeps the meat juicy, and the skin gets beautifully crispy. You can use chicken drumsticks too, but adjust cooking time slightly.
- 1 teaspoon salt — I prefer fine sea salt for even seasoning.
- 1/2 teaspoon black pepper — Freshly ground is always better.
- 1 teaspoon paprika — Adds a subtle smoky warmth and a beautiful color to the skin.
- 1/2 teaspoon garlic powder — Just a little extra garlic love.
For the Garlic Butter Rice
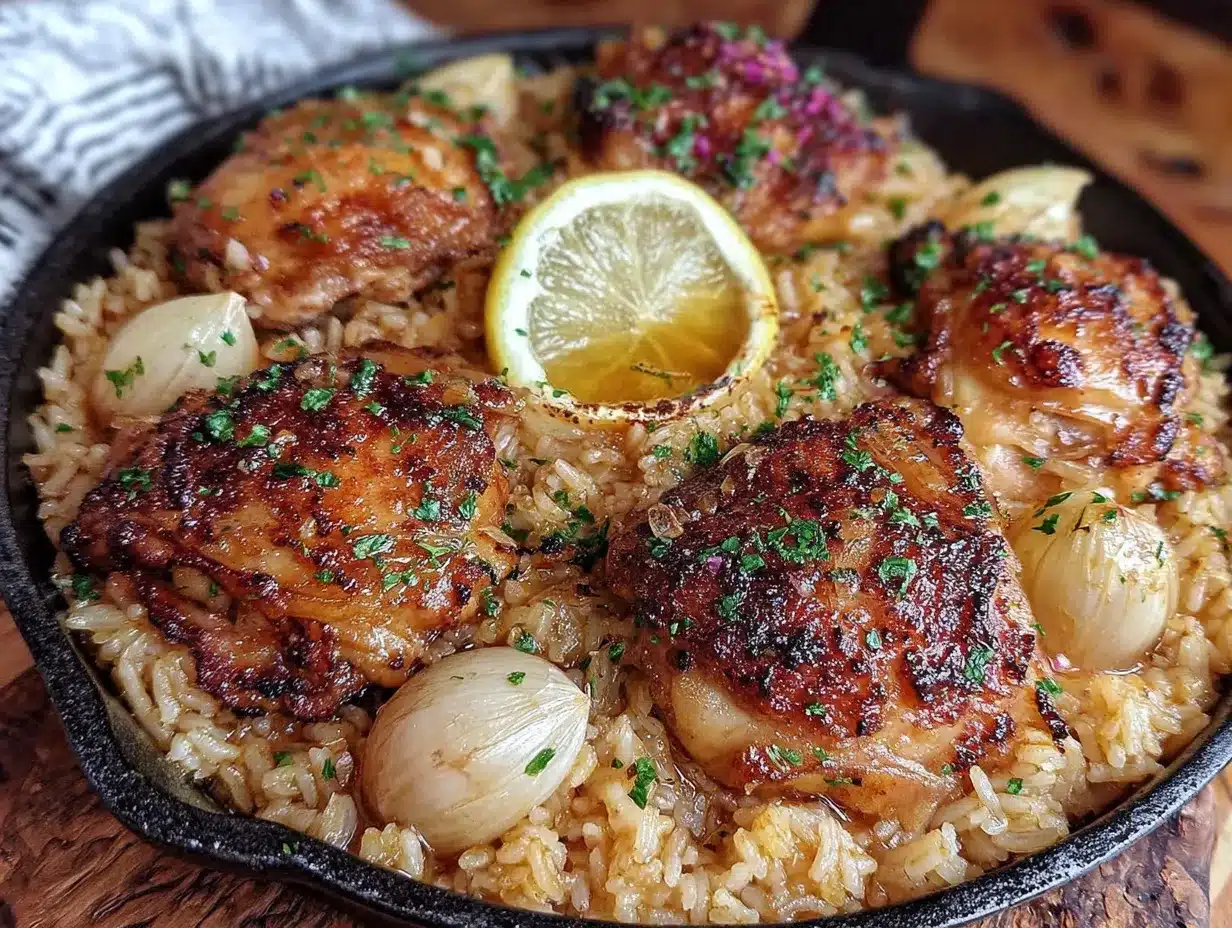
- 2 tablespoons unsalted butter — I use Kerrygold for its rich, creamy flavor, but any good-quality butter works.
- 6 cloves garlic, minced — Don’t skip on the garlic. This is the star of the show. Use fresh garlic, not the jarred stuff — the flavor is worlds apart.
- 1 cup long-grain white rice — Basmati or jasmine work beautifully. Avoid short-grain rice, which can get too sticky.
- 2 cups chicken broth — Low-sodium is best so you can control the salt level. Homemade broth adds even more depth, but store-bought is perfectly fine.
- 1/2 cup water — Helps the rice cook evenly without drying out.
- 1/4 teaspoon dried thyme — A little earthy, herby note that pairs beautifully with garlic.
- 1 bay leaf — Adds a subtle, almost floral background flavor. Remove it before serving.
- Salt to taste — Start with 1/2 teaspoon and adjust at the end.
For the Garnish
- 2 tablespoons fresh parsley, chopped — Adds a pop of color and freshness. Flat-leaf parsley is my go-to.
- 1 tablespoon fresh lemon juice — A squeeze at the end brightens everything up. Don’t skip this — it cuts through the richness of the butter.
- Optional: red pepper flakes — For a tiny kick of heat. I add a pinch when I’m serving a crowd that likes a little spice.
Ingredient Tips: If you’re using chicken breasts instead of thighs, know that they cook faster and can dry out more easily. I recommend pounding them to even thickness and reducing the cooking time by about 5-7 minutes. For a dairy-free version, substitute the butter with a high-quality olive oil or vegan butter. The flavor will be slightly different but still delicious. And if you’re gluten-free, double-check your chicken broth — some brands contain gluten. Most are fine, but it’s worth a quick label read.
I like to prep all my ingredients before I start cooking. Mince the garlic, measure the rice, chop the parsley. It makes the whole process smoother, especially when you’re hosting and have a million other things to do. Trust me, your future self will thank you.
Equipment Needed
You don’t need a lot of fancy tools for this one, which is part of the beauty. Here’s what you’ll need:
- A large oven-safe skillet or Dutch oven — I use a 12-inch cast iron skillet for the best sear and even heat distribution. A stainless steel skillet with an oven-safe handle works too. If you don’t have an oven-safe skillet, you can transfer everything to a baking dish after searing the chicken.
- Tongs — For flipping the chicken without piercing the skin. I’ve made the mistake of using a fork, and all those delicious juices just drain out.
- A sharp knife and cutting board — For mincing garlic and chopping parsley. A microplane is great if you want really fine garlic.
- Measuring cups and spoons — Precision matters with rice, so measure carefully.
- A wooden spoon or silicone spatula — For stirring the rice and scraping up any browned bits from the bottom of the pan. Those bits are pure flavor.
- Aluminum foil — For covering the skillet while the rice finishes cooking. A tight-fitting lid works too.
If you’re on a budget, don’t stress. A basic oven-safe skillet from a thrift store works just as well as a fancy Le Creuset. I started with a $10 cast iron pan from a garage sale, and it made some of the best chicken and rice I’ve ever had. Just make sure whatever you use can go from stovetop to oven without any plastic or rubber handles.
One tip: after cooking, let the pan cool completely before washing. Cast iron especially needs to cool down slowly to avoid warping. And if you get any stubborn bits stuck on, a little hot water and a stiff brush will take care of it. No soap needed for cast iron — just a good scrub and a thin layer of oil to keep it seasoned.
Preparation Method
Let’s get cooking! This recipe comes together in about 45 minutes, and most of that is hands-off oven time. Perfect for when you want to chat with guests or just take a breather.
- Preheat your oven to 375°F (190°C). Position the rack in the middle. While the oven heats, pat the chicken thighs dry with paper towels. This is crucial for crispy skin — wet skin steams instead of sears.
- Season the chicken. In a small bowl, mix the salt, pepper, paprika, and garlic powder. Sprinkle this mixture evenly over both sides of the chicken thighs. Rub it in gently with your fingers. Let the chicken sit at room temperature for 10-15 minutes while you prep the other ingredients.
- Sear the chicken. Place your oven-safe skillet over medium-high heat and add 1 tablespoon of the butter. Once it’s melted and sizzling, carefully place the chicken thighs skin-side down. Don’t crowd the pan — if your skillet is small, work in batches. Let them cook undisturbed for 5-6 minutes until the skin is deep golden brown and crispy. Flip using tongs and cook for another 3 minutes on the other side. Transfer the chicken to a plate and set aside. Don’t wipe out the pan — those browned bits are flavor gold.
- Cook the garlic. Reduce the heat to medium. Add the remaining 1 tablespoon of butter to the pan. Once it melts, add the minced garlic. Stir constantly for about 30-60 seconds until it’s fragrant and just starting to turn golden. Be careful — garlic burns fast and turns bitter. If it starts to brown too quickly, remove the pan from the heat for a few seconds.
- Toast the rice. Add the rice to the pan and stir it around in the garlic butter for 1-2 minutes. You’ll notice the rice turning slightly translucent at the edges. This step adds a nutty flavor and helps the rice stay separate and fluffy instead of clumping together.
- Add the liquid. Pour in the chicken broth, water, dried thyme, and bay leaf. Stir everything together, scraping the bottom of the pan with your wooden spoon to release all those browned bits. Taste the liquid and add salt if needed — remember, the chicken will also release some saltiness as it cooks.
- Return the chicken. Nestle the seared chicken thighs back into the skillet, skin-side up, on top of the rice. They should be partially submerged in the liquid but not completely covered. Bring the liquid to a gentle simmer — you should see small bubbles around the edges.
- Bake. Carefully transfer the skillet to the preheated oven. Bake uncovered for 25-30 minutes, or until the rice is tender and has absorbed most of the liquid, and the chicken reaches an internal temperature of 175°F (80°C) for thighs. If using chicken breasts, check at 20 minutes.
- Rest and finish. Remove the skillet from the oven and cover it loosely with aluminum foil. Let it rest for 5-10 minutes. This allows the rice to finish absorbing any remaining liquid and makes it extra fluffy. Remove the bay leaf (trust me, nobody wants to bite into that).
- Garnish and serve. Sprinkle the chopped parsley over the top and squeeze fresh lemon juice all around. If you like a little heat, add a pinch of red pepper flakes. Serve straight from the skillet for a rustic, impressive presentation.
Visual Cues: The rice should look fluffy and tender, not mushy or crunchy. The chicken skin should be golden and crispy, and the meat should pull away from the bone easily. If the rice is still a little firm after 30 minutes, add a splash more broth or water, cover, and bake for another 5 minutes. If the rice is done but there’s still liquid, leave the foil off and let it sit on the counter — the steam will evaporate.
Cooking Tips & Techniques
After making this garlic butter chicken and rice more times than I can count, I’ve learned a few things the hard way. Let me save you some trouble.
Don’t skip the sear. I know it’s tempting to just throw everything in the pan and call it a day, but that initial sear is what gives the chicken its golden, crispy skin and builds the flavor base for the rice. Those browned bits at the bottom of the pan? That’s where the magic happens. I once skipped this step when I was in a rush, and the chicken came out pale and the rice tasted flat. Never again.
Watch your garlic. Garlic burns faster than you think. I learned this the hard way when I got distracted by a phone call and came back to black, bitter garlic. If you’re multitasking, keep the heat at medium and stir constantly. The moment it turns golden, add the rice immediately.
Use the right rice. Long-grain rice is your friend here. It stays separate and fluffy. I’ve tried this with short-grain sushi rice (disaster — too sticky) and brown rice (took forever to cook and the chicken dried out). Stick with basmati or jasmine for the best texture.
Let it rest. I know you’re hungry. Your guests are hungry. But that 5-10 minute rest period is non-negotiable. It lets the rice finish absorbing liquid and the juices in the chicken redistribute. If you dig in right away, the rice will be soupy and the chicken will release all its juices onto the plate. Patience pays off.
Scale with confidence. Hosting a bigger crowd? This recipe doubles beautifully. Use a larger skillet or Dutch oven and increase the cooking time by about 10 minutes. Just make sure the chicken isn’t overcrowded during the sear — do it in batches if needed. I’ve made this for a party of twelve by tripling the recipe and using my largest roasting pan. It worked like a charm.
One more thing — if you’re prepping ahead of time, you can sear the chicken and cook the garlic butter rice base up to a day in advance. Store them separately in the fridge, then combine and bake when you’re ready. It’s a lifesaver for dinner parties.
Variations & Adaptations
This recipe is wonderfully flexible. Here are some ways I’ve adapted it over the years:
Lemon Herb Version: Add the zest of one lemon along with the garlic, and throw in a few sprigs of fresh rosemary and thyme instead of dried. The lemon brightens everything up, and the fresh herbs add a lovely aromatic quality. I made this version for a spring brunch, and it was a hit.
Spicy Southwest Twist: Swap the thyme for 1 teaspoon of cumin and 1/2 teaspoon of chili powder. Add a diced jalapeño along with the garlic. Top with fresh cilantro instead of parsley and a squeeze of lime. Serve with a side of black beans and sliced avocado. This one’s great for a casual taco night vibe.
Creamy Mushroom Version: After searing the chicken, sauté 8 ounces of sliced cremini mushrooms in the pan before adding the garlic. Then stir in 1/4 cup of heavy cream along with the broth. The mushrooms add an earthy, umami richness that’s absolutely decadent. This is my go-to for a cozy winter dinner.
Dairy-Free Adaptation: Substitute the butter with a good-quality olive oil or vegan butter. I’ve used both, and while the flavor changes slightly, it’s still delicious. Add an extra tablespoon of oil to make up for the richness of the butter.
Vegetarian Option: Skip the chicken entirely and use vegetable broth instead of chicken broth. Add a can of drained chickpeas or white beans along with the broth for protein. Sauté some sliced bell peppers and zucchini along with the garlic for extra veggies. Bake for about 20 minutes, or until the rice is tender.
I once made a version with andouille sausage instead of chicken for a Mardi Gras party. I seared sliced sausage, removed it, then followed the recipe as usual, adding the sausage back in during the last 10 minutes of baking. It was smoky, spicy, and totally different from the original — but just as good. Don’t be afraid to experiment.
Serving & Storage Suggestions
This garlic butter chicken and rice is a showstopper served straight from the skillet. Place the hot pan on a trivet in the center of the table, and let everyone help themselves. The rustic presentation is part of the charm — it says “I made this with love” without being fussy.
What to Serve Alongside: A simple green salad with a lemony vinaigrette cuts through the richness perfectly. I also love serving it with roasted asparagus or steamed green beans — something green and fresh to balance the buttery rice. If you’re going all out, a crusty baguette to soak up any extra garlic butter sauce is never a bad idea. For drinks, a crisp white wine like Sauvignon Blanc or a light beer pairs beautifully.
Storage: Leftovers keep well in an airtight container in the refrigerator for up to 3 days. The rice might absorb a bit more liquid overnight, so don’t be alarmed if it seems a little drier the next day. To reheat, add a splash of chicken broth or water to the rice, cover, and microwave in 30-second intervals until hot. Or reheat in a covered skillet over low heat with a tablespoon of water.
Freezing: This dish freezes surprisingly well. Let it cool completely, then transfer to a freezer-safe container. It will keep for up to 3 months. Thaw overnight in the refrigerator, then reheat in a covered skillet over low heat with a splash of broth. The chicken might lose a bit of its crispy skin, but the flavor will still be fantastic.
Flavor Development: Honestly, this dish tastes even better the next day. The flavors meld together overnight, and the rice absorbs every last bit of that garlic butter goodness. I’ve been known to make it a day ahead on purpose, just for that deeper, more complex flavor. It’s one of those rare dishes that improves with time.
Nutritional Information & Benefits
Here’s an approximate nutritional breakdown per serving (one chicken thigh with rice, based on 4 servings):
| Nutrient | Amount |
|---|---|
| Calories | 520 |
| Protein | 32g |
| Fat | 22g |
| Saturated Fat | 9g |
| Carbohydrates | 45g |
| Fiber | 1g |
| Sugar | 1g |
| Sodium | 780mg |
This dish offers a good balance of protein, carbs, and healthy fats. Chicken thighs are rich in B vitamins, particularly niacin and B6, which support energy metabolism and brain health. Garlic is known for its immune-boosting properties and may help lower blood pressure. The butter provides fat-soluble vitamins A, D, E, and K, though it’s best enjoyed in moderation.
If you’re watching your sodium, use low-sodium broth and go easy on the added salt. For a lower-calorie option, use chicken breasts instead of thighs and reduce the butter to 1 tablespoon. You can also swap the white rice for brown rice — just increase the cooking time by about 15-20 minutes and add an extra 1/2 cup of liquid.
This recipe contains dairy (butter) and gluten (check your broth). For a dairy-free version, use olive oil. For a gluten-free version, ensure your broth is certified gluten-free. It’s naturally nut-free and egg-free.
Conclusion
This garlic butter chicken and rice has become my secret weapon for hosting. It’s the dish I turn to when I want to impress without stress, when I want to feed a crowd without spending all day in the kitchen, and when I want something that tastes like comfort and celebration all at once. It came from the most unexpected source — my accountant, of all people — but honestly, that’s part of why I love it. Good recipes can come from anywhere.
I hope you give this one a try. Make it for your next dinner party, your next potluck, or just a random Tuesday when you need something warm and satisfying. Customize it with your favorite herbs or spices, make it your own. And when your guests ask for the recipe, you’ll have a story to tell.
If you make this recipe, I’d love to hear about it. Leave a comment below and let me know how it turned out, or share your own twist on it. Don’t forget to pin this recipe for later and share it with your friends. Happy cooking, friends!
Frequently Asked Questions
Can I use chicken breasts instead of thighs?
Yes, you can. Chicken breasts cook faster and can dry out more easily, so I recommend pounding them to even thickness and reducing the oven time by 5-7 minutes. Check for doneness at 20 minutes with an instant-read thermometer — they should reach 165°F (74°C).
Can I make this in a slow cooker or Instant Pot?
I haven’t tested this exact recipe in a slow cooker or Instant Pot, but you can adapt it. For a slow cooker, sear the chicken and cook the garlic butter rice base on the stovetop first, then transfer everything to the slow cooker and cook on low for 3-4 hours. For an Instant Pot, use the sauté function for the searing and garlic steps, then pressure cook on high for 6 minutes with a natural release. The texture will be slightly different, but still delicious.
Why is my rice mushy or crunchy?
Mushy rice usually means too much liquid or overcooking. Make sure you’re using the exact ratio of 2 cups liquid to 1 cup rice. Crunchy rice means it needs more time or liquid. If the rice is still firm after the recommended cooking time, add a splash more broth, cover, and bake for another 5-10 minutes. Also, avoid lifting the lid during baking — the steam is essential for even cooking.
Can I add vegetables to this dish?
Absolutely. Sautéed mushrooms, bell peppers, zucchini, or spinach work beautifully. Add them after searing the chicken and before adding the garlic. For leafy greens like spinach, stir them in during the last 5 minutes of baking. Just be careful not to overcrowd the pan, or the rice might not cook evenly.
How do I get the chicken skin extra crispy?
The key is to pat the chicken completely dry before seasoning, and don’t move it while it’s searing. Let it cook undisturbed for a full 5-6 minutes skin-side down. Also, make sure the pan is hot enough — the butter should sizzle immediately when you add the chicken. If the skin isn’t as crispy as you’d like after baking, you can pop the skillet under the broiler for 1-2 minutes at the end. Watch it closely so it doesn’t burn.
Pin This Recipe!
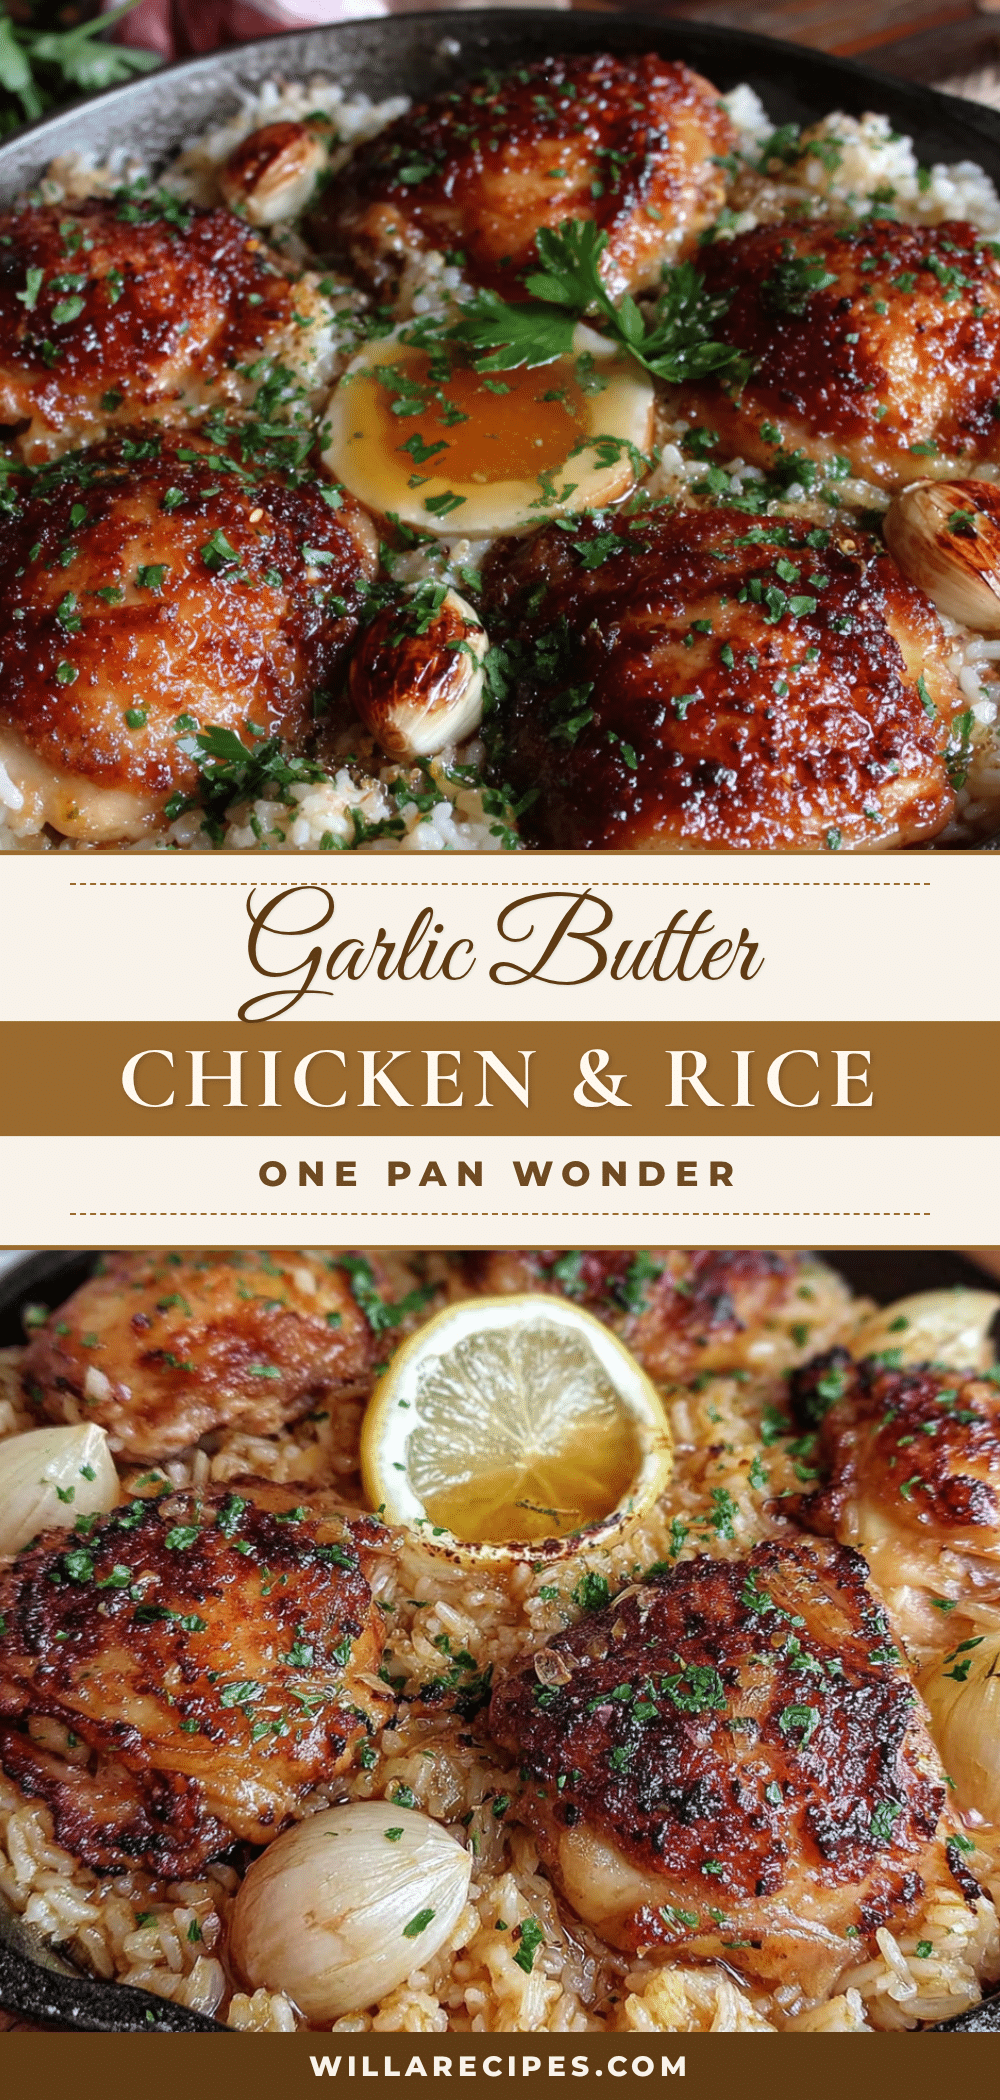
Crowd-Pleasing Garlic Butter Chicken and Rice: Easy One-Pan Dinner

This one-pan garlic butter chicken and rice features juicy bone-in chicken thighs and fluffy rice, all cooked in a rich garlic butter sauce. It’s a crowd-pleasing, easy dinner perfect for hosting or weeknight meals.
- Prep Time: 15 minutes
- Cook Time: 30 minutes
- Total Time: 45 minutes
- Yield: 4 servings 1x
- Category: Main Course
- Cuisine: American
Ingredients
- 4 bone-in, skin-on chicken thighs (about 1.5 pounds)
- 1 teaspoon salt
- 1/2 teaspoon black pepper
- 1 teaspoon paprika
- 1/2 teaspoon garlic powder
- 2 tablespoons unsalted butter
- 6 cloves garlic, minced
- 1 cup long-grain white rice (basmati or jasmine)
- 2 cups low-sodium chicken broth
- 1/2 cup water
- 1/4 teaspoon dried thyme
- 1 bay leaf
- Salt to taste
- 2 tablespoons fresh parsley, chopped
- 1 tablespoon fresh lemon juice
- Optional: red pepper flakes
Instructions
- Preheat your oven to 375°F (190°C). Pat the chicken thighs dry with paper towels.
- In a small bowl, mix salt, pepper, paprika, and garlic powder. Sprinkle evenly over both sides of the chicken thighs. Let sit at room temperature for 10-15 minutes.
- Place an oven-safe skillet over medium-high heat and add 1 tablespoon of butter. Once melted and sizzling, place chicken thighs skin-side down. Cook undisturbed for 5-6 minutes until deep golden brown. Flip and cook for another 3 minutes. Transfer chicken to a plate and set aside.
- Reduce heat to medium. Add remaining 1 tablespoon of butter. Once melted, add minced garlic and stir constantly for 30-60 seconds until fragrant and just starting to turn golden.
- Add rice to the pan and stir for 1-2 minutes until slightly translucent at the edges.
- Pour in chicken broth, water, dried thyme, and bay leaf. Stir, scraping the bottom of the pan. Taste and add salt if needed.
- Nestle the seared chicken thighs back into the skillet, skin-side up, on top of the rice. Bring the liquid to a gentle simmer.
- Transfer the skillet to the preheated oven. Bake uncovered for 25-30 minutes, or until rice is tender and chicken reaches an internal temperature of 175°F (80°C) for thighs.
- Remove from oven and cover loosely with aluminum foil. Let rest for 5-10 minutes. Remove the bay leaf.
- Sprinkle chopped parsley over the top and squeeze fresh lemon juice all around. Add red pepper flakes if desired. Serve straight from the skillet.
Notes
For extra crispy chicken skin, pat the chicken completely dry before seasoning and do not move it while searing. If the skin isn’t crispy enough after baking, broil for 1-2 minutes. Let the dish rest for 5-10 minutes before serving to allow the rice to absorb remaining liquid and the chicken juices to redistribute. Leftovers keep in the refrigerator for up to 3 days and taste even better the next day.
Nutrition
- Serving Size: 1 chicken thigh with
- Calories: 520
- Sugar: 1
- Sodium: 780
- Fat: 22
- Saturated Fat: 9
- Carbohydrates: 45
- Fiber: 1
- Protein: 32
Keywords: garlic butter chicken, one-pan chicken and rice, easy dinner, chicken thighs, garlic rice, crowd-pleasing recipe