I was standing in the hardware aisle of our local grocery store last November, trying to decide between two different turkey roasting bags, when the plumber working on the sink at the end of the aisle just started talking. Not to anyone in particular, really—just muttering about Thanksgiving. “Too much bird,” he said, shaking his head. “Every single year, too much bird.” I laughed, and that was all the invitation he needed. He told me he and his wife had been doing a small Thanksgiving for years now, just the two of them and maybe their grown daughter, and that they’d figured out the secret: an air fryer turkey breast. Honestly, I almost dropped the roasting bags right there. The plumber. The guy fixing the pipes. He was the one who cracked the code for my small Thanksgiving, and I haven’t looked back since.
You know that feeling when you realize you’ve been making things way harder than they need to be? That was me, wrestling a twenty-pound turkey into a tiny oven for four people, eating leftovers for two weeks straight, and feeling vaguely guilty about the whole thing. But this air fryer turkey breast? It changed everything. It’s juicy, it’s golden, it’s done in a fraction of the time, and it leaves you with just the right amount of leftovers—enough for a sandwich or two, but not so much that you’re freezing turkey soup in January. I mean, who actually needs that much turkey?
The first time I made it, I forgot to pat the skin dry. Rookie mistake. It still came out good, but not great—the skin was a little soft, not that perfect crackly crisp you want. The second time, I got it right, and let me tell you, that first bite made me close my eyes. It was so simple, so satisfying, and it felt like I’d finally figured out Thanksgiving for our little family. Maybe you’ve been there, staring at a whole turkey and wondering why you’re doing this to yourself. This is for you. This is the small Thanksgiving recipe that actually works.
Why You’ll Love This Recipe
Let’s be real—Thanksgiving can be a lot of pressure, especially when you’re cooking for a small group. You want the full holiday experience without the massive bird, the endless leftovers, or the stress of timing a huge roast. This air fryer turkey breast solves all of that. Here’s why it’s become my go-to for our small Thanksgiving:
- Quick & Easy: This turkey breast is ready in about an hour, start to finish. No brining overnight, no basting every thirty minutes, no hovering over the oven. The air fryer does the heavy lifting while you focus on the sides.
- Simple Ingredients: You probably have most of these in your kitchen right now. Butter, garlic, herbs, salt, pepper—that’s it. No fancy marinades, no specialty spice blends, no trips to three different stores.
- Perfect for Small Gatherings: This recipe is designed for 4 people, with just enough leftovers for a turkey sandwich the next day. It’s the ideal size for couples, small families, or anyone hosting a cozy Friendsgiving.
- Crowd-Pleaser: The breast meat stays incredibly juicy, and the skin gets that golden, crackly crisp that everyone fights over. Even my picky eater nephew, who usually just picks at the mashed potatoes, asked for seconds.
- Unbelievably Delicious: The combination of herb butter under the skin and the high-heat air frying creates a flavor and texture that rivals any oven-roasted bird. It’s comfort food at its finest, without the all-day commitment.
What makes this recipe different from all the other turkey breast recipes out there? It’s the technique. Instead of roasting low and slow, the air fryer uses rapid air circulation to cook the breast evenly while crisping the skin to perfection. No dry meat, no soggy skin, no guesswork. It’s the kind of recipe that makes you wonder why you ever bothered with a whole turkey in the first place. Honestly, this isn’t just another turkey breast recipe—it’s the one that’ll become your new Thanksgiving tradition.
What Ingredients You Will Need
This recipe uses simple, wholesome ingredients to deliver big flavor without the fuss. Most of these are pantry staples, which means you can focus on the cooking instead of hunting down obscure items. Here’s what you’ll need:
For the Turkey
- 1 (3 to 4 pound) bone-in, skin-on turkey breast (I prefer the whole breast, not split, for even cooking. Look for one that fits comfortably in your air fryer basket—measure first if you’re unsure!)
- 3 tablespoons unsalted butter, softened (Kerrygold is my go-to for its rich flavor, but any good-quality butter works. Make sure it’s truly soft so it spreads easily under the skin.)
- 3 cloves garlic, minced (Fresh garlic is non-negotiable here—the jarred stuff just doesn’t have the same punch. I use a microplane for a finer paste.)
- 1 tablespoon fresh rosemary, finely chopped (Dried rosemary works in a pinch, but fresh gives a much brighter, more aromatic flavor. Use about 1 teaspoon dried if that’s what you have.)
- 1 tablespoon fresh thyme leaves (Same deal—fresh is best, but 1 teaspoon dried thyme is a fine substitute.)
- 1 teaspoon salt (I use kosher salt for its clean flavor and easy pinch-ability. Diamond Crystal is my preferred brand.)
- 1/2 teaspoon black pepper, freshly ground (Pre-ground pepper works, but fresh cracks make a noticeable difference in the final flavor.)
- 1 tablespoon olive oil (For rubbing on the skin after the butter. It helps with browning and adds a little extra crispiness.)
For the Aromatics (Optional but Recommended)
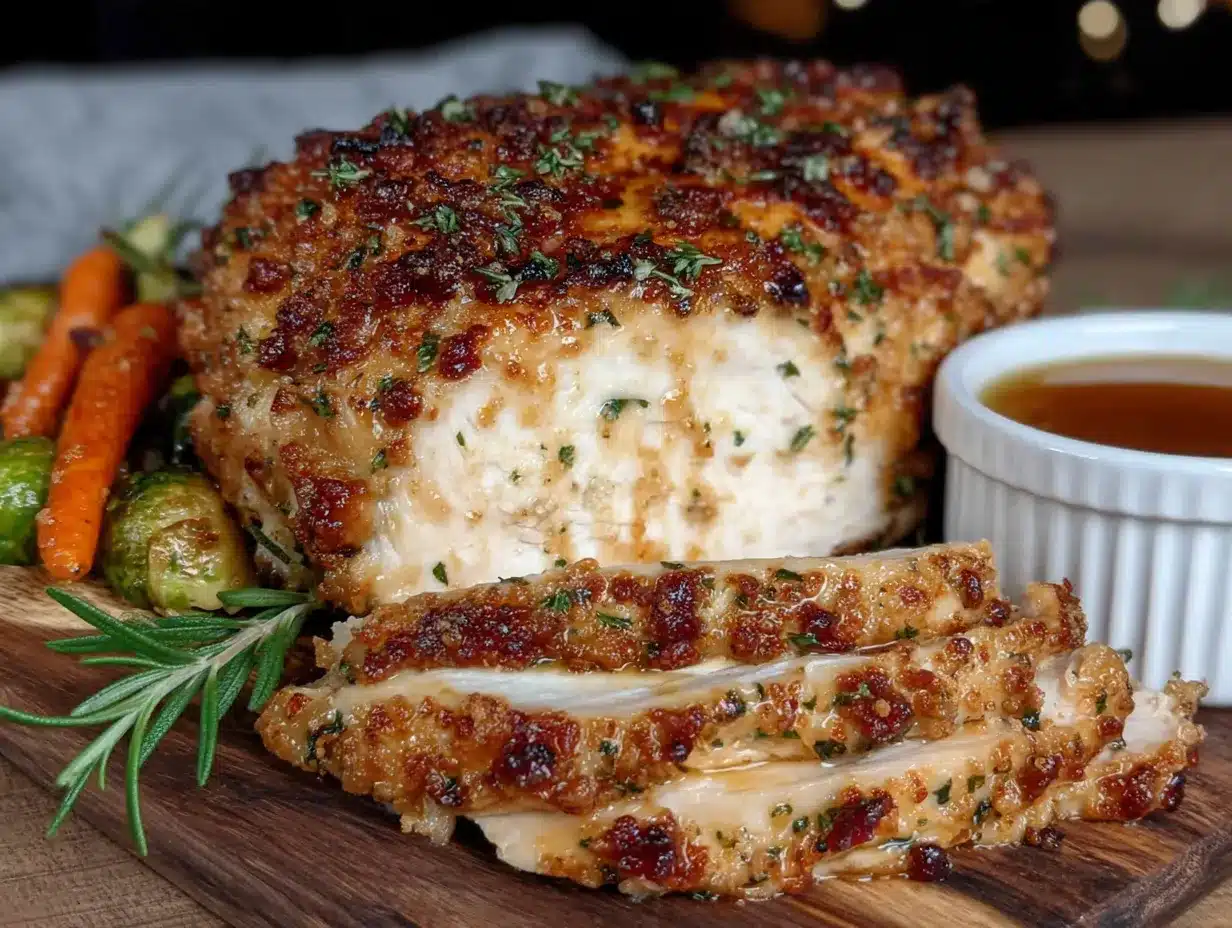
- 1/2 small onion, quartered (Adds moisture and a subtle sweetness to the cooking environment. Yellow or sweet onion both work well.)
- 2 sprigs fresh rosemary (For tucking around the turkey in the basket. They infuse the air with fragrance as it cooks.)
- 2 sprigs fresh thyme (Same idea—these little guys add a lot of flavor for almost zero effort.)
- 1/2 lemon, halved (A little citrus brightness that cuts through the richness. Place it cut-side down in the basket.)
Substitution Guidance: If you’re feeding someone with dietary restrictions, this recipe is easy to adapt. Use vegan butter or olive oil instead of butter for a dairy-free version—just note the skin won’t be quite as rich. For a lower-sodium option, reduce the salt to 1/2 teaspoon and add a pinch of garlic powder or onion powder for extra flavor without the salt. If you don’t have fresh herbs, dried herbs work—just use about 1/3 of the amount called for. And if your air fryer is on the smaller side, look for a 2 to 3 pound turkey breast and adjust the cooking time down by about 10 minutes.
Equipment Needed
You don’t need a lot of fancy gear for this recipe, which is part of why I love it. Here’s what you’ll need:
- Air Fryer: Any basket-style or oven-style air fryer will work. I use a 5.8-quart Cosori, which fits a 3 to 4 pound breast perfectly. If yours is smaller, just make sure the breast fits with at least an inch of space around it for air circulation. (I learned this the hard way—crowding the basket leads to uneven cooking.)
- Instant-Read Meat Thermometer: This is non-negotiable for poultry. Don’t rely on the air fryer’s built-in timer or guesswork. A $10 digital thermometer from Amazon works perfectly. I use a ThermoPro, and it’s never let me down.
- Small Bowl: For mixing the herb butter. Any small mixing bowl will do.
- Chef’s Knife and Cutting Board: For chopping the herbs and garlic. A sharp knife makes this step so much easier—trust me, dull knives are a recipe for frustration.
- Paper Towels: For patting the turkey breast dry. This is a crucial step for crispy skin, so don’t skip it.
- Tongs: For handling the hot turkey breast when it comes out of the air fryer. Silicone-tipped tongs are great for not scratching your basket.
Budget-Friendly Options: If you don’t have an air fryer, you can absolutely make this in a convection oven set to 375°F—just use a wire rack set inside a baking sheet and roast for about 50-60 minutes. No convection oven? A regular oven at 400°F will work, but add 10-15 minutes to the cooking time and expect slightly less crispy skin. And honestly, if you’re in the market for an air fryer, this is the perfect recipe to justify the purchase!
Preparation Method
Alright, let’s get cooking. This method is straightforward, but I’ve added a few notes from my own trials (and errors) to help you nail it on the first try.
- Prep the turkey breast: Take your turkey breast out of the fridge about 30 minutes before you start cooking. This helps it cook more evenly—a cold breast straight from the fridge will cook unevenly and might end up dry on the outside before the inside is done. Pat it completely dry with paper towels. I mean really dry—get in all the crevices. Moisture is the enemy of crispy skin, and we want that golden crackle.
- Make the herb butter: In a small bowl, combine the softened butter, minced garlic, chopped rosemary, chopped thyme, salt, and pepper. Mash it together with a fork until everything is evenly distributed. Give it a sniff—it should smell like a Thanksgiving dream. If it doesn’t, add a pinch more salt or another clove of garlic. Trust your nose here.
- Loosen the skin: This is the most important step for flavor. Gently slide your fingers under the skin of the turkey breast, working from the top down. Be careful not to tear the skin—if it does tear, don’t panic, just tuck it back in place later. You want to create a pocket between the skin and the meat. I use my index and middle fingers, working slowly and gently. It’s oddly satisfying, honestly.
- Apply the herb butter: Take about two-thirds of the herb butter and spread it evenly under the skin, directly onto the meat. Use your fingers to massage it in, making sure it covers the entire breast. Then spread the remaining butter over the top of the skin. Don’t worry if it looks a little messy—it’ll melt and distribute as it cooks.
- Rub with olive oil: Drizzle the olive oil over the buttered skin and rub it in gently. This helps the skin brown and crisp up in the air fryer. It also gives the final turkey a beautiful, glossy sheen that looks like it came from a magazine.
- Preheat the air fryer: Set your air fryer to 350°F (175°C) and let it preheat for 3-5 minutes. Preheating ensures the turkey starts cooking immediately, which helps with browning. I usually do this while I’m finishing up the prep.
- Arrange in the basket: Place the onion quarters, rosemary sprigs, thyme sprigs, and lemon halves in the bottom of the air fryer basket. These aromatics will steam and perfume the turkey as it cooks, adding a subtle layer of flavor. Place the turkey breast on top, skin-side up. Make sure it’s not touching the sides of the basket—if it is, the air won’t circulate properly and you’ll get uneven cooking.
- Cook the turkey: Air fry at 350°F (175°C) for 45-55 minutes, depending on the size of your breast. For a 3-pound breast, start checking at 40 minutes. For a 4-pound breast, start checking at 50 minutes. The internal temperature should reach 155°F (68°C) in the thickest part of the breast when you pull it out—it will carryover cook to 165°F (74°C) as it rests. Do not, I repeat, do not cook it to 165°F in the air fryer unless you want dry meat. That carryover cooking is your friend.
- Rest the turkey: This is the hardest part. Remove the turkey breast from the air fryer and place it on a cutting board. Tent it loosely with foil and let it rest for 15-20 minutes. I know it’s tempting to cut into it right away, but this rest period allows the juices to redistribute throughout the meat. If you cut too soon, all those lovely juices will run out onto the board instead of staying in the turkey. Trust me, I’ve made this mistake, and it’s heartbreaking.
- Carve and serve: After resting, carve the turkey breast against the grain into thick slices. I like to slice it about 1/2-inch thick—thick enough to be satisfying, thin enough to stay tender. Arrange on a platter with the aromatics from the basket (if you want) and serve immediately.
Cooking Tips & Techniques
I’ve made this recipe more times than I can count, and I’ve picked up a few tricks along the way. Here are the ones that make the biggest difference:
Don’t skip the drying step. I know I’ve said this already, but it bears repeating. Patting the turkey breast bone-dry before adding the butter is the single most important step for crispy skin. If you’re in a hurry, you can even let it sit uncovered in the fridge for an hour to dry out the skin further. That’s a pro move right there.
Use a thermometer, not a timer. Air fryers can vary wildly in temperature—one person’s 350°F might be another’s 375°F. The only way to guarantee perfectly cooked turkey is to use an instant-read thermometer. Insert it into the thickest part of the breast, avoiding the bone. When it hits 155°F, pull it out. That extra 10 degrees from carryover cooking will bring it to a safe 165°F without overcooking.
Watch the skin color. If the skin is browning too quickly (usually around the 30-minute mark), tent a small piece of foil over the top. This will slow down the browning while the inside continues to cook. I’ve had to do this a few times when I’ve been distracted by the mashed potatoes, and it works like a charm.
Let it rest, seriously. I know I mentioned this in the method, but it’s worth its own tip. The carryover cooking and juice redistribution that happens during the rest is what separates a good turkey breast from a great one. I once skipped the rest because I was starving, and the meat was noticeably drier. Never again.
Timing and multitasking: While the turkey is cooking, use that time to make your sides. Mash the potatoes, roast the Brussels sprouts, warm the gravy. The turkey will be done and resting just as everything else comes together. It’s a beautiful, stress-free flow. Honestly, this is the first Thanksgiving recipe that actually lets me enjoy the meal instead of running around the kitchen.
Variations & Adaptations
One of the best things about this recipe is how easy it is to customize. Here are a few variations I’ve tried and loved:
Herb Swap: Not a fan of rosemary and thyme? Try using sage and parsley for a more traditional Thanksgiving flavor profile. Or go with tarragon and chives for a lighter, more elegant twist. I made a sage version for a Friendsgiving last year, and it was a huge hit—the sage gives it that classic turkey-and-stuffing aroma that just feels like home.
Spicy Version: Add 1/2 teaspoon of smoked paprika and 1/4 teaspoon of cayenne pepper to the herb butter for a smoky, spicy kick. This is my husband’s favorite variation. The heat cuts through the richness of the butter and adds a whole new dimension. Just go easy on the cayenne—you can always add more, but you can’t take it out.
Citrus Herb Version: Add the zest of one orange and one lemon to the herb butter for a bright, citrusy flavor that pairs beautifully with the turkey. I tried this one Christmas when I had extra oranges lying around, and it was a revelation. The citrus cuts through the richness and makes the whole dish feel lighter.
Dietary Adaptations: For a dairy-free version, replace the butter with an equal amount of olive oil or vegan butter. The texture will be slightly different—less rich, but still delicious. For a lower-sodium option, reduce the salt to 1/2 teaspoon and add a pinch of garlic powder or onion powder. And if you’re cooking for someone with a garlic allergy, simply omit the garlic and double up on the herbs—it’ll still be flavorful.
Cooking Method Variation: If you don’t have an air fryer, you can roast this turkey breast in a conventional oven at 400°F (200°C) for about 50-60 minutes, or until it reaches 155°F internally. Use a wire rack set inside a baking sheet for the best air circulation. The skin won’t be quite as crispy as the air fryer version, but it’ll still be delicious.
Serving & Storage Suggestions
This turkey breast is the star of any small Thanksgiving table, but it plays well with others. Here’s how I like to serve it and what to do with the leftovers:
Serving Temperature and Presentation: Serve the turkey breast warm, sliced and arranged on a platter. I like to garnish with fresh herb sprigs and a few lemon wedges for color. Drizzle a little of the pan juices over the top for extra moisture and shine. It looks impressive without a ton of effort.
Complementary Dishes: This turkey breast pairs beautifully with classic Thanksgiving sides. I usually serve it with creamy mashed potatoes, roasted Brussels sprouts with balsamic glaze, and a simple cranberry sauce. The richness of the turkey is balanced by the tangy cranberries and the earthy Brussels sprouts. For a lighter option, a simple green salad with a vinaigrette works wonderfully.
Beverage Pairings: A crisp white wine like Sauvignon Blanc or a light Pinot Noir pairs beautifully with the herb flavors. For a non-alcoholic option, a sparkling apple cider adds a festive touch that everyone can enjoy.
Storage Instructions: Leftover turkey breast can be stored in an airtight container in the refrigerator for up to 4 days. The meat will stay moist if you leave it in whole pieces rather than slicing it all at once. If you’ve already sliced it, layer the slices with a damp paper towel to keep them from drying out.
Reheating Methods: The best way to reheat leftover turkey is in the air fryer at 300°F (150°C) for 3-5 minutes. This brings back some of the crispiness without drying out the meat. You can also reheat it in a skillet with a splash of chicken broth, covered, over medium-low heat for about 5 minutes. Avoid the microwave if you can—it tends to make the meat tough and rubbery.
How Flavors Develop Over Time: The herb flavors actually deepen and meld together after a day in the fridge. The leftovers are often just as good, if not better, than the fresh turkey. I love making turkey sandwiches the next day with the leftover meat, a little cranberry sauce, and some leftover stuffing. It’s the best part of Thanksgiving, honestly.
Nutritional Information & Benefits
Here’s an approximate nutritional breakdown for one serving (about 6 ounces of cooked turkey breast, without skin):
| Nutrient | Amount per Serving |
|---|---|
| Calories | 280 |
| Protein | 35g |
| Fat | 14g |
| Saturated Fat | 6g |
| Carbohydrates | 1g |
| Fiber | 0g |
| Sugar | 0g |
| Sodium | 450mg |
Turkey breast is an excellent source of lean protein, which is great for muscle maintenance and satiety. It’s also rich in B vitamins, particularly B6 and B12, which support energy metabolism and brain health. The garlic and herbs in this recipe add antioxidants and anti-inflammatory compounds, making this a surprisingly nutritious holiday dish.
Dietary Considerations: This recipe is naturally gluten-free and low-carb. It can be made dairy-free by substituting olive oil for the butter. If you’re watching your sodium intake, reduce the salt to 1/2 teaspoon or use a salt-free herb blend. The turkey itself is relatively low in sodium—most of the salt comes from the seasoning, so you have control over it.
Potential Allergens: This recipe contains dairy (butter). It is free of the other top allergens (eggs, peanuts, tree nuts, soy, wheat, fish, and shellfish) when made as written. Always check your specific ingredient labels if you’re cooking for someone with allergies.
Conclusion
I’ll be honest—I never thought I’d be writing a love letter to an air fryer turkey breast. But here we are. This recipe has genuinely changed how I approach Thanksgiving. It’s not just about the convenience (though that’s a huge part of it). It’s about reclaiming the holiday from the stress and the pressure and the endless leftovers. It’s about sitting down to a beautiful, golden-brown turkey breast that tastes like it took hours of work, when really, it took about an hour and a little bit of patience.
I hope you give this recipe a try, whether it’s for a small Thanksgiving, a cozy Friendsgiving, or just a random Tuesday when you’re craving turkey and mashed potatoes. Don’t be afraid to play with the herbs, adjust the seasonings, or make it your own. That’s the beauty of cooking—it’s never the same twice, and it’s always a little bit better when you add your own touch.
If you make this, I’d love to hear about it. Leave a comment below and let me know how it turned out, what variations you tried, or just share your favorite Thanksgiving memory. And if you’re looking for more small-batch holiday recipes, check out our small Thanksgiving menu guide for a complete stress-free feast. Happy cooking, and happy Thanksgiving!
Frequently Asked Questions
Can I use a frozen turkey breast in the air fryer?
I wouldn’t recommend it. Frozen turkey breast will cook unevenly in the air fryer, and the outside will likely dry out before the inside is done. Always thaw your turkey breast completely in the refrigerator before cooking. For a 3-4 pound breast, this takes about 24 hours.
How do I know when the turkey breast is fully cooked?
The only reliable way is to use an instant-read meat thermometer. Insert it into the thickest part of the breast, avoiding the bone. The turkey is safe to eat when it reaches 165°F (74°C), but I recommend pulling it out at 155°F (68°C) and letting it rest—the carryover cooking will bring it to the safe temperature without drying it out.
Can I cook a larger turkey breast in the air fryer?
It depends on the size of your air fryer. Most basket-style air fryers can accommodate up to a 4-pound breast comfortably. If you have a larger air fryer (like an oven-style one), you might be able to fit a 5-6 pound breast. Just make sure there’s at least an inch of space around the breast for air circulation, and expect to add 10-15 minutes to the cooking time.
Why is my air fryer turkey breast skin not crispy?
The most common culprit is moisture. Make sure you pat the turkey breast completely dry before adding the butter. Another reason could be that the air fryer isn’t hot enough—preheating is crucial. Finally, don’t overcrowd the basket. If the turkey is touching the sides, the air can’t circulate properly, and the skin won’t crisp up.
Can I make gravy from the drippings?
Absolutely! After cooking, pour the drippings from the bottom of the air fryer basket into a small saucepan. Whisk in 1 tablespoon of flour or cornstarch mixed with 1 tablespoon of cold water, then bring to a simmer over medium heat. Cook for 2-3 minutes until thickened. You can also add a splash of chicken broth if you want a thinner gravy. It’s simple and delicious!
Pin This Recipe!
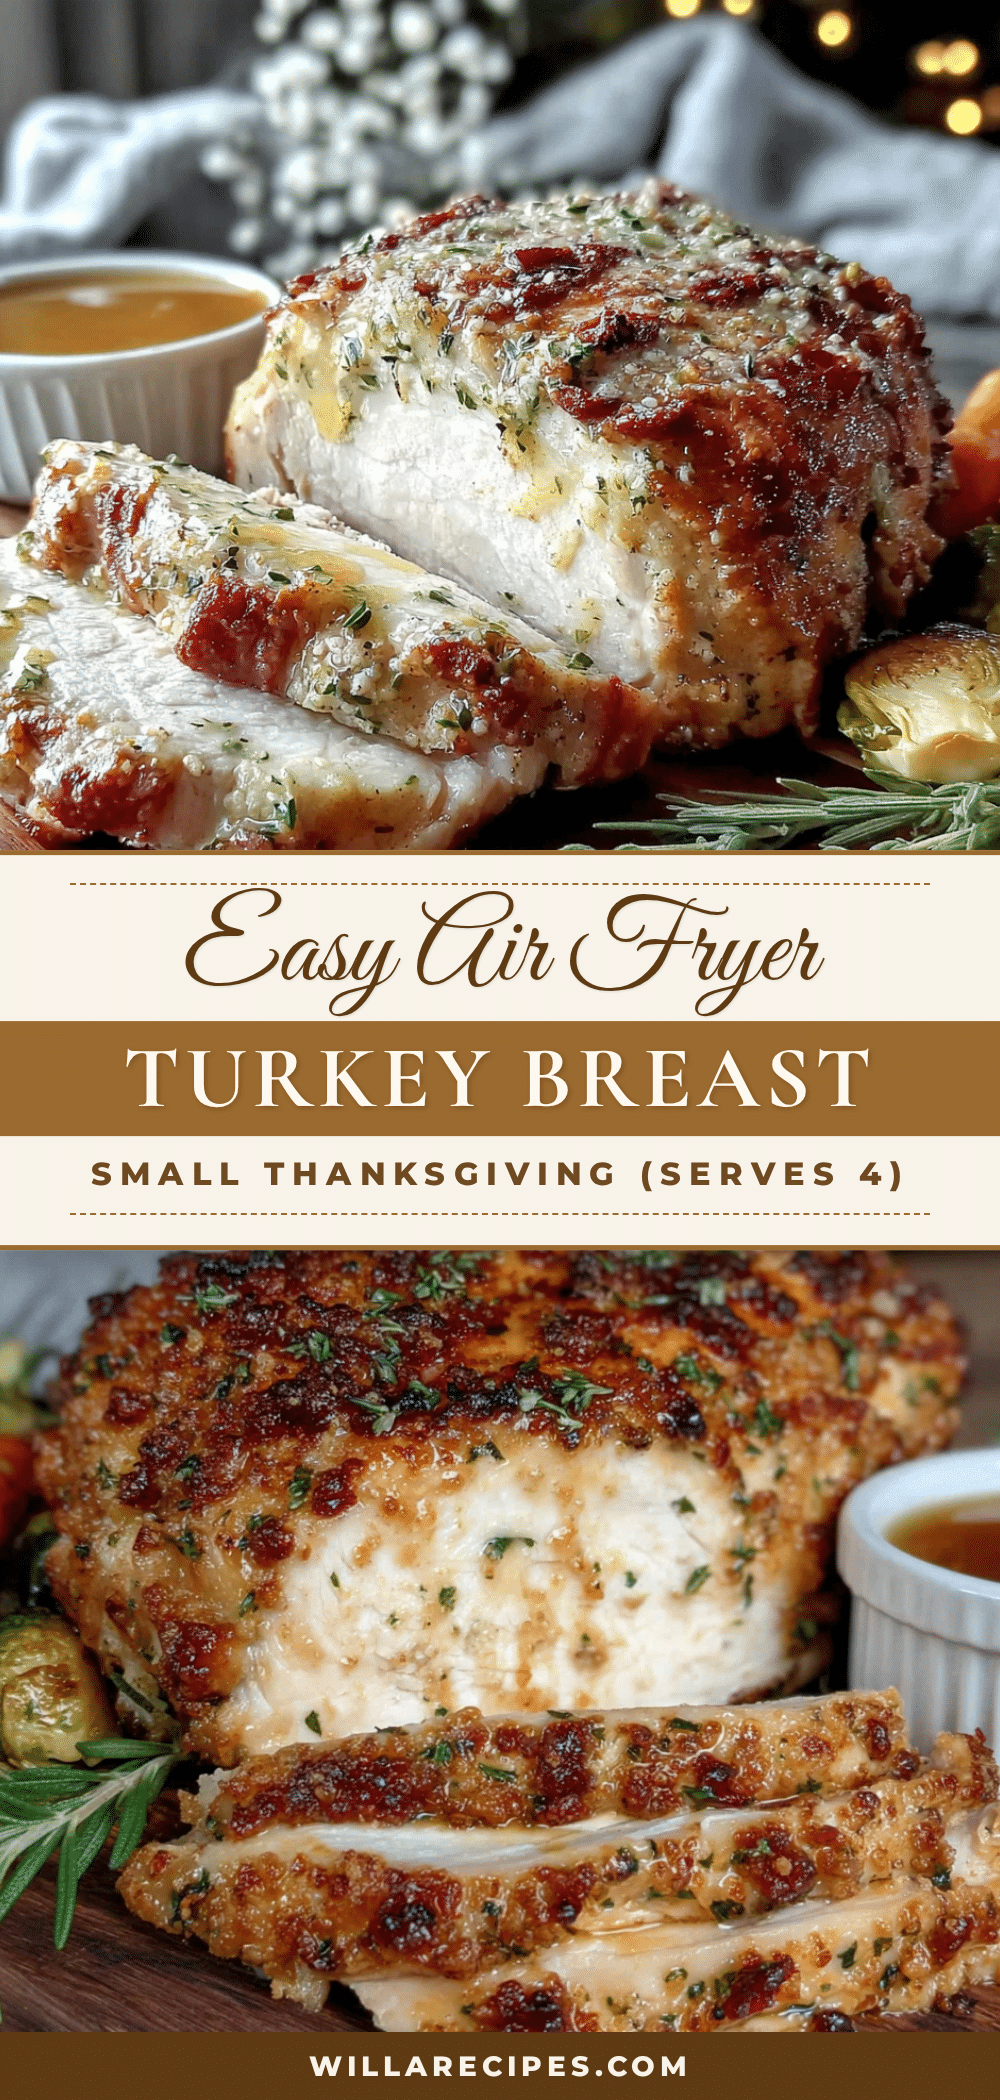
Easy Air Fryer Turkey Breast for Small Thanksgiving (Serves 4)

A juicy, golden air fryer turkey breast that’s perfect for small Thanksgiving gatherings. Ready in about an hour with simple ingredients, this recipe delivers crispy skin and tender meat without the stress of a whole bird.
- Prep Time: 15 minutes
- Cook Time: 50 minutes
- Total Time: 1 hour 5 minutes
- Yield: 4 servings 1x
- Category: Main Course
- Cuisine: American
Ingredients
- 1 (3 to 4 pound) bone-in, skin-on turkey breast
- 3 tablespoons unsalted butter, softened
- 3 cloves garlic, minced
- 1 tablespoon fresh rosemary, finely chopped
- 1 tablespoon fresh thyme leaves
- 1 teaspoon kosher salt
- 1/2 teaspoon black pepper, freshly ground
- 1 tablespoon olive oil
- 1/2 small onion, quartered (optional)
- 2 sprigs fresh rosemary (optional)
- 2 sprigs fresh thyme (optional)
- 1/2 lemon, halved (optional)
Instructions
- Take the turkey breast out of the fridge about 30 minutes before cooking. Pat it completely dry with paper towels.
- In a small bowl, combine softened butter, minced garlic, chopped rosemary, chopped thyme, salt, and pepper. Mash together with a fork until evenly distributed.
- Gently slide your fingers under the skin of the turkey breast to create a pocket, being careful not to tear the skin.
- Spread about two-thirds of the herb butter under the skin directly onto the meat. Spread the remaining butter over the top of the skin.
- Drizzle olive oil over the buttered skin and rub in gently.
- Preheat the air fryer to 350°F (175°C) for 3-5 minutes.
- Place onion quarters, rosemary sprigs, thyme sprigs, and lemon halves in the bottom of the air fryer basket. Place the turkey breast on top, skin-side up, ensuring it doesn’t touch the sides.
- Air fry at 350°F (175°C) for 45-55 minutes, until internal temperature reaches 155°F (68°C) in the thickest part.
- Remove turkey from air fryer, tent loosely with foil, and let rest for 15-20 minutes. The temperature will rise to 165°F (74°C) during resting.
- Carve against the grain into 1/2-inch thick slices and serve.
Notes
Pat the turkey breast bone-dry for crispy skin. Use a meat thermometer for accuracy—pull at 155°F and let carryover cooking bring it to 165°F. If skin browns too quickly, tent with foil. Let rest 15-20 minutes before carving to retain juices.
Nutrition
- Serving Size: 6 ounces cooked turk
- Calories: 280
- Sodium: 450
- Fat: 14
- Saturated Fat: 6
- Carbohydrates: 1
- Protein: 35
Keywords: air fryer turkey breast, small Thanksgiving, turkey breast recipe, easy turkey, Thanksgiving for 4, air fryer turkey


