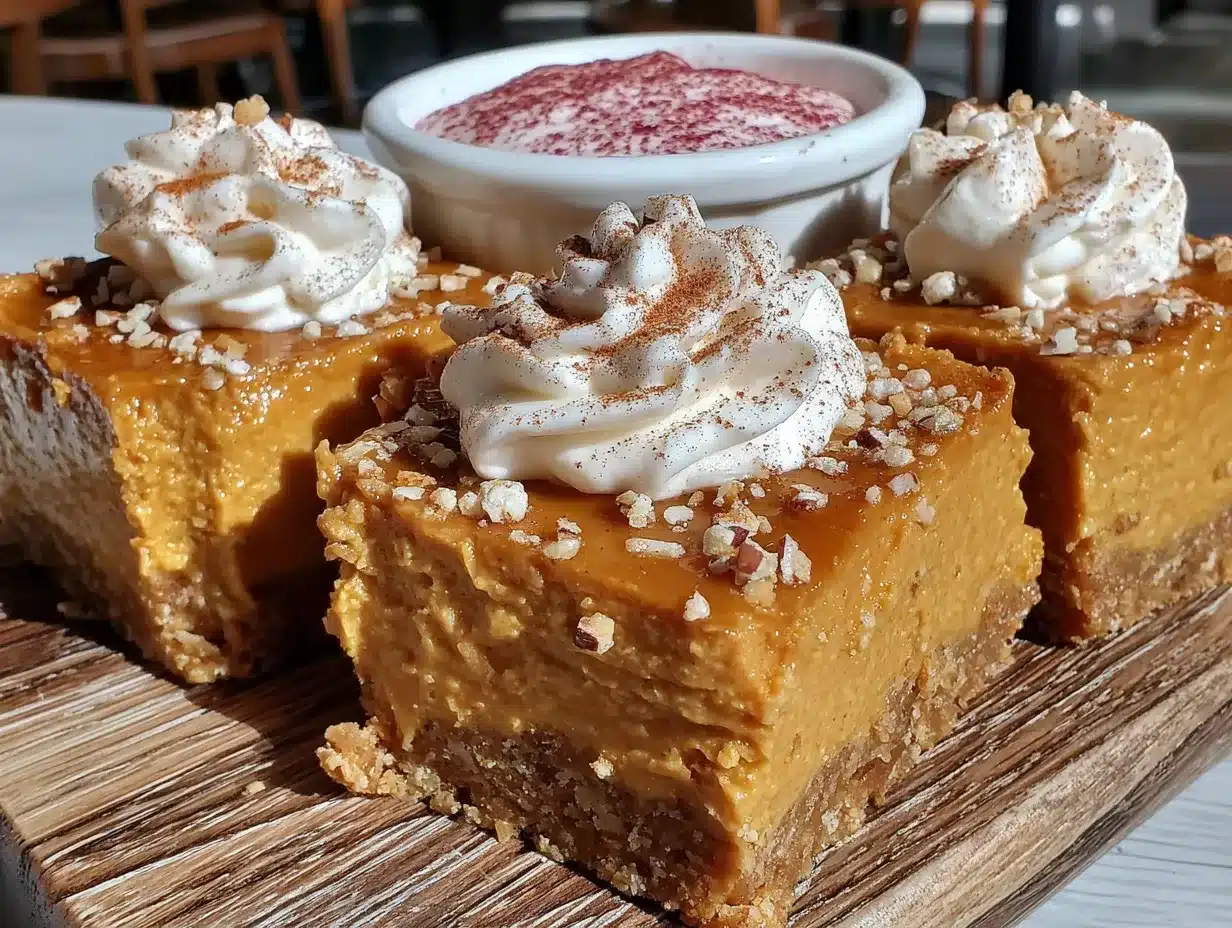
There used to be a tiny bakery tucked between a laundromat and a used bookstore in my old neighborhood. It was called The Gilded Spoon, and they had this glass case near the register that held the most incredible pumpkin cheesecake bars. The kind with a buttery, crumbly crust and a filling so smooth and creamy it felt like eating a cloud—if clouds tasted like autumn. When they closed their doors two years ago (the building got sold, and the owner retired to Florida, of all places), I honestly felt a little pang of grief. I mean, I’d stop by every Friday after work, rain or shine, just for one of those bars.
After about twelve attempts—twelve!—I finally cracked the code. My first few tries were disasters. One batch turned out grainy, another was so soft it basically melted into a puddle on the plate. But this version? It’s the one. It’s the one that makes me close my eyes after the first bite, and maybe you’ve been there, chasing a taste from your past. This cozy no-bake pumpkin cheesecake bars recipe is my little victory. It’s the taste of a lost bakery, recreated in my own kitchen, and I’m so excited to share it with you.
Why You’ll Love This Recipe
Let me tell you, these aren’t just any pumpkin bars. They’re the kind of dessert that makes you feel like you’ve got your act together, even when you don’t. I’ve tested this recipe more times than I care to admit, tweaking the ratios until the texture was absolutely perfect. Here’s why I think you’ll fall for them too:
- Quick & Easy: You can have these ready in about 20 minutes of active time. No oven needed, which means no waiting for it to preheat. Perfect for those “I need dessert now” moments.
- Simple Ingredients: No fancy grocery trips required. You probably have most of these staples in your pantry already. I’m talking graham crackers, cream cheese, and canned pumpkin.
- Perfect for Cozy Nights: These are ideal for a slow evening at home, a chilly fall afternoon, or honestly, any time you need a little comfort. They’re like a hug in bar form.
- Crowd-Pleaser: I’ve brought these to potlucks and family gatherings, and they disappear fast. Kids and adults both go crazy for that creamy, spiced filling.
- Unbelievably Delicious: The texture is what gets me. It’s so smooth and velvety, with that crunchy, buttery crust underneath. It’s next-level comfort food, no question.
What makes this recipe different from all the others? It’s the technique. I use a little trick with the cream cheese—letting it come to room temperature and then beating it until it’s super fluffy—that makes the filling incredibly light. Plus, I’ve found the perfect balance of pumpkin pie spice so it’s flavorful but not overwhelming. This isn’t just another version; it’s the best version I’ve ever made.
Honestly, this recipe is the kind that makes you close your eyes after the first bite. It’s comfort food reimagined—faster, easier, but with the same soul-soothing satisfaction. Perfect for impressing guests without any stress, or turning a simple Tuesday night into something memorable.
What Ingredients You Will Need
This recipe uses simple, wholesome ingredients to deliver that bold pumpkin flavor and satisfying, creamy texture without any fuss. Most of these are pantry staples, especially if you do any fall baking.
For the Crust
- 2 cups graham cracker crumbs (about 16 full sheets, crushed finely)
- 1/2 cup unsalted butter, melted (adds richness and helps the crust hold together)
- 1/4 cup granulated sugar
- 1/4 teaspoon salt (balances the sweetness)
For the Pumpkin Cheesecake Filling
- 16 oz (two 8-oz blocks) cream cheese, softened to room temperature (I recommend Philadelphia for the creamiest texture)
- 1 cup pumpkin puree (not pumpkin pie filling—make sure it’s 100% pure pumpkin)
- 1/2 cup packed brown sugar (light or dark works; dark gives a deeper molasses flavor)
- 1/4 cup granulated sugar
- 1 teaspoon vanilla extract
- 1 1/2 teaspoons pumpkin pie spice (or a mix of 1 tsp cinnamon, 1/4 tsp nutmeg, 1/4 tsp ginger, and a pinch of cloves)
- 1/4 teaspoon salt
- 1 cup heavy cream, cold (this gets whipped to make the filling light and airy)
For the Topping (Optional but Recommended)
- 1/2 cup heavy cream, cold
- 2 tablespoons powdered sugar
- 1/2 teaspoon vanilla extract
- A sprinkle of cinnamon or pumpkin pie spice, for garnish
Ingredient Tips: For the best texture, make sure your cream cheese is truly at room temperature. If you’re in a rush, you can cut it into cubes and let it sit on the counter for 30 minutes. I also like to use a high-quality pumpkin puree, like Libby’s, for the most consistent flavor. If you want a gluten-free option, use gluten-free graham crackers—they work perfectly!
Equipment Needed
You don’t need a lot of fancy tools for these cozy no-bake pumpkin cheesecake bars, which is part of their charm. Here’s what you’ll want to have on hand:
- 8×8-inch baking pan (a 9×9-inch works too, but the bars will be slightly thinner)
- Parchment paper (for easy lifting—trust me, this is a game-changer)
- Electric hand mixer or stand mixer (for whipping the cream and beating the cream cheese)
- Large mixing bowls (one for the crust, one for the filling)
- Food processor or zip-top bag and rolling pin (for crushing the graham crackers)
- Spatula (for spreading the filling evenly)
- Measuring cups and spoons
Budget-Friendly Alternative: If you don’t have a food processor, just put the graham crackers in a sturdy zip-top bag and crush them with a rolling pin or even the bottom of a heavy skillet. It’s a little more work, but it gets the job done!
Preparation Method
Okay, let’s get to the fun part. I’ll walk you through this step-by-step. The whole process takes about 20 minutes of active time, plus a few hours in the fridge to set. Honestly, the hardest part is waiting for them to chill!
Step 1: Prepare the Pan
Line your 8×8-inch baking pan with parchment paper. Leave a little overhang on two opposite sides—this will be your “handles” to lift the bars out later. It makes life so much easier.
Step 2: Make the Crust
In a medium bowl, combine the graham cracker crumbs, melted butter, sugar, and salt. Stir with a fork until the mixture looks like wet sand and all the crumbs are evenly coated. Press the mixture firmly into the bottom of your prepared pan. I like to use the bottom of a measuring cup to really pack it down. Pop it in the fridge while you make the filling.
Step 3: Whip the Cream
In a large mixing bowl, pour in the cold heavy cream. Using your electric mixer, whip the cream on medium-high speed until soft peaks form. This should take about 2-3 minutes. Be careful not to overwhip—you want it fluffy, not buttery. Set the bowl aside.
Step 4: Beat the Cream Cheese
In another large bowl, beat the softened cream cheese with an electric mixer on medium speed until it’s smooth and creamy, about 1 minute. Scrape down the sides of the bowl with a spatula. Add the brown sugar, granulated sugar, vanilla extract, pumpkin pie spice, and salt. Beat for another 2 minutes until everything is well combined and fluffy. Then, add the pumpkin puree and beat until fully incorporated. The mixture should be smooth and a beautiful orange color.
Step 5: Fold in the Whipped Cream
Here’s the trick. Take about a third of your whipped cream and gently fold it into the pumpkin-cream cheese mixture using a spatula. This lightens the batter. Then, add the rest of the whipped cream and fold it in gently until no white streaks remain. Be patient and gentle—you don’t want to deflate all that lovely air.
Step 6: Assemble the Bars
Pour the filling over the chilled crust. Use your spatula to spread it evenly, right into the corners. Give the pan a gentle tap on the counter to release any air bubbles.
Step 7: Chill
Cover the pan with plastic wrap and refrigerate for at least 4 hours, but overnight is best. I know, the waiting is the worst part! The bars need this time to set up properly so they slice cleanly.
Step 8: Make the Topping (Optional)
When you’re ready to serve, whip the remaining heavy cream with the powdered sugar and vanilla until soft peaks form. Spread or pipe it over the chilled bars. Sprinkle a little cinnamon on top for that cozy, finished look.
Step 9: Slice and Serve
Use the parchment paper handles to lift the entire block out of the pan. Place it on a cutting board and use a sharp knife to slice into 9 or 16 squares. For clean cuts, wipe the knife clean between each slice.
Cooking Tips & Techniques
I’ve made a few mistakes along the way so you don’t have to. Here are my best tips for perfect bars every time:
- Room temperature cream cheese is non-negotiable. Cold cream cheese will give you a lumpy filling. Leave it out on the counter for at least an hour before you start. I forgot once and tried to microwave it—big mistake. It partially melted and the texture was all wrong.
- Don’t skip the salt. A little salt in both the crust and the filling balances the sweetness and makes the pumpkin flavor pop. It’s a small detail that makes a big difference.
- Chill time matters. I know you’ll be tempted to dig in after 2 hours, but trust me on this. Four hours is the minimum, and overnight is ideal. The bars need time to firm up so they hold their shape when you cut them.
- Use a sharp knife for slicing. A dull knife will drag through the creamy filling and make a mess. Run the knife under hot water, wipe it dry, then slice. Clean the blade between cuts for the prettiest presentation.
- Plan ahead. These are a perfect make-ahead dessert. You can prepare them the day before your gathering and just add the whipped topping right before serving. It saves so much stress on the day of.
Variations & Adaptations
One of the best things about this recipe is how easy it is to tweak. Here are a few ways I’ve changed it up:
1. Gluten-Free Version
Simply swap the graham crackers for gluten-free graham crackers or even crushed gluten-free shortbread cookies. The rest of the recipe is naturally gluten-free. I’ve done this for a friend with celiac disease, and she couldn’t tell the difference!
2. Vegan Version
Use vegan cream cheese and a vegan butter substitute for the crust. For the filling, you can replace the heavy cream with a can of full-fat coconut cream (chilled overnight, then whipped). It’s a little different in texture but still deliciously creamy.
3. Spiced-Up Version
If you like a little heat, add 1/4 teaspoon of cayenne pepper or a pinch of chipotle powder to the filling. The warmth of the spice pairs beautifully with the pumpkin and cream cheese. I tried this on a whim last fall, and it was a huge hit at a dinner party.
4. No-Bake Pumpkin Cheesecake Bars with a Gingersnap Crust
For a more intense ginger flavor, replace the graham crackers with crushed gingersnap cookies. The spicy snap of the cookie is amazing with the creamy pumpkin filling. This is my personal favorite variation.
Serving & Storage Suggestions
These bars are best served cold, straight from the fridge. The texture is perfect when they’re nicely chilled—firm but still incredibly creamy. I love to serve them on a pretty plate with a dollop of the whipped cream and a light dusting of cinnamon.
For a truly cozy presentation, pair them with a warm mug of spiced apple cider or a hot cup of coffee. The contrast between the cold, creamy bar and the warm drink is just heavenly. They also go wonderfully with a scoop of vanilla ice cream if you’re feeling extra indulgent.
Storage: Leftover bars (if there are any!) can be stored in an airtight container in the refrigerator for up to 5 days. The flavor actually gets even better after a day or two as the spices meld together.
Freezing: These bars freeze beautifully. Once the bars are fully set, slice them into individual portions. Place them on a baking sheet lined with parchment paper and freeze for about an hour, or until firm. Then, transfer the frozen bars to a freezer-safe bag or container. They’ll keep for up to 3 months. To serve, thaw them in the refrigerator overnight. Add the whipped topping after thawing for the best texture.
Nutritional Information & Benefits
While these are definitely a treat, they do have a few redeeming qualities! Pumpkin is packed with vitamin A and fiber, which is always a nice bonus. The cream cheese provides some calcium and protein, and using a graham cracker crust keeps things a little lighter than a traditional pastry crust.
Here’s an approximate nutritional breakdown per bar (based on 9 servings):
- Calories: 410
- Fat: 28g
- Carbohydrates: 37g
- Protein: 6g
- Fiber: 2g
- Sugar: 28g
Dietary Considerations: This recipe can be made gluten-free and vegan with simple substitutions as noted above. It does contain dairy and gluten in its standard form. For a lower-sugar version, you can reduce the sugar in the filling by a couple of tablespoons, but it will affect the texture slightly.
I believe in balance, you know? These bars are a wonderful way to enjoy a seasonal dessert without spending hours in the kitchen. They’re a little bit of indulgence that feels totally worth it.
Conclusion
So there you have it. My little tribute to a lost bakery, a recipe that took twelve tries to perfect, and now a dessert I make for every cozy occasion I can think of. These cozy no-bake pumpkin cheesecake bars are more than just a recipe to me. They’re a reminder that you can recreate a cherished memory, even if it takes a little trial and error.
I really hope you give these a try. Don’t be afraid to make them your own—add more spice, swap the crust, or double the batch because trust me, one pan is never enough. And when you do make them, I’d love to hear about it. Leave a comment below and let me know how they turned out, or share a photo on Pinterest and tag me. It makes my day to see your creations.
Happy baking—or in this case, happy no-baking! May your kitchen smell like autumn and your heart feel a little warmer.
Frequently Asked Questions (FAQs)
Can I use pumpkin pie filling instead of pumpkin puree?
I wouldn’t recommend it. Pumpkin pie filling is already sweetened and spiced, which will throw off the balance of the recipe. Stick with 100% pure pumpkin puree for the best results.
How long do these bars need to set in the fridge?
At least 4 hours, but overnight is best. The longer they chill, the cleaner your slices will be. Patience is key here!
Can I make these bars dairy-free?
Absolutely! Use a high-quality vegan cream cheese and a dairy-free butter substitute for the crust. For the whipped cream, use chilled full-fat coconut cream. The texture will be slightly different, but still delicious.
My cream cheese is lumpy. What did I do wrong?
This usually happens when the cream cheese is too cold. Make sure it’s fully softened to room temperature before you start. If you’re in a rush, cut it into small cubes and let it sit for 20-30 minutes.
Can I freeze these bars?
Yes, they freeze wonderfully! Slice them, freeze them individually on a baking sheet, then transfer to a freezer bag. They’ll keep for up to 3 months. Thaw in the fridge before serving.
Pin This Recipe!
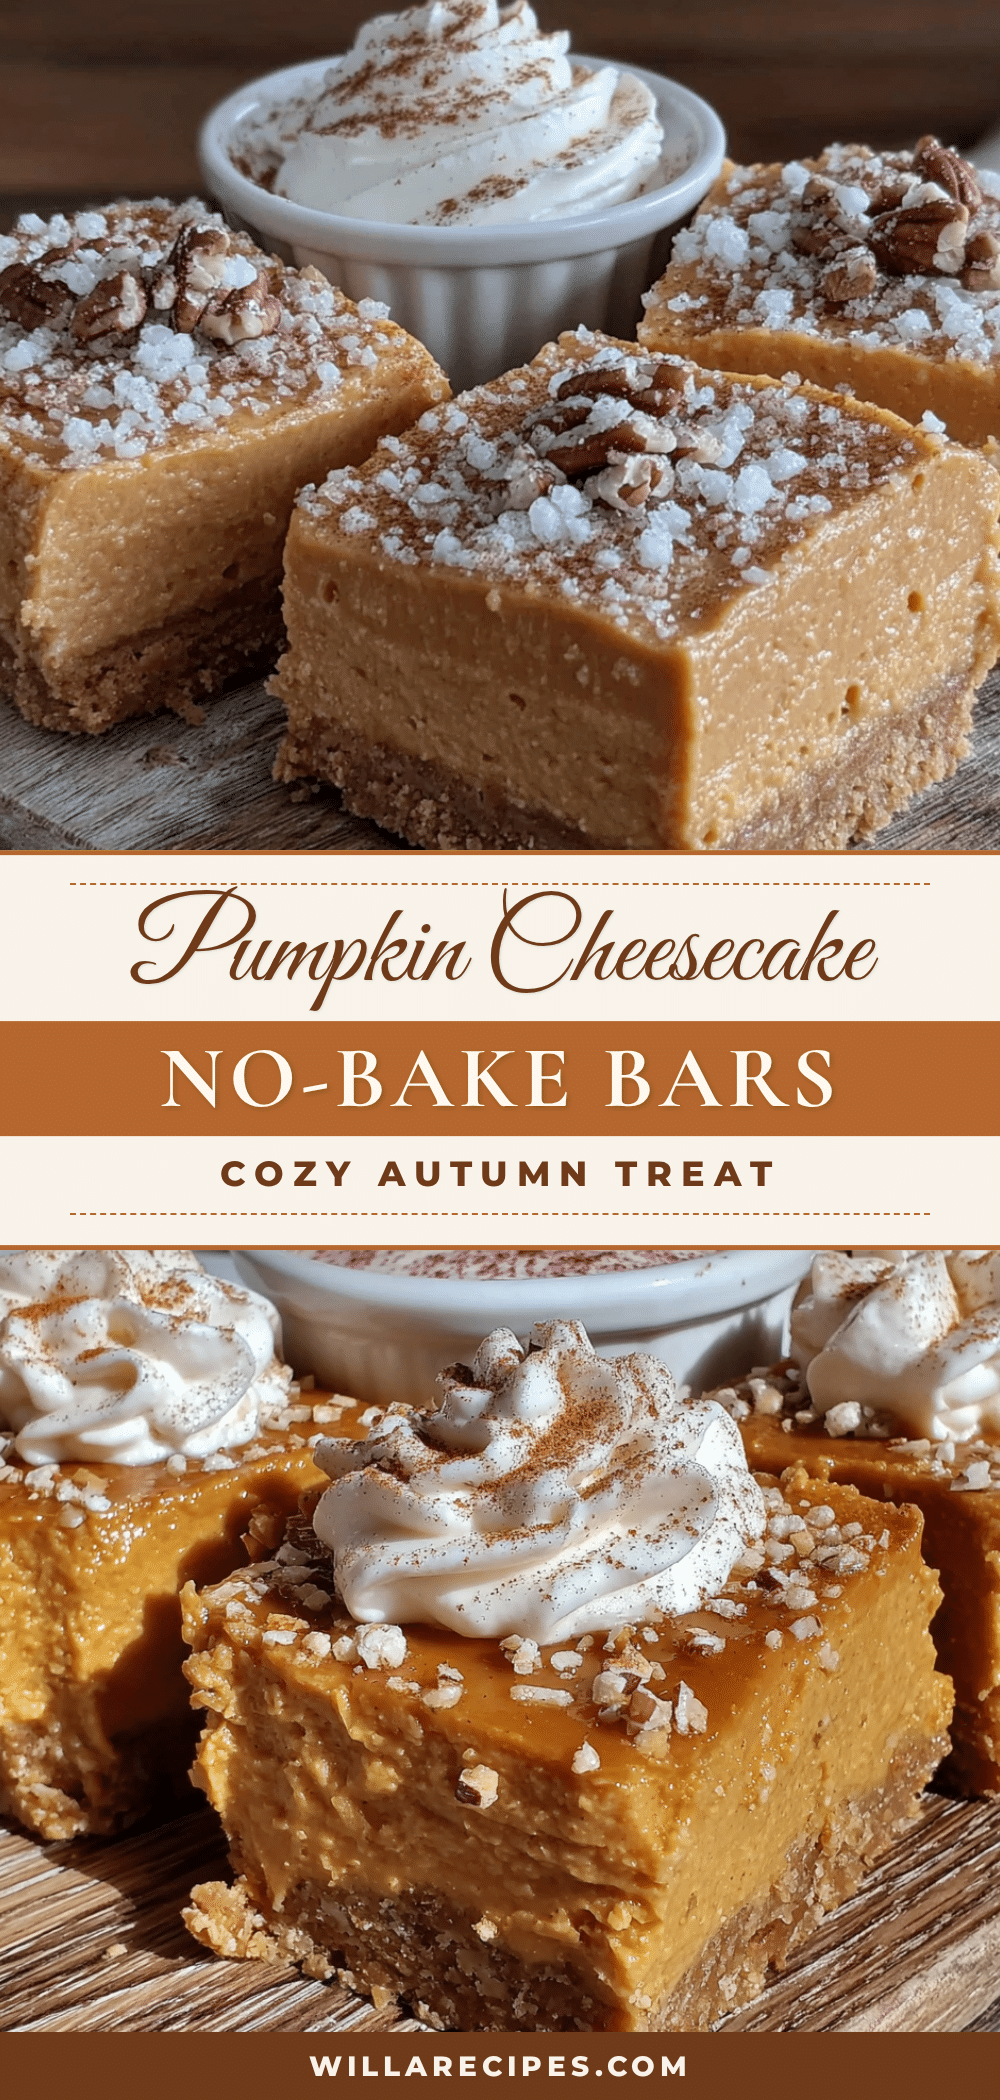
Cozy No-Bake Pumpkin Cheesecake Bars: Easy 20-Min Dessert
These no-bake pumpkin cheesecake bars feature a buttery graham cracker crust and a creamy, spiced pumpkin filling. Ready in just 20 minutes of active time, they’re the perfect easy fall dessert.
- Prep Time: 20 minutes
- Cook Time: 0 minutes
- Total Time: 4 hours 20 minutes (includes chilling)
- Yield: 9 servings 1x
- Category: Dessert
- Cuisine: American
Ingredients
- 2 cups graham cracker crumbs (about 16 full sheets, crushed finely)
- 1/2 cup unsalted butter, melted
- 1/4 cup granulated sugar
- 1/4 teaspoon salt
- 16 oz (two 8-oz blocks) cream cheese, softened to room temperature
- 1 cup pumpkin puree (not pumpkin pie filling)
- 1/2 cup packed brown sugar (light or dark)
- 1/4 cup granulated sugar
- 1 teaspoon vanilla extract
- 1 1/2 teaspoons pumpkin pie spice (or a mix of 1 tsp cinnamon, 1/4 tsp nutmeg, 1/4 tsp ginger, and a pinch of cloves)
- 1/4 teaspoon salt
- 1 cup heavy cream, cold
- 1/2 cup heavy cream, cold (for topping)
- 2 tablespoons powdered sugar (for topping)
- 1/2 teaspoon vanilla extract (for topping)
- A sprinkle of cinnamon or pumpkin pie spice, for garnish
Instructions
- Line an 8×8-inch baking pan with parchment paper, leaving overhang on two opposite sides.
- In a medium bowl, combine graham cracker crumbs, melted butter, 1/4 cup granulated sugar, and 1/4 teaspoon salt. Stir until mixture resembles wet sand. Press firmly into the bottom of the prepared pan. Refrigerate while making the filling.
- In a large mixing bowl, whip 1 cup cold heavy cream with an electric mixer on medium-high speed until soft peaks form, about 2-3 minutes. Set aside.
- In another large bowl, beat softened cream cheese on medium speed until smooth and creamy, about 1 minute. Add brown sugar, 1/4 cup granulated sugar, 1 teaspoon vanilla extract, pumpkin pie spice, and 1/4 teaspoon salt. Beat for 2 minutes until fluffy. Add pumpkin puree and beat until fully incorporated.
- Gently fold about one-third of the whipped cream into the pumpkin-cream cheese mixture using a spatula. Fold in the remaining whipped cream until no white streaks remain.
- Pour the filling over the chilled crust and spread evenly. Tap the pan gently on the counter to release air bubbles.
- Cover with plastic wrap and refrigerate for at least 4 hours, preferably overnight.
- When ready to serve, whip the remaining 1/2 cup heavy cream with powdered sugar and 1/2 teaspoon vanilla extract until soft peaks form. Spread or pipe over the chilled bars. Sprinkle with cinnamon or pumpkin pie spice.
- Use the parchment paper handles to lift the bars out of the pan. Slice into 9 or 16 squares using a sharp knife, wiping the blade clean between cuts.
Notes
For best texture, ensure cream cheese is at room temperature. Chill for at least 4 hours, preferably overnight. For clean slices, use a sharp knife and wipe it clean between cuts. Bars can be stored in the refrigerator for up to 5 days or frozen for up to 3 months.
Nutrition
- Serving Size: 1 bar (based on 9 se
- Calories: 410
- Sugar: 28
- Fat: 28
- Carbohydrates: 37
- Fiber: 2
- Protein: 6
Keywords: no-bake pumpkin cheesecake bars, easy pumpkin dessert, fall dessert, no-bake cheesecake, pumpkin bars