It was 11:47 PM on a random Thursday, and I had this ridiculous craving for chicken parmesan. Not just any chicken parmesan — the kind that’s so crispy it shatters when you cut into it, smothered in melted mozzarella, and swimming in a garlicky tomato sauce. The problem? I didn’t have the energy for the traditional breading-and-frying circus. I mean, standing over a sputtering pan of oil at midnight? No thanks. But I had panko breadcrumbs collecting dust in the back of the pantry, a block of mozzarella that needed using up, and this wild idea that maybe — just maybe — I could get that same golden crunch from the oven.
So I grabbed a baking sheet, lined it with a wire rack (because I’d read somewhere that airflow is the secret to crispy baked things), and started experimenting. I seasoned the breadcrumbs with garlic powder, dried oregano, and a pinch of cayenne because why not? I dipped the chicken in egg, then in the crumbs, and baked it at a higher temperature than I normally would. Honestly, I was skeptical. Oven-baked chicken parmesan always felt like a compromise — healthier, sure, but never as satisfying as the real deal.
But when I pulled that sheet out of the oven at 12:34 AM, the kitchen smelled like a trattoria. The chicken was golden, the cheese was bubbly, and the sauce had caramelized around the edges. I took a bite standing at the counter, and I swear I almost teared up. It was crispy. It was juicy. It was everything I wanted. And the best part? I didn’t have to scrub a single grease-splattered stovetop. That late-night experiment turned into the recipe I now make for every dinner party, potluck, and holiday gathering. It’s the one dish that makes me look like I spent hours in the kitchen when really, I just let the oven do the heavy lifting. And honestly? That’s the kind of cooking magic we all need.
Why You’ll Love This Recipe
If you’re hosting a crowd — whether it’s a birthday dinner, a game day spread, or a casual Sunday supper — this crispy baked chicken parmesan is about to become your secret weapon. It’s the kind of dish that makes people close their eyes after the first bite, and you get to take all the credit without breaking a sweat.
- Crowd-Sized and Stress-Free: This recipe scales beautifully. You can easily double or triple it without crowding your oven, and everything bakes on a single sheet pan. No standing over a fryer, no splattering oil, no last-minute chaos.
- Actually Crispy (Yes, Really): The combination of panko breadcrumbs, a wire rack, and high heat gives you that shatteringly crunchy coating — no deep frying required. I’ve tested this a dozen times, and it works every single time.
- Simple Pantry Ingredients: You probably already have most of what you need: chicken breasts, breadcrumbs, eggs, mozzarella, parmesan, and canned tomatoes. No fancy grocery runs or obscure spices required.
- Perfect for Impressing Guests: There’s something about a golden, cheesy chicken parmesan that feels celebratory. It looks impressive on a platter, and everyone — kids, picky eaters, even your uncle who “doesn’t do baked chicken” — will go back for seconds.
- Make-Ahead Friendly: You can bread the chicken earlier in the day, refrigerate it, and pop it in the oven just before your guests arrive. That means you get to actually enjoy the party instead of hiding in the kitchen.
- My Best Version: This isn’t just another baked chicken parmesan recipe. The secret is in the double-breading technique and the oven temperature — I bake at 425°F to get that golden crust without drying out the meat. Plus, I add a touch of garlic powder and oregano to the breadcrumbs for that classic Italian-American flavor that tastes like it came from a red-sauce joint.
This is the recipe you’ll turn to when you want to feed a crowd something unforgettable, but you also want to keep your sanity. It’s comfort food reimagined — faster, easier, and just as soul-soothing as the original.
What Ingredients You Will Need
This recipe relies on simple, high-quality ingredients to deliver that signature crunch and rich flavor. Most of these are pantry staples, which makes this dish perfect for last-minute hosting.
- Chicken breasts: 4 large boneless, skinless chicken breasts (about 2 pounds total). Look for evenly sized breasts so they cook at the same rate. If they’re huge, butterfly them or pound them to an even thickness — about 1/2 inch thick works best.
- Panko breadcrumbs: 2 cups. I prefer panko over regular breadcrumbs because they create a lighter, crunchier crust. My go-to brand is Ian’s or Kikkoman. (Pro tip: toast them lightly in a dry pan for extra color, though I skip that step most of the time.)
- Grated Parmesan cheese: 1/2 cup, plus more for serving. Use the real stuff, not the green can. Parmigiano-Reggiano adds a nutty, salty depth that makes the crust sing.
- All-purpose flour: 1/2 cup. This helps the egg wash stick to the chicken, creating a better base for the breadcrumbs.
- Eggs: 3 large, beaten. They act as the glue between the flour and the breadcrumb coating.
- Mozzarella cheese: 2 cups shredded whole-milk mozzarella. Low-moisture mozzarella melts beautifully without making the crust soggy. Fresh mozzarella is too watery for this application — trust me, I learned that the hard way.
- Marinara sauce: 2 cups. Use your favorite jarred sauce or homemade. I often use Rao’s or Mutti because they’re flavorful and not too sweet. If you’re feeling ambitious, my quick garlic marinara takes 15 minutes.
- Olive oil: 2 tablespoons, for drizzling over the breaded chicken before baking. This is crucial — it helps the panko brown and crisp up in the oven.
- Garlic powder: 1 teaspoon. Mixed into the breadcrumbs for that savory punch.
- Dried oregano: 1 teaspoon. Adds that classic Italian-American herb flavor.
- Salt and black pepper: To taste. Season the chicken and the breadcrumb mixture generously.
- Red pepper flakes (optional): 1/4 teaspoon. I add this to the breadcrumbs for a subtle kick that cuts through the richness.
- Fresh parsley: For garnish. A sprinkle of green makes the dish pop visually.
Substitution Notes: For a gluten-free version, use gluten-free panko and a 1:1 gluten-free flour blend. For a dairy-free option, substitute the Parmesan with nutritional yeast and use a dairy-free mozzarella shreds — just note the texture might be slightly different. If you’re feeding a crowd with different dietary needs, this is easy to adapt in batches.
Equipment Needed
You don’t need a fancy kitchen to pull this off, but a few key tools make the process smoother and the results more consistent.
- Baking sheet: A large rimmed baking sheet (18×13 inches) is ideal. The rim catches any drips from the sauce and cheese.
- Wire rack: This is the secret to crispy baked chicken. Placing the breaded chicken on a wire rack set inside the baking sheet allows hot air to circulate underneath, preventing the bottom from getting soggy. A standard cooling rack works perfectly.
- Three shallow bowls: For the flour, egg wash, and breadcrumb mixture. I use wide, shallow pasta bowls for easy dipping.
- Meat mallet or rolling pin: To pound the chicken breasts to an even thickness. This ensures they cook evenly and stay juicy.
- Tongs: For transferring the chicken between bowls and onto the baking sheet. They keep your hands clean and the coating intact.
- Chef’s knife and cutting board: For prepping the chicken and chopping parsley.
- Measuring cups and spoons: For accurate ingredient portions.
- Oven mitts: The sheet pan gets hot, especially at 425°F.
If you don’t have a wire rack, you can bake the chicken directly on the sheet pan — just flip it halfway through cooking to crisp both sides. But honestly, the rack is a game-changer. I picked mine up at a restaurant supply store for under $10, and it’s one of the most used tools in my kitchen.
Preparation Method
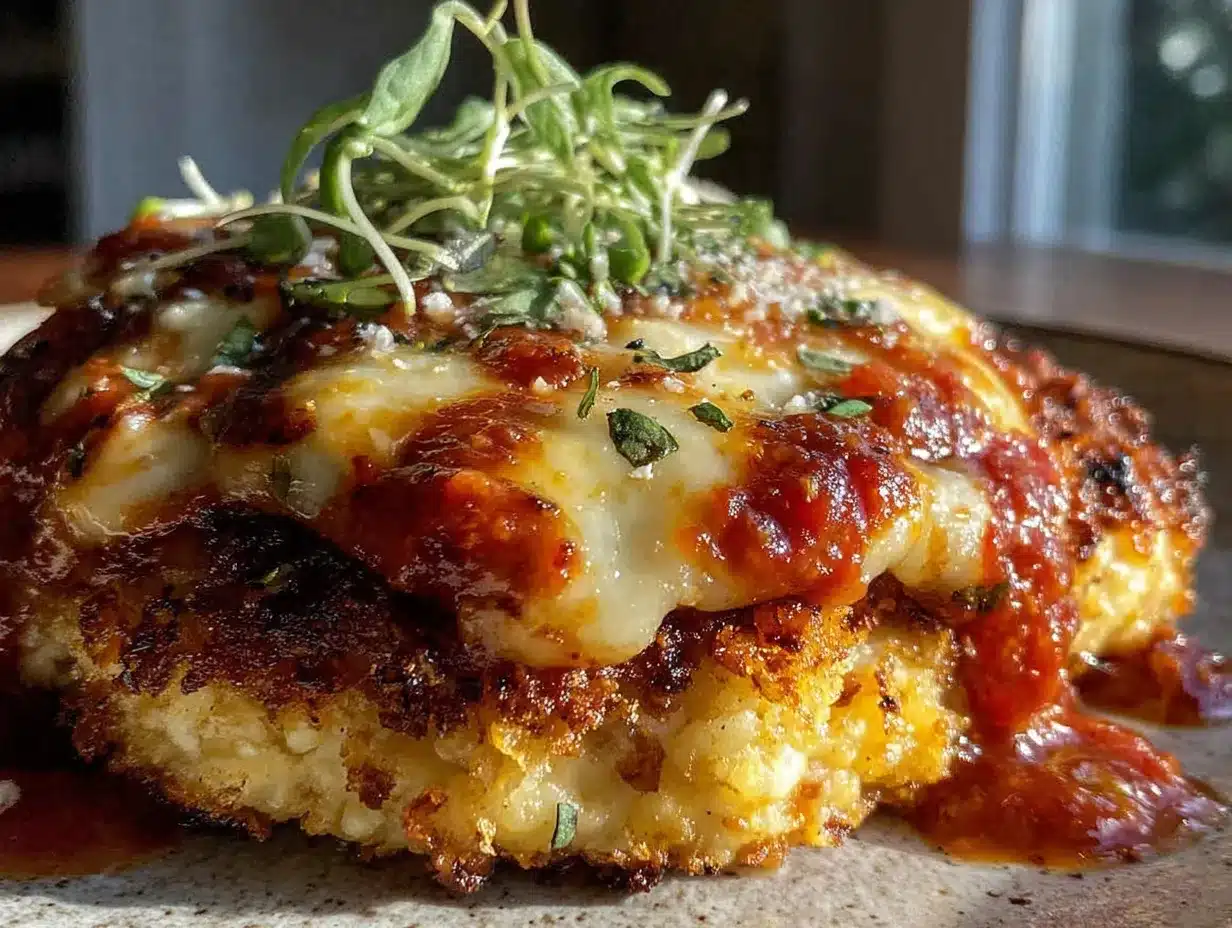
This method is designed to feed a crowd without the stress. You can prep the chicken a few hours ahead or bake it fresh — either way, it comes out perfectly crispy.
- Preheat the oven to 425°F (220°C). Place a wire rack inside a rimmed baking sheet and spray it lightly with nonstick cooking spray. This prevents the chicken from sticking and makes cleanup a breeze.
- Prepare the chicken. Place each chicken breast between two sheets of plastic wrap or parchment paper. Pound them to an even thickness of about 1/2 inch using a meat mallet or rolling pin. Season both sides generously with salt and black pepper. (I usually go with about 1/2 teaspoon salt and 1/4 teaspoon pepper per breast.)
- Set up the breading station. In the first shallow bowl, add 1/2 cup all-purpose flour. In the second bowl, beat 3 large eggs with a splash of water (about 1 tablespoon). In the third bowl, combine 2 cups panko breadcrumbs, 1/2 cup grated Parmesan, 1 teaspoon garlic powder, 1 teaspoon dried oregano, 1/4 teaspoon red pepper flakes (if using), and a pinch of salt and pepper. Mix well with a fork.
- Bread the chicken. Working one piece at a time, dredge the chicken in the flour, shaking off the excess. Dip it into the egg wash, letting any excess drip off. Then press it firmly into the panko mixture, making sure both sides are fully coated. Place the breaded chicken on the prepared wire rack. Repeat with all the pieces. (Here’s a tip I learned after a few too many messy attempts: use one hand for dry ingredients and one hand for wet ingredients. It keeps the breading from clumping on your fingers.)
- Drizzle with olive oil. Lightly drizzle or spray the breaded chicken with olive oil. This is non-negotiable — it’s what gives the panko that golden, crunchy finish in the oven. You can use a pastry brush to spread it evenly if you’re feeling fancy.
- Bake the chicken. Place the baking sheet in the preheated oven and bake for 15 minutes. The chicken should be golden and cooked through (internal temperature of 165°F). If your chicken breasts are on the thicker side, add 2-3 minutes.
- Add sauce and cheese. Remove the baking sheet from the oven. Spoon about 2 tablespoons of marinara sauce onto each chicken breast, spreading it gently. Top each with a generous handful of shredded mozzarella (about 1/3 cup per breast). Sprinkle a little extra Parmesan on top for good measure.
- Finish baking. Return the sheet to the oven and bake for another 5-7 minutes, until the cheese is melted, bubbly, and starting to brown in spots. If you want deeper browning, switch the oven to broil for the last 1-2 minutes — but watch it carefully so the cheese doesn’t burn.
- Rest and garnish. Let the chicken parmesan rest on the baking sheet for 5 minutes. This allows the juices to redistribute and the cheese to set slightly. Sprinkle with fresh chopped parsley before serving.
Sensory cues: At step 6, the panko should look golden and feel crisp to the touch. At step 8, the cheese should be fully melted with a few golden-brown bubbles on the surface. The sauce should be hot and slightly thickened around the edges.
Cooking Tips & Techniques
I’ve made this recipe more times than I can count, and I’ve definitely had my share of failures. Here’s what I’ve learned along the way so you can skip the mistakes.
- Don’t skip the wire rack. I tried baking the chicken directly on the sheet pan once, and the bottom turned into a sad, soggy mess. The wire rack allows hot air to circulate underneath, keeping the crust crispy on all sides. If you don’t have one, flip the chicken halfway through baking and add 3-4 minutes to the total cooking time.
- Toast the panko for extra crunch. This is an optional step, but if you have an extra 3 minutes, toast the panko in a dry skillet over medium heat until it’s lightly golden before mixing it with the Parmesan and seasonings. It gives the crust a head start on browning and adds a nutty flavor.
- Don’t overcrowd the baking sheet. Leave at least an inch of space between each piece of chicken. If they’re too close together, they’ll steam instead of crisp. For a large crowd, use two baking sheets and rotate them halfway through baking.
- Make it ahead of time. You can bread the chicken up to 4 hours in advance and refrigerate it on the wire rack (uncovered). When you’re ready to bake, just drizzle with oil and pop it in the oven. This is a lifesaver when you’re hosting — you can prep everything while your guests are mingling.
- Use a meat thermometer. Chicken breasts can go from perfectly juicy to dry in a minute. I always check the internal temperature at the thickest part — 165°F is the sweet spot. If you don’t have a thermometer, cut into the thickest piece; the juices should run clear and the meat should be opaque throughout.
- My biggest failure: The first time I made this for a dinner party, I forgot to season the breadcrumbs. The chicken was perfectly crispy but totally bland. Now I always taste the breadcrumb mixture before breading — it should taste slightly salty and well-seasoned. A little pinch goes a long way.
Variations & Adaptations
This recipe is endlessly adaptable, which makes it perfect for different crowds and dietary needs. Here are a few variations I’ve tried and loved.
- Chicken Parmesan Sliders: After baking, slice each chicken breast into 3-4 pieces and serve on mini brioche buns with extra marinara and melted provolone. These are a hit at game day parties and potlucks.
- Spicy Arrabiata Version: Swap the marinara for a spicy arrabiata sauce (I use Mutti’s or add extra red pepper flakes to my homemade sauce). The heat cuts through the richness of the cheese and adds a nice kick.
- Eggplant Parmesan Variation: For a vegetarian option, substitute the chicken with 2 large eggplants. Slice them into 1/2-inch rounds, salt them for 30 minutes to draw out moisture, then follow the same breading and baking process. The eggplant bakes in about 20 minutes total.
- Gluten-Free Adaptation: Use gluten-free panko (I like Ian’s) and a 1:1 gluten-free flour blend. The texture is slightly less crunchy but still delicious. I’ve served this to gluten-sensitive friends and they couldn’t tell the difference.
- Dairy-Free Version: Replace the Parmesan with nutritional yeast (use 1/4 cup) and use dairy-free mozzarella shreds. The crust won’t be as rich, but it’s still satisfying. Drizzle a little extra olive oil to compensate for the missing fat.
- My personal favorite twist: I sometimes add a thin layer of pesto under the mozzarella before baking. It adds a fresh, herby flavor that pairs beautifully with the tomato sauce. Just spread about 1 teaspoon of pesto on each chicken breast before adding the cheese.
Serving & Storage Suggestions
This dish is made for sharing, and it’s versatile enough to fit into any meal plan. Here’s how to serve it and store leftovers.
Serving: Serve the chicken parmesan hot, straight from the oven. I like to arrange the pieces on a large platter with extra marinara sauce on the side for dipping. Garnish with fresh parsley and a generous grating of Parmesan. For a complete meal, pair it with a simple arugula salad dressed with lemon and olive oil, and a side of garlic bread or crusty Italian bread to soak up the sauce. If you’re serving it as a main course, it goes beautifully with spaghetti aglio e olio or a classic Caesar salad.
Make-Ahead Tips: You can fully assemble the chicken parmesan (breaded, sauced, and cheesed) up to 2 hours before baking. Cover it loosely with foil and refrigerate. When you’re ready to bake, add 5-7 minutes to the cooking time since you’re starting from cold. This is perfect for dinner parties — you can relax while your guests arrive and pop it in the oven when everyone’s ready to eat.
Storage: Leftover chicken parmesan keeps well in the refrigerator for up to 4 days. Store it in an airtight container, preferably with the pieces separated by parchment paper to prevent sticking. The flavors actually meld together overnight, making leftovers taste even better.
Reheating: The best way to reheat is in the oven at 375°F for 10-12 minutes, or until the cheese is bubbly and the chicken is heated through. Avoid the microwave — it makes the crust soggy and the rubbery. If you’re in a hurry, you can reheat it in an air fryer at 350°F for 5-7 minutes, which restores some of the crunch.
Freezing: You can freeze the fully baked chicken parmesan for up to 3 months. Let it cool completely, then wrap each piece individually in plastic wrap and place them in a freezer-safe bag. To reheat, thaw in the refrigerator overnight and bake at 375°F for 15-18 minutes.
Flavor Development: I’ve noticed that the chicken parmesan tastes even better the next day. The sauce soaks into the edges of the crust just enough to soften it slightly, and the flavors of the garlic, oregano, and cheese meld together beautifully. If you’re planning a party, consider making it a day ahead and reheating it — your guests won’t know the difference.
Nutritional Information & Benefits
This recipe is indulgent, but it’s also packed with protein and can fit into a balanced diet. Here’s the estimated nutritional breakdown per serving (one chicken breast with sauce and cheese, without sides).
| Nutrient | Amount Per Serving |
|---|---|
| Calories | 485 |
| Protein | 52g |
| Fat | 18g |
| Saturated Fat | 7g |
| Carbohydrates | 22g |
| Fiber | 2g |
| Sugar | 6g |
| Sodium | 890mg |
Health Benefits: Chicken breast is an excellent source of lean protein, which supports muscle repair and keeps you feeling full. The marinara sauce provides lycopene, an antioxidant linked to heart health, especially when cooked. Parmesan cheese adds calcium and a small amount of protein. If you’re watching your sodium, you can use a low-sodium marinara and reduce the added salt in the breadcrumbs.
Dietary Considerations: This recipe is not gluten-free or dairy-free in its standard form, but as noted in the variations section, both adaptations work well. It’s naturally low in carbohydrates compared to pasta-based dishes, making it a good option for those on a lower-carb diet. If you’re serving a crowd with mixed dietary needs, consider making a separate gluten-free batch on a smaller baking sheet.
I personally love that this recipe feels like comfort food without the post-dinner guilt. It’s satisfying and rich, but it doesn’t leave you feeling heavy or sluggish. That’s the kind of cooking I can get behind.
Conclusion
This crispy baked chicken parmesan has become my go-to for every gathering, and I think it’s about to become yours too. It delivers everything you want from the classic dish — the crunch, the cheese, the saucy goodness — without the hassle of deep frying or the stress of last-minute prep. It’s the kind of recipe that makes you look like a hero in the kitchen, even when you’re just letting the oven do the work.
What I love most about this recipe is how forgiving it is. You can tweak the seasonings, swap the cheese, or double the batch without worrying about ruining it. It’s designed for real life — for busy weeknights, for impromptu dinner parties, for those moments when you want to feed the people you love something truly memorable. And honestly? The fact that it’s baked means you can enjoy a glass of wine with your guests instead of hovering over a hot stove.
I’d love to hear how this turns out for you. Did you try any of the variations? Did your crowd go back for seconds? Drop a comment below and let me know — I read every single one. And if you’re looking for more crowd-pleasing recipes, check out my garlic butter shrimp pasta or this one-pan lemon herb salmon. Happy cooking, friends!
Frequently Asked Questions
Can I use chicken thighs instead of breasts?
Absolutely! Boneless, skinless chicken thighs work great in this recipe. They’re more forgiving and stay juicy even if you overcook them slightly. Adjust the baking time to about 18-20 minutes for the initial bake, since thighs are a bit thicker.
How do I keep the breading from falling off?
The key is the flour-egg-breadcrumb sequence. Make sure the chicken is dry (pat it with paper towels), shake off excess flour, let the egg drip off, and press the breadcrumbs firmly into the chicken. Also, let the breaded chicken rest on the wire rack for 5-10 minutes before baking — it helps the coating adhere better.
Can I prepare this in advance for a party?
Yes! You can bread the chicken up to 4 hours ahead and refrigerate it on the wire rack (uncovered). You can also fully assemble the chicken parmesan (with sauce and cheese) up to 2 hours before baking. Just cover it loosely with foil and refrigerate, then add a few extra minutes to the baking time.
What’s the best way to reheat leftovers?
The oven is your best friend here. Reheat at 375°F for 10-12 minutes, or until the cheese is bubbly and the chicken is hot. If you have an air fryer, 350°F for 5-7 minutes works beautifully and restores some of the crunch. Avoid the microwave — it makes the crust soggy.
Can I freeze this chicken parmesan?
Definitely. Let the fully baked chicken parmesan cool completely, then wrap each piece individually in plastic wrap and place them in a freezer-safe bag. It will keep for up to 3 months. To reheat, thaw overnight in the refrigerator and bake at 375°F for 15-18 minutes.
Pin This Recipe!
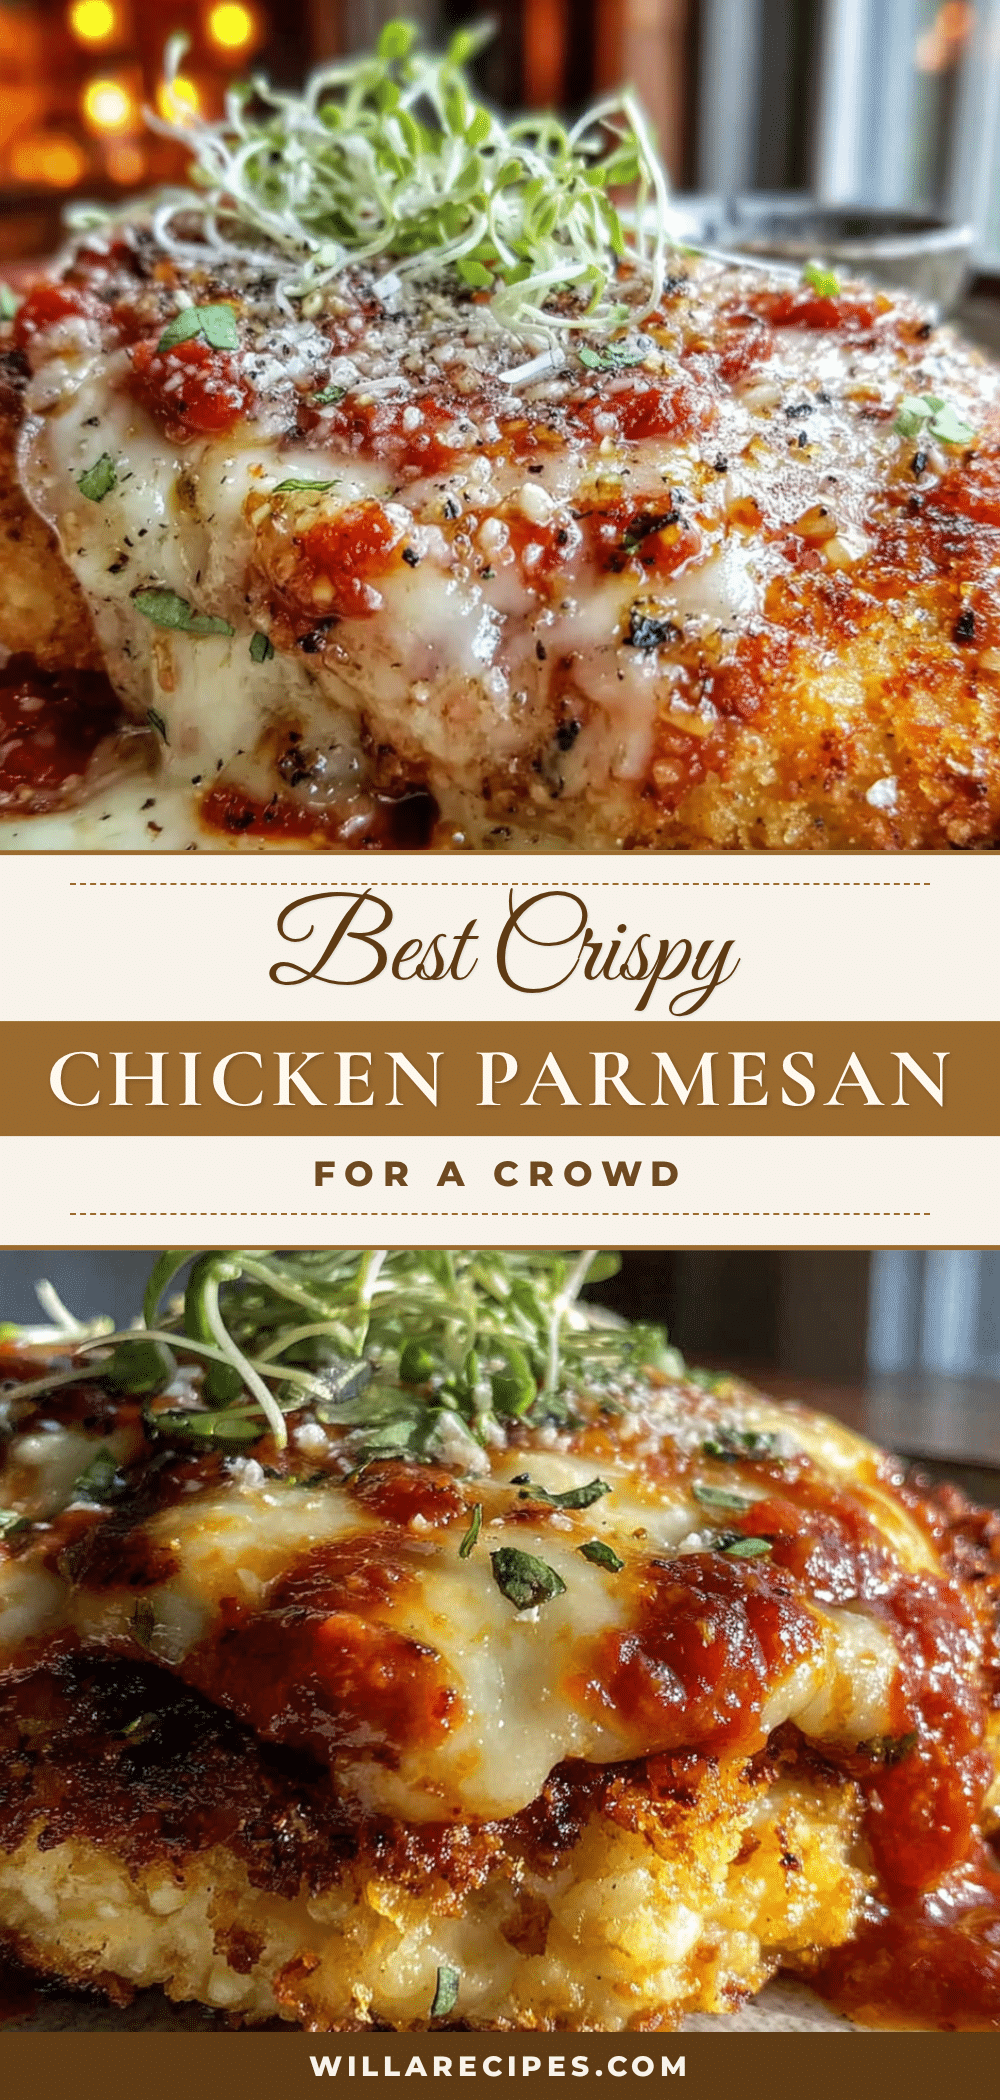
Best Crispy Baked Chicken Parmesan for an Easy Crowd Dinner
This crispy baked chicken parmesan delivers a shatteringly crunchy coating, melted mozzarella, and garlicky tomato sauce without the hassle of deep frying. Perfect for feeding a crowd, it’s a stress-free, make-ahead friendly dish that tastes like it came from a red-sauce joint.
- Prep Time: 20 minutes
- Cook Time: 25 minutes
- Total Time: 45 minutes
- Yield: 4 servings 1x
- Category: Main Course
- Cuisine: Italian-American
Ingredients
- 4 large boneless, skinless chicken breasts (about 2 pounds total)
- 2 cups panko breadcrumbs
- 1/2 cup grated Parmesan cheese, plus more for serving
- 1/2 cup all-purpose flour
- 3 large eggs, beaten
- 2 cups shredded whole-milk mozzarella cheese
- 2 cups marinara sauce
- 2 tablespoons olive oil
- 1 teaspoon garlic powder
- 1 teaspoon dried oregano
- Salt and black pepper to taste
- 1/4 teaspoon red pepper flakes (optional)
- Fresh parsley for garnish
Instructions
- Preheat the oven to 425°F (220°C). Place a wire rack inside a rimmed baking sheet and spray it lightly with nonstick cooking spray.
- Place each chicken breast between two sheets of plastic wrap or parchment paper. Pound them to an even thickness of about 1/2 inch using a meat mallet or rolling pin. Season both sides generously with salt and black pepper.
- Set up the breading station: In the first shallow bowl, add 1/2 cup all-purpose flour. In the second bowl, beat 3 large eggs with a splash of water (about 1 tablespoon). In the third bowl, combine 2 cups panko breadcrumbs, 1/2 cup grated Parmesan, 1 teaspoon garlic powder, 1 teaspoon dried oregano, 1/4 teaspoon red pepper flakes (if using), and a pinch of salt and pepper. Mix well.
- Working one piece at a time, dredge the chicken in the flour, shaking off the excess. Dip it into the egg wash, letting any excess drip off. Then press it firmly into the panko mixture, making sure both sides are fully coated. Place the breaded chicken on the prepared wire rack. Repeat with all the pieces.
- Lightly drizzle or spray the breaded chicken with olive oil.
- Place the baking sheet in the preheated oven and bake for 15 minutes, until the chicken is golden and cooked through (internal temperature of 165°F).
- Remove the baking sheet from the oven. Spoon about 2 tablespoons of marinara sauce onto each chicken breast, spreading it gently. Top each with a generous handful of shredded mozzarella (about 1/3 cup per breast). Sprinkle a little extra Parmesan on top.
- Return the sheet to the oven and bake for another 5-7 minutes, until the cheese is melted, bubbly, and starting to brown in spots. If you want deeper browning, switch the oven to broil for the last 1-2 minutes.
- Let the chicken parmesan rest on the baking sheet for 5 minutes. Sprinkle with fresh chopped parsley before serving.
Notes
For extra crunch, toast the panko in a dry skillet over medium heat until lightly golden before mixing with Parmesan and seasonings. To make ahead, bread the chicken up to 4 hours in advance and refrigerate on the wire rack (uncovered). For a gluten-free version, use gluten-free panko and a 1:1 gluten-free flour blend. For a dairy-free version, substitute Parmesan with nutritional yeast and use dairy-free mozzarella shreds.
Nutrition
- Serving Size: 1 chicken breast wit
- Calories: 485
- Sugar: 6
- Sodium: 890
- Fat: 18
- Saturated Fat: 7
- Carbohydrates: 22
- Fiber: 2
- Protein: 52
Keywords: baked chicken parmesan, crispy chicken parmesan, easy chicken parmesan, crowd dinner, chicken parmesan recipe