This was supposed to be a pecan pie. I had the pecans toasted, the corn syrup measured, and I was feeling pretty smug about my holiday baking game. Then my three-year-old decided the kitchen floor needed a thorough mopping—with the entire bottle of dish soap—and by the time I got back to the counter, I’d grabbed a can of pumpkin puree instead of the second bag of pecans. Honestly, I didn’t even notice until the filling was halfway mixed. The color was off. The smell was… not pecan. I stood there, spatula in hand, ready to dump the whole thing and start over. But the baby was crying, the dog was licking soap bubbles, and I just didn’t have it in me. So I poured it into the crust, crossed my fingers, and shoved it in the oven. What came out was nothing like the plan—and way, way better. That pie became the surprise hit of Thanksgiving, and my mother-in-law actually asked for the recipe. Twice. Maybe you’ve been there, standing in a messy kitchen wondering how you managed to swap two completely different ingredients. Trust me, this accident is one you’ll want to repeat on purpose.
Why You’ll Love This Recipe
This isn’t just another pumpkin pie recipe that shows up on every blog from September through December. This is the one that disappears first, even when there’s chocolate cake on the table. I’ve tested it six times—yes, six—to get the texture just right. Not too dense, not too jiggly, but that perfect custard-smooth slice that holds its shape but melts on your tongue.
- Budget-Friendly Ingredients: You probably have most of these in your pantry right now. No expensive extracts or hard-to-find spices. Just good, honest staples that won’t blow your grocery budget.
- Make-Ahead Magic: This pie actually tastes better the next day. The flavors meld together overnight, and the caramel sinks into the filling just enough to make every bite interesting. Perfect for busy holiday mornings when you’re already juggling a turkey and three side dishes.
- Picky Eater Approved: My kids won’t touch a slice of store-bought pumpkin pie, but they’ll eat two helpings of this one. The salted caramel drizzle is the secret weapon—it cuts the earthiness of the pumpkin and makes it feel like dessert, not a vegetable in disguise.
- Foolproof Filling: No water baths, no fussy tempering of eggs. You literally whisk everything in one bowl and pour. If I can make it while chasing a toddler and a soap-covered dog, you can definitely make it.
- Leftovers That Reheat Like a Dream: A cold slice of this pie is good. A warm slice with a little extra caramel? That’s the kind of breakfast you don’t tell anyone about.
What makes this recipe different is the salted caramel. Most pumpkin pies rely on whipped cream for sweetness, but the caramel adds a deep, buttery richness that complements the warm spices perfectly. It’s not just a drizzle on top—it’s baked into the experience. The first time I made this, I closed my eyes after the first bite. It was that good. And the best part? It costs about half of what a bakery pie would, and it feeds a crowd without any stress.
What Ingredients You Will Need
This recipe uses simple, wholesome ingredients to deliver that bold, comforting pumpkin flavor with a touch of indulgence. Most of these are pantry staples, especially if you do any fall baking. I’ve added a few notes based on what I’ve learned from making this pie more times than I can count.
- For the Pie Filling:
- 1 can (15 ounces / 425 grams) pumpkin puree (not pumpkin pie filling—I use Libby’s for consistent texture)
- 1 can (14 ounces / 397 grams) sweetened condensed milk (this is the key to that silky texture; don’t substitute evaporated milk here)
- 2 large eggs, room temperature (cold eggs can make the filling lumpy—let them sit on the counter for 30 minutes)
- 1 teaspoon ground cinnamon (I prefer Saigon cinnamon for its warmth, but regular works fine)
- 1/2 teaspoon ground ginger
- 1/4 teaspoon ground nutmeg (freshly grated if you have it—it makes a difference)
- 1/4 teaspoon ground cloves
- 1/2 teaspoon salt (don’t skip this—it balances the sweetness)
- 1 teaspoon vanilla extract (pure, not imitation)
- For the Crust:
- 1 store-bought or homemade 9-inch pie crust, unbaked (I use Pillsbury refrigerated crust in a pinch, but homemade is always better)
- If making homemade: 1 1/4 cups all-purpose flour, 1/2 teaspoon salt, 1/2 cup cold butter cubed, 3-4 tablespoons ice water
- For the Salted Caramel Drizzle:
- 1 cup (200 grams) granulated sugar
- 6 tablespoons (85 grams) unsalted butter, cut into pieces
- 1/2 cup (120 ml) heavy cream, room temperature (cold cream will seize the caramel—trust me on this)
- 1 teaspoon flaky sea salt (Maldon is my go-to, but any flaky salt works)
- 1 teaspoon vanilla extract
Substitution Notes: If you’re dairy-free, you can use a can of full-fat coconut milk instead of sweetened condensed milk, but the texture will be slightly less creamy. For a gluten-free option, use a gluten-free pie crust blend—just pre-bake it for 10 minutes before adding the filling. And if you don’t have all the spices, a heaping tablespoon of pumpkin pie spice mix works beautifully.
Equipment Needed
You don’t need a fancy kitchen to pull this off. Here’s what I use every single time:
- 9-inch pie dish (glass or ceramic works best—metal can cook the crust too fast)
- Large mixing bowl and whisk (no electric mixer needed)
- Medium saucepan for the caramel (a light-colored pan helps you see the color change)
- Measuring cups and spoons
- Rubber spatula (for scraping every last bit of filling into the crust)
- Pie shield or aluminum foil (to protect the crust edges from burning)
- Cooling rack
I’ve made this pie with a cheap glass pie dish from the grocery store and it turned out perfectly. Don’t let a lack of fancy equipment stop you. If you don’t have a pie shield, just fold a strip of aluminum foil around the edges of the crust halfway through baking. Budget-friendly and effective.
Preparation Method
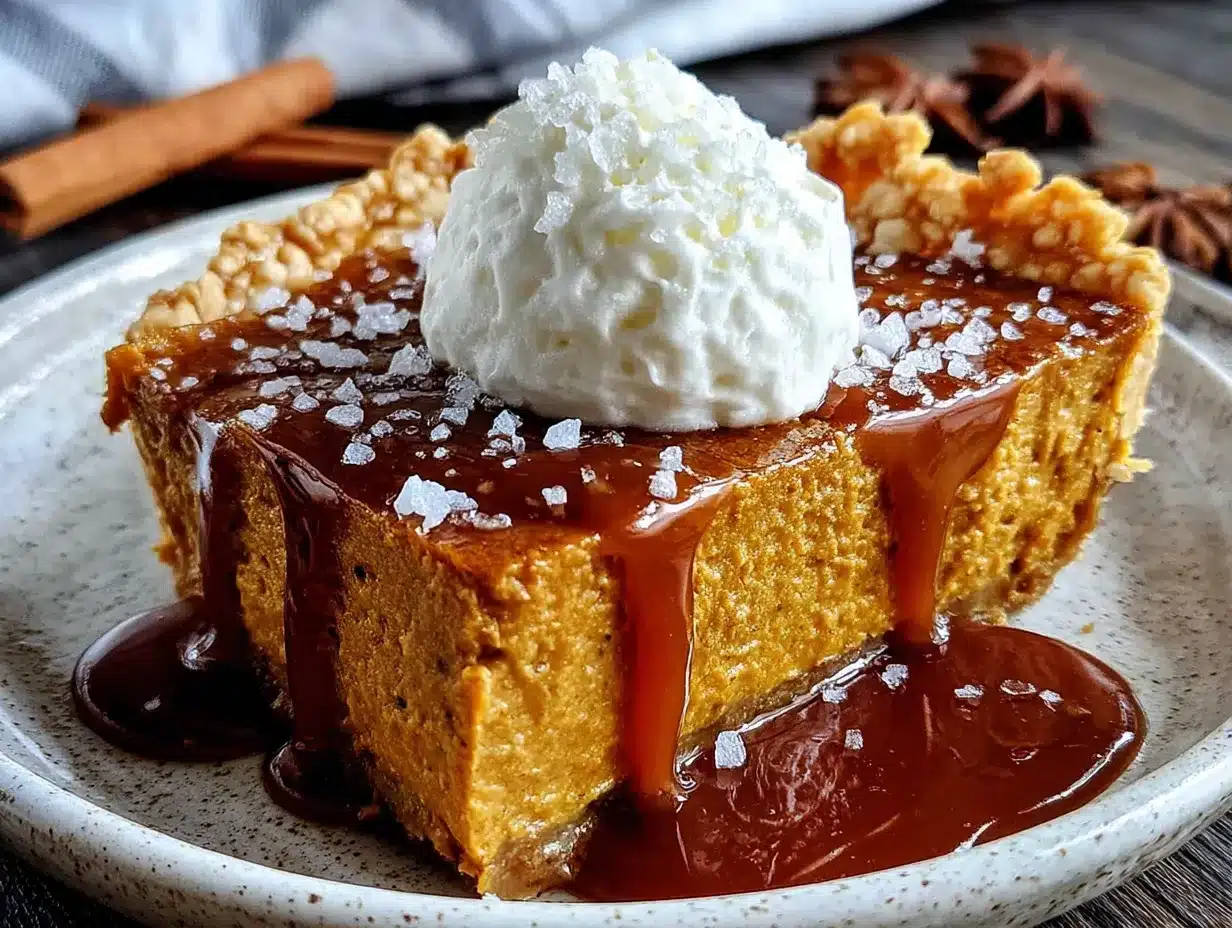
Let’s get baking. I’ve broken this down into clear steps so you don’t miss anything. Take your time—this is a forgiving recipe.
Step 1: Preheat and Prepare the Crust
Preheat your oven to 425°F (220°C). If you’re using a store-bought crust, let it sit at room temperature for 15 minutes before unrolling. If you’re making your own, roll it out to about 12 inches in diameter and gently press it into your pie dish. Crimp the edges however you like—I do a simple pinch with my fingers. Place the crust in the freezer for 10 minutes while you make the filling. This helps prevent shrinking.
Step 2: Make the Filling
In a large bowl, whisk the eggs until they’re light and frothy, about 30 seconds. Add the pumpkin puree, sweetened condensed milk, cinnamon, ginger, nutmeg, cloves, salt, and vanilla extract. Whisk until everything is smooth and well combined. Don’t overmix—you don’t want to incorporate too much air. The filling should be thick but pourable, like a milkshake. Set it aside.
Step 3: Blind Bake the Crust (Optional but Recommended)
Take the crust out of the freezer. Line it with parchment paper or foil and fill with pie weights or dried beans. Bake at 425°F (220°C) for 10 minutes. Remove the weights and parchment, then bake for another 5 minutes until the bottom looks dry and slightly golden. This step keeps your bottom crust from getting soggy. I skipped it once and regretted it—the crust was sad and floppy.
Step 4: Pour and Bake
Lower the oven temperature to 375°F (190°C). Pour the filling into the warm crust. It should come almost to the top. Carefully transfer the pie to the oven and bake for 45-50 minutes. The edges should be set and slightly puffed, but the center will still jiggle slightly when you gently shake the pan. That’s okay—it will continue to set as it cools. If the crust edges are browning too quickly, tent them with foil or a pie shield after 20 minutes.
Step 5: Cool Completely
Place the pie on a cooling rack and let it cool to room temperature, about 2 hours. Then refrigerate for at least 4 hours, preferably overnight. This is crucial—the filling needs time to fully set. Cutting into a warm pie will give you a soupy mess. I learned this the hard way when I was impatient for a midnight slice.
Step 6: Make the Salted Caramel
While the pie chills, make the caramel. In a medium saucepan over medium heat, spread the sugar in an even layer. Watch it carefully—it will start to melt around the edges. Swirl the pan occasionally (don’t stir) until the sugar is completely melted and turns a deep amber color, about 8-10 minutes. Remove from heat immediately. Add the butter and whisk until melted—it will bubble up, that’s normal. Slowly pour in the heavy cream while whisking constantly. The mixture will steam and bubble. Whisk in the salt and vanilla. Let it cool for 10 minutes, then transfer to a jar. It will thicken as it cools.
Step 7: Assemble and Serve
Once the pie is fully chilled, drizzle the salted caramel over the top in a zigzag pattern. Slice with a sharp knife, wiping it clean between cuts for neat slices. Serve cold or at room temperature.
Cooking Tips & Techniques
I’ve made every mistake in the book with this pie, so you don’t have to. Here are the things I wish someone had told me.
Don’t Overbake the Filling. The biggest mistake people make is baking until a knife comes out clean. That’s for cakes, not custard pies. Your pumpkin pie is done when the edges are set and the center jiggles like Jell-O when you shake the pan. It will firm up as it cools. Overbaking leads to cracks and a dry, grainy texture.
Room Temperature Ingredients Matter. Cold eggs and cold cream can cause the filling to separate or become lumpy. Let everything sit on the counter for 30 minutes before you start. It’s a small step that makes a big difference.
Caramel Troubleshooting. If your caramel seizes up (turns into a hard, grainy mess), don’t panic. You probably added cold cream to hot sugar. Next time, warm the cream slightly before adding it. To fix it, return the pan to low heat and stir gently until it smooths out. It might not be perfect, but it’ll still taste amazing.
Multitasking Strategy. Make the caramel while the pie bakes, not while it’s cooling. That way you’re not rushing around at the last minute. And make extra caramel—it keeps in the fridge for two weeks and is incredible on ice cream or oatmeal.
Consistency Tip. For the smoothest filling, press the pumpkin puree through a fine-mesh sieve before mixing. It removes any stringy bits. I only do this when I’m trying to impress someone, but it does make a difference.
Variations & Adaptations
This recipe is flexible—don’t be afraid to make it your own.
Vegan Version: Use a vegan pie crust, replace the eggs with 2 tablespoons of cornstarch mixed with 3 tablespoons of water, and use full-fat coconut milk instead of sweetened condensed milk. The texture will be a little softer, but the flavor is still fantastic.
Spiced-Up Version: Add a pinch of cayenne pepper or chipotle powder to the caramel for a smoky, spicy kick. It sounds weird, but it pairs beautifully with the pumpkin. My brother-in-law requests this version every year.
Chocolate Lover’s Version: Melt 4 ounces of dark chocolate and swirl it into the filling before baking. The chocolate and pumpkin combo is underrated. Drizzle with the salted caramel and you’ve got a dessert that feels fancy without any extra work.
Gluten-Free Adaptation: Use a gluten-free pie crust from the store, or make your own with a 1:1 gluten-free flour blend. Pre-bake it for 12 minutes to ensure it’s fully cooked before adding the filling.
Personal Variation I Love: I once added a tablespoon of bourbon to the caramel right at the end, and it was life-changing. The warmth of the bourbon cuts through the sweetness and adds this cozy, adult flavor. Just don’t add it to the kids’ slice—unless you want a very interesting conversation with the school principal.
Serving & Storage Suggestions
This pie is best served cold or at room temperature. I like to let it sit out for 15 minutes before slicing—it takes the chill off and lets the flavors open up. For presentation, drizzle the caramel right before serving so it stays glossy. Add a dollop of lightly sweetened whipped cream and a final sprinkle of flaky sea salt. It looks like something from a fancy bakery, but you made it in your own kitchen.
What to Serve With It: A cup of black coffee or a scoop of vanilla bean ice cream. The bitterness of the coffee and the creaminess of the ice cream balance the sweetness of the caramel. For a full holiday spread, pair it with a savory side like roasted turkey or a hearty squash soup.
Storage Instructions: Cover the pie loosely with plastic wrap or foil and refrigerate for up to 5 days. The caramel can be stored separately in a jar in the fridge for up to 2 weeks. Reheat the caramel gently in the microwave (15-second bursts) or on the stovetop before serving.
Freezing: You can freeze the baked pie (without the caramel) for up to 3 months. Wrap it tightly in plastic wrap, then foil. Thaw overnight in the fridge, then add the caramel just before serving. The texture is still excellent—I’ve done this for Thanksgiving prep and nobody noticed.
How Flavors Develop: Honestly, this pie is better on day two. The spices mellow out and meld with the caramel, and the texture firms up perfectly. If you can wait a day, do it. Your patience will be rewarded.
Nutritional Information & Benefits
Let’s be real—this is a dessert, not a health food. But it’s made with real ingredients, and that counts for something. Here’s the approximate breakdown per slice (based on 8 servings):
- Calories: 420
- Fat: 18 grams
- Carbohydrates: 58 grams
- Protein: 6 grams
- Fiber: 3 grams
- Sugar: 42 grams
Pumpkin is packed with vitamin A (great for your eyes and immune system) and fiber, which helps with digestion. The eggs add protein, and the cinnamon has anti-inflammatory properties. The salted caramel? Well, that’s for the soul. I like to think of this pie as a balanced indulgence—it’s not guilt-free, but it’s worth every single bite.
Dietary Considerations: This recipe contains dairy, eggs, and gluten. For dairy-free and gluten-free options, see the variations section above. It is nut-free as written.
Conclusion
This pumpkin pie with salted caramel drizzle started as a mistake, but it’s become the dessert I’m most proud of. It’s the one that gets requested for every family gathering, the one that makes people close their eyes and say “mm” after the first bite. And it’s the one that proves you don’t need perfection to create something beautiful—you just need to be willing to keep going when things go wrong.
I’d love to hear how this pie turns out for you. Did you add your own twist? Did your kids ask for seconds? Drop a comment below and tell me about it. And if you share a photo on Pinterest, tag me—I want to see your beautiful, caramel-drizzled creations. Now go make that pie. Your family will thank you.
Frequently Asked Questions
Can I use a store-bought caramel sauce instead of making my own?
You can, but it won’t be the same. Homemade salted caramel has a deeper, more complex flavor and a better texture. Plus, it’s surprisingly easy to make. If you’re short on time, look for a high-quality jarred caramel and add a pinch of flaky salt.
Why is my pumpkin pie cracking on top?
Cracks usually mean the pie was overbaked or the oven temperature was too high. The filling expands as it bakes and contracts as it cools—if it’s overbaked, the contraction causes cracks. Bake until the center is just set with a slight jiggle, and cool it slowly on a rack.
Can I make this pie gluten-free?
Absolutely. Use a gluten-free pie crust (store-bought or homemade with a 1:1 gluten-free flour blend). Pre-bake the crust for 12 minutes before adding the filling to ensure it’s fully cooked. The filling itself is naturally gluten-free.
How do I prevent a soggy bottom crust?
Blind bake the crust before adding the filling. Line the crust with parchment and fill with pie weights or dried beans, then bake at 425°F (220°C) for 10 minutes. Remove the weights and bake for another 5 minutes. This creates a barrier that keeps the crust crisp.
Can I freeze the leftover caramel?
Yes! Store the caramel in an airtight jar in the freezer for up to 3 months. Thaw it in the fridge overnight, then reheat gently in the microwave or on the stovetop. It might separate slightly, but a good whisk will bring it back together.
Pin This Recipe!
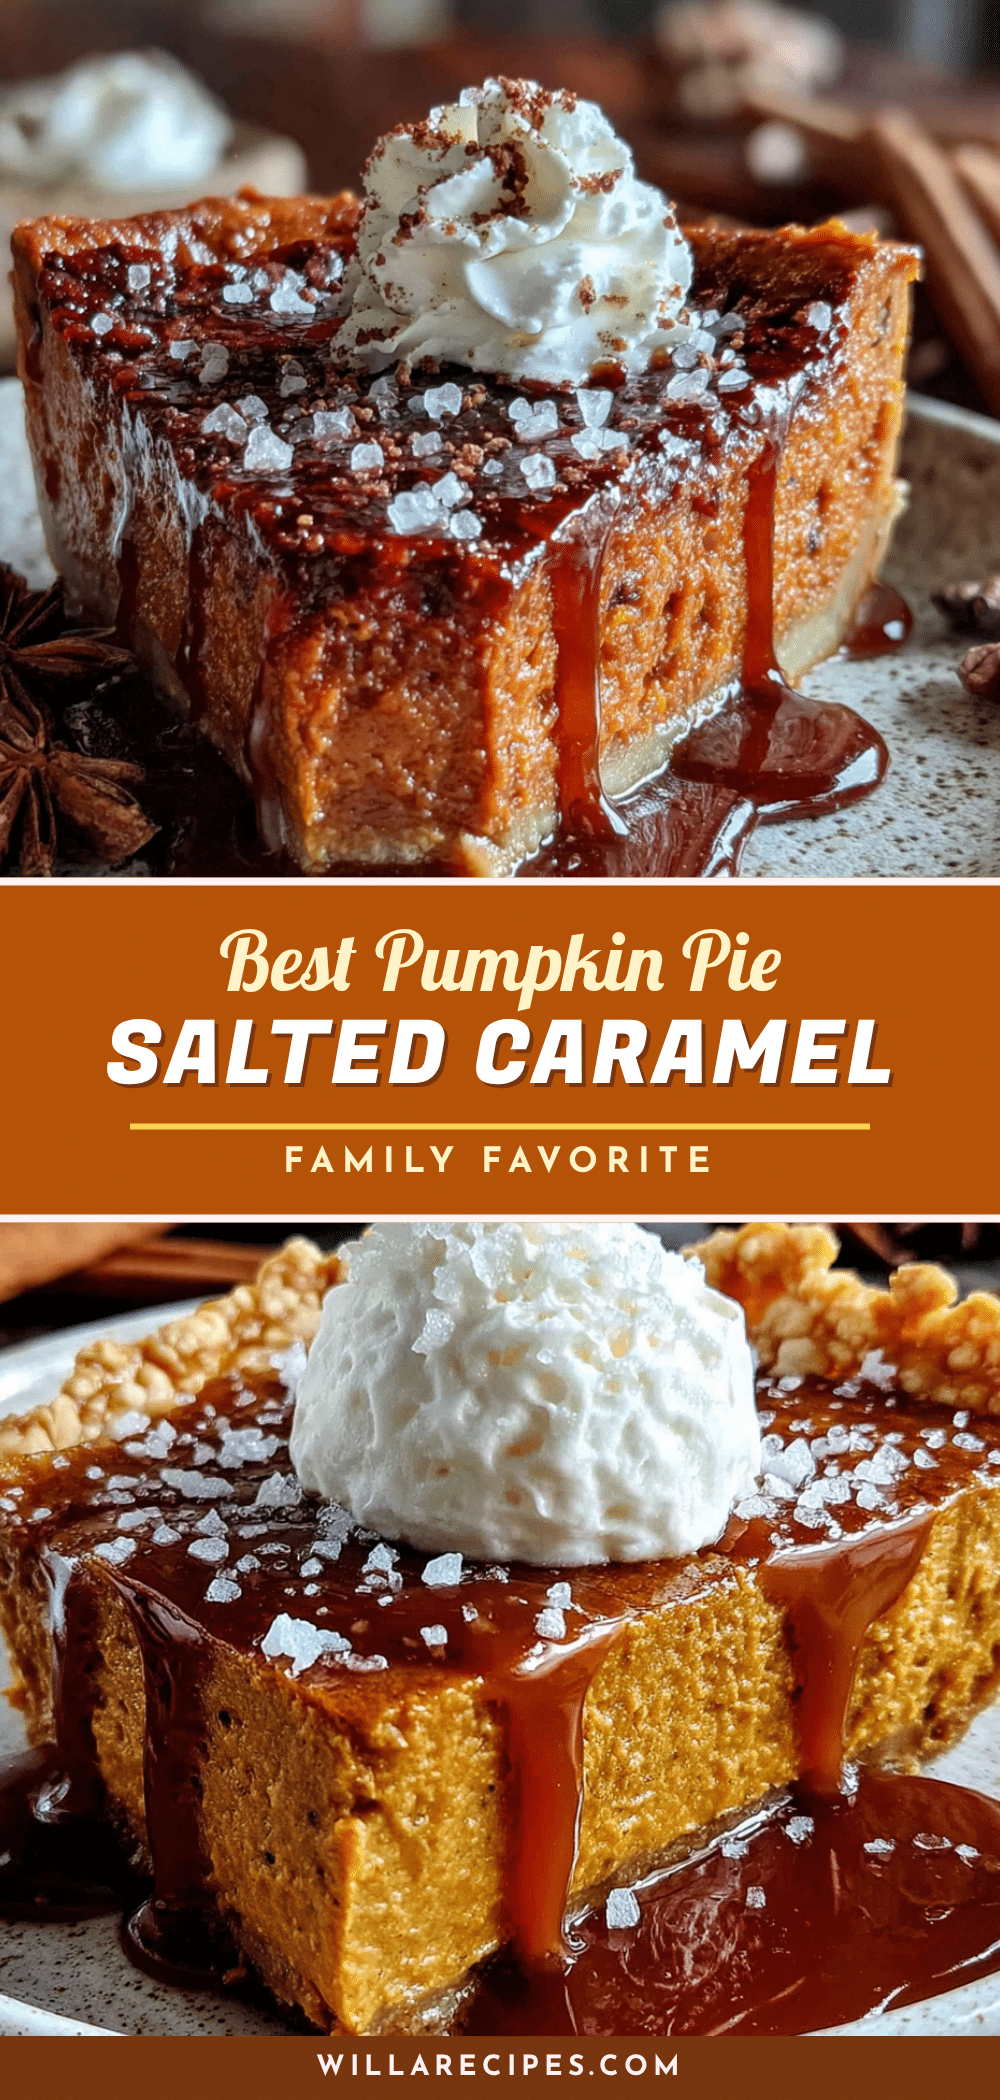
Easy Homemade Pumpkin Pie with Salted Caramel Drizzle
A rich, silky pumpkin pie with a buttery crust and a homemade salted caramel drizzle. This accidental recipe became a holiday favorite—it’s budget-friendly, make-ahead, and picky eater approved.
- Prep Time: 30 minutes
- Cook Time: 50 minutes
- Total Time: 5 hours (includes cooling and chilling)
- Yield: 8 servings 1x
- Category: Dessert
- Cuisine: American
Ingredients
- 1 can (15 ounces / 425 grams) pumpkin puree (not pumpkin pie filling)
- 1 can (14 ounces / 397 grams) sweetened condensed milk
- 2 large eggs, room temperature
- 1 teaspoon ground cinnamon
- 1/2 teaspoon ground ginger
- 1/4 teaspoon ground nutmeg
- 1/4 teaspoon ground cloves
- 1/2 teaspoon salt
- 1 teaspoon vanilla extract
- 1 store-bought or homemade 9-inch pie crust, unbaked
- 1 cup (200 grams) granulated sugar
- 6 tablespoons (85 grams) unsalted butter, cut into pieces
- 1/2 cup (120 ml) heavy cream, room temperature
- 1 teaspoon flaky sea salt
- 1 teaspoon vanilla extract
Instructions
- Preheat oven to 425°F (220°C). If using store-bought crust, let it sit at room temperature for 15 minutes. If making homemade, roll out to 12 inches and press into pie dish. Crimp edges and freeze for 10 minutes.
- In a large bowl, whisk eggs until light and frothy, about 30 seconds. Add pumpkin puree, sweetened condensed milk, cinnamon, ginger, nutmeg, cloves, salt, and vanilla extract. Whisk until smooth and well combined. Set aside.
- Remove crust from freezer. Line with parchment paper or foil and fill with pie weights or dried beans. Bake at 425°F (220°C) for 10 minutes. Remove weights and parchment, then bake for another 5 minutes until bottom looks dry and slightly golden.
- Lower oven temperature to 375°F (190°C). Pour filling into warm crust. Bake for 45-50 minutes until edges are set and center jiggles slightly. If crust edges brown too quickly, tent with foil after 20 minutes.
- Cool pie on a rack to room temperature, about 2 hours. Then refrigerate for at least 4 hours, preferably overnight.
- While pie chills, make caramel: In a medium saucepan over medium heat, spread sugar in an even layer. Swirl pan occasionally until sugar melts and turns deep amber, about 8-10 minutes. Remove from heat. Add butter and whisk until melted. Slowly pour in heavy cream while whisking constantly. Whisk in salt and vanilla. Let cool 10 minutes, then transfer to a jar.
- Once pie is fully chilled, drizzle salted caramel over the top in a zigzag pattern. Slice with a sharp knife, wiping clean between cuts. Serve cold or at room temperature.
Notes
Don’t overbake the filling—center should jiggle slightly. Room temperature ingredients prevent lumps. For smoother filling, press pumpkin puree through a fine-mesh sieve. Make caramel while pie bakes. Pie tastes better on day two. Store covered in fridge up to 5 days. Freeze baked pie (without caramel) up to 3 months.
Nutrition
- Serving Size: 1 slice (1/8 of pie)
- Calories: 420
- Sugar: 42
- Sodium: 350
- Fat: 18
- Saturated Fat: 10
- Carbohydrates: 58
- Fiber: 3
- Protein: 6
Keywords: pumpkin pie, salted caramel, Thanksgiving dessert, easy pumpkin pie, homemade pie, fall dessert


