There used to be a tiny bakery tucked between a dry cleaner and a vintage shop on the corner of Elm and 4th that made the most ridiculous peppermint bark cheesecake bars I’ve ever tasted. When they closed their doors three winters ago—just packed up and vanished before the holiday season—I honestly felt a little lost. That first December without them, I tried every peppermint dessert I could find, and nothing came close. After twelve tries—twelve, let me tell you, my coworkers were sick of being taste testers—I finally cracked the code.
The secret, it turns out, is in the layering. That bakery wasn’t just throwing crushed candy canes on top of cheesecake. They had this perfect ratio of fudgy chocolate base, silky peppermint cheesecake, and that signature crackly chocolate-peppermint topping that shatters when you bite into it. I spent way too many late nights staring at a half-baked pan, muttering about ratios and temperatures, until my kitchen looked like a candy cane exploded in it. But honestly? Worth every sticky mess.
These bars are the kind of dessert that makes people stop mid-conversation. You know that feeling when someone takes a bite and their eyes go wide? That’s what we’re after here. They’re rich without being heavy, festive without being gimmicky, and they somehow manage to look like you spent hours on them when the hardest part is waiting for them to chill. Maybe you’ve been searching for that one dessert that steals the whole holiday table—the one people ask you to bring every single year. This is that recipe.
Why You’ll Love This Recipe
I’ve tested this recipe more times than I care to admit, and every single batch disappeared faster than I could wrap it. These peppermint bark cheesecake bars aren’t just another holiday dessert—they’re the one that gets requested before the turkey even hits the table. Here’s why they’ll become your new go-to:
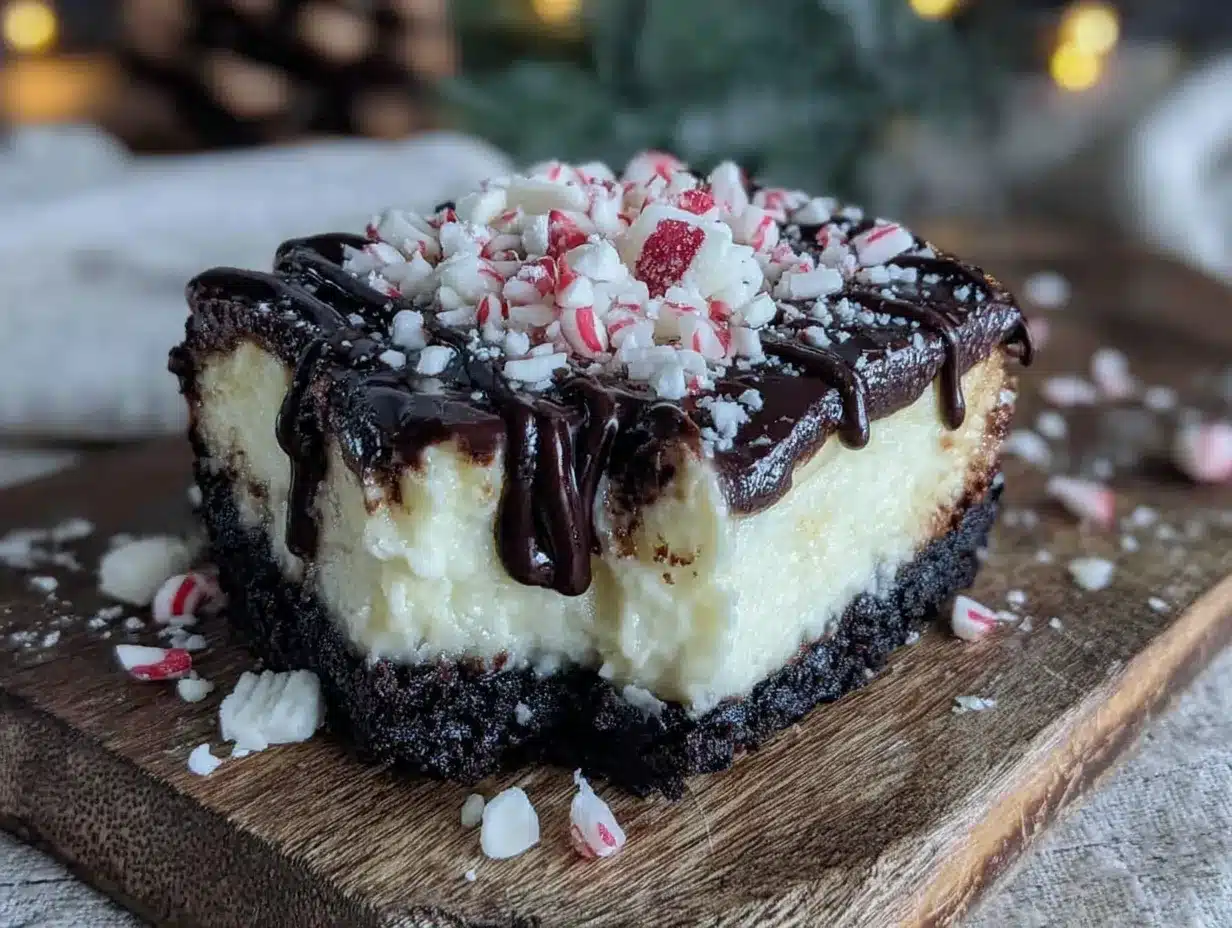
- Show-Stopping Presentation : The glossy chocolate topping studded with crushed candy canes looks like something from a fancy bakery window. Your guests will think you slaved away for hours.
- Perfect for Crowds : This recipe makes a generous 16 bars, which is exactly what you need for a holiday gathering. No one leaves hungry, and everyone gets that perfect edge piece or gooey center.
- Make-Ahead Magic : These bars actually taste better after a day in the fridge. You can prep them completely the day before your party and just pull them out when guests arrive. Stress-free hosting at its finest.
- No-Fail Technique : I’ve streamlined every step to avoid the common pitfalls—cracked tops, soggy crusts, separation issues. Even if you’ve never made cheesecake bars before, you’ll nail this.
- Incredible Texture Contrast : The crunchy chocolate crust, the velvety peppermint cheesecake, and that snappy chocolate topping with crunchy candy bits create layers of texture that keep every bite interesting.
- Kid-Approved and Adult-Friendly : The peppermint flavor is bright without being toothpaste-y, and the chocolate balances it perfectly. Everyone from your niece to your grandmother will be reaching for seconds.
What makes these different from every other peppermint bark recipe out there is the technique. I spent weeks figuring out how to keep the cheesecake layer perfectly creamy while getting that signature bark crunch on top. The answer was a water bath method adapted for bars and a specific chocolate-to-cream ratio that sets up glossy and firm without being rock hard. This isn’t just another version—it’s the version that made my pickiest foodie friend ask for the recipe before she’d even finished her first bar.
There’s something about that first bite that just hits different. The cool creaminess of the cheesecake, the snap of the chocolate, the little burst of mint—it’s comfort food dressed up in its holiday best. Perfect for impressing your in-laws, winning the office potluck, or just treating yourself after a long day of wrapping presents.
What Ingredients You Will Need
This recipe uses simple, high-quality ingredients that come together to create something truly special. Most of these are pantry staples during the holiday season, but I’ve included notes on where to splurge and where you can save.
For the Chocolate Cookie Crust
- 2 cups (200g) chocolate sandwich cookie crumbs — I use Oreo cookies with the filling still in. Pulse them in a food processor until you get fine crumbs. You’ll need about 24 cookies. (Pro tip: don’t bother scraping out the filling—it adds richness and helps bind the crust.)
- 5 tablespoons (70g) unsalted butter, melted — Use real butter here, not margarine. The flavor difference is noticeable, and it helps the crust hold together better. Let it cool slightly before mixing.
- 2 tablespoons (25g) granulated sugar — Just a little extra sweetness to balance the dark chocolate later. You can skip this if you’re using double-stuffed cookies.
- Pinch of salt — A tiny amount, but it makes the chocolate flavor pop. I use fine sea salt.
For the Peppermint Cheesecake Filling
- 24 ounces (680g) cream cheese, softened — Full-fat is non-negotiable here. The low-fat versions have too much water and will make your cheesecake layer weepy. Set it out on the counter for at least 2 hours before you start. I recommend Philadelphia brand for consistent results.
- 1 cup (200g) granulated sugar — Regular white sugar works perfectly. Don’t substitute brown sugar—it adds too much moisture and changes the color.
- 3 large eggs, room temperature — Cold eggs will seize up your batter and create lumps. If you forgot to set them out, place them in a bowl of warm water for 5 minutes.
- 1 cup (240ml) sour cream, room temperature — This is my secret for extra creamy texture. It adds tang and tenderness. Full-fat Greek yogurt works in a pinch.
- 2 teaspoons peppermint extract — This is where quality matters. Use pure peppermint extract, not peppermint oil or mint flavoring. I’ve tried them all, and pure extract gives the cleanest, brightest flavor without tasting artificial. Nielsen-Massey is my go-to brand.
- 1/2 teaspoon vanilla extract — Just enough to round out the peppermint. Don’t skip it—it prevents that “candy only” flavor.
- 2 tablespoons all-purpose flour — Helps stabilize the cheesecake and prevents cracking. You can substitute cornstarch if you’re gluten-free.
- Red food coloring (optional) — For that classic pink swirl. I use gel food coloring because it doesn’t thin the batter. Just 2-3 drops is plenty. You can skip it entirely for a white cheesecake layer.
For the Peppermint Bark Topping
- 1 1/2 cups (255g) semi-sweet chocolate chips — I prefer Ghirardelli or Guittard for their smooth melting properties. Don’t use chocolate chunks—they don’t melt evenly. (Adds richness and that signature snap.)
- 1/2 cup (120ml) heavy cream — Full-fat cream only. The fat content is crucial for a glossy, stable ganache. Use dairy-free coconut cream if needed, but the texture will be slightly different.
- 1/2 teaspoon peppermint extract — Added to the ganache for that double hit of mint.
- 1/2 cup (80g) crushed candy canes or peppermint candies — About 6-8 standard candy canes. Crush them in a sealed bag with a rolling pin. Don’t pulverize them into dust—you want some texture. (Use for garnish, adds crunch and festive color.)
- Optional: white chocolate drizzle — 1/4 cup melted white chocolate chips for that classic bark look. Totally optional but very pretty.
Equipment Needed
You don’t need a professional bakery setup for these bars, but having the right tools makes everything smoother. Here’s what you’ll need:
- 9×13-inch baking pan — Metal or glass both work, but metal conducts heat more evenly. If you use glass, reduce the oven temperature by 25°F.
- Parchment paper — Non-negotiable. Cut two long strips that overhang the pan on opposite sides to create a sling for lifting the bars out. I learned this the hard way after destroying my first batch trying to pry them out.
- Food processor or rolling pin — For crushing the cookies and candy canes. A food processor gives more consistent crumbs, but a sealed bag and rolling pin works fine.
- Electric hand mixer or stand mixer — You need something to cream the cream cheese and sugar. A whisk and elbow grease technically work, but you’ll be there forever and risk overworking the batter.
- Large mixing bowls — At least two. One for the crust mixture, one for the cheesecake batter.
- Rubber spatula — For scraping down the bowl and spreading the batter evenly. A good flexible one makes a difference.
- Measuring cups and spoons — Accurate measurements matter in baking. I use metal measuring cups for dry ingredients and glass ones for liquids.
- Small saucepan — For making the ganache. You can also use a microwave-safe bowl.
- Offset spatula — For smoothing the cheesecake layer and spreading the ganache. A regular butter knife works, but an offset spatula gives you that clean, professional finish.
- Wire cooling rack — Essential for cooling the bars evenly before refrigerating. Don’t skip this—trapped heat creates condensation and soggy crusts.
Budget-friendly tip: Check thrift stores for baking pans and spatulas. I found my favorite 9×13 pan for three dollars, and it’s been going strong for five years.
Preparation Method
Let’s walk through this step by step. I’ve included all the little details that make the difference between good bars and unforgettable ones.
Step 1: Prepare Your Pan and Preheat
Preheat your oven to 325°F (163°C). Line your 9×13-inch baking pan with parchment paper, leaving about 2 inches of overhang on the long sides. Lightly grease the parchment with butter or non-stick spray. This sling method lets you lift the entire block of bars out cleanly after they’ve set.
Step 2: Make the Chocolate Cookie Crust
Pulse 24 chocolate sandwich cookies in a food processor until you have fine crumbs. You should have about 2 cups. Transfer to a medium bowl and add the melted butter, sugar, and salt. Stir with a fork until every crumb is moistened—it should look like wet sand. Press the mixture firmly into the bottom of your prepared pan. Use the bottom of a measuring cup to pack it down evenly. Bake for 10 minutes, then set aside to cool slightly while you make the filling. The crust should look set and smell deeply chocolatey.
Step 3: Prepare the Peppermint Cheesecake Filling
In a large bowl, beat the softened cream cheese with an electric mixer on medium speed until smooth and creamy—about 2 minutes. Scrape down the sides and bottom of the bowl with a rubber spatula. Add the sugar and beat for another 2 minutes until light and fluffy. Add the eggs one at a time, beating on low after each addition just until combined. Overbeating at this stage incorporates too much air and will cause cracks later.
Add the sour cream, peppermint extract, vanilla extract, and flour. Mix on low until just combined. If you’re using red food coloring, remove about 1/2 cup of the batter to a small bowl, add 2-3 drops of gel coloring, and stir gently. You can drizzle this over the plain batter and swirl it with a knife for a marbled effect. Pour the filling over the crust and spread it evenly with an offset spatula.
Step 4: Bake the Cheesecake Bars
Place the pan in the center of the preheated oven. Bake for 35-40 minutes, or until the edges are set and the center still jiggles slightly when you gently shake the pan. The internal temperature should read 150°F (65°C) on an instant-read thermometer. Don’t overbake—the residual heat will continue cooking the bars as they cool. Turn off the oven, crack the door open, and leave the bars inside for 1 hour. This gradual cooling prevents the dreaded top crack.
Step 5: Cool and Chill
Remove the pan from the oven and place it on a wire rack to cool completely to room temperature—about 2 hours. Once cool, cover the pan with plastic wrap and refrigerate for at least 4 hours, but overnight is better. The bars need this time to fully set and develop their flavor. I know it’s tempting to rush, but trust me on this one.
Step 6: Make the Peppermint Bark Topping
When the cheesecake layer is fully chilled and firm, make the ganache. Place the semi-sweet chocolate chips in a heatproof bowl. Heat the heavy cream in a small saucepan over medium heat until it just begins to simmer—small bubbles around the edge, not a rolling boil. Pour the hot cream over the chocolate chips and let it sit undisturbed for 3 minutes. Gently stir with a rubber spatula until smooth and glossy. Stir in the peppermint extract.
Pour the ganache over the chilled cheesecake layer and spread it evenly with an offset spatula. Work quickly—the ganache sets fast on the cold surface. Immediately sprinkle the crushed candy canes over the top before the ganache firms up. If you’re adding a white chocolate drizzle, melt 1/4 cup white chocolate chips with 1 teaspoon coconut oil in 30-second bursts in the microwave, then drizzle it in thin lines across the top.
Step 7: Final Set and Slice
Return the pan to the refrigerator for at least 1 hour, or until the ganache is completely firm. To slice, use the parchment sling to lift the entire block out of the pan. Place it on a cutting board and use a sharp chef’s knife, wiping it clean between cuts. For cleanest slices, run the knife under hot water and dry it before each cut. Cut into 16 even bars—4 rows by 4 rows.
Cooking Tips & Techniques
I’ve made every mistake in the book so you don’t have to. Here are the lessons I learned the hard way:
Room temperature ingredients are not optional. I know, I know—it’s annoying to plan ahead. But cold cream cheese creates lumps that no amount of beating will fix, and cold eggs can break your batter. Set everything out 2 hours before you start. If you forget, cut the cream cheese into cubes and microwave it in 10-second bursts until softened but not warm.
Don’t overmix the batter. Once you add the eggs, mix on low speed and stop as soon as everything comes together. Overmixing incorporates too much air, which expands in the oven and then collapses, leaving you with a cracked, sunken cheesecake. I learned this after my third batch looked like the surface of the moon.
The water bath shortcut. Traditional cheesecake recipes call for a water bath to prevent cracking, but for bars, I’ve found a simpler method works just as well. Place a shallow pan of hot water on the oven rack below the cheesecake bars. The steam creates a humid environment that prevents the top from drying out and cracking. Works like a charm and saves you from wrapping your pan in foil.
Patience with the chill time. I get it—you want to eat these immediately. But slicing too early is the number one reason these bars fail. The cheesecake needs that full 4 hours minimum to set properly. Overnight is better. The ganache needs at least an hour after that. If you rush, you’ll get a gooey mess instead of clean, beautiful bars.
Sharp knife, hot water. For those Instagram-worthy clean slices, dip your knife in hot water and wipe it dry between each cut. The heat helps the knife glide through the chocolate topping without shattering it. Trust me, this one trick makes your bars look like they came from a bakery.
Variations & Adaptations
One of the best things about this recipe is how adaptable it is. Here are some variations I’ve tried and loved:
Dark Chocolate Peppermint Bars — Swap the semi-sweet chocolate chips in the ganache for 70% dark chocolate. The bitterness balances the sweet cheesecake beautifully. I made this version for a friend who claims to hate “sweet desserts,” and she ate three bars in one sitting.
Gluten-Free Adaptation — Use gluten-free chocolate sandwich cookies for the crust. Most brands work well, but check that they’re certified gluten-free if that matters to you. The filling is naturally gluten-free if you substitute the 2 tablespoons of flour with cornstarch or a gluten-free flour blend.
White Chocolate Peppermint Twist — For the topping, use white chocolate chips instead of semi-sweet. Add 1/4 teaspoon peppermint extract and top with crushed candy canes and a dark chocolate drizzle. The contrast is stunning and tastes like a fancy candy shop creation.
Mint Chocolate Chip Version — Fold 1/2 cup mini chocolate chips into the cheesecake batter before pouring it over the crust. The little pockets of chocolate add texture and make every bite exciting. My kids request this version for their birthday parties instead of cake.
Dairy-Free Option — Use dairy-free cream cheese (Kite Hill works well), coconut cream instead of sour cream, and dairy-free chocolate chips. The texture will be slightly softer, but the flavor is still fantastic. I developed this version for a friend with lactose intolerance, and she cried happy tears.
Serving & Storage Suggestions
These bars are at their best when served cold, straight from the refrigerator. The cold temperature keeps the cheesecake layer firm and the ganache snappy. If you’re serving them at a party, arrange them on a platter about 15 minutes before guests arrive so they lose a tiny bit of chill but stay perfectly sliceable.
For presentation, I like to dust the platter with a light snowfall of powdered sugar and arrange the bars in a neat grid. A few extra candy cane pieces scattered around the edges adds a festive touch. These bars pair beautifully with hot coffee, spiced cider, or a bold red wine like a Zinfandel. If you’re serving them as part of a dessert spread, they hold their own next to brownies, shortbread cookies, or a simple vanilla panna cotta.
Storage: Store the bars in an airtight container in the refrigerator for up to 5 days. Layer them with parchment paper between each layer to prevent sticking. The flavor actually improves after a day or two as the peppermint infuses the cheesecake more deeply.
Freezing: These bars freeze beautifully for up to 3 months. Wrap each bar individually in plastic wrap, then place them in a freezer-safe bag or container. To thaw, transfer to the refrigerator overnight. Don’t thaw at room temperature—the ganache can get sticky. I always keep a stash in my freezer for unexpected guests or late-night cravings.
Reheating: Honestly, I prefer these cold. But if you want a warm dessert experience, microwave a single bar for 10-15 seconds. The cheesecake softens slightly and the ganache gets a little melty. Top with a scoop of vanilla ice cream for an indulgent treat.
Nutritional Information & Benefits
Let’s be real—these are a treat, not a health food. But here’s the nutritional breakdown for one bar (based on 16 servings):
| Nutrient | Amount per Serving |
|---|---|
| Calories | 385 |
| Total Fat | 24g |
| Saturated Fat | 14g |
| Cholesterol | 95mg |
| Sodium | 280mg |
| Total Carbohydrates | 38g |
| Dietary Fiber | 2g |
| Sugars | 28g |
| Protein | 6g |
On the bright side, the cream cheese provides a good amount of calcium and protein, and the dark chocolate in the ganache is rich in antioxidants. The peppermint extract can aid digestion—a nice bonus after a heavy holiday meal. If you’re watching your sugar intake, you can reduce the sugar in the cheesecake layer by 1/4 cup without affecting the texture too much. These bars are vegetarian, and with the adaptations mentioned above, can be made gluten-free or dairy-free. They contain dairy, gluten, and eggs as written.
Conclusion
These peppermint bark cheesecake bars are the dessert that keeps on giving. They’re the recipe that makes people stop mid-conversation, the one that gets texted around the family group chat, the one that shows up at every holiday party because everyone knows you’re the person who brings that dish. And honestly? That feels pretty great.
What I love most about this recipe is how it captures the whole holiday season in one bite—the warmth of chocolate, the brightness of peppermint, the creamy comfort of cheesecake. It’s a dessert that doesn’t take itself too seriously but delivers serious results. Whether you’re hosting a big family dinner, bringing something to a cookie exchange, or just treating yourself after a long week of holiday shopping, these bars deliver.
I’d love to hear how yours turn out! Drop a comment below and let me know if you tried any variations, or tag me in your photos on social media. Did your family fight over the corner pieces? Did you add a secret ingredient? Share your wins—and your happy accidents—in the comments. Happy baking, friends!
Frequently Asked Questions
Can I use pre-crushed candy canes?
Absolutely. Pre-crushed candy canes save time and are available at most grocery stores during the holiday season. Just make sure they’re not too finely ground—you want some texture for that satisfying crunch.
Why did my cheesecake layer crack?
Cracking usually happens from overbaking or sudden temperature changes. Make sure you pull the bars when the center still jiggles slightly, and let them cool gradually in the oven with the door cracked open. The steam pan trick also helps prevent cracks.
Can I make these bars without a food processor?
Definitely. Place the cookies in a sealed zip-top bag and crush them with a rolling pin. For the candy canes, use the same method. It takes a little more elbow grease, but the results are just as good.
How far in advance can I make these?
You can make these bars up to 3 days ahead and store them in the refrigerator. They also freeze beautifully for up to 3 months. The flavors actually meld together and improve after a day or two.
Can I use peppermint oil instead of extract?
I don’t recommend it. Peppermint oil is much more concentrated and can easily overpower the cheesecake. Stick with pure peppermint extract for the best, most balanced flavor. If you only have oil, use just 1/4 teaspoon and mix it with the vanilla extract first.
Pin This Recipe!
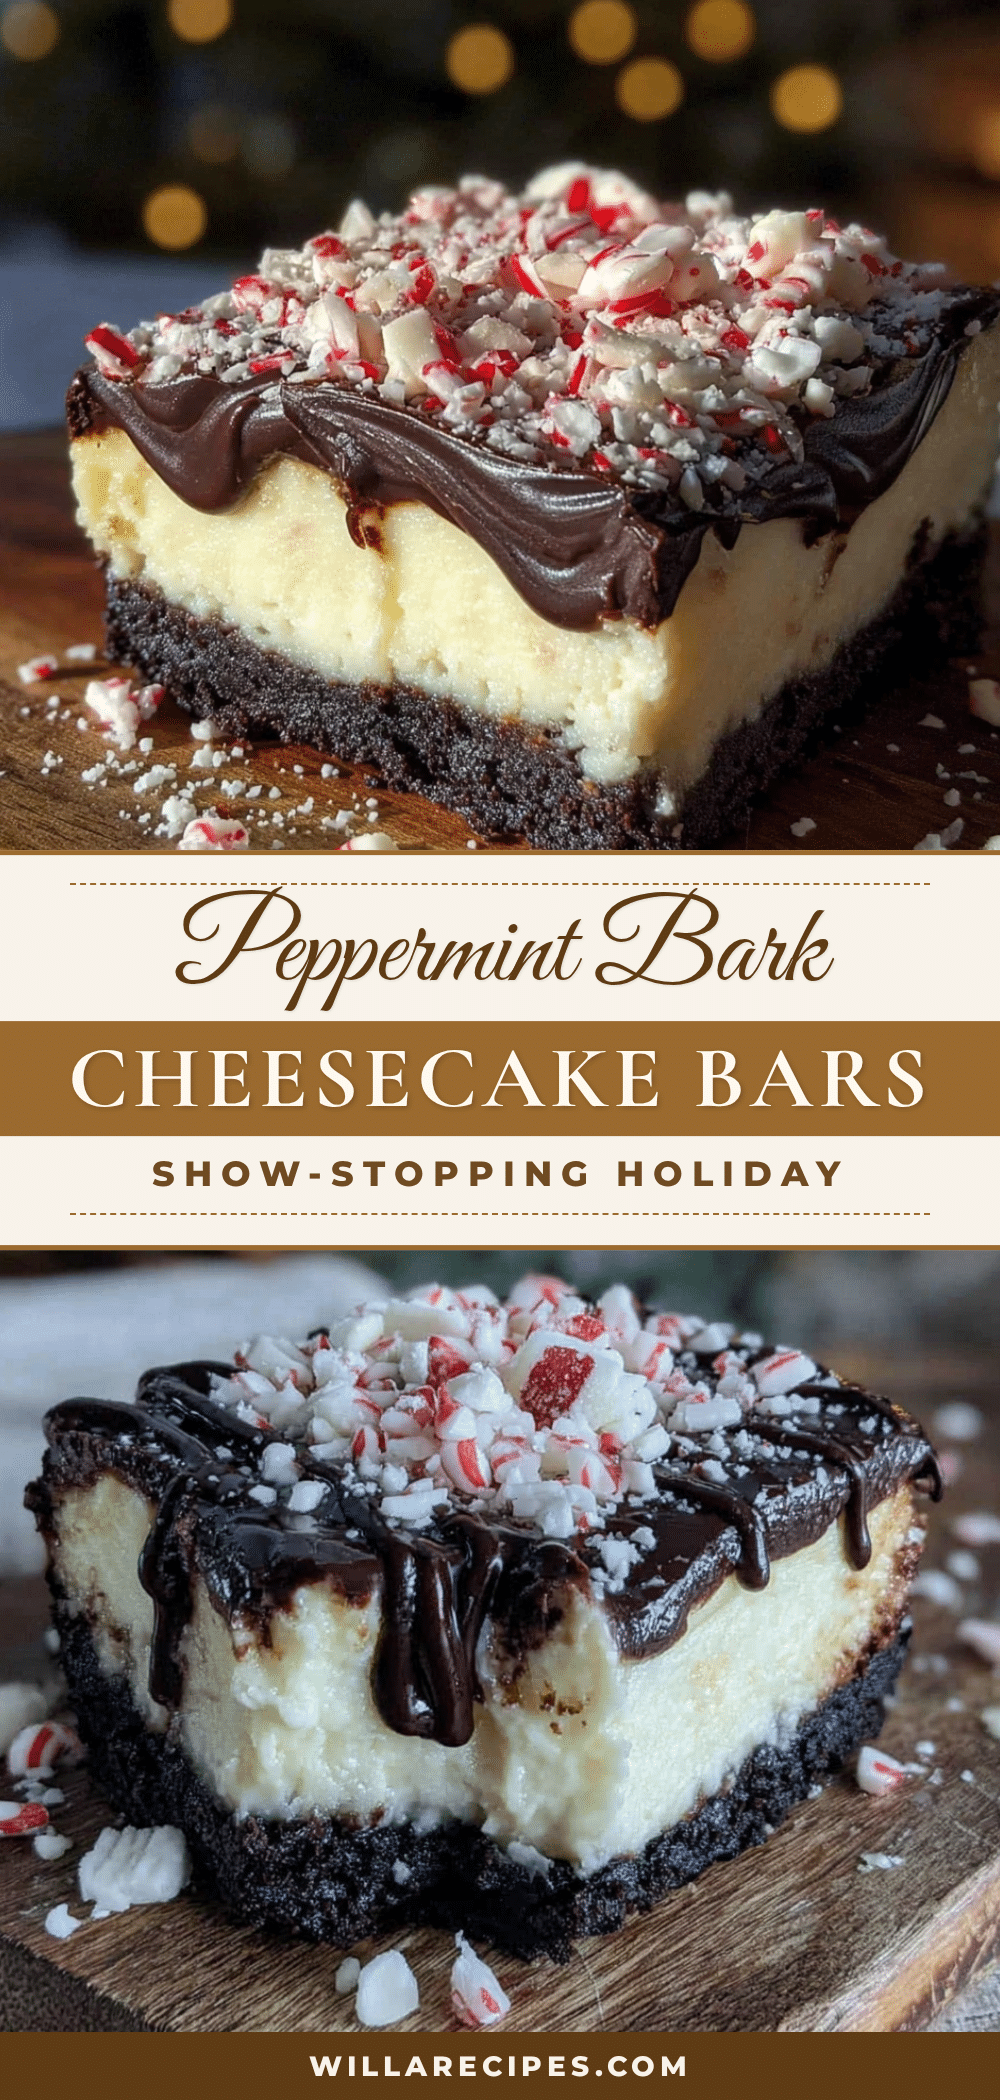
Best Peppermint Bark Cheesecake Bars Holiday Recipe
These peppermint bark cheesecake bars feature a fudgy chocolate cookie crust, silky peppermint cheesecake filling, and a crackly chocolate-peppermint topping studded with crushed candy canes. They’re the perfect make-ahead holiday dessert that looks like it came from a fancy bakery.
- Prep Time: 30 minutes
- Cook Time: 40 minutes
- Total Time: 5 hours 10 minutes (includes cooling and chilling)
- Yield: 16 bars 1x
- Category: Dessert
- Cuisine: American
Ingredients
- 2 cups (200g) chocolate sandwich cookie crumbs (about 24 Oreo cookies with filling)
- 5 tablespoons (70g) unsalted butter, melted
- 2 tablespoons (25g) granulated sugar
- Pinch of fine sea salt
- 24 ounces (680g) cream cheese, softened
- 1 cup (200g) granulated sugar
- 3 large eggs, room temperature
- 1 cup (240ml) sour cream, room temperature
- 2 teaspoons pure peppermint extract
- 1/2 teaspoon vanilla extract
- 2 tablespoons all-purpose flour
- Red food coloring (optional, 2-3 drops gel)
- 1 1/2 cups (255g) semi-sweet chocolate chips
- 1/2 cup (120ml) heavy cream
- 1/2 teaspoon peppermint extract
- 1/2 cup (80g) crushed candy canes or peppermint candies (about 6–8 standard candy canes)
- Optional: 1/4 cup melted white chocolate chips for drizzle
Instructions
- Preheat oven to 325°F (163°C). Line a 9×13-inch baking pan with parchment paper, leaving 2 inches overhang on the long sides. Lightly grease the parchment.
- Make the crust: Pulse 24 chocolate sandwich cookies in a food processor until fine crumbs. Transfer to a bowl and mix with melted butter, sugar, and salt until it looks like wet sand. Press firmly into the bottom of the prepared pan. Bake for 10 minutes, then set aside to cool slightly.
- Make the filling: In a large bowl, beat softened cream cheese with an electric mixer on medium speed until smooth (about 2 minutes). Add sugar and beat for another 2 minutes until light and fluffy. Add eggs one at a time, beating on low just until combined. Add sour cream, peppermint extract, vanilla extract, and flour; mix on low until just combined. If using red food coloring, remove 1/2 cup batter, add 2-3 drops gel coloring, and stir. Pour plain batter over crust, then drizzle colored batter…
- Bake: Place pan in center of oven. Bake for 35-40 minutes until edges are set and center jiggles slightly. Internal temperature should be 150°F (65°C). Turn off oven, crack door open, and leave bars inside for 1 hour.
- Cool and chill: Remove pan from oven and cool completely on a wire rack (about 2 hours). Cover with plastic wrap and refrigerate for at least 4 hours, preferably overnight.
- Make the topping: Place chocolate chips in a heatproof bowl. Heat heavy cream in a small saucepan over medium heat until it just simmers. Pour hot cream over chocolate chips, let sit 3 minutes, then stir until smooth. Stir in 1/2 teaspoon peppermint extract. Pour ganache over chilled cheesecake and spread evenly. Immediately sprinkle crushed candy canes on top. If using white chocolate drizzle, melt white chocolate chips with 1 teaspoon coconut oil in microwave in 30-second bursts, then drizzle …
- Final set and slice: Refrigerate for at least 1 hour until ganache is firm. Use parchment sling to lift bars out. Slice into 16 even bars (4×4) using a sharp knife dipped in hot water and wiped dry between cuts.
Notes
Room temperature ingredients are essential for a smooth batter. Don’t overmix once eggs are added. For a water bath shortcut, place a shallow pan of hot water on the oven rack below the bars. Chill thoroughly before slicing for clean cuts. Bars can be stored in the refrigerator for up to 5 days or frozen for up to 3 months.
Nutrition
- Serving Size: 1 bar
- Calories: 385
- Sugar: 28
- Sodium: 280
- Fat: 24
- Saturated Fat: 14
- Carbohydrates: 38
- Fiber: 2
- Protein: 6
Keywords: peppermint bark, cheesecake bars, holiday dessert, Christmas dessert, peppermint cheesecake, chocolate peppermint, make-ahead dessert


