I was standing in the grocery store aisle last October, staring at a bag of black olives, when the strangest thing happened. The fluorescent lights flickered overhead, and for one split second, the smell of hard-boiled eggs and paprika hit me so hard I had to grab the cart. Suddenly I was seven years old at my Aunt Rita’s kitchen table, watching her carefully slice olives into the tiniest little legs you’ve ever seen. She wasn’t a fancy cook, not by any stretch. But every Halloween, she’d make these deviled eggs that looked like spiders, and I thought she was magic. I mean, honestly, I’d sit there with my chin in my hands, watching her work, completely convinced that those little olive spiders might just crawl right off the platter.
Aunt Rita’s been gone almost fifteen years now, and I don’t think I’ve had a single Halloween since that didn’t start with me trying to remember exactly how she angled those olive legs. It’s funny the things that stick with you, you know? Not the big moments, not the costume parades or the candy hauls, but the way she’d laugh when I’d accidentally eat one of the spider bodies before she could get it on the plate. “You’re ruining my masterpiece,” she’d say, but she was always smiling. So last year, with my own kids bouncing off the walls and a bag of eggs in my hand, I decided it was time. Time to stop just remembering and start making.
These spooky spider deviled eggs aren’t just a Halloween snack. They’re the thing my kids now ask for starting in September, the thing I bring to every school party, the thing that makes people stop and say “wait, how did you do that?” And let me tell you, they’re easier than you think. I messed up my first batch pretty badly—olive legs sliding everywhere, filling that was too runny, the whole nine yards. But I figured it out, and now I’m going to show you exactly how to get it right. Because every family deserves a little Halloween magic that doesn’t come from a plastic wrapper.
Why You’ll Love This Recipe
Let me be real with you for a second. I’ve tested this recipe at three different Halloween parties, two school potlucks, and one very chaotic family dinner where my nephew decided the spiders needed to “swim” in the ranch dressing. Through all of that chaos, these eggs came out perfect every single time. Here’s why they work so well for families like yours:
- Quick & Easy: You can have these done in about 30 minutes of active time. The eggs boil while you get the other ingredients ready, and the assembly goes fast once you get the hang of it.
- Simple Ingredients: No fancy grocery store trips. You need eggs, mayonnaise, mustard, paprika, and a can of black olives. That’s it. I bet you have most of this already.
- Perfect for Halloween Parties: These disappear faster than candy at a costume contest. Kids love the spooky look, and adults love that they’re actually eating something with protein instead of pure sugar.
- Crowd-Pleaser: I’ve yet to meet a kid who doesn’t think these are the coolest thing at the snack table. Even the picky eaters go for them because, let’s face it, deviled eggs are basically fancy egg salad, and who doesn’t love that?
- Unbelievably Delicious: The creamy filling with that little kick of paprika, paired with the briny pop of the olive spiders—it’s a combination that just works. Plus, they’re naturally gluten-free and low-carb, so everyone can enjoy them.
What makes these different from every other deviled egg recipe out there? It’s the little details. I learned the hard way that you need to dry your olive legs on a paper towel or they’ll slide right off the egg white. I figured out that a tiny pinch of sugar in the filling balances the tang perfectly. And I discovered that if you chill the filled eggs for fifteen minutes before adding the spiders, everything stays put. These aren’t just tricks I read somewhere—they’re things I learned by messing up and fixing it, so you don’t have to.
This is the kind of recipe that makes you feel like a kitchen rockstar without actually having to work that hard. It’s comfort food with a spooky twist, perfect for creating those little Halloween memories that stick with your kids forever. Because honestly, isn’t that what it’s all about?
What Ingredients You Will Need
This recipe uses simple, everyday ingredients to create something that looks way more impressive than it actually is. I’ve tested these ingredients with different brands and variations, and I’ll share what works best so you don’t have to guess.
- 12 large eggs (room temperature works best for even cooking, but cold is fine too)
- 1/3 cup mayonnaise (I prefer Hellmann’s or Duke’s for that creamy tang, but any brand works)
- 1 teaspoon yellow mustard (adds that classic deviled egg flavor and a little color)
- 1/2 teaspoon white vinegar (trust me on this—it brightens everything up without making it taste like vinegar)
- 1/4 teaspoon salt (fine sea salt dissolves better than kosher here)
- 1/8 teaspoon black pepper (freshly ground if you have it)
- 1/4 teaspoon paprika (for the filling, plus extra for sprinkling on top)
- 1 can (6 ounces) large black olives (you need the big ones for the spider bodies—the small sliced ones won’t work)
- Optional: 1/8 teaspoon garlic powder (my secret weapon, but leave it out if your kids are sensitive to garlic)
- Optional: Fresh chives or parsley (for garnish, if you’re feeling fancy)
Let me talk about the eggs for a minute because this matters more than you’d think. Older eggs actually peel better than fresh ones. If you can, buy your eggs a week before you plan to make these. I know that sounds weird, but the slight air pocket that develops in older eggs makes the shell come off so much easier. I learned this the hard way after destroying three perfect hard-boiled eggs in a row. Now I always plan ahead.
For the olives, look for the jumbo or colossal size. Regular black olives are too small to look like convincing spider bodies. I use the Lindsay brand jumbo olives when I can find them, but any store brand works as long as they’re big. You’ll need about 12 olives for the spider bodies, and the rest you can slice into legs. Don’t worry if you have extras—olives keep forever in the fridge.
The mayonnaise is where you can really make a difference. Full-fat mayo gives you the creamiest filling, but I’ve made these with light mayo and they still turned out great. Just don’t use Miracle Whip unless you really love that sweet tang—it changes the flavor completely. And if you’re dairy-free, check your mayo label. Most mayo is naturally dairy-free, but some brands add milk solids.
Equipment Needed
You don’t need any fancy gadgets for these spooky spider deviled eggs, which is part of why I love this recipe. Here’s what you’ll need:
- Large pot (big enough to hold your eggs in a single layer)
- Mixing bowl (medium size is perfect)
- Fork or potato masher (for mashing the yolks)
- Piping bag or zip-top bag (a quart-size bag works perfectly—no need to buy a piping bag)
- Sharp knife (for slicing olives and cutting eggs cleanly)
- Cutting board (dedicate one to eggs to avoid any weird flavors)
- Small spoon or melon baller (for scooping out the yolks)
- Paper towels (trust me, you’ll need these for the olive legs)
- Platter or egg plate (something with a flat surface so the spiders don’t roll around)
If you don’t have a piping bag, don’t stress. I’ve made these more times than I can count using a simple zip-top bag with the corner snipped off. It’s not as pretty, but it works just fine. And if you really want to keep it simple, you can just spoon the filling in. The spiders cover up any imperfections anyway.
One tip I learned from my aunt: use a serrated knife to cut the eggs in half. It gives you a cleaner cut than a straight blade. I ruined so many eggs before I figured that out. Also, wipe your knife between cuts to keep the yolk from smearing across the white.
Preparation Method
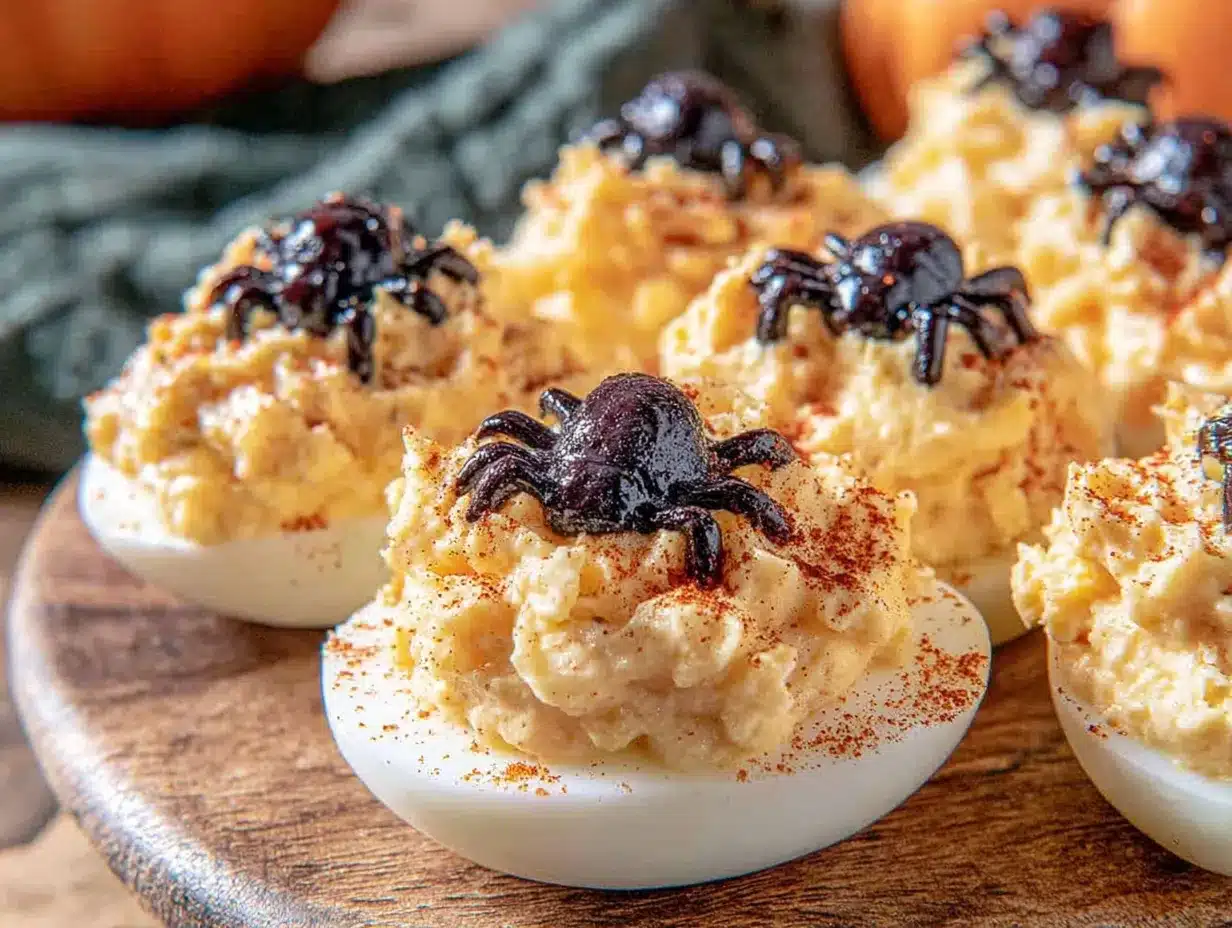
Alright, let’s make some spooky spiders! I’m going to walk you through this step by step, including all the little tricks I’ve picked up along the way.
- Boil the eggs: Place your 12 eggs in a single layer in a large pot. Cover them with cold water by about an inch. Bring the water to a rolling boil over high heat, then cover the pot, turn off the heat, and let it sit for exactly 12 minutes. This gives you perfectly hard-boiled eggs with no green ring around the yolk. While they’re sitting, fill a large bowl with ice water.
- Ice bath time: After 12 minutes, transfer the eggs to the ice water bath using a slotted spoon. Let them sit for at least 10 minutes. This stops the cooking immediately and makes peeling way easier. I’ve skipped this step before when I was in a hurry, and I regretted it. The shells stuck like glue.
- Peel carefully: Gently tap each egg on the counter to crack the shell all over, then roll it between your palms to loosen the shell. Start peeling from the wider end where the air pocket is. Run the egg under cold water as you peel to help remove any stubborn bits. Try not to gouge the egg white—you want them smooth for the spider bodies.
- Cut the eggs: Using a sharp knife, slice each egg in half lengthwise. Wipe the knife clean between cuts. Gently pop out the yolks into your mixing bowl. Arrange the egg white halves on your serving platter, cut side up.
- Make the filling: Add the mayonnaise, mustard, vinegar, salt, pepper, paprika, and garlic powder (if using) to the bowl with the yolks. Mash everything together with a fork until it’s smooth and creamy. Taste it and adjust the seasoning. I usually add a tiny pinch more salt at this point. If the filling seems too thick, add another teaspoon of mayo. Too thin? Add another yolk if you have one, or just chill it for a bit.
- Prepare the olives: Drain your can of olives and pat them dry with paper towels. This step is crucial—wet olives won’t stick to the egg whites. Set aside 12 whole olives for the spider bodies. Slice the remaining olives crosswise into thin rounds. You want about 4 to 6 slices per spider leg. Cut each round in half to create the legs. You should end up with 8 legs per spider.
- Fill the eggs: Spoon your filling into a piping bag or a zip-top bag with the corner snipped off. Pipe the filling into each egg white half, mounding it slightly. You want it to look generous, not flat. If you’re using a spoon, just dollop it in and smooth the top.
- Chill the filled eggs: Pop the platter into the refrigerator for 15 minutes. This firms up the filling so the olive spiders have something solid to stick to. I learned this trick after my first batch of spiders kept sliding off into a sad little pile.
- Assemble the spiders: Take the platter out of the fridge. Place one whole olive in the center of each filled egg half—this is the spider body. Arrange 8 olive leg halves around each body, pressing them gently into the filling so they stay put. You want them to look like they’re crawling, so angle them slightly forward.
- Final touch: Sprinkle a light dusting of paprika over the whole platter. It adds color and makes the spiders pop. If you’re using fresh chives or parsley, scatter a few pieces around the edges of the platter for a creepy “crawling through grass” effect.
- Serve or store: These are best served within a few hours. If you need to make them ahead, stop after step 7, cover the platter with plastic wrap, and refrigerate. Add the olive spiders right before serving so they stay fresh and perky.
A quick note about timing: the whole process takes about 45 minutes from start to finish, but that includes the boiling and chilling time. Your actual hands-on time is closer to 25 minutes. I usually boil the eggs while I’m getting dinner ready, then assemble the spiders after the kids are in bed. It makes Halloween morning so much less stressful.
Cooking Tips & Techniques
I’ve made these spooky spider deviled eggs probably a dozen times now, and I’ve collected a few tips that make the whole process smoother. Some of these I learned from my aunt, some from trial and error, and a couple from sheer desperation.
The perfect hard-boiled egg every time: I know everyone has their own method, but here’s what works for me. Start with cold water, bring it to a boil, then cover and let it sit off the heat. No fancy gadgets needed. The key is the ice bath afterward—don’t skip it. I once tried to peel eggs that hadn’t been shocked in ice water, and I ended up with pitted, ugly egg whites that looked more like the moon than a spider. Not cute.
Keeping the olive legs in place: This was my biggest struggle at first. The legs would slide right off the creamy filling. Here’s the fix: after you slice the olive rounds, pat them dry on a paper towel. Then, when you place them on the filling, press down gently but firmly. The filling should hold them like little anchors. If you’re still having trouble, you can dip the edge of each leg slice in a tiny bit of the egg yolk mixture before placing it. That extra stickiness works like glue.
Making the spiders look creepy: Angle the legs forward, like the spider is in mid-crawl. Don’t line them up perfectly straight—spiders are chaotic little creatures. I like to have two or three legs slightly lifted off the filling, as if the spider is about to take a step. It adds movement and makes the platter look alive.
Timing and multitasking: Here’s how I handle this on a busy Halloween day. I boil the eggs the night before and keep them in the fridge, unpeeled. The next morning, I peel them, make the filling, and pipe it into the whites. Then I cover the platter and refrigerate. Right before the party, I add the olive spiders. This way, the eggs are fresh and the spiders look their best. I’ve tried making them fully the night before, and the olives get a little dried out. Not terrible, but not ideal.
What to do if your filling is too runny: It happens to the best of us. Maybe your eggs were extra fresh and the yolks were wet, or maybe you added too much mayo. Don’t panic. Add another hard-boiled yolk if you have one. If not, stir in a tablespoon of plain breadcrumbs or crushed crackers. It sounds weird, but it absorbs the extra moisture without changing the flavor much. I’ve done this twice, and nobody noticed.
My biggest failure: The first time I made these for my son’s kindergarten class, I forgot to pat the olives dry. The legs slid off, the bodies rolled away, and I showed up with a platter of sad, naked deviled eggs. I told the teacher they were “spider molting eggs” and she laughed. The kids didn’t care—they ate them anyway. But I learned my lesson. Dry your olives, people.
Variations & Adaptations
One of the best things about this recipe is how easy it is to change up. I’ve tried several variations over the years, and here are my favorites:
Spicy Spider Eggs: Add 1/4 teaspoon of cayenne pepper or a dash of hot sauce to the yolk mixture. The heat pairs beautifully with the cool, creamy filling. My husband loves this version, but I keep it separate from the kids’ batch. Nobody wants a crying four-year-old at a Halloween party.
Avocado Spider Eggs: Replace half the mayonnaise with mashed avocado. The filling turns a beautiful pale green, which looks amazing against the black olives. Plus, it’s a little healthier. Just be aware that avocado filling doesn’t keep as long—these need to be eaten within a few hours. I made this version for a grown-up Halloween dinner and got rave reviews.
Bacon Spider Legs: Instead of olive legs, use thin strips of crispy bacon cut into small pieces. It’s not as spooky, but it’s incredibly delicious. The salty, smoky flavor with the creamy egg filling is next-level. I did this once when I ran out of olives, and my kids actually preferred it. Now I sometimes do half and half.
Deviled Egg Mummies: If you want to switch things up, skip the spiders and make mummies instead. Pipe the filling into the egg whites, then use thin strips of cheddar cheese to wrap around like bandages. Add two tiny dots of mustard for eyes. My daughter’s class went crazy for these last year.
Dairy-Free Version: Use a vegan mayonnaise and skip any dairy-based garnishes. The recipe is already naturally gluten-free, so this is an easy adaptation. I’ve made these for a friend with dairy allergies, and she said they were the best deviled eggs she’d had in years. The olive spiders don’t care about your dietary restrictions.
Make it a Meal: Serve these alongside a batch of creamy Halloween chicken noodle soup for a fun, spooky dinner. The warm soup balances the cold eggs perfectly, and kids love the themed meal.
Serving & Storage Suggestions
These spooky spider deviled eggs are best served cold, straight from the refrigerator. I like to arrange them on a dark platter or a black serving tray to make the spiders really pop. If you have a platter with a slight rim, even better—it keeps the eggs from sliding around when people reach for them.
For presentation, I sometimes scatter a few fake spider webs around the edges of the platter. It’s a little cheesy, I know, but the kids absolutely love it. You can also add some candy eyeballs to the platter for extra spooky factor. Just make sure they don’t touch the eggs directly if you’re worried about sugar getting into the filling.
Storage: Store any leftover eggs in an airtight container in the refrigerator for up to two days. The olive spiders might start to dry out after 24 hours, so they’re best eaten fresh. If you’re storing them, cover the container with plastic wrap before putting the lid on to keep the eggs from absorbing fridge odors.
Reheating: Don’t. These are served cold. If you want warm deviled eggs, you’re making a different recipe. That said, if you’ve stored them and the filling has firmed up too much, let them sit at room temperature for about 10 minutes before serving.
How flavors develop: The filling actually gets better after a few hours in the fridge. The flavors meld together, and the texture becomes creamier. That’s why I recommend making the filling and piping it into the whites a few hours ahead of time. Just add the olive spiders right before serving for maximum freshness and visual appeal.
What to serve with them: These eggs pair beautifully with other Halloween snacks. I like to serve them alongside a platter of easy Halloween veggie tray with monster dip for a complete party spread. The crunch of the veggies balances the creaminess of the eggs, and the colorful dip adds more visual interest to the table.
Nutritional Information & Benefits
Here’s the nutritional breakdown for one spider deviled egg (based on using full-fat mayo and standard large eggs):
| Nutrient | Amount per serving |
|---|---|
| Calories | 85 |
| Protein | 6g |
| Fat | 6g |
| Saturated Fat | 1.5g |
| Carbohydrates | 1g |
| Fiber | 0g |
| Sugar | 0g |
| Sodium | 180mg |
These spooky spider deviled eggs are surprisingly nutritious for a party snack. Eggs are packed with high-quality protein, vitamin D, and choline, which is great for brain health. The olives add healthy monounsaturated fats and a good dose of vitamin E. If you use light mayonnaise, you can cut the calories and fat by about a third without sacrificing much flavor.
This recipe is naturally gluten-free, low-carb, and keto-friendly. It’s also suitable for anyone following a paleo diet if you use a paleo-approved mayonnaise. The only potential allergen is eggs, so be mindful if you’re serving these at a school party where allergies might be a concern.
From a wellness perspective, I love that these give my kids a protein-rich option at Halloween parties. They fill up on these before hitting the candy bowl, which means less sugar-induced chaos later. It’s a small win, but I’ll take it.
Conclusion
These spooky spider deviled eggs have become a non-negotiable part of our Halloween tradition, and I honestly can’t imagine the holiday without them anymore. They’re the recipe that connects my childhood to my kids’ childhood, the thing that makes me feel close to Aunt Rita even though she’s not here to see my messy kitchen counter covered in olive slices. And you know what? They’re so much easier than I ever expected them to be.
I hope you give these a try, even if you’re not usually a deviled egg person. The spiders make everything more fun, and the taste is genuinely delicious. Feel free to customize them however you want—more spice, different legs, whatever makes your family happy. That’s the beauty of a recipe like this. It’s a starting point, not a rulebook.
If you make these, I’d love to hear about it. Drop a comment below and tell me how your kids reacted, or share a photo of your spooky spider platter. Did your olive legs stay put? Did anyone try to eat the spiders first? I want to know all the details. And if you have your own Halloween tradition recipe, share that too. I’m always looking for new ideas to add to our holiday rotation.
Until next time, happy cooking and happy Halloween. May your eggs peel easily and your spiders stay creepy.
Frequently Asked Questions
Can I make these spooky spider deviled eggs the night before?
Yes, with one important caveat. You can boil, peel, fill, and pipe the eggs the night before. Cover them tightly with plastic wrap and refrigerate. However, I recommend adding the olive spiders no more than a few hours before serving. The olives can dry out and the legs may start to slide off if they sit too long. If you’re really pressed for time, you can add them the night before, just know they won’t look quite as fresh.
How do I get my eggs to peel easily every time?
The two biggest factors are egg age and the ice bath. Older eggs peel much easier than fresh ones, so buy your eggs at least a week ahead if possible. After boiling, immediately transfer the eggs to an ice water bath and let them sit for at least 10 minutes. This shocks the shell and makes it release from the egg white. I also find that peeling under running cold water helps loosen stubborn shell pieces.
What if I can’t find jumbo olives for the spider bodies?
No problem! You can use two smaller olives stacked on top of each other to create a bigger spider body. Just use a tiny bit of the yolk mixture as “glue” to hold them together. Alternatively, you can use pitted dates or even small meatballs for a completely different look. The spiders don’t have to be perfect—kids will love them no matter what.
Can I freeze these deviled eggs?
I don’t recommend freezing deviled eggs. The texture of both the egg white and the filling changes dramatically after freezing and thawing. The whites become rubbery and the filling can separate and become watery. These are best made fresh or up to two days ahead. If you need to prep way in advance, boil and peel the eggs, then store them in the fridge for up to a week. Make the filling and assemble when you’re ready.
My kids are picky eaters. Will they actually eat these?
In my experience, yes! The spider shape makes everything more fun, and deviled eggs are naturally kid-friendly. My own kids were skeptical the first time, but once they saw the spiders, they couldn’t resist. If your kids are really hesitant, let them help assemble the spiders. When kids have a hand in making the food, they’re much more likely to eat it. You can also serve these alongside kid-friendly Halloween pizza mummies for a full spooky meal they’ll actually finish.
Pin This Recipe!
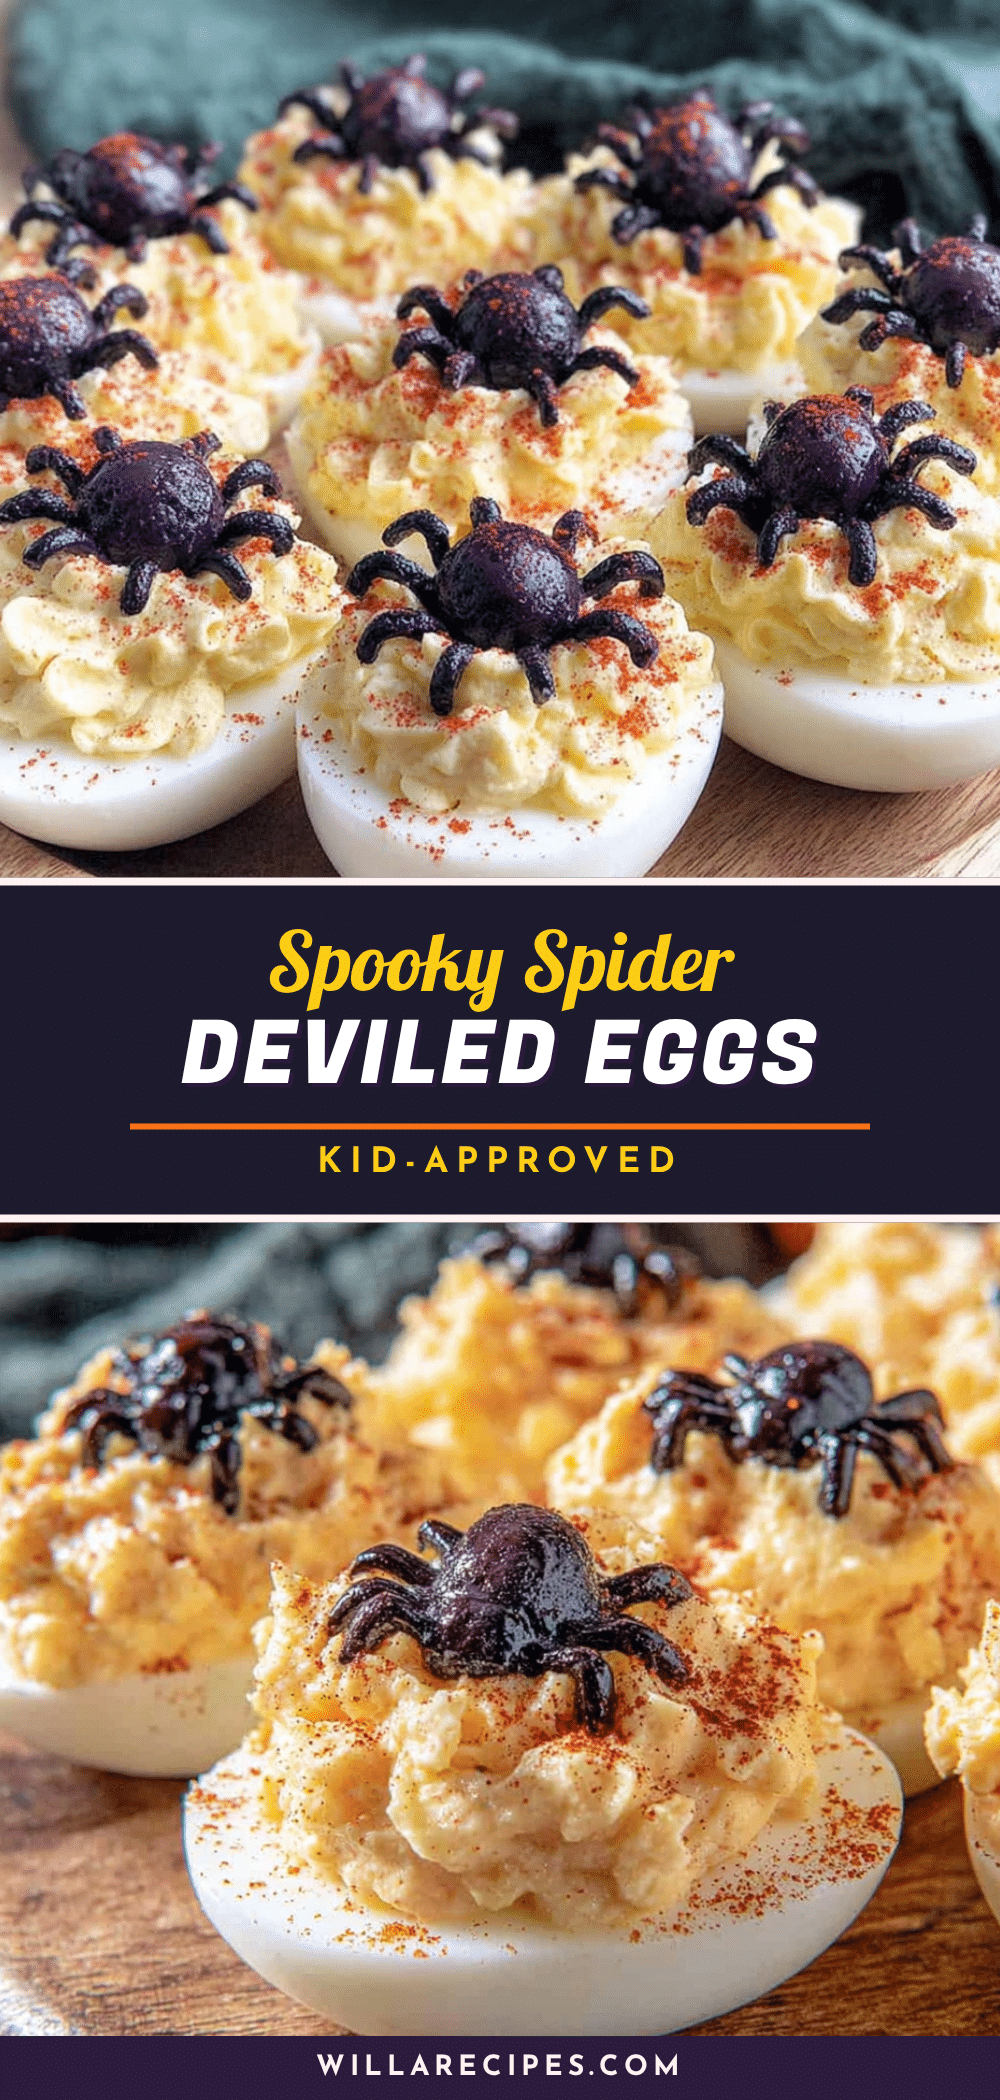
Best Spooky Spider Deviled Eggs for Halloween
These spooky spider deviled eggs are a fun and easy Halloween snack that kids and adults love. Creamy deviled eggs topped with olive spiders create a creepy-cute treat perfect for parties.
- Prep Time: 25 minutes
- Cook Time: 12 minutes
- Total Time: 45 minutes
- Yield: 24 servings 1x
- Category: Appetizer
- Cuisine: American
Ingredients
- 12 large eggs (room temperature preferred)
- 1/3 cup mayonnaise (Hellmann’s or Duke’s recommended)
- 1 teaspoon yellow mustard
- 1/2 teaspoon white vinegar
- 1/4 teaspoon fine sea salt
- 1/8 teaspoon freshly ground black pepper
- 1/4 teaspoon paprika (plus extra for sprinkling)
- 1 can (6 ounces) large black olives (jumbo or colossal size)
- Optional: 1/8 teaspoon garlic powder
- Optional: Fresh chives or parsley for garnish
Instructions
- Place 12 eggs in a single layer in a large pot. Cover with cold water by about 1 inch. Bring to a rolling boil over high heat, then cover, turn off heat, and let sit for exactly 12 minutes.
- Transfer eggs to a large bowl of ice water using a slotted spoon. Let sit for at least 10 minutes to stop cooking and make peeling easier.
- Gently tap each egg on the counter to crack the shell all over, then roll between palms to loosen. Peel starting from the wider end under cold running water.
- Slice each egg in half lengthwise with a sharp knife, wiping the knife clean between cuts. Gently pop out yolks into a mixing bowl. Arrange egg white halves on a serving platter, cut side up.
- Add mayonnaise, mustard, vinegar, salt, pepper, paprika, and garlic powder (if using) to the yolks. Mash with a fork until smooth and creamy. Taste and adjust seasoning.
- Drain olives and pat dry with paper towels. Set aside 12 whole olives for spider bodies. Slice remaining olives crosswise into thin rounds, then cut each round in half to create legs (about 8 legs per spider).
- Spoon filling into a piping bag or zip-top bag with the corner snipped off. Pipe filling into each egg white half, mounding slightly.
- Refrigerate the platter for 15 minutes to firm up the filling.
- Remove platter from fridge. Place one whole olive in the center of each filled egg half for the spider body. Arrange 8 olive leg halves around each body, pressing gently into the filling. Angle legs slightly forward for a crawling look.
- Sprinkle a light dusting of paprika over the platter. Garnish with fresh chives or parsley if desired.
- Serve within a few hours. For make-ahead, complete through step 7, cover, and refrigerate. Add olive spiders just before serving.
Notes
Use older eggs for easier peeling. Pat olive legs dry to prevent sliding. Chill filled eggs before adding spiders for better adhesion. For best results, add olive spiders just before serving.
Nutrition
- Serving Size: 1 spider deviled egg
- Calories: 85
- Sodium: 180
- Fat: 6
- Saturated Fat: 1.5
- Carbohydrates: 1
- Protein: 6
Keywords: Halloween deviled eggs, spider deviled eggs, spooky deviled eggs, Halloween appetizer, deviled eggs with olives