I was standing in the middle of the grocery store aisle last November, staring at a block of cheddar like it held the secrets to the universe. My phone buzzed in my pocket — our group chat was exploding. Everyone was bringing “a little something” to our first-ever Friendsgiving, and somehow, I had volunteered for the appetizer. Not just any appetizer, either. I needed an easy Friendsgiving charcuterie board that feeds a crowd without turning my kitchen into a disaster zone. I was 26 again, standing in my college roommate’s tiny apartment, watching her mom arrange salami roses on a wooden board she’d borrowed from the neighbor. That memory hit me hard — the laughter, the spilled wine, the way we all fought over the last slice of prosciutto. I never learned how she made those roses look so fancy. But you know what? I figured out my own way. And honestly, this board has become my secret weapon for every gathering since. Maybe you’ve been there too — wanting to show up with something impressive but not wanting to spend all day prepping. Let me tell you, this is the answer.
Why You’ll Love This Easy Friendsgiving Charcuterie Board
I’ve tested this board more times than I care to admit — for big parties, small dinners, and even a few Tuesday nights when I needed a pick-me-up. It’s the kind of recipe that builds confidence in the kitchen, and here’s why it works every single time.
- Quick & Easy: You can put this together in under 20 minutes. No cooking, no complicated steps — just smart arranging. Perfect for when your Friendsgiving guests arrive early or you’re running behind on the turkey.
- Simple Ingredients: Everything comes from a regular grocery store. No specialty shops, no fancy imports you’ll never use again. I promise you can find all of this at your local market.
- Perfect for Friendsgiving: It’s the ultimate shareable appetizer. People can graze while you finish the main dishes, and it keeps everyone happy without filling them up too much.
- Crowd-Pleaser: I’ve watched picky eaters go back for thirds. The variety means there’s something for everyone — meat lovers, cheese fans, veggie seekers, and even gluten-free friends.
- Unbelievably Delicious: The combo of salty prosciutto, creamy brie, sweet figs, and tangy pickles is next-level. It’s not just a board — it’s an experience.
What makes this different from every other charcuterie board out there? It’s the balance. I’ve spent years figuring out the perfect ratio of meats to cheeses to extras, so you don’t end up with a sad pile of crackers and one lonely piece of cheese. Plus, I’ll show you the trick for making those salami roses that look like you spent hours on them. Spoiler alert: it takes about 30 seconds each.
This is the kind of board that makes people close their eyes after the first bite. It’s comfort food reimagined for sharing — faster, simpler, but with the same soul-soothing satisfaction. Perfect for impressing your friends without the stress, or turning a simple gathering into something memorable.
Ingredients You Will Need
This easy Friendsgiving charcuterie board uses simple, crowd-friendly ingredients to deliver big flavor and beautiful presentation without the fuss. Most of these are pantry staples or easy to find at any grocery store.
For the Meats
- Prosciutto – 6 ounces, thinly sliced (I recommend Boar’s Head for consistent quality)
- Salami – 8 ounces, such as Genoa or hard salami (look for pre-sliced to save time)
- Pepperoni – 4 ounces, sliced (adds a nice spicy kick)
- Capicola – 4 ounces, optional but worth it for the flavor
For the Cheeses
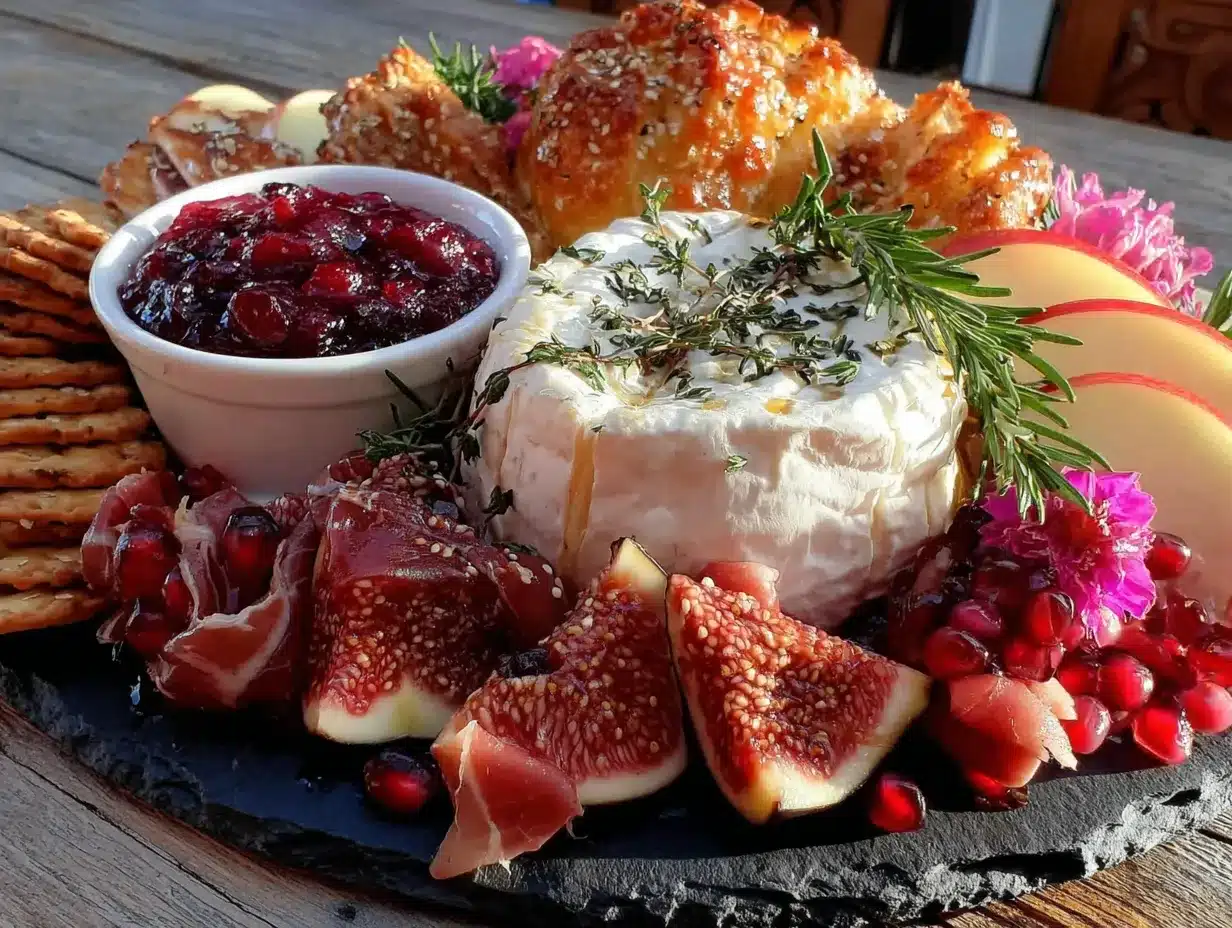
- Brie – 8 ounces, one whole wheel (let it come to room temperature for best texture)
- Aged Cheddar – 6 ounces, sharp and crumbly (I like Cabot Seriously Sharp)
- Gouda – 6 ounces, smoked or regular (adds a creamy, nutty flavor)
- Goat Cheese – 4 ounces, log style (use dairy-free if needed)
For the Crackers and Bread
- Crackers – 8 ounces, mix of plain and flavored (water crackers, wheat thins, rosemary crackers)
- Baguette – 1 small, sliced into thin rounds and lightly toasted
- Breadsticks – 4 ounces, plain or sesame (adds height to the board)
For the Fruits and Vegetables
- Red Grapes – 1 cup, washed and separated into small clusters
- Dried Figs – 4 ounces, halved (or use dried apricots in a pinch)
- Fresh Apples – 1, sliced thin and tossed in lemon juice to prevent browning
- Cherry Tomatoes – 1 cup, washed (adds color and freshness)
- Pickles – 4 ounces, cornichons or small gherkins
- Olives – 4 ounces, mixed varieties, pitted
For the Spreads and Extras
- Honey – 2 tablespoons, for drizzling over brie
- Fig Jam – 4 ounces, or use apricot preserves
- Whole Grain Mustard – 2 tablespoons, in a small bowl
- Nuts – 4 ounces, mixed almonds and walnuts (toast them lightly for extra flavor)
- Dark Chocolate – 2 ounces, broken into pieces (a surprising but welcome addition)
- Fresh Rosemary – a few sprigs, for garnish (optional but pretty)
Equipment Needed
You don’t need anything fancy for this easy Friendsgiving charcuterie board. Here’s what I use:
- Large Wooden Board or Serving Platter – At least 12×18 inches. I got mine at a thrift store for five bucks. A baking sheet lined with parchment works in a pinch.
- Small Bowls – 3 to 4, for spreads, olives, and nuts. Ramekins or small mason jars work great.
- Cheese Knives – At least 2, one for soft cheese and one for hard cheese. A butter knife works for brie.
- Tongs or Small Spoons – For serving pickles and olives.
- Paring Knife – For slicing apples and cheese.
- Cutting Board – For prepping ingredients.
Pro tip: If you don’t have a big board, use a large cutting board or even a clean pizza pan. The key is surface area — you want room to spread everything out so it looks abundant, not crowded.
Preparation Method
Let me walk you through this step by step. I’ve made this board so many times I could do it in my sleep, but I’ll share all my little tricks so yours turns out perfect on the first try.
- Start with the bowls (5 minutes). Place your small bowls on the board first. I put fig jam in one, honey in another, whole grain mustard in a third, and olives in the fourth. Space them out evenly — they’ll anchor the board and give it structure. Don’t put them all in the middle; spread them out so people can reach from different sides.
- Add the soft cheese (2 minutes). Place the whole brie wheel on the board. I like to put it near one of the bowls so it has a neighbor. Drizzle a little honey on top and sprinkle with fresh rosemary. The goat cheese log goes next to it — I sometimes roll it in crushed black pepper or herbs for extra flavor.
- Arrange the hard cheeses (3 minutes). Cut the cheddar and gouda into cubes or thin slices. Fan them out in small piles or rows. Don’t stack them too high — you want people to see what’s available. I like to put cheddar near the apples and gouda near the grapes. It just makes sense, you know?
- Make the salami roses (5 minutes). Here’s the trick that impresses everyone. Take 3-4 slices of salami, overlap them slightly, then fold the whole stack in half. Roll it up from one end, and voila — a rose. Place them on the board with the “petals” facing up. I usually make 4-5 roses and scatter them around. For the prosciutto, just fold it into loose ribbons — don’t press it flat.
- Add the crackers and bread (3 minutes). Fan out crackers in small clusters around the board. Put the baguette slices in a separate pile. Breadsticks can stand upright in a small jar or lean against a cheese pile. Don’t put all the crackers in one spot — spread them out so every section has something to scoop with.
- Fill in with fruits and vegetables (5 minutes). This is where the board comes alive. Place small grape clusters in empty spaces. Tuck dried figs near the brie. Scatter cherry tomatoes and pickles around. Apple slices go next to the cheddar. The goal is to fill every gap so no wood shows through. Think of it like a puzzle — every piece has a place.
- Add the finishing touches (2 minutes). Sprinkle nuts in the remaining gaps. Tuck dark chocolate pieces here and there. Add a few sprigs of fresh rosemary for color. Step back and look at your board — if you see a bare spot, fill it with grapes or crackers.
- Serve immediately or cover and refrigerate. If you’re making this ahead, cover the whole board with plastic wrap and refrigerate. Take it out 30 minutes before serving to let the cheeses come to room temperature. Trust me on this — cold cheese doesn’t have the same flavor.
Cooking Tips & Techniques
I’ve made my share of mistakes with charcuterie boards, and I’m happy to share what I’ve learned so you don’t make the same ones.
Don’t overcrowd the board. I know I said fill every gap, but there’s a fine line between abundant and messy. Leave a little breathing room around each item so people can grab what they want without knocking everything over. If you have too much food, use a second board or a plate on the side.
Think about color contrast. A board that’s all brown and beige is boring. Add red grapes, green pickles, yellow cheese, and dark chocolate to create visual interest. The more colors, the more appetizing it looks. I once made a board with nothing but brown crackers, brown salami, and brown cheese — it looked like a mud pie. Never again.
Let the cheese breathe. Take your cheeses out of the fridge at least 30 minutes before serving. Cold cheese loses its flavor and texture. Brie should be soft and spreadable, not hard and rubbery. I learned this the hard way when my friends tried to spread cold brie and it just crumbled into a mess.
Prep everything before you start arranging. Cut the cheese, slice the apples, make the salami roses — do it all before you touch the board. Once you start arranging, you want to keep moving. Stopping to wash and cut an apple in the middle of assembly breaks your flow and stresses you out.
Make extra salami roses. They go fast. People love them and will grab them first. I usually make a few extra and keep them in the fridge to replenish the board mid-party. It takes 30 seconds each, and your friends will think you’re a culinary genius.
Variations & Adaptations
This easy Friendsgiving charcuterie board is super flexible. Here are some ways to make it your own:
Vegetarian Version: Skip the meats and double up on cheese and veggies. Add roasted red peppers, artichoke hearts, marinated mushrooms, and hummus. I tried this for a vegetarian friend and honestly didn’t miss the meat at all. The roasted peppers add so much flavor.
Gluten-Free Option: Use gluten-free crackers and breadsticks. Most cheeses and meats are naturally gluten-free, but double-check labels on any pre-marinated items. Rice crackers work great and have a nice crunch. I’ve also used sliced cucumber and bell pepper strips as dippers — they’re refreshing and add more color.
Seasonal Twist: In fall, add roasted pumpkin seeds, dried cranberries, and sliced pears. In summer, swap in fresh berries, sliced peaches, and heirloom cherry tomatoes. In winter, add candied pecans, dried orange slices, and a sprinkle of pomegranate seeds. The board changes with the seasons, which keeps it exciting.
Spicy Version: Add pepper jack cheese, spicy salami, jalapeño-stuffed olives, and a chipotle dip. A drizzle of hot honey over the brie takes it to another level. I made this for a group of spice lovers and the board was empty in 20 minutes.
Budget-Friendly Version: Use more crackers and bread, less expensive meats. Replace prosciutto with ham, and use a block of cheddar instead of multiple fancy cheeses. Add lots of grapes and apples — they’re cheap and fill the board nicely. I’ve done this for tight-budget gatherings and nobody noticed the difference.
Serving & Storage Suggestions
Serve this board at room temperature — it tastes best that way. Place it in the center of the table so everyone can reach. I like to put small plates and napkins nearby, plus a few extra cheese knives so people don’t have to share.
What to Serve With It: This board pairs beautifully with a crisp white wine like Sauvignon Blanc or a light red like Pinot Noir. For non-alcoholic options, sparkling water with lemon or a fruity iced tea works great. If you’re serving this as part of a Friendsgiving meal, it’s perfect before the turkey and stuffing — light enough not to spoil dinner but satisfying enough to keep hunger at bay.
Storage: If you have leftovers (which is rare, honestly), separate the components. Store meats and cheeses in airtight containers in the fridge. Crackers and bread go in a ziplock bag at room temperature. Fruits and veggies should be stored separately. Don’t leave the board assembled overnight — the crackers get stale and the cheese dries out.
Reheating: This is a cold board, so no reheating needed! Just take it out of the fridge 30 minutes before serving. The flavors actually improve as the ingredients sit together — the cheese softens, the meats release their oils, and everything melds beautifully. I’ve made this board a day ahead and it was even better the next day.
Nutritional Information & Benefits
This board is meant for sharing, so nutritional values will vary based on what people grab. But here’s a rough estimate per serving (about 1/8 of the board):
- Calories: 350-450
- Protein: 15-20g
- Fat: 25-30g
- Carbohydrates: 20-25g
- Fiber: 3-5g
- Sugar: 10-15g
The cheese provides calcium and protein, while nuts offer healthy fats and fiber. Grapes and apples add vitamins and antioxidants. It’s a balanced snack that keeps you full without weighing you down. For those watching their intake, load up on the veggies and lean meats, and go easy on the crackers and cheese. This board can easily be made lower in sodium by choosing reduced-salt meats and cheeses.
Conclusion
This easy Friendsgiving charcuterie board has saved me more times than I can count. It’s the dish I turn to when I want to impress without stress, when I want to feed a crowd without spending a fortune, and when I want to actually enjoy the party instead of hiding in the kitchen. The best part? You can make it your own. Swap in your favorite cheeses, use whatever meats you love, add the fruits and veggies that make you happy. That’s the beauty of a charcuterie board — it’s forgiving, flexible, and always delicious.
I’d love to hear how yours turns out. Drop a comment below and tell me what you put on your board — or better yet, tag me in your photos. There’s something special about seeing your creation come to life in someone else’s kitchen. And if you have a Friendsgiving tradition, I’d love to hear about that too. Until next time, happy grazing!
Frequently Asked Questions
How far in advance can I make this charcuterie board?
You can assemble the entire board up to 24 hours in advance. Just cover it tightly with plastic wrap and refrigerate. Take it out 30 minutes before serving to let the cheeses come to room temperature. The crackers might get a little soft, so I recommend adding those fresh just before serving if you’re making it ahead.
How much food do I need per person?
For a Friendsgiving appetizer, plan on about 2-3 ounces of meat and 2-3 ounces of cheese per person. For crackers, about 4-5 per person. If this is the main appetizer before a big meal, you can scale back slightly. If it’s the main event, double the amounts. My rule of thumb: it’s better to have too much than too little.
Can I make this board dairy-free?
Absolutely! Use dairy-free cheese alternatives — there are some great options now that melt and taste like the real thing. Skip the brie and use a cashew-based spread instead. For crackers, check labels for dairy. Most meats are dairy-free, but double-check processed options. The fruits, veggies, and nuts are naturally dairy-free, so load up on those.
What’s the best way to arrange the board so it looks professional?
Start with the bowls and soft cheeses — they create anchors. Then add hard cheeses in small piles. Next, place the meats in folds or roses. Fill the gaps with crackers, then fruits and veggies. Finally, add small items like nuts and chocolate to fill any remaining spaces. The key is to create visual variety — different heights, colors, and textures. Don’t be afraid to rearrange until it looks right.
How do I keep the apple slices from turning brown?
Toss the apple slices in a little lemon juice or lime juice right after cutting. The acid prevents oxidation and keeps them looking fresh for hours. You can also use a commercial product like Fruit-Fresh, but lemon juice works just as well and adds a nice tang. Slice the apples just before serving for the best results.
Pin This Recipe!
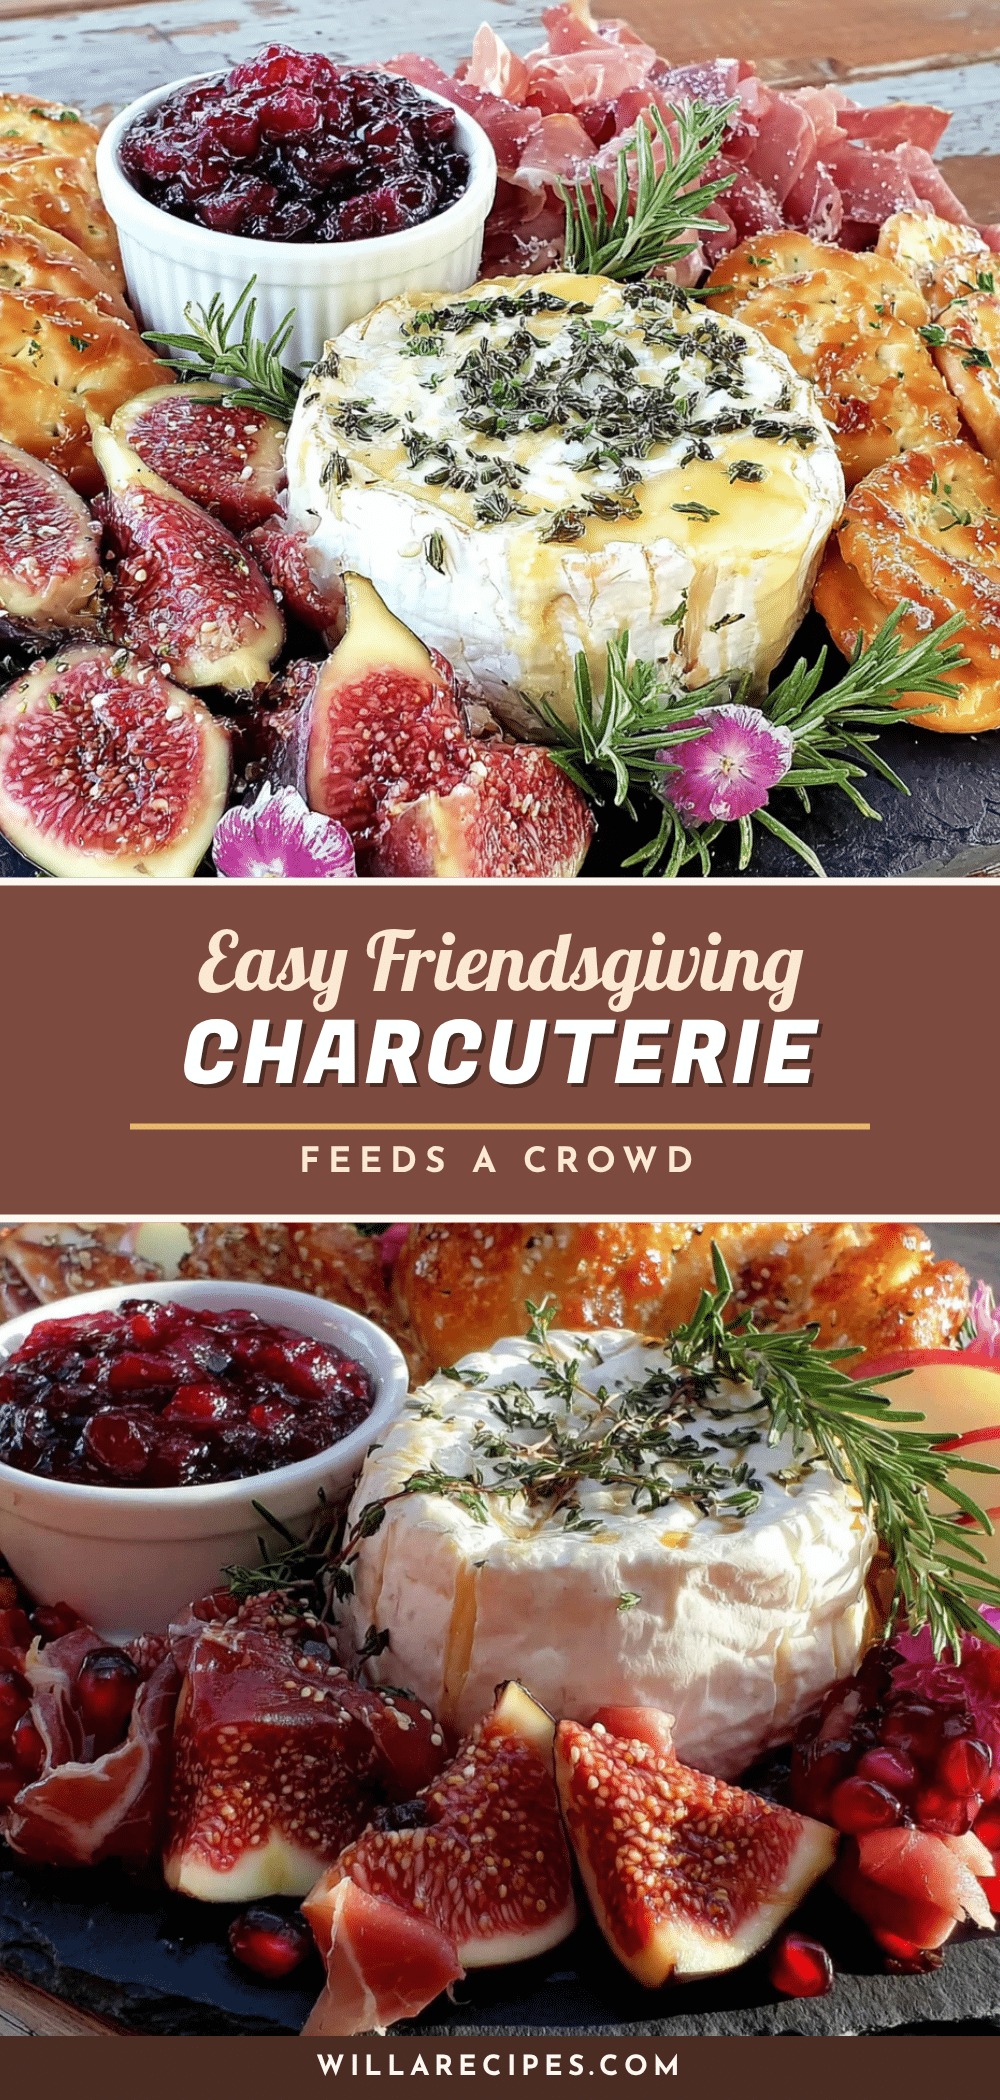
Easy Friendsgiving Charcuterie Board For A Crowd
This easy Friendsgiving charcuterie board is the ultimate shareable appetizer, perfect for feeding a crowd without spending all day in the kitchen. With a perfect balance of meats, cheeses, fruits, and extras, it’s a crowd-pleaser that looks impressive but comes together in under 20 minutes.
- Prep Time: 20 minutes
- Cook Time: 0 minutes
- Total Time: 20 minutes
- Yield: 8 servings 1x
- Category: Appetizer
- Cuisine: American
Ingredients
- 6 ounces prosciutto, thinly sliced
- 8 ounces salami (Genoa or hard salami), pre-sliced
- 4 ounces pepperoni, sliced
- 4 ounces capicola (optional)
- 8 ounces brie, one whole wheel
- 6 ounces aged cheddar, sharp and crumbly
- 6 ounces gouda, smoked or regular
- 4 ounces goat cheese, log style
- 8 ounces crackers, mix of plain and flavored (water crackers, wheat thins, rosemary crackers)
- 1 small baguette, sliced into thin rounds and lightly toasted
- 4 ounces breadsticks, plain or sesame
- 1 cup red grapes, washed and separated into small clusters
- 4 ounces dried figs, halved (or dried apricots)
- 1 fresh apple, sliced thin and tossed in lemon juice
- 1 cup cherry tomatoes, washed
- 4 ounces pickles (cornichons or small gherkins)
- 4 ounces olives, mixed varieties, pitted
- 2 tablespoons honey
- 4 ounces fig jam (or apricot preserves)
- 2 tablespoons whole grain mustard
- 4 ounces nuts, mixed almonds and walnuts, lightly toasted
- 2 ounces dark chocolate, broken into pieces
- Fresh rosemary sprigs for garnish (optional)
Instructions
- Start with the bowls (5 minutes). Place small bowls of fig jam, honey, whole grain mustard, and olives on the board, spacing them out evenly to anchor the board.
- Add the soft cheese (2 minutes). Place the whole brie wheel on the board, drizzle with honey, and sprinkle with fresh rosemary. Place the goat cheese log next to it.
- Arrange the hard cheeses (3 minutes). Cut cheddar and gouda into cubes or thin slices and fan them out in small piles or rows. Place cheddar near the apples and gouda near the grapes.
- Make the salami roses (5 minutes). Overlap 3-4 slices of salami, fold the stack in half, and roll it up from one end to form a rose. Place on the board with petals facing up. Fold prosciutto into loose ribbons.
- Add the crackers and bread (3 minutes). Fan out crackers in small clusters around the board. Place baguette slices in a separate pile. Stand breadsticks upright in a small jar or lean them against cheese.
- Fill in with fruits and vegetables (5 minutes). Place grape clusters, dried figs near brie, cherry tomatoes, pickles, and apple slices next to cheddar. Fill every gap so no wood shows through.
- Add the finishing touches (2 minutes). Sprinkle nuts in remaining gaps, tuck dark chocolate pieces, and add fresh rosemary sprigs for color. Step back and fill any bare spots with grapes or crackers.
- Serve immediately or cover and refrigerate. If making ahead, cover with plastic wrap and refrigerate. Take out 30 minutes before serving to let cheeses come to room temperature.
Notes
Prep everything before arranging. Let cheeses come to room temperature for best flavor. Make extra salami roses as they go fast. For a vegetarian version, skip meats and double up on cheese and veggies. For gluten-free, use gluten-free crackers and breadsticks. Store leftovers separately: meats and cheeses in airtight containers in the fridge, crackers and bread in a ziplock bag at room temperature, fruits and veggies separately.
Nutrition
- Serving Size: 1/8 of the board
- Calories: 350450
- Sugar: 1015
- Sodium: 600800
- Fat: 2530
- Saturated Fat: 1012
- Carbohydrates: 2025
- Fiber: 35
- Protein: 1520
Keywords: Friendsgiving, charcuterie board, appetizer, easy, crowd-pleaser, holiday, party food, no-cook


