It was 11:47 PM on a random Tuesday in October, and I was staring into the fridge like it held the answers to life’s biggest questions. The craving hit me out of nowhere—not for chocolate, not for chips, but for something salty and crunchy with that deep, nutty flavor you only get from roasted pumpkin seeds. The problem? I had just carved a pumpkin with my niece three days ago, and the seeds were still sitting in a bowl on the counter, looking sad and forgotten. I didn’t have the patience for the oven—honestly, I didn’t have the patience for anything that took longer than 15 minutes—but I had this air fryer I’d barely used since buying it on a whim last summer. And then the idea arrived: what if I just tossed them in there with some oil and salt and hoped for the best?
Let me tell you, that late-night experiment changed everything. The air fryer roared to life at 11:52 PM, and by midnight, I was sitting on my kitchen floor—because I was too tired to stand—eating warm, perfectly roasted pumpkin seeds straight from the basket. They were golden, crispy, and exactly salty enough to make me close my eyes and forget about the long day. I mean, I’ve made oven-roasted seeds before, and they were fine, but this was different. The texture was crunchier, the flavor more concentrated, and the whole thing took less than 15 minutes. Maybe you’ve been there—standing in your kitchen late at night, craving something simple but satisfying, not wanting to make a big production out of it. That’s what this recipe is for.
I’ve been making these Quick Air Fryer Roasted Pumpkin Seeds with Sea Salt ever since that night, and I honestly don’t think I’ll ever go back to the oven method. The air fryer gives them this even, all-around crispiness that’s hard to achieve otherwise, and the sea salt just melts into the warm seeds in a way that feels almost magical. Plus, you can season them however you want—I’ll share some of my favorite variations later—but the basic version is so good, you might not even bother. Whether you’re carving pumpkins for Halloween, snacking on a weeknight, or just looking for a healthy-ish crunchy treat, these seeds are about to become your new best friend.
Why You’ll Love This Recipe
Look, I’ve tested this recipe more times than I care to admit. I’ve burned seeds, undercooked seeds, overseasoned seeds, and made every mistake in the book so you don’t have to. After all that trial and error, here’s why I keep coming back to this version—and why I think you will too.
- Quick & Easy: From start to finish, these seeds are ready in under 15 minutes. No preheating a big oven, no waiting around. Perfect for those “I need a snack right now” moments or for whipping up something impressive for guests at the last minute.
- Simple Ingredients: You only need pumpkin seeds, oil, and sea salt. That’s it. No fancy grocery trips, no obscure spices you’ll never use again. Chances are, you already have everything you need in your kitchen right now.
- Perfect for Snacking: These seeds are great for Halloween parties, game day snacks, movie nights, or just munching on during a busy workday. They’re also fantastic on salads or soups for added crunch.
- Crowd-Pleaser: I’ve brought these to gatherings and watched people devour them. Kids love them, adults love them, even picky eaters can’t resist that salty, crunchy goodness.
- Unbelievably Delicious: The air fryer gives these seeds a texture that’s next-level crispy without being dry or burnt. The sea salt brings out the natural nuttiness of the seeds in a way that’s honestly addictive.
What makes this recipe different from all the others out there? It’s the method. Most recipes tell you to boil the seeds first or dry them overnight—who has time for that? My approach skips all the fuss and goes straight to roasting. The air fryer circulates hot air so efficiently that you get perfectly roasted seeds every single time, with no soggy spots or burnt edges. Plus, I’ve dialed in the exact timing and temperature so you don’t have to guess.
This isn’t just another pumpkin seed recipe—it’s the one I make for myself when I need something fast and satisfying. It’s the kind of snack that makes you feel like you’re treating yourself, even though it’s made from something you might have thrown away. And honestly, there’s something deeply satisfying about turning a leftover ingredient into something so delicious.
What Ingredients You Will Need
This recipe uses simple, wholesome ingredients to deliver bold flavor and satisfying crunch without any fuss. Most of these are pantry staples or things you’ll have on hand after carving a pumpkin.
- Pumpkin seeds (also called pepitas), fresh from a pumpkin or store-bought raw seeds. If you’re using fresh seeds, you’ll want to clean them well—more on that below. About 1 cup of seeds works perfectly for a single batch in a standard air fryer.
- Olive oil or avocado oil, about 1 tablespoon. The oil helps the salt stick and promotes even browning. I prefer avocado oil for its neutral flavor and high smoke point, but olive oil works beautifully too. Coconut oil is also an option if you like a subtle tropical note.
- Sea salt, flaky or fine, about 1/2 to 1 teaspoon depending on your taste. I love using Maldon sea salt flakes because they give these little bursts of saltiness that make each bite interesting. Regular table salt works in a pinch, but start with less since it’s more concentrated.
That’s the base recipe, and honestly, it’s perfect as is. But if you want to get fancy, here are some optional add-ins I’ve tried and loved:
- Garlic powder (1/2 teaspoon) for a savory kick that pairs amazingly with the sea salt.
- Smoked paprika (1/2 teaspoon) for a warm, smoky depth that feels cozy and autumnal.
- Cayenne pepper (1/4 teaspoon) if you like a little heat. Start small—you can always add more, but you can’t take it away.
- Lime zest from half a lime, added after roasting for a bright, citrusy finish that cuts through the richness.
- Everything bagel seasoning (1 tablespoon) for that irresistible savory, sesame-packed flavor that makes everything taste better.
A few tips from my many batches of trial and error: If you’re using fresh pumpkin seeds, don’t skip the cleaning step. Separate the seeds from the stringy pulp by rinsing them in a colander under cold water. Pick out any big pieces of pulp, but don’t stress about getting every last bit—a little bit of pumpkin fiber adds flavor and won’t hurt the texture. Pat them dry with a clean kitchen towel or paper towels before tossing with oil. Wet seeds won’t crisp up properly, so take an extra minute to dry them well.
For the oil, you don’t need much—just enough to lightly coat the seeds. Too much oil will make them greasy instead of crispy. I usually drizzle the oil over the seeds in a bowl, then toss with my hands until every seed has a thin, even coating. It’s a small step that makes a big difference.
And about the salt: if you’re using fine salt, use less than you think you need. Flaky salt is more forgiving because it doesn’t dissolve as quickly, so you get those nice pops of saltiness. If you’re unsure, start with a light sprinkle, taste a seed after roasting, and adjust from there. You can always add more salt at the end, but you can’t take it away.
Equipment Needed
One of the best things about this recipe is how little equipment you need. Here’s what you’ll need to have on hand:
- Air fryer — Any size works, but a basket-style air fryer (like a Cosori or Ninja) is ideal for even cooking. I use a 5.8-quart model, and it handles a cup of seeds with room to spare. If yours is smaller, just make sure the seeds are in a single layer and work in batches if needed.
- Mixing bowl — Any medium bowl will do for tossing the seeds with oil and seasonings. I like using a glass or stainless steel bowl because they don’t absorb odors.
- Colander — For rinsing fresh pumpkin seeds. A fine-mesh strainer works even better because it catches the smaller seeds that might slip through.
- Clean kitchen towel or paper towels — For drying the seeds after washing. A salad spinner also works brilliantly if you have one—it gets the seeds much drier than towels alone.
- Spatula or spoon — For stirring the seeds halfway through cooking. A silicone spatula is gentle on the air fryer basket’s nonstick coating.
- Measuring spoons — For oil and seasonings. Eyeballing works, but measuring helps with consistency, especially if you’re making multiple batches.
If you don’t have an air fryer, you can still make this recipe in a conventional oven. Spread the seeds on a baking sheet in a single layer and roast at 350°F for 12-15 minutes, stirring halfway through. The texture won’t be quite as crispy, and it takes a bit longer, but it’s still delicious. I’ve also tried making these in a toaster oven with convection mode, and they turned out great—just keep an eye on them since toaster ovens can have hot spots.
One tip I learned the hard way: don’t use parchment paper in the air fryer for this recipe. The seeds are light enough that the fan can blow them around, and the parchment can get sucked up into the heating element. Just put them directly in the basket or use a silicone air fryer liner if you want easy cleanup.
Preparation Method
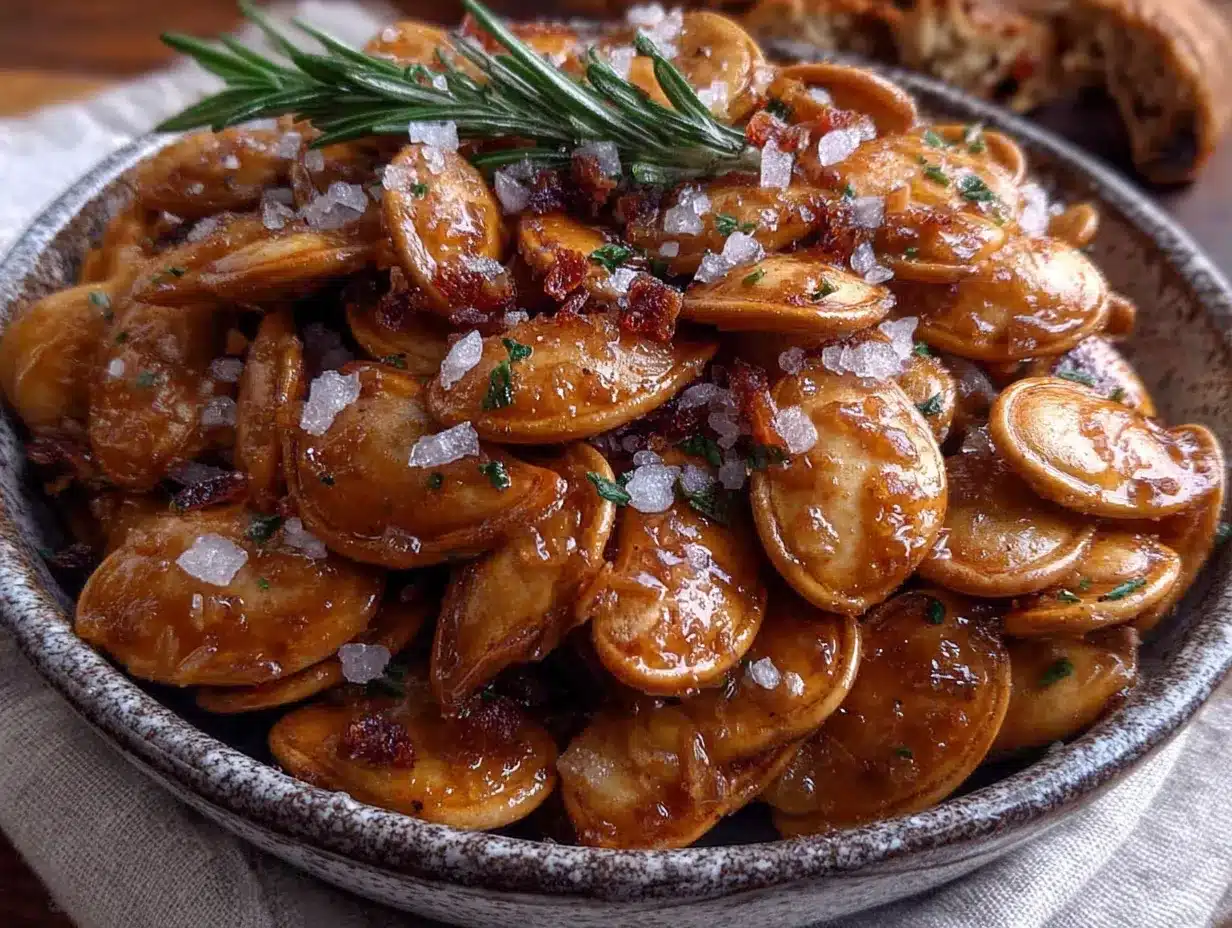
Alright, let’s get to the good part. Here’s exactly how to make these Quick Air Fryer Roasted Pumpkin Seeds with Sea Salt, step by step.
- Clean the seeds. If you’re using fresh pumpkin seeds, separate them from the pulp by placing them in a colander and rinsing under cold water. Use your fingers to break up any clumps of pulp. Don’t worry about getting every last string—a little bit adds flavor. Pick out any really big pieces of pumpkin fiber. This should take about 2-3 minutes.
- Dry the seeds thoroughly. This step is crucial for crispy seeds. Spread the cleaned seeds on a clean kitchen towel or paper towels and pat them dry. Let them sit for 5 minutes to air-dry a bit more. If you’re in a hurry, you can use a salad spinner to get them really dry—this is my preferred method because it’s faster and more effective than towel-drying. Wet seeds will steam instead of roast, so don’t skip this.
- Preheat your air fryer. Set it to 350°F (175°C) and let it preheat for 3 minutes. I know some recipes say you don’t need to preheat air fryers, but for seeds, I’ve found that starting with a hot basket gives you a better, more even roast. The seeds start cooking immediately instead of slowly warming up, which helps them get crispy on the outside while staying tender inside.
- Toss the seeds with oil. Place the dried seeds in a medium bowl. Drizzle with 1 tablespoon of olive or avocado oil. Use your hands or a spoon to toss until every seed is lightly coated. You want them glistening but not swimming in oil. If you’re adding any dry seasonings like garlic powder or smoked paprika, add them now and toss to combine.
- Arrange seeds in the air fryer basket. Spread the seasoned seeds in a single layer in the air fryer basket. Don’t overcrowd—if you have more than will fit in a single layer, cook in batches. Overcrowding leads to uneven cooking and soggy spots. I usually do 1 cup of seeds at a time in my 5.8-quart basket.
- Air fry at 350°F for 5 minutes. Set the timer and let them cook. You’ll hear them start to pop and sizzle after a couple of minutes—that’s normal and a good sign. The kitchen will start smelling amazing, like toasted nuts and warm oil.
- Shake the basket. After 5 minutes, pull out the basket and give it a good shake. This ensures even cooking. If your seeds are sticking together, use a spatula to break them apart. You’ll notice they’re starting to turn golden brown in spots.
- Air fry for another 3-5 minutes. Return the basket to the air fryer and cook for another 3-5 minutes, depending on how crispy you like them. Start checking at the 3-minute mark. The seeds should be golden brown and sound hollow when you shake the basket. If they’re still pale or soft, give them another minute or two. My sweet spot is usually 8 minutes total, but air fryers vary, so trust your eyes and ears.
- Season with sea salt immediately. As soon as the seeds come out of the air fryer, transfer them to a bowl and sprinkle with sea salt while they’re still hot. The heat helps the salt stick and melt slightly into the seeds. Start with 1/2 teaspoon, toss, taste, and add more if needed. I usually end up using about 3/4 teaspoon of flaky salt.
- Let them cool. Spread the hot seeds on a plate or baking sheet in a single layer and let them cool completely. I know it’s tempting to dig in right away, but they get crunchier as they cool. The residual heat continues to crisp them up, so patience pays off. Give them at least 10 minutes before tasting.
A few troubleshooting notes I’ve gathered from my many batches: If your seeds are burnt on the outside but still soft inside, your air fryer runs hot. Next time, lower the temperature to 325°F and cook a little longer. If they’re taking forever to get crispy, they might not have been dry enough before cooking, or you might be overcrowding the basket. And if they taste bland, you probably didn’t use enough salt—don’t be shy with it, especially if you’re using flaky salt.
One thing I love about this method is how consistent the results are. Unlike oven roasting, where the edges of the pan cook faster than the middle, the air fryer’s circulating heat gives you evenly roasted seeds every time. No more picking out the burnt ones or leaving the pale ones behind.
Cooking Tips & Techniques
After making these seeds at least two dozen times (I’m not exaggerating—I had a pumpkin phase last fall), I’ve picked up a few tricks that make a real difference. Here’s what I’ve learned.
Don’t skip the drying step. I know I’ve said this already, but it’s worth repeating. The number one reason for soggy pumpkin seeds is moisture. When I’m in a hurry, I’ve tried cooking them straight after rinsing, and the results are always disappointing. The seeds steam instead of roast, and you end up with a chewy texture that’s nothing like the crispy, crunchy seeds you’re after. Take the extra 5 minutes to dry them well. Your future self will thank you.
Watch the temperature. Air fryers can run hot, especially if they’re older models. I burned my first batch because I trusted the default setting without checking. Start with 350°F and adjust based on your results. If you notice the seeds browning too quickly on the outside while staying soft inside, drop the temperature to 325°F next time. Every air fryer has its own personality, and learning yours is the key to consistent results.
Shake halfway through. This isn’t optional—it’s essential. The seeds on the bottom of the basket cook faster than the ones on top, and shaking redistributes them so everything cooks evenly. I set a timer on my phone for 5 minutes so I don’t forget. Trust me, I’ve forgotten, and the result is half-burnt, half-raw seeds that nobody wants to eat.
Season after cooking. While I add dry spices before cooking, I always add the sea salt after. Salt can draw out moisture during cooking and make the seeds less crispy. Plus, salt sprinkled on hot seeds sticks better and gives you those satisfying bursts of flavor. If you’re using wet seasonings like lime juice or Worcestershire sauce, add them after cooking too—they’ll burn in the air fryer.
Make extra. These seeds disappear fast. I always make at least double what I think I need because people (including me) can’t stop eating them. They’re like popcorn in that way—once you start, it’s hard to stop. Plus, they store well, so leftovers are never a problem.
One mistake I’ll never make again: I once tried roasting seeds straight from the pumpkin without cleaning them first. The pulp burned and created this bitter, acrid smell that filled my entire kitchen. The seeds were inedible, and my air fryer smelled like burnt pumpkin for a week. Learn from my failure—clean those seeds thoroughly, even if you’re in a rush.
Variations & Adaptations
One of the best things about this recipe is how easy it is to customize. I’ve experimented with all kinds of flavor combinations, and here are my favorites.
Spicy Chili Lime Seeds: Toss the seeds with oil and 1/2 teaspoon chili powder before cooking. After roasting, squeeze the juice of half a lime over the hot seeds and sprinkle with sea salt. The acidity of the lime cuts through the richness of the seeds, and the chili gives it a warm, slow-building heat. I made these for a football party last year, and they were gone before halftime.
Sweet Cinnamon Sugar Seeds: Skip the salt and toss the roasted seeds with 1 tablespoon of coconut sugar (or brown sugar) and 1/2 teaspoon of cinnamon while they’re still warm. The sugar melts slightly and creates a crunchy, caramelized coating that’s dangerously addictive. These are amazing on top of oatmeal or yogurt, or just eaten by the handful for dessert.
Everything Bagel Seeds: After tossing with oil, add 1 tablespoon of everything bagel seasoning (poppy seeds, sesame seeds, garlic flakes, onion flakes, and salt). Air fry as directed. These are my go-to for snacking—they have that irresistible savory flavor that makes everything taste better. I’ve even used them as a crunchy topping for avocado toast.
Parmesan Herb Seeds: After roasting, toss the hot seeds with 2 tablespoons of finely grated Parmesan cheese and 1 teaspoon of dried Italian herbs (oregano, basil, thyme). The cheese melts slightly and creates these little cheesy clusters that are absolutely divine. Just be aware that these don’t store as well—the cheese loses its crispiness after a day or two—so eat them fresh.
Maple Dijon Seeds: Before cooking, toss the seeds with 1 tablespoon of maple syrup, 1 teaspoon of Dijon mustard, and a pinch of cayenne. Air fry at 325°F (since the sugar can burn at higher temperatures) and watch them carefully. The result is sweet, tangy, and slightly spicy—a flavor combination that works surprisingly well with the nutty seeds.
For dietary adaptations, these seeds are naturally gluten-free, vegetarian, and vegan (as long as you skip the Parmesan version). If you’re watching your sodium, you can use less salt or try using a salt-free seasoning blend like nutritional yeast, which adds a cheesy, savory flavor without the sodium. And if you’re avoiding oil, you can dry-roast the seeds in the air fryer—just keep a close eye on them since they’ll cook faster without the oil’s buffering effect.
Serving & Storage Suggestions
These seeds are incredibly versatile, and I’ve found dozens of ways to enjoy them beyond just snacking straight from the bowl.
How to serve: I love serving these seeds warm, right after they’ve cooled for 10 minutes. The texture is at its peak—crispy on the outside, tender on the inside, with that irresistible crunch. They’re perfect on their own as a snack, but they also shine as a topping for soups (especially butternut squash or pumpkin soup), salads, roasted vegetables, or even mac and cheese for a crunchy contrast. I’ve also sprinkled them over hummus or guacamole for added texture, and they’re fantastic on a charcuterie board alongside cheese and dried fruit.
What to pair them with: These seeds go beautifully with a cold beer or a glass of crisp white wine. For a non-alcoholic option, try them with sparkling water and a squeeze of lime. They’re also great alongside other snacks like popcorn, roasted chickpeas, or spiced nuts for a DIY snack mix. If you’re serving them at a party, put them in a small bowl and watch them disappear.
How to store: Once the seeds are completely cool, transfer them to an airtight container. I use a glass jar with a tight-fitting lid, but any container that seals well will work. Store them at room temperature in a cool, dark place—not in the refrigerator, where they can absorb moisture and lose their crunch. Properly stored, they’ll stay fresh for up to 2 weeks. In my house, they rarely last that long, but it’s good to know.
How to re-crisp: If your seeds have lost some of their crunch after a few days, don’t throw them out! Spread them on a baking sheet and pop them in a 300°F oven for 3-5 minutes, or back in the air fryer at 300°F for 2-3 minutes. Let them cool completely before storing again. This brings back that fresh-roasted texture and makes them taste like you just made them.
Freezing instructions: You can freeze roasted pumpkin seeds for up to 3 months. Let them cool completely, then transfer to a freezer-safe bag or container. Squeeze out as much air as possible before sealing. To thaw, just let them come to room temperature on the counter. They might be slightly less crispy after freezing, so you may want to re-crisp them in the oven or air fryer before serving.
One thing I’ve noticed is that the flavors continue to develop over the first day or two. The salt melds into the seeds, and any spices you’ve added become more pronounced. So if you can resist eating them all on day one, they’ll taste even better on day two. Not that I’ve ever managed to wait that long.
Nutritional Information & Benefits
These Quick Air Fryer Roasted Pumpkin Seeds with Sea Salt aren’t just delicious—they’re packed with nutrition too. Here’s what you’re getting in a typical 1/4-cup serving (about 30 grams):
- Calories: Approximately 150-170 calories
- Protein: 8-9 grams
- Healthy Fats: 13-15 grams (mostly unsaturated)
- Fiber: 2-3 grams
- Carbohydrates: 4-5 grams
- Iron: 15% of the Daily Value
- Magnesium: 35% of the Daily Value
- Zinc: 20% of the Daily Value
Pumpkin seeds are a nutritional powerhouse. They’re one of the best plant-based sources of magnesium, which supports muscle function, sleep quality, and bone health. The zinc content is great for immune function and skin health, and the iron helps with energy levels. Plus, they’re rich in antioxidants like vitamin E and carotenoids, which help protect your cells from damage.
For anyone watching their carbohydrate intake, these seeds are naturally low-carb and keto-friendly. They’re also a good source of plant-based protein, making them a satisfying snack that keeps you full between meals. The healthy fats, particularly the omega-6 and omega-3 fatty acids, support heart health and brain function.
One thing to keep in mind: pumpkin seeds are high in calories, so portion control is important if you’re watching your weight. A quarter-cup serving is plenty for a satisfying snack. Also, because they’re high in fiber, eating too many at once can cause digestive discomfort for some people. Start with a small handful and see how you feel.
From a wellness perspective, I love that this recipe turns a byproduct of pumpkin carving into a healthy, delicious snack. It’s a small way to reduce food waste while nourishing your body. And because you’re controlling the oil and salt, you can make them as healthy or indulgent as you like.
Conclusion
I still think about that late October night when I first made these Quick Air Fryer Roasted Pumpkin Seeds with Sea Salt. It was one of those happy accidents that turned into a staple in my kitchen. The fact that something so simple—just seeds, oil, and salt—could be so satisfying still amazes me. And the air fryer makes it almost too easy. No preheating a big oven, no waiting forever, no complicated steps. Just 10 minutes and you’ve got a snack that’s better than anything you can buy at the store.
What I love most about this recipe is how adaptable it is. You can keep it simple with just sea salt, or you can go wild with spices and seasonings. You can make it for a party or just for yourself on a quiet weeknight. You can use fresh pumpkin seeds from your fall decorations or grab a bag of raw pepitas from the store. However you make them, they’re going to be good.
I really hope you give these a try. Whether you’re carving pumpkins with your kids, looking for a healthy snack to get you through the afternoon, or just wanting to try something new in your air fryer, these seeds are worth the 10 minutes they take to make. And if you come up with your own flavor combination, I’d love to hear about it. Drop a comment below and let me know how they turned out—or share your favorite seasoning blend. Happy snacking!
Frequently Asked Questions
Do I have to boil pumpkin seeds before air frying?
Nope, not at all! That’s one of the best things about this recipe. Traditional oven methods often call for boiling the seeds first to help them crisp up, but the air fryer’s circulating hot air does the job perfectly without that extra step. Just clean, dry, season, and cook. It saves you about 15 minutes and a pot to wash.
Can I use store-bought raw pumpkin seeds instead of fresh?
Absolutely. In fact, I often use raw pepitas (the green, hulled pumpkin seeds) from the store when I’m not carving pumpkins. They cook even faster than fresh seeds because they don’t have the white hull, so check them at the 5-minute mark. The flavor is slightly different—more nutty and less earthy—but just as delicious.
Why are my air fryer pumpkin seeds chewy instead of crispy?
Chewy seeds are usually the result of one of two things: they weren’t dry enough before cooking, or they were overcrowded in the basket. Make sure you pat them dry thoroughly after washing, and spread them in a single layer with space between each seed. If you have a lot of seeds, cook them in batches. Also, let them cool completely after cooking—they continue to crisp up as they cool.
Can I make these without oil?
Yes, you can dry-roast pumpkin seeds in the air fryer without any oil. They’ll still get crispy, though the texture will be slightly different—a bit more brittle and less rich. Just keep a close eye on them because they can burn faster without the oil’s protective coating. Start checking at the 5-minute mark. You might also want to spray them with a little cooking spray afterward to help the salt stick.
How long do these stay fresh, and can I freeze them?
Stored in an airtight container at room temperature, these seeds stay fresh and crispy for up to 2 weeks. Yes, you can freeze them for up to 3 months—just make sure they’re completely cool before freezing, and use a freezer-safe container. When you’re ready to eat them, let them thaw on the counter and re-crisp in the air fryer at 300°F for 2-3 minutes if needed.
Pin This Recipe!
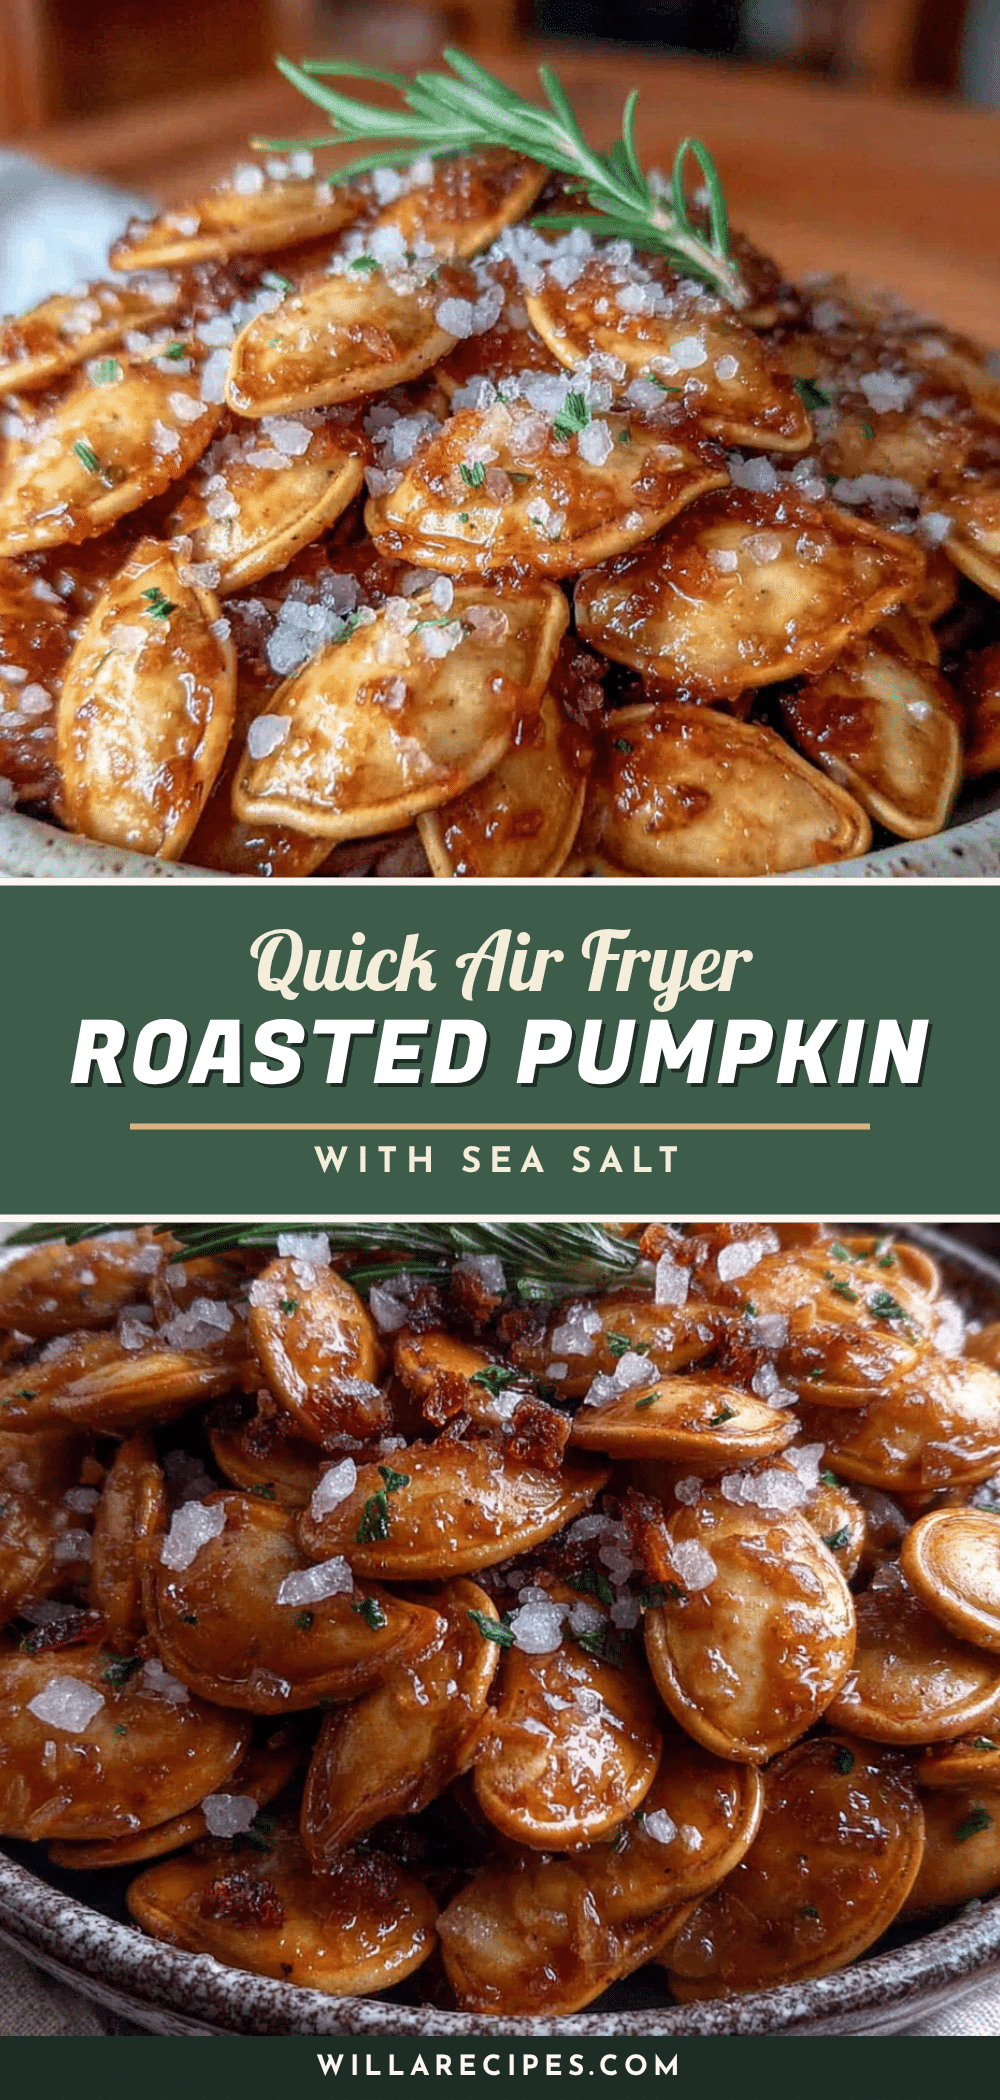
Quick Air Fryer Roasted Pumpkin Seeds – Best Easy Sea Salt Recipe

These Quick Air Fryer Roasted Pumpkin Seeds with Sea Salt are perfectly crispy, golden, and ready in under 15 minutes. Made with just pumpkin seeds, oil, and sea salt, they’re the ultimate easy snack for Halloween, game day, or any time you crave something salty and crunchy.
- Prep Time: 10 minutes
- Cook Time: 8 minutes
- Total Time: 18 minutes
- Yield: 4 servings 1x
- Category: Snack
- Cuisine: American
Ingredients
- 1 cup pumpkin seeds (fresh from pumpkin or raw pepitas)
- 1 tablespoon olive oil or avocado oil
- 1/2 to 1 teaspoon sea salt (flaky or fine)
- Optional: 1/2 teaspoon garlic powder
- Optional: 1/2 teaspoon smoked paprika
- Optional: 1/4 teaspoon cayenne pepper
- Optional: zest of half a lime (added after roasting)
- Optional: 1 tablespoon everything bagel seasoning
Instructions
- Clean the seeds: If using fresh pumpkin seeds, separate them from the pulp by rinsing in a colander under cold water. Remove any large pieces of pulp.
- Dry the seeds thoroughly: Spread cleaned seeds on a clean kitchen towel or paper towels and pat dry. Let sit for 5 minutes to air-dry, or use a salad spinner for faster drying.
- Preheat air fryer to 350°F (175°C) for 3 minutes.
- Toss seeds with oil: Place dried seeds in a medium bowl, drizzle with 1 tablespoon oil, and toss until evenly coated. If using dry seasonings (garlic powder, smoked paprika, cayenne), add now and toss.
- Arrange seeds in a single layer in the air fryer basket. Do not overcrowd; cook in batches if needed.
- Air fry at 350°F for 5 minutes.
- Shake the basket and break apart any clumps with a spatula.
- Air fry for another 3-5 minutes, until golden brown and hollow-sounding when shaken. Start checking at 3 minutes.
- Immediately transfer hot seeds to a bowl and sprinkle with sea salt while still hot. Start with 1/2 teaspoon, toss, taste, and add more if needed.
- Spread seeds on a plate or baking sheet in a single layer and let cool completely (at least 10 minutes) before serving.
Notes
For best results, dry seeds thoroughly before cooking to avoid sogginess. If seeds burn on outside but are soft inside, lower temperature to 325°F next time. Season with salt after cooking to maintain crispiness. Seeds continue to crisp as they cool. Store in an airtight container at room temperature for up to 2 weeks. To re-crisp, air fry at 300°F for 2-3 minutes.
Nutrition
- Serving Size: 1/4 cup (about 30 gr
- Calories: 160
- Sugar: 1
- Sodium: 150
- Fat: 14
- Saturated Fat: 2.5
- Carbohydrates: 5
- Fiber: 2
- Protein: 8
Keywords: air fryer pumpkin seeds, roasted pumpkin seeds, sea salt pumpkin seeds, easy pumpkin seeds, quick snack, Halloween snack, healthy snack, gluten-free, vegan