There used to be a little bakery called “The Mud Puddle” tucked between a dry cleaner and a hardware store in my old neighborhood. They made these Halloween dirt cups that were legendary—layered chocolate pudding, crushed Oreos, and gummy worms peeking out like they were escaping a grave. When they closed three years ago, I honestly felt a little lost. No more grabbing a cup on my way to a party. No more that perfect ratio of creamy to crunchy. After seven tries—one was a soupy disaster, another had the wrong kind of worm—I finally cracked it. Let me tell you, this version might even be better than the original.
These dirt cups are the kind of dessert that makes people stop mid-conversation. You know that feeling when you set something on the table and everyone just goes quiet for a second? That’s this recipe. I brought them to a Halloween potluck last year, and a friend actually said, “Hand me that bowl,” before I even finished explaining what they were. They disappeared in under ten minutes. Honestly, I should have made a double batch.
The best part? They’re ridiculously easy to pull off. No baking, no complicated steps, just a little layering and some fridge time. You can make them the night before your party, which is a lifesaver when you’re already juggling decorations and costumes. And the gummy worms—well, they’re the star of the show. Kids love them, adults pretend to be grossed out, and then they eat three. It’s pure Halloween magic in a cup.
Why You’ll Love This Recipe
I’ve tested this recipe at four different gatherings now, and it’s never let me down. Here’s why it works so well for hosts like you:
- No-Bake Magic : Comes together in about 20 minutes of active time. The hardest part is waiting for the pudding to set. Perfect for busy Halloween weeknights.
- Simple Ingredients : You probably have most of this stuff already. Pudding mix, milk, Oreos, cream cheese, and gummy worms. No fancy grocery trips needed.
- Perfect for Parties : Great for Halloween parties, potlucks, spooky movie nights, or even classroom treats. They travel well and look impressive on a dessert table.
- Crowd-Pleaser : I’ve seen picky eaters, grown adults, and even my grandma go back for seconds. The combination of creamy pudding and crunchy cookies is universally loved.
- Unbelievably Delicious : The texture is next-level comfort food. The pudding is silky, the Oreo crumbs add that perfect crunch, and the cream cheese gives it a tangy richness that store-bought versions just don’t have.
What makes this recipe different from all the other dirt cup recipes out there? It’s the cream cheese. Most versions just use instant pudding and Cool Whip, but adding softened cream cheese gives the pudding layer a velvety, almost cheesecake-like texture. It’s richer, more satisfying, and honestly, it tastes like you spent way more effort than you actually did. Plus, I use a trick of crushing the Oreos in a zip-top bag with a rolling pin—it’s faster than a food processor and gives you those perfect dirt-like crumbs with some texture variation.
This recipe isn’t just good—it’s the kind that makes you close your eyes after the first bite. It’s comfort food reimagined for Halloween: spooky, fun, but with the same soul-soothing satisfaction as your favorite childhood dessert. Perfect for impressing guests without stress, or turning a simple get-together into something memorable. Let’s be real—when you show up with these, you’re the hero of the party.
What Ingredients You Will Need
This recipe uses simple, everyday ingredients to deliver that perfect dirt cup experience. Most of these are pantry staples, and the rest are easy to find at any grocery store.
- 1 (3.9 oz) box instant chocolate pudding mix (I prefer Jell-O brand for consistent results; the sugar-free version works too)
- 2 cups cold whole milk (2% works fine, but whole milk gives the richest texture; use oat milk for dairy-free)
- 4 oz cream cheese, softened to room temperature (adds that tangy richness; Philly is my go-to)
- 1/4 cup powdered sugar (helps sweeten and stabilize the cream cheese)
- 1 (8 oz) tub Cool Whip, thawed (or homemade whipped cream if you’re feeling fancy)
- 1 (14.3 oz) package Oreo cookies (about 36 cookies; regular or double-stuf both work)
- 1 cup gummy worms (the sour kind add a nice tangy contrast, but classic ones are great too)
- Optional: green food coloring (for making “slime” pudding, if you want extra spooky vibes)
- Optional: small plastic cups or clear cups (4 to 6 oz size works best; clear cups show off the layers)
For the Topping (optional but fun):
- Extra crushed Oreos (for a thicker “dirt” layer)
- Extra gummy worms (for decoration)
- Edible eyes or Halloween sprinkles (adds a cute spooky touch)
Ingredient Selection Tips: Look for full-fat cream cheese for the best texture—low-fat versions can make the pudding watery. If you’re using homemade whipped cream, make sure it’s stiff so the layers hold up. For the gummy worms, I recommend buying a big bag because you’ll want extra for snacking and decorating. The sour worms actually work really well here because the tanginess cuts through the sweetness of the pudding.
Substitution Guidance: For a gluten-free version, use gluten-free chocolate sandwich cookies (like Glutino’s) and double-check your pudding mix. For dairy-free, use vegan cream cheese, coconut whipped cream, and oat milk. The texture will be slightly different, but still delicious. You can also swap the Oreos for chocolate graham crackers or chocolate wafer cookies if you want a different crumb texture.
Equipment Needed
You don’t need fancy equipment for these dirt cups, which is part of their charm. Here’s what you’ll need:
- Large mixing bowls (one for the pudding, one for the cream cheese mixture)
- Electric hand mixer or stand mixer (a whisk works too, but your arm will get tired)
- Zip-top freezer bags (gallon size works best for crushing Oreos)
- Rolling pin or heavy-bottomed pan (for crushing Oreos into dirt)
- Measuring cups and spoons
- Spatula (for scraping every last bit of pudding)
- Clear plastic cups or small mason jars (4 to 6 oz each; clear cups let you see the layers)
- Refrigerator space (they need at least 2 hours to chill)
If you don’t have a rolling pin, a wine bottle or even a heavy skillet works just as well for crushing Oreos. I’ve used a clean coffee mug in a pinch—it’s not pretty, but it gets the job done. For the cups, I like using clear plastic ones from the party supply store because they’re cheap and show off the layers beautifully. You can also use small mason jars for a more rustic look. Just make sure they’re wide enough to fit a spoon.
One tip: if you’re making a big batch for a party, consider using disposable cups with lids. They’re easier to transport and keep the dirt cups fresh. I learned that the hard way after a car ride full of spilled pudding.
Preparation Method
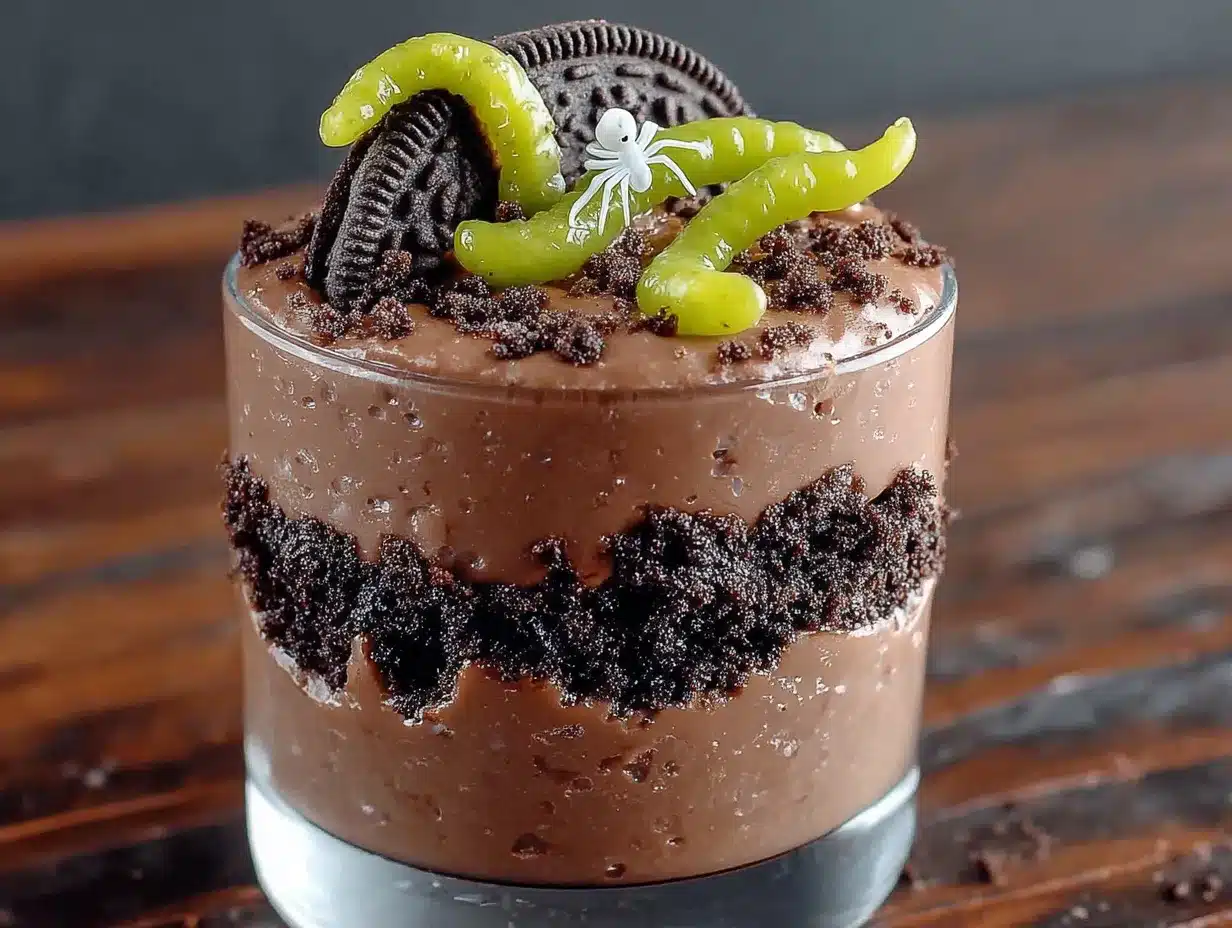
Let’s get to the fun part. Here’s how to make these Halloween dirt cups step by step. Trust me, the process is almost as enjoyable as eating them.
- Crush the Oreos. Place the entire package of Oreos (cream filling and all) into a large zip-top bag. Seal it, then use a rolling pin to crush them into fine crumbs. You want a mix of fine dirt-like powder and slightly larger chunks for texture. Don’t overdo it—some bigger pieces add a nice crunch. Set aside about 1/4 cup for topping if you want extra “dirt” on top.
- Make the cream cheese mixture. In a large bowl, beat the softened cream cheese with the powdered sugar until smooth and fluffy. This takes about 2 minutes with an electric mixer. Make sure there are no lumps—this is key for a silky texture. Scrape down the sides of the bowl with a spatula.
- Prepare the pudding. In a separate bowl, whisk together the instant chocolate pudding mix and cold milk. Whisk for about 2 minutes until it starts to thicken. Let it sit for 5 minutes to set up slightly. It should be thick but still pourable.
- Combine everything. Fold the pudding into the cream cheese mixture until well combined. Don’t overmix—you want it smooth, not runny. Then gently fold in the Cool Whip until the mixture is uniform. This is your “dirt” base. It should be thick, creamy, and a little bit decadent.
- Layer the cups. Spoon about 2 tablespoons of crushed Oreos into the bottom of each cup. This forms the first “dirt” layer. Then add a generous layer of the pudding mixture—about 3 to 4 tablespoons, depending on your cup size. Smooth it out with the back of a spoon.
- Add the worms. Press 2 to 3 gummy worms into the pudding layer so they’re partially sticking out. This is where the fun happens—make it look like they’re crawling out of the dirt. You can arrange them in different positions for a more dramatic effect.
- Top with more dirt. Sprinkle a thick layer of crushed Oreos over the pudding, covering the worms. Make sure the worms are still visible—you want them peeking out like they’re escaping. Add a few extra gummy worms on top for decoration if you like.
- Chill. Refrigerate the dirt cups for at least 2 hours, or overnight. This allows the pudding to set and the flavors to meld together. The longer they sit, the better they taste. I’ve made them a day ahead with great results.
- Serve cold. Right before serving, add any extra decorations like edible eyes or Halloween sprinkles. Serve straight from the fridge for the best texture. Watch them disappear!
Pro Tip: If you want extra spooky vibes, add a few drops of green food coloring to the pudding mixture before folding in the Cool Whip. It gives the pudding a “slime” look that’s perfect for Halloween. My niece called it “witch’s brew pudding” and that name stuck.
Cooking Tips & Techniques
I’ve made these dirt cups more times than I can count, and I’ve learned a few things along the way. Here are my best tips for getting them perfect every time.
Room temperature cream cheese is non-negotiable. I learned this the hard way when I tried to rush it. Cold cream cheese doesn’t blend smoothly and leaves lumps in your pudding. Let it sit on the counter for 30 minutes before starting. If you’re in a hurry, microwave it for 10 seconds at half power—but watch it closely.
Don’t overmix the pudding. When you combine the pudding mix with milk, stop as soon as it starts to thicken. Overmixing can make it thin and watery. Let it set for those 5 minutes before folding it into the cream cheese mixture. Patience pays off here.
Crush Oreos in batches. If you’re making a large batch, crush the Oreos in two or three bags instead of one. It’s easier to get even crumbs, and you won’t risk tearing the bag. I once had a bag explode all over my kitchen—not fun.
Layer strategically. The key to a good dirt cup is visible layers. Use clear cups so everyone can see the dirt, the pudding, and the worms. Don’t skimp on the Oreo layer at the bottom—it gives the cup structure and adds that satisfying crunch.
Make ahead and relax. These dirt cups actually taste better the next day. The Oreo crumbs soften slightly and meld with the pudding, creating a more cohesive texture. Make them a day before your party and you’ll have one less thing to worry about. Just add the extra gummy worms on top right before serving so they stay bright and chewy.
Timing is everything. The pudding needs at least 2 hours to set, but overnight is ideal. If you’re short on time, use a shallow pan instead of cups—it sets faster. But honestly, the individual cups are worth the wait. They’re so much fun to serve.
Variations & Adaptations
One of the best things about this recipe is how easy it is to customize. Here are some variations I’ve tried and loved.
Peanut Butter Dirt Cups. Add 1/4 cup of creamy peanut butter to the cream cheese mixture before folding in the Cool Whip. It adds a rich, nutty flavor that pairs beautifully with the chocolate. My husband calls these “Reese’s cups” and requests them for every party.
Vegan Dirt Cups. Use vegan cream cheese, coconut whipped cream, and oat milk. Swap the Oreos for gluten-free chocolate sandwich cookies if needed. The texture is slightly lighter, but still delicious. I made these for a vegan friend and she couldn’t tell the difference.
Pumpkin Spice Dirt Cups. For a fall twist, add 1/2 cup of pumpkin puree and 1 teaspoon of pumpkin pie spice to the pudding mixture. Use crushed ginger snaps instead of Oreos for the “dirt.” Top with candy corn instead of gummy worms. It’s a Thanksgiving-approved dessert.
Low-Sugar Version. Use sugar-free pudding mix and Cool Whip, and swap the Oreos for sugar-free chocolate cookies. The cream cheese and powdered sugar can be replaced with a sugar-free cream cheese alternative. It’s not quite as indulgent, but it satisfies the craving without the sugar crash.
Spooky Slime Cups. Add a few drops of green food coloring to the pudding mixture and use sour gummy worms for extra tang. Top with edible eyes and Halloween sprinkles. Kids absolutely lose their minds over these. I made them for a classroom party and was asked for the recipe by three different parents.
Serving & Storage Suggestions
These dirt cups are best served cold, straight from the fridge. The contrast between the creamy pudding and the crunchy Oreo crumbs is at its peak when they’re chilled. If you’re serving them at a party, set them on a tray with some extra gummy worms scattered around for a spooky effect.
What to serve alongside: These pair beautifully with other Halloween treats like pumpkin-shaped cookies, caramel apples, or a warm mug of apple cider. For a full dessert table, add some ghost-shaped meringues or chocolate-dipped pretzels. The dirt cups are the star, but they play well with others.
Storage: Cover the cups with plastic wrap or lids and refrigerate for up to 3 days. The Oreo crumbs will soften over time, which some people actually prefer. If you want to keep them crunchy, add the top layer of Oreo crumbs just before serving. I’ve also frozen them successfully—just wrap each cup tightly and freeze for up to a month. Thaw in the fridge overnight before serving.
Reheating: Don’t. These are meant to be served cold. If you want a warm dessert, try a chocolate lava cake instead. These dirt cups are all about that chilled, creamy texture.
Flavor development: The flavors really meld together after 24 hours in the fridge. The cream cheese and pudding become one cohesive layer, and the Oreo crumbs absorb just enough moisture to feel like real dirt. It’s honestly better the next day. I always make mine a day ahead for the best results.
Nutritional Information & Benefits
Let’s be honest—these dirt cups are a treat, not a health food. But here’s the approximate nutritional breakdown for one serving (based on 8 servings):
- Calories: 380
- Fat: 18g
- Carbohydrates: 52g
- Protein: 6g
- Sugar: 38g
- Fiber: 2g
Health Benefits: The cream cheese provides a small amount of calcium and protein. The cocoa in the pudding has antioxidants, and the gummy worms… well, they’re mostly sugar. But hey, it’s Halloween. Everything in moderation, right?
Dietary Considerations: This recipe contains dairy and gluten. For a gluten-free version, use gluten-free chocolate sandwich cookies. For dairy-free, use vegan alternatives. The sugar content is high, so this is definitely a special occasion dessert. I don’t make these every week, but for Halloween? Absolutely worth it.
Personal Perspective: I believe in enjoying food without guilt. These dirt cups are a celebration of Halloween fun, and sometimes that means indulging. Balance it out with a healthy dinner and a walk around the neighborhood for trick-or-treating. Life’s too short to skip dessert.
Conclusion
These Halloween dirt cups with gummy worms are more than just a dessert—they’re a memory in the making. They’re the kind of treat that makes people smile, laugh, and reach for seconds. Whether you’re hosting a spooky party or just want to surprise your family, this recipe delivers every time.
What I love most about these dirt cups is how they bring people together. I’ve seen kids argue over who gets the worm with the most candy coating. I’ve watched adults sneak one when they thought no one was looking. It’s pure, uncomplicated joy in a cup. And honestly, that’s what Halloween is all about.
So go ahead and make a batch. Customize them with your favorite gummy candies, add some edible eyes, or keep it classic. Whatever you do, make sure you make enough—because trust me, they’re going to disappear fast. I’d love to hear how yours turn out! Drop a comment below and tell me about your Halloween party or your favorite dirt cup variation. Share this recipe with a friend who loves spooky desserts, and let’s spread the dirt cup love.
Happy Halloween, and happy eating!
Frequently Asked Questions
Can I make these dirt cups ahead of time?
Absolutely! In fact, they taste better the next day. Make them up to 24 hours in advance and keep them refrigerated. Just add the extra gummy worms on top right before serving to keep them bright and chewy.
Can I use homemade pudding instead of instant?
Yes, but the texture will be different. Homemade pudding is thinner and may not set as firmly. If you use homemade, cook it until it’s very thick and let it cool completely before layering. Instant pudding is more reliable for this recipe.
How do I prevent the gummy worms from getting soggy?
Press the worms into the pudding layer so only the top half is exposed. The part in the pudding will soften slightly, which actually makes them more “worm-like” in texture. The exposed part stays chewy. If you’re making them a day ahead, add a few fresh worms on top just before serving.
Can I freeze these dirt cups?
Yes! Wrap each cup tightly in plastic wrap and freeze for up to a month. Thaw in the fridge overnight before serving. The texture will be slightly different—the Oreo crumbs will be softer—but they’re still delicious.
What size cups should I use?
I recommend 4 to 6 oz clear plastic cups. They’re the perfect single-serving size and show off the layers beautifully. You can also use small mason jars or even shot glasses for mini versions. Just adjust the layering amounts accordingly.
Pin This Recipe!
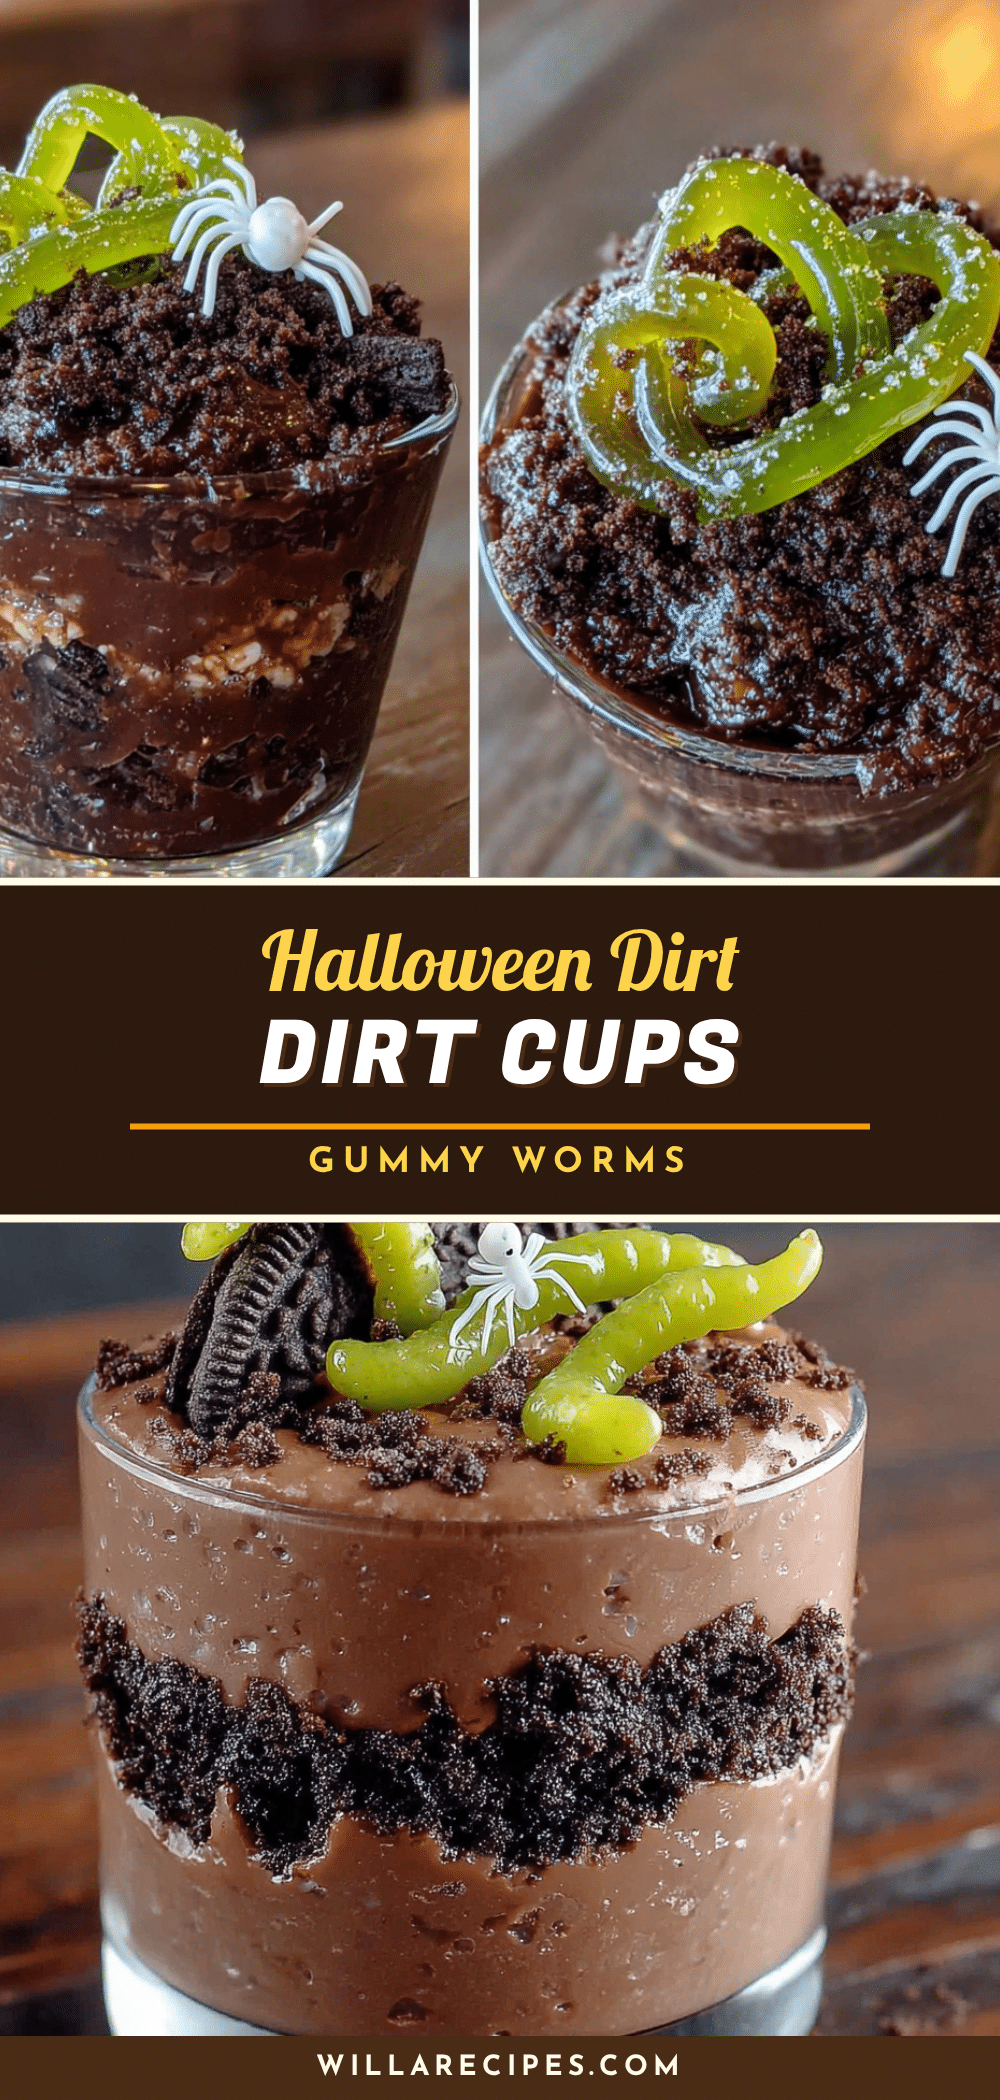
Best Halloween Dirt Cups with Gummy Worms: Easy Recipe
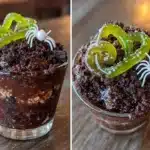
These no-bake Halloween dirt cups feature layers of creamy chocolate pudding, crushed Oreos, and gummy worms peeking out like they’re escaping a grave. A cream cheese addition gives the pudding a velvety, cheesecake-like texture that makes this version even better than the original.
- Prep Time: 20 minutes
- Cook Time: 0 minutes
- Total Time: 2 hours 20 minutes (includes chilling time)
- Yield: 8 servings 1x
- Category: Dessert
- Cuisine: American
Ingredients
- 1 (3.9 oz) box instant chocolate pudding mix
- 2 cups cold whole milk
- 4 oz cream cheese, softened to room temperature
- 1/4 cup powdered sugar
- 1 (8 oz) tub Cool Whip, thawed
- 1 (14.3 oz) package Oreo cookies (about 36 cookies)
- 1 cup gummy worms
- Optional: green food coloring
- Optional: small plastic cups or clear cups (4 to 6 oz size)
- For the topping (optional): extra crushed Oreos, extra gummy worms, edible eyes or Halloween sprinkles
Instructions
- Crush the Oreos. Place the entire package of Oreos (cream filling and all) into a large zip-top bag. Seal it, then use a rolling pin to crush them into fine crumbs. You want a mix of fine dirt-like powder and slightly larger chunks for texture. Set aside about 1/4 cup for topping if desired.
- Make the cream cheese mixture. In a large bowl, beat the softened cream cheese with the powdered sugar until smooth and fluffy, about 2 minutes with an electric mixer. Scrape down the sides of the bowl.
- Prepare the pudding. In a separate bowl, whisk together the instant chocolate pudding mix and cold milk for about 2 minutes until it starts to thicken. Let it sit for 5 minutes to set up slightly.
- Combine everything. Fold the pudding into the cream cheese mixture until well combined. Then gently fold in the Cool Whip until the mixture is uniform.
- Layer the cups. Spoon about 2 tablespoons of crushed Oreos into the bottom of each cup. Then add a generous layer of the pudding mixture—about 3 to 4 tablespoons. Smooth it out.
- Add the worms. Press 2 to 3 gummy worms into the pudding layer so they’re partially sticking out, as if crawling out of the dirt.
- Top with more dirt. Sprinkle a thick layer of crushed Oreos over the pudding, covering the worms but leaving them visible. Add extra gummy worms on top for decoration if desired.
- Chill. Refrigerate the dirt cups for at least 2 hours, or overnight.
- Serve cold. Right before serving, add any extra decorations like edible eyes or Halloween sprinkles. Serve straight from the fridge.
Notes
Room temperature cream cheese is essential for a smooth texture. For extra spooky vibes, add a few drops of green food coloring to the pudding mixture. These dirt cups taste even better the next day. For gluten-free, use gluten-free chocolate sandwich cookies. For dairy-free, use vegan cream cheese, coconut whipped cream, and oat milk.
Nutrition
- Serving Size: 1 dirt cup
- Calories: 380
- Sugar: 38
- Sodium: 320
- Fat: 18
- Saturated Fat: 10
- Carbohydrates: 52
- Fiber: 2
- Protein: 6
Keywords: Halloween dirt cups, gummy worms, no-bake dessert, chocolate pudding, Oreo, spooky dessert, easy Halloween recipe