Last October, I was standing in the party supply aisle, staring at a bag of plastic skeletons, and I had one of those moments where you just know something is about to click. My neighbor, a woman named Clara who I’d only ever traded waves with, spotted me wrestling with a giant bag of fake spider webs. She didn’t say anything at first. Then she just laughed, walked over, and tossed a bag of pretzel sticks into my cart. “You’re overthinking it,” she said. “Halloween snacks should look like a mess. That’s the whole point.”
That conversation—which lasted maybe ten minutes, right there by the clearance candy—changed how I approach holiday food entirely. Clara told me about a tradition her family had where they’d dump everything snack-related onto a big board and call it a “graveyard.” No rules, no fancy presentation, just salty, sweet, and creepy all mixed together. I went home that night, grabbed a cutting board, and started building my first Spooky Graveyard Snack Mix Charcuterie Board. Honestly, I burned the popcorn that first time (the smoke alarm went off, and my cat hid under the couch for an hour), but the board itself? It was perfect.
This recipe is my version of what Clara started. It’s not about precision—it’s about the joy of throwing things together and watching people’s faces light up. Maybe you’ve been there, standing in a store, trying to make Halloween perfect and feeling like you’re failing. Let me tell you, this board is the opposite of that. It’s forgiving, it’s fun, and it tastes like the best kind of chaos. I keep making it because every time I set it out, someone says, “Wait, I can just eat the tombstone?” And that reaction never gets old.
Why You’ll Love This Recipe
I’ve tested this Spooky Graveyard Snack Mix Charcuterie Board at three different Halloween parties now, and it’s never failed. Here’s why it works so well:
- Quick & Easy: Comes together in under 20 minutes. No baking, no cooking (unless you want to make your own snack mix, which I’ll show you). Perfect for last-minute Halloween gatherings or a fun family movie night.
- Simple Ingredients: Everything comes from the snack aisle or your pantry. You don’t need specialty stores or weird ingredients. Pretzels, popcorn, candy corn, chocolate—the usual suspects.
- Perfect for Halloween Parties: It’s the centerpiece that doubles as the snack. Guests graze while they mingle, and it keeps them out of the kitchen while you’re prepping other things.
- Crowd-Pleaser: Kids love the “graveyard” theme, and adults appreciate the mix of salty and sweet. I’ve watched people pick out the candy eyeballs first, then go back for the pretzel “bones.”
- Unbelievably Delicious: The combination of crunchy, salty, sweet, and a little bit spooky is next-level comfort food. The texture contrast between the crispy snack mix and the smooth chocolate is what makes people keep reaching for more.
What makes this recipe different from other Halloween snack boards is the “graveyard” concept itself. It’s not just a pile of snacks on a board—it’s a storytelling element. The tombstones (chocolate bars or cookies), the “dirt” (crushed Oreos or chocolate cereal), and the “bones” (pretzel sticks) all work together to create a scene. It’s not just another version of a charcuterie board; it’s your best version of Halloween fun. And honestly, it’s the kind of recipe that makes you close your eyes after the first bite because the salty-sweet combo hits just right.
What Ingredients You Will Need
This recipe uses simple, mostly store-bought ingredients to deliver maximum Halloween flavor with minimal effort. You can customize almost everything based on what you have or what your family loves. Here’s what I use for my go-to Spooky Graveyard Snack Mix Charcuterie Board:
For the “Graveyard” Base
- 6 cups popped popcorn (plain or lightly salted; I use air-popped to keep it light, but microwave works fine)
- 3 cups pretzel sticks (these become the “bones” and fence posts)
- 2 cups cheese crackers (like Goldfish or Cheez-Its; adds a savory, cheesy element)
- 1 cup roasted, salted peanuts (or almonds if you prefer; adds crunch and protein)
- 1 cup candy corn (the classic Halloween candy; use the autumn mix for variety)
- 1 cup candy pumpkins (the little marshmallow ones, like “Pumpkin Spice” or “Autumn Mix”)
- 1/2 cup chocolate-covered raisins or peanuts (adds a chocolate hit without melting everywhere)
- 1/2 cup dried cranberries or cherries (for a tart pop that balances the sweetness)
For the “Tombstones” & Decorations
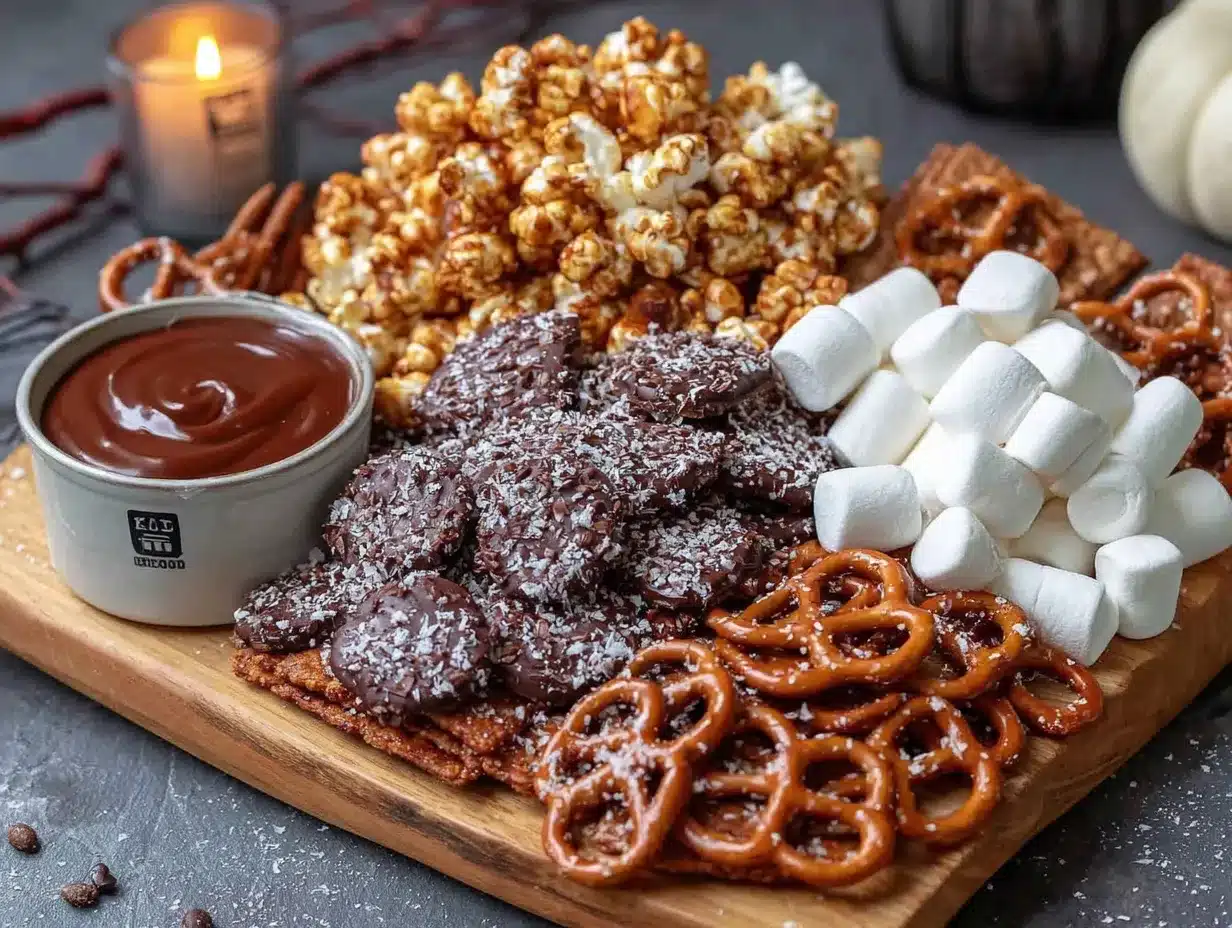
- 4-6 chocolate bars or cookies (I use Milano cookies or rectangular chocolate bars; you’ll write “RIP” on them with icing)
- 1/2 cup white chocolate melting wafers or candy melts (for writing on tombstones; I recommend Wilton brand for smooth melting)
- 1/4 cup black gel icing or food-safe marker (easier than piping if you’re not confident with a piping bag)
- 12-15 candy eyeballs (the edible kind; they’re sold in the baking aisle near sprinkles)
- 1/2 cup crushed chocolate cookies (like Oreos) (this becomes the “dirt” for the graveyard)
- Optional: gummy worms, plastic spiders, or skeleton hands (for extra creepy factor; make sure they’re food-safe if they touch the food)
For the Snack Mix (Optional Homemade Version)
If you want to make your own snack mix instead of using store-bought, here’s what you need:
- 4 cups crispy rice cereal squares (like Chex or Crispix)
- 2 cups pretzel twists (broken into pieces)
- 1 cup mixed nuts (unsalted preferred)
- 3 tablespoons melted butter (or coconut oil for dairy-free)
- 2 tablespoons Worcestershire sauce (adds that savory umami flavor)
- 1 teaspoon garlic powder
- 1 teaspoon onion powder
- 1/2 teaspoon smoked paprika (for a subtle smoky depth)
- Salt to taste
Ingredient Tips: For the best texture, I recommend using a mix of crunchy and soft elements. The candy corn and pumpkins add chewiness, while the pretzels and crackers add crunch. If you’re making this for a party with nut allergies, swap the peanuts for sunflower seeds or roasted chickpeas. And for the chocolate tombstones, I’ve found that Milano cookies hold up better than thin chocolate bars because they don’t crack when you write on them.
Equipment Needed
You don’t need anything fancy to build this Spooky Graveyard Snack Mix Charcuterie Board. Here’s what I use:
- Large wooden cutting board or serving platter (at least 12×18 inches; a baking sheet works in a pinch)
- Small piping bag or zip-top bag (for writing on tombstones with melted chocolate)
- Small bowls or ramekins (for holding candy eyeballs, gummy worms, or smaller items)
- Spatula or spoon (for arranging the snack mix without crushing it)
- Parchment paper (optional, for easy cleanup)
- Toothpicks or small skewers (for holding up tombstones or decorating)
If you don’t have a large board, you can use a sheet pan, a pizza stone, or even a clean cookie sheet. I’ve used a cheap wooden cutting board from IKEA for years, and it works perfectly. For the piping bag, a simple zip-top bag with the corner snipped off does the job just as well as a fancy pastry bag. Don’t overthink the equipment—this recipe is about the fun, not the presentation perfection.
Preparation Method
Building this Spooky Graveyard Snack Mix Charcuterie Board is straightforward, but I’ve learned a few tricks along the way. Follow these steps, and you’ll have a board that looks like it took hours (it didn’t).
- Prepare the tombstones (5 minutes): Lay your chocolate bars or cookies on a piece of parchment paper. Melt the white chocolate wafers according to package directions (usually 30-second bursts in the microwave, stirring in between). Transfer the melted white chocolate to a small piping bag or zip-top bag, snip a tiny corner, and pipe “RIP,” “Boo,” or “2024” onto each tombstone. Let them set for about 10 minutes at room temperature, or pop them in the fridge for 5 minutes if you’re in a hurry. Pro tip: If your handwriting is shaky (mine is), use black gel icing instead—it’s much easier to control.
- Make the “dirt” (2 minutes): Place the chocolate cookies in a zip-top bag and crush them with a rolling pin or the bottom of a measuring cup. You want a mix of fine crumbs and small chunks—not powder, not boulders. Aim for something that looks like garden soil. Set aside in a small bowl.
- Prepare the snack mix (if making homemade) (15 minutes): Preheat your oven to 250°F (120°C). In a large bowl, combine the cereal squares, broken pretzels, and mixed nuts. In a small bowl, whisk together the melted butter, Worcestershire sauce, garlic powder, onion powder, smoked paprika, and salt. Pour the butter mixture over the dry ingredients and toss until everything is evenly coated. Spread the mixture in a single layer on a baking sheet lined with parchment paper. Bake for 10 minutes, stirring halfway through. Let it cool completely on the baking sheet—it will crisp up as it cools. This step is optional, but the homemade version has a savory depth that store-bought mix can’t match.
- Assemble the base layer (5 minutes): On your large board or platter, start by spreading the popcorn in an even layer. This creates the “ground” of your graveyard. Don’t pile it too high—you want it to be about 1-2 inches deep so other items can sit on top. Next, scatter the pretzel sticks, cheese crackers, peanuts, candy corn, candy pumpkins, chocolate-covered raisins, and dried cranberries evenly across the popcorn. Think of this as the “filling” of the graveyard. Leave a few clear spaces where you’ll place the tombstones and decorations.
- Add the “dirt” and tombstones (3 minutes): Sprinkle the crushed cookie “dirt” in patches across the board, focusing on areas where the tombstones will go. This creates the illusion of freshly dug graves. Gently press the tombstones into the popcorn and snack mix so they stand upright. If they wobble, use a pretzel stick as a support behind them. Arrange them at slightly different angles for a more authentic graveyard look.
- Decorate with creepy details (5 minutes): Place the candy eyeballs in small clusters around the board—some peeking out from under a pretzel stick, others nestled in the popcorn. Add gummy worms crawling over the edge of the board or through the “dirt.” If you’re using plastic spiders or skeleton hands, position them as if they’re emerging from the snack mix. This is where you can let your creativity run wild. I once arranged the candy eyeballs to spell “BOO” across the board, and it got more photos than the actual food.
- Final touches and serving (2 minutes): Place small bowls or ramekins on the board for any dipping sauces or extra candy (like chocolate sauce or caramel dip for the pretzels). Check that the board looks balanced—you want a mix of colors and textures across the entire surface. Serve immediately at room temperature. The popcorn stays crunchy for about 2-3 hours, but after that, it starts to soften from the moisture in the air. If you’re making this ahead, assemble everything except the popcorn and add it just before serving.
Sensory cues: When you crush the cookies, you should hear a satisfying crackle—not a muffled thud. That means they’re fresh. When you pipe the white chocolate onto the tombstones, it should flow smoothly like thick cream, not drip like water. If it’s too thick, microwave for 5 more seconds. The final board should look like a chaotic Halloween scene—think overgrown cemetery, not tidy garden. The more uneven and messy, the better.
Cooking Tips & Techniques
I’ve made this Spooky Graveyard Snack Mix Charcuterie Board about a dozen times now, and I’ve collected a few hard-earned lessons. Here’s what I wish someone had told me:
Don’t overthink the tombstones. My first attempt, I tried to write cursive “RIP” with melted chocolate, and it looked like a spider had a seizure on the cookie. Now I use black gel icing in a tube—it’s cheaper, easier, and you can control the flow better. Plus, the kids love it when the letters are a little crooked. It adds character.
Keep the popcorn fresh. Popcorn is the backbone of this board, and stale popcorn ruins everything. If you’re making the board more than an hour before serving, store the popcorn in a separate airtight container and add it last. I learned this the hard way when I assembled the board three hours before a party and ended up with sad, chewy popcorn that nobody wanted to eat.
Balance the salty and sweet. This board is all about contrast. If you use too many sweet elements (candy corn, candy pumpkins, chocolate), it becomes cloying. If you go too heavy on the salty (pretzels, peanuts, cheese crackers), it’s one-dimensional. I aim for a 60-40 ratio of salty to sweet. Taste as you go and adjust. The dried cranberries are my secret weapon—they cut through the sweetness and add a bright, tart note.
Watch out for melting chocolate. If your kitchen is warm (above 75°F), the white chocolate on the tombstones might soften and smear. Set the tombstones on a separate plate in the fridge until just before serving. Also, keep chocolate-covered items away from direct heat sources or direct sunlight. I once set the board near a window, and the chocolate raisins started sweating. Not a good look.
Make it a family activity. This is one of those recipes where the preparation is as fun as the eating. Let kids arrange the candy eyeballs, crush the cookies, or place the tombstones. My niece once arranged all the gummy worms in a line leading to the “RIP” tombstone, like they were crawling out of the grave. It was genius. Don’t be afraid to let the board evolve organically.
Variations & Adaptations
One of the best things about this Spooky Graveyard Snack Mix Charcuterie Board is how easy it is to adapt. Here are a few variations I’ve tried:
Gluten-Free Version: Swap the pretzels for gluten-free pretzel sticks (they exist, and they’re surprisingly good). Use gluten-free crackers or rice cakes broken into pieces. For the tombstones, use gluten-free chocolate bars or cookies. Double-check that your candy corn and candy eyeballs are certified gluten-free—most are, but it’s worth verifying.
Nut-Free Version: Replace the peanuts with roasted chickpeas, sunflower seeds, or pumpkin seeds. Skip the mixed nuts in the homemade snack mix and add extra pretzels or cereal. Be careful with chocolate-covered items—some contain nut traces. I use Enjoy Life brand for nut-free chocolate options.
Vegan Version: Use vegan butter or coconut oil for the homemade snack mix. Choose vegan chocolate bars for the tombstones (like Hu Kitchen or Enjoy Life). Most candy corn and candy pumpkins are accidentally vegan, but check the label. Skip the cheese crackers or use a vegan alternative. The board still looks and tastes amazing.
Spicy Version: Add a kick by mixing in spicy chili-lime peanuts, jalapeño-flavored pretzels, or a sprinkle of cayenne pepper over the snack mix. The heat contrasts beautifully with the sweetness of the candy corn. I tried this once for a Halloween party with friends who love spice, and the board was empty in 30 minutes.
Breakfast Graveyard Board: Yes, I’ve done this. For a Halloween morning surprise, use cereal (like Cocoa Puffs or Froot Loops) instead of popcorn, yogurt-covered raisins instead of chocolate, and mini donuts as tombstones. It’s ridiculous and wonderful, and my kids still talk about it.
Serving & Storage Suggestions
This Spooky Graveyard Snack Mix Charcuterie Board is best served at room temperature, right after assembly. The popcorn stays crunchy for about 2-3 hours, so plan your timing accordingly. If you’re serving it at a party, set it out about 15-20 minutes before guests arrive so it looks fresh and inviting.
For presentation: Place the board in the center of your table or snack station. Surround it with small plates or napkins—trust me, people will grab handfuls. If you have Halloween-themed serving utensils (like a skeleton hand spoon), use them. It adds to the theme. I also like to scatter a few extra candy eyeballs around the board for visual pop.
For storage: This board is not designed for long-term storage. The popcorn will go stale, and the candy corn will harden. If you have leftovers, separate the components: store the popcorn in an airtight container at room temperature for up to 2 days (though it won’t be as crunchy), the pretzels and crackers in a separate container, and the candy in a zip-top bag. The tombstones can be stored in an airtight container in the fridge for up to a week.
For reheating: You can’t really “reheat” this board, but if the popcorn has gone soft, you can spread it on a baking sheet and warm it in a 300°F oven for 3-4 minutes to crisp it back up. Let it cool completely before adding it back to the board. The candy elements should stay at room temperature—don’t microwave them, or they’ll melt into a sticky mess.
Flavor development: Unlike some recipes that get better with time, this board is best fresh. The magic is in the contrast of textures—crunchy popcorn, chewy candy, crisp pretzels. After a few hours, everything softens and blends together. That’s not necessarily bad (my kids still eat the leftovers), but for the full experience, serve it within an hour of assembly.
Nutritional Information & Benefits
Let’s be honest—this Spooky Graveyard Snack Mix Charcuterie Board is a treat, not a health food. But that doesn’t mean it’s devoid of nutritional value. Here’s a rough estimate per serving (about 1 cup of the mix):
- Calories: 280-350 (varies based on ingredients)
- Protein: 6-8g (from peanuts, popcorn, and cheese crackers)
- Carbohydrates: 40-50g (mostly from popcorn, pretzels, and candy)
- Fat: 12-18g (from nuts, chocolate, and butter in the snack mix)
- Fiber: 3-5g (popcorn and nuts are good sources)
- Sugar: 15-25g (mainly from candy corn and chocolate)
Health benefits of key ingredients: Popcorn is a whole grain and a good source of fiber. Peanuts provide healthy fats and protein. Dark chocolate (if you use it) contains antioxidants. Even the candy corn, while sugary, offers a small amount of iron and niacin. The key is portion control—this board is meant for grazing, not gorging.
Dietary considerations: This recipe can be made gluten-free, nut-free, or vegan with simple substitutions (see Variations section). It contains common allergens: dairy (chocolate, butter), nuts (peanuts, mixed nuts), gluten (pretzels, crackers), and soy (in some chocolate products). Always check labels if serving guests with allergies.
My personal wellness perspective: I believe in balance. Halloween is one night a year, and this board brings people together. I don’t stress about the sugar content or the calories. Instead, I focus on the joy of sharing food with loved ones. If you want to make it a little lighter, swap half the candy for extra nuts and dried fruit. But honestly? Life is short. Eat the candy corn.
Conclusion
This Spooky Graveyard Snack Mix Charcuterie Board is more than just a recipe—it’s a conversation starter, a photo op, and a memory maker all rolled into one. It’s forgiving enough for beginners, customizable enough for picky eaters, and festive enough to be the star of your Halloween party. Whether you’re hosting a big bash or having a quiet night in with the family, this board delivers every time.
I encourage you to make it your own. Swap in your favorite snacks, experiment with different decorations, and don’t worry about perfection. The best boards are the ones that look like they were assembled with love and a little bit of chaos. That’s what Halloween is all about, right?
I’d love to hear how yours turns out. Drop a comment below with your favorite variation, tag me in your photos, or share a tip you discovered while building your board. And if you try the gummy worm escape route, send me a picture—I want to see it.
Happy Halloween, and happy snacking. You’ve got this.
Frequently Asked Questions
Can I make this Spooky Graveyard Snack Mix Charcuterie Board ahead of time?
You can prep the components ahead, but I recommend assembling the board no more than 1-2 hours before serving. The popcorn will start to soften after that. You can make the tombstones, crush the cookies, and portion out the candy up to 3 days in advance—just store everything in separate airtight containers.
What can I use instead of popcorn if I don’t have any?
You can use popped sorghum, puffed rice cereal, or even broken tortilla chips as the base. The key is something light and crunchy that creates a “ground” for the graveyard. If you use chips, go for a neutral flavor like plain tortilla or lightly salted.
How do I keep the tombstones from falling over?
Press them gently into the popcorn and snack mix so they’re supported on both sides. If they still wobble, use a pretzel stick or a piece of candy as a brace behind them. You can also use a dab of melted chocolate as “glue” to stick them to the board—just let it set before adding the rest of the ingredients.
Can I use real chocolate for the tombstones instead of cookies?
Absolutely. Thick chocolate bars work well, but avoid thin ones that might crack when you write on them. I’ve used Ghirardelli squares, Hershey’s bars, and even chocolate bark. Just make sure they’re at room temperature before you pipe the “RIP” lettering—cold chocolate can cause the white chocolate to seize.
How many people does this board serve?
This recipe serves about 8-10 people as a snack or appetizer. If you’re serving it as a main snack for a party, it might feed 6-8. I always double the recipe for larger gatherings because people tend to go back for seconds (and thirds).
Pin This Recipe!
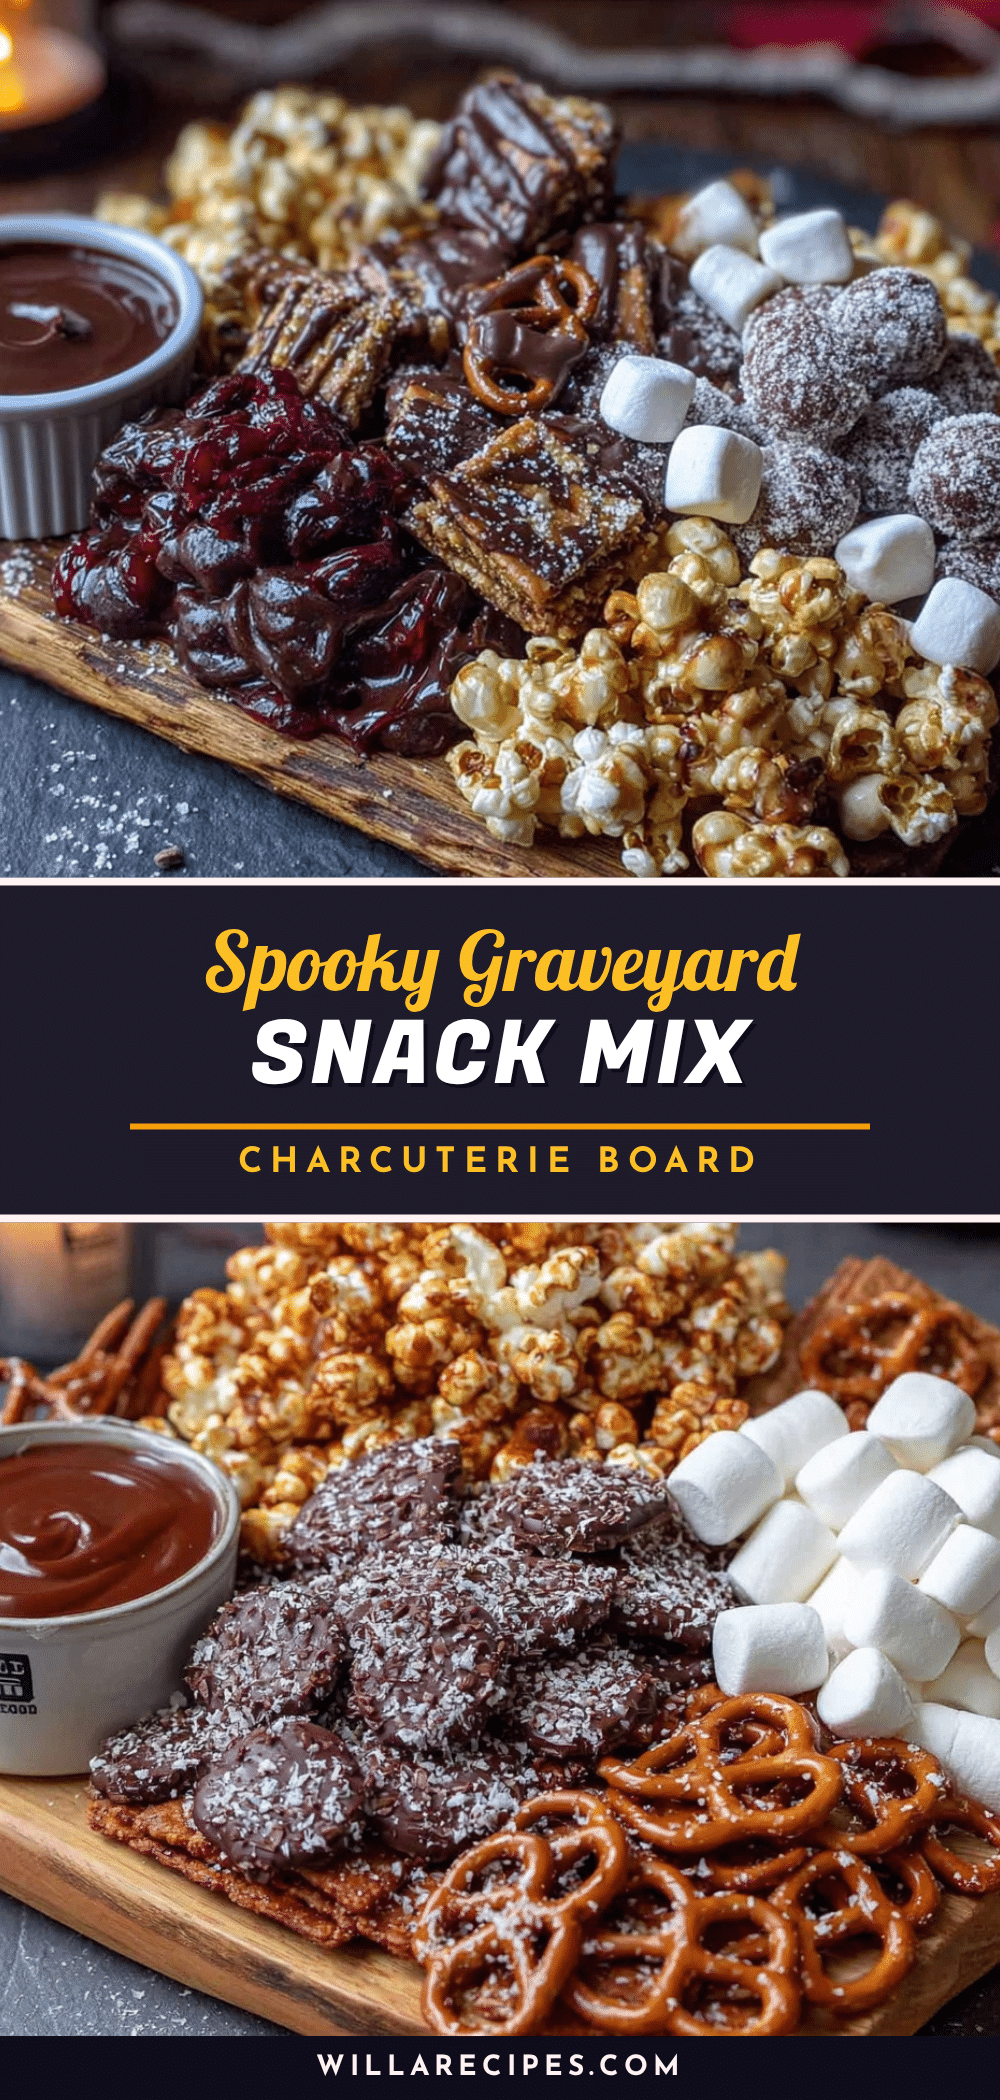
Spooky Graveyard Snack Mix Charcuterie Board: Easy Halloween Recipe
A fun and forgiving Halloween snack board that combines salty, sweet, and creepy elements into a graveyard-themed centerpiece. Perfect for parties or family movie nights, it comes together in under 20 minutes with simple ingredients.
- Prep Time: 20 minutes
- Cook Time: 10 minutes (if making homemade snack mix)
- Total Time: 30 minutes
- Yield: 8-10 servings 1x
- Category: Appetizer
- Cuisine: American
Ingredients
- 6 cups popped popcorn (plain or lightly salted)
- 3 cups pretzel sticks
- 2 cups cheese crackers (like Goldfish or Cheez-Its)
- 1 cup roasted, salted peanuts
- 1 cup candy corn
- 1 cup candy pumpkins
- 1/2 cup chocolate-covered raisins or peanuts
- 1/2 cup dried cranberries or cherries
- 4–6 chocolate bars or cookies (e.g., Milano cookies)
- 1/2 cup white chocolate melting wafers or candy melts
- 1/4 cup black gel icing or food-safe marker
- 12–15 candy eyeballs
- 1/2 cup crushed chocolate cookies (like Oreos)
- Optional: gummy worms, plastic spiders, or skeleton hands
- For the homemade snack mix (optional): 4 cups crispy rice cereal squares, 2 cups pretzel twists (broken), 1 cup mixed nuts (unsalted), 3 tablespoons melted butter, 2 tablespoons Worcestershire sauce, …
Instructions
- Prepare the tombstones (5 minutes): Lay chocolate bars or cookies on parchment paper. Melt white chocolate wafers according to package directions. Transfer to a piping bag or zip-top bag, snip a tiny corner, and pipe ‘RIP,’ ‘Boo,’ or ‘2024’ onto each tombstone. Let set for 10 minutes at room temperature or 5 minutes in the fridge.
- Make the ‘dirt’ (2 minutes): Place chocolate cookies in a zip-top bag and crush with a rolling pin or measuring cup until you have a mix of fine crumbs and small chunks. Set aside.
- Prepare the snack mix (if making homemade) (15 minutes): Preheat oven to 250°F (120°C). Combine cereal squares, broken pretzels, and mixed nuts in a large bowl. In a small bowl, whisk together melted butter, Worcestershire sauce, garlic powder, onion powder, smoked paprika, and salt. Pour over dry ingredients and toss to coat. Spread on a parchment-lined baking sheet and bake for 10 minutes, stirring halfway. Let cool completely.
- Assemble the base layer (5 minutes): Spread popcorn evenly on a large board or platter to create the ‘ground.’ Scatter pretzel sticks, cheese crackers, peanuts, candy corn, candy pumpkins, chocolate-covered raisins, and dried cranberries evenly across the popcorn. Leave clear spaces for tombstones and decorations.
- Add the ‘dirt’ and tombstones (3 minutes): Sprinkle crushed cookie ‘dirt’ in patches, focusing on areas where tombstones will go. Gently press tombstones into the popcorn and snack mix so they stand upright. Use a pretzel stick as a support if needed.
- Decorate with creepy details (5 minutes): Place candy eyeballs in small clusters around the board. Add gummy worms crawling over the edge or through the ‘dirt.’ Position plastic spiders or skeleton hands as if emerging from the snack mix.
- Final touches and serving (2 minutes): Place small bowls or ramekins on the board for dipping sauces or extra candy. Check that the board looks balanced. Serve immediately at room temperature.
Notes
Popcorn stays crunchy for about 2-3 hours. For best results, assemble no more than 1-2 hours before serving. If making ahead, store popcorn separately and add just before serving. The board is forgiving and customizable—let creativity run wild.
Nutrition
- Serving Size: 1 cup
- Calories: 280350
- Sugar: 1525
- Sodium: 200400
- Fat: 1218
- Saturated Fat: 35
- Carbohydrates: 4050
- Fiber: 35
- Protein: 68
Keywords: Halloween snack, charcuterie board, graveyard snack mix, easy Halloween recipe, party snack, spooky snack board


