There used to be a tiny Russian bakery tucked inside a strip mall off Highway 99 that made the most perfect, melt-in-your-mouth tea cake cookies I had ever tasted. When they closed suddenly two summers ago—a handwritten sign taped to the door saying “Thank you for 23 years”—I actually stood there for a minute feeling genuinely sad. After about eight attempts in my own kitchen—some crumbly disasters, a few that tasted more like flour than butter—I finally cracked the code. These budget-friendly Russian tea cake cookies are the result, and honestly? My kids now beg for them more than they ever asked for store-bought treats.
You know that feeling when you bite into a cookie and it just dissolves on your tongue, leaving behind this nutty, buttery sweetness? That’s exactly what we’re making here. I’m not a professional pastry chef or anything—just a mom who got obsessed with recreating a memory. The first batch I made after the bakery closed was so dry my youngest asked if we could dip them in milk to soften them up. (We did, and it actually wasn’t terrible.) But by batch four, I had figured out the trick: the right ratio of powdered sugar to flour, and toasting the nuts just enough to bring out their flavor without burning them.
What I love most about these cookies—beyond the fact that they taste like I spent hours in the kitchen when really it’s about 20 minutes of hands-on work—is that they use ingredients I almost always have on hand. Flour, butter, sugar, nuts. That’s it. No fancy extracts, no specialty flours, nothing that requires a trip to a speciality store. And when you’re feeding a family on a sensible budget, that kind of simplicity matters. So let me tell you how these little snowball-like cookies became a regular in our house, and why I think they’ll become one in yours too.
Why You’ll Love This Recipe
I’ve tested this recipe more times than I care to admit, and I can confidently say it’s the best version for home cooks. It has been family-approved by my own picky eaters and neighbor-tested at three different potlucks (where they disappeared fastest every time).
- Budget-Friendly: This recipe uses basic pantry staples. A bag of walnuts or pecans costs a fraction of what you’d pay for pre-made cookies at the bakery.
- Quick & Easy: From start to finish, you’re looking at about 30 minutes of active time. The dough comes together in one bowl with no electric mixer required if your butter is soft enough.
- Kid-Approved: My kids call them “snowball cookies” and love rolling them in powdered sugar. It’s a fun activity to do together, and the mess is totally worth it.
- Perfect for Any Occasion: Christmas cookie exchanges, afternoon tea with friends, after-school snacks, or just because it’s Tuesday—these cookies fit every scenario.
- Freezer-Friendly: Make a double batch and freeze half. They thaw beautifully and taste just as fresh as the day you baked them.
What makes this recipe different from others you’ll find online? It’s the toasting technique. Most recipes skip this step, but taking five extra minutes to toast the nuts in a dry skillet changes everything. The warmth releases their natural oils, which then infuse the entire cookie with a deeper, richer flavor. Plus, I’ve adjusted the butter-to-flour ratio to ensure these cookies hold their shape without being dry—a problem I ran into with countless other versions.
Honestly, this recipe is the kind that makes you close your eyes after the first bite. It’s comfort food at its simplest and best—no complicated techniques, no expensive ingredients, just pure, buttery, nutty happiness that costs pennies to make.
What Ingredients You Will Need
This recipe uses simple, wholesome ingredients to deliver that classic Russian tea cake texture—delicate, crumbly, and perfectly sweet without being overwhelming. Most of these are probably already sitting in your pantry or fridge right now.
- Unsalted butter, softened (1 cup / 226g): I always use unsalted so I can control the salt level. Let it sit out for about 30 minutes before starting—you want it soft but not melted. Land O’Lakes is my go-to for consistent results.
- Powdered sugar, divided (1/2 cup / 60g for dough, plus 1/2 cup / 60g for rolling): This is what gives the cookies their signature melt-in-your-mouth texture and that snowy coating. Don’t substitute granulated sugar—it changes the whole cookie.
- All-purpose flour (2 cups / 240g): Spoon and level your flour rather than scooping directly from the bag. Scooping packs the flour down and you’ll end up with dry cookies. Gold Medal or King Arthur both work beautifully here.
- Finely chopped walnuts or pecans (1 cup / 100g): Toast them first! Spread them on a baking sheet at 350°F for 5-7 minutes, shaking halfway through. Let them cool completely before chopping. I prefer walnuts for their milder flavor, but pecans add a lovely sweetness.
- Vanilla extract (1 teaspoon): Pure vanilla makes a difference, but honestly, good-quality imitation vanilla works fine too when you’re on a budget. I’ve used both and my family couldn’t tell the difference.
- Salt (1/4 teaspoon): Just a pinch to balance the sweetness and bring out the nutty flavor. If you use salted butter, reduce this to a tiny pinch or omit it entirely.
Ingredient Tips: For the best texture, make sure your butter is truly at room temperature—if you press your finger into it, it should leave an indent without feeling greasy. If you’re dairy-free, you can substitute vegan butter (I like Earth Balance sticks), though the texture will be slightly less tender. For nut-free version, try finely chopped toasted sunflower seeds or simply omit the nuts and add an extra 1/4 cup of flour—they won’t be traditional Russian tea cakes anymore, but they’ll still be delicious little butter cookies.
One more thing—don’t skip the second coating of powdered sugar. I know it seems messy, but that’s what gives these cookies their iconic look. My daughter once called them “snow-covered mountain cookies,” and honestly, that’s exactly what they look like on a plate.
Equipment Needed
You don’t need a fancy kitchen to make these cookies. Here’s what you’ll actually use:
- Large mixing bowl: Any bowl will do—I use a ceramic one my grandmother gave me, but a stainless steel or glass bowl works just fine.
- Baking sheet: A standard half-sheet pan is perfect. Line it with parchment paper for easy cleanup, though these cookies don’t spread much so it’s not strictly necessary.
- Measuring cups and spoons: For accuracy, especially with the flour. I’ve had better luck with metal measuring cups than plastic ones.
- Cooling rack: Helps the cookies cool evenly before that first powdered sugar coating. If you don’t have one, just let them cool on the baking sheet for a few extra minutes.
- Small skillet (optional but recommended): For toasting the nuts. A dry pan over medium heat works perfectly—just keep shaking it so they don’t burn.
- Ziploc bag or food processor: For chopping the nuts. A Ziploc bag and a rolling pin works great if you don’t have a food processor. My kids actually love helping with this part—they take turns smashing the bag.
That’s it. No stand mixer, no sifter, no special cookie scoop (though a cookie scoop does make portioning faster). This is truly a one-bowl recipe that anyone can make.
Preparation Method
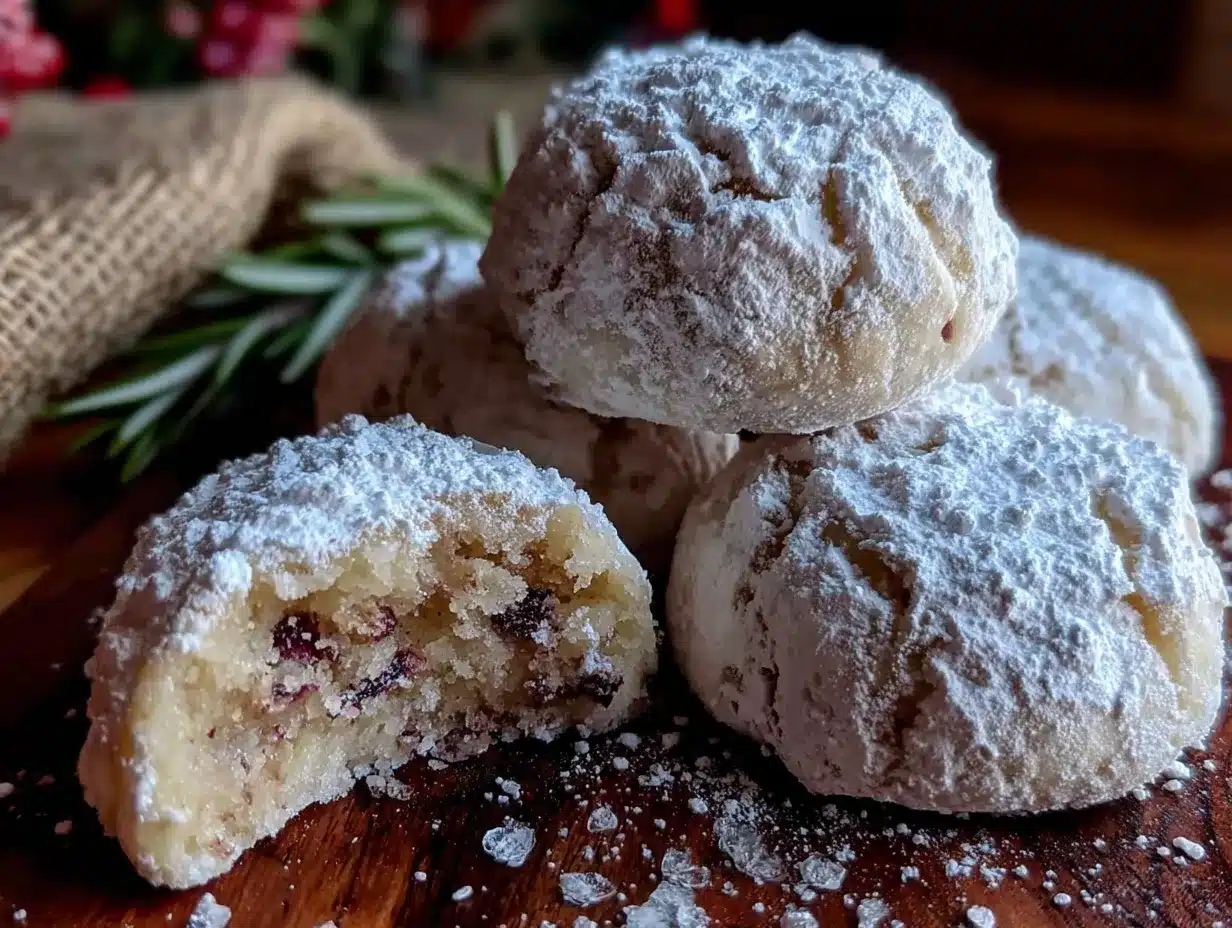
Let’s get baking! Here’s how to make these budget-friendly Russian tea cake cookies step by step.
- Toast the nuts: Preheat your oven to 350°F (175°C). Spread the chopped walnuts or pecans on a baking sheet and toast for 5-7 minutes, until they smell fragrant and are lightly golden. Watch them carefully—they can go from perfectly toasted to burnt in seconds. Let them cool completely while you prepare the dough.
- Cream the butter and sugar: In a large mixing bowl, beat the softened butter with 1/2 cup (60g) of powdered sugar until light and fluffy. If you’re using a hand mixer, about 2 minutes on medium speed should do it. If you’re mixing by hand, use a wooden spoon and give it a good 3-4 minutes of arm work. You want the mixture to look pale and creamy.
- Add vanilla and salt: Stir in the vanilla extract and salt until combined. This is where you’ll start smelling that buttery, sweet aroma that makes everyone wander into the kitchen asking what you’re making.
- Mix in the flour: Gradually add the all-purpose flour, mixing until just combined. Don’t overmix here—stop as soon as you no longer see white streaks of flour. Overworking the dough develops gluten and makes the cookies tough instead of tender.
- Fold in the nuts: Gently fold in the cooled, toasted nuts until they’re evenly distributed throughout the dough. The dough will be slightly crumbly but should hold together when pressed. If it seems too dry, add a teaspoon of milk. If it’s too sticky, add a tablespoon more flour.
- Chill the dough (optional but helpful): Cover the bowl and refrigerate for 15-20 minutes. This makes the dough easier to handle and helps the cookies hold their shape better. If you’re short on time, you can skip this step—just know the cookies might spread a tiny bit more.
- Shape the cookies: Preheat your oven to 350°F (175°C) if you haven’t already. Roll tablespoon-sized portions of dough into 1-inch balls. Place them about 2 inches apart on a parchment-lined baking sheet. They don’t spread much, so you can fit about 12 on a standard sheet.
- Bake: Bake for 12-15 minutes, until the bottoms are lightly golden and the tops look set but are still pale. The cookies should not brown on top—that’s the secret to their delicate texture. Mine are usually perfect at the 13-minute mark, but ovens vary, so start checking at 12 minutes.
- First coating: Let the cookies cool on the baking sheet for 5 minutes. While they’re still warm (but not hot), gently roll each cookie in a bowl of powdered sugar. The warmth helps the sugar stick and creates that first layer of sweetness.
- Second coating: Let the cookies cool completely on a wire rack—about 20 minutes. Once they’re fully cool, roll them in powdered sugar again. This second coating gives them that beautiful snowy appearance and adds the perfect finishing touch.
A note on timing: The whole process takes about 45 minutes from start to finish, with about 20 minutes of active work. The rest is just waiting for things to cool. Perfect for a weekend afternoon with kids helping or a quick bake after dinner.
Cooking Tips & Techniques
After making these cookies at least a dozen times, I’ve learned a few things the hard way. Let me save you some trouble.
Don’t skip toasting the nuts. I know it’s an extra step, and on busy days you might be tempted to skip it. But raw nuts don’t release the same depth of flavor. Toasted nuts transform these cookies from “pretty good” to “what bakery did you get these from?” The difference is night and day.
Watch your oven temperature. My first few batches came out too brown on top because my oven runs hot. If your cookies are browning before the 12-minute mark, reduce the temperature to 325°F (160°C) for the next batch. The tops should stay pale—that’s how you know they’re perfect.
Let them cool properly between sugar coatings. I once rushed this step and ended up with melted, sticky sugar instead of that beautiful powdery coating. Patience here pays off. Warm cookies for the first roll, completely cool for the second—that’s the magic formula.
Use a cookie scoop for uniform size. I didn’t own one for years and just used my hands, but a small cookie scoop (about 1 tablespoon) makes perfectly even cookies that all bake at the same rate. If you don’t have one, just try to make each ball roughly the same size.
Double the batch. Honestly, these cookies disappear fast. I always make a double batch now and freeze half. They thaw in about 15 minutes at room temperature and taste just as good as fresh-baked. Perfect for unexpected guests or last-minute school bake sales.
One more thing—if your dough feels too crumbly to shape into balls, your butter might not have been soft enough, or your flour measurement was a bit heavy. Add a teaspoon of milk at a time until the dough comes together. I’ve had to do this more times than I’d like to admit, and it always saves the batch.
Variations & Adaptations
One of the best things about this recipe is how easily it adapts to different tastes and dietary needs. Here are some variations I’ve tried and loved.
Chocolate-Dipped Russian Tea Cakes: After the second powdered sugar coating, melt 1/2 cup of semi-sweet chocolate chips with 1 teaspoon of coconut oil and dip half of each cookie into the chocolate. Let them set on parchment paper. My kids go absolutely crazy for these—they call them “fancy snowball cookies.”
Gluten-Free Version: Substitute the all-purpose flour with a 1:1 gluten-free baking flour blend (I like Bob’s Red Mill). The texture will be slightly more crumbly, but the flavor is still spot-on. Just handle them gently when rolling in sugar.
Spiced Variation: Add 1/2 teaspoon of cinnamon and 1/4 teaspoon of nutmeg to the flour mixture. This makes them taste like a cozy winter afternoon. I made these for a holiday cookie exchange and they were the first plate to empty.
Citrus Twist: Add 1 tablespoon of finely grated orange or lemon zest to the butter mixture. The bright citrus flavor pairs beautifully with the toasted nuts and cuts through the richness. Perfect for spring or summer gatherings.
Nut-Free Option: Substitute the walnuts or pecans with 1 cup of finely chopped toasted sunflower seeds or pumpkin seeds. They won’t have the same traditional flavor, but they’re still delicious and safe for school lunchboxes.
Vegan Adaptation: Use 1 cup of vegan butter (I’ve had good results with Earth Balance sticks) and make sure your powdered sugar is vegan (most are, but some brands use bone char in processing). The texture will be slightly less tender, but honestly, they’re still pretty amazing.
My personal favorite variation? The chocolate-dipped ones. I made them for a neighbor’s birthday last month and she asked for the recipe three times before I finally wrote it down for her. There’s something about that combination of snowy powdered sugar and dark chocolate that just works.
Serving & Storage Suggestions
These Russian tea cake cookies are best served at room temperature, with a cup of hot tea or coffee. The powdered sugar coating is meant to be a little messy—that’s part of the charm. I like to arrange them on a pretty plate with a small dusting of extra powdered sugar over the top for presentation.
Storage: Keep these cookies in an airtight container at room temperature for up to 2 weeks. I use a glass cookie jar with a tight-fitting lid. Layer them between sheets of wax paper to prevent them from sticking together. The powdered sugar might absorb a bit over time, but you can always give them a fresh roll in sugar before serving.
Freezer Instructions: These cookies freeze beautifully. Place them in a single layer on a baking sheet and freeze for 1 hour, then transfer to a freezer-safe bag or container. They’ll keep for up to 3 months. To thaw, just leave them at room temperature for 15-20 minutes. I like to give them a fresh dusting of powdered sugar after thawing to revive that snowy look.
Flavor Development: Here’s a little secret—these cookies actually taste better the next day. The flavors meld together overnight, and the texture becomes even more tender. So if you’re making them for a party or holiday, bake them a day ahead. Your future self will thank you.
What to Serve With Them: A cup of black tea is the classic pairing, but they’re also wonderful with coffee, hot chocolate, or even a glass of cold milk. For a dessert spread, I like to serve them alongside fresh berries and a dollop of whipped cream. They’re also perfect for dunking—try them in a warm cup of chai for an extra-special treat.
One serving tip from experience—if you’re bringing these to a potluck or party, pack them in a single layer in a container with a tight lid. They’re delicate and can crumble if stacked too high. A shallow tin or disposable aluminum pan works perfectly.
Nutritional Information & Benefits
These cookies are a treat, so I’m not going to pretend they’re health food. But they do have some redeeming qualities, especially compared to store-bought cookies.
Per cookie (based on 24 cookies per batch):
- Calories: ~120
- Fat: 8g (mostly from butter and nuts)
- Carbohydrates: 11g
- Protein: 2g
- Sugar: 5g
- Fiber: 0.5g
Health Benefits: Walnuts and pecans are packed with healthy omega-3 fatty acids, which support heart health and brain function. The butter provides vitamin A and healthy fats that help your body absorb nutrients. Plus, since these cookies are made from scratch, you control exactly what goes into them—no preservatives, artificial flavors, or mystery ingredients.
Dietary Considerations: This recipe is vegetarian. For vegan, gluten-free, or nut-free options, see the variations section above. These cookies contain dairy (butter) and nuts, so they’re not suitable for those with allergies to those ingredients. The powdered sugar coating means they’re not low-sugar, but you can reduce the sugar in the dough slightly if needed—just don’t skip the coating, as that’s essential for the texture.
Honestly, I believe in balance. These cookies are a special treat in our house, not an everyday thing. But when we do make them, we enjoy every single bite without guilt. Life’s too short for bad cookies.
Conclusion
These budget-friendly Russian tea cake cookies are everything I hoped they’d be when I started my quest to recreate that bakery memory. They’re simple enough for a beginner baker to master, affordable enough to make regularly, and delicious enough to impress even the pickiest eaters. My kids now help me make them, and our kitchen fills with the same warmth and joy I felt standing in that little bakery years ago.
I’d love for you to try this recipe and make it your own. Maybe you’ll add chocolate chips or orange zest, or keep it perfectly traditional. Maybe you’ll make them for a holiday party or a random Tuesday afternoon. Whatever you do, I hope they bring you the same comfort and happiness they’ve brought to my family.
If you make these cookies, I’d love to hear about it! Leave a comment below and let me know how they turned out—did your kids love them? Did you try a variation? Share your photos on Pinterest and tag me so I can see your beautiful snowy cookies. Happy baking, friends!
Frequently Asked Questions
Can I make these cookies without nuts?
Absolutely! Simply omit the nuts and add an extra 1/4 cup of all-purpose flour. The cookies will still be delicious—just traditional butter cookies without the nutty texture. You can also substitute finely chopped toasted sunflower seeds for a similar crunch.
Why did my cookies turn out too dry?
This usually happens from over-measuring the flour or overbaking. Make sure you’re spooning the flour into your measuring cup and leveling it off, not scooping directly from the bag. Also, check your cookies at the 12-minute mark—they should still be pale on top when you take them out.
Can I use a different type of sugar for rolling?
Powdered sugar is essential for that classic melt-in-your-mouth texture and snowy appearance. Granulated sugar won’t stick the same way and will give a different texture. If you’re out of powdered sugar, you can make your own by blending granulated sugar in a food processor until it’s fine and powdery.
How do I prevent the powdered sugar from melting into the cookies?
The key is the two-coat method. Roll the cookies in powdered sugar while they’re still warm (but not hot) for the first coat. Then let them cool completely before the second coat. If the cookies are too warm during the second coating, the sugar will melt and become sticky instead of powdery.
Can I freeze the dough instead of the baked cookies?
Yes! Shape the dough into balls and place them on a baking sheet lined with parchment paper. Freeze until solid, then transfer to a freezer bag. When you’re ready to bake, place the frozen dough balls on a baking sheet and add 2-3 minutes to the baking time. No need to thaw first!
Pin This Recipe!
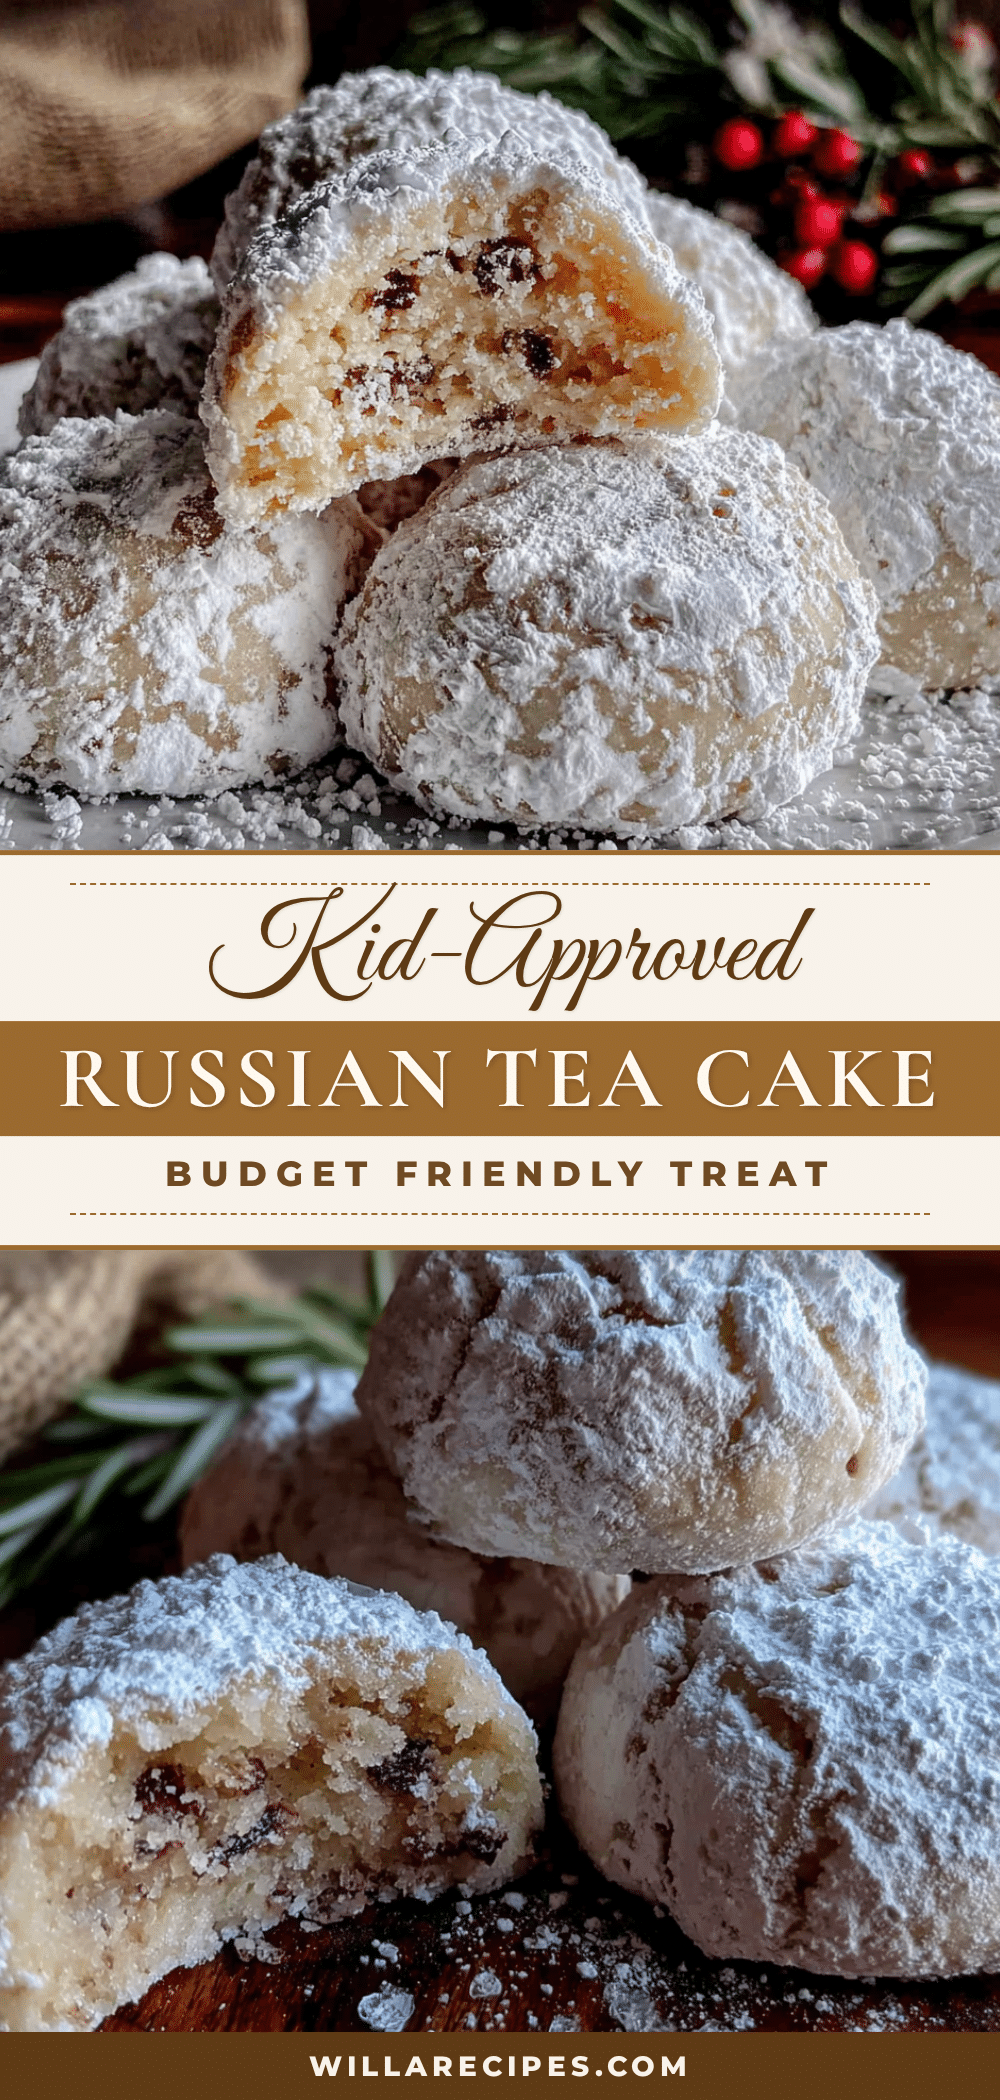
Easy Budget Russian Tea Cake Cookies

These budget-friendly Russian tea cake cookies are melt-in-your-mouth buttery, nutty, and perfectly sweet. Made with simple pantry staples, they come together in about 30 minutes of active time and are perfect for any occasion.
- Prep Time: 20 minutes
- Cook Time: 12-15 minutes
- Total Time: 45 minutes
- Yield: 24 cookies 1x
- Category: Dessert
- Cuisine: Russian
Ingredients
- 1 cup (226g) unsalted butter, softened
- 1/2 cup (60g) powdered sugar (for dough)
- 1/2 cup (60g) powdered sugar (for rolling)
- 2 cups (240g) all-purpose flour
- 1 cup (100g) finely chopped walnuts or pecans, toasted
- 1 teaspoon vanilla extract
- 1/4 teaspoon salt
Instructions
- Toast the nuts: Preheat oven to 350°F (175°C). Spread chopped nuts on a baking sheet and toast for 5-7 minutes until fragrant and lightly golden. Let cool completely.
- Cream the butter and sugar: In a large mixing bowl, beat softened butter with 1/2 cup powdered sugar until light and fluffy (about 2 minutes with a mixer or 3-4 minutes by hand).
- Add vanilla and salt: Stir in vanilla extract and salt until combined.
- Mix in the flour: Gradually add flour, mixing until just combined. Do not overmix.
- Fold in the nuts: Gently fold in cooled toasted nuts until evenly distributed. Dough should be slightly crumbly but hold together when pressed.
- Chill the dough (optional): Cover and refrigerate for 15-20 minutes for easier handling.
- Shape the cookies: Preheat oven to 350°F (175°C). Roll tablespoon-sized portions into 1-inch balls. Place 2 inches apart on a parchment-lined baking sheet.
- Bake: Bake for 12-15 minutes until bottoms are lightly golden and tops are set but still pale.
- First coating: Let cookies cool on baking sheet for 5 minutes. While still warm, roll each in powdered sugar.
- Second coating: Let cookies cool completely on a wire rack (about 20 minutes), then roll in powdered sugar again.
Notes
For best results, toast the nuts to enhance flavor. Use the two-coat method for powdered sugar: first coat while warm, second coat when completely cool. Cookies taste even better the next day. Freeze baked cookies for up to 3 months.
Nutrition
- Serving Size: 1 cookie
- Calories: 120
- Sugar: 5
- Sodium: 30
- Fat: 8
- Saturated Fat: 4
- Carbohydrates: 11
- Fiber: 0.5
- Protein: 2
Keywords: Russian tea cake cookies, budget-friendly cookies, snowball cookies, easy cookie recipe, nut cookies, butter cookies, Christmas cookies


