My friend Jenna had claimed for years that she hated red velvet cake. “It’s just chocolate cake with red food coloring,” she’d say, rolling her eyes every time someone ordered a slice at a birthday party. “And that cream cheese frosting is way too sweet.” I’d nod along, not wanting to argue, but secretly I felt a little defensive of this Southern classic. Then, last Valentine’s Day, I made a batch of these perfect red velvet heart cupcakes for a small dinner party I was hosting. I didn’t say a word about the flavor. I just set the plate down on the table, the cream cheese frosting swirled into perfect little peaks, a single raspberry perched on top of each one. Halfway through the main course, I caught Jenna sneaking a cupcake from the kitchen counter. She thought no one was watching. I mean, honestly, it was the most satisfying moment of my entire hosting career. She took a bite, and her eyes went wide. “Okay,” she mumbled, mouth still full. “These are different.” That’s the thing about this recipe—it doesn’t need a big sales pitch. It just quietly convinces you, one bite at a time. And let me tell you, there’s nothing quite like the smug satisfaction of proving a food skeptic wrong without ever having to say “I told you so.” Maybe you’ve been there with a dish you love but everyone else swears they hate? This is that recipe for me.
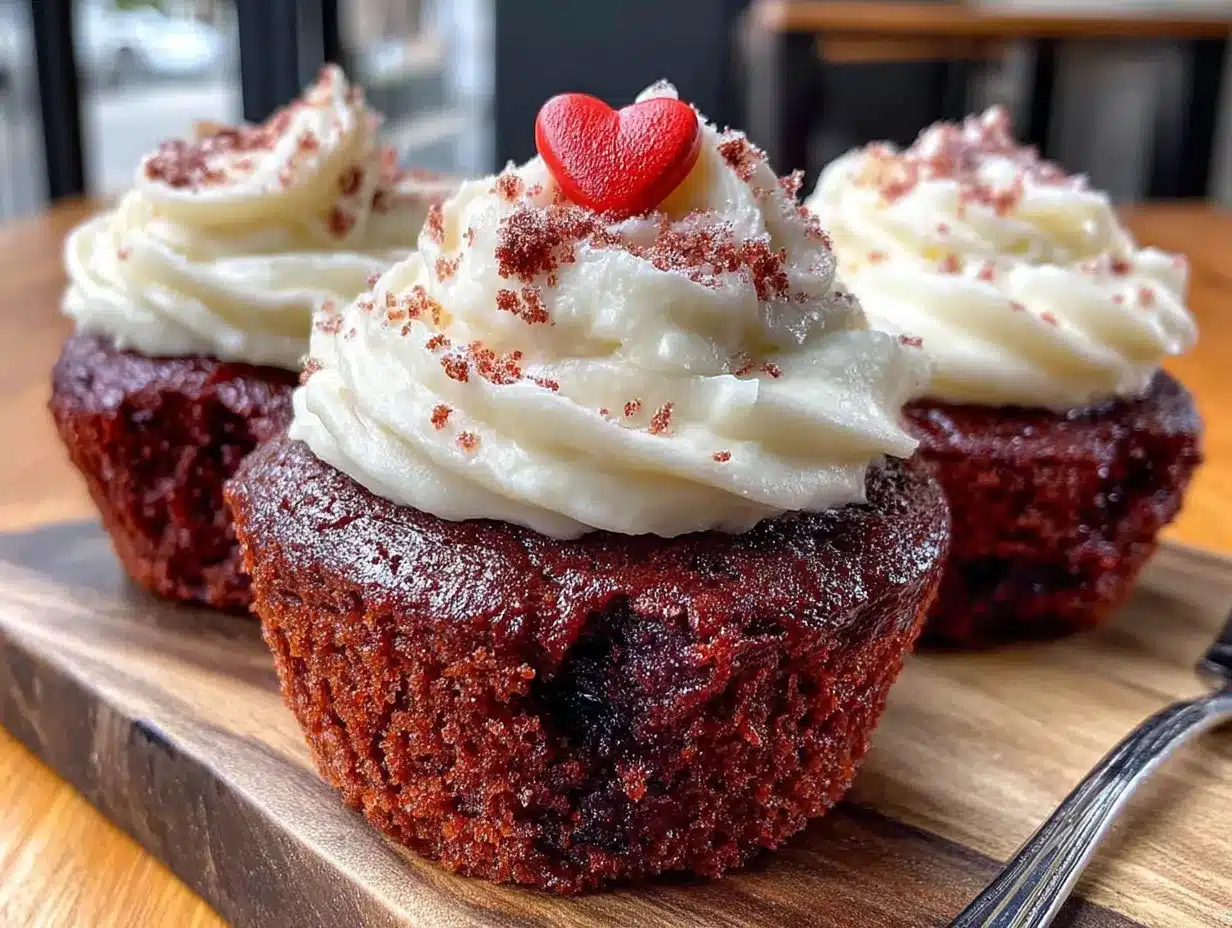
These aren’t just any red velvet cupcakes. They’re baked in heart-shaped molds, making them the perfect centerpiece for a romantic dinner party, a Galentine’s gathering, or any occasion where you want to show off a little. The cake is incredibly moist, with a tender crumb that practically melts in your mouth. The cocoa flavor is subtle, not overpowering, and the tang from the buttermilk and vinegar gives it that signature red velvet complexity. And the frosting? It’s a silky, not-too-sweet cream cheese buttercream that I’ve perfected over dozens of batches. It holds its shape beautifully for piping, but it’s still light and fluffy. This is the kind of dessert that makes your guests close their eyes after the first bite. It’s the kind that makes them ask for the recipe before they’ve even finished their cupcake. And honestly? That’s the whole point of hosting, isn’t it?
Why You’ll Love This Recipe
I’ve tested this recipe more times than I can count, tweaking the ratios, adjusting the baking time, and perfecting the frosting consistency. It’s been taste-tested by my family, my neighbors, and even my picky friend Jenna. So trust me when I say this one is a winner.
- Perfect for a Dinner Party: These heart-shaped cupcakes are an instant conversation starter. They look impressive on a cake stand, but they’re surprisingly easy to make. You can even bake the cupcakes a day ahead and frost them just before your guests arrive.
- Simple Ingredients: No weird, hard-to-find ingredients here. You probably have most of these in your pantry already. The secret to the tender crumb is just a combination of pantry staples like flour, sugar, cocoa powder, and buttermilk.
- Crowd-Pleaser: I’ve served these at everything from casual potlucks to fancy dinner parties, and they always disappear first. Kids love the heart shape, and adults appreciate the sophisticated flavor. It’s a win-win.
- Unbelievably Moist: The combination of buttermilk, oil, and a touch of vinegar creates a cake that stays moist for days. No dry, crumbly cupcakes here. I mean, you can even make them on a Tuesday and they’ll still be perfect on Thursday.
- Show-Stopping Presentation: The deep red cake against the white cream cheese frosting is just gorgeous. Add a fresh raspberry or a sprinkle of red glitter on top, and you’ve got a dessert that looks like it came from a fancy bakery.
This recipe isn’t just good—it’s the kind that makes you feel like a rockstar host. It’s comfort food dressed up in its Sunday best. It’s the dessert you pull out when you want to impress without the stress. And honestly, that’s a beautiful thing.
What Ingredients You Will Need
This recipe uses simple, wholesome ingredients to deliver a rich, complex flavor and a perfectly tender texture. Most of these are pantry staples, so you might not even need a trip to the store.
- All-purpose flour, 2 ½ cups (315g) – Spoon and level it into your measuring cup for the most accurate measurement. Too much flour will make the cupcakes dense.
- Granulated sugar, 1 ½ cups (300g) – This provides sweetness and helps create a tender crumb. I don’t recommend reducing the sugar, as it affects the texture.
- Unsweetened cocoa powder, 2 tablespoons (15g) – Use a high-quality brand like Ghirardelli or Hershey’s Special Dark for the best flavor. The cocoa is subtle here, so don’t be tempted to add more.
- Baking soda, 1 teaspoon – This helps the cupcakes rise and creates a light, fluffy texture. Make sure it’s fresh for the best results.
- Salt, ½ teaspoon – Balances the sweetness and enhances the chocolate flavor. I use fine sea salt.
- Vegetable oil, 1 cup (240ml) – Oil keeps the cupcakes incredibly moist. You can use canola or any neutral-flavored oil. Don’t substitute melted butter here; oil gives a better texture.
- Buttermilk, 1 cup (240ml), room temperature – This is the secret to a tender crumb. The acidity reacts with the baking soda to create lift. If you don’t have buttermilk, you can make a quick substitute: add 1 tablespoon of lemon juice or white vinegar to a measuring cup, then fill with regular milk to the 1-cup line. Let it sit for 5 minutes before using.
- Large eggs, 2, room temperature – Room-temperature eggs emulsify better into the batter, creating a smoother texture. Take them out of the fridge 30 minutes before you start baking.
- White vinegar, 1 teaspoon – This might sound weird, but it reacts with the baking soda to make the cupcakes extra fluffy. You won’t taste it at all, I promise.
- Vanilla extract, 1 teaspoon – Use pure vanilla extract for the best flavor. Imitation vanilla works in a pinch, but the real stuff makes a difference.
- Red gel food coloring, 1 to 2 tablespoons – This is crucial. Liquid food coloring won’t give you that vibrant red color. I use Americolor Super Red. Start with 1 tablespoon and add more if you want a deeper shade. (I usually use about 1 ½ tablespoons for a rich, Valentine’s Day red.)
For the Cream Cheese Frosting:
- Cream cheese, 8 ounces (226g), softened – Use full-fat, block-style cream cheese. Don’t use the spreadable kind in a tub; it has too much water and will make your frosting runny.
- Unsalted butter, ½ cup (113g), softened – Let it sit out for at least an hour to come to room temperature. It should be soft but not melty.
- Powdered sugar, 4 cups (480g), sifted – Sifting removes lumps and makes the frosting silky smooth. I know it’s an extra step, but it’s worth it.
- Vanilla extract, 2 teaspoons – Again, use the pure stuff if you can.
- Pinch of salt – Just a tiny pinch to balance the sweetness.
For Decoration:
- Fresh raspberries, 12 to 15 – These add a pop of color and a tangy burst of flavor that complements the sweet frosting perfectly.
- Red sanding sugar or edible glitter (optional) – For a little extra sparkle. Because why not?
Equipment Needed
You don’t need a fancy bakery setup to make these cupcakes. Here’s what you’ll need:
- Heart-shaped cupcake pan, 12-cup – This is the key to the whole look. You can find these at most kitchen supply stores or online. I’ve had my Wilton pan for years and it still works perfectly.
- Heart-shaped silicone baking cups (optional) – These make for easy removal and a clean, professional look. Plus, they’re reusable! If you don’t have them, just grease the pan well with butter or non-stick spray.
- Mixing bowls – You’ll need a large bowl for the dry ingredients and another for the wet ingredients. I like using glass or stainless steel bowls.
- Electric hand mixer or stand mixer – A hand mixer works great for the frosting. You can also use a stand mixer with the paddle attachment. A whisk and some elbow grease will work for the cake batter, but the frosting really needs the power.
- Rubber spatula – For scraping down the sides of the bowl and folding in the dry ingredients. A good spatula is a baker’s best friend.
- Wire cooling rack – Letting the cupcakes cool completely before frosting is non-negotiable. A warm cupcake will melt your beautiful frosting into a puddle.
- Piping bag and a large star tip (like a Wilton 1M) – This makes frosting the cupcakes look effortless. If you don’t have a piping bag, you can snip the corner off a ziplock bag. It won’t be as pretty, but it’ll still taste amazing.
- Measuring cups and spoons – Accurate measurements are important in baking. I use a kitchen scale for the flour and sugar, but measuring cups work fine if you use the spoon-and-level method.
Preparation Method
Let’s get baking! I’ll walk you through every step so you can nail these cupcakes on your first try.
- Preheat your oven to 350°F (175°C). Position the rack in the center of the oven. Line your heart-shaped cupcake pan with silicone baking cups or grease it well with butter or non-stick spray. Set it aside.
- Whisk the dry ingredients. In a large bowl, whisk together the all-purpose flour, granulated sugar, unsweetened cocoa powder, baking soda, and salt. Make sure there are no lumps. This takes about 30 seconds. Set the bowl aside.
- Mix the wet ingredients. In a separate medium bowl, whisk together the vegetable oil, room-temperature buttermilk, eggs, white vinegar, and vanilla extract. Whisk until the mixture is smooth and well-combined. It should look pale and slightly frothy.
- Add the food coloring. Pour in the red gel food coloring. I start with 1 tablespoon. Whisk it into the wet mixture until the color is uniform. It should be a vibrant, deep pink at this point. If you want a more dramatic red, add another ½ to 1 tablespoon of coloring and whisk again. Don’t be shy—the color will bake up a little less intense than it looks in the batter.
- Combine wet and dry ingredients. Pour the wet mixture into the bowl with the dry ingredients. Use a rubber spatula to gently fold everything together. Stir just until you no longer see streaks of flour. A few small lumps are okay. Overmixing will make the cupcakes tough, so be gentle. The batter will be thin and pourable—that’s normal.
- Fill the cupcake pan. Divide the batter evenly among the 12 heart-shaped cavities. I like to use a cookie scoop or a ¼-cup measuring cup for this. Fill each cavity about ⅔ to ¾ full. Don’t overfill, or the cupcakes will overflow and lose their heart shape.
- Bake. Place the pan in the preheated oven and bake for 15 to 18 minutes. The cupcakes are done when a toothpick inserted into the center of one comes out clean or with a few moist crumbs. The tops should spring back when you gently press them. Start checking at the 15-minute mark—every oven is different.
- Cool completely. Let the cupcakes cool in the pan for 5 minutes. Then, carefully transfer them to a wire cooling rack. Let them cool completely, about 30 to 45 minutes. Do not frost them while they’re still warm, or the frosting will slide right off. I learned this the hard way at a party once—it was a sticky, beautiful mess.
- Make the cream cheese frosting. While the cupcakes are cooling, make the frosting. In a large bowl, beat the softened cream cheese and unsalted butter together with an electric hand mixer on medium speed until smooth and creamy, about 2 minutes. Scrape down the sides of the bowl with a rubber spatula.
- Add the powdered sugar. With the mixer on low speed, gradually add the sifted powdered sugar, about 1 cup at a time. Mix until each addition is incorporated before adding the next. This prevents a cloud of powdered sugar from flying everywhere. Trust me on this one.
- Finish the frosting. Add the vanilla extract and a tiny pinch of salt. Increase the speed to medium-high and beat for 2 to 3 minutes, until the frosting is light, fluffy, and spreadable. If it’s too thick, add a tablespoon of milk or heavy cream. If it’s too thin, chill it in the fridge for 10 minutes.
- Frost the cupcakes. Fit a piping bag with a large star tip (Wilton 1M works great). Fill the bag with the cream cheese frosting. Starting at the outer edge of each cooled cupcake, pipe a spiral of frosting, working your way in toward the center. Then, lift the tip straight up to create a little peak. Alternatively, you can just spread the frosting on with a knife—it’ll still taste incredible.
- Decorate. Top each frosted cupcake with a fresh raspberry. If you’re feeling fancy, sprinkle a little red sanding sugar or edible glitter over the top. The raspberry adds a beautiful pop of color and a tangy flavor that cuts through the sweetness of the frosting.
Cooking Tips & Techniques
Over the years, I’ve made a few mistakes so you don’t have to. Here are my best tips for perfect red velvet heart cupcakes every single time.
Don’t overmix the batter. This is the number one mistake I see home bakers make. Red velvet cake is supposed to be tender and light. If you overmix the batter once the flour is added, you’ll develop the gluten, and your cupcakes will be tough and dense. Mix just until the flour disappears. A few small lumps are totally fine.
Use room temperature ingredients. This is one of those baking rules that actually matters. Cold eggs and cold buttermilk won’t emulsify properly into the batter, which can lead to a greasy or uneven texture. Take your eggs and buttermilk out of the fridge about 30 minutes before you start. If you forget, you can place the eggs in a bowl of warm water for 5 minutes.
Get the right red. Liquid food coloring won’t cut it here. You need gel or paste food coloring to get that vibrant, Instagram-worthy red. I’ve tried both, and gel is just so much more concentrated and gives a better color without thinning out the batter. Start with 1 tablespoon and add more if you want a deeper shade.
Don’t overbake. Dry cupcakes are a tragedy. Red velvet cupcakes can go from perfectly moist to dry and crumbly in about 60 seconds. Start checking them at the 15-minute mark. A toothpick inserted into the center should come out with a few moist crumbs, not clean. The tops should spring back when you touch them.
Chill the frosting if needed. If your kitchen is warm or your cream cheese frosting seems a little soft, pop the bowl in the fridge for 10 to 15 minutes before piping. This will help the frosting hold its shape and make those beautiful swirls easier to achieve.
Bake ahead of time. This is my number one dinner party hack. You can bake the cupcakes up to two days in advance. Let them cool completely, then store them in an airtight container at room temperature. Frost them just before your guests arrive. This takes so much stress out of hosting. You can even make the frosting a day ahead and keep it in the fridge. Just let it come to room temperature and give it a quick whip with the mixer before piping.
Variations & Adaptations
This recipe is wonderfully versatile. Here are a few ways to make it your own.
Gluten-Free Version: Substitute the all-purpose flour with a good quality 1-to-1 gluten-free baking flour blend. I’ve had great results with Bob’s Red Mill. The texture will be slightly different, but they’ll still be delicious. Just be careful not to overmix the batter.
Dairy-Free Adaptation: Use a dairy-free buttermilk substitute (like almond milk mixed with a teaspoon of vinegar) and a dairy-free cream cheese alternative for the frosting. Miyoko’s and Kite Hill make excellent plant-based cream cheeses. Use vegan butter in the frosting as well. The texture might be a tiny bit less fluffy, but the flavor will still be fantastic.
Chocolate Lover’s Twist: If you want a more pronounced chocolate flavor, increase the cocoa powder to ¼ cup (20g). This will deepen the color slightly and give the cupcakes a richer, more decadent taste. It’s not traditional red velvet, but it’s absolutely delicious.
Lemon-Raspberry Variation: Add the zest of one lemon to the frosting and swap the vanilla extract for lemon extract. The bright, citrusy flavor pairs beautifully with the tangy cream cheese and the fresh raspberries on top. It’s a lovely springtime twist.
Mini Cupcakes: Use a mini heart-shaped cupcake pan and bake for 8 to 10 minutes. These are perfect for a party where guests might want to try a few different desserts. You’ll get about 36 mini cupcakes from this recipe.
I once made a batch with a hint of almond extract in the frosting, and it was a huge hit. Just a ¼ teaspoon—it adds a subtle, almost marzipan-like flavor that complements the cocoa beautifully. Give it a try if you’re feeling adventurous!
Serving & Storage Suggestions
These cupcakes are best served at room temperature. The frosting is soft and creamy, and the cake is perfectly moist. If you’ve refrigerated them, let them sit out for about 20 minutes before serving.
Presentation Ideas: Arrange the heart-shaped cupcakes on a beautiful cake stand or a large wooden board. For a dinner party, I love to place them in the center of the table as a stunning centerpiece. Scatter a few fresh raspberries and mint leaves around the base for a pop of color. If you’re serving them at a potluck, a simple platter works just fine.
What to Serve Alongside: These cupcakes are rich and decadent, so they pair beautifully with a light, refreshing beverage. Try serving them with a cup of hot coffee or espresso, a glass of cold milk, or even a sparkling rosé for a grown-up treat. A scoop of vanilla bean ice cream on the side is never a bad idea either.
Storage Instructions: Store any leftover cupcakes in an airtight container in the refrigerator for up to 5 days. The cream cheese frosting needs to be kept cold. Let them sit at room temperature for about 15 to 20 minutes before serving to take the chill off.
Freezing Instructions: You can freeze the unfrosted cupcakes for up to 3 months. Wrap each cooled cupcake individually in plastic wrap, then place them in a freezer-safe bag or container. When you’re ready to serve, thaw them overnight in the refrigerator, then bring them to room temperature before frosting. The frosting itself can also be frozen in an airtight container for up to 3 months. Thaw it in the fridge overnight, then re-whip it with a mixer before using.
Flavor Development: Honestly, these cupcakes taste even better the next day. The flavors meld together, and the cake becomes even more moist. So don’t stress about baking them at the last minute. Make them a day ahead, and your future self will thank you.
Nutritional Information & Benefits
Let’s be real—these are a treat, not a health food. But here’s a rough estimate of what you’re looking at per cupcake (with frosting and a raspberry).
| Nutrient | Amount per Cupcake |
|---|---|
| Calories | ~420 |
| Total Fat | 22g |
| Saturated Fat | 9g |
| Cholesterol | 55mg |
| Sodium | 220mg |
| Total Carbohydrates | 55g |
| Sugar | 42g |
| Protein | 4g |
Health Highlights: The cocoa powder in these cupcakes is a good source of antioxidants (flavonoids), which can help reduce inflammation. The cream cheese frosting provides a small amount of calcium and protein. And the fresh raspberries on top are packed with vitamin C and fiber. So there are a few redeeming qualities! But honestly, this is a dessert meant to be enjoyed in moderation. Don’t stress about the numbers—just savor every bite.
Dietary Considerations: This recipe contains gluten, dairy, and eggs. For gluten-free and dairy-free options, see the Variations section above. These cupcakes are not suitable for a vegan diet without significant substitutions.
Conclusion
These perfect red velvet heart cupcakes are more than just a dessert—they’re a little piece of edible joy. They’re the kind of thing you make when you want to show the people you love just how much you care. The deep red color, the tender crumb, the silky cream cheese frosting, and that bright, tangy raspberry on top—every single element works together to create something truly special.
I hope you’ll give them a try for your next dinner party, potluck, or just because it’s a Tuesday. Don’t be afraid to make them your own. Add a little extra vanilla, swap the raspberries for strawberries, or go wild with the edible glitter. The most important thing is that you’re making something with love to share with the people you care about. And honestly, that’s what cooking is all about.
If you make these, I’d love to hear about it! Leave a comment below and let me know how they turned out. Did you try any fun variations? Did your friends and family love them? Share your photos on social media and tag me—I can’t wait to see your beautiful creations. Happy baking, friend!
Frequently Asked Questions
Can I use a regular round cupcake pan instead of a heart-shaped one?
Absolutely! You can use any standard 12-cup cupcake pan. The baking time will be the same. They just won’t be heart-shaped. If you want the heart shape but don’t have the pan, you can bake them in a round pan and then use a heart-shaped cookie cutter to cut them out. It’s a little extra work, but it works in a pinch.
Why did my cream cheese frosting turn out runny?
This usually happens for one of two reasons: your cream cheese or butter was too soft (almost melted), or you used low-fat or spreadable cream cheese. Always use full-fat, block-style cream cheese, and make sure it’s softened but not warm. If your frosting does turn out runny, pop it in the fridge for 15 to 20 minutes to firm up before piping.
Can I make these cupcakes without red food coloring?
You can, but they won’t be red velvet in the traditional sense. The color is a key part of the experience. If you want to avoid artificial dyes, you can try using beet powder or natural red food coloring. The color will be more of a deep pink or burgundy, but the flavor will still be delicious. I’ve tried beet powder, and it gives a lovely earthy undertone.
How far in advance can I make these for a party?
You can bake the cupcakes up to two days in advance and store them in an airtight container at room temperature. The frosting can be made a day ahead and stored in the fridge. I recommend frosting the cupcakes no more than a few hours before serving for the best presentation. The frosting will stay beautiful, and the cupcakes will be perfectly moist.
Can I use a different type of frosting?
Of course! Cream cheese frosting is the classic pairing for red velvet, but you can use a simple vanilla buttercream, a chocolate buttercream, or even a whipped cream frosting. If you’re feeling adventurous, a ermine frosting (also known as cooked flour frosting) is a traditional Southern option that’s less sweet and incredibly silky. I’ve tried it, and it’s divine.
Pin This Recipe!
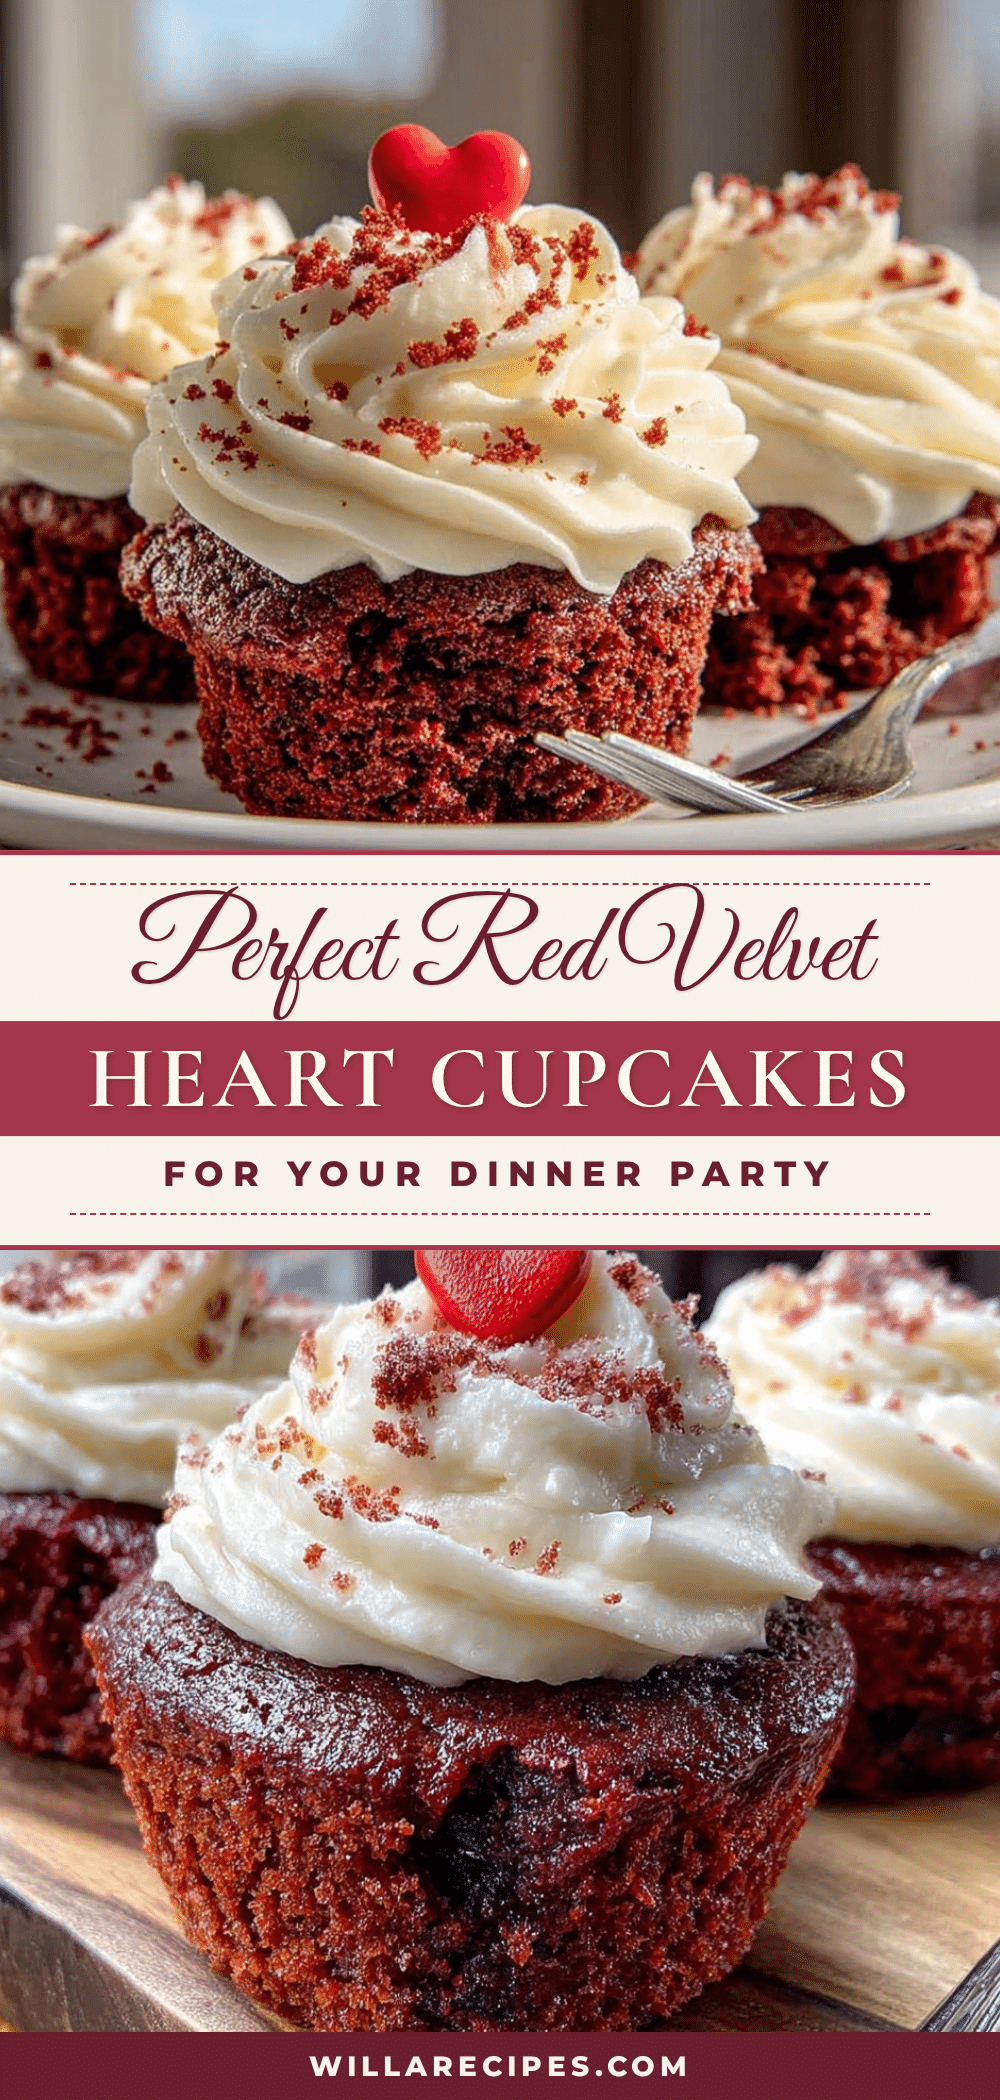
Perfect Red Velvet Heart Cupcakes: Easy Dinner Party Dessert
These moist, tender red velvet cupcakes are baked in heart-shaped molds and topped with a silky cream cheese frosting and a fresh raspberry. Perfect for a romantic dinner party or any occasion where you want to impress.
- Prep Time: 20 minutes
- Cook Time: 18 minutes
- Total Time: 1 hour 15 minutes
- Yield: 12 cupcakes 1x
- Category: Dessert
- Cuisine: American
Ingredients
- 2 ½ cups (315g) all-purpose flour
- 1 ½ cups (300g) granulated sugar
- 2 tablespoons (15g) unsweetened cocoa powder
- 1 teaspoon baking soda
- ½ teaspoon salt
- 1 cup (240ml) vegetable oil
- 1 cup (240ml) buttermilk, room temperature
- 2 large eggs, room temperature
- 1 teaspoon white vinegar
- 1 teaspoon vanilla extract
- 1 to 2 tablespoons red gel food coloring
- 8 ounces (226g) cream cheese, softened
- ½ cup (113g) unsalted butter, softened
- 4 cups (480g) powdered sugar, sifted
- 2 teaspoons vanilla extract
- Pinch of salt
- 12 to 15 fresh raspberries
- Red sanding sugar or edible glitter (optional)
Instructions
- Preheat your oven to 350°F (175°C). Position the rack in the center of the oven. Line your heart-shaped cupcake pan with silicone baking cups or grease it well with butter or non-stick spray. Set it aside.
- In a large bowl, whisk together the all-purpose flour, granulated sugar, unsweetened cocoa powder, baking soda, and salt. Set aside.
- In a separate medium bowl, whisk together the vegetable oil, room-temperature buttermilk, eggs, white vinegar, and vanilla extract until smooth and well-combined.
- Pour in the red gel food coloring (start with 1 tablespoon) and whisk until the color is uniform.
- Pour the wet mixture into the bowl with the dry ingredients. Use a rubber spatula to gently fold together just until no streaks of flour remain. Do not overmix.
- Divide the batter evenly among the 12 heart-shaped cavities, filling each about ⅔ to ¾ full.
- Bake for 15 to 18 minutes, until a toothpick inserted into the center comes out clean or with a few moist crumbs. Let cool in the pan for 5 minutes, then transfer to a wire rack to cool completely.
- While the cupcakes cool, make the frosting: In a large bowl, beat the softened cream cheese and unsalted butter together with an electric hand mixer on medium speed until smooth and creamy, about 2 minutes.
- With the mixer on low speed, gradually add the sifted powdered sugar, about 1 cup at a time, mixing until each addition is incorporated.
- Add the vanilla extract and a tiny pinch of salt. Increase speed to medium-high and beat for 2 to 3 minutes until light, fluffy, and spreadable.
- Fit a piping bag with a large star tip (Wilton 1M) and fill with frosting. Pipe a spiral of frosting onto each cooled cupcake, starting at the outer edge and working inward, then lift to create a peak.
- Top each frosted cupcake with a fresh raspberry. Optionally, sprinkle with red sanding sugar or edible glitter.
Notes
Don’t overmix the batter. Use room temperature ingredients. Gel food coloring is essential for vibrant red. Start checking cupcakes at 15 minutes to avoid overbaking. Chill frosting if too soft. Cupcakes can be baked up to 2 days ahead; frost just before serving.
Nutrition
- Serving Size: 1 cupcake
- Calories: 420
- Sugar: 42
- Sodium: 220
- Fat: 22
- Saturated Fat: 9
- Carbohydrates: 55
- Fiber: 1
- Protein: 4
Keywords: red velvet, heart cupcakes, cream cheese frosting, Valentine's Day, dinner party dessert


