This was supposed to be my famous three-bean chili. I had it all planned out—the cans lined up on the counter like little soldiers, the ground beef already browning in the pot. But then my three-year-old decided it was the perfect moment to “help” by dumping the entire bag of kidney beans into the sink while I was wrestling with a stuck spice jar lid. Let me tell you, that moment tested every ounce of patience I had left after a long Tuesday.
I stood there, staring at the sink full of beans, the spicy aroma of browning meat filling the kitchen, and I almost just gave up and ordered pizza. Honestly, I was this close. But the beef was already halfway done, and the onions were softening in that perfect, translucent way that smells like home. So I made a split-second decision—I’d just skip the beans entirely and lean hard into the meat and spices. I figured it would be edible, maybe even okay, but nothing special.
What came out of that pot was nothing like the plan. It was richer, meatier, and somehow deeper in flavor than any chili I’d ever made. The texture was this incredible, thick, spoon-coating situation that felt more like a slow-braised beef stew than a traditional chili. My husband took one bite and asked me to never put beans in chili again. That’s how this no-bean chili for a crowd was born—out of a toddler-induced kitchen disaster and a refusal to give up on dinner.
Maybe you’ve been there, staring at a messed-up recipe and wondering if you should just scrap the whole thing. I’m here to tell you—don’t. Some of the best dishes come from those moments when everything goes wrong and you just have to wing it. This chili has become my go-to for game days, potlucks, and those cold evenings when you need something that feels like a warm blanket on the inside. And honestly? I haven’t bought a can of beans since.
Why You’ll Love This Recipe
Let me be straight with you—this isn’t just another chili recipe. This is the chili that people ask for by name at parties. The one that disappears first from the slow cooker at potlucks. And the best part? It’s surprisingly simple to pull off.
- Quick & Easy: This no-bean chili comes together in about an hour, most of which is just simmering time. Perfect for those days when you want something impressive without spending all afternoon in the kitchen.
- Simple Ingredients: Ground beef, canned tomatoes, onions, peppers, and a handful of spices. You probably have most of this in your pantry right now.
- Perfect for a Crowd: This recipe scales beautifully. I’ve made it for Super Bowl parties and family reunions, and it always delivers. One batch easily serves 8-10 hungry people.
- Crowd-Pleaser: Even the pickiest eaters love this. No weird textures, no surprise ingredients—just pure, meaty, spicy goodness that everyone can get behind.
- Unbelievably Delicious: The flavor is deep, complex, and seriously satisfying. The long simmer lets the spices meld together in a way that tastes like it cooked all day, even when it didn’t.
What makes this recipe different from all the other chili recipes out there? It’s the technique. Most people just dump everything in a pot and call it done. But I’ve learned that browning the meat in batches, letting the spices bloom in the hot fat, and giving the chili time to reduce and concentrate are what take it from good to “can I get this recipe?” territory. It’s comfort food at its finest—hearty, warming, and made for sharing with the people you love.
This is the kind of meal that makes you close your eyes after the first bite. It’s soul-soothing satisfaction in a bowl, perfect for cold nights, lazy Sundays, or any day that needs a little fixing.
What Ingredients You Will Need
This no-bean chili uses simple, straightforward ingredients that work together to create something truly special. Most of these are pantry staples, which makes this recipe perfect for last-minute cooking.
- Ground beef (3 pounds, 80/20 blend): The fat content is important here. 80/20 gives you enough richness without making the chili greasy. I prefer ground chuck for its beefy flavor.
- Yellow onions (2 large, diced): They provide the savory base for the whole dish. Sweet onions work too, but yellow onions give the best depth.
- Green bell peppers (2 large, diced): They add a subtle sweetness and nice texture. Red bell peppers work if that’s what you have.
- Garlic (6 cloves, minced): Don’t skimp here. Fresh garlic makes a real difference in the final flavor.
- Canned diced tomatoes (two 14.5-ounce cans, undrained): I prefer fire-roasted for extra smoky flavor. San Marzano tomatoes are great if you want to splurge.
- Canned crushed tomatoes (one 28-ounce can): This gives the chili its thick, hearty texture. Look for a brand with no added sugar.
- Tomato paste (one 6-ounce can): This is the secret to deep, concentrated tomato flavor. It’s worth the extra step.
- Beef broth (1 cup): Use low-sodium so you can control the salt level. Better than Bouillon mixed with water works great in a pinch.
- Chili powder (3 tablespoons): This is the backbone of the spice blend. I like Gebhardt for its balanced heat.
- Ground cumin (1 tablespoon): It adds that warm, earthy note that makes chili taste like chili.
- Smoked paprika (1 tablespoon): This is my secret weapon. It gives the chili a subtle smokiness that makes it taste like it cooked for hours.
- Dried oregano (1 teaspoon): A little goes a long way. Mexican oregano is ideal if you can find it.
- Cayenne pepper (½ teaspoon, or to taste): Adjust this based on your heat preference. Start small—you can always add more.
- Salt and black pepper (to taste): Season as you go, not just at the end.
- Olive oil (2 tablespoons): For browning the meat and sautéing the vegetables.
- Optional toppings: Shredded cheddar cheese, sour cream, diced red onion, fresh cilantro, sliced jalapeños, or crushed tortilla chips.
Equipment Needed
You don’t need fancy equipment for this no-bean chili, which is part of its charm. Here’s what you’ll need:
- Large heavy-bottomed pot or Dutch oven (at least 6 quarts): This is non-negotiable. A good pot distributes heat evenly and prevents burning. I use my trusty Le Creuset, but any heavy pot works.
- Sharp chef’s knife: Dicing onions and peppers is much easier with a sharp blade. It makes the whole prep process faster and safer.
- Cutting board: Go for a large one so you have plenty of room to work.
- Wooden spoon or spatula: For stirring and scraping up the browned bits from the bottom of the pot.
- Measuring spoons: Accurate spice measurements matter in chili.
- Can opener: You’ll be opening a lot of cans, so make sure it works well.
- Large bowl (optional): For holding the browned meat while you cook the vegetables.
If you don’t have a Dutch oven, a large stockpot works fine. Just keep an eye on the heat and stir more frequently to prevent sticking. I’ve made this chili in a cheap stockpot more times than I can count, and it always turns out great.
Preparation Method
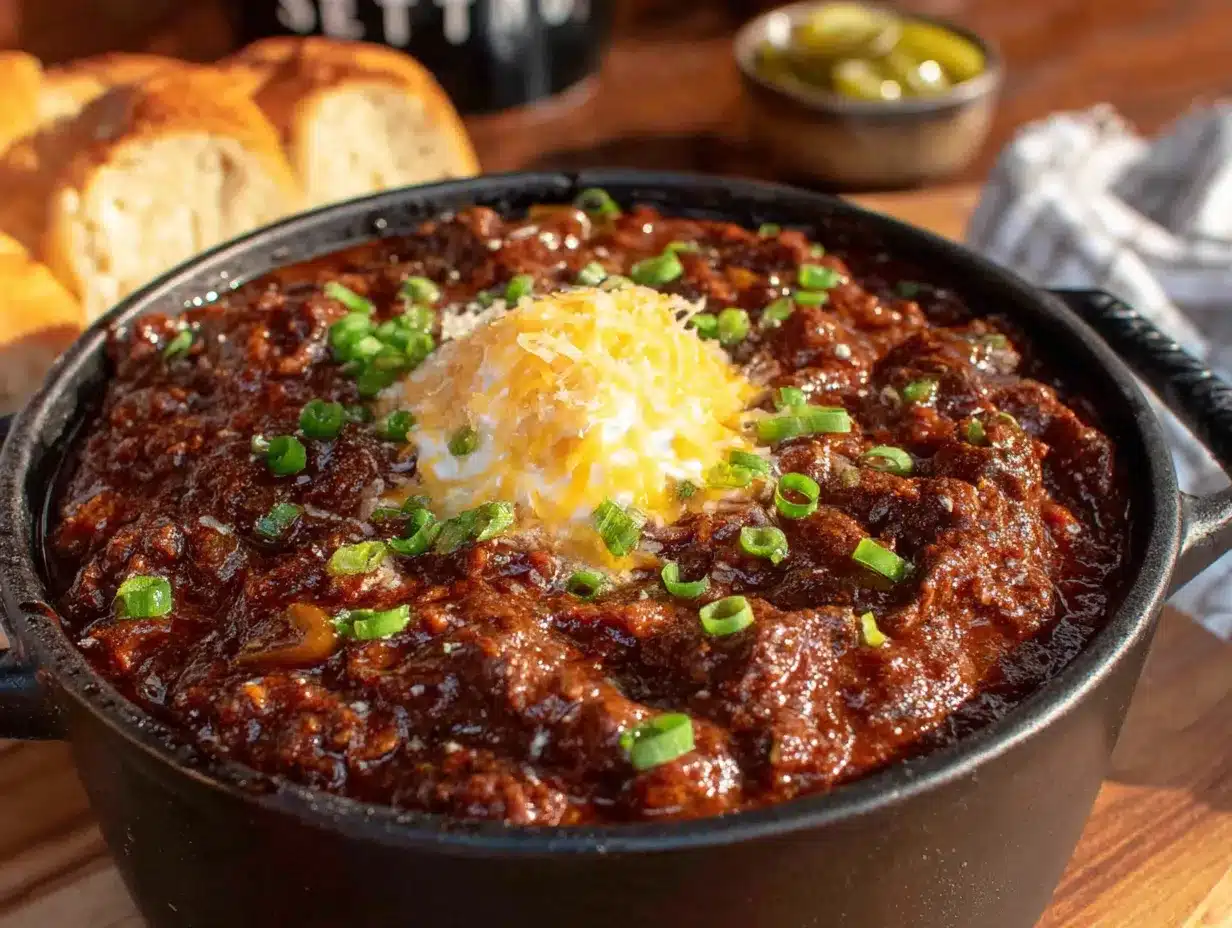
Let me walk you through this step by step. Trust the process, and you’ll end up with the best chili of your life.
- Brown the meat in batches. Heat 1 tablespoon of olive oil in your large pot over medium-high heat. Add about half the ground beef (1.5 pounds) and let it cook without moving for 4-5 minutes. You want a deep brown crust on the bottom. Break it up with your spoon and continue cooking until no longer pink. Use a slotted spoon to transfer the meat to a bowl, leaving the fat in the pot. Repeat with the remaining beef and the other tablespoon of oil.
- Sauté the vegetables. Reduce the heat to medium. Add the diced onions and bell peppers to the pot with the rendered fat. Cook for 6-8 minutes, stirring occasionally, until the onions are soft and translucent. The smell at this point is incredible—that savory, sweet aroma that tells you you’re on the right track.
- Bloom the spices. Add the minced garlic, chili powder, cumin, smoked paprika, oregano, and cayenne. Stir constantly for about 1 minute until the spices are fragrant. This step is crucial—it wakes up the flavors and makes them more potent. Your kitchen will smell amazing right about now.
- Add the tomato paste. Stir in the tomato paste and cook for 2 minutes, stirring frequently. It will darken slightly and start to stick to the bottom of the pot. This caramelization adds incredible depth.
- Combine everything. Return the browned beef to the pot, along with any accumulated juices. Add the diced tomatoes (with their juices), crushed tomatoes, and beef broth. Stir everything together until well combined.
- Simmer low and slow. Bring the chili to a gentle boil, then reduce the heat to low. Cover and let it simmer for 45 minutes, stirring occasionally. The longer it simmers, the better it gets. If you have time, let it go for a full hour.
- Season and adjust. After simmering, taste the chili and adjust the seasoning. You’ll likely need more salt than you think—chili can handle it. Add more cayenne if you want extra heat. If the chili seems too thick, add a splash of beef broth. If it’s too thin, let it simmer uncovered for 10 more minutes.
- Rest before serving. Remove the pot from the heat and let the chili rest for 10-15 minutes. This allows the flavors to settle and the texture to thicken slightly. Trust me, this little pause makes a difference.
A few sensory cues to watch for: The chili should be thick enough to coat the back of a spoon without being pasty. The color should be a deep, rich reddish-brown. And the aroma? It should smell like the best chili you’ve ever had—smoky, spicy, and deeply savory.
Cooking Tips & Techniques
I’ve made this no-bean chili more times than I can count, and I’ve learned a few things along the way. Some of these tips came from happy accidents, others from outright failures.
Don’t skip the browning. I know it’s tempting to just dump all the meat in at once and save time, but you’ll lose that deep, beefy flavor. Browning in batches ensures each piece gets good contact with the hot pan. The browned bits stuck to the bottom of the pot are pure flavor gold.
Let the spices bloom. This was a game-changer for me. Adding spices to the hot fat before adding any liquid releases their essential oils and makes them exponentially more flavorful. It only takes a minute, but it transforms the whole dish.
Watch your heat. Chili burns easily if you’re not careful. Keep it at a gentle simmer—just a few bubbles breaking the surface—not a rolling boil. If you see it boiling hard, turn it down immediately.
Make it ahead. This chili actually tastes better the next day. The flavors have time to meld and deepen overnight in the fridge. I often make it a day ahead for parties, and it’s always a hit.
One mistake I’ll never make again: I once tried to speed things up by using a higher heat. The bottom scorched, and the whole pot had a bitter, burnt taste. I had to throw it out and start over. Lesson learned—low and slow is the way to go.
Timing strategy: While the chili simmers, you have plenty of time to prep your toppings and sides. Grate the cheese, dice the onions, set out the sour cream. It makes serving so much easier.
Variations & Adaptations
One of the best things about this no-bean chili is how adaptable it is. Here are some variations I’ve tried and loved:
Turkey chili: Swap the ground beef for ground turkey (93/7 blend). Add an extra tablespoon of olive oil since turkey is leaner. The flavor is slightly lighter but still delicious. My sister-in-law makes this version, and it’s her go-to for healthy meal prep.
Spicy version: Add 2 diced jalapeños (seeds included for extra heat) with the onions and peppers. Stir in 1 tablespoon of chipotle peppers in adobo sauce for smoky heat. Top with fresh sliced jalapeños for a fresh kick. My husband loves this version—the more heat, the better.
Slow cooker method: Brown the meat and sauté the vegetables on the stovetop as directed. Transfer everything to a slow cooker and cook on low for 6-8 hours or high for 3-4 hours. This is perfect for busy days when you want dinner ready when you walk in the door.
Mushroom and beef blend: Replace 1 pound of ground beef with 8 ounces of finely chopped cremini mushrooms. Sauté the mushrooms with the onions until they release their liquid and start to brown. This adds a wonderful umami flavor and stretches the meat further.
Smoky chipotle version: Add 2-3 chipotle peppers in adobo sauce, finely chopped, along with the spices. The smoky heat is incredible and gives the chili a completely different personality. I made this for a tailgate party once, and people were literally licking their bowls.
Serving & Storage Suggestions
This chili is incredibly versatile when it comes to serving. Here’s how I like to do it:
Serving temperature: Serve piping hot, straight from the pot. Ladle into deep bowls and let people customize their own toppings. A chili bar is always a hit—set out bowls of shredded cheddar, sour cream, diced red onion, fresh cilantro, sliced jalapeños, and crushed tortilla chips.
Perfect pairings: Cornbread is the classic side, and for good reason—the sweet, crumbly texture is perfect for soaking up the chili. A simple green salad with a tangy vinaigrette cuts through the richness beautifully. For drinks, a cold beer or a glass of full-bodied red wine works wonders.
Storage instructions: Let the chili cool completely before storing. Transfer to airtight containers and refrigerate for up to 5 days. The flavor actually improves over the first few days as the spices meld together.
Freezer instructions: This chili freezes like a dream. Portion into freezer-safe bags or containers, leaving a little room for expansion. Freeze for up to 3 months. Thaw overnight in the refrigerator before reheating.
Reheating methods: Reheat on the stovetop over medium-low heat, stirring occasionally, until bubbling. You can also microwave individual portions in 30-second bursts, stirring between each. If the chili seems too thick after freezing, add a splash of beef broth or water to loosen it up.
Flavor development: I’ve noticed that this chili is at its absolute best on day two or three. The flavors have time to settle and deepen, and the texture becomes even more luscious. Don’t be afraid to make it ahead—your future self will thank you.
Nutritional Information & Benefits
Here’s the approximate nutritional breakdown for one serving (based on 8 servings, not including toppings):
| Nutrient | Amount per Serving |
|---|---|
| Calories | 425 |
| Protein | 32g |
| Fat | 28g |
| Carbohydrates | 12g |
| Fiber | 3g |
| Sugar | 6g |
| Sodium | 680mg |
Health benefits: This chili is packed with protein from the beef, which helps keep you full and satisfied. The tomatoes are rich in lycopene, a powerful antioxidant. Onions and garlic provide immune-supporting compounds. And the spices—cumin, chili powder, smoked paprika—have anti-inflammatory properties.
Dietary considerations: This recipe is naturally gluten-free and low-carb (about 12g net carbs per serving). It’s also dairy-free if you skip the cheese topping. For a lower-fat option, use ground sirloin (90/10) and drain off the fat after browning.
Potential allergens: This recipe is free of common allergens like nuts, eggs, and soy. However, if you’re sensitive to nightshades (tomatoes, peppers), this may not be suitable. Always check your spice blends for hidden additives.
I love that this chili feels indulgent but is actually pretty balanced. It’s the kind of meal that nourishes you from the inside out—warm, satisfying, and made with real, whole ingredients.
Conclusion
This no-bean chili for a crowd has become a staple in my kitchen for good reason. It started as a happy accident, but it’s earned its place in my regular rotation through sheer deliciousness. It’s the recipe I turn to when I need to feed a crowd, when I want comfort food on a cold night, or when I just need something that feels like a hug in a bowl.
I hope you’ll make this your own. Adjust the spices to your liking, pile on your favorite toppings, and share it with the people you love. That’s what this recipe is really about—bringing people together around a warm, satisfying meal that doesn’t require hours of effort.
If you make this chili, I’d love to hear about it. Drop a comment below and let me know how it turned out, what toppings you used, or if you came up with your own variation. And if you’re looking for more crowd-pleasing comfort food, check out my crispy garlic chicken or slow cooker beef stew—they’re both perfect for those cozy nights in.
Happy cooking, friends. Go make some chili and warm up your soul.
Frequently Asked Questions
Can I use a different type of ground meat?
Absolutely. Ground turkey, chicken, or even ground pork work well. Just adjust the cooking time and fat content as needed. Leaner meats may require a little extra oil to prevent sticking.
How can I make this chili less spicy?
Reduce or omit the cayenne pepper. Stick with just the chili powder and cumin for a mild, family-friendly version. You can also serve it with a dollop of sour cream, which helps cool down the heat.
Can I add beans to this recipe?
Of course! If you want to add beans, stir in two cans of drained and rinsed kidney beans or pinto beans during the last 15 minutes of simmering. Just know that the texture and flavor will be different from the original recipe.
How do I thicken the chili if it’s too thin?
Let it simmer uncovered for 10-15 minutes to allow excess liquid to evaporate. You can also mash a few tablespoons of the chili against the side of the pot to release the starches, which will naturally thicken the sauce.
Can I double this recipe for a really large crowd?
Yes, this recipe doubles beautifully. Just make sure you have a large enough pot—at least 10 quarts for a double batch. You may need to increase the simmering time slightly to allow the flavors to meld properly.
PrintBest Easy No-Bean Chili for a Crowd

This rich, meaty no-bean chili was born from a kitchen disaster and has become a go-to for game days, potlucks, and cozy nights. It’s surprisingly simple to make, packed with deep flavor, and perfect for feeding a crowd.
- Prep Time: 15 minutes
- Cook Time: 1 hour
- Total Time: 1 hour 15 minutes
- Yield: 8-10 servings 1x
- Category: Main Course
- Cuisine: American
Ingredients
- 3 pounds ground beef (80/20 blend)
- 2 large yellow onions, diced
- 2 large green bell peppers, diced
- 6 cloves garlic, minced
- 2 (14.5-ounce) cans diced tomatoes, undrained
- 1 (28-ounce) can crushed tomatoes
- 1 (6-ounce) can tomato paste
- 1 cup low-sodium beef broth
- 3 tablespoons chili powder
- 1 tablespoon ground cumin
- 1 tablespoon smoked paprika
- 1 teaspoon dried oregano
- ½ teaspoon cayenne pepper (or to taste)
- Salt and black pepper to taste
- 2 tablespoons olive oil
- Optional toppings: shredded cheddar cheese, sour cream, diced red onion, fresh cilantro, sliced jalapeños, crushed tortilla chips
Instructions
- Brown the meat in batches: Heat 1 tablespoon olive oil in a large pot over medium-high heat. Add half the ground beef (1.5 pounds) and cook without moving for 4-5 minutes until a deep brown crust forms. Break up the meat and continue cooking until no longer pink. Transfer to a bowl with a slotted spoon, leaving fat in the pot. Repeat with remaining beef and oil.
- Sauté the vegetables: Reduce heat to medium. Add diced onions and bell peppers to the pot with the rendered fat. Cook for 6-8 minutes, stirring occasionally, until onions are soft and translucent.
- Bloom the spices: Add minced garlic, chili powder, cumin, smoked paprika, oregano, and cayenne. Stir constantly for about 1 minute until fragrant.
- Add the tomato paste: Stir in tomato paste and cook for 2 minutes, stirring frequently, until it darkens slightly and starts to stick to the bottom.
- Combine everything: Return browned beef to the pot along with any accumulated juices. Add diced tomatoes (with juices), crushed tomatoes, and beef broth. Stir until well combined.
- Simmer low and slow: Bring to a gentle boil, then reduce heat to low. Cover and simmer for 45 minutes, stirring occasionally. For best flavor, simmer up to 1 hour.
- Season and adjust: Taste and adjust seasoning. Add more salt if needed, and more cayenne for extra heat. If too thick, add a splash of beef broth. If too thin, simmer uncovered for 10 more minutes.
- Rest before serving: Remove from heat and let rest for 10-15 minutes to allow flavors to settle and texture to thicken.
Notes
For best flavor, make this chili a day ahead and refrigerate overnight. The flavors meld and deepen. To freeze, portion into freezer-safe bags or containers and freeze for up to 3 months. Thaw overnight in the refrigerator before reheating. Reheat on stovetop over medium-low heat or in the microwave.
Nutrition
- Serving Size: 1 serving (based on
- Calories: 425
- Sugar: 6
- Sodium: 680
- Fat: 28
- Saturated Fat: 10
- Carbohydrates: 12
- Fiber: 3
- Protein: 32
Keywords: no-bean chili, chili for a crowd, easy chili recipe, ground beef chili, game day chili, potluck chili, comfort food, gluten-free chili, low-carb chili


