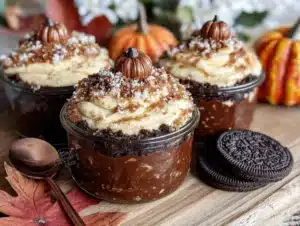
My sister swore she hated “dirt” desserts. For years. Every time someone brought a gummy worm-studded chocolate pudding cup to a potluck, she’d make this little face—you know the one—and whisper something about how it was a “kids-only” thing. I never pushed it, honestly. Some hills aren’t worth dying on, especially ones involving crushed Oreos and fake worms. But then last October, I was testing a pumpkin version for a Halloween party I was hosting, and I caught her standing in front of my open fridge at 11 p.m., spoon already in hand, halfway through one of the cups I’d made “just for the party.” She didn’t even flinch when I walked in. Just looked at me, took another bite, and said, “Okay, this is different. This is actually good.”
That moment stuck with me, partly because it was hilarious watching her get caught red-handed, but mostly because she was right. This no-bake pumpkin dirt pudding is different. It has that same nostalgic, creamy, spoon-able appeal of the classic version we all grew up with, but it trades the artificial colors for real pumpkin flavor and a cozy, spiced warmth that feels like fall in a cup. The texture is this perfect cross between a mousse and a pudding—light enough to feel indulgent but rich enough to satisfy that deep dessert craving. And the best part? You don’t even need to turn on your oven.
These little cups are what I bring to every fall gathering now. They’re the dessert that makes people pause, look at the ingredients, and then ask for the recipe before they’ve even finished their first serving. Maybe you’ve been there too—looking for something that feels special but doesn’t require a complicated baking project. Something that tastes like you spent hours on it but actually comes together in about twenty minutes. These cozy no-bake pumpkin patch dirt pudding cups are that dessert. Let me show you how to make them.
Why You’ll Love This Recipe
I’ve tested this recipe about six times now—tweaking the spice ratio, adjusting the pumpkin-to-cream cheese balance, even trying different cookie brands for the “dirt” topping. After all that trial and error (and a few very happy taste-testers), here’s why this version is the one you’ll keep coming back to:
- No Oven Required: This is a true no-bake dessert. No heating up the kitchen, no watching the clock for baking times. Just mix, layer, and chill.
- Simple Ingredients: You probably already have most of these in your pantry. Canned pumpkin, cream cheese, whipped topping, and some crushed cookies. No fancy grocery store trips needed.
- Perfect for Fall Gatherings: Whether it’s a Halloween party, Thanksgiving dessert table, or just a cozy Sunday afternoon, these cups fit right in. They’re portable, individual-sized, and always get noticed.
- Crowd-Pleaser for All Ages: Kids love the “dirt” and gummy worm factor, adults appreciate the sophisticated pumpkin spice flavor. It’s rare to find a dessert that genuinely works for both groups.
- Make-Ahead Friendly: These actually taste better after a few hours in the fridge. The flavors meld together, the texture sets up perfectly, and you can make them a day ahead without any stress.
What makes this recipe different from the countless other pumpkin pudding recipes out there? It’s the texture. Most pumpkin puddings end up either too dense (like a heavy cheesecake filling) or too runny (like a thin custard). This one hits that sweet spot—creamy, almost mousse-like, with just enough structure to hold its shape when you spoon into it. The cream cheese gives it a slight tang that balances the sweetness, and the pumpkin puree keeps it feeling light instead of heavy. Plus, the crushed cookie “dirt” on top adds that satisfying crunch that makes every bite interesting.
This isn’t just good for a no-bake dessert. It’s good, period. The kind of dessert that makes you close your eyes after the first bite and just enjoy the moment. It’s comfort food reimagined for fall—easier than pumpkin pie, faster than pumpkin cheesecake, but with the same soul-soothing satisfaction. Perfect for impressing guests without breaking a sweat, or turning a simple weeknight into something a little more special.
What Ingredients You Will Need
This recipe uses simple, wholesome ingredients to deliver that bold pumpkin flavor and creamy texture without any complicated steps. Most of these are pantry staples for fall baking, and I’ve included notes on substitutions where they work well.
- 1 can (15 oz) pumpkin puree (not pumpkin pie filling—make sure you grab the plain puree. I prefer Libby’s for consistent texture, but store brands work fine too. Look for 100% pumpkin with no added spices.)
- 8 oz cream cheese, softened to room temperature (Full-fat gives the best creamy texture, but reduced-fat works in a pinch. Just know the final texture will be slightly less rich. Let it sit out for at least 30 minutes before starting.)
- 1 cup powdered sugar (Also called confectioners’ sugar. This dissolves smoothly into the cream cheese without any graininess. Don’t substitute granulated sugar here—it won’t blend properly.)
- 1 teaspoon pumpkin pie spice (Store-bought is fine, but you can make your own by mixing ½ teaspoon cinnamon, ¼ teaspoon nutmeg, ¼ teaspoon ginger, and a pinch of cloves. I actually prefer my homemade blend—it feels more personal.)
- ½ teaspoon vanilla extract (Pure vanilla extract adds a warmth that artificial vanilla just can’t match. It’s worth using the real stuff here.)
- 1 ½ cups cold heavy cream (Or one 8-ounce tub of frozen whipped topping, thawed. I’ve tested both, and honestly, the whipped topping is more stable for make-ahead desserts. But if you want to whip your own cream, go for it—just make sure it’s very cold and you whip it to stiff peaks.)
- 24 chocolate sandwich cookies (Oreos are the classic choice, but any chocolate sandwich cookie works. You’ll crush these into a fine “dirt” texture. I recommend removing the cream filling first for a darker, more soil-like look, but leaving it in gives a slightly sweeter result.)
- Gummy worms and pumpkins for decoration (This is where the “pumpkin patch” theme comes in. You can find seasonal gummy pumpkins at most grocery stores in the fall. Gummy worms add that playful dirt-dessert vibe. Both are optional but highly recommended for presentation.)
- Optional: 2 tablespoons melted butter (Mixing this into the crushed cookies helps them clump together slightly, giving a more realistic “dirt” texture. Not necessary, but it adds a nice richness.)
For the pumpkin puree, I’ve found that different brands have slightly different water content. If your puree looks very watery, let it sit in a fine-mesh strainer lined with paper towels for about 15 minutes to drain off excess liquid. This prevents the pudding from becoming too runny. It’s a small step that makes a big difference.
If you’re dairy-free, you can substitute the cream cheese with a plant-based version (Kite Hill makes a good one) and use coconut cream instead of heavy cream. The texture will be slightly different—a bit more coconut flavor—but it still works beautifully. Just make sure everything is well-chilled before whipping.
Equipment Needed
You don’t need any fancy equipment for this recipe, which is part of what makes it so approachable. Here’s what you’ll want to have on hand:
- Electric hand mixer or stand mixer (You can technically do this by hand with a whisk, but your arm will get tired. A hand mixer makes the cream cheese mixture silky smooth in about two minutes. I’ve used my old KitchenAid hand mixer for years—it’s a workhorse.)
- Large mixing bowls (You’ll need at least two: one for the cream cheese mixture and one for whipping the cream. Glass or stainless steel works best because they stay cold longer.)
- Food processor or rolling pin (For crushing the cookies into “dirt.” A food processor gives the most consistent texture, but a zip-top bag and a rolling pin work just as well—and it’s oddly satisfying to smash them yourself.)
- Small clear cups or glasses (I use 6-ounce clear plastic cups for parties because they’re portable and you can see the layers. But any small glass jars, mason jars, or even small bowls work. The clear cups really show off the pretty layers, though.)
- Spatula (A rubber spatula helps scrape every bit of that creamy pumpkin mixture into the cups. Don’t waste any of it.)
- Measuring cups and spoons (Standard set for accurate measurements. Baking is a science, even when you’re not baking.)
If you don’t have a food processor, don’t worry. Place the cookies in a sturdy zip-top bag, seal it, and go to town with a rolling pin or even the bottom of a heavy skillet. It’s a great way to release some stress, honestly. Just make sure the bag doesn’t have any holes, or you’ll have chocolate dust everywhere—speaking from experience here.
Preparation Method
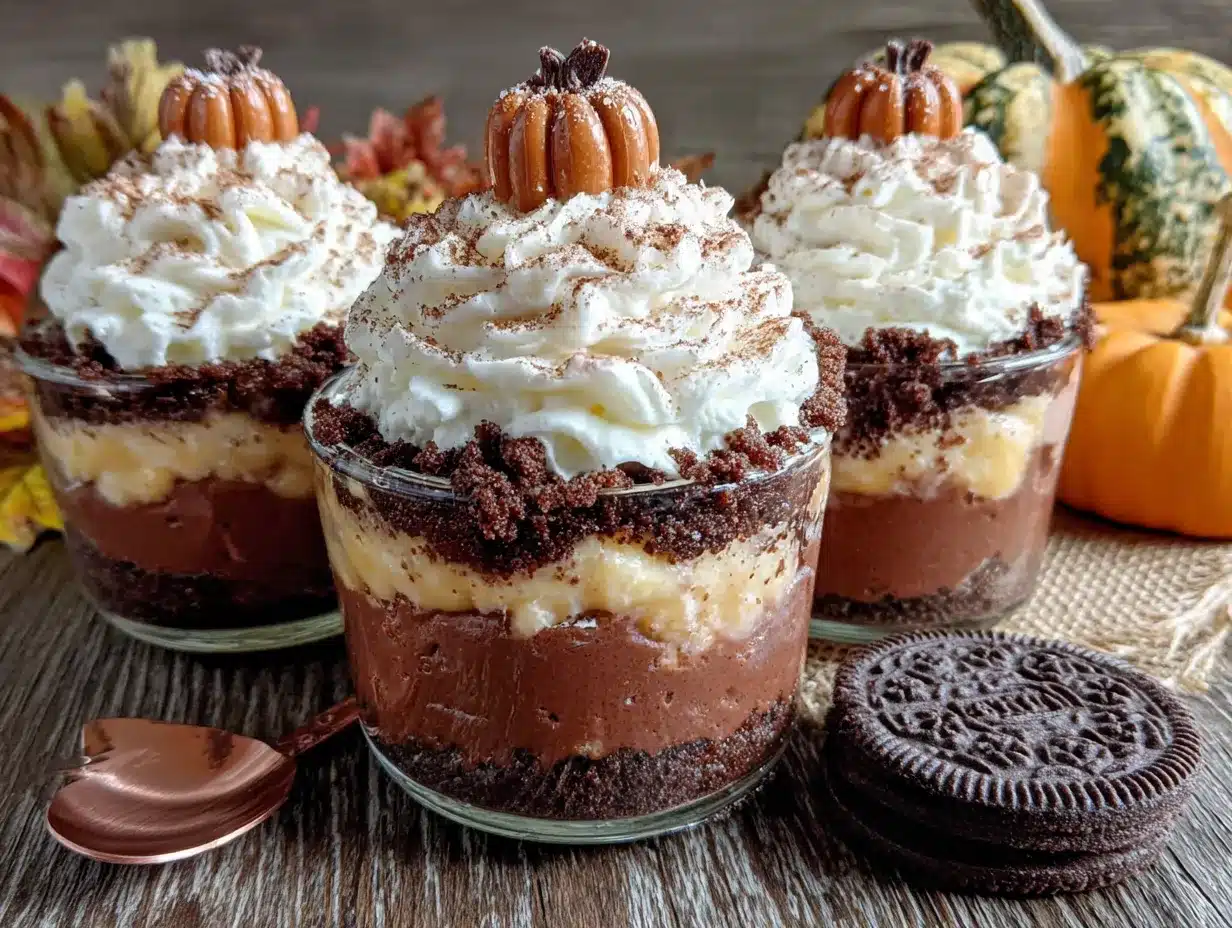
This comes together in about 20 minutes of active time, plus at least 2 hours of chilling. The waiting is the hardest part, I know, but it’s essential for the texture to set properly.
- Crush the cookies into “dirt.” Place 24 chocolate sandwich cookies in a food processor and pulse until you have fine crumbs that resemble soil. If using the rolling pin method, place cookies in a zip-top bag and crush until you have a consistent texture. For a more realistic look, remove the white cream filling from the cookies before crushing—this gives a darker, more soil-like color. Transfer the crumbs to a bowl. If using melted butter, stir in 2 tablespoons now until the crumbs are evenly moistened. Set aside.
- Beat the cream cheese until smooth. In a large mixing bowl, beat the softened 8 ounces of cream cheese with an electric mixer on medium speed until it’s completely smooth and free of lumps. This usually takes about 1-2 minutes. Scrape down the sides of the bowl with a spatula halfway through. Don’t rush this step—lumpy cream cheese means lumpy pudding.
- Add the sugar and spices. Add 1 cup of powdered sugar, 1 teaspoon of pumpkin pie spice, and ½ teaspoon of vanilla extract to the cream cheese. Beat on low speed at first to avoid a sugar cloud, then increase to medium and beat until everything is well combined and fluffy, about 1 minute. The mixture should be pale and smooth. Scrape the bowl again.
- Mix in the pumpkin puree. Add the entire 15-ounce can of pumpkin puree to the cream cheese mixture. Beat on medium speed until the pumpkin is fully incorporated and the mixture is a uniform orange color. It will look a bit looser than you might expect—that’s normal. The texture will firm up once you fold in the whipped cream and chill it.
- Whip the cream (or use whipped topping). In a separate clean bowl, pour 1 ½ cups of cold heavy cream. Beat on high speed with clean beaters until stiff peaks form—this means when you lift the beaters, the cream holds its shape without drooping. It usually takes 3-4 minutes. Be careful not to over-whip, or you’ll end up with butter. If using frozen whipped topping, simply thaw it in the refrigerator and skip this step.
- Fold the whipped cream into the pumpkin mixture. This is the most important step for texture. Add about one-third of the whipped cream to the pumpkin mixture and gently fold it in with a spatula using a cutting motion—down through the middle, across the bottom, and up the side. Rotate the bowl as you go. Once that’s mostly incorporated, add the remaining whipped cream and continue folding until no white streaks remain. The mixture should be light, airy, and a beautiful pale orange. Don’t stir vigorously, or you’ll deflate all that air.
- Layer the cups. Take your small cups or glasses and start with a layer of crushed cookie “dirt” at the bottom—about 1 to 2 tablespoons per cup, depending on the size. Spoon or pipe the pumpkin pudding mixture on top, filling each cup about three-quarters full. Smooth the tops with the back of a spoon or a small offset spatula.
- Top with more “dirt” and decorations. Sprinkle a generous layer of the remaining cookie crumbs over the top of each cup, covering the pumpkin layer completely. This is where the “dirt” look really comes together. Press the crumbs down gently so they stick to the pudding. Add gummy worms poking out of the “dirt” and a few gummy pumpkins on top for that pumpkin patch theme.
- Chill for at least 2 hours. Place the cups in the refrigerator uncovered for about 30 minutes to let the tops set, then cover loosely with plastic wrap or place in an airtight container. Chill for at least 2 hours, but overnight is even better. The flavors meld together beautifully as they rest.
A quick note on piping: if you want cleaner layers, transfer the pumpkin pudding to a piping bag or a zip-top bag with the corner snipped off. This lets you pipe the pudding into the cups without messing up the bottom cookie layer. It’s not strictly necessary, but it does give a more polished look if you’re serving these for a party.
Cooking Tips & Techniques
After making these pumpkin patch dirt pudding cups about a dozen times (for science, obviously), I’ve learned a few things that make the process smoother and the results more consistent. Let me share what I wish I’d known from the start.
Room temperature cream cheese is non-negotiable. I know it’s tempting to use cold cream cheese straight from the fridge, but it will leave you with lumpy pudding no matter how long you beat it. Let it sit on the counter for at least 30 minutes before starting. If you’re in a hurry, cut it into small cubes and microwave it on low power for 10-second intervals until it’s soft but not melted. Trust me on this one—I learned the hard way when I had to strain lumps out of my first batch.
Don’t skip the draining step for watery pumpkin puree. Some brands of pumpkin puree have more water than others. If you notice liquid pooling on top when you open the can, pour it off or gently press the puree through a fine-mesh strainer lined with paper towels. Too much moisture in the pumpkin will make your pudding runny, and no amount of chilling will fix that. Better to remove it upfront.
Fold, don’t stir. When incorporating the whipped cream into the pumpkin mixture, use a gentle folding motion rather than stirring in circles. Stirring deflates the air you’ve carefully whipped into the cream, resulting in a denser, less creamy pudding. Folding takes a little longer, but the light, mousse-like texture is worth it. You’ll know you’re done when the mixture is uniform in color and has a soft, billowy consistency.
Chill time matters more than you think. I know it’s hard to wait, but these really do need at least 2 hours in the fridge. The pudding needs time to set up properly, and the flavors need time to meld. If you serve them too soon, the texture will be loose and the pumpkin spice flavor won’t have fully developed. Overnight chilling is ideal—the difference between 2 hours and 12 hours is noticeable.
Make extra cookie crumbs. You’ll want a generous top layer of “dirt” on each cup, and having extra crumbs means you can be generous without worrying about running out. Plus, you can use any leftovers as a topping for ice cream or yogurt. It’s a win-win.
Variations & Adaptations
One of the best things about this recipe is how flexible it is. Here are some variations I’ve tried and loved:
Dairy-Free Version: Use plant-based cream cheese (Kite Hill or Violife work well) and coconut cream instead of heavy cream. The coconut cream needs to be chilled overnight, then whipped just like regular cream. The flavor will have a subtle coconut note, but it actually pairs nicely with the pumpkin and spices. I tested this for a friend with dairy allergies, and she said it was better than the original—though I think she was just being nice.
Gluten-Free Version: Swap the chocolate sandwich cookies for gluten-free chocolate cookies. Brands like Glutino or Goodie Girl make excellent options that crush up just like regular Oreos. Everything else in the recipe is naturally gluten-free, so this is an easy adaptation.
Pumpkin Cheesecake Style: For a richer, denser texture, increase the cream cheese to 12 ounces and reduce the heavy cream to 1 cup. This gives you more of a no-bake cheesecake filling that’s still creamy but has a firmer set. Top with a dollop of whipped cream instead of cookie crumbs for a different presentation.
Spice It Up: If you like things spicy, add an extra ¼ teaspoon of ginger and a pinch of cayenne pepper to the pumpkin mixture. The heat is subtle but adds a nice warmth that lingers. I tried this on a whim and now it’s my preferred version for chilly November evenings.
Individual Trifles: Instead of small cups, layer the pudding and cookie crumbs in a large glass trifle dish. Repeat the layers two or three times, ending with cookie crumbs on top. This makes a stunning centerpiece for a fall dessert table, and it serves a crowd without needing individual cups.
Serving & Storage Suggestions
These pumpkin patch dirt pudding cups are best served cold, straight from the refrigerator. The texture is at its peak when the pudding is fully chilled and set—creamy, smooth, and just firm enough to hold its shape when you dig in with a spoon.
For presentation, I like to arrange the cups on a wooden board or a fall-themed platter, surrounded by mini pumpkins, colorful leaves, or small gourds. It makes the whole spread feel intentional and seasonal. If you’re serving these at a Halloween party, you can add a few plastic spider rings or candy eyeballs to the top for a spooky touch. For Thanksgiving, keep it elegant with just the gummy pumpkins and maybe a sprinkle of cinnamon on top.
These pair beautifully with a warm drink—think hot apple cider, a pumpkin spice latte, or even a mug of spiced tea. The cool, creamy pudding contrasts nicely with something warm and cozy. If you’re serving them as part of a dessert spread, they go well with apple crisp, pecan pie bars, or even just a simple plate of shortbread cookies.
Storage Instructions: Store any leftover cups in the refrigerator, covered tightly with plastic wrap or in an airtight container. They’ll keep for up to 3 days, though the cookie “dirt” on top may soften over time. If that bothers you, you can store the cookie crumbs separately and add them just before serving. I personally don’t mind the softened texture—it reminds me of the bottom of a good ice cream sundae.
These can also be frozen, though I don’t recommend it for the best texture. If you must freeze them, do so without the cookie topping. Wrap each cup individually in plastic wrap and then foil, and freeze for up to 1 month. Thaw in the refrigerator overnight, then add fresh cookie crumbs before serving. The pudding will be slightly icier after freezing, but it’s still delicious.
One thing I love about this recipe is that the flavors actually improve after a day in the fridge. The pumpkin spice has time to meld with the cream cheese and cream, resulting in a more rounded, cohesive flavor. So don’t hesitate to make these a day ahead—they’ll be even better.
Nutritional Information & Benefits
While these are definitely a treat, they do offer a few nutritional perks worth noting. Here’s the estimated breakdown per serving (based on 8 servings):
| Nutrient | Amount per Serving |
|---|---|
| Calories | 385 |
| Total Fat | 24g |
| Saturated Fat | 13g |
| Cholesterol | 65mg |
| Sodium | 280mg |
| Total Carbohydrates | 40g |
| Dietary Fiber | 3g |
| Sugars | 28g |
| Protein | 5g |
| Vitamin A | 190% DV |
| Vitamin C | 4% DV |
| Calcium | 8% DV |
| Iron | 10% DV |
The star ingredient here is pumpkin, which is packed with vitamin A—one serving provides nearly 200% of your daily needs. Vitamin A is essential for eye health, immune function, and healthy skin. Pumpkin also contains fiber, which helps with digestion and keeps you feeling full longer. The cream cheese and heavy cream add calcium and protein, though they also bring the fat content up, so this is definitely a “sometimes” dessert rather than an everyday indulgence.
If you’re watching your sugar intake, you can reduce the powdered sugar to ¾ cup without significantly affecting the texture. The pumpkin and cream cheese provide enough richness that you won’t miss the extra sweetness. For a lower-fat version, use reduced-fat cream cheese and light whipped topping, but be aware that the texture will be less creamy and luxurious.
This recipe contains dairy and gluten (from the cookies), so it’s not suitable for those with allergies to those ingredients unless you use the substitutions mentioned in the variations section. It is egg-free and nut-free as written, making it a good option for many common dietary restrictions.
Conclusion
These cozy no-bake pumpkin patch dirt pudding cups are everything I want in a fall dessert—they’re easy, impressive, and deeply satisfying in that nostalgic, comfort-food way. No oven required, no complicated techniques, just simple ingredients that come together into something that feels special. Whether you’re making them for a Halloween party, a Thanksgiving dessert table, or just because it’s October and you want to celebrate the season, they deliver every time.
I love that this recipe lets you be creative with the toppings and presentation. You can go playful with gummy worms and spiders, or keep it elegant with just the cookie crumbs and a dusting of cinnamon. It adapts to your mood and your occasion, which is exactly what a good recipe should do. Plus, it’s the kind of dessert that makes people smile—there’s something inherently joyful about eating “dirt” that looks like a tiny pumpkin patch.
I’d love to hear how these turn out for you! Did you add your own twist? Did your kids help with the cookie crushing? Drop a comment below and let me know—I read every single one, and your ideas often inspire my next recipe test. And if you’re looking for more easy fall desserts, check out my pumpkin bars with cream cheese frosting or these apple cider donut hole bites. Happy fall baking, friends—or in this case, happy fall no-baking!
Frequently Asked Questions
Can I use homemade pumpkin puree instead of canned?
Yes, you can! Just make sure to drain it well. Homemade pumpkin puree tends to be more watery than canned. After making your puree, let it sit in a fine-mesh strainer lined with cheesecloth or paper towels for at least 30 minutes to remove excess moisture. Too much water will make your pudding runny.
How far in advance can I make these pudding cups?
You can make them up to 3 days in advance. In fact, they taste better after a day in the fridge because the flavors have time to meld together. Just wait to add the gummy decorations until right before serving, or they’ll soften and lose their shape.
Can I use low-fat cream cheese or whipped topping?
You can, but the texture will be different. Low-fat cream cheese has more water and less fat, which can make the pudding less creamy and slightly grainy. Light whipped topping works fine, but the final texture won’t be as rich and luxurious. For the best results, stick with full-fat ingredients.
My pudding turned out runny. What went wrong?
This usually happens for one of three reasons: the pumpkin puree was too watery, the cream cheese wasn’t fully softened before mixing, or the whipped cream wasn’t whipped to stiff peaks. Next time, drain the pumpkin puree, make sure your cream cheese is at room temperature, and whip the cream until it holds firm peaks that don’t droop.
Can I make these in a large dish instead of individual cups?
Absolutely! Layer the cookie crumbs and pudding in a 9×9 inch dish or a large trifle bowl. Repeat the layers two or three times, ending with cookie crumbs on top. This is perfect for feeding a crowd, and it looks beautiful on a dessert table. Just make sure to chill it for at least 3 hours so the layers set properly.
PrintCozy No-Bake Pumpkin Dirt Pudding Cups (Easy Fall Dessert)
These no-bake pumpkin dirt pudding cups are a creamy, spiced fall dessert with a playful ‘dirt’ topping made from crushed chocolate cookies. Perfect for Halloween or Thanksgiving, they come together in about 20 minutes and require no oven.
- Prep Time: 20 minutes
- Cook Time: 0 minutes
- Total Time: 2 hours 20 minutes (includes chilling)
- Yield: 8 servings 1x
- Category: Dessert
- Cuisine: American
Ingredients
- 1 can (15 oz) pumpkin puree (not pumpkin pie filling)
- 8 oz cream cheese, softened to room temperature
- 1 cup powdered sugar
- 1 teaspoon pumpkin pie spice
- ½ teaspoon vanilla extract
- 1 ½ cups cold heavy cream (or 8 oz frozen whipped topping, thawed)
- 24 chocolate sandwich cookies (e.g., Oreos)
- Gummy worms and pumpkins for decoration (optional)
- 2 tablespoons melted butter (optional, for cookie crumbs)
Instructions
- Crush the cookies into fine crumbs using a food processor or a zip-top bag and rolling pin. For a darker ‘dirt,’ remove the cream filling before crushing. If using melted butter, stir it into the crumbs. Set aside.
- In a large bowl, beat the softened cream cheese with an electric mixer on medium speed until smooth, about 1-2 minutes. Scrape down the sides.
- Add powdered sugar, pumpkin pie spice, and vanilla extract. Beat on low speed to combine, then increase to medium and beat until fluffy, about 1 minute. Scrape the bowl.
- Add the pumpkin puree and beat on medium speed until fully incorporated and the mixture is a uniform orange color.
- In a separate clean bowl, beat the cold heavy cream on high speed until stiff peaks form, about 3-4 minutes. (If using whipped topping, skip this step.)
- Gently fold one-third of the whipped cream into the pumpkin mixture using a spatula. Add the remaining whipped cream and fold until no white streaks remain. The mixture should be light and airy.
- Layer the cups: Place about 1-2 tablespoons of cookie crumbs in the bottom of each small cup or glass. Spoon or pipe the pumpkin pudding mixture on top, filling each cup about three-quarters full. Smooth the tops.
- Sprinkle a generous layer of remaining cookie crumbs over the top of each cup. Press gently so they stick. Decorate with gummy worms and gummy pumpkins.
- Chill uncovered for 30 minutes, then cover loosely and refrigerate for at least 2 hours, or overnight for best results.
Notes
For best texture, ensure cream cheese is at room temperature and pumpkin puree is not watery. Chilling overnight improves flavor. Store leftovers covered in the refrigerator for up to 3 days. Cookie crumbs may soften over time; store separately if desired.
Nutrition
- Serving Size: 1 cup
- Calories: 385
- Sugar: 28
- Sodium: 280
- Fat: 24
- Saturated Fat: 13
- Carbohydrates: 40
- Fiber: 3
- Protein: 5
Keywords: no-bake pumpkin dessert, pumpkin dirt pudding, fall dessert, Halloween dessert, Thanksgiving dessert, easy pumpkin recipe