My neighbor, Mrs. Kowalski, watched me trying to hard-boil eggs without cracking them and didn’t say anything at first. Then she just shook her head, opened her back door, and motioned for me to follow. She had this way of teaching without making you feel like a student—more like she was just letting you in on a secret she’d been keeping too long.
It was the week before Halloween, and her kitchen smelled like vinegar and paprika. She was making deviled eggs for her grandson’s costume party, but these weren’t the ones your grandma brought to potlucks. She had dyed the egg whites a pale, sickly green and piped the yolk filling into little mounds. Then came the olives—stuffed with pimento, sliced in half, and perched on top like something out of a monster movie.
“You can’t call them deviled eggs without making them look the part,” she said, wiping her hands on her apron. I laughed, but honestly, I was hooked. That afternoon, she told me about growing up in Poland, where eggs were decorated for every holiday, not just Easter. Halloween was her favorite, she said, because you could let your imagination run wild. No rules, no traditions—just whatever creepy thing you could dream up.
I’ve been making these Spooky Monster Eyeball Deviled Eggs every year since. They’re the kind of snack that makes people stop mid-conversation and point. Kids love them, adults pretend to be grossed out, and then they eat three. I’ve tweaked her original recipe over time—added a little more tang to the filling, figured out the perfect boil so the whites stay tender—but the heart of it is still hers. Maybe you’ve been there, staring at a platter of plain deviled eggs and wishing they had a little more personality. Well, let me tell you, these deliver.
Why You’ll Love This Recipe
I’ve tested this recipe at four different Halloween parties, two family gatherings, and one very skeptical book club meeting. Every single time, the platter came back empty. Here’s why this version stands out from every other deviled egg recipe you’ve seen.
- Quick & Easy: From stove to table in under 45 minutes, including chilling time. You can even prep the eggs a day ahead and assemble them right before your party.
- Simple Ingredients: Eggs, mayo, mustard, vinegar, paprika, and olives. You probably have everything except the olives in your fridge right now.
- Perfect for Halloween: These aren’t just snacks—they’re decorations. They set the mood before anyone even takes a bite.
- Crowd-Pleaser: I’ve watched picky eaters, health-conscious friends, and kids who “don’t like eggs” devour these without hesitation. The monster eyeball thing really works.
- Unbelievably Delicious: Let’s be real—if they didn’t taste good, the gimmick wouldn’t matter. The creamy, tangy filling with that briny olive bite is a combination I haven’t found anywhere else.
What makes this recipe different from the rest is the texture. I blend the yolks with just enough mayonnaise and a splash of pickle brine—yes, pickle brine—to make the filling impossibly smooth without being runny. Most recipes skip this step, but it’s the secret to that diner-quality mouthfeel. Plus, the brine cuts through the richness in a way that plain vinegar just can’t match.
This is the kind of recipe that makes you feel like a kitchen genius. It’s simple enough to make with kids, impressive enough to bring to any party, and just weird enough to be unforgettable. Honestly, it’s my favorite thing to bring to Halloween gatherings because it always starts a conversation. People lean in, point, laugh, and then take a bite. And then another. And then they ask for the recipe.
What Ingredients You Will Need
This recipe uses simple, everyday ingredients to create something that looks complicated but isn’t. The magic is in the presentation, not the shopping list. Here’s everything you need to bring these monster eyeballs to life.
For the Hard-Boiled Eggs
- 12 large eggs (room temperature eggs peel more easily—take them out of the fridge 20 minutes before boiling)
- 1 tablespoon white vinegar (added to the boiling water helps the eggs peel cleanly)
- 1 teaspoon salt (also helps with peeling and seasons the whites subtly)
- Ice water bath (a large bowl filled with ice and cold water for shocking the eggs)
For the Monster Eyeball Effect
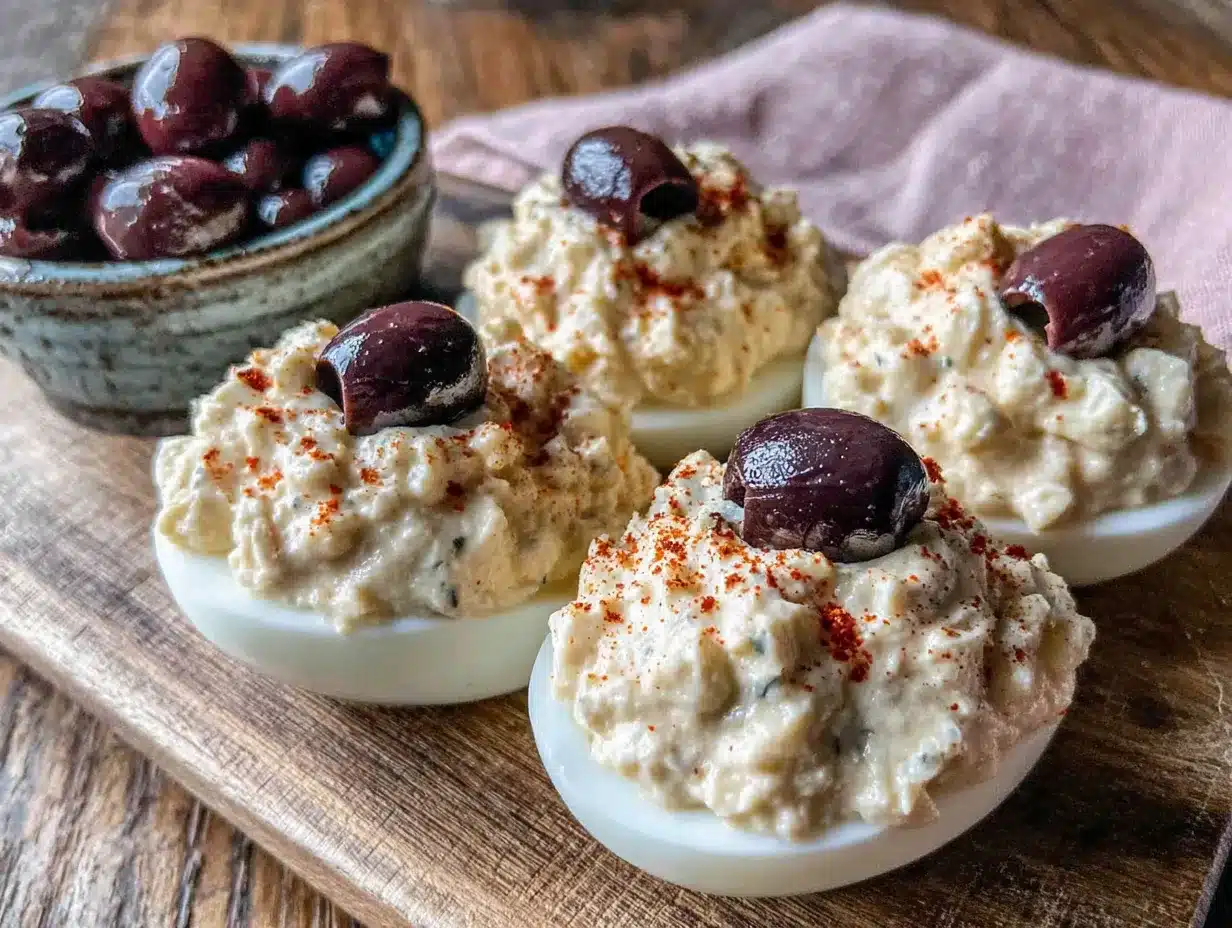
- 1 can (6 ounces) large pitted black olives (look for the jumbo size—regular olives look too small for the “eyeball” effect)
- 1 jar (4 ounces) pimento-stuffed green olives (these become the iris and pupil; I prefer the ones with whole pimentos, not the chopped kind)
- Red or purple food coloring (gel food coloring works best—liquid can make the whites too watery)
- Optional: black food coloring or squid ink (for creating spooky “blood vessels” on the egg whites—totally optional but very cool)
For the Filling
- 1/3 cup mayonnaise (I recommend Duke’s or Hellmann’s for the creamiest texture; avoid Miracle Whip—it’s too sweet)
- 1 tablespoon yellow mustard (adds tang and that classic deviled egg color; Dijon works too but gives a milder flavor)
- 1 tablespoon pickle brine (from your favorite pickle jar—this is my secret ingredient for extra tanginess)
- 1/2 teaspoon paprika (smoked paprika adds a deeper flavor, but regular works fine)
- 1/4 teaspoon garlic powder (optional but recommended for savory depth)
- Salt and black pepper to taste (start with 1/4 teaspoon each and adjust)
For Garnish (Optional but Fun)
- Sriracha or hot sauce (a tiny dot on top of the olive for a “bloodshot” look)
- Fresh chives or dill (chopped fine and sprinkled around the platter like “monster hair”)
- Black sesame seeds (a few scattered on the whites look like freckles or warts)
When it comes to the olives, don’t skimp. I learned the hard way that regular-sized olives look more like sad buttons than monster eyeballs. Splurge on the jumbo ones—they make a huge difference in presentation. And if you can find them, the green olives stuffed with garlic or jalapeño add an extra kick that pairs beautifully with the creamy filling.
For the food coloring, I recommend using gel or paste rather than liquid drops. Liquid coloring can thin out the egg whites and make them rubbery. A tiny dab of red gel mixed with a drop of blue gives you that perfect bloody-marble effect without turning the whole egg purple.
Equipment Needed
You don’t need fancy equipment to make these monster eyeballs, but a few specific tools will make your life much easier.
- Large saucepan or pot (big enough to hold 12 eggs in a single layer without crowding)
- Slotted spoon (for lowering eggs into boiling water and transferring them to the ice bath)
- Medium mixing bowl (for the yolk filling)
- Fork or potato masher (for mashing the yolks—a fork works fine, but a masher is faster)
- Piping bag or zip-top bag (a piping bag with a star tip gives a professional look, but a zip-top bag with the corner snipped off works perfectly)
- Small paring knife (for slicing olives and trimming egg whites if needed)
- Cutting board (dedicated one for prep work)
- Paper towels (for drying eggs after peeling—wet eggs make the filling slide off)
- Platter or serving dish (a dark-colored platter makes the pale green eggs pop)
If you don’t have a piping bag, don’t worry. I’ve used a sandwich bag more times than I can count. Just fill it with the yolk mixture, twist the top, and snip off a tiny corner. It’s not as pretty as a star tip, but it gets the job done. For the food coloring application, a small paintbrush (dedicated to food use) works better than trying to dip the eggs directly into coloring.
One tip I picked up from Mrs. Kowalski: use a stainless steel pot, not aluminum, for boiling the eggs. Aluminum can react with the eggs and leave them with a metallic taste. It’s a small thing, but it makes a difference in the final flavor.
Preparation Method
Step 1: Perfect Hard-Boiled Eggs
Place the eggs in a single layer in your saucepan and cover them with cold water by about an inch. Add the vinegar and salt. Bring the water to a rolling boil over high heat, then immediately cover the pot, remove it from the heat, and let it sit for exactly 12 minutes. This method gives you fully cooked yolks without the green ring that happens when you overcook them.
Step 2: Shock and Peel
While the eggs are resting, prepare your ice water bath. When the timer goes off, use your slotted spoon to transfer the eggs directly into the ice water. Let them sit for at least 10 minutes. This stops the cooking instantly and makes peeling much easier. To peel, gently tap the egg on the counter all over, then roll it between your palms to crack the shell in a web pattern. Start peeling from the wider end—there’s an air pocket there that makes it easier to get under the membrane.
Step 3: Prepare the Egg Whites
Once peeled, slice each egg in half lengthwise. Carefully pop out the yolks into your mixing bowl. Set the whites aside on a paper towel-lined plate to dry completely—any moisture will make your filling slide off later. For the monster effect, you’ll want to keep the whites intact and smooth. If any whites tear, don’t panic—just set them aside for snacking and use the prettier ones for your platter.
Step 4: Create the Monster Color
In a small bowl, mix a few drops of red food coloring with a tiny drop of blue or green to create a pale, sickly green or grayish-purple hue. Using a clean pastry brush or your fingertip, gently paint the inside of each egg white half. Don’t soak them—just a light wash of color. Let them sit for 5 minutes to absorb the color, then gently pat away any excess with a paper towel. If you’re using black food coloring for blood vessels, dip a toothpick in the coloring and draw thin, wavy lines on the outside of the whites. Let them dry while you make the filling.
Step 5: Make the Filling
Mash the egg yolks with a fork until they resemble fine crumbs. Add the mayonnaise, mustard, pickle brine, paprika, garlic powder, and a pinch of salt and pepper. Stir until completely smooth and creamy. Taste it—this is important. You want the filling to be tangy, creamy, and just a little salty. Adjust the seasoning if needed. If the filling seems too thick, add another teaspoon of pickle brine. If it’s too thin, add a few more mashed yolks (you can boil an extra egg or two for this purpose).
Step 6: Pipe the Filling
Transfer the filling to your piping bag or zip-top bag. Snip off the tip (about 1/2 inch wide if using a bag). Pipe a generous mound of filling into each colored egg white, mounding it slightly above the rim. You want a nice, rounded dome—this is the “eyeball” part. Don’t worry about being perfect; the olives will cover any imperfections.
Step 7: Assemble the Eyeballs
Take your pimento-stuffed green olives and slice them crosswise into rounds about 1/4 inch thick. Each olive should give you 3-4 slices. Place one olive slice, pimento side up, on top of each mound of filling. The pimento becomes the “pupil,” and the green olive becomes the “iris.” For a more monstrous look, you can also use black olive slices as the pupil—just cut a tiny circle from a black olive and place it on top of the green olive slice.
Step 8: Add the Finishing Touches
For the “bloodshot” effect, dab a tiny drop of sriracha or red food coloring gel near the edge of the olive. You can also draw thin red lines radiating from the olive using a toothpick dipped in red food coloring. If you’re using black sesame seeds, place a few randomly on the egg whites. Arrange the finished eggs on your serving platter and refrigerate for at least 30 minutes before serving. This allows the flavors to meld and the filling to firm up.
Cooking Tips & Techniques
The first time I made these, I boiled the eggs for 15 minutes and ended up with that ugly green ring around the yolks. They still tasted fine, but they looked sad. Here’s what I’ve learned since then.
The 12-minute rule is non-negotiable. I’ve tested 10, 12, 14, and 16 minutes. Twelve minutes gives you fully set yolks with a creamy, not chalky, texture. The yolks should be bright yellow, not pale or greenish. If you’re at high altitude, add one minute—so 13 minutes total.
Don’t skip the ice bath. I know it’s tempting to just run them under cold water, but the ice bath does two things: it stops the cooking instantly, preventing that green ring, and it shocks the shell membrane, making peeling significantly easier. I’ve peeled eggs without the ice bath, and I’ve peeled eggs with it. The difference is night and day.
Use older eggs for boiling. Fresh eggs are great for frying and poaching, but they’re terrible for hard-boiling. The fresher the egg, the harder it is to peel. Eggs that are 7-10 days old peel much more cleanly. If you’re planning ahead, buy your eggs a week before Halloween and let them sit in the fridge.
Keep the filling cold. Once you’ve made the filling, keep it in the fridge until you’re ready to pipe it. Warm filling is runny and won’t hold its shape. If you’re assembling these for a party, you can boil and color the whites a day ahead, make the filling the morning of, and assemble everything an hour before guests arrive.
Multitask strategically. While the eggs are boiling and then cooling, you can slice your olives and prepare your coloring station. While the whites are drying after coloring, you can make the filling. The whole process flows smoothly if you plan ahead.
One mistake I made early on was over-mixing the filling. You want it smooth, but if you mix it too vigorously, it becomes almost gluey. Fold the ingredients together gently until just combined. A few tiny lumps are fine—they add texture.
Variations & Adaptations
These monster eyeballs are endlessly customizable. Here are a few variations I’ve tried and loved.
Spicy Bloodshot Eyeballs
Add 1 teaspoon of sriracha or your favorite hot sauce to the yolk filling. The heat cuts through the richness beautifully and adds a red tint to the filling itself. For the “bloodshot” effect, use a mixture of sriracha and a tiny drop of red food coloring—it looks more realistic than plain coloring.
Vegan Monster Eyeballs
Substitute the hard-boiled eggs with firm tofu that’s been pressed and boiled for 5 minutes in salted water. For the filling, mash the tofu with vegan mayonnaise, mustard, pickle brine, and a pinch of black salt (kala namak) for that eggy flavor. The texture won’t be identical, but it’s surprisingly good. Use the same olive technique for the eyeball effect.
Alien Eyeballs
Instead of green and red coloring, use neon blue or purple food coloring for the egg whites. Swap the green olives for black olives with a tiny sliver of red bell pepper in the center. The result looks like something from outer space—perfect for a sci-fi themed party.
Gluten-Free and Keto-Friendly
This recipe is naturally gluten-free and low-carb. Each deviled egg half contains less than 1 gram of carbs, making them perfect for keto and low-carb diets. Just double-check your mayonnaise label—some brands add sugar or modified food starch.
Kid-Friendly Version
Skip the hot sauce and red food coloring for the “bloodshot” effect. Instead, use blue or green food coloring for the whites and let the kids help pipe the filling. They love placing the olive “eyeballs” on top. You can also use sliced carrots or cucumber rounds instead of olives if your kids aren’t olive fans.
I once tried a version where I added crumbled bacon to the filling. It was delicious, but it made the eyeballs look less like eyeballs and more like, well, bacon eggs. Stick to the classic for presentation, and serve bacon on the side.
Serving & Storage Suggestions
These monster eyeballs are best served chilled, straight from the fridge. Arrange them on a dark-colored platter—black, dark purple, or deep green—to make the pale egg whites pop. I like to line the platter with fresh kale or lettuce leaves to create a “monster lair” effect. It sounds silly, but guests always comment on it.
For a full Halloween spread, pair these with other spooky snacks like mummy pigs in a blanket, witch finger cookies, or a pumpkin-shaped cheese ball. The combination of savory and sweet always works well. For drinks, a dark red punch or blackberry lemonade complements the creepy theme.
Storage: You can make the hard-boiled eggs up to 3 days in advance and keep them unpeeled in the fridge. Once peeled and colored, they’ll keep for 1 day in an airtight container. Assembled deviled eggs should be eaten within 24 hours—the egg whites start to release moisture after that, making the filling slide off.
Freezing: Don’t freeze assembled deviled eggs. The texture of the egg whites becomes rubbery and watery when thawed. However, you can freeze the yolk filling in a sealed bag for up to 2 months. Thaw it in the fridge overnight, re-whip it, and pipe it into freshly boiled whites.
Reheating: These are served cold, so no reheating needed. If you’ve refrigerated them for more than a few hours, let them sit at room temperature for 10 minutes before serving to take the chill off. The flavors are more pronounced when they’re not ice-cold.
The filling actually gets better after a few hours in the fridge. The flavors meld together, and the texture firms up to a perfect piping consistency. I always make these at least 2 hours before serving—sometimes the day before—and they’re always better the next day.
Nutritional Information & Benefits
Each monster eyeball deviled egg half contains approximately:
- Calories: 75-85
- Protein: 6 grams
- Fat: 6 grams (mostly from the yolk and mayonnaise)
- Carbohydrates: 1 gram
- Fiber: 0 grams
- Sugar: 0 grams
- Sodium: 200-250 mg (varies based on olives and seasoning)
Eggs are a fantastic source of high-quality protein, choline (important for brain health), and vitamin D. The yolks contain most of the nutrients, including iron, vitamin A, and antioxidants like lutein and zeaxanthin, which support eye health. Yes, eye health—how fitting for an eyeball recipe!
Olives provide healthy monounsaturated fats and vitamin E, while the pickle brine adds probiotics if you’re using naturally fermented pickles. This recipe is naturally low in carbohydrates and contains no gluten, dairy, or added sugar. For those watching their sodium, you can use low-sodium olives and reduce the salt in the filling.
If you’re concerned about cholesterol, current research shows that dietary cholesterol from eggs has minimal impact on blood cholesterol for most people. The American Heart Association now says one egg per day is perfectly healthy. That said, if you’re serving these at a party, most people will have two or three halves, so keep that in mind.
I personally love that this recipe is both indulgent and nutritious. It feels like a treat, but it’s packed with protein and healthy fats that keep you satisfied. It’s the perfect snack to serve before a heavy meal—it takes the edge off hunger without spoiling anyone’s appetite.
Conclusion
These Spooky Monster Eyeball Deviled Eggs have become a Halloween tradition in my house, and I hope they become one in yours too. They’re proof that you don’t need elaborate decorations or expensive ingredients to create something memorable. Just a dozen eggs, some olives, and a little imagination.
What I love most about this recipe is how it brings people together. Kids who normally turn up their noses at deviled eggs can’t resist the eyeball presentation. Adults appreciate the clever twist on a classic appetizer. And everyone leaves the party asking for the recipe. It’s the kind of dish that makes you look like you spent hours in the kitchen when really, it took you less than an hour.
Don’t be afraid to make these your own. Change the colors, experiment with different olive combinations, or add your favorite spices to the filling. The base recipe is forgiving and flexible. The first time I made these, I forgot the pickle brine and used lemon juice instead. It was still delicious. The second time, I accidentally used too much food coloring and ended up with neon green eggs that looked more radioactive than spooky. My nephew loved them.
So go ahead—boil those eggs, slice those olives, and get a little weird with it. Halloween only comes once a year, and these monster eyeballs deserve their moment in the spotlight. Make them for your party, your family, or just for yourself. And when someone asks how you made them, tell them Mrs. Kowalski taught you. She would have loved that.
If you try this recipe, drop a comment below and let me know how it turned out. Did you add your own twist? Did the kids love them? I want to hear all about it. And if you’re looking for more Halloween inspiration, check out my spider web dip and graveyard cupcakes for a full spooky spread.
Frequently Asked Questions
Can I make these monster eyeball deviled eggs ahead of time?
Absolutely! You can boil and peel the eggs up to 3 days in advance. Store them unpeeled in the fridge. You can also make the filling up to 2 days ahead and keep it in a piping bag in the fridge. Assemble everything no more than 24 hours before serving for the best texture and appearance.
How do I get the eggs to peel easily without tearing the whites?
Use older eggs (7-10 days old), add vinegar and salt to the boiling water, and shock them in an ice bath immediately after cooking. Start peeling from the wider end where the air pocket is. If you’re still struggling, try peeling them under running cold water—the water helps separate the membrane from the white.
What if I can’t find jumbo olives?
Regular-sized olives work too, but they look more like “baby” eyeballs. You can also use sliced black olives with a tiny piece of red bell pepper in the center for a different look. Another option is to use caper berries or even small cherry tomatoes sliced in half (though those will add moisture).
Can I use a different food coloring to make other monster colors?
Of course! The fun of this recipe is customization. Try neon green for alien eyeballs, purple for a cosmic theme, or even blue for a “frozen monster” look. Just remember that gel food coloring works best—it’s concentrated and won’t make the egg whites watery. Start with a tiny amount and build up the color gradually.
How do I prevent the filling from sliding off the egg whites?
Make sure your egg whites are completely dry before piping the filling. Pat them gently with a paper towel after coloring. Also, don’t overfill—pipe a generous mound, but leave a small border of white visible around the edge. Chilling the assembled eggs for at least 30 minutes before serving helps the filling firm up and stay in place.
Pin This Recipe!
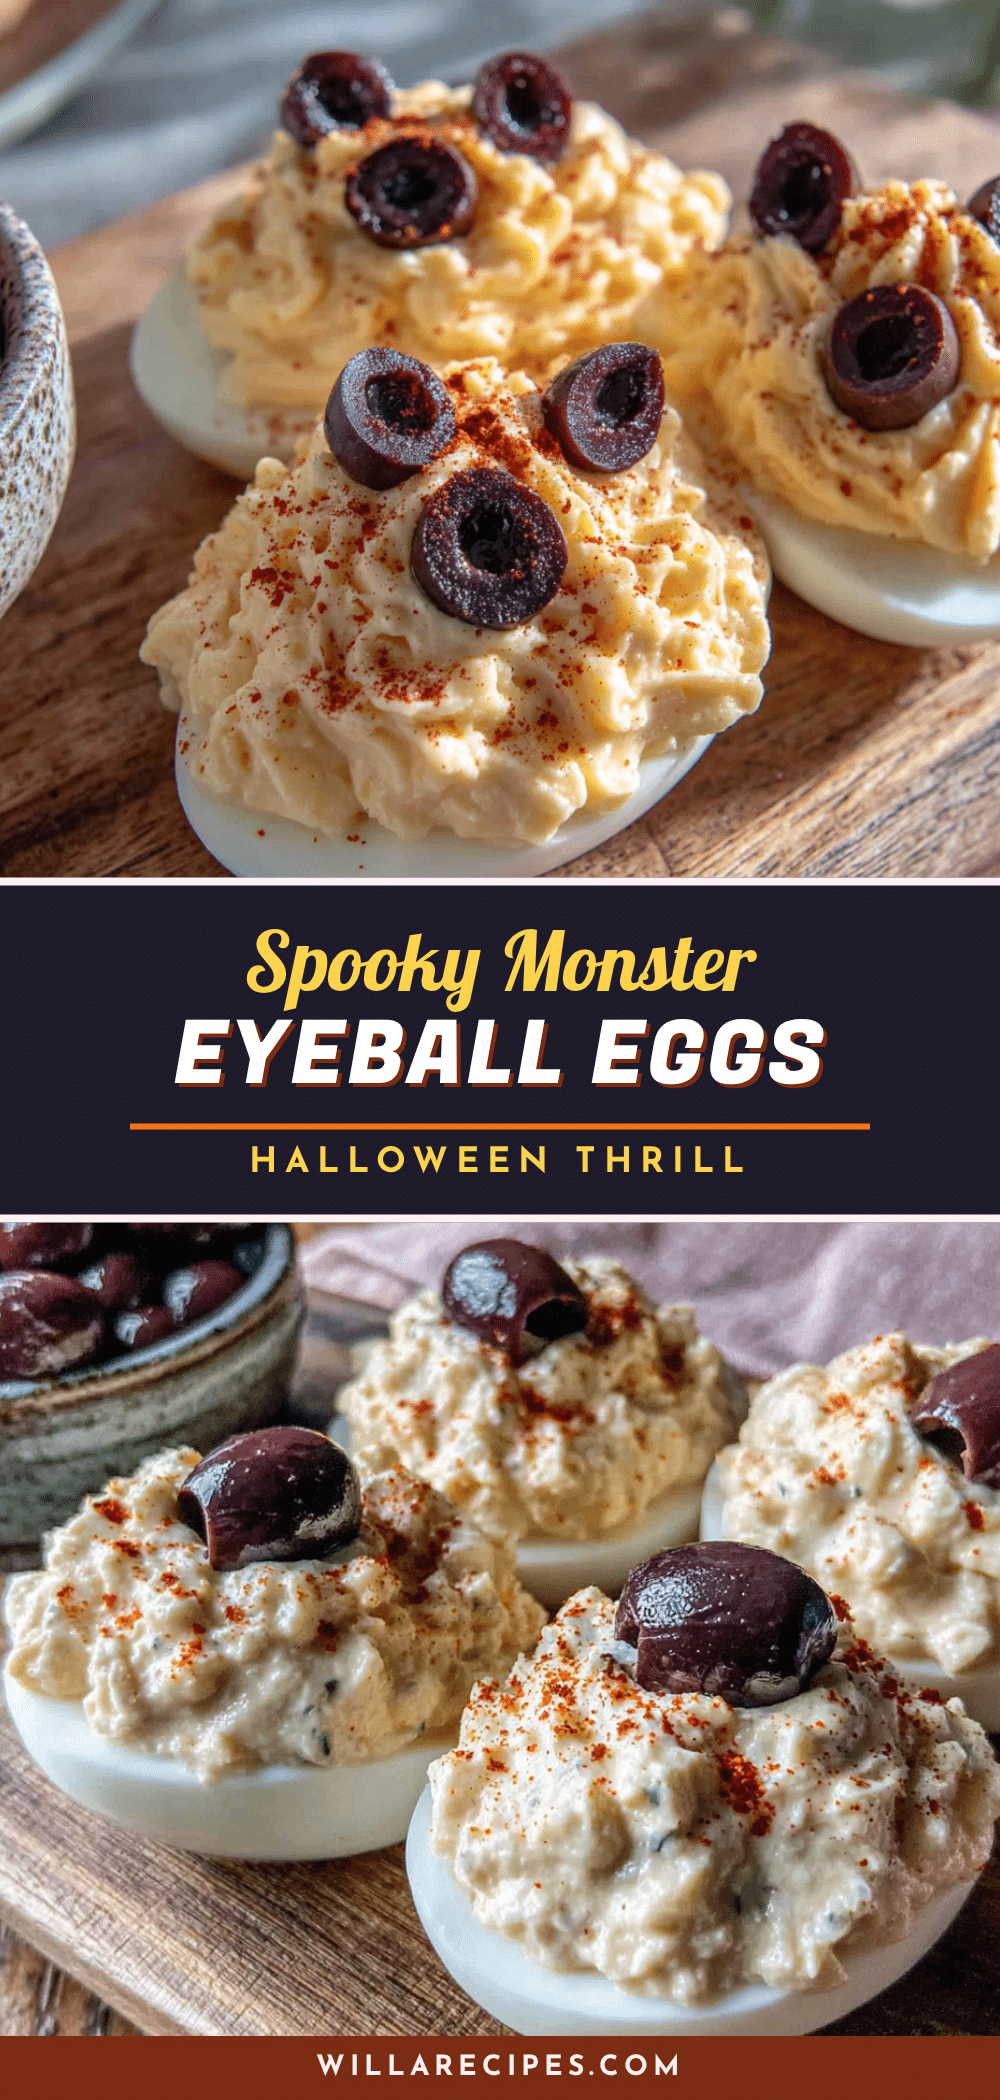
Spooky Monster Eyeball Deviled Eggs: Easy Halloween Snack
These spooky deviled eggs are dyed a pale green and topped with olive slices to look like monster eyeballs. They’re a fun, easy, and delicious Halloween snack that’s sure to be a hit at any party.
- Prep Time: 20 minutes
- Cook Time: 12 minutes
- Total Time: 45 minutes
- Yield: 24 servings 1x
- Category: Appetizer
- Cuisine: American
Ingredients
- 12 large eggs (room temperature)
- 1 tablespoon white vinegar
- 1 teaspoon salt
- Ice water bath
- 1 can (6 ounces) large pitted black olives
- 1 jar (4 ounces) pimento-stuffed green olives
- Red or purple food coloring (gel preferred)
- Optional: black food coloring or squid ink
- 1/3 cup mayonnaise (Duke’s or Hellmann’s recommended)
- 1 tablespoon yellow mustard
- 1 tablespoon pickle brine
- 1/2 teaspoon paprika (smoked or regular)
- 1/4 teaspoon garlic powder (optional)
- Salt and black pepper to taste
- Optional: Sriracha or hot sauce for garnish
- Optional: fresh chives or dill for garnish
- Optional: black sesame seeds for garnish
Instructions
- Place eggs in a single layer in a saucepan and cover with cold water by about an inch. Add vinegar and salt. Bring to a rolling boil over high heat, then cover, remove from heat, and let sit for exactly 12 minutes.
- While eggs rest, prepare an ice water bath. Transfer eggs to the ice bath with a slotted spoon and let sit for at least 10 minutes. Peel eggs starting from the wider end.
- Slice each peeled egg in half lengthwise. Pop out yolks into a mixing bowl. Place whites on a paper towel-lined plate to dry completely.
- In a small bowl, mix a few drops of red food coloring with a tiny drop of blue or green to create a pale, sickly green or grayish-purple hue. Gently paint the inside of each egg white half. Let sit for 5 minutes, then pat away excess with a paper towel. Optionally, draw thin wavy lines on the outside with black food coloring using a toothpick.
- Mash egg yolks with a fork until fine crumbs. Add mayonnaise, mustard, pickle brine, paprika, garlic powder, and a pinch of salt and pepper. Stir until smooth and creamy. Adjust seasoning to taste.
- Transfer filling to a piping bag or zip-top bag. Snip off the tip (about 1/2 inch wide). Pipe a generous mound of filling into each colored egg white, mounding slightly above the rim.
- Slice pimento-stuffed green olives crosswise into rounds about 1/4 inch thick. Place one olive slice, pimento side up, on top of each mound of filling.
- For a bloodshot effect, dab a tiny drop of sriracha or red food coloring gel near the edge of the olive. Optionally, place black sesame seeds randomly on the egg whites. Arrange on a serving platter and refrigerate for at least 30 minutes before serving.
Notes
Use older eggs (7-10 days old) for easier peeling. The 12-minute boil is key for perfect yolks without a green ring. Gel food coloring works best to avoid watery whites. The filling can be made up to 2 days ahead and assembled up to 24 hours before serving. For a vegan version, substitute firm tofu and vegan mayo.
Nutrition
- Serving Size: 1 deviled egg half
- Calories: 80
- Sodium: 225
- Fat: 6
- Saturated Fat: 1.5
- Carbohydrates: 1
- Protein: 6
Keywords: deviled eggs, Halloween, monster eyeballs, spooky, appetizer, party snack, eggs, olives


