I was standing in the spice aisle of a grocery store last November when a jar of ground ginger slipped from my hand and shattered on the tile floor. The smell hit me like a freight train — sharp, warm, sweet, and suddenly I was seven years old at my neighbor Mrs. Kowalski’s kitchen table, watching her crush gingersnaps with a rolling pin while I licked the excess filling off a spatula. She wasn’t my grandmother, but she was the closest thing to one on our street, and every Thanksgiving she’d make two pies — one for her family and one for ours. That jar breaking in the grocery store felt like a sign. I needed to make her pumpkin pie with that gingersnap crust, and I needed to get it right.
I stood there for a good minute, honestly, just breathing in that ginger smell and trying to remember the exact way she’d press the crumbs into the pan. She always used her thumbs, never a measuring cup, and she’d hum this old folk song I still can’t name. I called my mom that night, and she laughed and said, “Oh, honey, I don’t have her recipe. She just did it by feel.” So I spent the next three days in my kitchen, trying to recreate that pie from memory alone. The first one was too crumbly. The second one was too sweet. The third one — well, the third one made me cry a little, because it tasted like a Tuesday afternoon in 1995.
Maybe you’ve been there — chasing a flavor from your past that you can’t quite pin down. This cozy homemade pumpkin pie with gingersnap crust is my best attempt at bottling that memory. And let me tell you, it’s worth every single messy step.
Why You’ll Love This Recipe
This isn’t just another pumpkin pie recipe. I mean, don’t get me wrong — I love a classic pastry crust as much as the next person. But this cozy homemade pumpkin pie with gingersnap crust is something else entirely. It’s the kind of dessert that makes people pause mid-bite and just close their eyes for a second. I’ve tested this recipe six times over the course of two weeks, tweaking the spice ratios and the crust-to-filling balance until it felt exactly right. Here’s why you’re going to love it:
- Quick & Easy: The filling comes together in about 10 minutes, and the crust requires zero rolling or chilling. Honestly, if you can crush cookies and stir, you’ve got this handled.
- Simple Ingredients: You probably already have most of the filling ingredients in your pantry right now. The only special purchase is a box of good gingersnap cookies.
- Perfect for Cozy Evenings: This is the pie you make when the weather turns cold and you want something that feels like a hug. It’s ideal for Thanksgiving, yes, but also for a random Tuesday in November when you just need comfort.
- Crowd-Pleaser: I brought a test version to a potluck last week, and three separate people asked for the recipe before I even got a slice myself. It’s that good.
- Unbelievably Delicious: The combination of silky pumpkin filling with that spicy, buttery gingersnap crust is next-level. The crust adds this warm, peppery crunch that perfectly offsets the creamy filling.
What makes this recipe different from all the others? It’s the crust, hands down. Most pumpkin pie recipes treat the crust as an afterthought — just something to hold the filling. But this gingersnap crust is the star of the show. It’s thick, it’s crunchy, and it has this deep molasses-and-ginger flavor that makes the pumpkin taste even richer. Plus, I’ve dialed in the perfect ratio of melted butter to cookie crumbs so the crust holds together without getting greasy. It’s comfort food reimagined — familiar, but with a little extra soul.
What Ingredients You Will Need
This recipe uses simple, wholesome ingredients to deliver bold flavor and satisfying texture without the fuss. Most of these are pantry staples, which means you can whip this up on a whim when that cozy craving hits. Let me walk you through what you’ll need and why each ingredient matters.
For the Gingersnap Crust
- 2 cups (240g) crushed gingersnap cookies — I prefer Nabisco or Anna’s brand for the best spice level. You want cookies that are snappy, not soft. Pulse them in a food processor until you get fine crumbs, or put them in a ziplock bag and go to town with a rolling pin like Mrs. Kowalski did.
- 1/4 cup (50g) granulated sugar — Just a little extra sweetness to balance the ginger’s bite. You can reduce this to 2 tablespoons if your cookies are already very sweet.
- 6 tablespoons (85g) unsalted butter, melted — Use good butter here. It’s the glue that holds everything together. Let it cool slightly before mixing so it doesn’t make the crumbs soggy.
- Pinch of salt — Even if your cookies are salted, add this. It brightens the whole crust.
For the Pumpkin Filling
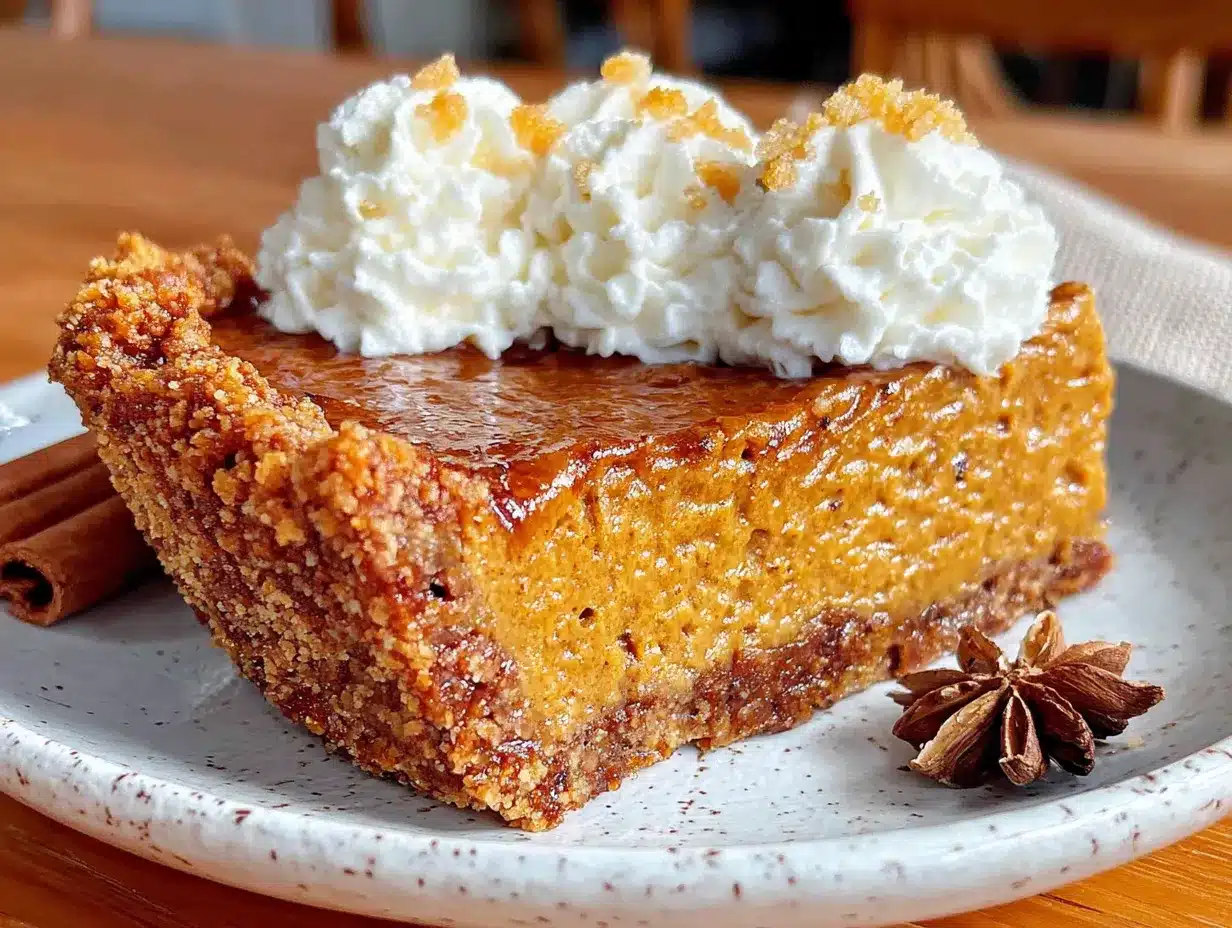
- 1 can (15 oz or 425g) pumpkin puree — Not pumpkin pie filling! Just pure pumpkin. Libby’s is my go-to because it’s consistently thick and not watery. If you’re using fresh pumpkin puree, make sure to strain it through cheesecloth first to remove excess moisture.
- 1 can (14 oz or 397g) sweetened condensed milk — This is the secret to that silky, luscious texture. Don’t substitute evaporated milk here — the sweetness and thickness are crucial.
- 2 large eggs — Room temperature is best. They incorporate more smoothly into the filling. If you forgot to take them out of the fridge, place them in a bowl of warm water for 5 minutes.
- 1 teaspoon vanilla extract — Pure vanilla, not imitation. It adds warmth and depth.
- 1 1/2 teaspoons ground cinnamon — The backbone of pumpkin pie spice. I use Saigon cinnamon for its stronger, sweeter flavor.
- 1 teaspoon ground ginger — This echoes the ginger in the crust and ties everything together beautifully.
- 1/2 teaspoon ground nutmeg — Freshly grated if you have it. The difference is noticeable.
- 1/4 teaspoon ground cloves — Go easy here. Cloves are potent and can easily overpower the other spices.
- 1/4 teaspoon salt — Don’t skip this! Salt makes the sweetness taste sweeter and the spices more aromatic.
One quick note on substitutions: if you need a dairy-free version, you can use full-fat coconut milk in place of the sweetened condensed milk, though the texture will be slightly less creamy. For a gluten-free crust, make sure your gingersnap cookies are certified gluten-free — many brands offer this option now.
Equipment Needed
You don’t need a fancy kitchen to make this pie. Here’s what you’ll actually use:
- 9-inch pie dish — Glass or ceramic works best. Metal can work too, but it conducts heat differently and may brown the crust faster. I use a deep-dish Pyrex pie plate because I can see the crust color through the glass.
- Food processor or ziplock bag and rolling pin — For crushing the gingersnaps. The food processor is faster and gives you more even crumbs, but there’s something satisfying about the manual method. I’ve done both, and honestly, the texture is nearly identical.
- Large mixing bowl — For the filling. Any bowl will do, but a wide one makes whisking easier.
- Medium bowl — For mixing the crust ingredients.
- Whisk — A balloon whisk works best for getting the filling smooth without overbeating.
- Measuring cups and spoons — For accuracy. I’ve learned the hard way that eyeballing spices in pumpkin pie can lead to disaster.
- Rubber spatula — For scraping every last bit of filling into the crust. Waste not, want not.
- Cooling rack — Essential for even cooling. Putting a hot pie dish directly on the counter can cause the bottom to continue cooking and potentially crack.
Optional but helpful: a kitchen scale for measuring the cookie crumbs by weight (it’s more accurate), and a pie shield or strips of foil to protect the crust edges if they brown too quickly.
Preparation Method
Alright, let’s make this pie. I’ve broken everything down into clear steps, and I’ve included all the little cues I wish someone had told me the first time I tried this.
Step 1: Preheat and Prep
Preheat your oven to 350°F (175°C). Position a rack in the center of the oven — not too high, not too low. While the oven heats up, take your eggs out of the fridge so they can come to room temperature. This takes about 15-20 minutes, so do this first.
Step 2: Make the Gingersnap Crust
Place 2 cups of gingersnap cookie crumbs in a medium bowl. Add 1/4 cup sugar and a pinch of salt, and stir to combine. Pour in 6 tablespoons of melted butter and stir with a fork until the mixture looks like wet sand. Every crumb should be coated. If it seems too dry, add another tablespoon of melted butter. If it seems too wet, add a tablespoon more crumbs. The texture should hold together when you squeeze a handful — like a snowball that’s just firm enough to pack.
Transfer the mixture to your 9-inch pie dish. Press it firmly and evenly into the bottom and up the sides. Use the bottom of a flat measuring cup or a glass to get the bottom really compact. For the sides, use your fingers or the back of a spoon. Don’t make the crust too thick at the rim — about 1/4 inch is perfect. Once it’s pressed in, place the dish on a baking sheet (this catches any drips and makes it easier to handle) and bake for 10 minutes. The crust should be fragrant and just slightly darker. Remove it from the oven and let it cool while you make the filling. Don’t turn the oven off!
Step 3: Make the Pumpkin Filling
In a large bowl, whisk together 1 can of pumpkin puree and 1 can of sweetened condensed milk until smooth. Yes, it will be thick — that’s normal. Add 2 room-temperature eggs, one at a time, whisking gently after each addition. You want to incorporate them without beating too much air into the mixture. Air bubbles can cause cracks in the finished pie.
Add 1 teaspoon vanilla extract, 1 1/2 teaspoons cinnamon, 1 teaspoon ginger, 1/2 teaspoon nutmeg, 1/4 teaspoon cloves, and 1/4 teaspoon salt. Whisk until everything is uniformly combined. The color should be a deep, warm orange, and the mixture should smell like autumn in a bowl. Give it a little taste — honestly, it’s safe to eat a tiny bit of raw egg, and this is the best way to check if your spice balance is right. Adjust if needed.
Step 4: Assemble and Bake
Pour the filling into the pre-baked crust. Use your rubber spatula to get every last drop. Gently spread it to the edges — it should settle evenly on its own. Place the pie (still on the baking sheet) in the center of the oven.
Bake for 50 to 60 minutes. Here’s the tricky part: the center should be just slightly jiggly when you gently shake the pan. Not liquid — think more like a firm Jell-O. The edges should be set and the filling should look matte, not shiny. If the crust edges start browning too quickly (around the 25-minute mark), loosely cover them with foil or a pie shield.
I always start checking at 45 minutes because every oven runs differently. My old oven took 55 minutes; my new one takes 52. You’ll learn your oven’s personality over time.
Step 5: Cool and Set
Remove the pie from the oven and place it on a cooling rack. Let it cool completely at room temperature — this takes about 2 hours. Do not put it in the fridge while it’s still warm, or the filling can crack. Once it’s completely cool, cover it loosely with plastic wrap and refrigerate for at least 4 hours, or overnight. This step is non-negotiable. The filling needs this time to fully set and develop its flavor. I know waiting is hard, but trust me.
Cooking Tips & Techniques
I’ve made this pie enough times to have a few spectacular failures under my belt. Let me save you from making the same mistakes I did.
Don’t overwork the crust. The first time I made this, I kept pressing and pressing the crumbs into the dish, trying to make it perfectly smooth. The result? A rock-hard crust that was almost impossible to cut through. You want it compact, yes, but not compressed into cement. A gentle, even press is all you need.
Watch for the jiggle. Overbaking is the number one reason pumpkin pies crack. The filling continues to cook from residual heat after you pull it out of the oven, so it’s better to underbake slightly than overbake. That jiggle in the center should be about the size of a silver dollar — not the whole pie. I learned this the hard way when I made a pie for a Friendsgiving and it looked like a dried-up lake bed.
Room temperature ingredients matter. I know it’s tempting to use cold eggs straight from the fridge, but cold ingredients don’t emulsify as well. You’ll end up with a slightly grainy texture. Set your eggs and any dairy out 30 minutes before you start mixing.
Blind baking is your friend. Some recipes skip pre-baking the crust for pumpkin pie, but I’ve found that pre-baking for 10 minutes makes a huge difference. It prevents the dreaded soggy bottom and gives the crust a head start on becoming crisp and toasty.
Timing strategy: Make the crust and filling on the same day, but bake the pie the day before you plan to serve it. This gives the flavors time to meld and makes your serving day stress-free. I do this for every holiday gathering now.
Variations & Adaptations
One of the best things about this recipe is how flexible it is. Here are a few ways I’ve tweaked it over the years:
Gluten-Free Version: Use certified gluten-free gingersnap cookies for the crust. The filling is naturally gluten-free, so this is an easy swap. I’ve tried this with Partake brand cookies, and the texture was spot-on.
Dairy-Free Version: Substitute the sweetened condensed milk with a can of full-fat coconut cream mixed with 1/3 cup maple syrup and a pinch of salt. Use vegan butter or coconut oil for the crust. The texture is slightly less dense but still deliciously creamy.
Spiced-Up Variation: Add 1/4 teaspoon of cardamom and a pinch of white pepper to the filling for a more complex, warming spice profile. I did this on a whim last Christmas, and it was a huge hit. The cardamom adds this floral note that pairs beautifully with the ginger.
Mini Pie Version: Press the crust mixture into a muffin tin (lined with parchment paper strips for easy removal) and fill each cup with about 3 tablespoons of filling. Bake for 20-25 minutes. These are perfect for parties or portion control — not that I’ve ever exercised that option.
Maple Pumpkin Pie: Replace the granulated sugar in the crust with 2 tablespoons of maple sugar, and add 2 tablespoons of maple syrup to the filling. The maple flavor deepens the autumnal vibe of the pie beautifully.
Serving & Storage Suggestions
This pie is best served cold or at room temperature — never hot. The filling needs to be fully set for clean slices. I like to take the pie out of the fridge about 30 minutes before serving to take the chill off, but that’s a personal preference.
For the ultimate cozy presentation, top each slice with a generous dollop of lightly sweetened whipped cream and a sprinkle of cinnamon or crushed gingersnaps. If you’re feeling extra indulgent, a drizzle of caramel sauce takes this over the top. I once served it with a side of warm apple cider, and honestly, it was the most autumn thing I’ve ever done.
Storage: Cover the pie tightly with plastic wrap or foil and refrigerate for up to 5 days. The crust will soften slightly over time, but the flavor actually gets better on day two. I don’t recommend freezing this pie — the filling can become watery when thawed. If you must freeze it, do so before baking: assemble the pie, wrap it well (without the baking sheet), and freeze for up to 3 months. Bake directly from frozen, adding 15-20 minutes to the baking time.
Reheating: If you prefer warm pie, place individual slices on a microwave-safe plate and heat for 15-20 seconds. Don’t go longer, or the crust will get soggy. For the oven, reheat slices at 300°F (150°C) for about 10 minutes.
Nutritional Information & Benefits
Let’s be real — this is a dessert, not a health food. But there are some redeeming qualities worth mentioning. One slice (1/8 of the pie) contains approximately:
- Calories: 380
- Fat: 18g
- Carbohydrates: 50g
- Protein: 6g
- Fiber: 3g
- Sugar: 35g
Pumpkin is packed with vitamin A (over 200% of your daily needs per cup), which supports eye health and immune function. It’s also a good source of fiber and potassium. The ginger in the crust has anti-inflammatory properties and can aid digestion — which is handy after a big holiday meal. The cinnamon helps regulate blood sugar levels, so this pie is slightly less of a sugar bomb than it could be.
That said, this is a treat. I don’t pretend otherwise. But knowing there’s some nutritional value hiding in that silky filling makes me feel a little better about having a second slice.
Conclusion
This cozy homemade pumpkin pie with gingersnap crust is more than just a recipe — it’s a little piece of my childhood that I get to share with you. Every time I make it, I think of Mrs. Kowalski’s humming and the way her kitchen smelled like butter and ginger and love. And now, when I press those crumbs into the pie dish with my thumbs, I feel connected to her in a way that makes me smile every single time.
I hope you give this pie a try, and I hope you make it your own. Maybe you’ll add a little extra cinnamon, or maybe you’ll use a different cookie for the crust. That’s the beauty of cooking — it’s never exactly the same twice. If you do make it, I’d love to hear how it turned out. Leave a comment below and let me know if you had the same emotional reaction I did when you took that first bite. And if you have any questions, just ask — I’m here for you.
Go make some memories in your kitchen. You’ve got this.
Frequently Asked Questions
Can I use a store-bought crust instead of making the gingersnap crust?
You absolutely can, but you’ll miss out on the best part of this recipe! The gingersnap crust is what makes this pie special. If you’re short on time, look for a pre-made gingersnap crust in the baking aisle — some stores carry them during the holiday season.
Why did my pumpkin pie crack?
Cracks usually happen from overbaking or sudden temperature changes. Make sure you pull the pie out when the center is still slightly jiggly. Also, let it cool gradually on a wire rack at room temperature before refrigerating. Don’t put a hot pie directly into the fridge.
Can I make this pie ahead of time?
Yes! This pie actually tastes better the next day. You can make it up to 2 days in advance and keep it covered in the refrigerator. Just add the whipped cream right before serving.
How do I get clean slices?
Use a sharp knife and wipe it clean between each cut. For the cleanest slices, chill the pie for at least 4 hours (overnight is better) and cut it while it’s still cold. Let the slices come to room temperature for about 15 minutes before serving for the best flavor.
Can I use fresh pumpkin instead of canned?
You can, but you’ll need to cook and strain it first. Roast a sugar pumpkin at 400°F (200°C) for 45-60 minutes until tender, then puree the flesh and strain it through cheesecloth to remove excess water. Canned pumpkin is more consistent in texture and moisture content, which is why I recommend it for this recipe.
Pin This Recipe!
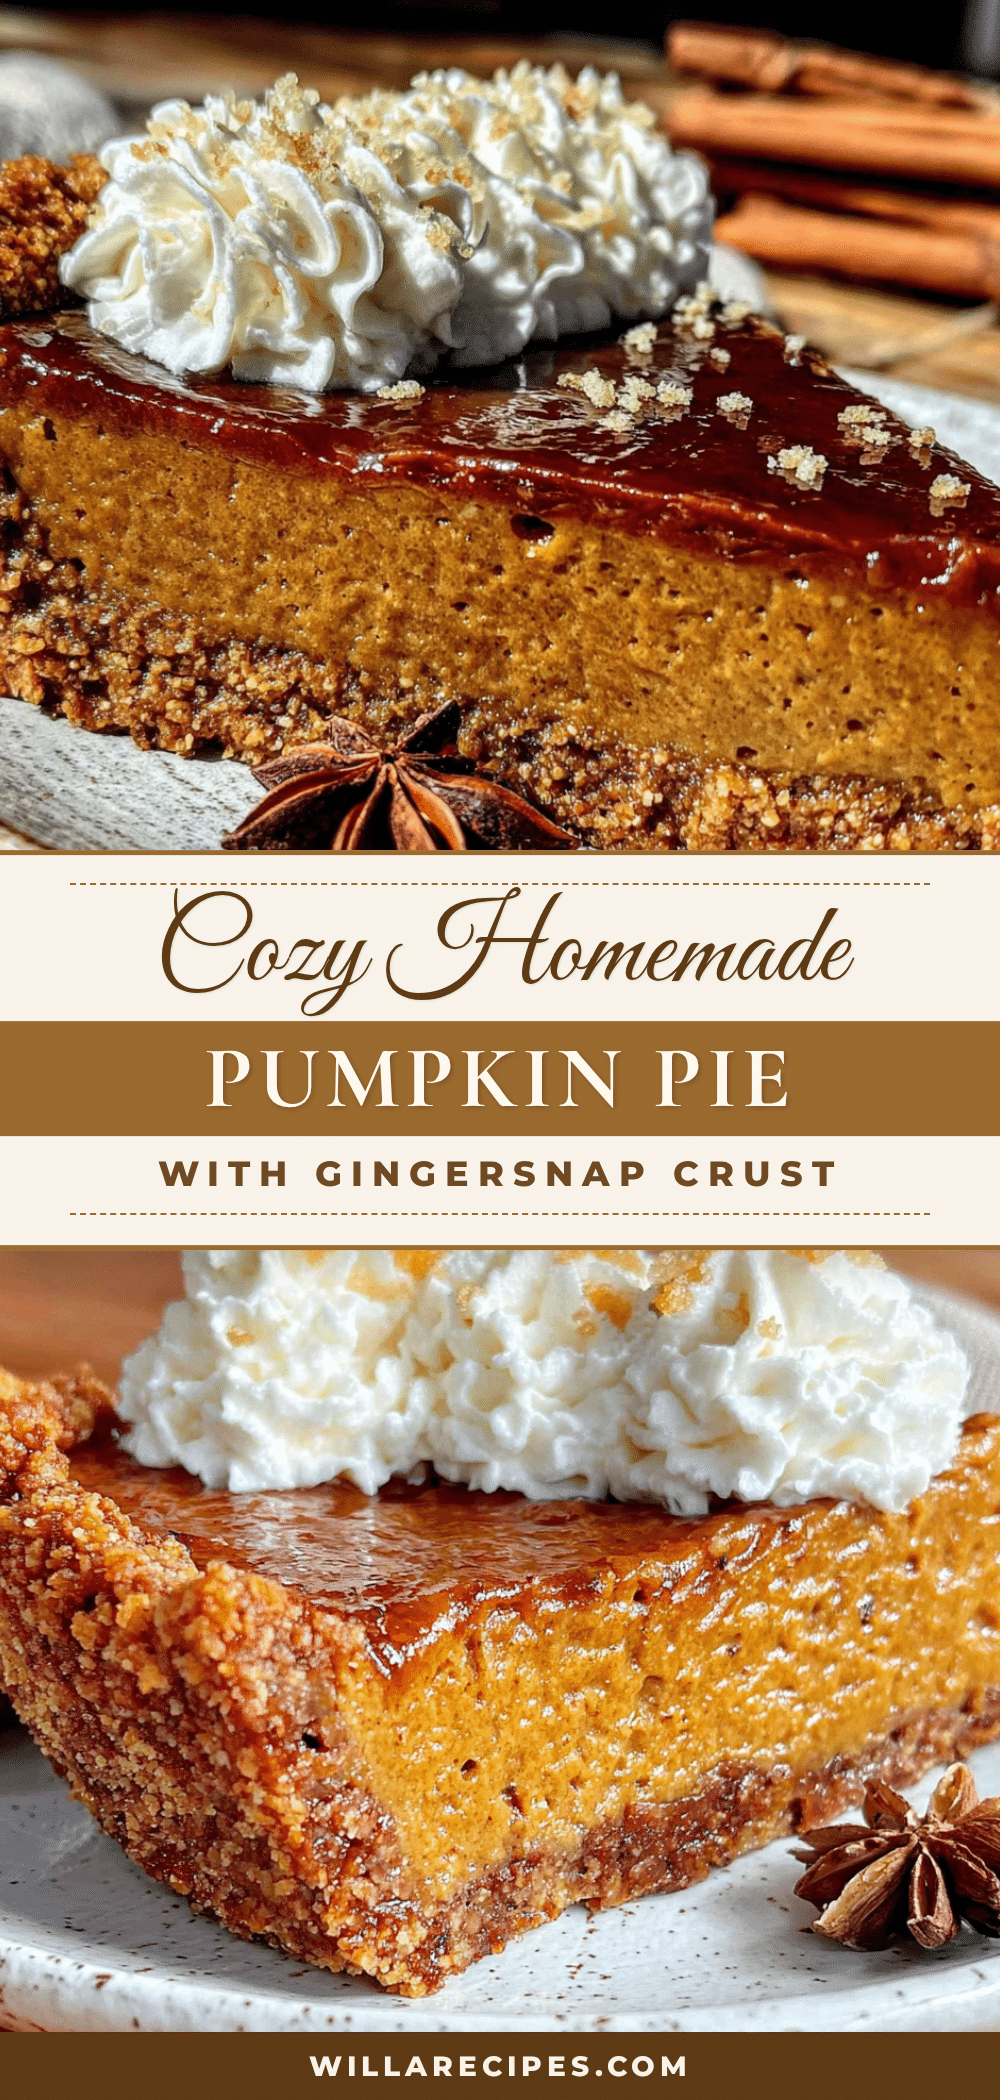
Cozy Homemade Pumpkin Pie with Gingersnap Crust
A nostalgic pumpkin pie with a spicy, buttery gingersnap crust that brings back memories of cozy autumn afternoons. This easy recipe features a silky pumpkin filling and a crunchy, flavorful crust that will make you close your eyes with every bite.
- Prep Time: 15 minutes
- Cook Time: 60 minutes
- Total Time: 4 hours 15 minutes (includes cooling and chilling)
- Yield: 8 servings 1x
- Category: Dessert
- Cuisine: American
Ingredients
- 2 cups (240g) crushed gingersnap cookies
- 1/4 cup (50g) granulated sugar
- 6 tablespoons (85g) unsalted butter, melted
- Pinch of salt
- 1 can (15 oz or 425g) pumpkin puree
- 1 can (14 oz or 397g) sweetened condensed milk
- 2 large eggs, room temperature
- 1 teaspoon vanilla extract
- 1 1/2 teaspoons ground cinnamon
- 1 teaspoon ground ginger
- 1/2 teaspoon ground nutmeg
- 1/4 teaspoon ground cloves
- 1/4 teaspoon salt
Instructions
- Preheat oven to 350°F (175°C). Position a rack in the center of the oven. Take eggs out of the fridge to come to room temperature.
- Make the crust: In a medium bowl, combine 2 cups gingersnap crumbs, 1/4 cup sugar, and a pinch of salt. Pour in 6 tablespoons melted butter and stir with a fork until the mixture looks like wet sand. Press firmly into a 9-inch pie dish, using a flat measuring cup for the bottom and your fingers for the sides. Bake for 10 minutes, then let cool.
- Make the filling: In a large bowl, whisk together pumpkin puree and sweetened condensed milk until smooth. Add eggs one at a time, whisking gently. Add vanilla, cinnamon, ginger, nutmeg, cloves, and salt. Whisk until combined.
- Pour filling into pre-baked crust. Place pie on a baking sheet and bake for 50-60 minutes, until edges are set and center is slightly jiggly. If crust edges brown too quickly, cover with foil after 25 minutes.
- Cool pie on a wire rack at room temperature for 2 hours. Then cover loosely with plastic wrap and refrigerate for at least 4 hours or overnight before serving.
Notes
For best results, make the pie a day ahead to allow flavors to meld. Use room temperature ingredients for a smooth filling. Don’t overbake—the center should be slightly jiggly when you remove it from the oven. For a dairy-free version, substitute sweetened condensed milk with full-fat coconut cream mixed with maple syrup.
Nutrition
- Serving Size: 1 slice (1/8 of pie)
- Calories: 380
- Sugar: 35
- Sodium: 320
- Fat: 18
- Saturated Fat: 10
- Carbohydrates: 50
- Fiber: 3
- Protein: 6
Keywords: pumpkin pie, gingersnap crust, Thanksgiving dessert, fall baking, easy pumpkin pie, homemade pie


