I was standing in the canned goods aisle at the grocery store last November, just staring at a shelf of pumpkin puree. It sounds ridiculous, I know. But the thing is, I wasn’t really seeing the cans at all. That particular shade of deep orange—it hit me like a wave, and suddenly I was seven years old in my Aunt Clara’s tiny kitchen, the one with the yellow linoleum floor that always felt sticky no matter how much she scrubbed.
Aunt Clara wasn’t really my aunt, you know. She was our next-door neighbor, this older woman with flour permanently dusted into the creases of her hands. Every Thanksgiving, she’d bring over a pie that looked like it came from a magazine cover. Perfect crimped edges, that gorgeous burnished top. I remember watching her once, my nose pressed against her screen door, and she caught me. “Get in here, kid,” she said, and handed me a spoon. The filling was still warm, and I swear I’d never tasted anything like it. It was rich and spiced and felt like a hug you didn’t know you needed.
I asked her for the recipe a few years later, probably when I was about twelve. She laughed—a big, wheezy laugh—and said, “Honey, it’s three ingredients. You’ve had it in your kitchen the whole time.” I didn’t believe her. I mean, how could something that good be that simple? But she was right. And honestly, I’ve been chasing that exact taste ever since. Maybe you’ve been there, trying to recreate a memory from your childhood and getting close but never quite nailing it?
Well, I finally did. And let me tell you, this easy 3-ingredient pumpkin pie is the one. It’s the dessert I bring to every dinner party now, the one that gets the “wait, that’s it?” reaction every single time. It’s Aunt Clara’s pie, simplified for the rest of us who don’t have flour permanently embedded in our hands. And it’s the perfect thing to make when you want to impress your guests without spending all day in the kitchen.
Why You’ll Love This Recipe
Look, I’ve tested a lot of pumpkin pie recipes over the years. Some were too fussy, some were too bland, and some required a shopping list longer than my arm. This one? It’s the Goldilocks of pumpkin pies—just right in every way. And it’s become my go-to for every gathering, from casual potlucks to fancy holiday dinners.
- Incredibly Quick & Easy: We’re talking about 10 minutes of active prep time. That’s it. You mix, you pour, you bake. No blind baking, no complicated crusts, no standing over a hot stove.
- Just 3 Simple Ingredients: You probably already have two of them in your pantry right now. No fancy grocery store runs required. This is the definition of a last-minute dessert hero.
- Perfect for Entertaining: This pie was practically made for dinner parties. It scales up beautifully, it looks stunning on a dessert table, and it frees you up to actually enjoy your guests instead of stressing over a complicated recipe.
- Guaranteed Crowd-Pleaser: I’ve served this to everyone from picky kids to foodie friends, and it gets devoured every single time. People always ask for the recipe, and they never believe me when I tell them how simple it is.
- Unbelievably Delicious: The texture is silky and smooth, the flavor is perfectly spiced, and that crust gets just the right amount of golden crunch. It’s comfort food at its finest, with zero of the stress.
What makes this recipe different from every other pumpkin pie out there? It’s the technique. Most recipes overcomplicate things with extra steps and ingredients that don’t actually improve the final result. This one strips it all back to the essentials, letting the pure pumpkin flavor shine. And because it’s so simple, it’s practically foolproof. Even if you’ve never made a pie from scratch before, you can nail this one on your first try.
This is the kind of dessert that makes you close your eyes after the first bite. It’s nostalgic without being old-fashioned, impressive without being intimidating. Perfect for impressing your guests without breaking a sweat, or turning a simple weeknight dinner into something special.
What Ingredients You Will Need
This recipe uses just three simple ingredients to deliver big, bold flavor. The beauty of it is that each ingredient plays a crucial role, and there’s nowhere to hide—so quality matters. Here’s what you’ll need:
For the Pie Filling
- 1 can (15 ounces) of pumpkin puree (not pumpkin pie filling—make sure you grab the 100% pure pumpkin). I personally prefer Libby’s for its consistent texture and deep color, but any brand works. Pro tip: look for cans that aren’t dented or expired.
- 1 can (14 ounces) of sweetened condensed milk (this is your sweetener and your creamy base all in one). Eagle Brand is my go-to, but store brands work fine too. Do not substitute with evaporated milk—they are not the same thing, and the texture will be completely different.
- 1/2 cup of your favorite pumpkin pie spice blend (yes, that’s a lot—trust me on this). You can use store-bought or make your own by mixing cinnamon, nutmeg, ginger, and cloves. I’ll share my exact blend in the tips section.
- 1 pre-made 9-inch pie crust (frozen or refrigerated, your choice). I know, I know—this is technically a fourth ingredient if you count the crust. But I’m calling it a “three-ingredient filling” pie, and I stand by that. You can use a homemade crust if you’re feeling ambitious, but the whole point of this recipe is simplicity.
See what I mean? Simple, straightforward, and all of it is stuff you can find at any grocery store. No special trips to the health food store, no weird ingredients you’ll never use again. Just three things that come together to make something magical.
One thing I’ve learned the hard way: always check the expiration date on your pumpkin puree. I once grabbed a can that was a few months past its date, and the pie came out with this weird, flat flavor. Fresh matters, even with canned goods.
If you’re serving a crowd, you can easily double this recipe and make two pies. Just make sure you have enough oven space—I learned that lesson the hard way one Thanksgiving when I had to bake pies in shifts.
Equipment Needed
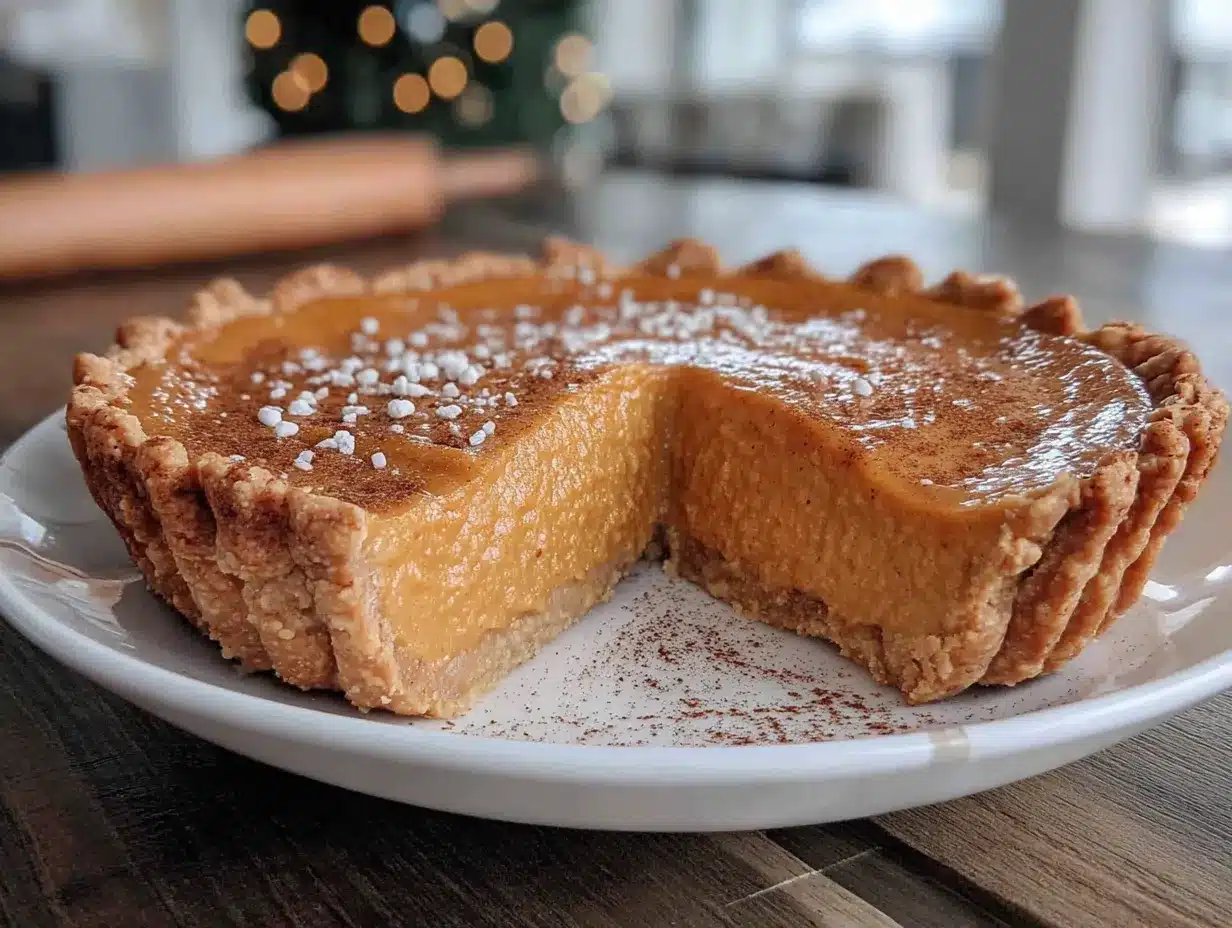
You don’t need a fancy kitchen to pull off this pie. Here’s what you’ll actually use:
- A 9-inch pie dish (glass or ceramic works best for even baking). I’ve used both Pyrex and ceramic dishes, and they both produce great results. Avoid metal pans if you can—they can cause the crust to brown too quickly.
- A large mixing bowl (any size will do, just make sure it’s big enough to whisk without splashing).
- A whisk (a fork works in a pinch, but a whisk gives you that silky smooth texture).
- A rubber spatula (for scraping every last bit of filling into the crust—waste not, want not).
- Measuring cups and spoons (for the spice blend).
- Aluminum foil or a pie shield (to protect the crust edges from burning). I use a reusable silicone pie shield now, but foil works perfectly well.
- A cooling rack (so the bottom of the pie doesn’t get soggy while it cools).
That’s it. No stand mixer, no food processor, no special gadgets. If you have a whisk and a bowl, you’re good to go. Honestly, I’ve made this pie in a rental cabin with nothing but a fork and a chipped ceramic bowl, and it still came out fantastic.
Preparation Method
Alright, let’s get to the fun part. This is where the magic happens. Follow these steps, and you’ll have a pie that looks and tastes like you spent hours on it.
- Preheat your oven to 425°F (220°C). This is important—you want the oven nice and hot to start so the crust gets golden and the filling sets properly. Position your oven rack in the center of the oven.
- Take your pie crust out of the fridge or freezer. If you’re using a frozen crust, let it sit at room temperature for about 10 minutes before you start. If it’s refrigerated, you can use it straight away. Gently press it into your pie dish, crimping the edges if you want that classic look. Don’t worry if it’s not perfect—rustic is charming.
- In your large mixing bowl, combine the pumpkin puree and sweetened condensed milk. Whisk them together until they’re completely smooth and uniform in color. This should take about 30 seconds. You’re looking for a thick, creamy mixture with no streaks of white or orange.
- Add your pumpkin pie spice blend. This is where the flavor happens. Whisk it in thoroughly, making sure there are no clumps of spice hiding anywhere. The mixture should smell incredible at this point—if it doesn’t, add a little more spice. Trust your nose.
- Pour the filling into your prepared pie crust. Use your rubber spatula to scrape every last bit out of the bowl. Gently tap the pie dish on the counter a few times to release any air bubbles that might be hiding in the filling.
- Place the pie in the oven and bake at 425°F for 15 minutes. This initial high heat helps set the crust and gives the filling a nice start. After 15 minutes, reduce the oven temperature to 350°F (175°C) without opening the door.
- Continue baking at 350°F for another 35-45 minutes. Here’s how you’ll know it’s done: the edges should be set and slightly puffed, while the center should still have a slight jiggle—like a firm Jell-O, not a liquid one. A knife inserted about an inch from the center should come out clean. The total baking time is usually around 50-60 minutes.
- Check the crust about halfway through. If the edges are browning too quickly, cover them with strips of foil or a pie shield. I always forget to do this, and I end up with burnt edges. Learn from my mistakes.
- Let the pie cool completely on a wire rack. This is crucial. I know it’s tempting to cut into it while it’s still warm, but the filling needs time to set. Plan for at least 2-3 hours at room temperature, or overnight in the fridge. The pie will continue to set as it cools.
- Serve at room temperature or chilled. Both are delicious. If you’re serving at a party, I like to make it the day before and let it chill overnight. The flavors meld together beautifully, and it takes one thing off your to-do list on the day of your gathering.
Cooking Tips & Techniques
I’ve made this pie more times than I can count, and I’ve learned a few things along the way. Here are my best tips for success:
- Don’t overmix the filling. Once everything is combined, stop. Overmixing can incorporate too much air, which can cause the pie to crack as it bakes. You want it smooth, not frothy.
- Use room temperature ingredients. If your pumpkin puree and condensed milk are cold from the fridge, they won’t blend as smoothly. Let them sit on the counter for 15-20 minutes before you start. This small step makes a big difference in the final texture.
- Make your own pumpkin pie spice. It’s so easy and tastes so much better than store-bought. My go-to blend: 1 tablespoon cinnamon, 2 teaspoons ginger, 1 teaspoon nutmeg, 1/2 teaspoon cloves, and 1/2 teaspoon allspice. This makes about 1/4 cup, which is perfect for this recipe. Store any extra in a small jar.
- Watch for the jiggle. The center of the pie should wobble slightly when you shake the pan. If it’s completely firm, it’s overbaked. If it’s liquid, it needs more time. That perfect jiggle is your target. I’ve pulled pies out too early and had them turn into soup, and I’ve left them in too long and ended up with a dry, cracked mess. The jiggle test is your best friend.
- Let it cool slowly. Don’t put a hot pie directly into the fridge. Let it come to room temperature on the counter first. Rapid temperature changes can cause the filling to crack. I learned this the hard way when I was rushing to make dessert for a party.
- Make it ahead of time. This pie actually tastes better the next day. The spices have time to meld and deepen, and the texture becomes even silkier. It’s the perfect make-ahead dessert for entertaining.
Variations & Adaptations
One of the best things about this recipe is how versatile it is. Here are some ways to make it your own:
Dietary Adaptations
- Gluten-Free: Use a gluten-free pie crust. Most store-bought options work well, or you can make your own with gluten-free flour. The filling itself is naturally gluten-free.
- Dairy-Free: This one’s tricky because sweetened condensed milk is dairy. But you can find dairy-free versions made with coconut or oat milk. They’re not quite as rich, but they still make a delicious pie. Just check the label for any added thickeners.
- Lower Sugar: Use a sugar-free sweetened condensed milk alternative. The texture will be slightly different, but the flavor will still be great.
Flavor Twists
- Add a splash of vanilla extract (about 1 teaspoon) for extra warmth and depth. I do this every time now—it just makes everything better.
- Swap the spice blend for chai spice or apple pie spice for a different flavor profile. Both work beautifully with pumpkin.
- Add a tablespoon of bourbon or dark rum for a grown-up version. The alcohol bakes off, leaving behind a lovely warmth.
Serving Variations
- Make mini pies using a muffin tin and pre-made tart shells. Perfect for parties where everyone wants their own little dessert.
- Turn it into a no-bake pie by using a pre-made graham cracker crust and chilling the filling until set. The texture will be softer, but it’s still delicious.
- Top it with a streusel made from butter, flour, brown sugar, and pecans for extra crunch. Bake it right on top of the pie during the last 15 minutes of baking.
I once made a version with a gingersnap crust and a dollop of maple whipped cream, and it was absolutely divine. Don’t be afraid to experiment—the base recipe is so forgiving that you can really play around with it.
Serving & Storage Suggestions
This pie is incredibly versatile when it comes to serving. Here’s how to make the most of it:
- Serving Temperature: I prefer it chilled, straight from the fridge. But it’s also wonderful at room temperature, especially if you’re serving it alongside warm coffee or tea. If you’re hosting a dinner party, let it sit out for about 20 minutes before slicing to take the chill off.
- Presentation Tips: A dollop of lightly sweetened whipped cream is the classic choice. I like to add a sprinkle of cinnamon or nutmeg on top for that extra touch. For a fancier presentation, pipe the whipped cream in rosettes using a star tip. It looks like you spent way more time than you actually did.
- What to Serve With It: This pie pairs beautifully with coffee, hot apple cider, or even a glass of bourbon. For a full dessert spread, serve it alongside vanilla ice cream or a slice of apple crisp. It also works great as part of a Thanksgiving dessert table alongside pecan pie and chocolate cake.
- Storage Instructions: Cover the pie loosely with plastic wrap or foil and store it in the refrigerator. It will keep for up to 5 days. The flavor actually improves after a day or two as the spices continue to meld.
- Freezing Instructions: You can freeze the baked pie for up to 3 months. Wrap it tightly in plastic wrap, then a layer of foil. Thaw it overnight in the refrigerator before serving. I’ve done this multiple times for holiday prep, and it works like a charm.
- Reheating: If you prefer your pie warm, pop individual slices in the microwave for about 15-20 seconds. Or reheat the whole pie in a 300°F oven for about 10 minutes. Just be careful not to overheat it, or the filling can get runny.
Nutritional Information & Benefits
Let’s be real—this is a dessert, not a health food. But it does have some redeeming qualities. Here’s a rough breakdown per slice (based on 8 servings):
- Calories: Approximately 320-350 per slice
- Fat: 12-15g (mostly from the crust and condensed milk)
- Carbohydrates: 48-52g
- Protein: 6-8g
- Fiber: 2-3g (thanks to the pumpkin)
- Sugar: 32-36g (mostly from the condensed milk)
On the plus side, pumpkin is packed with vitamin A (great for your eyes and immune system) and fiber. It’s also low in calories on its own—the sugar and fat come from the other ingredients. If you’re looking for a lighter option, you can use a low-fat sweetened condensed milk or a sugar-free version. I’ve tried both, and while the texture is slightly different, they still make a perfectly enjoyable pie.
This recipe is vegetarian and can be made gluten-free and dairy-free with the right substitutions. It does contain dairy and gluten in its standard form, so keep that in mind if you’re serving guests with allergies.
Conclusion
Look, I know there are a million pumpkin pie recipes out there. But this one? It’s the one I keep coming back to, year after year. It’s the one I make for Thanksgiving, for Friendsgiving, for random Tuesday nights when I just need a little taste of fall. It’s simple, it’s reliable, and it always, always delivers.
That moment when you pull it out of the oven and the whole kitchen smells like cinnamon and nutmeg? That’s the feeling I’m chasing. And honestly, this recipe gives me that feeling every single time. It’s not just about the pie—it’s about the memories it creates. The laughter around the table, the “oohs” and “aahs” when you bring it out, the satisfied sighs after the first bite.
I really hope you give this easy 3-ingredient pumpkin pie a try. And when you do, I want to hear about it. Did you add your own twist? Did your guests love it? Did it remind you of someone special? Drop a comment below and let me know—I read every single one. And if you share it on social media, tag me so I can see your beautiful creation. Happy baking, friends!
Frequently Asked Questions
Can I use pumpkin pie filling instead of pumpkin puree?
No, please don’t. Pumpkin pie filling already has sugar and spices added, so using it would throw off the entire recipe. Stick with 100% pure pumpkin puree for the best results.
Do I have to use sweetened condensed milk?
Yes, for this particular recipe. The sweetened condensed milk provides both sweetness and creaminess. If you substitute it with something else, the texture and flavor will be completely different. If you need a dairy-free option, look for a dairy-free sweetened condensed milk alternative.
Why did my pie crack on top?
Cracks usually happen from overbaking or sudden temperature changes. Make sure you pull the pie out when the center still has a slight jiggle, and let it cool slowly on the counter before moving it to the fridge. Overmixing the filling can also cause cracking.
Can I make this pie ahead of time?
Absolutely! In fact, I recommend it. This pie tastes even better the next day after the flavors have had time to meld. You can make it up to 2 days in advance and store it covered in the refrigerator.
How do I know when the pie is done baking?
The edges should be set and slightly puffed, while the center should still have a slight jiggle—like firm Jell-O. A knife inserted about an inch from the center should come out clean. The total baking time is usually around 50-60 minutes at the reduced temperature.
Pin This Recipe!
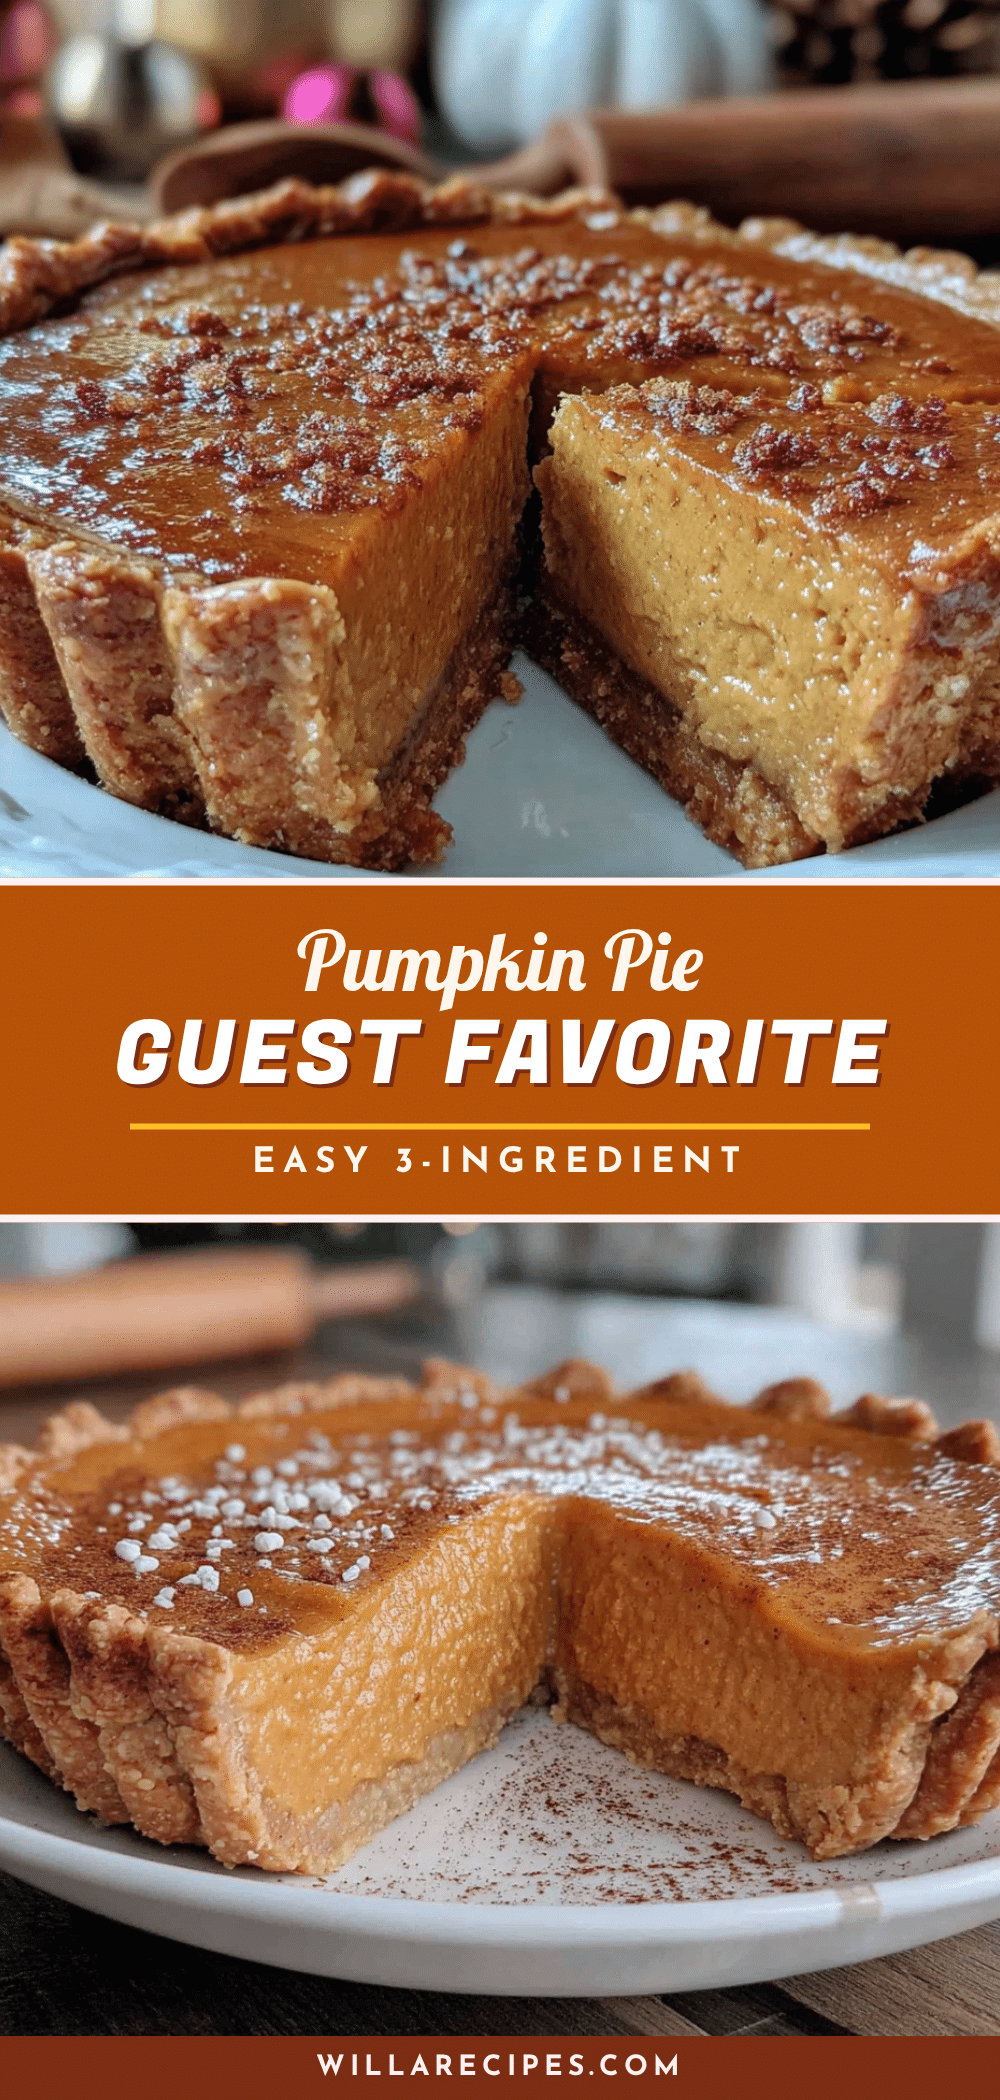
Easy 3-Ingredient Pumpkin Pie: The Perfect Guest Dessert
This incredibly simple pumpkin pie uses just three ingredients for the filling and comes together in minutes. It’s the perfect make-ahead dessert for entertaining, with a silky texture and perfectly spiced flavor that will impress your guests.
- Prep Time: 10 minutes
- Cook Time: 50-60 minutes
- Total Time: 1 hour 10 minutes (plus cooling time)
- Yield: 8 servings 1x
- Category: Dessert
- Cuisine: American
Ingredients
- 1 can (15 ounces) pumpkin puree (not pumpkin pie filling)
- 1 can (14 ounces) sweetened condensed milk
- 1/2 cup pumpkin pie spice blend
- 1 pre-made 9-inch pie crust (frozen or refrigerated)
Instructions
- Preheat your oven to 425°F (220°C). Position the oven rack in the center.
- Take your pie crust out of the fridge or freezer. If frozen, let it sit at room temperature for about 10 minutes. Gently press it into your pie dish, crimping the edges if desired.
- In a large mixing bowl, combine the pumpkin puree and sweetened condensed milk. Whisk until completely smooth and uniform in color, about 30 seconds.
- Add the pumpkin pie spice blend and whisk thoroughly until no clumps remain.
- Pour the filling into the prepared pie crust. Use a rubber spatula to scrape every last bit out of the bowl. Gently tap the pie dish on the counter a few times to release air bubbles.
- Place the pie in the oven and bake at 425°F for 15 minutes.
- Reduce the oven temperature to 350°F (175°C) without opening the door. Continue baking for 35-45 minutes. The pie is done when the edges are set and slightly puffed, and the center still has a slight jiggle (like firm Jell-O). A knife inserted about an inch from the center should come out clean.
- Check the crust about halfway through baking. If the edges are browning too quickly, cover them with strips of foil or a pie shield.
- Let the pie cool completely on a wire rack. Plan for at least 2-3 hours at room temperature, or overnight in the fridge.
- Serve at room temperature or chilled.
Notes
For best results, use room temperature ingredients. Do not overmix the filling. The pie tastes even better the next day. For a dairy-free version, use dairy-free sweetened condensed milk. For a gluten-free version, use a gluten-free pie crust. To make your own pumpkin pie spice blend: mix 1 tablespoon cinnamon, 2 teaspoons ginger, 1 teaspoon nutmeg, 1/2 teaspoon cloves, and 1/2 teaspoon allspice.
Nutrition
- Serving Size: 1 slice (1/8 of pie)
- Calories: 335
- Sugar: 34
- Sodium: 280
- Fat: 13.5
- Saturated Fat: 6
- Carbohydrates: 50
- Fiber: 2.5
- Protein: 7
Keywords: pumpkin pie, easy pumpkin pie, 3-ingredient pumpkin pie, Thanksgiving dessert, fall dessert, simple pumpkin pie


