The community garden coordinator, a woman named Rosa who always smelled faintly of rosemary and soil, watched me one afternoon as I wrestled with a batch of cookie dough that was stubbornly refusing to come together. I was trying to make a crisp gingerbread for a cookie swap, and the dough was cracking at the edges, dry and uncooperative. She didn’t say anything at first, just finished watering the kale bed. Then, she wiped her hands on her apron and said, “You’re fighting it. The dough wants to be soft. Let it be soft.” She didn’t teach me then and there. She just handed me a piece of paper the next week with her grandmother’s recipe for soft iced gingerbread cookies scribbled on it. The instructions were sparse, the measurements were in handfuls and pinches, and there was a note at the bottom that simply read, “These are for the children.” I made them that weekend, and honestly, I haven’t made a crisp gingerbread since. The dough came together like a dream, soft and pliable, and the smell that filled my kitchen was less like a holiday card and more like a hug. I forgot to line my baking sheet with parchment, and the first batch stuck a little, but the imperfections made them feel more real. Maybe you’ve been there, wrestling with a recipe that just doesn’t feel right. This one, let me tell you, is the one that finally behaves.
Why You’ll Love This Recipe
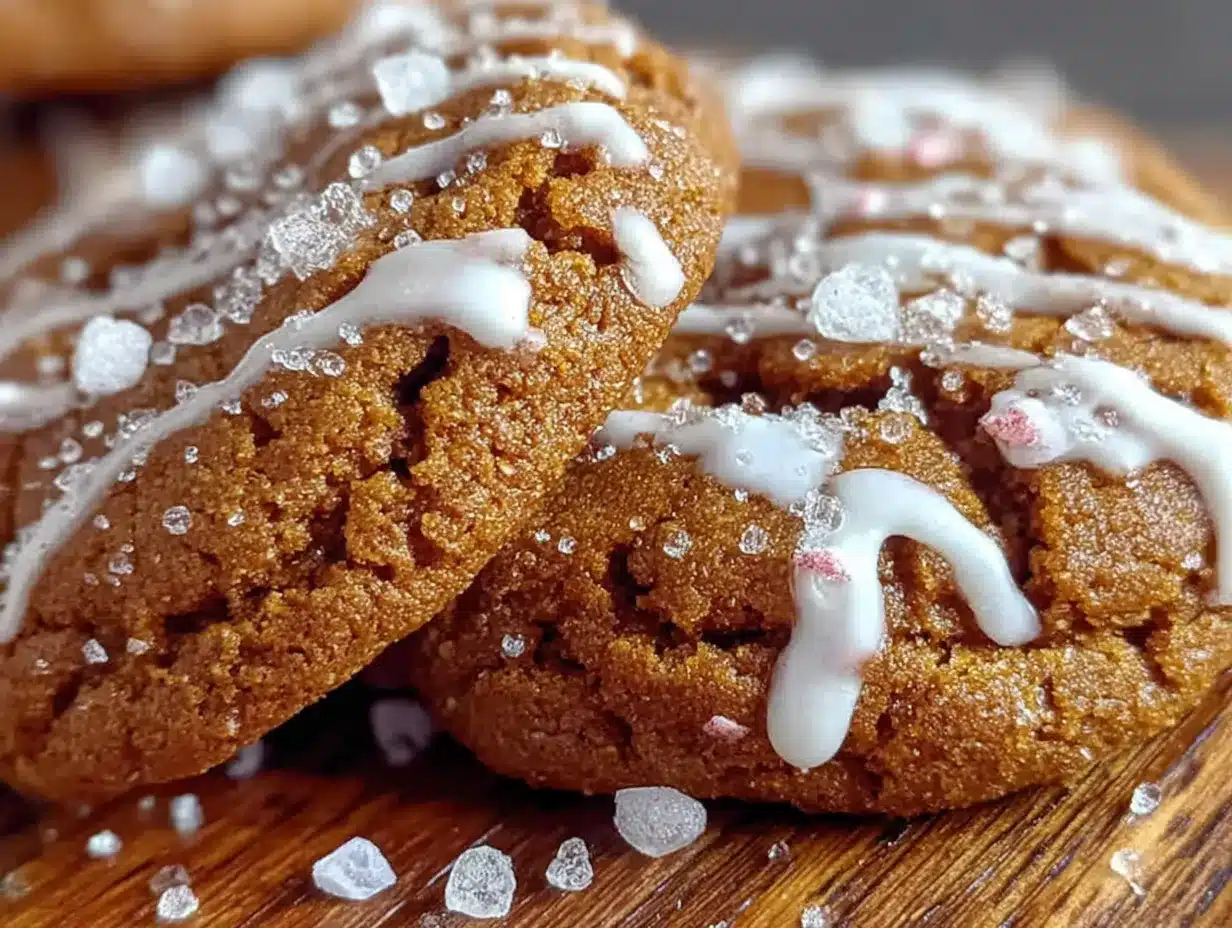
These aren’t your average gingerbread cookies. They are the kind that stay soft for days, the kind that kids actually reach for without being told, and the kind that make your whole house smell like a holiday dream without a ton of fuss. I’ve tested this recipe a dozen times to get the balance just right—soft enough to sink your teeth into, sturdy enough to hold a swirl of icing, and spiced warmly without being overwhelming.
- Kid-Approved and Parent-Friendly: The soft texture is a game-changer for little ones who find hard cookies tricky. Plus, the dough is easy for small hands to help roll and cut.
- Simple Pantry Ingredients: No need to hunt down molasses from a specialty store or buy a jar of something you’ll only use once. You likely have everything in your pantry right now.
- Perfect for Holiday Baking: Whether it’s for a school party, a family gathering, or a quiet afternoon of decorating, these cookies fit the bill without the stress.
- Unbelievably Soft: The secret is in the method—a touch of brown sugar and the right amount of butter create a cookie that stays tender for days, not hours.
- Freezes Like a Dream: You can make the dough ahead, bake when you need them, and they taste just as fresh. Perfect for a busy holiday schedule.
What makes these different from every other gingerbread recipe out there? It’s the texture. I’ve tried versions that were too cakey, too dry, or too crisp. This one hits that sweet spot—a dense, soft, almost pillowy bite that holds up to a generous layer of icing. It’s comfort food, reimagined for a busy family. The first time I made them for my niece, she looked at me after her first bite and said, “Can we make these every day?” That’s the kind of reaction this recipe gets.
What Ingredients You Will Need
This recipe uses simple, honest ingredients to create something special. The magic is in how they work together, not in any fancy additions. I’ve kept the list short and the instructions straightforward because that’s what works for a busy home cook.
- Unsalted Butter (1 cup / 2 sticks), softened: I always use unsalted so I can control the salt level. Let it sit out for about 30 minutes before starting. It should be soft to the touch but not melty.
- Brown Sugar (1 cup, packed): Light or dark brown sugar works here. Dark brown sugar gives a deeper molasses flavor, while light keeps it a bit milder. I personally prefer dark for a richer taste.
- Molasses (1/2 cup): Use unsulphured molasses for the best flavor. I like the Grandma’s brand for its consistent quality. Don’t use blackstrap molasses—it’s too bitter and will throw off the sweetness.
- Large Egg (1): Room temperature is best. If you forget to take it out, place it in a bowl of warm water for 5 minutes.
- All-Purpose Flour (3 cups): Spoon and level your flour for accuracy. Scooping directly from the bag can pack in too much flour and make the cookies dry.
- Baking Soda (1 teaspoon): This helps the cookies spread just the right amount and keeps them soft.
- Ground Ginger (2 teaspoons): This is the star spice. Make sure it’s fresh—if your jar has been sitting in the cabinet for two years, it’s time for a new one.
- Ground Cinnamon (1 teaspoon): Adds warmth and depth. I sometimes add an extra 1/2 teaspoon because I love cinnamon.
- Ground Cloves (1/2 teaspoon): A little goes a long way. It adds that classic holiday spice note.
- Salt (1/2 teaspoon): Balances the sweetness and enhances the spices.
For the Icing:
- Powdered Sugar (2 cups): Sift it if you can—it makes the icing smoother, but honestly, I often skip this step and it’s still fine.
- Milk (3-4 tablespoons): Whole milk gives a creamier icing, but any milk works. Start with 3 tablespoons and add more a teaspoon at a time until you reach your desired consistency.
- Vanilla Extract (1 teaspoon): Pure vanilla is best, but imitation works in a pinch.
Equipment Needed
You don’t need a fancy kitchen to make these cookies. I’ve made them with the bare minimum and they turned out just as good. Here’s what you’ll need:
- Mixing Bowls: One large for the dough, one medium for the icing. I use glass or stainless steel.
- Electric Mixer or Wooden Spoon: An electric hand mixer makes creaming the butter and sugar easier, but a good wooden spoon and some elbow grease works too. I’ve done both.
- Rolling Pin: A standard rolling pin is fine. If you don’t have one, a wine bottle works in a pinch—I’ve been there.
- Cookie Cutters: Gingerbread men are classic, but stars, trees, or simple rounds work beautifully.
- Baking Sheets: Light-colored sheets are best to prevent over-browning. I’ve used dark ones and had to watch them like a hawk.
- Parchment Paper or Silicone Baking Mat: This prevents sticking and makes cleanup a breeze. Worth every penny.
- Cooling Rack: Essential for getting that soft texture. If you let them cool on the sheet, they can get too soft on the bottom.
- Piping Bag or Zip-Top Bag: For the icing. A zip-top bag with a tiny corner snipped off works perfectly.
Preparation Method
Let’s get baking. This method is broken down into simple steps so you can follow along without any stress. I’ve included cues for what to look for at each stage because baking is as much about feel as it is about measurements.
- Cream the Butter and Sugar: In a large bowl, beat the softened butter and brown sugar together until light and fluffy. This should take about 3-4 minutes with an electric mixer on medium speed, or about 5-6 minutes by hand. You’re looking for a pale, airy mixture that looks like thick frosting. Scrape down the sides of the bowl once or twice.
- Add the Wet Ingredients: Beat in the molasses and the egg until everything is well combined. The mixture might look a little separated at this point—that’s okay. Don’t worry, it will come together once you add the flour. I once forgot the egg and only realized after adding the flour. I had to start over, so double-check before you move on.
- Mix the Dry Ingredients: In a separate bowl, whisk together the flour, baking soda, ginger, cinnamon, cloves, and salt. Whisking ensures the spices are evenly distributed so you don’t get a bite with too much clove.
- Combine Wet and Dry: Gradually add the dry ingredients to the wet mixture, mixing on low speed or stirring with a wooden spoon until just combined. The dough will be soft and slightly sticky. Don’t overmix—stop as soon as you don’t see any more streaks of flour. Overmixing develops gluten and can make the cookies tough.
- Chill the Dough: Divide the dough in half, shape each half into a disc about 1 inch thick, wrap tightly in plastic wrap, and refrigerate for at least 2 hours, or up to overnight. This step is non-negotiable. Chilling the dough solidifies the butter, which prevents the cookies from spreading too much and keeps them soft and thick. I’ve skipped this step before, and the cookies turned into flat, crispy discs. Learn from my mistake.
- Preheat and Prep: When you’re ready to bake, preheat your oven to 350°F (175°C). Line your baking sheets with parchment paper or silicone mats.
- Roll and Cut: On a lightly floured surface, roll out one disc of dough to about 1/4-inch thickness. Keep the other disc in the fridge. Cut out shapes using your cookie cutters and place them about 1 inch apart on the prepared baking sheets. Re-roll the scraps and cut again. If the dough gets too soft, pop it back in the fridge for 10 minutes.
- Bake: Bake for 8-10 minutes, or until the edges are just set and the centers look slightly underdone. They will puff up a little. The cookies should look soft and pale, not browned. Overbaking is the #1 reason for dry gingerbread. I take them out at the 8-minute mark for the softest texture.
- Cool Completely: Let the cookies cool on the baking sheet for 5 minutes, then transfer them to a wire rack to cool completely. Do not skip this resting time—it allows them to set without becoming hard. Once they are completely cool, they are ready for icing.
- Make the Icing: In a medium bowl, whisk together the powdered sugar, 3 tablespoons of milk, and the vanilla extract. Start with 3 tablespoons of milk and add more, one teaspoon at a time, until the icing is thick but still flows slowly off the whisk. It should be thick enough to hold its shape when piped but thin enough to spread slightly.
- Decorate: Transfer the icing to a piping bag or a zip-top bag with a tiny corner snipped off. Decorate your cookies as desired. Let the icing set for at least 30 minutes before stacking or serving.
Cooking Tips & Techniques
I’ve made a lot of mistakes with gingerbread over the years, so let me save you some trouble. Here are the things I wish someone had told me from the start.
Don’t Overwork the Dough: When you’re combining the wet and dry ingredients, stop mixing as soon as the flour disappears. If you keep going, you’ll develop too much gluten, and your cookies will be tough instead of tender. I learned this the hard way when I made a batch that could have doubled as hockey pucks.
Chill, Chill, Chill: I cannot stress this enough. If your dough is warm, the cookies will spread into thin, crispy messes. If you’re rolling out the dough and it starts sticking to your rolling pin or the counter, it’s too warm. Pop it back in the fridge for 15 minutes. I once tried to rush this step and ended up with cookies that looked more like gingerbread pancakes.
Use a Light Hand with Flour: When rolling out the dough, use just enough flour to prevent sticking. Too much flour on the surface will dry out the dough. I keep a small bowl of flour nearby and dust sparingly.
Bake from Chilled: Place the cut-out cookies directly onto the baking sheet and pop them in the oven right away. If they sit out too long, they’ll warm up and spread. I work in batches, keeping the dough I’m not using in the fridge.
The Toothpick Test (Sort Of): For the softest cookies, pull them out of the oven when the edges are set but the center still looks slightly underdone. They will continue to cook on the baking sheet as they cool. If you wait until the centers look fully baked, they’ll be dry.
Icing Consistency is Key: If your icing is too thin, it will run off the cookies and make a mess. If it’s too thick, it will be hard to pipe. Aim for a consistency that’s like thick honey. Test a small dollop on a plate—if it holds its shape but slowly spreads, you’re good.
Variations & Adaptations
One of the best things about this recipe is how flexible it is. Here are a few ways to make it your own.
Spice It Up or Down: If you’re feeding kids who are sensitive to spice, reduce the ginger to 1 teaspoon and skip the cloves. For a bolder flavor, add a pinch of black pepper or a 1/4 teaspoon of cardamom. I once added a touch of cayenne for a grown-up batch, and it was surprisingly good.
Gluten-Free Option: Substitute the all-purpose flour with a 1-to-1 gluten-free baking flour blend. I’ve used the King Arthur brand with great success. The texture will be slightly more delicate, so handle the dough gently. Chill it for an extra 30 minutes to make it easier to work with.
Dairy-Free Adaptation: Use vegan butter in place of regular butter, and substitute the milk in the icing with almond milk or oat milk. Make sure your vegan butter is well-chilled. I’ve made these for a dairy-free friend, and they turned out just as soft and delicious.
Citrus Twist: Add 1 tablespoon of finely grated orange zest to the dough along with the dry ingredients. The orange pairs beautifully with the ginger and molasses. For the icing, swap the vanilla extract for orange extract. This is my personal favorite variation during the holidays.
No Cookie Cutters? No Problem: Roll the dough into a log, chill it, and slice it into rounds. They won’t be shaped like gingerbread men, but they’ll taste just as good. You can also roll the dough into small balls and flatten them slightly with the bottom of a glass.
Serving & Storage Suggestions
These cookies are best served at room temperature with a cold glass of milk or a warm cup of tea. They are soft and tender, so they don’t need to be warmed up. If you want to dress them up, arrange them on a festive platter with a dusting of powdered sugar or alongside a bowl of fresh fruit.
Storage: Store the decorated cookies in an airtight container at room temperature for up to 5 days. Place a slice of bread in the container to help keep them soft—the cookies will absorb the moisture from the bread. Change the bread slice every other day if you’re storing them for longer. I’ve kept them for a full week this way, and they were still soft.
Freezing: You can freeze the unbaked dough for up to 3 months. Wrap the discs tightly in plastic wrap and then place them in a freezer bag. When you’re ready to bake, thaw the dough in the refrigerator overnight, then roll and cut as usual. You can also freeze the baked, un-iced cookies for up to 2 months. Thaw them at room temperature, then decorate. The icing does not freeze well, so always add it after thawing.
Reheating: These cookies are meant to be eaten at room temperature, so no reheating is necessary. If you want a slightly warm cookie, pop it in a 300°F (150°C) oven for 3-4 minutes. Do not microwave them—it will make the icing melt and the cookie turn gummy.
Flavor Development: Like many baked goods, these cookies taste even better the next day. The spices have time to meld together, and the texture settles into that perfect softness. I often make them a day ahead of when I plan to serve them.
Nutritional Information & Benefits
While these are definitely a treat, there are a few bright spots in the ingredient list. Molasses is a good source of iron, calcium, and magnesium—much more so than refined sugar. Ginger is known for its anti-inflammatory properties and can help soothe an upset stomach. Cinnamon is packed with antioxidants and may help regulate blood sugar.
That said, these cookies are still a dessert. One cookie (with icing) contains approximately:
- Calories: 180-200
- Fat: 8g
- Carbohydrates: 28g
- Sugar: 18g
- Protein: 2g
These values are estimates and will vary based on the size of your cookies and the amount of icing you use. For a slightly lighter version, you can reduce the sugar in the dough by 1/4 cup, though it will affect the texture slightly. I personally don’t stress about the numbers during the holidays—these are meant to be enjoyed in moderation, shared with loved ones, and savored.
If you have any dietary concerns, these cookies contain gluten, dairy, and eggs. They are not suitable for those with celiac disease, a dairy allergy, or an egg allergy without the substitutions mentioned in the variations section.
FAQs
Can I use blackstrap molasses?
I don’t recommend it. Blackstrap molasses has a very strong, bitter flavor that will overpower the other spices and make the cookies taste harsh. Stick with unsulphured molasses or a mild molasses for the best results.
Why did my cookies spread too much?
This usually happens for one of three reasons: the dough wasn’t chilled long enough, the butter was too soft, or the baking sheet was too warm. Make sure you chill the dough for at least 2 hours, and let your baking sheets cool completely between batches.
Can I make the dough ahead of time?
Absolutely. The dough can be refrigerated for up to 3 days or frozen for up to 3 months. Just wrap it tightly in plastic wrap. When you’re ready to bake, let it sit at room temperature for about 10 minutes to soften slightly before rolling.
How do I get the icing to set faster?
If you’re in a hurry, you can place the decorated cookies in the refrigerator for 15-20 minutes. The cold helps the icing firm up quickly. Just make sure the cookies are completely cool before you start decorating, or the icing will melt.
Can I use this recipe for a gingerbread house?
No, this recipe is specifically designed for soft cookies. For a gingerbread house, you need a much stiffer dough that can hold its shape and support weight. This dough is too tender and will crumble or sag. Save this recipe for eating, not building.
Conclusion
These soft iced gingerbread cookies have become a staple in my holiday baking rotation, and I honestly can’t imagine the season without them. They are forgiving, flexible, and most importantly, they make people happy. The first time I brought them to a family gathering, they disappeared before the ham was even carved. My sister-in-law asked for the recipe before she even finished her second cookie. That’s the kind of impact a simple, well-made cookie can have.
I hope you give them a try, and I hope you make them your own. Maybe you’ll add a little extra cinnamon, or maybe you’ll let the kids go wild with sprinkles. That’s the beauty of a good recipe—it’s a starting point, not a rulebook. If you make these, I’d love to hear how they turned out. Drop a comment below and let me know if your family loved them as much as mine does. Happy baking, friends!
Pin This Recipe!

Perfect Soft Iced Gingerbread Cookies: Easy Holiday Treat

These soft iced gingerbread cookies are a holiday dream—tender, spiced warmly, and perfect for decorating. Made with simple pantry ingredients, they stay soft for days and are kid-approved.
- Prep Time: 20 minutes
- Cook Time: 10 minutes
- Total Time: 2 hours 30 minutes (includes chilling)
- Yield: 24-30 cookies 1x
- Category: Dessert
- Cuisine: American
Ingredients
- 1 cup (2 sticks) unsalted butter, softened
- 1 cup packed brown sugar (light or dark)
- 1/2 cup unsulphured molasses
- 1 large egg, room temperature
- 3 cups all-purpose flour, spooned and leveled
- 1 teaspoon baking soda
- 2 teaspoons ground ginger
- 1 teaspoon ground cinnamon
- 1/2 teaspoon ground cloves
- 1/2 teaspoon salt
- 2 cups powdered sugar (for icing)
- 3–4 tablespoons milk (for icing)
- 1 teaspoon vanilla extract (for icing)
Instructions
- Cream the butter and brown sugar together in a large bowl until light and fluffy, about 3-4 minutes with an electric mixer or 5-6 minutes by hand.
- Beat in the molasses and egg until well combined. The mixture may look slightly separated.
- In a separate bowl, whisk together the flour, baking soda, ginger, cinnamon, cloves, and salt.
- Gradually add the dry ingredients to the wet mixture, mixing on low speed or stirring with a wooden spoon until just combined. Do not overmix.
- Divide the dough in half, shape each half into a 1-inch thick disc, wrap tightly in plastic wrap, and refrigerate for at least 2 hours or up to overnight.
- When ready to bake, preheat oven to 350°F (175°C) and line baking sheets with parchment paper or silicone mats.
- On a lightly floured surface, roll out one disc of dough to 1/4-inch thickness. Cut into shapes with cookie cutters and place 1 inch apart on prepared baking sheets.
- Bake for 8-10 minutes, until edges are set but centers look slightly underdone. Cool on baking sheet for 5 minutes, then transfer to a wire rack to cool completely.
- For the icing: whisk together powdered sugar, 3 tablespoons milk, and vanilla extract. Add more milk 1 teaspoon at a time until thick but flowable.
- Transfer icing to a piping bag or zip-top bag with a tiny corner snipped off. Decorate cooled cookies. Let icing set for at least 30 minutes before stacking or serving.
Notes
Chill the dough for at least 2 hours to prevent spreading. For the softest cookies, bake until edges are set but centers look slightly underdone. Store in an airtight container with a slice of bread to maintain softness. Dough can be frozen for up to 3 months.
Nutrition
- Serving Size: 1 cookie with icing
- Calories: 180200
- Sugar: 18
- Sodium: 120
- Fat: 8
- Saturated Fat: 5
- Carbohydrates: 28
- Fiber: 1
- Protein: 2
Keywords: soft gingerbread cookies, iced gingerbread, holiday cookies, easy gingerbread, soft cookies, Christmas cookies


