The candy cane was supposed to be crushed fine. Like, snow-fine. I had this whole vision of a perfectly smooth, elegant layer of dark chocolate topped with an equally pristine white chocolate layer, and then—this is where the vision gets good—a delicate, almost powdery dusting of peppermint that would look like fresh snowfall on a winter morning.
Instead, I was standing in my kitchen at 10 PM on a Tuesday, holding a rolling pin covered in sticky red-and-white shards, with crushed candy cane scattered across every surface. The bag I’d been pounding had split open right at the seam. My dog was licking a piece off the floor. And the chocolate? I’d gotten distracted answering a text and let the white chocolate seize up in the bowl—turning into a grainy, clumpy mess that looked nothing like the silky drizzle I’d planned.
Honestly, at that point, I almost dumped the whole thing in the trash. I mean, let me tell you, nothing kills the holiday spirit quite like scraping burnt chocolate off a stove burner at midnight. But I’d already melted the dark chocolate, and I’m not one to waste good ingredients. So I scraped the seized white chocolate into a separate bowl, added a splash of coconut oil (a trick my neighbor swore by), and stirred like my life depended on it. Slowly, miraculously, it smoothed out.
The candy cane pieces were still uneven—some were tiny specks, others were chunks the size of my thumbnail. I just sprinkled them on top anyway, figuring this batch was destined for my own snacking, not for gifting. But when I broke off a piece the next morning, something clicked. The uneven crunch of the peppermint against the smooth chocolate. The way the big pieces gave you a sudden burst of candy sweetness. It wasn’t what I planned. It was better. And honestly, that’s the story of how this easy homemade peppermint bark became my go-to holiday recipe—the one I actually look forward to making every single year.
Why You’ll Love This Recipe
This easy homemade peppermint bark isn’t just another holiday treat. It’s the kind of recipe that makes you look like you spent hours in the kitchen when really, you pulled it together in about 20 minutes of active work. Here’s why it keeps showing up in my kitchen year after year:
- Quick & Easy: Just 15 minutes of prep, then let the fridge do the rest. Perfect for those last-minute holiday cravings or unexpected guests dropping by.
- Simple Ingredients: You need exactly four things—dark chocolate, white chocolate, peppermint extract, and candy canes. That’s it. No hunting down specialty stores.
- Perfect for Gifting: This bark breaks into gorgeous, rustic shards that look beautiful in a cellophane bag tied with a ribbon. It’s my go-to hostess gift during the holiday season.
- Crowd-Pleaser: I’ve watched people who swear they “don’t like peppermint” go back for thirds. The combination of rich dark chocolate and sweet white chocolate wins everyone over.
- Unbelievably Delicious: The texture is what gets me every time—that satisfying snap when you bite through the chocolate layers, followed by the crunchy burst of peppermint. It’s next-level comfort food.
What makes this version different from the rest? It’s the technique. Most recipes tell you to just melt and layer, but I’ve learned that a tiny splash of coconut oil in the white chocolate keeps it from seizing (trust me, I learned this the hard way). And crushing the candy canes by hand instead of using a food processor gives you those perfect uneven pieces that make every bite slightly different. It’s not just another peppermint bark—it’s my best version, born from a kitchen disaster that turned into something I’m genuinely proud of.
This is the kind of treat that makes you close your eyes after the first bite. It’s holiday comfort food reimagined—faster, easier, but with the same soul-soothing satisfaction that reminds you why December is the best month for baking.
What Ingredients You Will Need
This recipe uses simple, wholesome ingredients to deliver that perfect balance of rich chocolate and refreshing peppermint. Most of these are pantry staples during the holiday season, but I’ll share a few tips I’ve picked up along the way.
- Dark chocolate, chopped (12 oz / 340g) — I prefer using a good-quality dark chocolate with 60-70% cacao. Ghirardelli or Lindt work beautifully here. Don’t use chocolate chips if you can help it; they contain stabilizers that prevent smooth melting.
- White chocolate, chopped (12 oz / 340g) — This is where quality really matters. Cheap white chocolate can be waxy and prone to seizing. I’ve had the best luck with Callebaut or Baker’s brand. Look for one that lists cocoa butter as an ingredient, not just vegetable oils.
- Coconut oil (1 teaspoon, divided) — This is my secret weapon. Adding a tiny amount to the white chocolate helps it melt smoothly and prevents that dreaded grainy texture. Refined coconut oil works best since it has no coconut flavor.
- Peppermint extract (1/2 teaspoon, divided) — Use pure peppermint extract, not peppermint flavoring. The difference is noticeable. I like Nielsen-Massey brand for its clean, bright flavor. A little goes a long way.
- Candy canes (6-8 regular-sized, about 1 cup crushed) — You want classic peppermint candy canes, not the fancy flavored ones. I’ve tried using pre-crushed peppermint pieces, but they’re never as fresh or crunchy. Crushing your own is worth the extra minute.
Ingredient Selection Tips: For the dark chocolate, I look for bars that feel heavy for their size—that usually means higher cocoa butter content, which translates to smoother melting. For the white chocolate, check the ingredient list. If sugar is the first ingredient followed by palm oil, put it back. You want cocoa butter to be in the top three ingredients.
Substitution Guidance: If you’re dairy-free, look for dark chocolate that’s labeled dairy-free (many high-percentage dark chocolates are naturally dairy-free). For the white chocolate, there are good dairy-free alternatives now—I’ve had success with Enjoy Life brand. Just note that dairy-free white chocolate behaves differently when melting, so keep a close eye on it. You can also skip the coconut oil and use a neutral vegetable oil instead, but coconut oil really does give the best texture.
Equipment Needed
You don’t need fancy equipment for this recipe, which is part of why I love it. Here’s what you’ll need:
- Baking sheet (13×18 inch or similar) — A rimmed baking sheet works best to contain the chocolate. I use my favorite Nordic Ware sheet.
- Parchment paper — Don’t skip this. It makes lifting the bark out so much easier. Wax paper won’t work here; it can melt with warm chocolate.
- Double boiler or heatproof bowls — I use a large glass bowl set over a saucepan of simmering water. If you’re careful, you can use the microwave, but I find the double boiler gives me more control.
- Rubber spatula — For spreading the chocolate evenly. A silicone spatula is ideal because it won’t scratch your bowls.
- Rolling pin or meat mallet — For crushing the candy canes. I’ve used both, and honestly, a meat mallet works better for me. Less mess.
- Ziploc bag — Put the candy canes inside before crushing. This contains the shards and makes cleanup infinitely easier.
- Sharp knife — For cutting or breaking the finished bark. A chef’s knife works well for clean cuts, but I prefer breaking it by hand for those rustic, natural shards.
Budget-Friendly Options: Don’t have a double boiler? A metal bowl set over any saucepan works perfectly. No meat mallet? A heavy skillet or even a can of beans will do the job. I’ve crushed candy canes with the bottom of a coffee mug in a pinch—it’s not elegant, but it works.
Preparation Method

- Prep your pan. Line a 13×18 inch baking sheet with parchment paper, leaving some overhang on the sides. This will make lifting the finished bark out much easier. Smooth out any wrinkles in the paper.
- Crush the candy canes. Place 6-8 candy canes in a sturdy Ziploc bag. Seal it, then wrap it in a kitchen towel (this prevents punctures). Using a rolling pin or meat mallet, gently smash the candy canes until you have a mix of fine powder and small pieces. Aim for pieces about the size of a pea or smaller. Set aside about 2 tablespoons of the finest powder for garnish.
- Melt the dark chocolate. Fill a small saucepan with about 2 inches of water and bring it to a gentle simmer. Place 12 oz of chopped dark chocolate in a heatproof bowl and set it over the saucepan, making sure the bottom of the bowl doesn’t touch the water. Stir occasionally with a rubber spatula until the chocolate is mostly melted—about 4-5 minutes. Remove from heat and continue stirring until completely smooth. Stir in 1/4 teaspoon of peppermint extract.
- Spread the dark chocolate layer. Pour the melted dark chocolate onto the prepared baking sheet. Using your spatula, spread it into an even layer about 1/4-inch thick. Don’t worry about making it perfect—rustic is part of the charm. Tap the pan gently on the counter to smooth out any air bubbles.
- Set the dark chocolate. Place the baking sheet in the refrigerator for 15-20 minutes, or until the chocolate is firm to the touch but not rock-hard. You want it set enough that the white chocolate won’t sink in, but not so cold that the layers will separate later.
- Melt the white chocolate. While the dark chocolate sets, melt the white chocolate using the same double boiler method. Add 1/2 teaspoon of coconut oil to the bowl along with the white chocolate. This is crucial—the coconut oil helps the white chocolate melt smoothly and prevents seizing. Stir gently until smooth, then remove from heat. Stir in the remaining 1/4 teaspoon of peppermint extract.
- Spread the white chocolate layer. Remove the baking sheet from the refrigerator. Pour the melted white chocolate over the set dark chocolate layer. Gently spread it into an even layer using your spatula. Work quickly but carefully—you don’t want to disturb the dark chocolate underneath.
- Add the peppermint topping. Immediately sprinkle the crushed candy cane pieces evenly over the white chocolate layer. Don’t press them in; just let them settle naturally. Sprinkle the reserved fine powder over the top for that snowy effect.
- Set the bark completely. Return the baking sheet to the refrigerator and let it set for at least 1 hour, or until the bark is completely firm. I usually leave it for 2 hours to be safe. The bark should lift easily from the parchment paper when it’s ready.
- Break into pieces. Once set, lift the bark out of the pan using the parchment paper overhang. Place it on a cutting board. Using your hands, break the bark into irregular pieces—I aim for 2-3 inch shards. If you prefer cleaner edges, use a sharp knife to cut it into squares or rectangles.
Sensory Cues: When the dark chocolate is ready to spread, it should look glossy and flow like thick syrup off your spatula. The white chocolate, when properly melted, should be smooth and pale ivory—if it looks grainy or separates, you’ve overheated it. The finished bark should have a clean snap when you break it, with no bending or soft spots.
Cooking Tips & Techniques
I’ve made this easy homemade peppermint bark more times than I can count, and I’ve learned a few things the hard way. Here are my best tips:
Don’t rush the melting. Chocolate is temperamental. Low and slow is the name of the game. If you’re using the microwave, use 50% power and stir every 20 seconds. I once tried to speed things up with full power and ended up with a bowl of burnt, grainy chocolate that smelled like despair.
The coconut oil trick is non-negotiable for white chocolate. White chocolate is more prone to seizing than dark chocolate because of its lower cocoa butter content. That tiny splash of coconut oil changes everything. I learned this after three separate batches turned into unusable clumps. Now I add it every single time, and I’ve never had an issue since.
Crush candy canes strategically. Don’t pulverize them into dust. You want a mix of textures—fine powder that sticks to the chocolate and small chunks that give you that satisfying crunch. I’ve found that crushing them in a Ziploc bag wrapped in a towel gives me the best control. And wear headphones if noise bothers you; it’s louder than you’d expect.
Temperature matters. Make sure your dark chocolate layer is set but not ice-cold before adding the white chocolate. If it’s too cold, the white chocolate will harden on contact and won’t spread evenly. If it’s too warm, the layers will blend together. That 15-20 minute chill is the sweet spot.
Work in a cool room. Chocolate doesn’t like heat. If your kitchen is warm, consider working in the coolest part of your house. I once made this in July (don’t ask), and the layers refused to set properly. The bark was delicious but messy. Save yourself the trouble and make it when the weather is cool.
Let it set completely before breaking. I know it’s tempting to sneak a piece, but patience pays off. Under-set bark will bend instead of snapping cleanly, and you’ll end up with messy, melted edges. Give it the full hour, minimum.
Variations & Adaptations
Once you’ve mastered the basic recipe, there’s so much room to play. Here are some variations I’ve tried and loved:
Dark Chocolate Peppermint Bark with Sea Salt: Sprinkle a pinch of flaky sea salt over the dark chocolate layer before it sets. The salt amplifies the chocolate flavor and balances the sweetness of the white chocolate. This is my personal favorite variation—I discovered it when I accidentally knocked a salt cellar over the pan, and it was the best mistake I’ve ever made.
Milk Chocolate Version: If dark chocolate isn’t your thing, swap it for milk chocolate. The result is sweeter and creamier, more like a candy bar. Just be aware that milk chocolate is softer than dark, so the bark won’t have quite the same snap. It’s still delicious, just different.
Vegan & Dairy-Free Adaptation: Use dairy-free dark chocolate (most 70% and above is naturally dairy-free) and a good-quality dairy-free white chocolate. I’ve had success with the Enjoy Life brand. The coconut oil is already vegan, so no changes needed there. The texture is slightly different—a bit softer—but the flavor is spot-on.
Add-In Variations: Before the white chocolate sets, sprinkle on some chopped toasted almonds, crushed pretzels, or dried cranberries along with the candy canes. The salty-sweet combination is incredible. I made a batch with crushed pistachios last year, and it was gone in two days.
Flavor Twists: Swap the peppermint extract for orange extract in the dark chocolate layer for a chocolate-orange version. Or use spearmint extract for a different kind of mint experience. I’ve even tried adding a pinch of cinnamon to the dark chocolate—it gives the bark a subtle warmth that’s perfect for winter.
Serving & Storage Suggestions
This peppermint bark is incredibly versatile when it comes to serving. Here’s how I handle it:
Serving Temperature: Peppermint bark is best served at room temperature. If it’s been in the fridge, let it sit out for about 10 minutes before serving. This allows the chocolate to soften slightly, giving you that perfect melt-in-your-mouth texture while still maintaining the satisfying snap.
Presentation Ideas: Arrange the shards on a festive platter or in a glass jar for a beautiful display. For gifting, I layer the pieces in a cellophane bag and tie it with a red or green ribbon. Add a small tag with the recipe name and date—it makes such a thoughtful homemade gift. I’ve also used these as stocking stuffers, and they’re always a hit.
Storage Instructions: Store the bark in an airtight container at room temperature for up to 2 weeks. If your kitchen is warm, you can store it in the refrigerator, but bring it to room temperature before serving. I’ve found that stacking the pieces between layers of parchment paper prevents them from sticking together.
Freezing Tips: This bark freezes beautifully. Place the pieces in a single layer on a baking sheet and freeze until solid, then transfer to a freezer-safe bag or container. It will keep for up to 3 months. Thaw in the refrigerator overnight, then let it come to room temperature before serving. I always make a double batch and stash one in the freezer for unexpected holiday visitors.
Flavor Development: Interestingly, the flavor actually improves after a day or two. The peppermint mellows and integrates with the chocolate, creating a more balanced taste. So if you can resist eating it all immediately, it’s worth waiting a day. I’ve never managed to wait that long, but I’ve heard it’s true.
Nutritional Information & Benefits
Let’s be honest—this is a treat, not a health food. But here’s what you should know:
Estimated Nutritional Values (per 1 oz serving, about 2-3 pieces):
- Calories: 150-170
- Fat: 9-11g
- Carbohydrates: 18-20g
- Sugar: 15-17g
- Protein: 2-3g
Health Highlights: Dark chocolate (60-70% cacao) is actually a decent source of antioxidants, specifically flavonoids, which can support heart health. It also contains iron, magnesium, and zinc in small amounts. The peppermint in the candy canes can aid digestion and freshen breath—though let’s be real, we’re eating this for the taste, not the health benefits.
Dietary Considerations: This recipe is naturally gluten-free (just double-check your chocolate labels to be sure). It can be made dairy-free and vegan with the right chocolate substitutions. It’s not low-sugar or low-fat, so portion control is key. I usually have one or two pieces with my afternoon coffee, and it satisfies my sweet tooth without going overboard.
Potential Allergens: Contains dairy (if using regular white chocolate) and may contain traces of nuts depending on the chocolate brand. Always check labels if you’re serving to someone with allergies.
Personal Wellness Perspective: I believe in balance. This peppermint bark is part of my holiday tradition, and I enjoy it without guilt. A small piece brings me joy, and that’s good for the soul. Life’s too short to skip dessert—just don’t eat the whole batch in one sitting (speaking from experience).
Conclusion
This easy homemade peppermint bark started as a kitchen disaster and turned into one of my most-loved holiday traditions. It’s proof that sometimes the best recipes come from mistakes—from seized chocolate and uneven candy cane pieces and the stubborn refusal to give up on a batch that looks like a mess.
What I love most about this recipe is how forgiving it is. You don’t need to be a pastry chef to make it. You don’t need fancy equipment or hard-to-find ingredients. You just need good chocolate, some candy canes, and a little bit of patience while it sets. And honestly, the imperfections are what make it special. The uneven shards, the scattered candy pieces, the way every bite is slightly different—that’s homemade charm you can’t replicate.
I hope you give this recipe a try, whether you’re making it for holiday gifting, a party, or just because you deserve a treat. Feel free to customize it with your favorite add-ins or flavor twists. And if you make a mistake along the way? Don’t panic. It might just turn out better than you planned.
I’d love to hear how yours turns out! Drop a comment below and let me know if you tried any variations, or share a photo of your finished bark. Happy holidays, and happy baking!
Frequently Asked Questions
Can I use chocolate chips instead of chopped chocolate?
You can, but I don’t recommend it. Chocolate chips contain stabilizers that help them hold their shape, which means they don’t melt as smoothly. The texture won’t be as silky, and the bark might not have that satisfying snap. If you’re in a pinch, use high-quality chips and add a teaspoon of coconut oil to help them melt.
Why did my white chocolate seize up?
White chocolate is sensitive to heat and moisture. If even a drop of water gets into the bowl, it can seize and turn grainy. That’s why I always add a bit of coconut oil—it helps stabilize the chocolate. If your white chocolate does seize, try stirring in a teaspoon of warm coconut oil or heavy cream. Sometimes you can rescue it.
How long does peppermint bark last?
Stored in an airtight container at room temperature, it will stay fresh for up to 2 weeks. In the refrigerator, it can last up to a month. And in the freezer, it’s good for about 3 months. Just make sure it’s well-sealed so it doesn’t absorb any odors from the fridge or freezer.
Can I use peppermint extract instead of candy canes?
You can use extract for flavor, but the candy canes provide that essential crunchy texture. If you skip the candy canes, you’ll end up with a smooth chocolate bark that tastes like peppermint but lacks the signature crunch. I recommend using both for the best result.
My layers separated. What went wrong?
This usually happens when the dark chocolate layer is too cold when you add the white chocolate. If the dark chocolate is ice-cold, the warm white chocolate will harden on contact and won’t bond properly. Let the dark chocolate set at room temperature for a bit before refrigerating, or let it sit out for 5 minutes after chilling before adding the white chocolate layer.
Pin This Recipe!
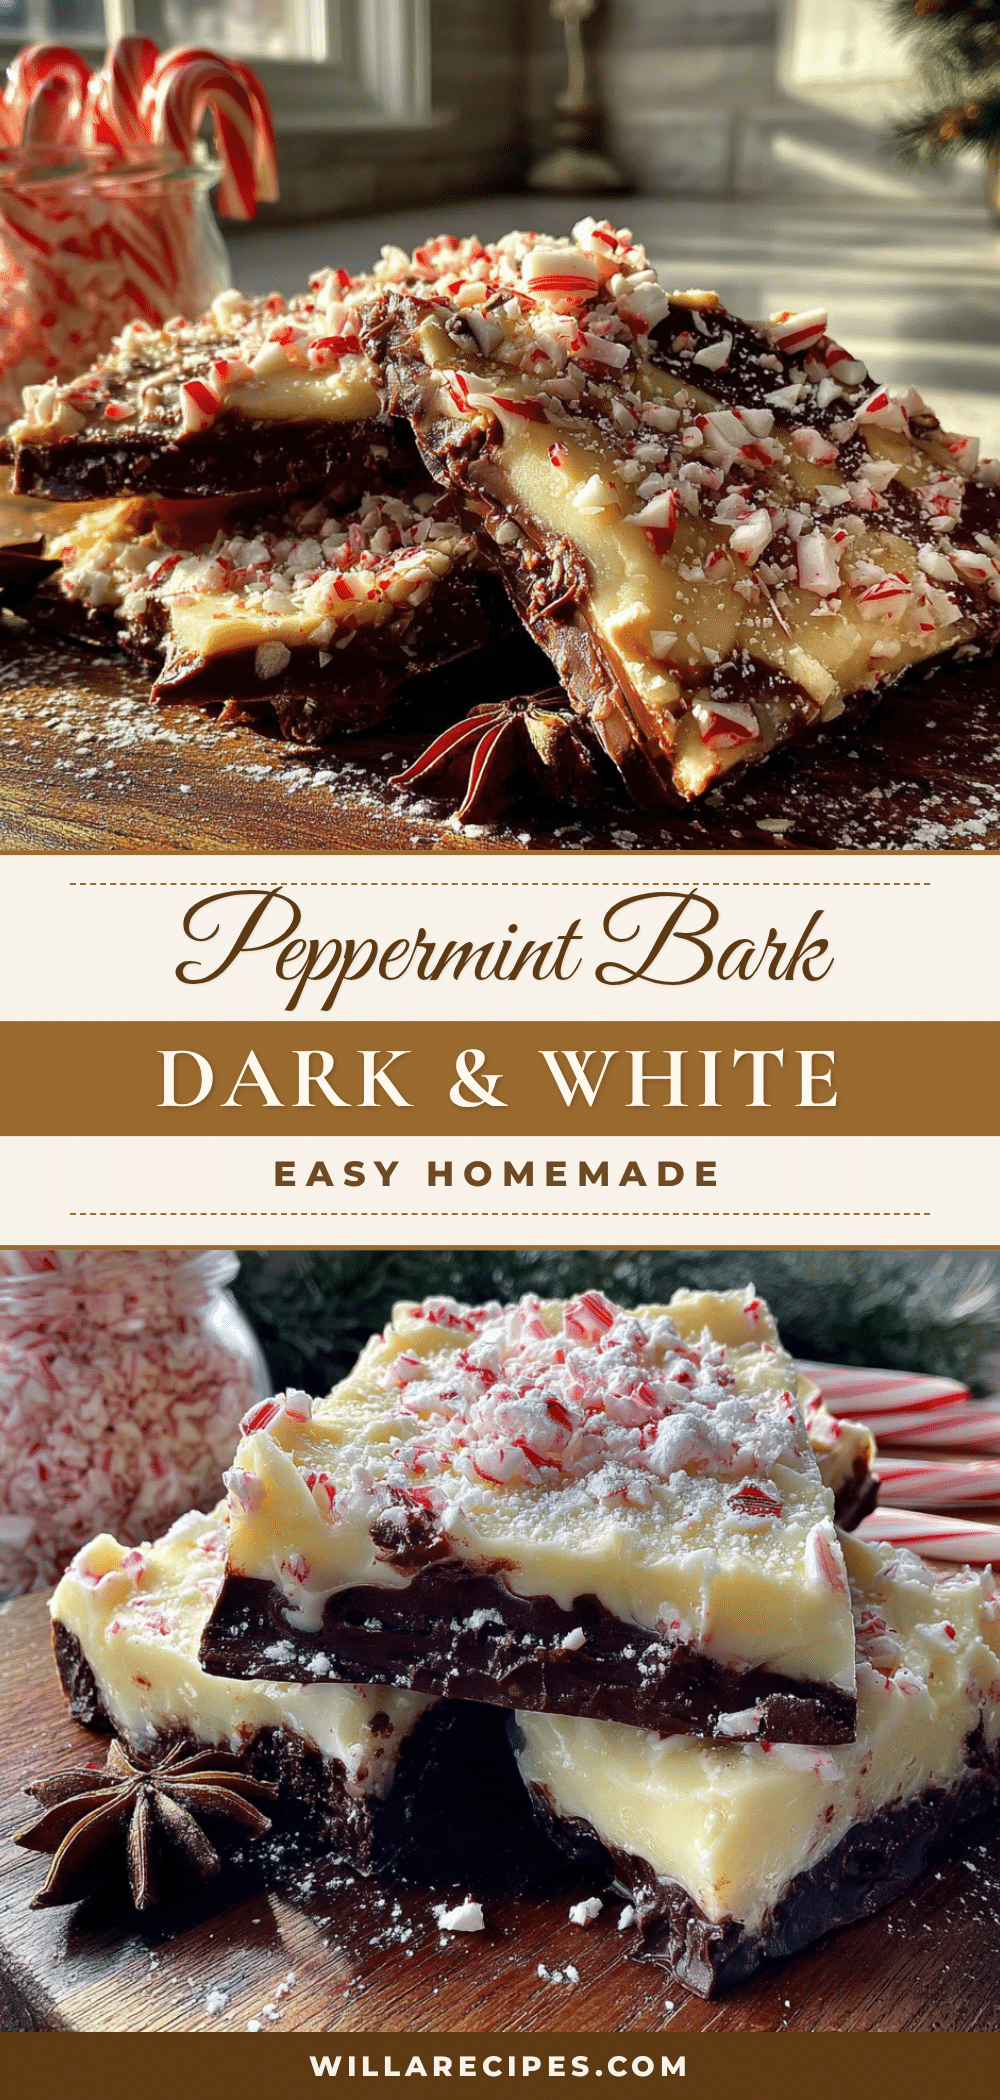
Easy Homemade Peppermint Bark Recipe (Best Dark & White Chocolate)
This easy homemade peppermint bark features layers of dark and white chocolate topped with crunchy candy cane pieces. It’s a quick, crowd-pleasing holiday treat that’s perfect for gifting or snacking.
- Prep Time: 15 minutes
- Cook Time: 10 minutes
- Total Time: 1 hour 25 minutes (includes chilling time)
- Yield: 24 servings 1x
- Category: Dessert
- Cuisine: American
Ingredients
- 12 oz (340g) dark chocolate, chopped (60-70% cacao)
- 12 oz (340g) white chocolate, chopped
- 1 teaspoon coconut oil, divided
- 1/2 teaspoon peppermint extract, divided
- 6–8 regular-sized candy canes (about 1 cup crushed)
Instructions
- Line a 13×18 inch baking sheet with parchment paper, leaving overhang on the sides.
- Place 6-8 candy canes in a sturdy Ziploc bag, seal, and wrap in a kitchen towel. Crush with a rolling pin or meat mallet until you have a mix of fine powder and small pieces (pea-sized or smaller). Set aside about 2 tablespoons of the finest powder for garnish.
- Fill a small saucepan with about 2 inches of water and bring to a gentle simmer. Place 12 oz chopped dark chocolate in a heatproof bowl over the saucepan (bowl should not touch water). Stir occasionally until mostly melted, about 4-5 minutes. Remove from heat and stir until completely smooth. Stir in 1/4 teaspoon peppermint extract.
- Pour melted dark chocolate onto prepared baking sheet. Spread into an even layer about 1/4-inch thick. Tap pan gently on counter to smooth out air bubbles.
- Refrigerate for 15-20 minutes until firm to the touch but not rock-hard.
- While dark chocolate sets, melt white chocolate using the same double boiler method. Add 1/2 teaspoon coconut oil to the bowl along with the white chocolate. Stir gently until smooth, then remove from heat. Stir in remaining 1/4 teaspoon peppermint extract.
- Remove baking sheet from refrigerator. Pour melted white chocolate over set dark chocolate layer. Gently spread into an even layer.
- Immediately sprinkle crushed candy cane pieces evenly over white chocolate layer. Sprinkle reserved fine powder on top.
- Return to refrigerator and let set for at least 1 hour, or until completely firm (2 hours recommended).
- Lift bark out of pan using parchment overhang. Break into irregular 2-3 inch shards by hand, or cut into squares with a sharp knife.
Notes
For best results, use high-quality chocolate. Adding coconut oil to white chocolate prevents seizing. Crush candy canes by hand for varied texture. Let bark set completely before breaking for clean snap. Flavor improves after a day or two.
Nutrition
- Serving Size: 1 oz (about 2-3 piec
- Calories: 160
- Sugar: 16
- Sodium: 15
- Fat: 10
- Saturated Fat: 6
- Carbohydrates: 19
- Fiber: 1
- Protein: 2
Keywords: peppermint bark, homemade peppermint bark, easy peppermint bark, dark chocolate peppermint bark, white chocolate peppermint bark, holiday candy, Christmas candy, peppermint dessert


