There used to be a tiny bakery tucked between a dry cleaner and a defunct video rental place on the corner of Elm and 4th that made the most ridiculous red velvet cake pops I have ever tasted. When they closed—suddenly, with a handwritten sign taped to the door saying “Thanks for the memories”—I honestly felt a little lost. Those little pops on a stick had become my go-to for every holiday party, every work event, every time I needed to bring something that disappeared in minutes. After maybe seven or eight tries—some of which crumbled into a depressing heap, and one that I accidentally dropped on the floor mid-dip—I finally got it.
The trick, let me tell you, is not overthinking it. I used to obsess over getting the crumb texture just right, or worrying that the cream cheese frosting was too thin. Then one Tuesday night, with a box of red velvet cake mix staring at me from the pantry and a bag of white chocolate chips I’d grabbed on a whim, I just went for it. No fuss, no five-step process that required a culinary degree. Just good cake, good frosting, and a little patience.
And honestly? These easy red velvet Christmas cake pops on a stick are better than that bakery’s version. They’re more tender, the chocolate coating is thicker, and the little sprinkle of crushed candy cane on top gives them that holiday feel that the original never had. Maybe you’ve been there—chasing a food memory that feels just out of reach. This is the one that finally landed.
Why You’ll Love This Recipe
Let’s be real for a second. Weeknights are chaos. You’re tired, the kids are hungry, and the last thing you want is a dessert project that takes all evening. These cake pops are the exception. They come together in under an hour of active time, and the rest is just chilling in the fridge while you do literally anything else.
- Quick & Easy: From start to finish, you’re looking at about 30 minutes of hands-on work. The cake bakes while you clean up, and the dipping goes fast once you get into a rhythm.
- Simple Ingredients: No weird extracts or specialty flours. You probably have most of this in your pantry right now—cake mix, oil, eggs, cream cheese, powdered sugar, and chocolate chips.
- Perfect for Christmas Parties: These things are basically edible ornaments. They look impressive on a platter, but nobody needs to know how simple they actually are.
- Crowd-Pleaser: I’ve brought these to cookie swaps, school parties, and family dinners. They’re always the first thing to go. Kids love them, adults sneak extra ones.
- Unbelievably Delicious: The combination of moist red velvet cake, tangy cream cheese frosting, and that snap of white chocolate is just… chef’s kiss. It’s comfort food on a stick.
What makes this version different from the dozens of other cake pop recipes out there? It’s the texture. Most cake pops are dense and almost fudge-like. These are light, almost fluffy, because I use a specific ratio of frosting to cake that keeps them from getting heavy. Plus, the addition of a tiny pinch of salt in the chocolate coating cuts through the sweetness perfectly. It’s not just another red velvet cake pop—it’s the one that actually tastes like the real thing, just in portable form.
What Ingredients You Will Need
This recipe relies on simple, everyday ingredients that come together to create something surprisingly elegant. The beauty is that you can find everything at a regular grocery store, no specialty baking shops required.
For the Cake:
- 1 box (15.25 oz) red velvet cake mix (I prefer Duncan Hines for its moist crumb, but Betty Crocker works great too)
- 3 large eggs, at room temperature (cold eggs can make the batter lumpy)
- 1/2 cup vegetable oil (canola or any neutral oil works)
- 1 cup water (use cold water for best results)
- 1 teaspoon vanilla extract (adds warmth and depth to the chocolate flavor)
For the Cream Cheese Frosting:
- 4 oz cream cheese, softened (full-fat is best for structure; low-fat can make the mixture too loose)
- 2 tablespoons unsalted butter, softened
- 1 cup powdered sugar, sifted (sifting prevents lumps)
- 1/2 teaspoon vanilla extract
- Pinch of salt (balances the sweetness)
For the Coating:
- 12 oz white chocolate melting wafers or white chocolate chips (I like Ghirardelli melting wafers for their smooth consistency)
- 1 tablespoon coconut oil or vegetable shortening (this thins the chocolate and helps it set with a glossy finish)
- Red and green sprinkles, for decoration
- Crushed candy canes, for a festive touch (optional but highly recommended)
For Assembly:
- 20-24 lollipop sticks (available at craft stores or online)
- 1 block of styrofoam or a cake pop stand (for drying)
If you’re dairy-free, you can substitute the cream cheese with a vegan version and use dairy-free white chocolate. The texture will be slightly different, but still delicious. For a gluten-free option, use a gluten-free red velvet cake mix—just check the box for specific instructions, as gluten-free mixes sometimes need an extra egg.
Equipment Needed
You don’t need a lot of fancy gear for these cake pops, which is part of their charm. Here’s what you’ll actually use:
- 9×13 inch baking pan (or two 8-inch round pans if you want thinner cake layers)
- Large mixing bowls (one for the cake batter, one for the frosting)
- Hand mixer or stand mixer (you can do this by hand, but a mixer makes the frosting silky smooth)
- Cookie scoop or melon baller (for uniform cake pop sizes—I use a 1.5-tablespoon scoop)
- Baking sheet lined with parchment paper (for chilling the cake balls)
- Microwave-safe bowl (for melting the chocolate)
- Lollipop sticks (the 6-inch ones are perfect)
- Styrofoam block or cake pop stand (for drying upright)
- Piping bag or small zip-top bag (for drizzling, if you want to get fancy)
If you don’t have a cookie scoop, just use your hands—lightly oiled so the mixture doesn’t stick. And if you don’t have a styrofoam block, you can poke holes in a cardboard box and use that. I’ve done it in a pinch, and it works just fine.
Preparation Method
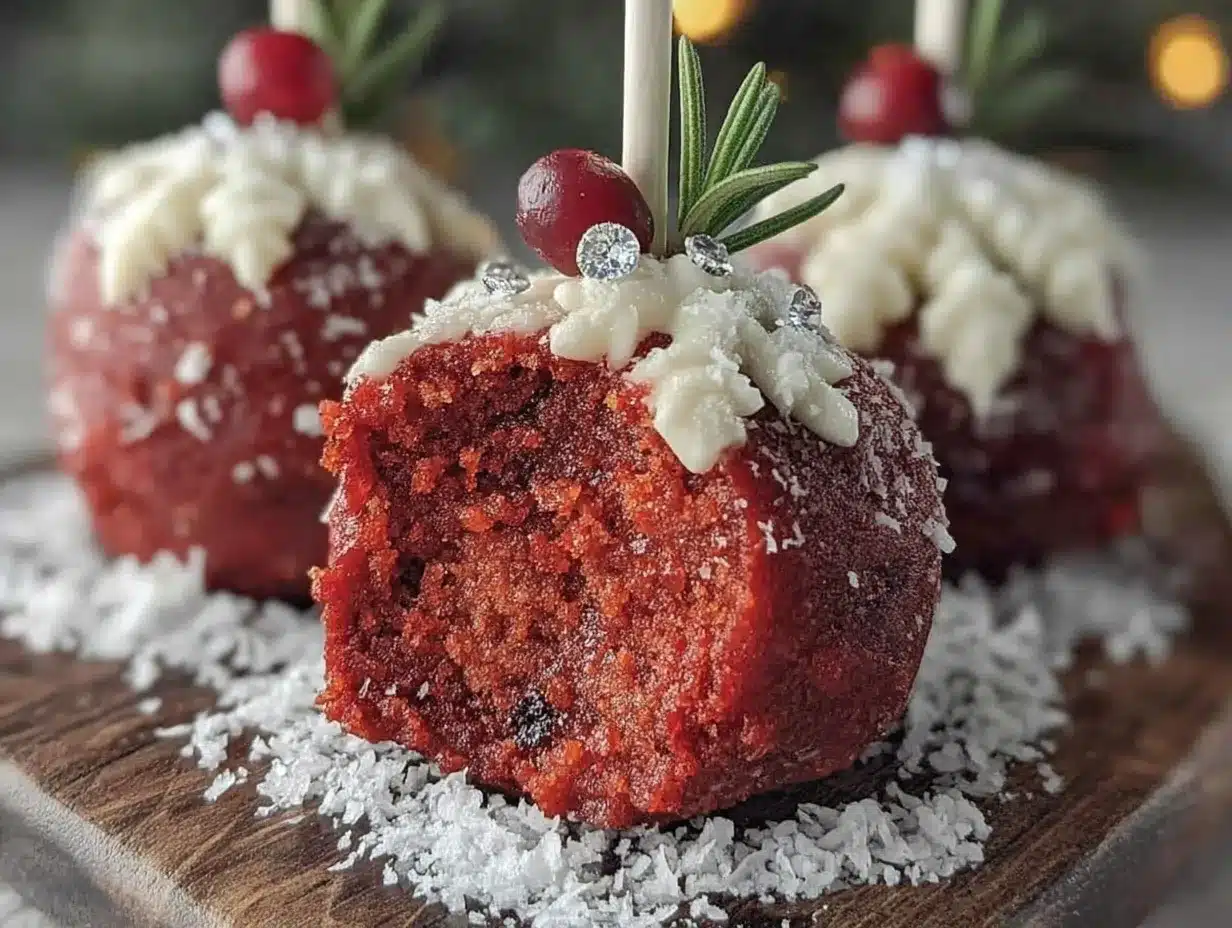
- Bake the cake. Preheat your oven to 350°F (175°C). Grease your 9×13 pan with butter or cooking spray. In a large bowl, combine the cake mix, eggs, oil, water, and vanilla extract. Mix on low speed for 30 seconds, then medium for 2 minutes. The batter should be smooth and a deep red color. Pour it into the prepared pan and bake for 28-32 minutes, or until a toothpick inserted in the center comes out clean. Let the cake cool completely in the pan—this is crucial. If the cake is even slightly warm, it will turn into a mushy mess when you try to crumble it.
- Make the frosting. While the cake cools, beat the softened cream cheese and butter together until smooth and fluffy, about 2 minutes. Add the sifted powdered sugar, vanilla, and salt, and beat on low until combined, then increase to medium for another minute. The frosting should be thick but spreadable. If it’s too stiff, add a teaspoon of milk. Set aside.
- Crumble the cake. Once the cake is completely cool, break it into large chunks and place them in a large bowl. Use your hands or a fork to crumble the cake into fine crumbs. You want it to look like wet sand—no large pieces remaining. This takes about 3-4 minutes of patient crumbling.
- Mix in the frosting. Add about 3/4 cup of the cream cheese frosting to the crumbled cake. Start with less—you can always add more. Use your hands to mix it together until the mixture holds together when pressed. It should feel like play dough. If it’s too dry, add another tablespoon of frosting. If it’s too wet and sticky, add a little more crumbled cake. (I once added too much frosting and ended up with cake pop soup. Not fun. Go slow.)
- Shape the cake balls. Using your cookie scoop or hands, roll the mixture into 1-inch balls. Place them on the parchment-lined baking sheet. You should get about 20-24 balls. Pop the tray into the refrigerator for at least 30 minutes, or up to 2 hours. They need to be firm before dipping, or they’ll fall off the stick.
- Melt the chocolate. About 10 minutes before you’re ready to dip, melt the white chocolate wafers and coconut oil together in a microwave-safe bowl. Microwave in 30-second intervals, stirring after each, until smooth. Do not overheat—white chocolate burns easily and gets grainy. Stir in a pinch of salt.
- Dip the sticks. Remove the cake balls from the fridge. Dip the tip of a lollipop stick into the melted chocolate, then insert it about halfway into a cake ball. This acts like glue and keeps the pop from sliding off. Repeat with all the pops, then return them to the fridge for 10 minutes to set the “glue.”
- Dip the cake pops. Holding each pop by the stick, dip it into the melted chocolate until fully coated. Gently tap the stick on the edge of the bowl to let excess chocolate drip off. Before the chocolate sets, sprinkle with red and green sprinkles or crushed candy cane. Place the pop upright in your styrofoam block to dry. Repeat with all the pops.
- Let them set. Allow the cake pops to dry completely at room temperature, about 30 minutes. Don’t put them in the fridge to speed this up—condensation can make the chocolate bloom and look streaky.
Cooking Tips & Techniques
I’ve made more cake pops than I care to count, and I’ve learned a few things the hard way. Here’s what I wish someone had told me:
Don’t overmix the cake crumb mixture. I know it’s tempting to keep working it until it’s perfectly uniform, but overmixing can make the pops dense and heavy. Just mix until it holds together, then stop.
The chilling step is non-negotiable. I once tried to skip the 30-minute chill because I was in a hurry. The cake ball slid right off the stick into the bowl of melted chocolate. It was a disaster. Give them time to firm up.
If your chocolate is too thick, add more oil. White chocolate can be finicky. If it’s too thick for smooth dipping, add another teaspoon of coconut oil. The goal is a consistency like warm honey.
Work in small batches. Keep the unchilled cake balls in the fridge while you dip a few at a time. If they warm up, they’ll fall apart. I usually take out 4-5 at a time and leave the rest chilling.
Tap, tap, tap. After dipping, tap the stick gently on the side of the bowl. This removes excess chocolate and prevents a thick “foot” at the base of the pop. Nobody wants a clunky bottom.
Use a deep, narrow bowl for dipping. A tall drinking glass or a narrow mason jar works better than a wide bowl. It lets you submerge the whole pop without getting chocolate all over your fingers.
If the cake pop cracks while dipping, the cake mixture was too cold or the chocolate was too hot. Let the chocolate cool for a minute, and let the pops sit at room temperature for 5 minutes before dipping.
Variations & Adaptations
One of the best things about this recipe is how easy it is to change up. Here are a few ways I’ve played with it:
Peppermint Red Velvet: Add 1/2 teaspoon of peppermint extract to the cake batter before baking. Then, after dipping, sprinkle crushed candy canes over the top. The mint-chocolate combo is incredibly festive.
Chocolate Coating: Not a fan of white chocolate? Use dark or milk chocolate melting wafers instead. The deep chocolate flavor pairs beautifully with the red velvet. Just add a little coconut oil to thin it out.
Vegan Version: Use a vegan red velvet cake mix, replace the eggs with flax eggs (1 tablespoon ground flax + 3 tablespoons water per egg), and use vegan cream cheese and butter. The texture is slightly softer, but the flavor is still spot-on.
Gluten-Free: As mentioned, a gluten-free cake mix works perfectly. Just be sure to let the cake cool completely before crumbling—gluten-free cakes can be more delicate.
Mini Cake Bites: Skip the sticks and roll the mixture into smaller, 1/2-inch balls. Dip them in chocolate and place them on parchment to set. They make great little truffles for gift boxes.
Flavor Twist: Swap the red velvet for chocolate or vanilla cake mix. Use a corresponding frosting flavor. The technique stays exactly the same, but you get a completely different dessert.
Personally, I love the peppermint variation. The first time I made it, I accidentally added too much peppermint extract—it was like eating a candy cane in cake form. But my family loved it, so now it’s the official Christmas version.
Serving & Storage Suggestions
These cake pops are best served at room temperature. The chocolate coating snaps when you bite into it, and the cake inside is soft and tender. If they’ve been in the fridge, let them sit out for 10-15 minutes before serving.
For a Christmas party, arrange them upright in a tall glass jar or a styrofoam block covered in festive wrapping paper. You can also lay them flat on a platter—just make sure they’re completely dry first, or they’ll stick together.
They pair beautifully with a cup of hot cocoa, a spiced chai latte, or even a glass of cold milk. For an adult gathering, try them with a dessert wine like a late-harvest Riesling.
Storage: Store leftover cake pops in an airtight container in the refrigerator for up to 5 days. The flavors actually meld together and get better after a day or two. If you need to store them longer, freeze them (without the coating) for up to 3 months. When you’re ready to serve, thaw them in the fridge overnight, then dip and decorate as directed.
Reheating: Honestly, these are best cold or at room temperature. But if you want a warm treat, microwave one for about 10 seconds. The chocolate will get slightly melty, and the cake will be soft. Just don’t overdo it, or the chocolate will seize.
A note on flavor development: I’ve noticed that these cake pops taste even better the next day. The moisture from the frosting seeps into the cake crumbs, making everything more cohesive. So if you can, make them a day ahead.
Nutritional Information & Benefits
Let’s be honest—cake pops are a treat, not a health food. But here’s the estimated breakdown for one cake pop (based on 24 servings):
- Calories: 185
- Fat: 9g
- Carbohydrates: 24g
- Protein: 2g
- Sugar: 16g
- Sodium: 150mg
The red velvet cake itself contains cocoa powder, which is rich in antioxidants called flavonoids. These can help reduce inflammation and support heart health. The cream cheese frosting adds a small amount of calcium and protein from the dairy. And the white chocolate? Well, it’s mostly sugar and fat, but it does contain a little calcium too.
For a slightly lighter version, you can use a sugar-free cake mix and a low-fat cream cheese frosting. The texture will be a bit different, but it’s a decent compromise if you’re watching your sugar intake.
Please note that this recipe contains gluten, dairy, and eggs. If you have allergies, be sure to use appropriate substitutions. The crushed candy canes are optional but add a festive touch—just check that they’re gluten-free if that’s a concern.
I personally believe that dessert should be enjoyed without guilt. These cake pops are a once-in-a-while indulgence, and they’re worth every bite. Life’s too short for sad desserts.
Conclusion
So there you have it—easy red velvet Christmas cake pops on a stick that taste like they came from a fancy bakery, but come together in your own kitchen with minimal fuss. They’re festive, they’re fun, and they’re honestly the easiest way to look like a baking superstar without spending all day in the kitchen.
I love this recipe because it brings back that memory of the little bakery on Elm Street, but it’s better now. It’s mine. And it can be yours too. Play with the variations, add your own sprinkles, make them your own. That’s the beauty of baking—you get to make the rules.
If you try these, I’d love to hear about it. Leave a comment below and let me know how they turned out. Did you add crushed candy canes? Use dark chocolate? Drop one on the floor like I did? Share your story. And if you’re looking for more holiday treats, check out our easy Christmas cookies or peppermint brownies for more quick desserts. Happy baking, friends!
Frequently Asked Questions
Can I use a homemade red velvet cake instead of a mix?
Absolutely. If you have a favorite from-scratch red velvet recipe, go for it. Just make sure the cake is fully cooled and crumbled finely. The amount of frosting you need might vary slightly, so add it gradually.
Why did my cake pops crack when I dipped them?
This usually happens when the cake balls are too cold and the chocolate is too hot. Let the cake balls sit at room temperature for 5-10 minutes before dipping, and let the melted chocolate cool for a minute or two. The temperature difference causes the cracking.
Can I freeze the cake pops after they’re decorated?
Yes, but the texture might change slightly. Freeze them in a single layer on a baking sheet, then transfer to an airtight container. Thaw in the fridge overnight before serving. The chocolate might develop a slight bloom (white streaks), but they’ll still taste fine.
How do I get the cake pops to stay on the stick?
The trick is the “glue” step. Dip the tip of the stick in melted chocolate before inserting it into the cake ball. This acts as an adhesive. Also, make sure the cake balls are well-chilled before you insert the sticks.
Can I use candy melts instead of white chocolate?
Yes! Candy melts are actually easier to work with because they’re designed to melt smoothly and set hard. They come in a variety of colors, so you could use red or green for Christmas. Just follow the package instructions for melting.
Pin This Recipe!
Easy Red Velvet Christmas Cake Pops Recipe

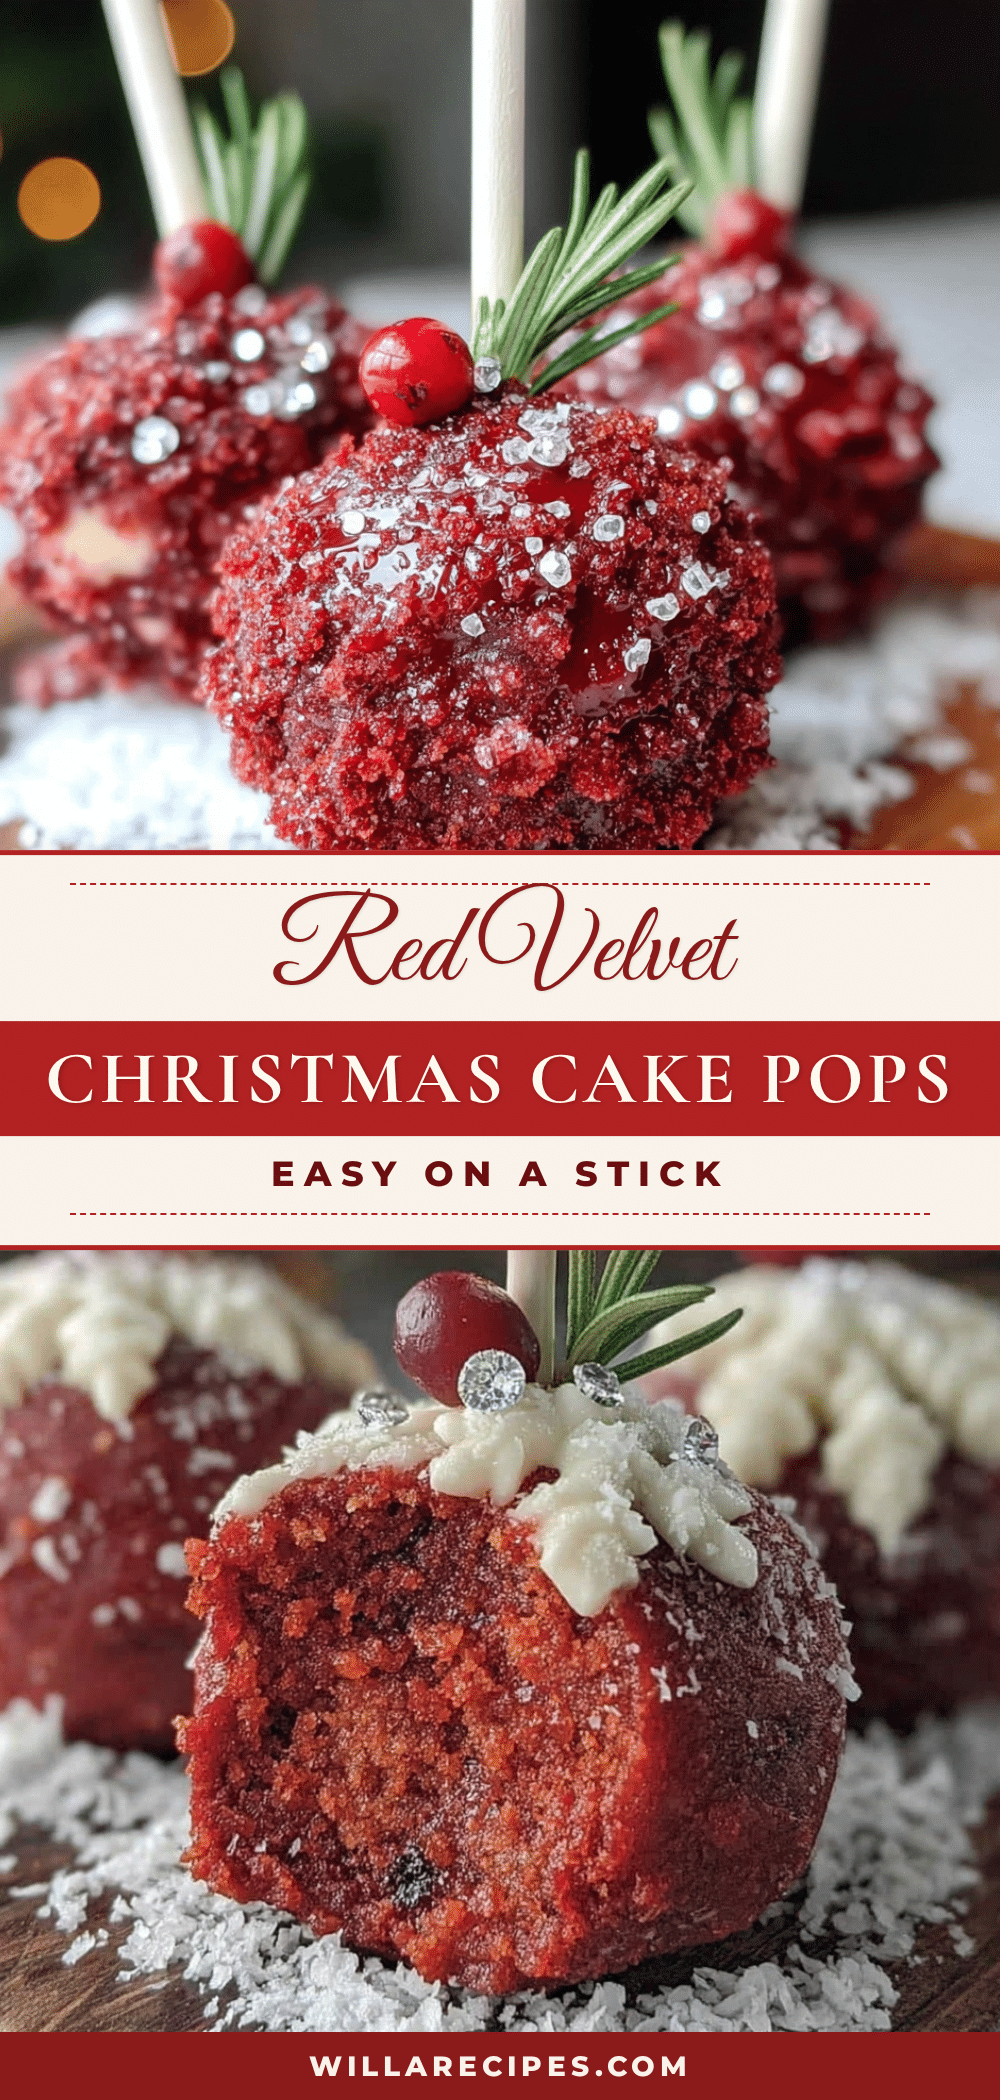
These easy red velvet Christmas cake pops on a stick are tender, with a thick white chocolate coating and a festive sprinkle of crushed candy cane. They come together in under an hour of active time and are perfect for holiday parties.
- Prep Time: 30 minutes
- Cook Time: 30 minutes
- Total Time: 1 hour 30 minutes (includes chilling time)
- Yield: 20-24 servings 1x
- Category: Dessert
- Cuisine: American
Ingredients
- 1 box (15.25 oz) red velvet cake mix (Duncan Hines or Betty Crocker)
- 3 large eggs, at room temperature
- 1/2 cup vegetable oil (canola or any neutral oil)
- 1 cup water (cold)
- 1 teaspoon vanilla extract
- 4 oz cream cheese, softened (full-fat)
- 2 tablespoons unsalted butter, softened
- 1 cup powdered sugar, sifted
- 1/2 teaspoon vanilla extract
- Pinch of salt
- 12 oz white chocolate melting wafers or white chocolate chips (Ghirardelli recommended)
- 1 tablespoon coconut oil or vegetable shortening
- Red and green sprinkles, for decoration
- Crushed candy canes, for decoration (optional)
- 20–24 lollipop sticks
- 1 block of styrofoam or a cake pop stand (for drying)
Instructions
- Preheat oven to 350°F (175°C). Grease a 9×13 inch baking pan.
- In a large bowl, combine cake mix, eggs, oil, water, and vanilla extract. Mix on low speed for 30 seconds, then medium for 2 minutes until smooth.
- Pour batter into prepared pan and bake for 28-32 minutes, or until a toothpick inserted in the center comes out clean. Let cake cool completely in the pan.
- While cake cools, make frosting: Beat softened cream cheese and butter together until smooth and fluffy, about 2 minutes. Add sifted powdered sugar, vanilla, and salt. Beat on low until combined, then medium for 1 minute. Set aside.
- Once cake is completely cool, crumble it into fine crumbs in a large bowl (like wet sand).
- Add about 3/4 cup of cream cheese frosting to the crumbled cake. Mix with hands until mixture holds together like play dough. Add more frosting if too dry, or more cake if too wet.
- Roll mixture into 1-inch balls using a cookie scoop or hands. Place on a parchment-lined baking sheet. Refrigerate for at least 30 minutes (up to 2 hours).
- About 10 minutes before dipping, melt white chocolate wafers and coconut oil together in a microwave-safe bowl in 30-second intervals, stirring after each, until smooth. Stir in a pinch of salt.
- Remove cake balls from fridge. Dip tip of a lollipop stick into melted chocolate, then insert about halfway into a cake ball. Repeat with all pops, then return to fridge for 10 minutes to set.
- Holding each pop by the stick, dip into melted chocolate until fully coated. Gently tap stick on bowl edge to remove excess chocolate. Before chocolate sets, sprinkle with red and green sprinkles or crushed candy cane.
- Place pops upright in styrofoam block to dry. Let set at room temperature for about 30 minutes (do not refrigerate).
Notes
Don’t overmix the cake crumb mixture. Chilling is non-negotiable. If chocolate is too thick, add more oil. Work in small batches, keeping unchilled balls in the fridge. Tap stick after dipping to remove excess chocolate. Use a deep, narrow bowl for dipping. If cake pops crack, let them sit at room temperature for 5 minutes before dipping. Store in airtight container in fridge for up to 5 days. Freeze undipped pops for up to 3 months.
Nutrition
- Serving Size: 1 cake pop
- Calories: 185
- Sugar: 16
- Sodium: 150
- Fat: 9
- Carbohydrates: 24
- Protein: 2
Keywords: red velvet cake pops, Christmas cake pops, easy cake pops, holiday dessert, white chocolate cake pops


