There used to be a tiny bakery tucked into a converted garage on a side street in Portland that made the most incredible banana bread. It wasn’t fancy—just a little hole-in-the-wall called “The Nook” with mismatched chairs and a chalkboard menu that always had a pun on it. When they closed three winters ago, I was genuinely heartbroken. Not just because I lost my Saturday morning ritual, but because I’d never been able to get their banana bread right at home. Mine always came out too dense or too dry, and I’d end up staring at a sad, crumbly slice wondering what I was missing.
After seventeen tries—seventeen, let me tell you—I finally cracked the code. The secret wasn’t a fancy ingredient or a complicated technique. It was the opposite, actually. It was simplicity itself. This cozy one-bowl banana bread uses no mixer, no special equipment, and just a handful of pantry ingredients. And honestly? It tastes even better than the one from The Nook. Maybe you’ve been there, chasing a recipe that seems impossible to recreate. That first bite of this bread, warm from the oven with a pat of butter melting into the crumb, is the moment you stop searching.
This isn’t just another banana bread recipe. It’s the one you’ll make on a rainy Sunday when the house feels quiet and you need something warm in the oven. It’s the one that uses up those spotty bananas on your counter and turns them into pure comfort. I keep making it because every time I pull that golden loaf out of the oven, I remember that feeling of finally getting it right. And I think you will too.
Why You’ll Love This Recipe
I’ve tested this recipe more times than I care to admit, and I can tell you with confidence—this is the one. It’s the banana bread I bring to potlucks, the one I make for stressed-out friends, and the one my neighbor specifically requests when she’s had a rough week. Here’s why it works so well:
- Quick & Easy: From start to oven in under 15 minutes. No mixer to haul out, no attachments to wash. Just a bowl, a spoon, and a little patience while it bakes.
- Simple Ingredients: You probably have everything in your kitchen right now. Butter, sugar, eggs, flour, baking soda, salt, and bananas. That’s it. No buttermilk, no sour cream, no weird extracts.
- Perfect for Cozy Days: This is the recipe you turn to when the weather turns cold, when you’re stuck inside, or when you just need something warm and familiar. It’s comfort food in its purest form.
- Crowd-Pleaser: I’ve served this to kids, grandparents, picky eaters, and food snobs. Every single person has asked for the recipe. It’s that good.
- Unbelievably Moist: The texture is what sets this apart—tender, buttery, and perfectly moist without being gummy. The secret is in how you handle the bananas and the butter.
What makes this different from every other banana bread recipe out there is the technique. Instead of creaming butter and sugar together (which requires a mixer), we melt the butter and let the sugar dissolve in the warm banana mixture. This creates a denser, more tender crumb that stays moist for days. It’s not just another version—it’s my best version, and I’m pretty proud of it.
This is the kind of recipe that makes you close your eyes after the first bite. The kind that reminds you why baking is worth the effort. It’s comfort food reimagined—simpler, faster, but with the same soul-soothing satisfaction that only a slice of warm banana bread can deliver.
What Ingredients You Will Need
This recipe uses simple, wholesome ingredients to deliver bold flavor and satisfying texture without the fuss. Most of these are pantry staples, which means you can make this banana bread on a whim without a trip to the grocery store.
- Unsalted butter (½ cup / 113 grams) – Melted and slightly cooled. I use unsalted so I can control the salt level. If you only have salted butter, reduce the added salt to ¼ teaspoon.
- Granulated sugar (¾ cup / 150 grams) – Standard white sugar works perfectly here. It dissolves easily into the warm butter-banana mixture and creates that tender crumb.
- Large eggs (2, room temperature) – Room temperature eggs blend more smoothly into the batter. If you forgot to take them out ahead of time, place them in a bowl of warm water for 5 minutes.
- Very ripe bananas (3 medium, about 1½ cups mashed) – The riper, the better. You want bananas that are heavily spotted or even mostly brown. They’re sweeter and easier to mash. I recommend using organic bananas if you can find them—they tend to ripen more evenly.
- Vanilla extract (1 teaspoon) – Pure vanilla extract adds warmth and depth. I prefer homemade vanilla extract when I have it on hand, but store-bought works just fine.
- All-purpose flour (1½ cups / 180 grams) – Spoon and level your flour for the most accurate measurement. Scooping directly from the bag can pack in too much flour and make the bread dry.
- Baking soda (1 teaspoon) – This is our only leavening agent. Make sure it’s fresh—if it doesn’t fizz when mixed with a little vinegar, it’s time for a new box.
- Salt (½ teaspoon) – Fine sea salt or table salt. Salt balances the sweetness and enhances the banana flavor.
- Optional mix-ins: ½ cup chopped walnuts or pecans, ½ cup chocolate chips, or ½ cup dried cranberries. I usually add chocolate chips because I’m a child at heart.
For the best texture, use bananas that are soft enough to mash with a fork—almost liquid inside. If your bananas aren’t ripe enough, you can place them on a baking sheet in a 300°F oven for 15-20 minutes until the skins darken. Let them cool before using. This trick has saved me many times when banana bread cravings struck unexpectedly.
Equipment Needed
The beauty of this recipe is that you don’t need much. Here’s what you’ll need to have on hand:
- Large mixing bowl (1) – Any bowl will work, but I prefer a wide, shallow bowl for easier mixing. My favorite is a ceramic bowl from a local potter—it’s heavy and doesn’t slide around.
- 9×5-inch loaf pan – A standard loaf pan is perfect. Glass, metal, or ceramic all work, but metal pans tend to produce the most even browning. If you’re using glass, reduce the oven temperature by 25°F.
- Fork or potato masher – For mashing the bananas. A fork works fine, but a potato masher is faster and gives you more control over the texture.
- Wooden spoon or rubber spatula – For mixing the batter. A wooden spoon is my go-to—it’s sturdy and doesn’t scratch the bowl.
- Parchment paper – Not strictly necessary, but it makes lifting the bread out of the pan so much easier. I always line my loaf pan with parchment, leaving a few inches of overhang on the long sides.
- Cooling rack – For cooling the bread completely. If you don’t have one, you can use the inverted loaf pan or even a clean kitchen towel.
- Measuring cups and spoons – For accuracy. I recommend using dry measuring cups for flour and sugar, and liquid measuring cups for the melted butter.
If you don’t have a loaf pan, you can bake this batter in a 9-inch round cake pan or even an 8×8 square pan. Just adjust the baking time—start checking at 35 minutes for the round pan and 30 minutes for the square pan. I’ve also made this as muffins (bake at 350°F for 18-22 minutes) and mini loaves (bake at 350°F for 25-30 minutes).
Preparation Method
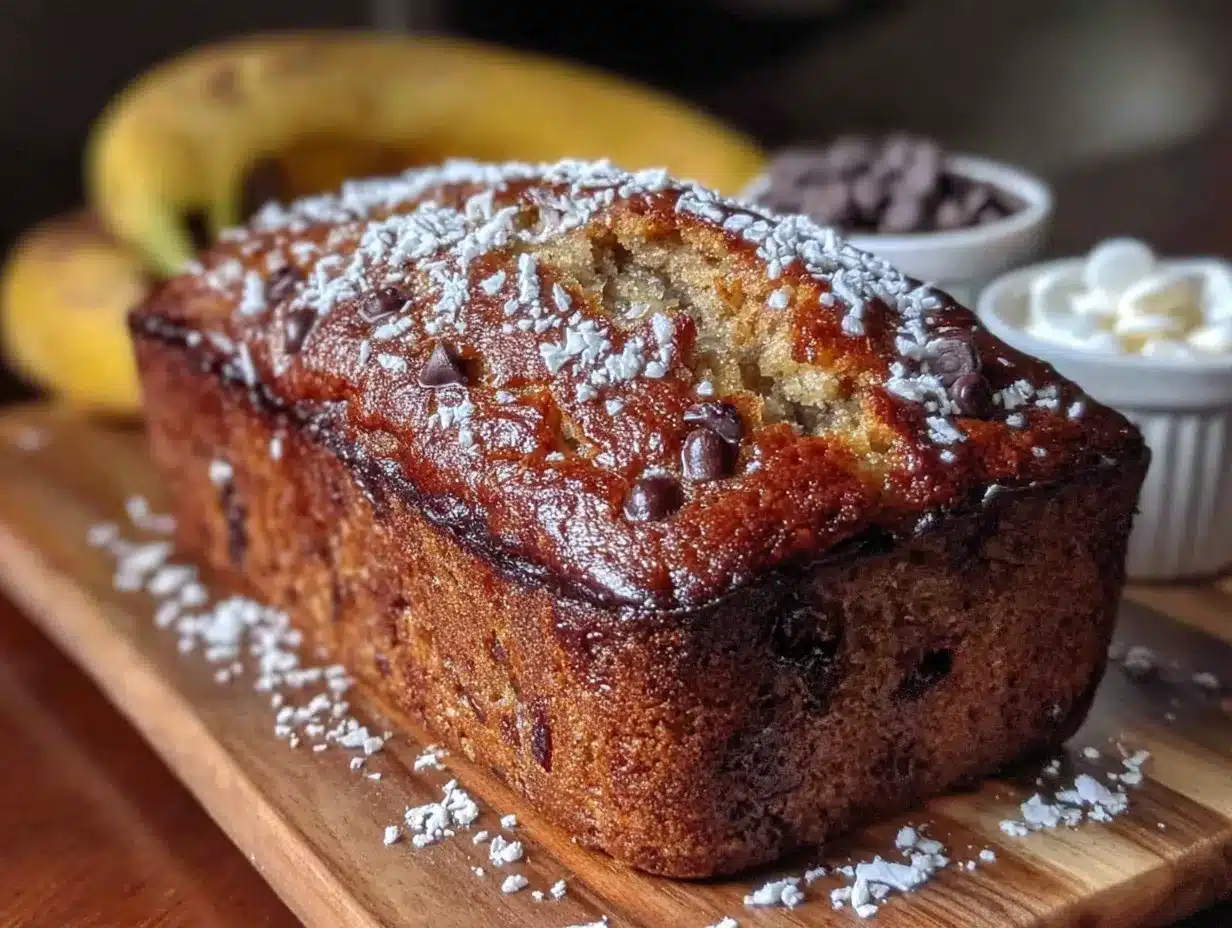
This is where the magic happens. The method is simple, but each step matters. Follow these instructions carefully, and you’ll have perfect banana bread every time.
- Preheat your oven to 350°F (175°C). Position the rack in the center of the oven. While the oven heats, line your loaf pan with parchment paper, leaving overhang on the two long sides. This will help you lift the bread out later.
- Melt the butter. Place the ½ cup of unsalted butter in a microwave-safe bowl and heat in 30-second bursts until melted. Alternatively, melt it in a small saucepan over low heat. Set it aside to cool slightly while you prepare the bananas.
- Mash the bananas. In your large mixing bowl, add the three very ripe bananas. Mash them with a fork or potato masher until they’re mostly smooth with a few small lumps remaining. You want some texture—completely smooth bananas can make the bread gummy. The mashing should take about 30 seconds.
- Combine the wet ingredients. Pour the slightly cooled melted butter into the bowl with the mashed bananas. Add the ¾ cup of granulated sugar, 2 room-temperature eggs, and 1 teaspoon of vanilla extract. Stir everything together with your wooden spoon or spatula until well combined. The mixture should look glossy and smell amazing. Don’t worry if it looks a little separated—that’s normal.
- Add the dry ingredients. Sprinkle the 1½ cups of all-purpose flour, 1 teaspoon of baking soda, and ½ teaspoon of salt over the wet mixture. Stir gently until just combined. A few streaks of flour are okay—overmixing will develop the gluten and make your bread tough. This is the most common mistake people make, so be gentle here. The batter should be thick but scoopable, similar to a thick muffin batter.
- Fold in your mix-ins (optional). If you’re adding chocolate chips, nuts, or dried fruit, fold them in now with just a few strokes. Don’t overmix—you want them evenly distributed without deflating the batter.
- Transfer to the loaf pan. Pour the batter into your prepared loaf pan and spread it evenly with the spatula. The batter should fill the pan about two-thirds full. Tap the pan gently on the counter a few times to release any air bubbles.
- Bake for 50-60 minutes. Place the pan in the preheated oven and bake until a toothpick inserted into the center comes out clean or with just a few moist crumbs. Start checking at 50 minutes. The top should be deep golden brown and cracked in the center—that crack is a good sign. If the top is browning too quickly, tent the pan loosely with aluminum foil after 35 minutes.
- Cool in the pan. Place the loaf pan on a cooling rack and let the bread cool in the pan for 15 minutes. This allows the structure to set so it doesn’t fall apart when you remove it.
- Remove and cool completely. Use the parchment overhang to lift the bread out of the pan and transfer it to the cooling rack. Let it cool completely before slicing—at least 1 hour. I know it’s tempting to cut into it warm, but slicing too early will result in crumbly, gummy pieces. Trust me, I’ve made that mistake more times than I’d like to admit.
One more thing—if you want a bakery-style domed top, sprinkle a tablespoon of granulated sugar over the batter just before baking. It creates a crackly, slightly crunchy crust that’s absolutely delightful.
Cooking Tips & Techniques
After seventeen attempts at perfecting this recipe, I’ve learned a few things the hard way. Here are my best tips to ensure your banana bread turns out perfectly every time.
Don’t overmix the batter. This is the number one mistake I see. When you overmix, you develop the gluten in the flour, which makes the bread tough and dense instead of tender. Mix until the flour is just incorporated—a few streaks are fine. The batter should look a little lumpy, not perfectly smooth.
Measure your flour correctly. Spoon the flour into your measuring cup and level it off with a knife. Scooping directly from the bag can add up to 25% more flour, which will dry out your bread. If you have a kitchen scale, use it—180 grams of flour is the sweet spot.
Use room temperature ingredients. Cold eggs can seize the melted butter and create a lumpy batter. If you forgot to take the eggs out of the fridge, place them in a bowl of warm water for 5 minutes. Same goes for the bananas—if they’re cold from the fridge, let them come to room temperature before mashing.
Check for doneness with a thermometer. If you want to be precise, the internal temperature of fully baked banana bread should be around 200-205°F. This is especially helpful if you’re using a glass pan, which can make judging doneness by color tricky.
Let it cool completely before slicing. I know it’s hard to wait, but this step is crucial. The bread continues to set as it cools, and slicing too early will result in a gummy, falling-apart mess. If you absolutely must have warm banana bread, pop a slice in the microwave for 10 seconds after it’s fully cooled.
Toast leftover slices. Day-old banana bread is even better when lightly toasted. Slice it, pop it in the toaster or under the broiler for a minute, and spread with a little butter. The warm, crispy edges with the soft interior are absolutely heavenly.
One failure I’ll never forget—I once forgot the sugar entirely. The bread came out of the oven looking beautiful, but it tasted like a sad, bland brick. I tried to salvage it by spreading honey on each slice, but it wasn’t the same. So double-check your ingredients before you start mixing!
Variations & Adaptations
This recipe is incredibly versatile. Here are some of my favorite variations, tested and approved by my family and friends.
Gluten-Free Version: Substitute the all-purpose flour with a 1:1 gluten-free baking flour blend that contains xanthan gum. I’ve had great results with King Arthur’s Measure for Measure flour. The texture will be slightly more tender, but it’s still delicious. Add an extra tablespoon of flour if the batter seems too thin.
Vegan Version: Replace the butter with melted coconut oil or vegan butter, and use two flax eggs (2 tablespoons ground flaxseed mixed with 5 tablespoons water, let sit for 5 minutes). The texture will be a bit denser, but the flavor is still wonderful. I’ve made this for vegan friends and they always ask for seconds.
Chocolate Lover’s Version: Reduce the flour to 1¼ cups and add ¼ cup of unsweetened cocoa powder. Fold in ½ cup of chocolate chips along with the cocoa. This creates a rich, fudgy chocolate banana bread that’s dangerously good. I sometimes add a handful of chopped dark chocolate on top before baking for extra indulgence.
Spiced Autumn Version: Add 1 teaspoon of cinnamon, ½ teaspoon of nutmeg, and ¼ teaspoon of ground ginger to the flour mixture. Fold in ½ cup of toasted pecans and ¼ cup of dried cranberries. This version smells like fall in a loaf pan and is perfect for Thanksgiving morning.
Peanut Butter Swirl Version: After pouring the batter into the pan, drop spoonfuls of creamy peanut butter (about ¼ cup) on top and swirl it through with a knife. The peanut butter creates pockets of salty-sweet goodness that complement the banana beautifully. This is my personal favorite variation.
Lower Sugar Version: Reduce the granulated sugar to ½ cup and use very ripe, almost black bananas for natural sweetness. You can also substitute ¼ cup of the sugar with coconut sugar or honey (if using honey, reduce the milk or water by 2 tablespoons). The bread won’t be as sweet, but the banana flavor will shine through more prominently.
Serving & Storage Suggestions
This banana bread is wonderful served warm or at room temperature. Here are my favorite ways to enjoy it.
Serve it warm with a pat of salted butter melting into the crumb. For an extra treat, spread a little honey or maple syrup on top. If you’re feeling fancy, a dollop of whipped cream or a scoop of vanilla ice cream turns this into a dessert worth celebrating.
Pair it with coffee or tea. A slice of this banana bread alongside a hot cup of coffee is my idea of a perfect afternoon. It also pairs beautifully with chai tea or a cold glass of milk. For a cozy breakfast, serve it with scrambled eggs and fresh fruit.
Storage at room temperature: Wrap the cooled loaf tightly in plastic wrap or aluminum foil and store at room temperature for up to 4 days. The bread actually gets more moist and flavorful on the second day as the flavors meld together. Keep it away from direct sunlight and heat sources.
Refrigerator storage: If you live in a warm climate or want to extend the shelf life, store the wrapped bread in the refrigerator for up to a week. Let it come to room temperature before serving, or warm individual slices in the microwave for 10-15 seconds.
Freezer storage: This banana bread freezes beautifully. Wrap the cooled loaf tightly in plastic wrap, then in a layer of aluminum foil, and place in a freezer-safe bag. It will keep for up to 3 months. To thaw, leave it at room temperature for a few hours or overnight in the refrigerator. You can also freeze individual slices for easy grab-and-go breakfasts.
Reheating instructions: For the best texture, reheat slices in a toaster or toaster oven until warm and slightly crispy on the edges. You can also microwave individual slices for 10-15 seconds, though the texture will be softer. For a whole loaf, wrap it in foil and warm in a 300°F oven for 10-15 minutes.
Nutritional Information & Benefits
Here’s the approximate nutritional breakdown for one slice (based on 10 slices per loaf, without mix-ins):
- Calories: 245
- Total Fat: 11g
- Saturated Fat: 7g
- Cholesterol: 55mg
- Sodium: 280mg
- Total Carbohydrates: 34g
- Dietary Fiber: 1g
- Sugars: 18g
- Protein: 4g
Bananas are a great source of potassium, vitamin B6, and vitamin C. They also provide natural sweetness, which allows us to use less refined sugar than many traditional recipes. The butter adds richness and helps create that tender crumb, while the eggs provide protein and structure.
For a slightly healthier version, you can substitute half of the all-purpose flour with whole wheat flour. This adds fiber and a nutty flavor that pairs beautifully with the bananas. If you’re watching your sugar intake, try the lower sugar variation mentioned above.
This recipe is vegetarian and can easily be made vegan or gluten-free with the substitutions provided. It contains dairy (butter) and gluten (flour), so it’s not suitable for those with allergies to those ingredients unless modified.
Conclusion
This cozy one-bowl banana bread has become a staple in my kitchen, and I hope it becomes one in yours too. It’s the recipe I turn to when I need something comforting, when I want to use up those spotty bananas, or when I just want to fill my home with the smell of something baking. It’s proof that you don’t need fancy equipment or complicated techniques to create something truly wonderful.
I love this recipe because it’s forgiving, adaptable, and always delivers. Whether you make it plain, loaded with chocolate chips, or swirled with peanut butter, it’s going to be delicious. And honestly? That’s what baking should be about—enjoying the process and sharing the results with the people you love.
I’d love to hear how your banana bread turns out! Did you add any fun mix-ins? Did you try one of the variations? Leave a comment below and let me know. And if you share a photo on Pinterest or Instagram, tag me so I can see your creation. Happy baking, friend!
Frequently Asked Questions
Can I use frozen bananas for this recipe?
Absolutely! Frozen bananas work wonderfully in banana bread. Thaw them completely at room temperature, then drain off any excess liquid before mashing. The thawed bananas will be very soft and almost liquid, which actually makes them easier to incorporate into the batter. Just be aware that frozen bananas can make the bread slightly more moist, so you may need to add an extra tablespoon of flour.
Why did my banana bread sink in the middle?
A sunken middle is usually caused by one of three things: the bread was underbaked, the oven temperature was too low, or the batter was overmixed. Make sure your oven is properly calibrated and always test for doneness with a toothpick. If the top is browning too quickly but the center is still raw, tent the loaf with foil and continue baking. Overmixing creates too much air in the batter, which can cause it to rise dramatically and then collapse.
Can I make this recipe into muffins instead of a loaf?
Yes! This batter makes about 12 standard muffins. Line a muffin tin with paper liners and fill each cup about two-thirds full. Bake at 350°F for 18-22 minutes, or until a toothpick inserted into the center of a muffin comes out clean. Muffins will bake faster than a loaf, so start checking at 18 minutes. This is a great option if you want individual portions or need to bake in less time.
How do I know when my bananas are ripe enough?
The perfect bananas for banana bread are heavily spotted with brown patches or even completely brown. They should feel soft when gently squeezed, almost like a ripe avocado. The skin may look unappealing, but the fruit inside will be sweet and flavorful. If your bananas are still yellow with green tips, they’re not ready. You can speed up the ripening process by placing them in a paper bag with an apple or by baking them in a 300°F oven for 15-20 minutes.
Can I add other fruits or vegetables to this banana bread?
Certainly! You can fold in up to ½ cup of grated zucchini (squeeze out the excess moisture first), shredded carrots, or diced apples. Berries like blueberries or raspberries also work well—just fold them in gently to avoid crushing them. If you’re adding a wetter fruit like berries, you may need to add an extra tablespoon of flour to absorb the extra moisture. I’ve even made a version with mashed sweet potato and it was surprisingly delicious!
Pin This Recipe!
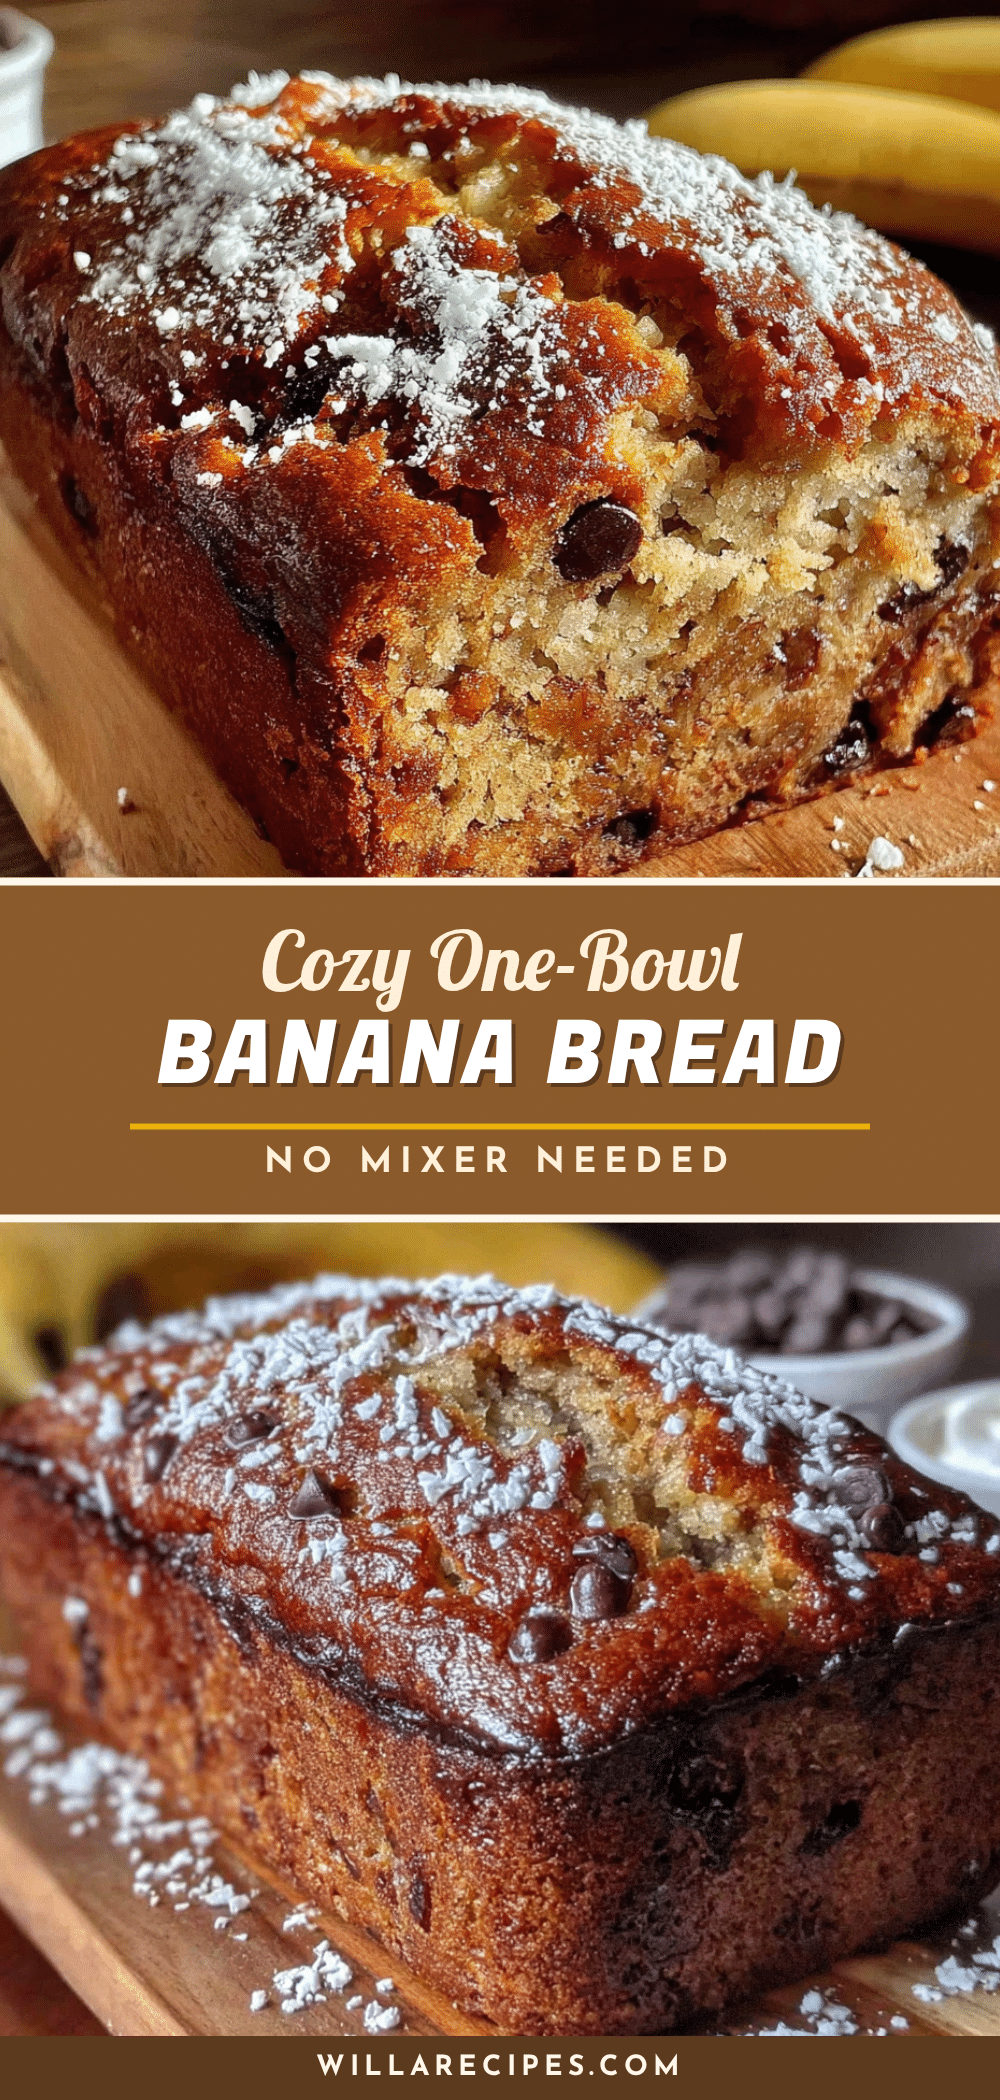
Cozy One-Bowl Banana Bread Recipe (No Mixer Needed)
This cozy one-bowl banana bread uses no mixer, no special equipment, and just a handful of pantry ingredients. It’s the recipe you’ll make on a rainy Sunday when the house feels quiet and you need something warm in the oven.
- Prep Time: 15 minutes
- Cook Time: 55 minutes
- Total Time: 1 hour 10 minutes
- Yield: 10 servings 1x
- Category: Dessert
- Cuisine: American
Ingredients
- ½ cup (113 grams) unsalted butter, melted and slightly cooled
- ¾ cup (150 grams) granulated sugar
- 2 large eggs, room temperature
- 3 medium very ripe bananas (about 1½ cups mashed)
- 1 teaspoon vanilla extract
- 1½ cups (180 grams) all-purpose flour, spooned and leveled
- 1 teaspoon baking soda
- ½ teaspoon fine sea salt or table salt
- Optional mix-ins: ½ cup chopped walnuts or pecans, ½ cup chocolate chips, or ½ cup dried cranberries
Instructions
- Preheat your oven to 350°F (175°C). Position the rack in the center of the oven. Line a 9×5-inch loaf pan with parchment paper, leaving overhang on the two long sides.
- Melt the ½ cup of unsalted butter in a microwave-safe bowl in 30-second bursts or in a small saucepan over low heat. Set aside to cool slightly.
- In a large mixing bowl, mash the three very ripe bananas with a fork or potato masher until mostly smooth with a few small lumps remaining.
- Add the melted butter, ¾ cup granulated sugar, 2 room-temperature eggs, and 1 teaspoon vanilla extract to the mashed bananas. Stir until well combined.
- Sprinkle the 1½ cups all-purpose flour, 1 teaspoon baking soda, and ½ teaspoon salt over the wet mixture. Stir gently until just combined—a few streaks of flour are okay. Do not overmix.
- If using optional mix-ins, fold them in with a few strokes.
- Pour the batter into the prepared loaf pan and spread evenly. Tap the pan gently on the counter to release air bubbles.
- Bake for 50-60 minutes, until a toothpick inserted into the center comes out clean or with a few moist crumbs. If the top browns too quickly, tent with foil after 35 minutes.
- Cool in the pan on a cooling rack for 15 minutes.
- Use the parchment overhang to lift the bread out of the pan and transfer to the cooling rack. Cool completely before slicing (at least 1 hour).
Notes
For a bakery-style domed top, sprinkle a tablespoon of granulated sugar over the batter just before baking. The bread gets more moist and flavorful on the second day. To test ripeness of bananas: they should be heavily spotted or mostly brown and soft when gently squeezed.
Nutrition
- Serving Size: 1 slice
- Calories: 245
- Sugar: 18
- Sodium: 280
- Fat: 11
- Saturated Fat: 7
- Carbohydrates: 34
- Fiber: 1
- Protein: 4
Keywords: banana bread, easy banana bread, one bowl banana bread, no mixer banana bread, moist banana bread, comfort food, quick bread


