It was 10:47 PM on a random Wednesday in October, and I had a very specific vision. I wanted stuffed peppers, but not just any stuffed peppers. I wanted them to look like little mummies, with googly eyes made of something, staring up from the dinner plate. The problem? I didn’t have any fancy Halloween cookie cutters or special food markers. But I did have a block of mozzarella, some leftover rice, and a wild idea that involved cutting cheese into strips. Honestly, I almost talked myself out of it. “You’re tired,” I told myself. “Just make regular stuffed peppers.” But the mummy idea had its little bandaged hooks in me.
So I stood there, in the quiet kitchen with only the hum of the fridge for company, and started cutting. The rice was already cooked from Tuesday night’s dinner. The ground beef was thawing in the sink. I grabbed a bell pepper—orange, because that’s what I had—and sliced the top off. I scooped out the seeds with a spoon, and that’s when the real experiment began. I mixed the meat with some spices I found in the back of the cabinet, stuffed it all in, and then tried to wrap mozzarella strips around the pepper like a mummy’s bandage. It was messy. The cheese kept sliding off. I used a toothpick to hold it in place, and I remember thinking, “This is either going to be a masterpiece or a total disaster.”
When they came out of the oven, the cheese was all melty and golden, and I stuck two little black olive slices on for eyes. I laughed out loud. They actually looked like grumpy little mummies. I ate one standing at the counter at 11:15 PM, and let me tell you, it was ridiculous and perfect. The kids saw them the next morning and lost their minds. That’s why I keep making them—because sometimes the best recipes are born from a late-night craving and a stubborn refusal to give up on a silly idea. You know that feeling when a weird kitchen experiment just works? This is that recipe.
Why You’ll Love This Recipe
Let’s be real for a second. Getting a family dinner on the table that everyone actually eats is a small miracle. These Kid-Approved Mummy Stuffed Peppers are that miracle. They are fun enough for a Halloween party but simple enough for a regular Tuesday night. I’ve tested this recipe more times than I can count, tweaking the filling so it’s juicy without being soggy, and figuring out the best way to get that cheese to stay put. Here is why this one is a winner:
- Quick & Easy: From start to finish, you are looking at about 45 minutes. That includes prep time. Perfect for those evenings when the kids are already asking “what’s for dinner?” before you’ve even taken off your coat.
- Simple Ingredients: No weird specialty items. Ground beef, rice, bell peppers, cheese, and a few pantry spices. You probably have most of this stuff already.
- Perfect for Halloween (and Every Other Day): Obviously, these are a hit for a spooky dinner. But honestly? My kids ask for these in March. The mummy look is just a bonus.
- Crowd-Pleaser: Picky eaters love the fun presentation, and adults love the classic stuffed pepper flavor. It’s a win-win.
- Unbelievably Delicious: The melted cheese gets all bubbly and slightly crispy on the edges. The filling is savory and satisfying. It’s comfort food with a little personality.
What makes this recipe different from every other stuffed pepper out there? It’s the presentation, sure. But it’s also the technique. I blend the rice and meat together in a way that keeps everything moist, and I use a specific cheese-cutting trick so the “bandages” actually stay on during baking. This isn’t just a gimmick. It’s a genuinely good dinner that happens to look like a mummy. It’s the kind of meal that makes you close your eyes after the first bite, not because it’s fancy, but because it’s just so satisfying. It’s comfort food reimagined for a busy family.
What Ingredients You Will Need
This recipe uses simple, wholesome ingredients to deliver big flavor and a whole lot of fun. Most of these are pantry staples or easy to find at any grocery store. Here is what you need to gather:
For the Filling
- 1 lb (450 g) ground beef (80/20 works best for flavor, but lean is fine too)
- 1 cup (200 g) cooked white rice (leftover rice is perfect here; use brown rice for more fiber)
- 1/2 cup (80 g) finely diced onion (yellow or white onion adds sweetness)
- 2 cloves garlic, minced (fresh is best, but 1/2 teaspoon garlic powder works in a pinch)
- 1 teaspoon dried oregano
- 1 teaspoon smoked paprika (adds a lovely depth of flavor)
- 1/2 teaspoon salt
- 1/4 teaspoon black pepper
- 1 can (8 oz / 227 g) tomato sauce (I like Hunt’s for its smooth consistency)
- 1/2 cup (50 g) shredded mozzarella cheese (for mixing into the filling)
For the Peppers and Assembly
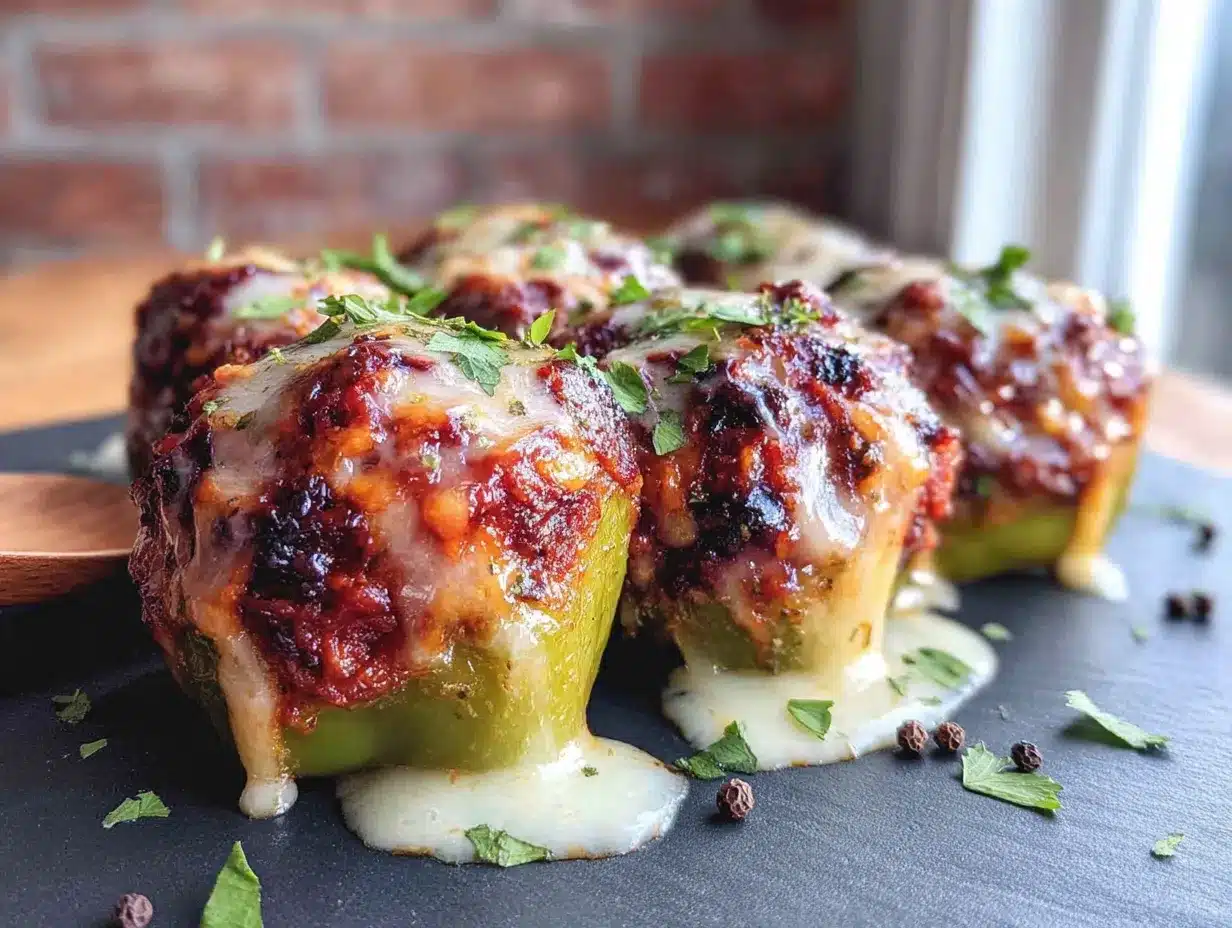
- 4 large bell peppers (any color works; orange, yellow, or red are sweeter, green are more savory)
- 8 oz (225 g) mozzarella cheese block (do NOT use pre-shredded for the bandages; it won’t melt the same way)
- 8 black olives, sliced (for the eyes; you can also use capers or small peppercorns)
- Toothpicks (to hold the cheese bandages in place while baking)
Ingredient Tips: For the best texture, look for bell peppers that are squat and round rather than tall and pointy. They sit better in the baking dish. I recommend using a block of whole-milk mozzarella for the bandages—it melts beautifully without turning into a puddle. If you are feeding a crowd, you can easily double this recipe. Just use a larger baking dish. For a gluten-free option, make sure your rice is certified gluten-free, as some brands process it with wheat.
Equipment Needed
You don’t need any fancy Halloween gadgets for this one. Here is what you need:
- Large skillet (for cooking the beef and onion)
- Sharp knife (a good chef’s knife makes cutting the peppers and cheese much easier)
- Cutting board
- Mixing bowl (for combining the filling)
- Baking dish (an 8×8 or 9×13 works; something that fits the peppers snugly)
- Small saucepan (if you need to cook the rice from scratch)
- Toothpicks (the unsung heroes of this recipe)
- Aluminum foil (for covering the dish during the first part of baking)
If you don’t have a baking dish that fits the peppers perfectly, you can use a cast-iron skillet. It works great and looks nice if you are serving straight from the pan. I’ve also used a muffin tin to keep the peppers upright, which is a neat trick if you are making a smaller batch. Just make sure to spray it well so nothing sticks.
Preparation Method
Alright, let’s get these mummies made. This is easier than you think, I promise. Follow these steps, and you will have a dinner that looks like it took way more effort than it actually did.
- Preheat your oven to 375°F (190°C). While it’s heating up, get your rice going if you don’t have leftovers. Cook 1/3 cup of dry rice in 2/3 cup of water. That will give you about 1 cup of cooked rice.
- Prepare the peppers. Wash your bell peppers and slice the tops off. Think of it like you are making a little bowl. Scoop out all the seeds and the white membranes inside. If the pepper won’t stand up straight, slice a tiny bit off the bottom—just enough so it sits flat. Try not to cut a hole in the bottom, or the filling will leak out.
- Cook the filling. Heat your large skillet over medium-high heat. Add the ground beef and cook it until it’s browned, breaking it up with a spoon as it cooks. This takes about 5 to 7 minutes. Drain off any excess fat. Add the diced onion and minced garlic to the pan. Cook for another 2 minutes, until the onion is soft and translucent.
- Season the meat. Stir in the oregano, smoked paprika, salt, and pepper. Let it cook for 30 seconds until it smells amazing. Then pour in the tomato sauce. Stir everything together and let it simmer for 2 to 3 minutes, until the sauce thickens slightly.
- Combine the filling. Take the pan off the heat. Stir in the cooked rice and the 1/2 cup of shredded mozzarella cheese. Mix it all up until the cheese is melted and everything is well combined. Taste it and adjust the salt or pepper if you need to. This is your moment to make sure it’s delicious.
- Stuff the peppers. Place your hollowed-out peppers in the baking dish. Spoon the meat and rice mixture into each pepper, packing it in gently. Don’t cram it in so hard that the pepper cracks, but make sure it’s full. You want a nice dome on top.
- Create the mummy bandages. This is the fun part. Take your block of mozzarella and slice it into thin strips, about 1/4-inch thick and 4 to 5 inches long. You want them thin enough to wrap but thick enough that they don’t just melt away. Wrap the strips around the stuffed peppers, crisscrossing them like a mummy’s bandages. Leave a small gap at the top for the eyes. Use toothpicks to secure the ends of the cheese strips so they stay in place. Don’t worry if it looks messy—mummies aren’t supposed to be neat!
- Bake the peppers. Cover the baking dish loosely with aluminum foil. Bake for 25 minutes. The foil keeps the peppers from drying out while they cook through. After 25 minutes, remove the foil and bake for another 10 to 15 minutes. You want the cheese to be melted, bubbly, and starting to get golden brown spots on the edges.
- Add the eyes. Take the peppers out of the oven and let them sit for 5 minutes. This is important—it lets everything settle. Carefully remove the toothpicks. Press two black olive slices into the gap you left at the top of each pepper. Now they have eyes! Serve immediately while the cheese is still stretchy.
Sensory Cue: When you pull the foil off, the steam should smell rich and savory, like a really good spaghetti sauce. The cheese should be pulling apart in gooey strings when you cut into it. That’s how you know it’s perfect.
Cooking Tips & Techniques
I have made these mummy peppers about a dozen times now, and I have learned a few things the hard way. Let me save you some trouble.
The Cheese Bandage Trick: The first time I made these, I used pre-shredded mozzarella. Big mistake. It melted into a blob and slid right off the pepper. You need a block of mozzarella that you slice yourself. The slices hold their shape better and create those nice, defined bandage lines. If your cheese strips are too thin, they will just melt into a puddle. Too thick, and they won’t wrap easily. Aim for about 1/4-inch thick.
Don’t Overstuff the Peppers: I know it’s tempting to really pack that filling in, but if you overstuff, the pepper can split while baking. Fill them so the mixture is level with the top, maybe a little dome, but don’t force it. Trust me, a cracked mummy is still delicious, but it’s not as pretty.
Make Ahead Strategy: You can prep these in the morning and bake them at dinner time. Stuff the peppers, wrap the cheese, and put them in the fridge, covered. When you are ready to eat, just add 10 minutes to the covered baking time because they will be cold from the fridge. This is a lifesaver on busy school nights.
Rice Consistency: If your rice is too wet, the filling can get mushy. Use leftover rice that has dried out a bit in the fridge, or cook your rice a little firmer than usual. The rice absorbs some of the tomato sauce and meat juices as it bakes, so you want it to be able to soak that up without turning into porridge.
Variations & Adaptations
This recipe is super flexible. Here are some ways to make it your own:
Dietary Swaps
- Vegetarian Version: Swap the ground beef for a can of black beans (drained and rinsed) or a plant-based ground meat substitute. Add an extra 1/2 cup of rice to bulk it up. The rest of the recipe stays the same.
- Low-Carb Option: Skip the rice entirely and replace it with finely chopped cauliflower. Steam the cauliflower first, then squeeze out the excess water before mixing it in. It’s surprisingly good.
- Gluten-Free: This recipe is naturally gluten-free as long as your spices and tomato sauce are certified gluten-free. Double-check the labels if you have a serious allergy.
Flavor Twists
- Mexican Mummies: Add 1/2 cup of corn and a can of diced green chiles to the filling. Swap the oregano for cumin and chili powder. Top with a little salsa before serving.
- Italian Mummies: Mix in some chopped fresh basil and a teaspoon of Italian seasoning. Use provolone cheese for the bandages instead of mozzarella for a sharper flavor.
- Spicy Mummies: Add a diced jalapeño to the beef while it cooks, or stir in a teaspoon of red pepper flakes. The kids might not love this one, but the adults will.
Personal Variation
One time I was out of tomato sauce, so I used a can of diced tomatoes that I blitzed in the blender. It was a little chunkier than usual, but honestly, it was fantastic. The texture was almost like a chunky salsa inside the pepper. Sometimes the best variations come from necessity.
Serving & Storage Suggestions
These peppers are best served hot, right out of the oven, when the cheese is still stretchy and the filling is steamy. I like to put them on a plate and drizzle a little extra tomato sauce around the bottom. It makes the plate look pretty and adds a little extra flavor to each bite.
What to Serve with Them: A simple side salad with a tangy vinaigrette cuts through the richness of the cheese and beef. Garlic bread is also a great choice for soaking up any extra sauce. If you want to keep it light, roasted broccoli or green beans work perfectly.
Storage: Leftover stuffed peppers keep well in the fridge for up to 4 days. Put them in an airtight container. The peppers will soften a bit as they sit, but the flavor gets even better. I honestly think they taste great the next day for lunch.
Reheating: The best way to reheat is in the oven at 350°F (175°C) for about 15 minutes. This keeps the cheese from turning into a rubbery mess. You can also use the microwave in a pinch, but the cheese won’t be as nice. To freeze them, wrap each pepper individually in plastic wrap, then put them in a freezer bag. They will keep for up to 3 months. Thaw in the fridge overnight before reheating.
Nutritional Information & Benefits
Here is a rough estimate per serving (one stuffed pepper):
- Calories: 420
- Protein: 32g
- Fat: 22g
- Carbohydrates: 24g
- Fiber: 3g
These numbers will vary depending on the exact ingredients you use. The good news is that bell peppers are packed with vitamin C—way more than an orange, actually. One bell pepper has about 150% of your daily vitamin C needs. The protein from the beef and cheese makes this a filling meal that will keep the kids full until bedtime. If you use lean ground beef and low-fat cheese, you can bring the fat content down quite a bit. This recipe is not low-carb by nature, but the rice provides energy that active kids need. It’s a balanced dinner that doesn’t feel like a sacrifice.
Conclusion
These Kid-Approved Mummy Stuffed Peppers are more than just a Halloween gimmick. They are a genuinely good dinner that happens to look like a cute monster. The filling is savory and satisfying, the cheese is gloriously melty, and the whole thing comes together in under an hour. I love this recipe because it makes my kids laugh every single time. They argue over who gets the mummy with the best eyes, and then they eat every bite without complaint. That is a parenting win right there.
I hope you give these a try. Don’t stress about making the bandages perfect. Mummies are supposed to look a little messy. That is part of their charm. Use whatever color peppers you have, swap the filling to suit your family’s taste, and have fun with it. If you make them, I would love to hear how they turned out. Did your kids love them? Did you come up with a cool variation? Drop a comment below and let me know. Happy cooking, and happy Halloween!
Frequently Asked Questions
Can I use ground turkey instead of beef?
Absolutely. Ground turkey works great. Just make sure to add a little olive oil to the pan when you cook it, since turkey is leaner and can dry out. You might also want to add an extra splash of tomato sauce to keep the filling moist.
How do I keep the cheese bandages from sliding off?
Toothpicks are your best friend here. Stick a toothpick through the cheese and into the pepper at the top and bottom of each strip. Just remember to take them out before serving! Also, make sure the peppers are dry on the outside before you wrap them—moisture makes the cheese slip.
Can I make these in an air fryer?
Yes, you can. Preheat the air fryer to 350°F (175°C). Place the stuffed peppers in the basket, making sure they aren’t touching. Cook for 15 to 18 minutes, then check the cheese. You might need to add a couple of minutes if the cheese isn’t bubbly enough. No need to cover them with foil in the air fryer.
What if my peppers are too tall and fall over?
Slice a thin piece off the bottom of the pepper to create a flat surface. Just be careful not to cut a hole in the bottom. If they are still wobbly, you can nestle them in the baking dish with a little extra rice or crumpled foil around the sides to hold them upright.
Can I use different types of cheese for the bandages?
Yes, but mozzarella is really the best choice because it melts so nicely and has that stretchy texture. Provolone or mild cheddar can work in a pinch, but they won’t be as gooey. Avoid hard cheeses like parmesan—they won’t melt into bandages, they will just burn.
Pin This Recipe!
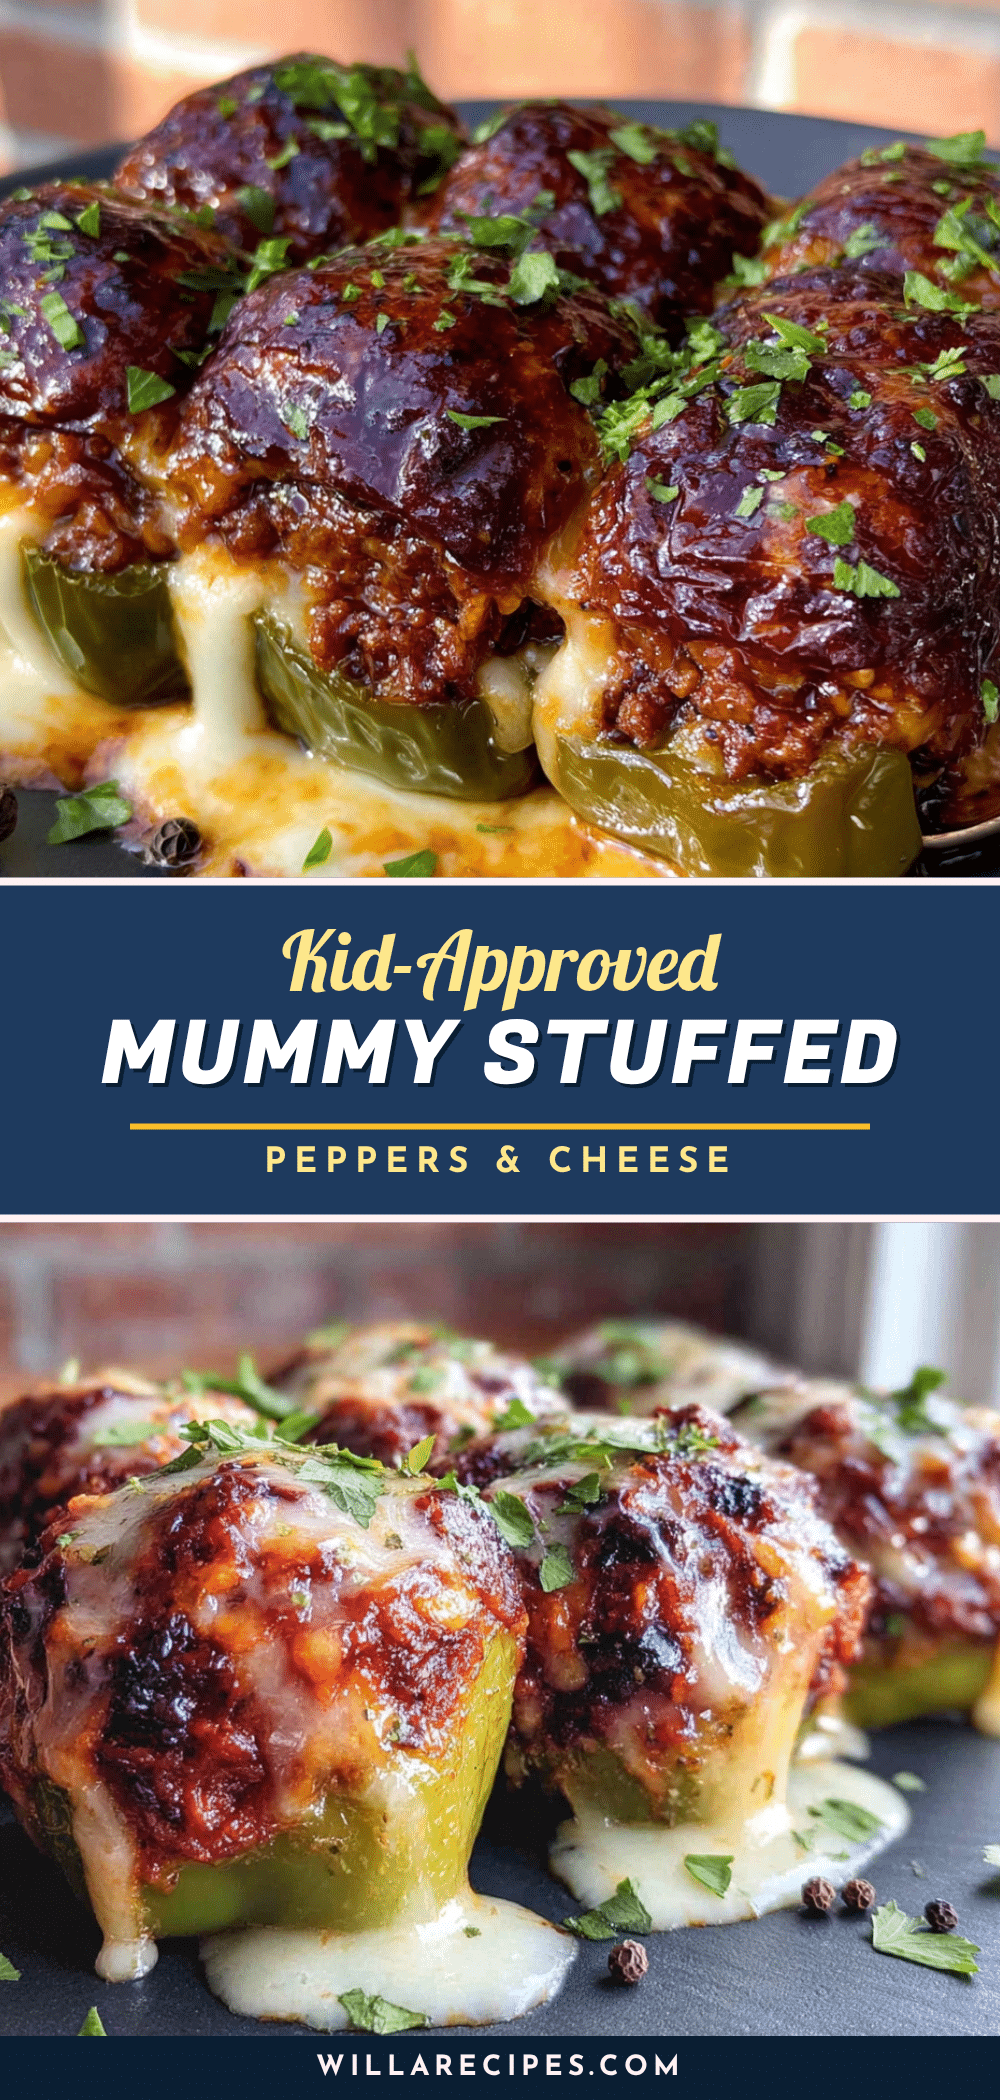
Kid-Approved Mummy Stuffed Peppers Easy Halloween Dinner
These fun and delicious mummy stuffed peppers are perfect for Halloween or any night. Made with ground beef, rice, and mozzarella cheese, they are a crowd-pleaser that kids and adults will love.
- Prep Time: 15 minutes
- Cook Time: 35 minutes
- Total Time: 50 minutes
- Yield: 4 servings 1x
- Category: Main Course
- Cuisine: American
Ingredients
- 1 lb (450 g) ground beef (80/20 works best for flavor, but lean is fine too)
- 1 cup (200 g) cooked white rice (leftover rice is perfect here; use brown rice for more fiber)
- 1/2 cup (80 g) finely diced onion (yellow or white onion adds sweetness)
- 2 cloves garlic, minced (fresh is best, but 1/2 teaspoon garlic powder works in a pinch)
- 1 teaspoon dried oregano
- 1 teaspoon smoked paprika (adds a lovely depth of flavor)
- 1/2 teaspoon salt
- 1/4 teaspoon black pepper
- 1 can (8 oz / 227 g) tomato sauce (I like Hunt’s for its smooth consistency)
- 1/2 cup (50 g) shredded mozzarella cheese (for mixing into the filling)
- 4 large bell peppers (any color works; orange, yellow, or red are sweeter, green are more savory)
- 8 oz (225 g) mozzarella cheese block (do NOT use pre-shredded for the bandages; it won’t melt the same way)
- 8 black olives, sliced (for the eyes; you can also use capers or small peppercorns)
- Toothpicks (to hold the cheese bandages in place while baking)
Instructions
- Preheat your oven to 375°F (190°C). While it’s heating up, get your rice going if you don’t have leftovers. Cook 1/3 cup of dry rice in 2/3 cup of water. That will give you about 1 cup of cooked rice.
- Prepare the peppers. Wash your bell peppers and slice the tops off. Think of it like you are making a little bowl. Scoop out all the seeds and the white membranes inside. If the pepper won’t stand up straight, slice a tiny bit off the bottom—just enough so it sits flat. Try not to cut a hole in the bottom, or the filling will leak out.
- Cook the filling. Heat your large skillet over medium-high heat. Add the ground beef and cook it until it’s browned, breaking it up with a spoon as it cooks. This takes about 5 to 7 minutes. Drain off any excess fat. Add the diced onion and minced garlic to the pan. Cook for another 2 minutes, until the onion is soft and translucent.
- Season the meat. Stir in the oregano, smoked paprika, salt, and pepper. Let it cook for 30 seconds until it smells amazing. Then pour in the tomato sauce. Stir everything together and let it simmer for 2 to 3 minutes, until the sauce thickens slightly.
- Combine the filling. Take the pan off the heat. Stir in the cooked rice and the 1/2 cup of shredded mozzarella cheese. Mix it all up until the cheese is melted and everything is well combined. Taste it and adjust the salt or pepper if you need to. This is your moment to make sure it’s delicious.
- Stuff the peppers. Place your hollowed-out peppers in the baking dish. Spoon the meat and rice mixture into each pepper, packing it in gently. Don’t cram it in so hard that the pepper cracks, but make sure it’s full. You want a nice dome on top.
- Create the mummy bandages. This is the fun part. Take your block of mozzarella and slice it into thin strips, about 1/4-inch thick and 4 to 5 inches long. You want them thin enough to wrap but thick enough that they don’t just melt away. Wrap the strips around the stuffed peppers, crisscrossing them like a mummy’s bandages. Leave a small gap at the top for the eyes. Use toothpicks to secure the ends of the cheese strips so they stay in place. Don’t worry if it looks messy—mummies aren’t supposed…
- Bake the peppers. Cover the baking dish loosely with aluminum foil. Bake for 25 minutes. The foil keeps the peppers from drying out while they cook through. After 25 minutes, remove the foil and bake for another 10 to 15 minutes. You want the cheese to be melted, bubbly, and starting to get golden brown spots on the edges.
- Add the eyes. Take the peppers out of the oven and let them sit for 5 minutes. This is important—it lets everything settle. Carefully remove the toothpicks. Press two black olive slices into the gap you left at the top of each pepper. Now they have eyes! Serve immediately while the cheese is still stretchy.
Notes
For the best texture, look for bell peppers that are squat and round rather than tall and pointy. They sit better in the baking dish. Use a block of whole-milk mozzarella for the bandages—it melts beautifully without turning into a puddle. If you are feeding a crowd, you can easily double this recipe. Just use a larger baking dish. For a gluten-free option, make sure your rice is certified gluten-free, as some brands process it with wheat. You can prep these in the morning and bake them at dinner time. Stuff the peppers, wrap the cheese, and put them in the fridge, covered. When you are ready to eat, just add 10 minutes to the covered baking time because they will be cold from the fridge.
Nutrition
- Serving Size: 1 stuffed pepper
- Calories: 420
- Fat: 22
- Carbohydrates: 24
- Fiber: 3
- Protein: 32
Keywords: mummy stuffed peppers, Halloween dinner, kid-friendly, stuffed peppers, easy dinner, ground beef, rice, mozzarella


