I was halfway through unloading a box of mismatched kitchen gadgets at a friend’s moving sale when the plumber—yes, the plumber—looked up from fixing a leaky sink in the corner and said, “You know what I’d make if I had a stove right now? Green chili mac.” I laughed, thinking he was joking. But he just wiped his hands on his coveralls and started describing it like he was reciting poetry. He talked about the smoky heat of roasted chilies, the creamy cheese pulling apart in long ribbons, and how his wife always asked him to make it after a long week. I wasn’t expecting cooking advice from a plumber, but there I was, holding a dusty muffin tin, listening to him explain exactly how to make a dish I couldn’t stop thinking about.
I scribbled his method on a paper bag from the moving sale—I mean, honestly, who carries a notebook to a garage sale? That crumpled bag sat on my counter for two weeks before I finally tried it. And let me tell you, the first batch was a glorious, cheesy mess. But it was also heavy. Like, sit-on-the-couch-and-regret-it heavy. So I started tinkering. I swapped out the heavy cream for something lighter, added extra veggies, and used a smarter cheese-to-pasta ratio. After a few trials—and one memorable incident where I forgot to add the pasta entirely—I landed on this version. It’s still creamy, still packed with that green chili kick, but it won’t leave you feeling like you swallowed a brick. Maybe you’ve been there, looking for comfort food that doesn’t weigh you down? This one’s for you.
Why You’ll Love This Recipe
This Lighter Green Chili Mac and Cheese isn’t just another pasta dish. It’s the kind of meal that makes you feel good about eating comfort food—because you’re not sacrificing flavor for a healthier choice. I’ve tested this recipe more times than I care to admit, tweaking the cheese blend and the chili ratio until it hit that sweet spot between indulgent and wholesome. Here’s why it’s become a staple in my kitchen:
- One Pot Wonder: Everything cooks in a single pot. Less cleanup, more time for you to actually enjoy your meal.
- Lighter but Still Luxurious: I swapped heavy cream for a combo of milk and Greek yogurt. You get that velvety texture without the extra calories.
- Bold Green Chili Flavor: Roasted green chilies add a smoky, mild heat that wakes up the whole dish. It’s not spicy—just flavorful.
- Packed with Hidden Veggies: Finely diced zucchini and bell pepper blend right into the sauce. You won’t even notice them, but your body will thank you.
- Perfect for Busy Weeknights: From start to finish, it’s about 30 minutes. That’s faster than takeout.
- Crowd-Pleasing Comfort: I’ve served this to picky eaters, health-conscious friends, and cheese snobs. Everyone goes back for seconds.
What really sets this apart is the technique. Instead of making a separate roux and cheese sauce, I cook the pasta in a seasoned milk mixture that thickens naturally as it simmers. It’s a trick I picked up from a chef friend, and it cuts the fat content without sacrificing that creamy texture. This isn’t just another mac and cheese recipe—it’s the one you’ll keep coming back to.
What Ingredients You Will Need
This recipe relies on simple, wholesome ingredients that come together to create something truly satisfying. Most of these are pantry staples, but a few special items make all the difference. Here’s what you’ll need:
For the Pasta Base
- 8 ounces elbow macaroni (or any short pasta like shells or cavatappi; whole wheat works great too)
- 2 cups low-sodium chicken or vegetable broth (adds savory depth without extra salt)
- 1 cup 2% milk (or unsweetened almond milk for a dairy-free option)
- 1 tablespoon unsalted butter (or olive oil for a lighter start)
- 1 small yellow onion, finely diced
- 2 cloves garlic, minced
- 1 medium zucchini, finely grated (about 1 cup; squeeze out excess moisture)
- 1 small red bell pepper, finely diced
For the Green Chili Flavor
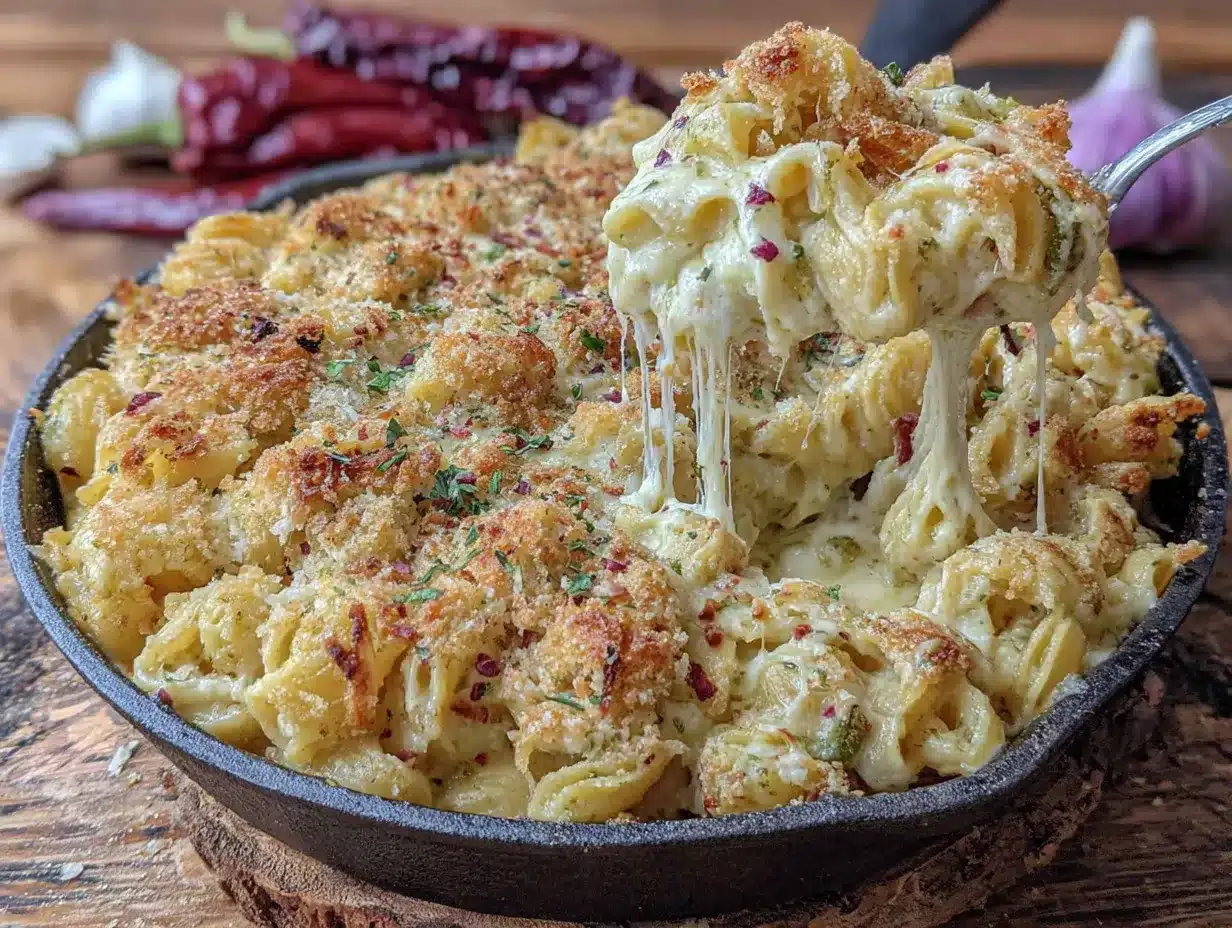
- 1 can (4 ounces) diced green chilies (I prefer Ortega or Hatch brand for authentic flavor)
- 1/2 teaspoon ground cumin
- 1/4 teaspoon smoked paprika
- Pinch of cayenne pepper (optional, for heat lovers)
- Salt and black pepper, to taste
For the Creamy Cheese Sauce
- 1 cup shredded sharp cheddar cheese (reduced-fat works fine, but full-fat melts better)
- 1/2 cup shredded Monterey Jack cheese (adds that gooey factor)
- 1/3 cup plain Greek yogurt (full-fat or 2%; adds creaminess without heavy cream)
- 1 tablespoon cornstarch (helps thicken the sauce smoothly)
Ingredient Tips: For the best texture, grate your own cheese from a block. Pre-shredded cheese contains anti-caking agents that can make the sauce grainy. I learned this the hard way after a few lumpy batches. Also, if you can find roasted Hatch green chilies, they add a deeper, smokier flavor than the canned variety. Look for them in the international aisle or online.
Substitutions: Need it gluten-free? Use gluten-free pasta and a 1:1 gluten-free flour blend instead of cornstarch. Want it vegetarian? The vegetable broth works perfectly. For a vegan version, swap the cheese for a plant-based cheddar shred and use coconut yogurt—just know the texture will be slightly different.
Equipment Needed
You don’t need a fancy kitchen to make this recipe. Here’s what you’ll need:
- Large Dutch oven or heavy-bottomed pot (4-5 quart capacity; a deep skillet also works)
- Wooden spoon or silicone spatula (for stirring without scratching your pot)
- Box grater or food processor (for shredding cheese and grating zucchini)
- Measuring cups and spoons (accuracy matters for the liquid ratio)
- Chef’s knife and cutting board (for dicing onion and bell pepper)
- Fine-mesh strainer (if you need to drain the zucchini after grating)
If you don’t have a Dutch oven, any large pot with a tight-fitting lid will do. I’ve made this in a stainless steel stockpot and even a nonstick wok in a pinch. The key is having enough surface area for the pasta to cook evenly. For the cheese grater, I honestly prefer the box grater over a food processor—it’s easier to clean and gives you more control over the shred size. And if you’re grating zucchini, a microplane works wonders for getting it super fine.
Preparation Method
Let’s get cooking. This comes together in about 30 minutes, and most of that is hands-off simmering time.
- Prep your veggies. Finely dice the onion and bell pepper. Grate the zucchini using the large holes of a box grater, then place it in a clean kitchen towel and squeeze out as much liquid as you can. This step is crucial—too much moisture will make your sauce watery.
- Sauté the aromatics. Heat the butter in your large pot over medium heat. Add the diced onion and cook for 3-4 minutes until soft and translucent. Add the minced garlic and cook for another 30 seconds until fragrant. You should be able to smell the garlic, but don’t let it brown.
- Add the veggies and spices. Stir in the grated zucchini, diced bell pepper, and the canned green chilies. Cook for 2-3 minutes, stirring occasionally, until the bell pepper softens. Sprinkle in the cumin, smoked paprika, cayenne (if using), and a pinch of salt and pepper. Stir to coat everything evenly.
- Build the cooking liquid. Pour in the chicken broth and milk. Stir to combine, scraping up any browned bits from the bottom of the pot. Bring the mixture to a gentle boil.
- Cook the pasta. Add the elbow macaroni to the pot. Stir once, then reduce the heat to a simmer. Cover the pot with the lid slightly ajar to prevent boiling over. Cook for 10-12 minutes, stirring every 2-3 minutes to prevent sticking. The pasta will absorb most of the liquid as it cooks. You want the pasta to be al dente—firm to the bite but not crunchy.
- Check the consistency. After 10 minutes, the liquid should be mostly absorbed, leaving a slightly saucy mixture. If it looks too dry, add a splash of milk or broth. If it’s too soupy, let it simmer uncovered for another minute or two.
- Make the cheese slurry. In a small bowl, whisk the cornstarch with 2 tablespoons of cold water until smooth. Pour this into the pot and stir well. This helps thicken the sauce without making it gluey.
- Add the cheese and yogurt. Remove the pot from the heat. Sprinkle in both shredded cheeses and stir until fully melted. The residual heat will do the work—no need to turn the burner back on. Once the cheese is smooth, stir in the Greek yogurt. This adds tanginess and creaminess without making the dish heavy.
- Taste and adjust. Give it a taste. Add more salt, pepper, or a pinch of cayenne if you want more heat. Let the mac and cheese rest for 2-3 minutes off the heat—it will thicken further as it cools.
- Serve immediately. Spoon into bowls and top with extra shredded cheese, a sprinkle of fresh cilantro, or a dollop of Greek yogurt if you like.
Troubleshooting Tip: If your sauce seems grainy, you probably added the cheese over too high heat. Always melt cheese off the burner. And if the pasta is still hard after 12 minutes, add a quarter cup of hot water and continue cooking covered—sometimes pasta brands vary in cooking time.
Cooking Tips & Techniques
After making this dish more times than I can count—including one memorable disaster where I used evaporated milk by accident—I’ve picked up a few tricks that make a real difference.
Don’t skip the zucchini squeeze. I know it’s an extra step, but trust me. If you don’t squeeze out the moisture, your sauce will end up watery and thin. I once skipped this step when I was in a hurry, and my mac and cheese looked like soup. Grate the zucchini, wrap it in a dish towel, and wring it out like you’re twisting a wet rag. It takes 30 seconds and saves the whole dish.
Grate your own cheese. I cannot stress this enough. Pre-shredded cheese is coated in potato starch and cellulose to prevent clumping, which also prevents it from melting smoothly. You’ll end up with a gritty sauce. A block of sharp cheddar and a box grater give you that silky, stretchy texture every time. I keep a block in my fridge just for this recipe.
Stir the pasta frequently. During the first 5 minutes of simmering, the pasta releases starch that helps thicken the sauce. But it also wants to stick to the bottom of the pot. Set a timer and stir every 2-3 minutes. I learned this the hard way after scraping a burnt layer off my favorite Dutch oven.
Let it rest before serving. This is the hardest tip to follow because it smells so good. But letting the mac and cheese sit for 2-3 minutes off the heat allows the sauce to thicken and cling to the pasta. If you serve it immediately, it will be looser. Patience pays off here.
Use low-sodium broth. Cheese is already salty, and the green chilies add their own brine. Low-sodium broth gives you control over the final salt level. You can always add more salt at the end, but you can’t take it out.
Variations & Adaptations
This recipe is forgiving and easy to adapt. Here are a few ways I’ve changed it up depending on what I have on hand or who I’m cooking for:
- Protein-Packed Version: Stir in 1 cup of shredded rotisserie chicken or cooked ground turkey after you add the cheese. It turns this into a complete meal with extra staying power. I do this when I know I’ll be eating leftovers for lunch the next day.
- Spicy Southwest Style: Add 1/2 cup of frozen corn kernels and a drained can of black beans along with the veggies. Top with fresh cilantro and a squeeze of lime juice before serving. The sweetness of the corn balances the heat from the chilies beautifully.
- Dairy-Free Adaptation: Use unsweetened oat milk or cashew milk instead of dairy milk. Swap the butter for olive oil. For the cheese, use a plant-based cheddar shred that melts well—I’ve had good luck with the Follow Your Heart brand. The Greek yogurt can be replaced with a thick coconut yogurt or just omitted. The texture will be slightly less creamy, but the flavor is still fantastic.
- Baked Mac and Cheese Style: If you want a crispy top, transfer the finished mac and cheese to a baking dish, sprinkle with panko breadcrumbs mixed with a little melted butter, and broil for 2-3 minutes until golden. This adds a lovely crunch that contrasts with the creamy pasta.
- Extra Veggie Boost: Finely chop a handful of spinach or kale and stir it in during the last minute of cooking. It wilts right into the sauce, adding color and nutrients without changing the flavor. I’ve done this when I needed to use up wilting greens in my fridge.
Serving & Storage Suggestions
This Lighter Green Chili Mac and Cheese is best served hot, straight from the pot. Spoon it into wide bowls so you can appreciate the creamy sauce coating every piece of pasta. I like to top mine with a sprinkle of fresh cilantro, a few extra shreds of sharp cheddar, and a crack of black pepper. A side of steamed broccoli or a simple green salad with lemon vinaigrette balances the richness perfectly.
For a heartier meal, serve it alongside grilled chicken or fish. The smoky green chili flavor pairs beautifully with a piece of cilantro-lime salmon. And if you’re feeding a crowd, this dish holds up well on a buffet table—just keep it covered to retain heat.
Storage: Leftovers keep well in an airtight container in the refrigerator for up to 4 days. The pasta will absorb some of the sauce as it sits, so don’t be alarmed if it seems drier the next day. To reheat, add a splash of milk or broth and warm it gently on the stovetop or in the microwave, stirring halfway through. Avoid high heat, which can make the cheese sauce separate.
Freezing: This mac and cheese freezes surprisingly well. Let it cool completely, then transfer to a freezer-safe container. It will keep for up to 3 months. Thaw overnight in the refrigerator and reheat as directed. The texture might be slightly softer after freezing, but the flavor stays bold.
Make-Ahead Tip: You can prep the veggies and shred the cheese up to 2 days in advance. Store them separately in the fridge. Then the actual cooking takes just 20 minutes. I do this on Sunday nights for an easy Monday dinner.
Nutritional Information & Benefits
Here’s the breakdown for one serving (about 1.5 cups) of this Lighter Green Chili Mac and Cheese:
| Nutrient | Amount Per Serving |
|---|---|
| Calories | 385 |
| Total Fat | 14g |
| Saturated Fat | 8g |
| Cholesterol | 40mg |
| Sodium | 520mg |
| Carbohydrates | 42g |
| Fiber | 4g |
| Sugar | 6g |
| Protein | 20g |
| Calcium | 280mg |
This dish is packed with protein from the cheese, Greek yogurt, and milk, which helps keep you full and satisfied. The zucchini and bell pepper add fiber, vitamin C, and antioxidants without piling on calories. Green chilies are a surprising source of vitamin A and capsaicin, which may help boost metabolism slightly. Compared to traditional mac and cheese, this version has about 40% less fat and 30% fewer calories, but you’d never know it from the taste. It’s comfort food that actually works with your wellness goals, not against them.
Dietary Notes: This recipe is vegetarian if you use vegetable broth. It can be made gluten-free with the right pasta and cornstarch. For a lower-carb option, use chickpea pasta or lentil pasta—just adjust the cooking time slightly. Always check your cheese labels if you’re avoiding animal rennet, as some brands use it.
Conclusion
This Lighter Green Chili Mac and Cheese has become my go-to for those nights when I want something cozy but don’t want to undo a week of eating well. It’s creamy, cheesy, and packed with flavor—everything you want from comfort food, just a little smarter. The best part? It comes together in one pot, so you spend less time cleaning and more time actually enjoying your meal.
I love how adaptable this recipe is. Maybe you’ll add extra veggies, or maybe you’ll go all-in with the spicy toppings. Either way, it’s hard to mess up. And if you do have leftovers, they make a fantastic lunch the next day—just add a splash of milk when reheating and you’re golden.
I’d love to hear how this turns out for you. Did you try a variation? Add something unexpected? Drop a comment below and let me know—I read every single one. And if you share a photo on Pinterest or Instagram, tag me so I can see your creation. Happy cooking, friend. This one’s a keeper.
Frequently Asked Questions
Can I use a different type of pasta?
Absolutely. Any short pasta shape works well here—shells, rotini, cavatappi, or even penne. Just keep an eye on the cooking time, as different shapes absorb liquid at different rates. Whole wheat pasta works too, but you may need to add an extra 1/4 cup of broth.
Is this recipe spicy?
Not really. Canned green chilies are mild and smoky rather than hot. The cayenne is optional, so if you’re sensitive to heat, just skip it. The dish has a gentle warmth that comes from the cumin and paprika, but it’s not the kind of spicy that makes you reach for water.
Can I make this ahead of time for a party?
Yes! You can make it up to 2 days in advance. Prepare the recipe as written, let it cool, and store it in the fridge. When you’re ready to serve, reheat it gently on the stovetop with a splash of milk, stirring frequently. You might want to add a little extra cheese on top to freshen it up.
What if I don’t have Greek yogurt?
You can substitute sour cream, crème fraîche, or even cream cheese (softened and stirred in). For a dairy-free option, use a thick coconut cream or just omit it entirely—the sauce will still be creamy from the cheese and milk, just slightly less tangy.
How do I prevent the mac and cheese from becoming gluey?
The key is not overcooking the pasta and not over-stirring once the cheese is added. Cook the pasta to al dente—it will continue to soften in the hot sauce. Also, avoid using high heat when melting the cheese. Low and slow (or off the heat entirely) keeps the sauce smooth and silky.
Pin This Recipe!
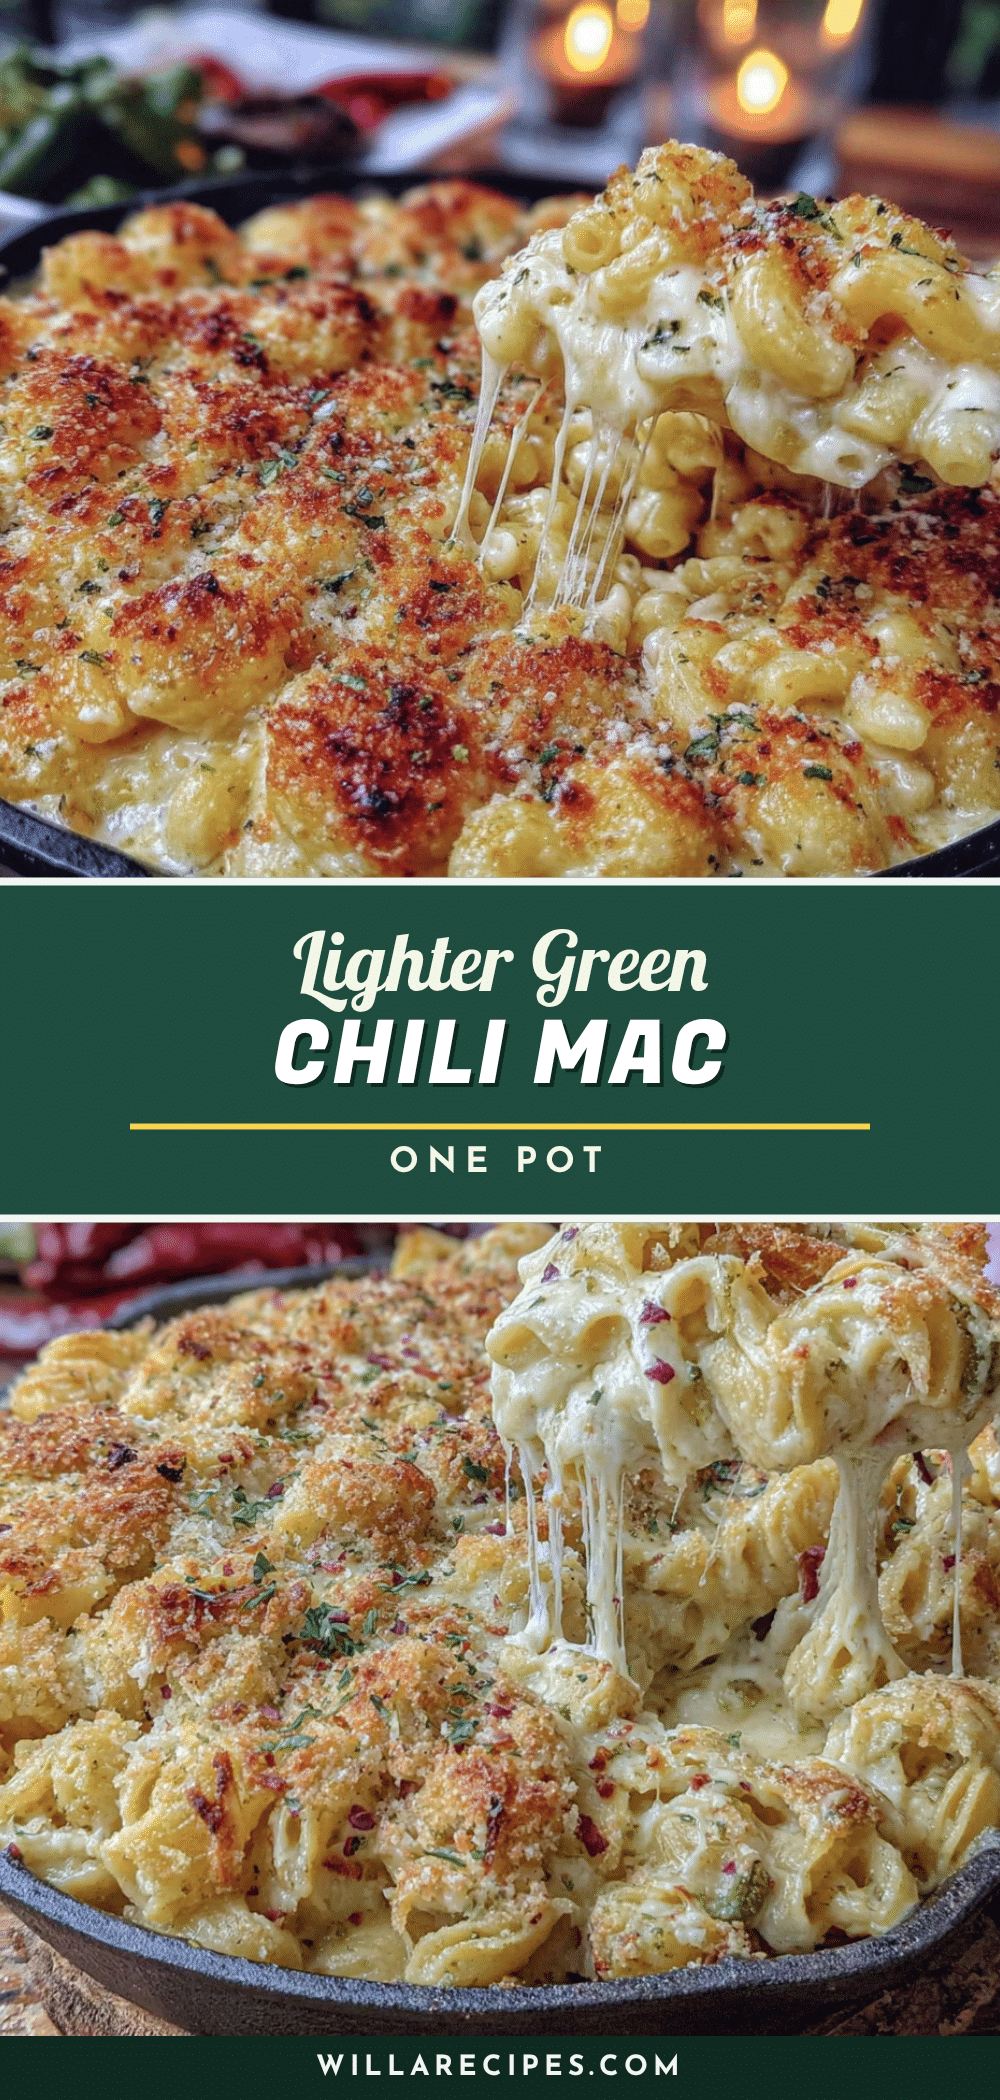
Easy One Pot Lighter Green Chili Mac and Cheese

A creamy, cheesy mac and cheese with smoky green chilies and hidden veggies, made lighter with Greek yogurt and milk instead of heavy cream. Ready in 30 minutes in one pot.
- Prep Time: 10 minutes
- Cook Time: 20 minutes
- Total Time: 30 minutes
- Yield: 4 servings 1x
- Category: Main Course
- Cuisine: American
Ingredients
- 8 ounces elbow macaroni (or any short pasta like shells or cavatappi; whole wheat works great too)
- 2 cups low-sodium chicken or vegetable broth
- 1 cup 2% milk (or unsweetened almond milk for a dairy-free option)
- 1 tablespoon unsalted butter (or olive oil for a lighter start)
- 1 small yellow onion, finely diced
- 2 cloves garlic, minced
- 1 medium zucchini, finely grated (about 1 cup; squeeze out excess moisture)
- 1 small red bell pepper, finely diced
- 1 can (4 ounces) diced green chilies (I prefer Ortega or Hatch brand for authentic flavor)
- 1/2 teaspoon ground cumin
- 1/4 teaspoon smoked paprika
- Pinch of cayenne pepper (optional, for heat lovers)
- Salt and black pepper, to taste
- 1 cup shredded sharp cheddar cheese (reduced-fat works fine, but full-fat melts better)
- 1/2 cup shredded Monterey Jack cheese (adds that gooey factor)
- 1/3 cup plain Greek yogurt (full-fat or 2%; adds creaminess without heavy cream)
- 1 tablespoon cornstarch
Instructions
- Prep your veggies. Finely dice the onion and bell pepper. Grate the zucchini using the large holes of a box grater, then place it in a clean kitchen towel and squeeze out as much liquid as you can. This step is crucial—too much moisture will make your sauce watery.
- Sauté the aromatics. Heat the butter in your large pot over medium heat. Add the diced onion and cook for 3-4 minutes until soft and translucent. Add the minced garlic and cook for another 30 seconds until fragrant. You should be able to smell the garlic, but don’t let it brown.
- Add the veggies and spices. Stir in the grated zucchini, diced bell pepper, and the canned green chilies. Cook for 2-3 minutes, stirring occasionally, until the bell pepper softens. Sprinkle in the cumin, smoked paprika, cayenne (if using), and a pinch of salt and pepper. Stir to coat everything evenly.
- Build the cooking liquid. Pour in the chicken broth and milk. Stir to combine, scraping up any browned bits from the bottom of the pot. Bring the mixture to a gentle boil.
- Cook the pasta. Add the elbow macaroni to the pot. Stir once, then reduce the heat to a simmer. Cover the pot with the lid slightly ajar to prevent boiling over. Cook for 10-12 minutes, stirring every 2-3 minutes to prevent sticking. The pasta will absorb most of the liquid as it cooks. You want the pasta to be al dente—firm to the bite but not crunchy.
- Check the consistency. After 10 minutes, the liquid should be mostly absorbed, leaving a slightly saucy mixture. If it looks too dry, add a splash of milk or broth. If it’s too soupy, let it simmer uncovered for another minute or two.
- Make the cheese slurry. In a small bowl, whisk the cornstarch with 2 tablespoons of cold water until smooth. Pour this into the pot and stir well. This helps thicken the sauce without making it gluey.
- Add the cheese and yogurt. Remove the pot from the heat. Sprinkle in both shredded cheeses and stir until fully melted. The residual heat will do the work—no need to turn the burner back on. Once the cheese is smooth, stir in the Greek yogurt. This adds tanginess and creaminess without making the dish heavy.
- Taste and adjust. Give it a taste. Add more salt, pepper, or a pinch of cayenne if you want more heat. Let the mac and cheese rest for 2-3 minutes off the heat—it will thicken further as it cools.
- Serve immediately. Spoon into bowls and top with extra shredded cheese, a sprinkle of fresh cilantro, or a dollop of Greek yogurt if you like.
Notes
For the best texture, grate your own cheese from a block. Pre-shredded cheese contains anti-caking agents that can make the sauce grainy. If you can find roasted Hatch green chilies, they add a deeper, smokier flavor than the canned variety. Don’t skip squeezing the zucchini—it prevents a watery sauce. Let the mac and cheese rest for 2-3 minutes before serving to allow the sauce to thicken.
Nutrition
- Serving Size: 1.5 cups
- Calories: 385
- Sugar: 6
- Sodium: 520
- Fat: 14
- Saturated Fat: 8
- Carbohydrates: 42
- Fiber: 4
- Protein: 20
Keywords: green chili mac and cheese, one pot mac and cheese, lighter mac and cheese, healthy mac and cheese, comfort food, weeknight dinner


