Megan wasn’t trying to impress anyone. I’d stopped by her place on a Tuesday night to pick up a book I’d lent her months ago, and the smell hit me before I even got past her front door. It was this warm, spicy, cheesy aroma that made absolutely no sense for a random weeknight. I stood there in her entryway like some kind of food detective, trying to figure out what she was hiding in her kitchen.
“Oh, that’s just dinner,” she said when I asked, waving her hand like it was nothing. She was wearing sweatpants and a t-shirt with a coffee stain on the sleeve. Honestly, she looked like she’d barely tried. But when she pulled those little peppers out of the oven — bright, glossy, bubbling over with this creamy buffalo chicken filling — I forgot I was even there for a book. I just stared at them like they held all the secrets of the universe.
She shrugged and said she’d thrown them together because she was tired and didn’t feel like making a big deal out of dinner. No fancy ingredients. No complicated steps. Just peppers, chicken, cream cheese, hot sauce, and some cheese on top. I took one bite standing at her kitchen counter, and let me tell you, I almost cried. Not because it was life-changing in some dramatic way, but because it was so simple and so good and I knew right then I’d be making them every single week for the rest of my life. Maybe you’ve been there — when a recipe hits you so hard you can’t stop thinking about it. That was me, standing in Megan’s kitchen, holding a pepper that changed everything.
Why You’ll Love This Recipe
These Easy Buffalo Chicken Dip Stuffed Peppers are the weeknight dinner hero you didn’t know you needed. They take everything you love about buffalo chicken dip — that creamy, spicy, cheesy goodness — and stuff it into a perfectly portioned pepper. No chips required, no messy scooping, just grab one and go.
- Ready in 30 Minutes: From start to finish, these peppers come together faster than you can decide what to order for takeout. Perfect for those nights when you’re running on empty.
- Simple Pantry Ingredients: You probably have most of these things already. Cream cheese, hot sauce, shredded chicken, cheese, and peppers. That’s it. No weird specialty items.
- Built-In Portion Control: Each pepper is its own serving. No more standing over the dip bowl wondering if you’ve had too much. (We’ve all been there.)
- Kid-Approved & Crowd-Pleasing: My nephew who claims to hate anything “spicy” ate three of these last week. The cream cheese tames the heat beautifully.
- Low-Carb Friendly: Skip the chips and crackers — these peppers are naturally low in carbs and packed with protein. You get all the flavor without the guilt.
What makes this recipe different from every other buffalo chicken dip out there? It’s the pepper itself. The bell pepper adds this subtle sweetness that balances the spicy buffalo sauce in a way chips never could. Plus, it bakes up tender but still holds its shape, giving you that satisfying crunch without being raw. This isn’t just buffalo chicken dip in a different vessel — it’s a complete meal that feels like comfort food but works for your busy lifestyle.
What Ingredients You Will Need
This recipe uses simple, everyday ingredients to create something genuinely special. Here’s what you’ll need to grab from your kitchen.
For the Stuffed Peppers
- 4 medium bell peppers (any color works, but I prefer red or orange for sweetness)
- 2 cups cooked shredded chicken (rotisserie chicken is my shortcut of choice)
- 8 oz cream cheese, softened to room temperature
- 1/2 cup buffalo wing sauce (I use Frank’s RedHot — trust me on this)
- 1 cup shredded cheddar cheese, divided
- 1/2 cup shredded mozzarella cheese
- 1/4 cup ranch dressing (or blue cheese if that’s your thing)
- 1/2 teaspoon garlic powder
- 1/4 teaspoon onion powder
- Salt and black pepper to taste
For the Topping (Optional but Recommended)

- 2 tablespoons melted butter
- 1 tablespoon fresh chives or green onions, chopped
- Extra drizzle of buffalo sauce for that final kick
A few notes on ingredient choices. I really do recommend Frank’s RedHot for this recipe — it has that perfect balance of heat and vinegar that makes buffalo flavor sing. If you’re sensitive to spice, start with 1/3 cup and taste as you go. For the chicken, rotisserie chicken is your best friend here. It’s already cooked, seasoned, and shreds like a dream. If you’re cooking chicken specifically for this, poach two boneless skinless chicken breasts in salted water for about 15 minutes, then shred with two forks.
For the cream cheese, please let it come to room temperature. Cold cream cheese will leave you with lumpy filling, and nobody wants that. Set it out on the counter while you prep your peppers and shred your chicken — it’ll be perfect by the time you need it.
Equipment Needed
You don’t need a fancy kitchen to make these stuffed peppers. Here’s what you’ll need:
- 9×13 baking dish (or any oven-safe dish that fits 4 pepper halves)
- Sharp knife for cutting the peppers cleanly
- Small spoon for scooping out seeds and membranes
- Medium mixing bowl for the filling
- Cutting board
- Measuring cups and spoons
- Fork or two forks for shredding chicken
- Aluminum foil for covering during baking
If you don’t have a 9×13 dish, a cast iron skillet works beautifully. I’ve also used a rimmed baking sheet in a pinch — just make sure the peppers are stable and not tipping over. For the mixing bowl, honestly any bowl will do. I’ve made this in a cereal bowl before when all my big bowls were dirty. It’s that forgiving.
One tip: use a melon baller to scoop out the pepper seeds if you have one. It’s faster than a spoon and gets into those tricky corners better. But a regular spoon works just fine too.
Preparation Method
Let’s make these peppers come to life. The whole process takes about 30 minutes, and I promise it’s easier than you think.
- Preheat your oven to 375°F (190°C). Get that heat going first so it’s ready when you are.
- Prep the peppers. Cut each bell pepper in half lengthwise from stem to tip. Scoop out all the seeds and white membranes with your spoon. Don’t worry about being perfect — just get the seeds out. Place the pepper halves cut-side up in your baking dish. If they wobble, trim a tiny sliver off the bottom to make them sit flat. (I learned this after watching one tip over and spill its filling everywhere. Not my finest moment.)
- Make the filling. In your medium mixing bowl, combine the softened cream cheese, buffalo wing sauce, ranch dressing, garlic powder, and onion powder. Stir until everything is smooth and well combined. The cream cheese should be soft enough that this takes less than a minute.
- Add the chicken and cheese. Fold in your shredded chicken, 1/2 cup of the cheddar cheese, and all of the mozzarella. Mix until every piece of chicken is coated in that creamy, spicy goodness. Taste the filling — you should get a nice kick from the buffalo sauce with the cream cheese mellowing it out. Add salt and pepper if needed, but remember the hot sauce and cheese are already salty.
- Stuff the peppers. Divide the filling evenly among the 8 pepper halves. Don’t be shy — pile it up. It will settle as it bakes. I usually use about 1/4 cup of filling per pepper half, but go by eye. Each pepper should be generously filled.
- Top with remaining cheese. Sprinkle the remaining 1/2 cup of cheddar cheese over the tops of the stuffed peppers. This is what gives you that beautiful golden, bubbly crust.
- Bake covered. Cover the baking dish with aluminum foil and bake for 15 minutes. This steams the peppers so they become tender without drying out. Your kitchen is going to start smelling incredible right about now.
- Bake uncovered. Remove the foil and bake for another 10-12 minutes, until the cheese is melted and bubbly and the peppers are tender when pierced with a fork. The edges of the cheese should be starting to brown just slightly.
- Finish with toppings. If you’re using the optional butter, drizzle the melted butter over the hot peppers right when they come out of the oven. Sprinkle with fresh chives or green onions and add an extra drizzle of buffalo sauce if you like things spicy. Let them rest for 2-3 minutes before serving — the filling needs a minute to set up so it doesn’t slide right off.
Cooking Tips & Techniques
After making these peppers more times than I can count, I’ve picked up a few tricks that make a real difference.
Don’t overcook the peppers. You want them tender but still holding their shape. If they get too soft, they’ll collapse and you’ll lose all that beautiful filling. Check them at the 10-minute mark after removing the foil. A fork should slide in easily but the pepper shouldn’t be mushy.
Room temperature cream cheese is non-negotiable. I learned this the hard way when I was in a hurry and used cold cream cheese. The filling was lumpy and didn’t blend properly. If you forget to set it out, microwave it in 10-second bursts until it’s soft but not melted. Trust me on this one.
Shred your chicken fine. Big chunks of chicken make the filling harder to stuff and eat. You want the chicken to be in small, even shreds so every bite has that perfect balance of chicken, cheese, and sauce. I use two forks and go at it until there are no large pieces left.
Line your baking dish with foil for easy cleanup. The cheese inevitably bubbles over and sticks to the dish. A sheet of foil means you just toss it and your dish is clean. This is the kind of tip that saves you from standing at the sink scrubbing when you’re already tired.
Let them rest before serving. I know it’s hard to wait when your kitchen smells this good, but those 2-3 minutes of resting time make a huge difference. The filling firms up just enough that you can pick up a pepper half and eat it without everything falling apart.
Variations & Adaptations
This recipe is incredibly flexible. Here are some ways to make it your own.
Make It Lighter
Use reduced-fat cream cheese and low-fat shredded cheese. You can also use Greek yogurt instead of ranch dressing for a protein boost. The texture will be slightly different but still delicious. I’ve made this version for friends who are watching their calories and nobody noticed the swap.
Vegetarian Version
Swap the chicken for two cans of drained and rinsed chickpeas or a bag of frozen cauliflower florets that you’ve roasted until tender. The cauliflower version is honestly amazing — it soaks up all that buffalo flavor and gets this incredible texture. My vegetarian sister requests this every time she visits.
Extra Spicy
Add 1-2 tablespoons of chopped pickled jalapeños to the filling, use extra buffalo sauce, and top with sliced fresh jalapeños before baking. If you really want to feel the burn, add a pinch of cayenne pepper to the cream cheese mixture. You’ve been warned.
Different Cheese Options
Try pepper jack cheese for extra heat, gouda for a smoky twist, or a Mexican blend for a different flavor profile. I once made these with smoked gouda and it was so good I ate four in one sitting. No regrets.
Grilled Version
In the summer, I make these on the grill. Prep everything the same way, then place the stuffed peppers on a grill pan or directly on the grates over medium heat. Cover and cook for 15-20 minutes, checking occasionally. You get this subtle smoky flavor that’s absolutely incredible.
Serving & Storage Suggestions
These peppers are best served hot, right out of the oven. The cheese should be bubbly and the peppers tender but not falling apart. I like to serve them with extra ranch or blue cheese dressing on the side for dipping — because you can never have too much dipping sauce.
For a complete weeknight meal, pair them with a simple side salad dressed with ranch or a tangy vinaigrette. The freshness of the salad balances the richness of the peppers perfectly. I also love serving them with celery sticks and carrot sticks to keep things crunchy and light. It’s like having buffalo wings but way more satisfying.
If you’re feeding a crowd, these peppers are perfect party food. They’re handheld, mess-free, and disappear faster than anything else on the table. I’ve brought them to game day gatherings and potlucks and always come home with an empty dish.
Storage: Leftover stuffed peppers keep well in an airtight container in the refrigerator for up to 4 days. The peppers will soften more as they sit, but the flavor actually gets better. I sometimes make a double batch on Sunday just to have easy lunches all week.
Reheating: Pop them in the microwave for 1-2 minutes, or reheat in a 350°F oven for 10 minutes to restore some of the texture. The oven method is better if you have the time — it keeps the peppers from getting too mushy.
Freezing: You can freeze the unbaked stuffed peppers for up to 3 months. Assemble them completely, place them on a baking sheet to freeze solid, then transfer to a freezer bag. When you’re ready to eat, bake from frozen at 375°F for 25-30 minutes covered, then 10 minutes uncovered. The filling stays creamy and the peppers hold up surprisingly well.
Nutritional Information & Benefits
Each stuffed pepper half (using standard ingredients) contains approximately:
- Calories: 280-320
- Protein: 22-25g
- Fat: 18-20g
- Carbohydrates: 6-8g
- Fiber: 2-3g
- Sugar: 3-4g
These numbers will vary based on the specific ingredients and brands you use, but this gives you a solid estimate. The protein content is impressive for such a satisfying meal — you get a good amount from both the chicken and the cheese.
Bell peppers are packed with vitamin C — actually more than oranges gram for gram. They also contain vitamin A, vitamin B6, and antioxidants that support overall health. The cream cheese and cheese provide calcium and protein, while the buffalo sauce adds a metabolism-boosting kick from the capsaicin in the hot peppers.
This recipe is naturally gluten-free and can be made low-carb or keto-friendly by using full-fat cream cheese and checking your hot sauce label. It’s also a great option for anyone following a high-protein diet or looking for a satisfying meal that won’t spike blood sugar.
Conclusion
These Easy Buffalo Chicken Dip Stuffed Peppers have become my go-to for so many reasons. They’re fast enough for a Tuesday night when you’re exhausted, impressive enough for company, and customizable enough that you never get bored. Every time I make them, I think about Megan standing in her kitchen in that stained t-shirt, acting like she hadn’t just created something magical. That’s the energy I want you to bring to this recipe — no pressure, no perfectionism, just good food made by someone who deserves a delicious dinner without the stress.
I’d love to hear how these turn out for you. Did you add something unexpected? Make a substitution that blew your mind? Serve them to someone who couldn’t stop eating? Drop a comment below and tell me all about it. And if you snap a photo, tag me so I can see your beautiful creation. Now go make some peppers — your tired weeknight self will thank you.
Frequently Asked Questions
Can I make these stuffed peppers ahead of time?
Absolutely. Assemble the peppers completely, cover them, and refrigerate for up to 24 hours before baking. You may need to add 5-10 minutes to the baking time since they’ll be starting from cold. This is a lifesaver on busy days.
Can I use a different type of pepper?
Yes! Mini sweet peppers work great for appetizer-sized portions — just cut them in half and stuff them. Poblano peppers add a mild heat and earthy flavor. Just avoid super thin-walled peppers like jalapeños unless you want a serious spice kick.
How do I prevent the peppers from getting too soft?
Don’t overcook them. Check for doneness starting at the 20-minute mark. You want them tender enough to pierce with a fork but still holding their shape. Also, don’t skip the covered baking time — that steam helps them cook evenly without drying out.
Can I use canned chicken instead of fresh?
You can, but I don’t recommend it. Canned chicken has a different texture and can be mushy. Rotisserie chicken is the best shortcut — it’s already cooked, perfectly seasoned, and shreds beautifully. If you’re in a real pinch, canned works, just drain it well and fluff it with a fork.
Is this recipe freezer-friendly?
Yes, both baked and unbaked versions freeze well. For unbaked, assemble and freeze before the baking step. For baked leftovers, freeze in an airtight container for up to 3 months. Thaw in the refrigerator overnight and reheat in the oven for best results.
Pin This Recipe!
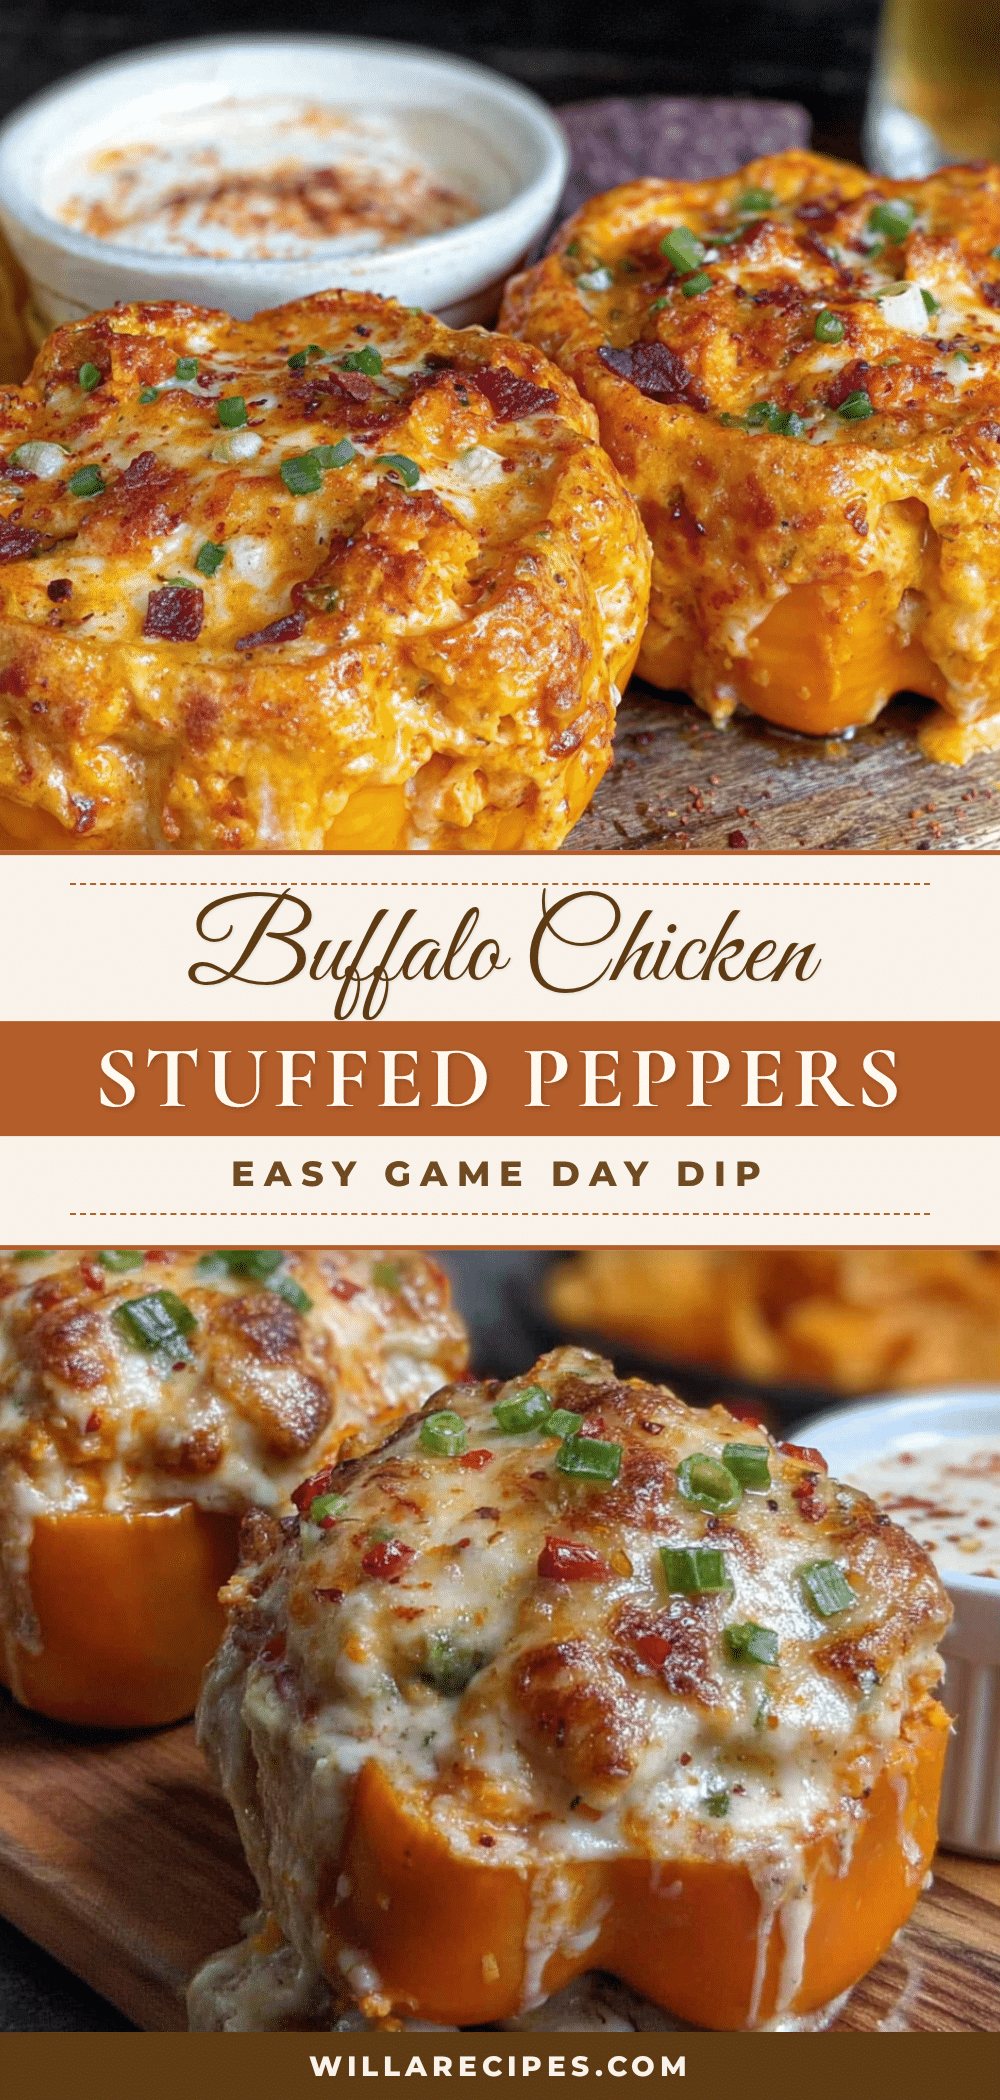
Easy Buffalo Chicken Dip Stuffed Peppers

These Easy Buffalo Chicken Dip Stuffed Peppers take everything you love about buffalo chicken dip and stuff it into a perfectly portioned pepper. Ready in 30 minutes, they’re a simple, low-carb weeknight dinner that’s kid-approved and crowd-pleasing.
- Prep Time: 10 minutes
- Cook Time: 25 minutes
- Total Time: 35 minutes
- Yield: 4 servings (8 pepper halves) 1x
- Category: Main Course
- Cuisine: American
Ingredients
- 4 medium bell peppers (any color, red or orange preferred)
- 2 cups cooked shredded chicken (rotisserie chicken recommended)
- 8 oz cream cheese, softened to room temperature
- 1/2 cup buffalo wing sauce (Frank’s RedHot recommended)
- 1 cup shredded cheddar cheese, divided
- 1/2 cup shredded mozzarella cheese
- 1/4 cup ranch dressing (or blue cheese)
- 1/2 teaspoon garlic powder
- 1/4 teaspoon onion powder
- Salt and black pepper to taste
- 2 tablespoons melted butter (optional, for topping)
- 1 tablespoon fresh chives or green onions, chopped (optional)
- Extra drizzle of buffalo sauce (optional)
Instructions
- Preheat your oven to 375°F (190°C).
- Prep the peppers: Cut each bell pepper in half lengthwise from stem to tip. Scoop out all seeds and white membranes. Place pepper halves cut-side up in a 9×13 baking dish. If they wobble, trim a tiny sliver off the bottom to make them sit flat.
- Make the filling: In a medium mixing bowl, combine softened cream cheese, buffalo wing sauce, ranch dressing, garlic powder, and onion powder. Stir until smooth and well combined.
- Add the chicken and cheese: Fold in shredded chicken, 1/2 cup cheddar cheese, and all of the mozzarella. Mix until every piece of chicken is coated. Taste and add salt and pepper if needed.
- Stuff the peppers: Divide the filling evenly among the 8 pepper halves, piling it up. Use about 1/4 cup filling per half.
- Top with remaining cheese: Sprinkle the remaining 1/2 cup cheddar cheese over the tops.
- Bake covered: Cover the baking dish with aluminum foil and bake for 15 minutes.
- Bake uncovered: Remove foil and bake for another 10-12 minutes, until cheese is melted and bubbly and peppers are tender when pierced with a fork.
- Finish with toppings: If using, drizzle melted butter over hot peppers, sprinkle with chives or green onions, and add extra buffalo sauce. Let rest for 2-3 minutes before serving.
Notes
Use room temperature cream cheese to avoid lumps. Rotisserie chicken is the best shortcut. Don’t overcook peppers; they should be tender but still hold their shape. Let peppers rest before serving to allow filling to set. For a lighter version, use reduced-fat cream cheese and low-fat cheese, or Greek yogurt instead of ranch. For a vegetarian version, swap chicken for chickpeas or roasted cauliflower. For extra spice, add pickled jalapeños or cayenne. Peppers can be assembled ahead and refrigerated for up to 24 hours before baking. Freeze unbaked stuffed peppers for up to 3 months.
Nutrition
- Serving Size: 2 pepper halves
- Calories: 300
- Sugar: 3
- Sodium: 800
- Fat: 19
- Saturated Fat: 10
- Carbohydrates: 7
- Fiber: 2
- Protein: 23
Keywords: buffalo chicken dip, stuffed peppers, low-carb, weeknight dinner, easy recipe, buffalo chicken, bell peppers, game day food


