I was supposed to be making French macarons. You know the ones—those finicky little sandwich cookies that require a kitchen scale, a candy thermometer, and the patience of a saint. I had the almond flour measured, the egg whites aging on the counter for three days, and I was feeling pretty confident. Then my neighbor rang the doorbell to borrow a whisk, my timer went off, and I grabbed the wrong bag of sugar. Instead of the fine almond flour I needed, I dumped a cup of regular powdered sugar into my meringue. I stood there staring at the bowl, thinking I’d just ruined a week’s worth of planning. But I was already committed, so I whipped it anyway. What came out of that oven was nothing like the delicate French cookies I’d planned—it was better. These little puffs were crisp, airy, and had this ghostly, ethereal shape that made me laugh out loud. I piped on some chocolate chip eyes, and my kids declared them Halloween cookies. Honestly, I’ve never gone back to making macarons. These ghost meringue cookies are now my signature fall treat, and they started with a completely distracted mistake. Maybe you’ve been there—the kitchen chaos that somehow leads to something wonderful. That’s exactly how this recipe was born, and I keep making it because it reminds me that not everything has to go according to plan to turn out delicious.
Why You’ll Love This Recipe
Let me tell you why these ghost meringue cookies have earned a permanent spot in my fall baking rotation. I’ve tested this recipe more times than I care to count, and every single batch comes out perfectly crisp and adorable.
- Quick & Easy: These come together in about 15 minutes of active prep time. The oven does the rest of the work while you go fold laundry or help with homework.
- Simple Ingredients: You need exactly four ingredients—egg whites, sugar, vanilla, and chocolate chips. Chances are you already have them in your kitchen right now.
- Perfect for Halloween: These are the star of any Halloween party, classroom treat, or spooky movie night. They’re cute without being creepy.
- Crowd-Pleaser: Kids adore them, adults sneak them, and everyone asks for the recipe. I’ve never brought a batch home.
- Unbelievably Delicious: The texture is pure magic—crisp on the outside, airy on the inside, and they melt on your tongue like a sweet cloud.
What makes this version different from other meringue cookies is the technique I stumbled into. Using powdered sugar instead of granulated creates a lighter, more stable meringue that holds its shape perfectly. Plus, the chocolate chip eyes stay put because the meringue is just tacky enough when you pipe them on. This isn’t just another Halloween cookie—it’s the one that makes people close their eyes after the first bite. It’s comfort food reimagined for the spooky season, and it’s perfect for impressing guests without any stress.
What Ingredients You Will Need
This recipe uses simple, wholesome ingredients to deliver that signature light-as-air texture and adorable ghost shape. Everything here is easy to find and likely already in your pantry.
For the Meringue Cookies
- 3 large egg whites, at room temperature (room temperature eggs whip up higher and more stable—trust me on this)
- 3/4 cup powdered sugar (I use Domino, but any brand works—just make sure it’s not lumpy)
- 1/4 teaspoon cream of tartar (this stabilizes the meringue and helps it hold those cute ghost shapes)
- 1/2 teaspoon vanilla extract (pure vanilla, not imitation—it makes a difference in flavor)
For the Ghost Faces
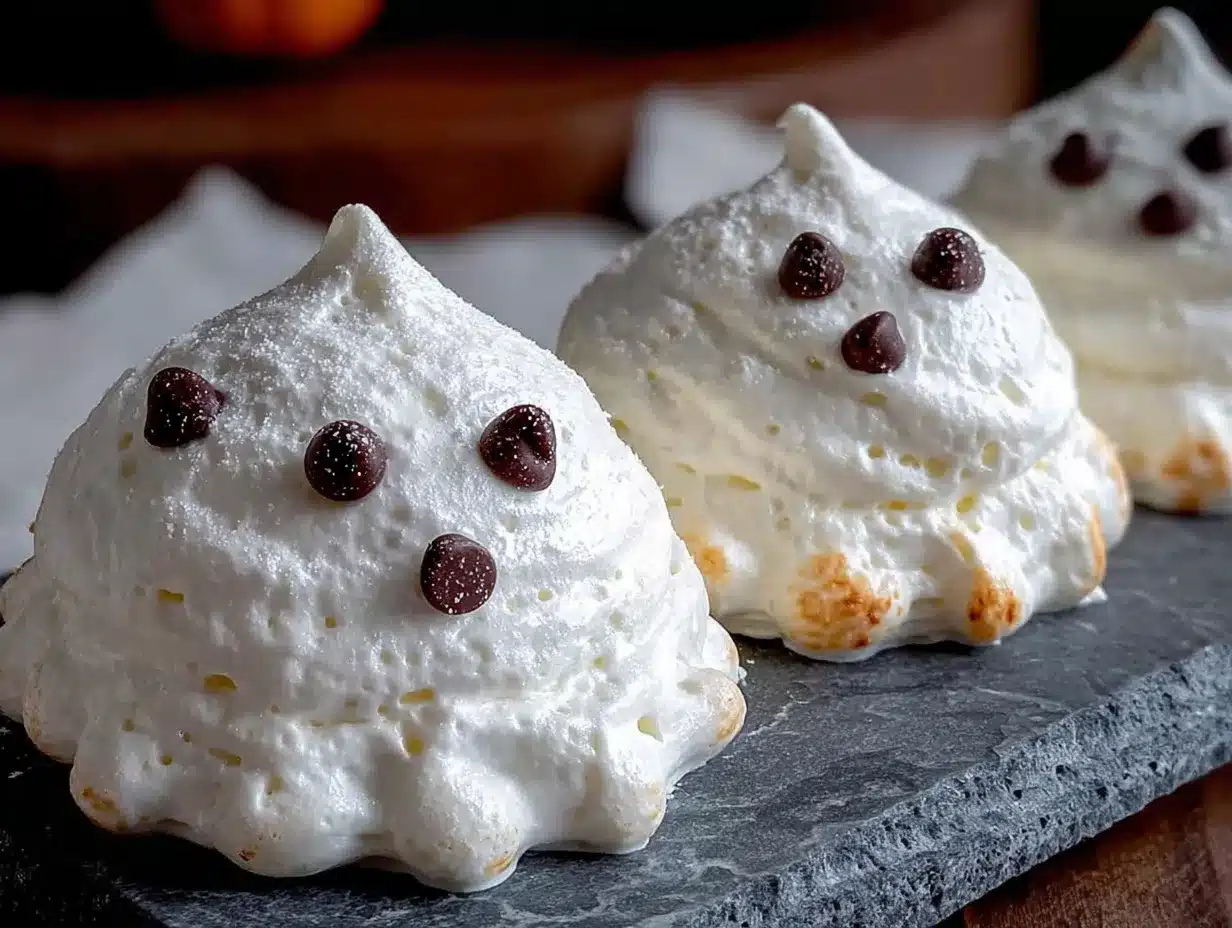
- 1/4 cup mini chocolate chips (I prefer Ghirardelli for their rich flavor, but any brand works)
- Optional: 1 tablespoon cocoa powder for dusting (adds a spooky shadow effect)
Let me share a quick tip about egg whites. For the best volume, separate your eggs when they’re cold, then let the whites sit on the counter for about 30 minutes. Cold egg whites don’t whip as well, and room temperature ones give you that billowy, cloud-like texture you’re after. Also, make sure your bowl and whisk attachment are completely clean and grease-free. Any trace of fat—even a speck of yolk—will keep your meringue from whipping properly. I wipe my bowl down with a little lemon juice or vinegar on a paper towel just to be safe.
For the powdered sugar, here’s something I learned the hard way: sift it. I know, it’s an extra step, but lumps of sugar in your meringue won’t dissolve properly and can leave you with weird spots. Just give it a quick sift into the bowl before you start whipping.
Equipment Needed
You don’t need anything fancy for these ghost meringue cookies, which is part of their charm.
- Electric mixer (stand mixer or hand mixer—I’ve used both and they work equally well)
- Large mixing bowl (glass or metal, not plastic—plastic can hold onto grease)
- Piping bag with a round tip (I use a Wilton #12 tip, but you can also use a zip-top bag with the corner snipped off)
- Baking sheet lined with parchment paper (silicone mats work too, but parchment gives the best crisp bottom)
- Spatula for scraping down the bowl
- Small offset spatula (optional, but helpful for piping smooth shapes)
If you don’t have a piping bag, don’t stress. A sturdy zip-top bag works perfectly—just fill it, snip off about 1/4 inch from one corner, and you’re in business. I’ve done it that way plenty of times when I couldn’t find my piping tips. For the baking sheet, use one without raised edges if you have it—it helps the air circulate better around the cookies.
Preparation Method
Here’s how to make these ghost meringue cookies step by step. Take your time with the whipping—it’s the most important part.
- Preheat your oven to 200°F (93°C). Yes, that’s low. We’re drying these cookies out, not baking them. Line a baking sheet with parchment paper and set aside.
- Wipe your mixing bowl and whisk attachment with a little lemon juice or white vinegar on a paper towel. This removes any trace of grease that could sabotage your meringue.
- Add the room temperature egg whites and cream of tartar to the bowl. Start whipping on medium speed until the mixture becomes foamy and bubbly—about 1 to 2 minutes. You’ll see it go from clear liquid to white foam.
- Gradually add the sifted powdered sugar, about 1 tablespoon at a time, while the mixer runs on medium speed. This slow addition helps the sugar dissolve properly. Keep whipping for another 3 to 4 minutes.
- Add the vanilla extract and increase the speed to medium-high. Whip until the meringue forms stiff, glossy peaks. This means when you lift the whisk, the meringue stands straight up without flopping over. This usually takes 5 to 7 minutes total. The mixture should look smooth and shiny, not grainy.
- Transfer the meringue to your piping bag fitted with a round tip. If you’re using a zip-top bag, fill it about halfway and twist the top closed to prevent air bubbles.
- Pipe ghost shapes onto the prepared baking sheet. Hold the piping bag straight up and down, about 1/2 inch above the parchment. Squeeze out a round base, then lift the bag straight up while continuing to squeeze gently. As you pull away, the meringue will form a little peak on top—that’s the ghost’s head. Each ghost should be about 1 to 1.5 inches tall. Leave about 1 inch between each cookie—they don’t spread much, but you want air circulation.
- Gently press two mini chocolate chips into each ghost for eyes. Place them about halfway down the ghost’s body. Don’t push too hard or you’ll deflate the meringue. Just a gentle press is enough to make them stick.
- Bake for 60 to 75 minutes at 200°F (93°C). The cookies are done when they’re dry to the touch and easily lift off the parchment. They should be crisp all the way through, not chewy. If they still feel soft in the center, give them another 10 minutes.
- Turn off the oven and leave the cookies inside with the door slightly ajar for another 30 minutes. This helps them dry out completely and prevents cracking.
A quick note about timing: The total time from start to finish is about 2 hours, but most of that is hands-off baking and cooling. You can easily prep these while dinner cooks or during nap time.
Cooking Tips & Techniques
After making these ghost meringue cookies more times than I can count, I’ve picked up a few tricks that make a real difference.
Don’t rush the whipping. I know it’s tempting to crank the mixer to high and hope for the best, but slow and steady wins this race. Starting on medium speed and gradually increasing gives the egg proteins time to unfold and trap air properly. If you go too fast too soon, you’ll get a weak meringue that deflates in the oven.
Humidity is your enemy. Meringue cookies hate humid days. The sugar attracts moisture from the air, which can make your cookies sticky and chewy instead of crisp. If it’s raining or super humid, wait for a drier day. I learned this the hard way when I made a batch during a summer thunderstorm and ended up with sad, sticky blobs.
Check for stiff peaks correctly. Lift your whisk attachment straight up and look at the peak that forms. If it stands up straight without bending, you’re there. If it flops over, keep whipping. If it looks grainy or separates, you’ve gone too far—unfortunately, there’s no fixing over-whipped meringue.
Pipe with confidence. Your first few ghosts might look a little wonky—that’s totally normal. I’ve made ghosts that looked more like blobs than spirits, but once you add the chocolate chip eyes, they magically transform. Don’t overthink the piping. Just squeeze, lift, and move on.
Store them right. These cookies are sensitive to moisture. Once they’re completely cool, transfer them to an airtight container. I layer them between sheets of parchment paper to prevent them from bumping into each other. They’ll stay crisp for up to two weeks if stored properly.
Variations & Adaptations
One of the best things about these ghost meringue cookies is how easy they are to customize. Here are some variations I’ve tried and loved.
Spooky Shadows
After baking, dust the ghosts lightly with cocoa powder using a fine-mesh sieve. It gives them a shadowy, haunted look that’s perfect for Halloween parties. Just go easy—a little goes a long way.
Colorful Ghosts
Add a drop or two of gel food coloring to the meringue before piping. Purple, green, or orange ghosts are so fun for Halloween. Use a toothpick to swirl the color through the meringue for a marbled effect—don’t overmix or you’ll lose the color streaks.
Gluten-Free and Low-Sugar
These cookies are naturally gluten-free since they’re made with just egg whites and sugar. For a lower-sugar version, you can substitute half the powdered sugar with a monk fruit sweetener blend. The texture will be slightly less crisp, but still delicious.
Flavor Twists
Swap the vanilla extract for peppermint, almond, or orange extract. Peppermint ghosts are amazing for Christmas, and orange ghosts work great for fall. Just use the same amount—1/2 teaspoon.
Chocolate Ghosts
Sift 1 tablespoon of cocoa powder into the powdered sugar before adding it to the egg whites. You’ll get chocolate ghosts with dark chocolate chip eyes. My kids call them “double chocolate spooks.”
Serving & Storage Suggestions
These ghost meringue cookies are best served at room temperature. They’re crisp, airy, and practically melt in your mouth. I like to arrange them on a platter with some fake cobwebs and plastic spiders for a Halloween party—they look so cute sitting there.
For a complete Halloween treat spread, pair them with pumpkin spice cupcakes, caramel apples, or hot chocolate. They also make fantastic edible decorations for a Halloween dessert table. I’ve even tied them to treat bags with ribbon as party favors.
Storage: Once the cookies are completely cool, transfer them to an airtight container. Layer them between sheets of parchment paper to prevent breakage. Store at room temperature in a cool, dry place. Do not refrigerate—the moisture will ruin the texture.
Freezer: You can freeze these cookies for up to 3 months. Place them in a single layer in a freezer-safe container with parchment between layers. Thaw at room temperature for about 15 minutes before serving. They’ll be just as crisp as the day you made them.
One thing I love about these cookies is that their flavor actually improves after a day or two. The vanilla mellows out and the texture becomes even more delicate. So feel free to make them a day ahead of your Halloween party.
Nutritional Information & Benefits
Here’s a rough estimate per ghost meringue cookie (based on making about 24 cookies with this recipe):
- Calories: 25
- Fat: 0.5g
- Carbohydrates: 5g
- Protein: 0.5g
- Sugar: 4g
These cookies are naturally gluten-free, dairy-free, and nut-free, making them a great option for people with common food allergies. They’re also incredibly low in calories compared to traditional cookies, so you can enjoy a few without guilt.
The egg whites provide a small amount of protein, and the cream of tartar adds potassium. Plus, since they’re baked at such a low temperature, the egg whites are fully cooked and safe for everyone, including kids and pregnant women.
From a wellness perspective, I love that these cookies satisfy my sweet tooth without weighing me down. They’re light, airy, and feel like a treat without the heavy, greasy feeling that comes with butter-based cookies. Perfect for health-minded folks who still want something fun and festive.
FAQs
Can I make these ghost meringue cookies without a piping bag?
Absolutely! Use a sturdy zip-top bag with the corner snipped off. You can also use a spoon to drop small mounds of meringue onto the baking sheet and shape them gently with the back of the spoon. They won’t be as perfectly ghost-shaped, but they’ll still taste amazing.
Why did my meringue turn out sticky?
Sticky meringue usually means it wasn’t baked long enough or the humidity was too high. Pop them back in the oven at 200°F for another 15 to 20 minutes. If the weather is humid, try baking them a little longer next time or wait for a drier day.
Can I use liquid egg whites from a carton?
I don’t recommend it. Carton egg whites often have stabilizers that prevent them from whipping into stiff peaks. Fresh egg whites from whole eggs give you the best volume and texture. If you must use carton whites, look for ones labeled “pasteurized” and expect them to take longer to whip.
How do I know when the meringue is stiff enough?
Lift your whisk attachment straight up. The meringue should form a peak that stands straight up without flopping over. If it bends or droops, keep whipping. Also, the mixture should look glossy and smooth, not grainy or separated.
Can I double this recipe?
Yes, but you’ll need to bake in batches. Meringue doesn’t hold well once piped, so work quickly. I usually double the recipe and bake on two racks, rotating the pans halfway through. Just be aware that baking time might increase slightly with a full oven.
Conclusion
These ghost meringue cookies started as a complete kitchen accident, and honestly, I’m so grateful for that mistake. They’re proof that sometimes the best recipes come from the moments when everything goes wrong. Light, crisp, adorable, and made with just four simple ingredients—what’s not to love?
I hope you give these a try, whether for a Halloween party, a classroom treat, or just because you want something fun and festive. Don’t be afraid to make them your own—try different colors, flavors, or face designs. The chocolate chip eyes are classic, but you could use candy eyes or even draw little mouths with melted chocolate.
I’d love to hear how yours turn out! Drop a comment below and tell me about your ghost meringue adventure. Did you make them with your kids? Did you try a fun variation? Share your photos and tag me—I can’t wait to see your spooky creations. Happy baking, and remember: sometimes the best recipes are the ones you never planned to make.
Pin This Recipe!
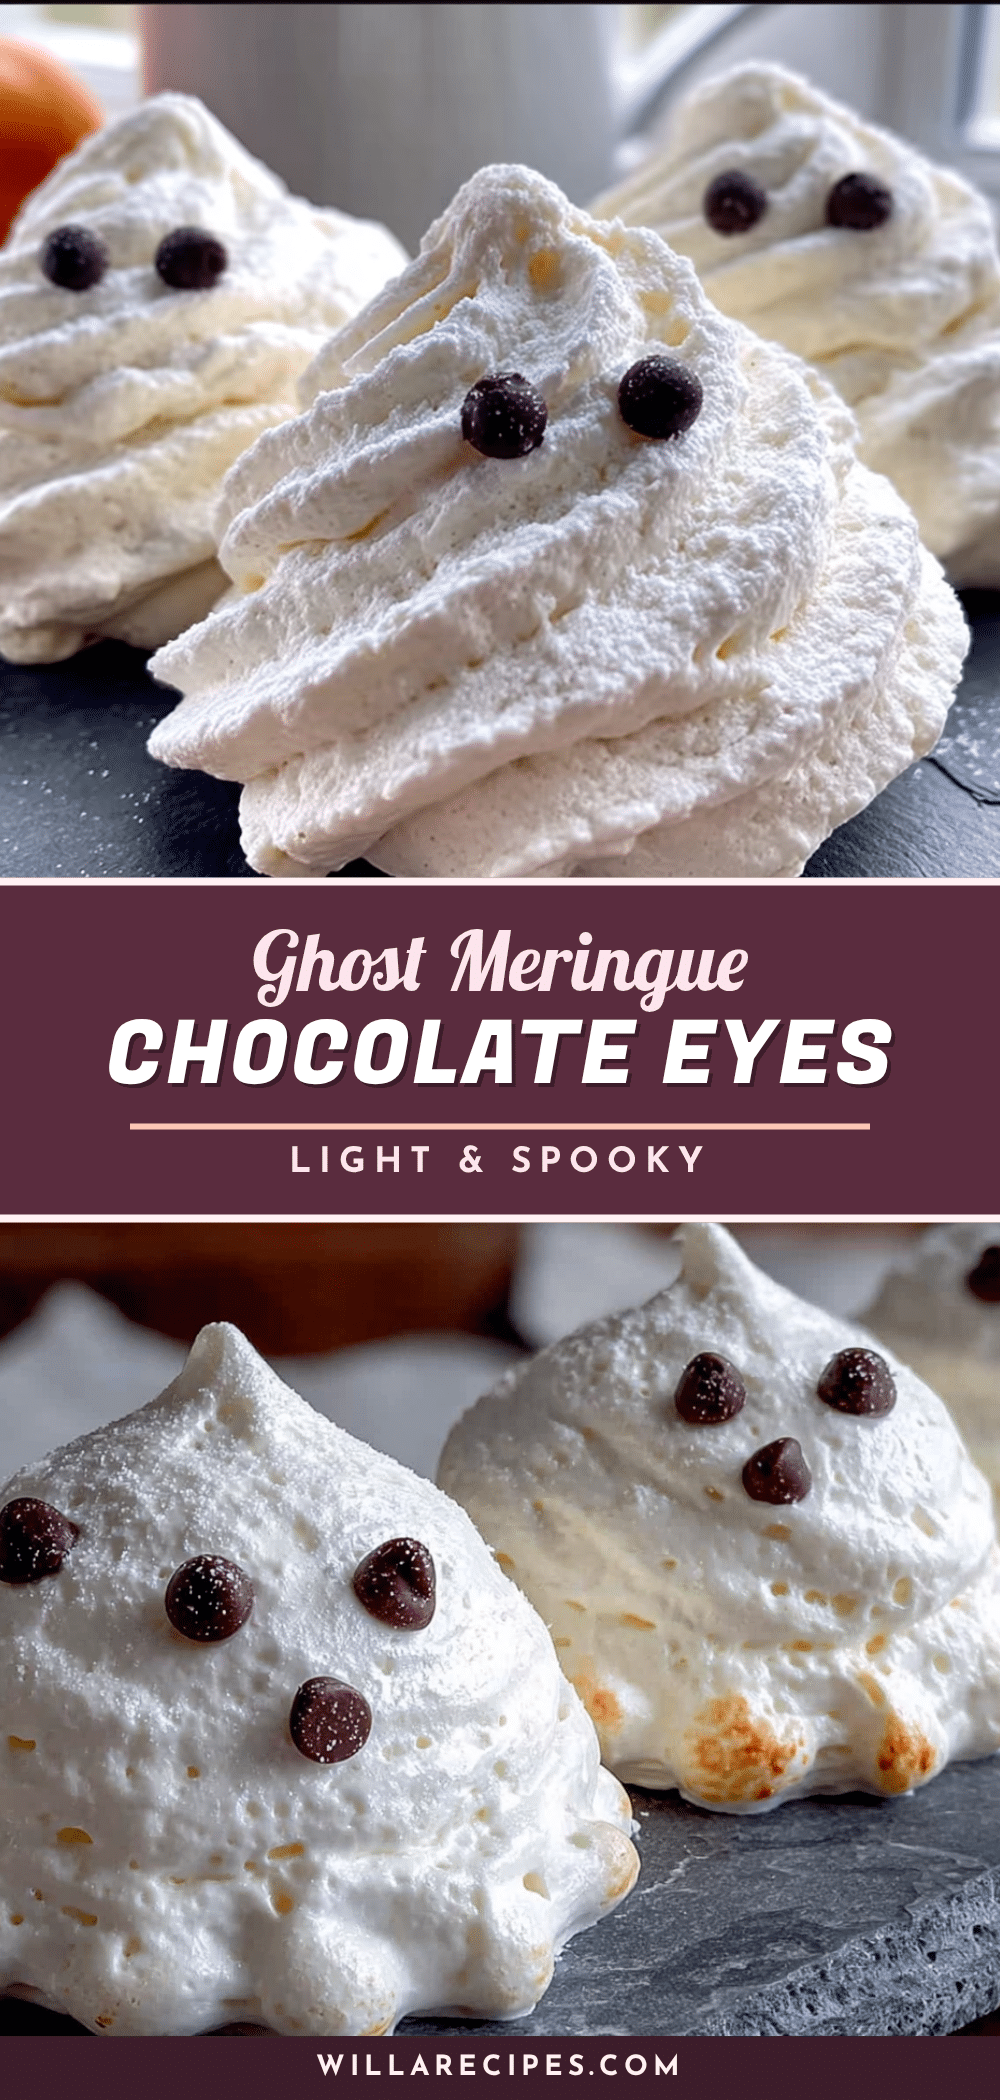
Light Ghost Meringue Cookies with Easy Chocolate Chip Eyes
These ghost meringue cookies are crisp, airy, and adorable, made with just four simple ingredients. Perfect for Halloween parties, classroom treats, or spooky movie nights, they melt in your mouth like a sweet cloud.
- Prep Time: 15 minutes
- Cook Time: 60-75 minutes
- Total Time: 2 hours (including 30 minutes cooling in oven)
- Yield: 24 cookies 1x
- Category: Dessert
- Cuisine: American
Ingredients
- 3 large egg whites, at room temperature
- 3/4 cup powdered sugar
- 1/4 teaspoon cream of tartar
- 1/2 teaspoon vanilla extract
- 1/4 cup mini chocolate chips
- Optional: 1 tablespoon cocoa powder for dusting
Instructions
- Preheat your oven to 200°F (93°C). Line a baking sheet with parchment paper and set aside.
- Wipe your mixing bowl and whisk attachment with a little lemon juice or white vinegar on a paper towel to remove any grease.
- Add the room temperature egg whites and cream of tartar to the bowl. Start whipping on medium speed until the mixture becomes foamy and bubbly, about 1 to 2 minutes.
- Gradually add the sifted powdered sugar, about 1 tablespoon at a time, while the mixer runs on medium speed. Continue whipping for another 3 to 4 minutes.
- Add the vanilla extract and increase the speed to medium-high. Whip until the meringue forms stiff, glossy peaks, which usually takes 5 to 7 minutes total.
- Transfer the meringue to a piping bag fitted with a round tip (or a zip-top bag with the corner snipped off).
- Pipe ghost shapes onto the prepared baking sheet: squeeze out a round base, then lift the bag straight up while continuing to squeeze gently to form a peak. Each ghost should be about 1 to 1.5 inches tall, with 1 inch between cookies.
- Gently press two mini chocolate chips into each ghost for eyes, placing them about halfway down the ghost’s body.
- Bake for 60 to 75 minutes at 200°F (93°C), until the cookies are dry to the touch and easily lift off the parchment.
- Turn off the oven and leave the cookies inside with the door slightly ajar for another 30 minutes to dry out completely.
Notes
For best results, use room temperature egg whites and ensure all equipment is grease-free. Humidity can affect the texture, so avoid making these on rainy days. Store in an airtight container at room temperature for up to two weeks. Can be frozen for up to 3 months.
Nutrition
- Serving Size: 1 cookie
- Calories: 25
- Sugar: 4
- Sodium: 10
- Fat: 0.5
- Carbohydrates: 5
- Protein: 0.5
Keywords: ghost meringue cookies, Halloween cookies, meringue cookies, easy Halloween treats, ghost cookies, chocolate chip eyes, gluten-free cookies, dairy-free cookies


