The PTA bake sale was in twelve hours and I’d completely forgotten. I mean, completely. I’d marked it on the calendar for the wrong week, and now here I was, staring at a bag of flour and a stick of butter at 9 PM on a Tuesday, wondering how everyone else managed to bring those gorgeous, intricate treats. My neighbor, Sarah, had apparently been planning her bourbon-pecan pie for a month. Another mom had a tiered tray of macarons that looked like they came from a Parisian patisserie. And me? I had a vague memory of a sugar cookie recipe I’d scribbled on a napkin somewhere and a stubborn refusal to show up empty-handed.
Honestly, I almost just grabbed a box of store-bought cookies and called it a day. But then I remembered the look on my son’s face when I’d promised him we’d make something special for the bake sale together. So, with a sigh and a second cup of coffee, I pulled out the mixer. I figured I’d just make simple round cookies, maybe dust them with some colored sugar. That was the plan, anyway. But as I was rolling out the dough, my eyes landed on a little turkey cookie cutter I’d bought on a whim last November and never used. A ridiculous idea took hold. Could I really pull off decorated turkey cookies in a single night?
The answer, much to my surprise, was a very sleepy, very messy yes. The kitchen looked like a flour bomb had gone off. I got royal icing in my hair. I definitely burned my tongue taste-testing the first batch. But those little turkey cookies—with their slightly lopsided feathers and goofy little faces—were the first thing to sell out the next morning. A mom actually bought the last four and said they were the “sweetest things at the table.” Maybe you’ve been there, where a last-minute panic turns into your most memorable kitchen win. That’s the story of these cookies, and honestly, it’s why I keep making them. They’re a reminder that you don’t need a week of prep to create something that feels truly special.
Why You’ll Love This Recipe
Let’s be honest, decorating cookies can feel like a project, not a pleasure. This recipe flips that script. It’s designed to give you that “wow, I actually did that” feeling without the stress. I’ve tested this dough and icing combo more times than I can count, tweaking it until it was foolproof enough for a frantic Tuesday night. It’s the kind of recipe that builds your confidence in the kitchen, one perfectly piped feather at a time.
- Simple Ingredients: You probably already have everything for the cookies and icing in your pantry. No weird extracts or hard-to-find decorating sugars. Just real, wholesome basics.
- Perfect for Thanksgiving Fun: These are the ultimate activity for a family gathering, a classroom party, or a low-key Friendsgiving. They bring people together around the table in the best way.
- Crowd-Pleaser: Kids go wild for the decorating part, and adults appreciate the classic, buttery sugar cookie flavor that isn’t overly sweet. They disappear fast.
- Unbelievably Delicious: This isn’t just a pretty cookie. The dough is soft, thick, and has a perfect hint of vanilla and almond. It holds its shape beautifully, so your turkeys look like turkeys.
What makes this recipe different is the royal icing. I use a slightly thicker consistency than most, which means it’s more forgiving for beginners. It doesn’t run off the edges of the cookie, but it’s still fluid enough to self-level into a smooth, glossy finish. Plus, I’ll share my trick for getting that perfect “flood” consistency every single time. This isn’t just another sugar cookie recipe—it’s your new go-to for a holiday tradition that feels wholesome, creative, and genuinely fun.
What Ingredients You Will Need
This recipe uses simple, wholesome ingredients to deliver a soft, buttery cookie that’s the perfect canvas for your royal icing creations. The dough is sturdy enough for detailed cutouts but tender enough to melt in your mouth. Here’s what you’ll need to gather.
For the Sugar Cookies
- Unsalted butter, softened: 1 cup (2 sticks / 226g). I always use unsalted so I can control the salt level. Let it sit out for at least 30 minutes to get truly soft. (Cold butter leads to flat cookies!)
- Granulated sugar: 1 cup (200g). Regular white sugar is best for that classic sweet flavor and crisp edge.
- Large egg: 1, at room temperature. A room-temp egg emulsifies into the butter-sugar mixture much better, creating a smoother dough.
- Vanilla extract: 1 teaspoon. I prefer pure vanilla extract for the richest flavor, but imitation works fine in a pinch.
- Almond extract: ½ teaspoon. This is my secret ingredient! It adds a subtle, nutty warmth that elevates the cookie. Don’t skip it if you can help it.
- All-purpose flour: 2 ½ cups (312g). Spoon and level your flour into the measuring cup. Scooping directly from the bag packs it down and leads to dry cookies.
- Baking powder: 1 teaspoon. This gives the cookies just a little lift, keeping them from being too dense.
- Salt: ½ teaspoon. Balances the sweetness and enhances all the other flavors.
For the Royal Icing
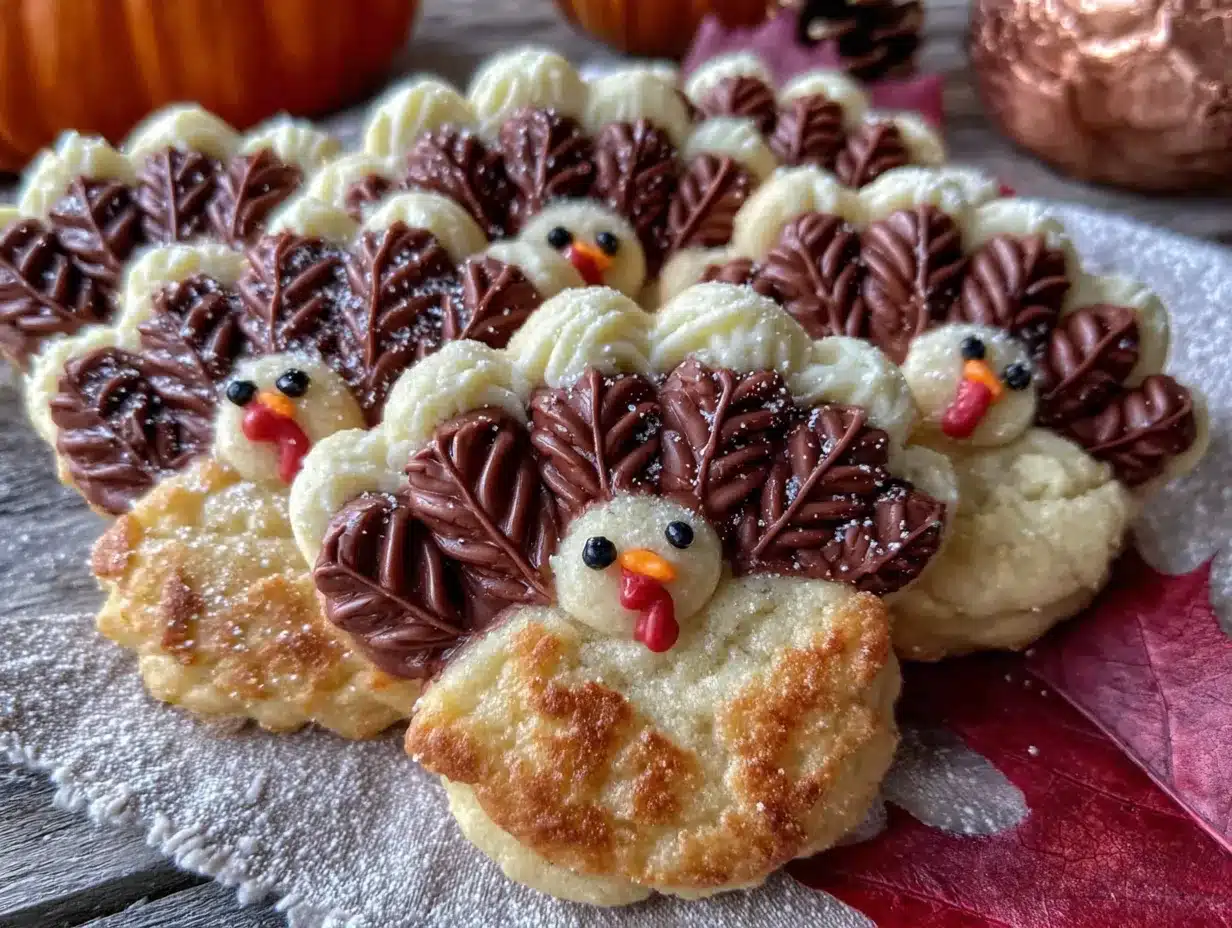
- Powdered sugar: 3 cups (340g). Also known as confectioners’ sugar. Sift it if it’s lumpy for the smoothest icing.
- Meringue powder: 2 tablespoons (16g). This is key for royal icing. It stabilizes the icing, gives it that glossy finish, and makes it dry hard. (I always look for a brand that is gluten-free and made with pasteurized egg whites).
- Warm water: 4-6 tablespoons (60-90ml). You’ll add this slowly to get the right consistency. Start with 4 tablespoons and add more as needed.
- Corn syrup: 1 teaspoon (optional). This adds a beautiful shine and helps prevent the icing from cracking as it dries. I use it for the “flood” consistency.
- Gel food coloring: In orange, yellow, red, and brown. I recommend gel or paste colors. Liquid food coloring will thin out your icing and mess with the consistency.
Equipment Needed
You don’t need a professional bakery setup to make these cookies shine. A few key tools will make the process smoother and more enjoyable. Here’s what I use in my own kitchen.
- Stand mixer or hand mixer: A stand mixer with a paddle attachment is my favorite for creaming the butter and sugar, but a good hand mixer works great too. You just need something to get that light, fluffy texture.
- Turkey cookie cutter: This is non-negotiable! You can find them online or at any craft store during the fall season. Get a few different sizes if you want variety.
- Rolling pin with thickness rings: This is my absolute best tip for even baking. Thickness rings (usually ¼-inch) snap onto your rolling pin and guarantee your dough is a uniform thickness. No more thin centers and thick edges!
- Piping bags and tips: Disposable piping bags are easiest for cleanup. For the royal icing, you’ll want a small round tip (like a Wilton #2 or #3) for outlining and detail work, and a slightly larger round tip (like a #4 or #5) for flooding. If you don’t have tips, you can snip a tiny corner off a piping bag, but it’s less precise.
- Parchment paper or silicone baking mats: Both work perfectly. Silicone mats are reusable and create a very even bake. Parchment paper is great for easy cleanup.
- Cooling rack: Essential for letting your cookies cool completely before you even think about icing them. A warm cookie will melt your royal icing instantly.
- Small bowls or cups: You’ll need these to mix your different icing colors. I use small glass ramekins.
- Toothpicks: A lifesaver for popping air bubbles in the icing and for swirling colors together for a marbled effect.
Don’t stress if you don’t have all the fancy stuff. I’ve used a clean, empty ketchup bottle as a makeshift piping bag before (it works, but it’s messy!). The most important tool is a little bit of patience.
Preparation Method
Alright, let’s get our hands a little floury. This process is broken down into two main parts: the cookies and the icing. I find it’s easiest to make the dough one day, chill it overnight, and then bake and decorate the next day. But you can totally do it all in one go if you’re feeling ambitious.
Making the Sugar Cookie Dough
- Cream the butter and sugar: In the bowl of your stand mixer (or a large bowl with a hand mixer), beat the softened butter and granulated sugar together on medium speed until it’s light, fluffy, and pale in color. This takes about 3-4 minutes. Scrape down the sides of the bowl once or twice. You’re looking for a texture that resembles a fluffy cloud.
- Add the wet ingredients: Beat in the egg, vanilla extract, and almond extract until everything is fully combined. The mixture might look a little curdled at this point—don’t worry, that’s totally normal! It will come together once you add the flour.
- Whisk the dry ingredients: In a separate medium bowl, whisk together the all-purpose flour, baking powder, and salt. This ensures the baking powder and salt are evenly distributed throughout the dough.
- Combine wet and dry: With the mixer on low speed, gradually add the dry ingredients to the wet ingredients. Mix only until the flour disappears and a soft dough forms. Over-mixing here will develop the gluten and make your cookies tough. Stop as soon as it comes together.
- Divide and chill: Turn the dough out onto a lightly floured surface. Divide it in half, shape each half into a flat disc (about 1 inch thick), and wrap them tightly in plastic wrap. Refrigerate for at least 2 hours, or up to 3 days. Chilling is not optional—it prevents the cookies from spreading in the oven and makes the dough much easier to roll out.
Baking the Cookies
- Preheat and prepare: When you’re ready to bake, preheat your oven to 375°F (190°C). Line your baking sheets with parchment paper or silicone baking mats.
- Roll out the dough: Remove one disc of dough from the fridge. Let it sit at room temperature for 5 minutes to soften just slightly. On a lightly floured surface, roll the dough out to ¼-inch thickness. Using a rolling pin with thickness rings makes this step foolproof.
- Cut your turkeys: Dip your turkey cookie cutter in a little bit of flour to prevent sticking. Cut out as many cookies as you can, pressing the cutter straight down and lifting it straight up. Don’t twist the cutter, as that can seal the edges and prevent the cookies from rising evenly.
- Bake: Place the cut-out cookies about 2 inches apart on your prepared baking sheets. Bake for 8-10 minutes, or until the edges are just barely starting to turn a light golden brown. The centers will still look pale and slightly soft. That’s perfect.
- Cool completely: Let the cookies cool on the baking sheet for 5 minutes. This allows them to firm up. Then, use a thin spatula to carefully transfer them to a wire cooling rack to cool completely. Do not even think about icing them until they are 100% cool to the touch.
Making and Using the Royal Icing
- Mix the icing: In the bowl of your stand mixer (or a large bowl), combine the powdered sugar and meringue powder. With the whisk attachment, turn the mixer on low and slowly add 4 tablespoons of warm water. Increase the speed to medium-high and beat for 5-7 minutes, until the icing is thick, glossy, and forms stiff peaks. If it’s too thick, add more water, one teaspoon at a time.
- Color your icing: Divide the white icing into separate bowls for your colors. For turkey cookies, I usually make a large batch of white for the base, then smaller batches of orange (for the beak and feet), yellow (for the feathers), red (for the wattle), and brown (for the body). Use a toothpick to add a tiny amount of gel food coloring and stir until the color is even. Start with a little—you can always add more!
- Get the right consistency: This is the most important part. For outlining, you want a “stiff peak” consistency—it should hold its shape in a sharp point on the toothpick. For flooding (filling in the cookie), you need to thin it down. Add water, one drop at a time, stirring gently. You’re looking for a “10-second” consistency: when you lift your spoon, the icing should drizzle down and the ribbon on the surface should disappear in about 10 seconds. If it disappears in 5 seconds, it’s too thin.
- Pipe the outline: Fit a piping bag with a #2 or #3 round tip and fill it with your stiff-consistency icing. Outline the entire turkey shape on your cookie. This creates a “dam” to hold the flood icing inside.
- Flood the cookie: Switch to a #4 or #5 tip or just snip a slightly larger hole in a new bag. Fill it with your 10-second consistency icing. Starting at the edges, pipe the flood icing inside the outline. Use a toothpick to gently guide the icing into all the corners and to pop any air bubbles. Let this base layer dry for at least 30 minutes to an hour.
- Add the details: Once the base is dry to the touch, you can pipe the feathers, the wattle, the beak, and the eyes using your stiff-consistency colored icings. For the feathers, I like to pipe small overlapping lines. For the eyes, just two tiny dots of brown or black icing. Let the cookies dry completely, uncovered, for at least 6 hours or overnight. The icing should be completely hard to the touch.
Cooking Tips & Techniques
Over the years, I’ve made every mistake in the book with these cookies. I’ve had icing that ran right off the cookie and pooled on the counter. I’ve had dough that spread into shapeless blobs. Here are the hard-won lessons I’ve learned so you can skip the frustration.
The #1 mistake: Not chilling the dough long enough. I once tried to rush the process and only chilled the dough for 30 minutes. My turkeys looked more like abstract blobs. The butter needs to be thoroughly cold again after you roll the dough out. If your cut-out cookies feel soft or sticky at all, pop the baking sheet in the fridge for 15 minutes before they go into the oven. This is called “chilling the cut-outs” and it’s a game-changer for sharp edges.
My personal failure with royal icing: The first time I made royal icing, I added all the water at once and ended up with a soupy mess. The key is to add water slowly and stop well before you think it’s thin enough. For outlining, it should be thick enough to hold a stiff peak—like toothpaste. For flooding, it should flow like warm honey but not be watery. Test it on the side of the bowl first.
A timing strategy that saves my sanity: I almost always bake the cookies one day and decorate them the next. The cookies stay fresh for days, and the royal icing can be made ahead and stored in an airtight container in the fridge for up to a week. When you’re ready to use it, just give it a good stir—it might need a drop or two of water to get back to the right consistency. This turns a big project into two manageable, fun sessions.
Consistency is king: For perfectly even cookies, always use a kitchen scale for your flour. The “spoon and level” method is good, but a scale is foolproof. And don’t skip the thickness rings for your rolling pin. It’s the single best investment I’ve made for my cookie baking. It guarantees every cookie is the same thickness and bakes in the same amount of time.
Variations & Adaptations
This recipe is a wonderful base for so many different ideas. Don’t be afraid to make it your own. Here are a few ways I’ve adapted it over the years.
- Gluten-Free Version: I have a friend with celiac disease, so I’ve tested this with a good 1:1 gluten-free baking flour blend (I like King Arthur Measure for Measure). It works beautifully! Just be sure to chill the dough for a full 2 hours, as gluten-free doughs can be a bit stickier. The texture is slightly more tender, but still delicious.
- Different Shapes: While this post is all about turkeys, this dough is perfect for any fall shape. Use leaf, acorn, or pumpkin cutters. You can even use a simple round cutter and decorate them like little pumpkins or apples. The royal icing technique is the same, just with different colors.
- Spiced Sugar Cookies: For a more “autumnal” flavor, add 1 teaspoon of ground cinnamon, ½ teaspoon of ground ginger, and ¼ teaspoon of ground nutmeg to the dry ingredients. This creates a wonderfully aromatic cookie that pairs perfectly with a simple vanilla royal icing.
- No-Icing Option: If you’re short on time or don’t want to mess with piping bags, you can skip the royal icing entirely. Before baking, press some sparkling sugar or colorful sprinkles onto the cut-out cookies. Or, after they cool, drizzle them with a simple glaze made from powdered sugar and milk.
- Vegan Adaptation: To make these vegan, use a high-quality vegan butter stick (not the spreadable kind in a tub) and a flax egg (1 tablespoon ground flaxseed mixed with 3 tablespoons warm water, let sit for 5 minutes). For the royal icing, you can find vegan meringue powder made from aquafaba (chickpea water) or use a simple powdered sugar and plant-milk glaze instead.
Serving & Storage Suggestions
These cookies are a joy to serve and surprisingly easy to store. Here’s how I handle them from the cooling rack to the table.
Serving: These cookies are best served at room temperature. The royal icing should be completely hard and dry to the touch. I love arranging them on a large wooden platter or a tiered cake stand for a Thanksgiving dessert table. They also make fantastic, edible place cards for your holiday dinner—just pipe a guest’s name on the turkey’s body!
Storage: Once the royal icing is fully dry (this can take 6-12 hours depending on humidity), store the cookies in an airtight container at room temperature. Place them in a single layer, or separate layers with a sheet of parchment paper or wax paper. Do not refrigerate them. The fridge introduces moisture, which can make the royal icing get sticky and soft.
Freezing: You can absolutely freeze these cookies! The best way is to freeze the baked, undecorated cookies. Place them in a single layer on a baking sheet and freeze until solid, then transfer them to a freezer-safe bag or container. They will keep for up to 3 months. When you’re ready to decorate, thaw them on a wire rack at room temperature. Do not freeze cookies that have been decorated with royal icing, as the icing can crack.
How flavors develop: Honestly, these cookies taste even better the next day. The flavors meld together, and the texture of the cookie softens just a tiny bit from the moisture in the icing, creating a perfect, tender bite. So don’t be afraid to make them a day or two ahead of your event.
Nutritional Information & Benefits
Let’s be real—these are a treat. But that doesn’t mean they can’t be part of a balanced, wholesome approach to eating. Using real, simple ingredients means you know exactly what’s going into them.
Per cookie (based on a standard 3-inch turkey cutter and using the recipe as written, not including decorative sprinkles), the estimated nutritional values are:
- Calories: 180-220
- Fat: 8-10g
- Carbohydrates: 26-30g
- Protein: 2-3g
- Sugar: 16-20g
Healthier aspects: The butter provides a small amount of Vitamin A, and the eggs are a source of protein. If you want to feel a little better about the indulgence, you can reduce the sugar in the cookie dough by ¼ cup without affecting the texture too much. Using a high-quality vanilla and almond extract means you get maximum flavor from minimal ingredients. My personal wellness perspective is simple: food is about joy and connection. A homemade cookie eaten with gratitude and shared with loved ones is a beautiful thing. It’s not an everyday food, but it’s a wonderful part of celebrating a special occasion.
Dietary Considerations: This recipe contains gluten (flour), dairy (butter), and eggs. For gluten-free and vegan options, please see the Variations section above.
Conclusion
There’s something incredibly satisfying about pulling a batch of these decorated turkey sugar cookies out of the oven—and even more so about watching them disappear. They’re a little project, sure, but they’re the kind of project that rewards you with laughter, creativity, and a plate of beautiful, delicious treats. Whether you’re making them for a frantic bake sale (like I did) or for a calm afternoon of baking with your kids, I promise the effort is worth it. They taste like a hug and look like a celebration.
I love this recipe because it’s a blank canvas. You can make your turkeys as simple or as fancy as you want. You can get the kids involved in piping the feathers. You can even have a cookie-decorating party! My only rule is to have fun with it and not stress about perfection. Some of my favorite cookies have been the ones where the icing “accidentally” swirled together to create a whole new pattern.
Now I want to see your creations! Leave a comment below and tell me how your turkeys turned out. Did you try any fun variations? Share this post with a friend who loves a good baking project, and don’t forget to pin it to your Thanksgiving or Holiday Baking board on Pinterest. Happy baking, friends!
Frequently Asked Questions
Can I make the sugar cookie dough ahead of time?
Absolutely. You can refrigerate the dough discs, tightly wrapped in plastic, for up to 3 days. You can also freeze the unbaked dough for up to 3 months. Just thaw it in the refrigerator overnight before rolling and cutting.
My royal icing is too runny. How do I fix it?
Don’t panic! If your icing is too thin, simply add a bit more sifted powdered sugar, one tablespoon at a time, and stir until it thickens up. If it’s too thick, add water one drop at a time. Remember, you want a “10-second” consistency for flooding.
How do I get my royal icing to dry faster?
Humidity is the enemy of drying royal icing. If your kitchen is humid, you can place the iced cookies in a room with a dehumidifier or in front of a gently oscillating fan. Do not put them in the oven or microwave to dry—the heat will melt the icing.
Can I use liquid food coloring instead of gel?
I strongly recommend using gel or paste food coloring. Liquid food coloring will add too much extra water to your royal icing, which can throw off the consistency and make it too runny. Gel colors are more concentrated and will give you brighter, truer colors without thinning your icing.
Why did my cookies spread in the oven?
This usually happens for one of three reasons: your dough wasn’t chilled long enough, your butter was too soft when you creamed it, or your baking sheet was too warm. Always chill your cut-out cookies on the baking sheet for 10-15 minutes before baking, and use a cool baking sheet for each batch.
Pin This Recipe!
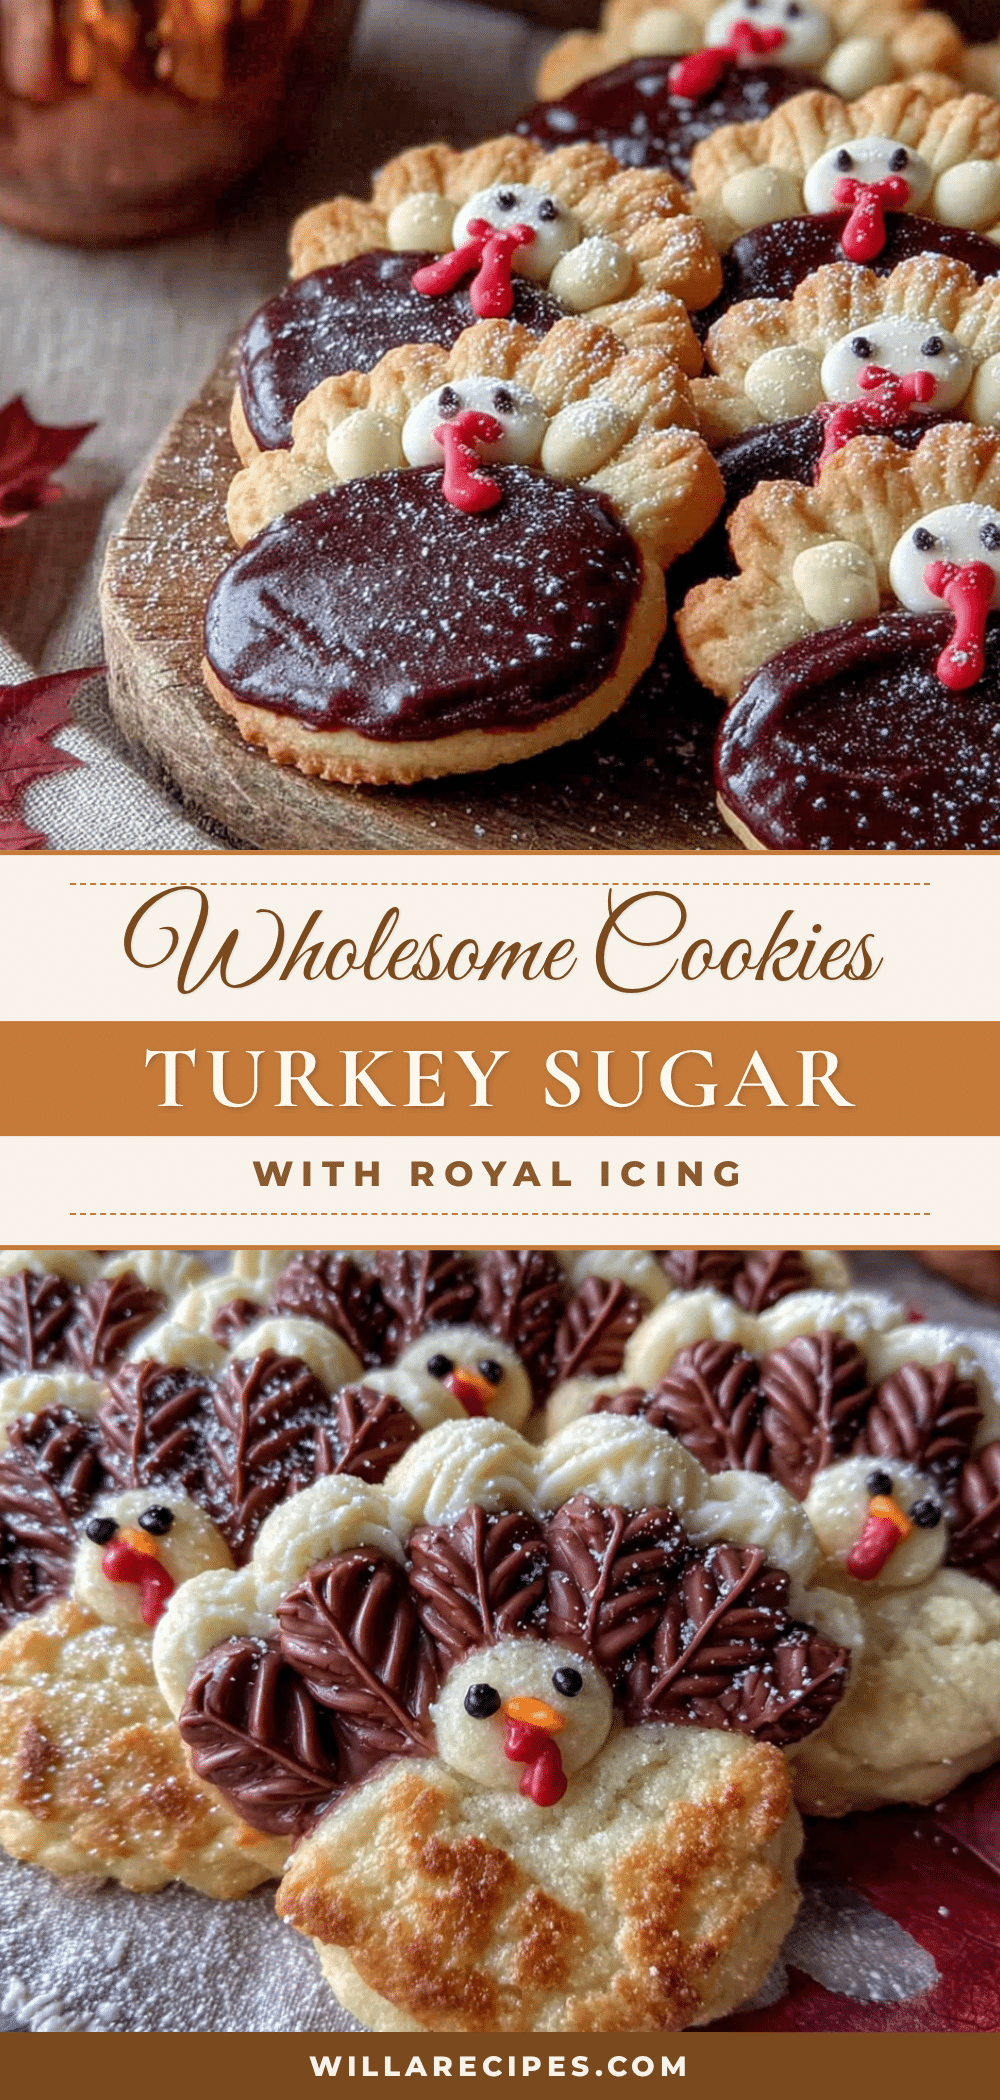
Perfect Decorated Turkey Sugar Cookies with Easy Royal Icing

These soft, buttery sugar cookies are decorated with a forgiving royal icing to create adorable turkey cookies. Perfect for Thanksgiving bake sales, family gatherings, or a fun holiday baking project.
- Prep Time: 30 minutes
- Cook Time: 10 minutes
- Total Time: 2 hours 40 minutes (includes chilling and drying time)
- Yield: 24 servings 1x
- Category: Dessert
- Cuisine: American
Ingredients
- 1 cup (2 sticks / 226g) unsalted butter, softened
- 1 cup (200g) granulated sugar
- 1 large egg, at room temperature
- 1 teaspoon vanilla extract
- ½ teaspoon almond extract
- 2 ½ cups (312g) all-purpose flour
- 1 teaspoon baking powder
- ½ teaspoon salt
- 3 cups (340g) powdered sugar
- 2 tablespoons (16g) meringue powder
- 4–6 tablespoons (60-90ml) warm water
- 1 teaspoon corn syrup (optional)
- Gel food coloring in orange, yellow, red, and brown
Instructions
- Cream the butter and sugar: In the bowl of a stand mixer (or a large bowl with a hand mixer), beat the softened butter and granulated sugar together on medium speed until light, fluffy, and pale in color, about 3-4 minutes. Scrape down the sides of the bowl once or twice.
- Add the wet ingredients: Beat in the egg, vanilla extract, and almond extract until fully combined. The mixture might look slightly curdled—this is normal.
- Whisk the dry ingredients: In a separate medium bowl, whisk together the all-purpose flour, baking powder, and salt.
- Combine wet and dry: With the mixer on low speed, gradually add the dry ingredients to the wet ingredients. Mix only until the flour disappears and a soft dough forms. Do not over-mix.
- Divide and chill: Turn the dough out onto a lightly floured surface. Divide it in half, shape each half into a flat disc (about 1 inch thick), and wrap tightly in plastic wrap. Refrigerate for at least 2 hours, or up to 3 days.
- Preheat and prepare: When ready to bake, preheat oven to 375°F (190°C). Line baking sheets with parchment paper or silicone baking mats.
- Roll out the dough: Remove one disc of dough from the fridge. Let it sit at room temperature for 5 minutes. On a lightly floured surface, roll the dough out to ¼-inch thickness.
- Cut your turkeys: Dip a turkey cookie cutter in flour to prevent sticking. Cut out as many cookies as possible, pressing straight down and lifting straight up. Do not twist the cutter.
- Bake: Place cut-out cookies about 2 inches apart on prepared baking sheets. Bake for 8-10 minutes, until edges are just barely starting to turn light golden brown. Centers will still look pale and slightly soft.
- Cool completely: Let cookies cool on the baking sheet for 5 minutes, then transfer to a wire cooling rack to cool completely.
- Mix the icing: In the bowl of a stand mixer (or a large bowl), combine powdered sugar and meringue powder. With the whisk attachment, turn mixer on low and slowly add 4 tablespoons of warm water. Increase speed to medium-high and beat for 5-7 minutes, until thick, glossy, and forms stiff peaks. If too thick, add more water one teaspoon at a time.
- Color your icing: Divide white icing into separate bowls for colors. Use a toothpick to add tiny amounts of gel food coloring and stir until even.
- Get the right consistency: For outlining, use stiff peak consistency (holds a sharp point). For flooding, thin with water one drop at a time until it reaches a ’10-second’ consistency (ribbon disappears in about 10 seconds).
- Pipe the outline: Fit a piping bag with a #2 or #3 round tip and fill with stiff-consistency icing. Outline the entire turkey shape on the cookie.
- Flood the cookie: Switch to a #4 or #5 tip or snip a slightly larger hole in a new bag. Fill with 10-second consistency icing. Starting at the edges, pipe flood icing inside the outline. Use a toothpick to guide icing into corners and pop air bubbles. Let base layer dry for at least 30 minutes to an hour.
- Add the details: Once base is dry to the touch, pipe feathers, wattle, beak, and eyes using stiff-consistency colored icings. Let cookies dry completely, uncovered, for at least 6 hours or overnight until icing is hard to the touch.
Notes
Chill the dough for at least 2 hours to prevent spreading. For best results, bake cookies one day and decorate the next. Royal icing can be made ahead and stored in an airtight container in the fridge for up to a week. Use gel food coloring to avoid thinning the icing. Do not refrigerate decorated cookies; store in an airtight container at room temperature.
Nutrition
- Serving Size: 1 cookie
- Calories: 200
- Sugar: 18
- Sodium: 80
- Fat: 9
- Saturated Fat: 5
- Carbohydrates: 28
- Protein: 2
Keywords: turkey cookies, sugar cookies, royal icing, Thanksgiving cookies, decorated cookies, holiday baking


