This was supposed to be a classic New York-style cheesecake. I had it all planned out—the water bath was prepped, the springform pan was greased, and I was feeling pretty confident. But then, in a moment of pure distraction (my neighbor decided to ring the doorbell right as I was measuring), I grabbed the peppermint extract instead of the vanilla. And the coffee? That was an accident too. I had a mug of cold brew sitting on the counter, and without thinking, I swapped it for the heavy cream. I stared at the bowl, realizing I had just created a peppermint mocha disaster. I almost dumped it out, honestly. But I was already running late for a holiday potluck, and I didn’t have time to start over. So I baked it anyway, fully expecting a mess. What came out was nothing like the plan—and better. The texture was denser, almost like a bar, and that minty coffee kick? It was incredible. I cut it into squares, threw them on a platter, and watched them disappear in minutes. People were asking for the recipe before I could even explain the happy accident. That’s the thing about this recipe—it’s proof that sometimes the best dishes come from the moments you almost give up. Maybe you’ve been there, standing in a messy kitchen, wondering if you ruined dinner. Trust me, I get it. But these bars? They’re worth the panic.
I’ve been making these peppermint mocha cheesecake bars for every holiday gathering since that first accidental batch. They’ve become my secret weapon—the dessert that looks like you spent hours on it but actually came together because of a mistake. Honestly, I think that’s why I love them so much. They remind me that cooking doesn’t have to be perfect to be amazing. And now, I’m sharing the exact recipe with you, so you can have your own “oops” moment that turns into a crowd favorite.
Why You’ll Love This Recipe
Let me tell you why these bars have become my go-to for every holiday party, potluck, and family dinner. They’re not just another dessert—they’re the one that gets people talking.
- Quick & Easy: These bars come together in under 30 minutes of active prep time. No water bath, no fussy techniques—just mix, layer, and bake. Perfect for those busy holiday weeks when you’re already juggling a million things.
- Simple Ingredients: You probably have most of these in your pantry right now. Cream cheese, butter, chocolate cookies, coffee, and peppermint extract. No fancy grocery store runs required.
- Perfect for Gatherings: These bars are made for sharing. They cut cleanly into squares, travel well, and look gorgeous on a dessert table. I’ve brought them to cookie exchanges, holiday dinners, and even New Year’s Eve parties—they always steal the show.
- Crowd-Pleaser: Kids love the chocolate and mint combo, adults appreciate the coffee kick, and everyone goes back for seconds. I’ve never had a single leftover.
- Unbelievably Delicious: The texture is this perfect mix—creamy cheesecake on top, crunchy cookie crust on the bottom, and that peppermint mocha flavor that hits all the right notes. It’s comfort food reimagined.
What makes this recipe different from the rest? It’s the balance. A lot of peppermint desserts can taste like toothpaste, and coffee desserts can be bitter. But these bars? The cream cheese mellows everything out, the chocolate adds richness, and the peppermint just brightens it all up. I’ve tested this recipe more times than I can count, tweaking the ratios until every bite was perfect. And trust me, it is.
This recipe isn’t just good—it’s the kind that makes you close your eyes after the first bite. It’s dessert that feels special without the stress, perfect for impressing guests or just treating yourself after a long day.
What Ingredients You Will Need
This recipe uses simple, wholesome ingredients to deliver bold flavor and satisfying texture without the fuss. Most of these are pantry staples, but I’ve included some notes to help you pick the best options.
For the Crust
- 2 cups chocolate cookie crumbs (about 20 Oreos or chocolate wafers, finely crushed) — I recommend using Oreos for the best flavor, but any chocolate sandwich cookie works. Remove the cream filling if you want a less sweet crust.
- 5 tablespoons unsalted butter, melted — This binds the crust together. Use salted butter if that’s all you have, but reduce the added salt in the filling.
- 2 tablespoons granulated sugar — Optional, but it adds a little extra sweetness to balance the dark chocolate.
For the Cheesecake Filling
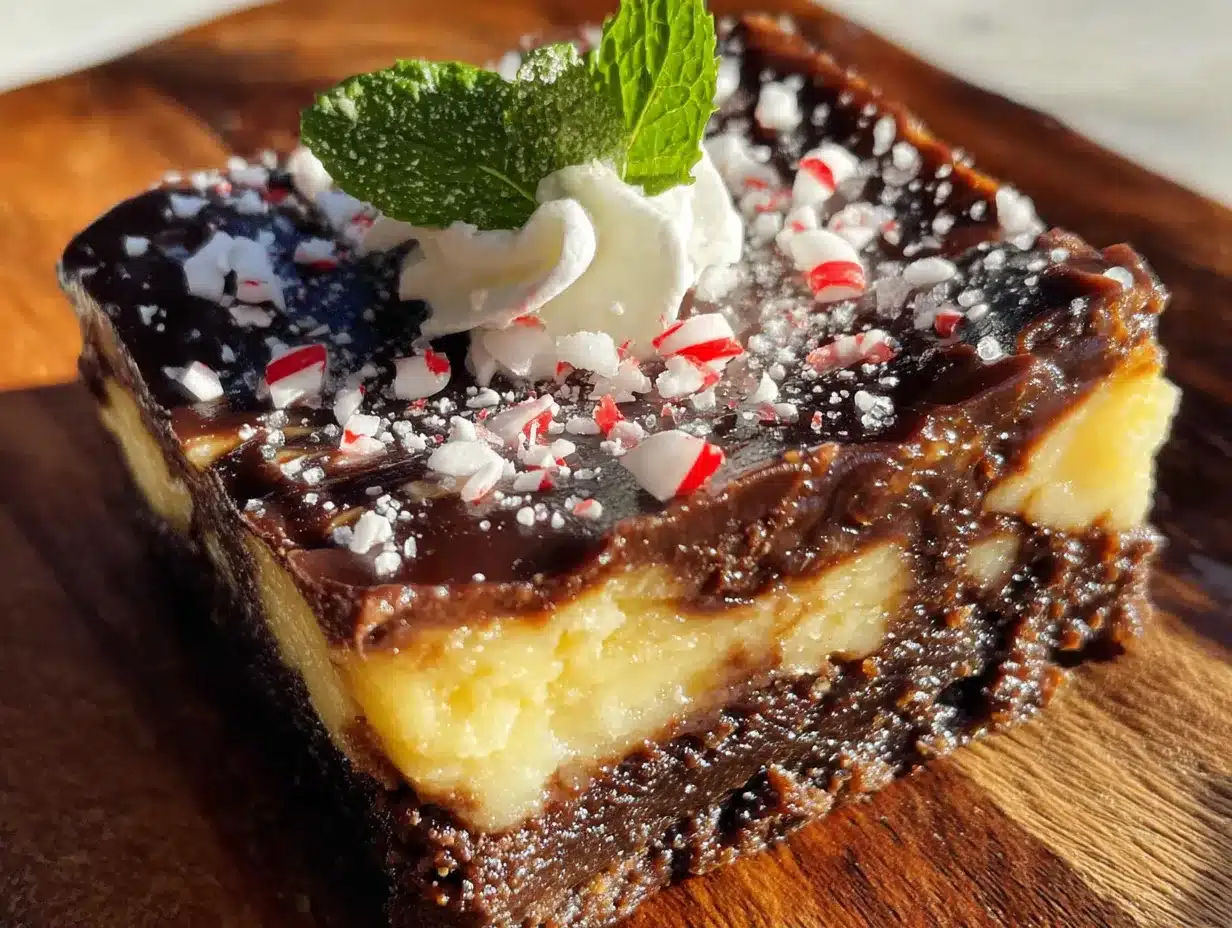
- 16 ounces cream cheese, softened — Full-fat cream cheese gives the best texture. I’ve tried low-fat versions, and they just don’t set as well. Let it sit on the counter for at least 30 minutes before starting.
- 3/4 cup granulated sugar — This sweetens the filling without making it cloying.
- 2 large eggs, room temperature — Cold eggs can make the filling lumpy. If you forget to take them out, place them in a bowl of warm water for 5 minutes.
- 1/4 cup sour cream — This adds tanginess and makes the cheesecake extra creamy. Greek yogurt works as a substitute.
- 2 tablespoons strong brewed coffee or espresso, cooled — I use cold brew concentrate for the richest flavor. Instant espresso powder dissolved in water also works great.
- 1 teaspoon peppermint extract — Look for pure peppermint extract, not mint extract, which can taste artificial. I recommend Nielsen-Massey for the cleanest flavor.
- 1/2 cup semi-sweet chocolate chips, melted — These get swirled into the filling for that mocha effect. Use dark chocolate if you prefer a less sweet bar.
For the Topping
- 1/2 cup semi-sweet chocolate chips — For the ganache layer on top.
- 1/4 cup heavy cream — This makes the ganache smooth and shiny.
- 1/4 cup crushed peppermint candies or candy canes — For that festive crunch. You can find pre-crushed peppermint in the baking aisle, or crush your own in a zip-top bag.
Equipment Needed
You don’t need a lot of fancy tools for this recipe, which is one of the reasons I love it. Here’s what you’ll need:
- 9×9-inch baking pan — This is the perfect size for bars. If you only have an 8×8, the bars will be a little thicker—just add 5-10 minutes to the baking time.
- Electric mixer — A hand mixer or stand mixer both work. You need this to get the cream cheese smooth and fluffy. I’ve tried mixing by hand, and it’s just not the same texture.
- Food processor or zip-top bag — For crushing the cookies. A food processor gives you a fine, even crumb, but a rolling pin and a bag work just fine.
- Mixing bowls — You’ll need at least two medium bowls.
- Spatula — A rubber spatula helps scrape down the sides of the bowl and spread the filling evenly.
- Parchment paper — This is a lifesaver for easy removal. Leave an overhang on two sides so you can lift the bars out cleanly.
If you don’t have a 9×9 pan, you can use a 9-inch round cake pan. Just adjust the baking time slightly. And if you’re on a budget, skip the food processor and crush the cookies by hand—it’s a little more work, but the bars will taste just as good.
Preparation Method
Follow these steps carefully, and you’ll have perfect peppermint mocha cheesecake bars every time. I’ve included timing estimates and visual cues so you know exactly what to look for.
Step 1: Prep the Pan and Crust
Preheat your oven to 325°F (160°C). Line your 9×9-inch baking pan with parchment paper, leaving an overhang on two opposite sides. This will make lifting the bars out so much easier later. In a medium bowl, combine the chocolate cookie crumbs, melted butter, and sugar. Stir until the mixture looks like wet sand. Press it firmly into the bottom of the prepared pan. I use the bottom of a measuring cup to get it even and compact. Bake the crust for 10 minutes, then set it aside to cool slightly while you make the filling.
Step 2: Make the Cheesecake Filling
In a large bowl, beat the softened cream cheese with an electric mixer on medium speed until it’s smooth and creamy—about 2 minutes. Scrape down the sides of the bowl with a spatula. Add the sugar and beat for another minute until combined. Add the eggs one at a time, beating on low speed after each addition until just incorporated. Don’t overmix here, or you’ll incorporate too much air, which can cause cracks. Add the sour cream, cooled coffee, and peppermint extract, and beat on low until smooth. The mixture should be thick and velvety.
Step 3: Add the Chocolate Swirl
Melt the 1/2 cup of semi-sweet chocolate chips in a microwave-safe bowl in 30-second intervals, stirring between each, until smooth. Let it cool for a minute. Pour the cheesecake filling over the crust and spread it evenly. Drop spoonfuls of the melted chocolate over the top. Use a knife or toothpick to swirl it into the filling—don’t over-swirl, or you’ll lose the marbled effect. A few figure-eight motions are all you need.
Step 4: Bake the Bars
Place the pan in the preheated oven and bake for 35-40 minutes. The edges should be set and slightly puffed, but the center should still jiggle slightly when you gently shake the pan. That’s the sweet spot—it will continue to set as it cools. If the top starts to brown too quickly, tent it loosely with foil for the last 10 minutes. Remove from the oven and let it cool on a wire rack for 1 hour at room temperature. Then transfer to the refrigerator and chill for at least 4 hours, or overnight. This step is crucial—don’t rush it. The bars need time to firm up for clean slices.
Step 5: Make the Ganache Topping
Once the bars are fully chilled, make the ganache. Place the remaining 1/2 cup of chocolate chips in a small bowl. Heat the heavy cream in a small saucepan until it just begins to simmer—don’t let it boil. Pour the hot cream over the chocolate chips and let it sit for 2 minutes. Then stir gently until smooth and glossy. Let it cool for 5 minutes, then pour it over the chilled cheesecake bars. Spread it evenly with a spatula. Sprinkle the crushed peppermint candies over the top while the ganache is still wet so they stick. Return the pan to the refrigerator for 30 minutes to set the ganache.
Step 6: Slice and Serve
Lift the bars out of the pan using the parchment overhang. Place them on a cutting board and use a sharp knife to slice into 16 squares. For clean cuts, wipe the knife between each slice. Serve cold or at room temperature—both are delicious.
Cooking Tips & Techniques
After making these bars more times than I can count, I’ve picked up a few tricks that make a real difference. Here are my best tips for success:
- Room temperature ingredients are non-negotiable. I learned this the hard way. Cold cream cheese and eggs create a lumpy filling that never bakes evenly. Set everything out 30-45 minutes before you start.
- Don’t overmix the filling. When you beat the eggs in, do it on low speed and stop as soon as they’re incorporated. Too much air causes cracks and a spongy texture instead of that dense, creamy cheesecake we want.
- Use a water bath alternative. Traditional cheesecake recipes call for a water bath to prevent cracking, but for these bars, I’ve found it’s not necessary. Just make sure your oven isn’t too hot and don’t overbake. If you’re worried, place a pan of hot water on the rack below the cheesecake bars.
- Chill overnight for the best texture. I know it’s hard to wait, but the bars really do taste better the next day. The flavors meld together, and the texture becomes perfectly creamy. Plus, they slice so much cleaner.
- Crush the peppermint finely. Big chunks of candy can be hard to bite through. I put my candy canes in a zip-top bag and crush them with a rolling pin until they’re a mix of fine powder and small pieces.
One mistake I made early on was using mint extract instead of peppermint. Mint extract has a more herbal, almost toothpaste-like flavor. Peppermint is sweeter and cleaner. Trust me, it makes a difference. Also, don’t skip the parchment paper. My first batch stuck to the pan, and I had to serve them as a messy crumble. Still delicious, but not pretty.
Variations & Adaptations
This recipe is incredibly versatile. Here are some ways to make it your own:
Dietary Variations
- Gluten-Free: Use gluten-free chocolate sandwich cookies for the crust. I’ve tested this with several brands, and they all work well.
- Dairy-Free: Substitute the cream cheese with a dairy-free version (I like Kite Hill), use coconut cream instead of sour cream, and replace the butter with a plant-based alternative. The texture will be slightly softer, but still delicious.
- Lower Sugar: Reduce the granulated sugar to 1/2 cup and use sugar-free chocolate chips. The bars will be less sweet but still have that peppermint mocha punch.
Flavor Twists
- White Chocolate Peppermint: Swap the semi-sweet chocolate in the ganache for white chocolate. The creamy sweetness pairs beautifully with the peppermint.
- Mocha Madness: Add an extra tablespoon of espresso powder to the filling for a stronger coffee flavor. This is my personal favorite variation.
- Dark Chocolate Dream: Use dark chocolate cookies for the crust and dark chocolate chips in the ganache. The bitterness balances the sweet filling perfectly.
Seasonal Adaptations
- Holiday Spice: Add 1/2 teaspoon of cinnamon and a pinch of nutmeg to the filling for a cozy winter twist.
- Summer Berry: Top the bars with fresh raspberries or strawberries before serving. The tartness cuts through the richness.
I once tried a version with crushed gingerbread cookies for the crust, and it was incredible. Don’t be afraid to experiment—that’s how this recipe was born in the first place!
Serving & Storage Suggestions
These bars are best served chilled, straight from the refrigerator. The texture is firm and creamy, and the ganache has a satisfying snap. If you prefer a softer texture, let them sit at room temperature for 10-15 minutes before serving.
For presentation, I like to cut them into neat squares and arrange them on a white platter. A dusting of powdered sugar or a few extra crushed peppermint candies on top makes them look extra festive. They pair beautifully with a hot cup of coffee, a glass of cold milk, or even a scoop of vanilla ice cream on the side.
To store, place the bars in an airtight container in the refrigerator. They will stay fresh for up to 5 days. The flavors actually deepen after a day or two, so don’t be afraid to make them ahead. I often make these a day before a party, and they’re always a hit.
For longer storage, you can freeze the bars. Wrap them individually in plastic wrap, then place them in a freezer-safe bag. They’ll keep for up to 3 months. To thaw, transfer them to the refrigerator overnight. The texture remains surprisingly good—just as creamy as fresh.
Nutritional Information & Benefits
These peppermint mocha cheesecake bars are a treat, so they’re not exactly health food. But I believe in balance, and knowing what’s in your food is part of that. Here’s the estimated nutritional breakdown per bar (based on 16 servings):
- Calories: 320
- Fat: 22g
- Carbohydrates: 28g
- Protein: 5g
- Sugar: 20g
That said, there are some redeeming qualities. The cream cheese provides a good amount of calcium and protein. The dark chocolate in the ganache is rich in antioxidants, and the coffee gives you a little caffeine boost. The peppermint is known for aiding digestion—so you can tell yourself it’s practically a health food!
For those with dietary concerns, this recipe contains dairy, gluten, and eggs. It can be adapted as noted in the variations section. I always recommend enjoying treats like these in moderation, as part of a balanced diet. Life is too short to skip dessert, but it’s also too short to overdo it.
Conclusion
These peppermint mocha cheesecake bars are proof that the best recipes often come from happy accidents. They’re creamy, chocolatey, minty, and just the right amount of coffee-flavored. Perfect for holiday parties, potlucks, or any time you want to impress a crowd without spending hours in the kitchen.
I hope you give them a try and make them your own. Maybe you’ll add a little extra peppermint, or swap in dark chocolate, or crush your candy canes a little finer. That’s the beauty of cooking—there’s always room for your personal touch.
If you make these bars, I’d love to hear about it. Leave a comment below and let me know how they turned out, or share a photo on social media and tag me. Your feedback helps me create better recipes, and I genuinely love seeing your creations. Happy baking, and remember—sometimes the best dishes are the ones you almost gave up on.
Frequently Asked Questions
Can I make these bars ahead of time?
Absolutely! In fact, I recommend it. These bars taste even better after a day in the refrigerator, as the flavors meld together. You can make them up to 3 days ahead and store them in the fridge.
Can I use peppermint extract instead of fresh peppermint?
Yes, the recipe calls for peppermint extract. Fresh peppermint leaves won’t give you the same concentrated flavor. Stick with the extract for the best results.
How do I get clean slices?
Use a sharp knife and wipe it clean between each cut. For the cleanest slices, chill the bars for at least 4 hours, or overnight, before cutting.
Can I freeze these bars?
Yes! Wrap individual bars in plastic wrap and place them in a freezer-safe bag. They’ll keep for up to 3 months. Thaw in the refrigerator overnight before serving.
What if I don’t have a 9×9 pan?
You can use an 8×8 pan, but the bars will be thicker. Increase the baking time by 5-10 minutes and check for doneness with the jiggle test. You can also use a 9-inch round cake pan.
Pin This Recipe!
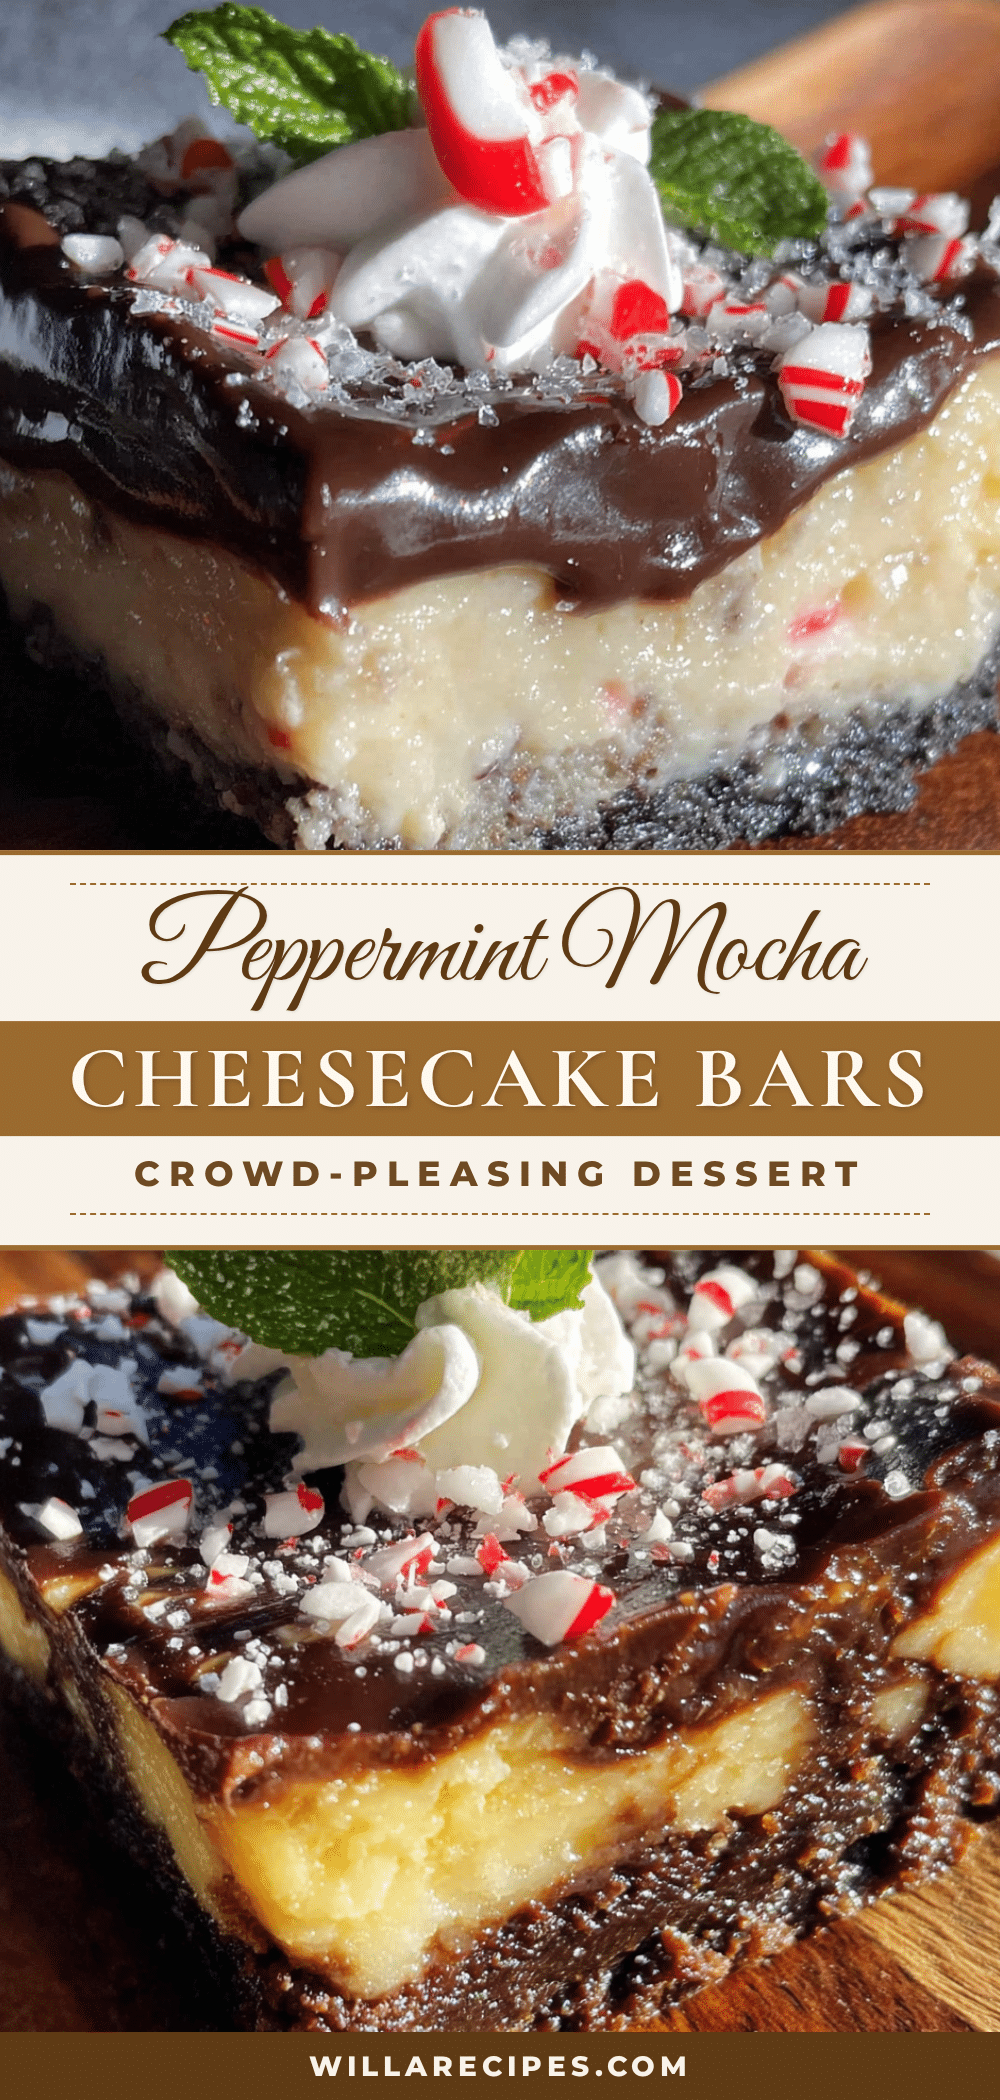
Easy Peppermint Mocha Cheesecake Bars Recipe
These peppermint mocha cheesecake bars are a happy accident turned crowd favorite—creamy, chocolatey, minty, and just the right amount of coffee-flavored. Perfect for holiday gatherings, they come together in under 30 minutes of active prep time and cut cleanly into squares.
- Prep Time: 30 minutes
- Cook Time: 40 minutes
- Total Time: 5 hours 10 minutes (includes chilling)
- Yield: 16 servings 1x
- Category: Dessert
- Cuisine: American
Ingredients
- 2 cups chocolate cookie crumbs (about 20 Oreos or chocolate wafers, finely crushed)
- 5 tablespoons unsalted butter, melted
- 2 tablespoons granulated sugar
- 16 ounces cream cheese, softened
- 3/4 cup granulated sugar
- 2 large eggs, room temperature
- 1/4 cup sour cream
- 2 tablespoons strong brewed coffee or espresso, cooled
- 1 teaspoon peppermint extract
- 1/2 cup semi-sweet chocolate chips, melted
- 1/2 cup semi-sweet chocolate chips (for ganache)
- 1/4 cup heavy cream (for ganache)
- 1/4 cup crushed peppermint candies or candy canes
Instructions
- Preheat oven to 325°F (160°C). Line a 9×9-inch baking pan with parchment paper, leaving an overhang on two opposite sides.
- In a medium bowl, combine chocolate cookie crumbs, melted butter, and 2 tablespoons sugar. Stir until mixture looks like wet sand. Press firmly into the bottom of the prepared pan. Bake for 10 minutes, then set aside to cool slightly.
- In a large bowl, beat softened cream cheese with an electric mixer on medium speed until smooth and creamy, about 2 minutes. Scrape down sides. Add 3/4 cup sugar and beat for another minute until combined.
- Add eggs one at a time, beating on low speed after each addition until just incorporated. Add sour cream, cooled coffee, and peppermint extract; beat on low until smooth.
- Melt 1/2 cup semi-sweet chocolate chips in a microwave-safe bowl in 30-second intervals, stirring between each, until smooth. Let cool for a minute.
- Pour cheesecake filling over crust and spread evenly. Drop spoonfuls of melted chocolate over the top. Use a knife or toothpick to swirl into the filling with a few figure-eight motions.
- Bake for 35-40 minutes. Edges should be set and slightly puffed, but center should still jiggle slightly. If top browns too quickly, tent loosely with foil for last 10 minutes.
- Remove from oven and cool on a wire rack for 1 hour at room temperature. Transfer to refrigerator and chill for at least 4 hours, or overnight.
- For ganache: Place remaining 1/2 cup chocolate chips in a small bowl. Heat heavy cream in a small saucepan until it just begins to simmer. Pour hot cream over chocolate chips, let sit for 2 minutes, then stir until smooth and glossy. Let cool for 5 minutes.
- Pour ganache over chilled cheesecake bars and spread evenly. Sprinkle crushed peppermint candies over the top while ganache is still wet. Return to refrigerator for 30 minutes to set ganache.
- Lift bars out of pan using parchment overhang. Place on cutting board and slice into 16 squares using a sharp knife, wiping knife clean between each slice. Serve cold or at room temperature.
Notes
Room temperature ingredients are crucial for a smooth filling. Don’t overmix the filling to avoid cracks. Chill overnight for best texture and clean slices. Use pure peppermint extract, not mint extract. Crush peppermint candies finely for easier eating.
Nutrition
- Serving Size: 1 bar
- Calories: 320
- Sugar: 20
- Sodium: 180
- Fat: 22
- Saturated Fat: 12
- Carbohydrates: 28
- Fiber: 1
- Protein: 5
Keywords: peppermint mocha, cheesecake bars, holiday dessert, chocolate, mint, coffee, easy cheesecake, no water bath


