I wasn’t expecting cooking advice from my accountant, but there I was, sitting in his cluttered office on a Tuesday afternoon in late November, listening to him describe exactly how to make the fudge his grandmother had been making for sixty years. He had just finished explaining my quarterly taxes—a truly grim affair—and I was gathering my papers to leave when he said, almost as an afterthought, “You know what always makes December bearable? That old fudge recipe my grandma clipped from a magazine in 1957.” He pulled a worn, butter-stained index card from his desk drawer, and I swear I could smell the chocolate from across the room. It was the last place I expected to find a recipe that would become a December tradition in my own kitchen.
Honestly, I almost didn’t look at the card. I mean, my accountant? The same man who once sent me a spreadsheet color-coded by deduction category? But there was something about the way his face softened when he talked about standing on a step stool next to his grandmother, stirring a pot of bubbling sugar and chocolate. He told me about the year they forgot the marshmallow creme and ended up with something that looked like chocolate gravel. He laughed at that memory, and I realized this wasn’t just a recipe—it was a piece of someone’s life. So I copied it down on a sticky note, thanked him, and promptly lost the sticky note for three weeks.
When I finally found it crumpled at the bottom of my purse, I decided to give it a try. Maybe you’ve been there—standing in your kitchen with a recipe that feels more like a rumor than a real set of instructions. The first batch seized up on me. The second batch was grainy. But the third batch? That was the one. It came out glossy, smooth, and perfectly set, with that classic melt-in-your-mouth texture that makes fantasy fudge so irresistible. I’ve tweaked it just a little over the years—a pinch more salt, a slightly different stirring technique—but the heart of it is still that index card from 1957, handed over by a man who probably still color-codes his holiday cookie tins.
Why You’ll Love This Recipe
This homemade classic fantasy fudge isn’t just another holiday dessert. It’s the kind of recipe that makes you look like a kitchen wizard without requiring any actual wizardry. I’ve tested this method more times than I care to count, and I can tell you with confidence that this version works every single time—as long as you follow the temperature rules.
- Simple Ingredients: No fancy grocery store runs needed. You probably have most of these in your pantry right now, which is exactly what you want when a fudge craving hits at 9 PM on a Wednesday.
- Foolproof Method: I’ve learned all the tricks the hard way so you don’t have to. This recipe includes the precise temperature, the right stirring technique, and the exact cooling method to guarantee that smooth, creamy texture every time.
- Perfect for the Holidays: This fudge is a staple on my cookie platter every December. It travels well, keeps for weeks, and somehow disappears faster than anything else on the table.
- Crowd-Pleaser: I’ve brought this to potlucks, office parties, and family gatherings, and it never fails to get requests for the recipe. Kids love it, adults love it, and even picky eaters who claim they don’t like sweets have been caught sneaking a second piece.
- Budget-Friendly: When you’re feeding a family on a sensible budget, you need desserts that deliver maximum joy without maximum cost. This fudge uses affordable pantry staples and makes a generous batch that stretches across multiple occasions. Plus, it freezes beautifully, so you can make it ahead and pull it out when you need a quick treat.
What makes this recipe different from all the other fudge recipes out there? It’s the balance of ingredients and the specific technique. I’ve tried versions with sweetened condensed milk, versions with marshmallows, versions that required a candy thermometer and a prayer. This one uses marshmallow creme, which gives it that signature creamy texture without the fuss of tempering chocolate. It’s comfort food reimagined—faster, more reliable, but with the same soul-soothing satisfaction that makes you close your eyes after the first bite.
What Ingredients You Will Need
This recipe uses simple, wholesome ingredients to deliver that classic fantasy fudge flavor and satisfying texture. Most of these are pantry staples, which is exactly what you want when you’re making a last-minute dessert for a family gathering or a holiday party.
- Granulated Sugar (3 cups / 600g): This is the backbone of the fudge. It provides structure and sweetness. I use regular white sugar—no need for anything fancy.
- Unsalted Butter (¾ cup / 1½ sticks / 170g): Adds richness and helps create that smooth, melt-in-your-mouth texture. I prefer unsalted so I can control the salt level. If you only have salted butter, just reduce the added salt slightly.
- Evaporated Milk (⅔ cup / 160ml): This is not the same as sweetened condensed milk. Evaporated milk adds creaminess without the extra sugar. I’ve tried this with whole milk in a pinch, and it works, but the texture is noticeably less luxurious.
- Semi-Sweet Chocolate Chips (12 ounces / 340g): I recommend Ghirardelli or Guittard for the best flavor and melting consistency. The quality of your chocolate chips really matters here—cheap brands sometimes have stabilizers that prevent smooth melting.
- Marshmallow Creme (1 jar / 7 ounces / 198g): This is the secret ingredient that makes fantasy fudge so creamy. Don’t substitute with marshmallows—the texture won’t be the same. I’ve tried both ways, and the creme wins every time.
- Vanilla Extract (1 teaspoon / 5ml): Pure vanilla extract adds depth and warmth. Imitation vanilla will work, but the flavor won’t be as rich.
- Chopped Walnuts (1 cup / 120g): Optional, but highly recommended. The crunch adds a lovely contrast to the smooth fudge. Toast them lightly in a dry pan for extra flavor. Pecans also work beautifully here.
- Salt (¼ teaspoon / 1.5g): Don’t skip this. A little salt balances the sweetness and enhances the chocolate flavor. I use fine sea salt.
One thing I’ve learned from making this fudge more times than I can count: bring your ingredients to room temperature before you start. The butter, the evaporated milk, even the marshmallow creme—having everything at a similar temperature helps the mixture come together smoothly and prevents graininess. It’s a small step that makes a big difference.
Equipment Needed
- Medium Heavy-Bottomed Saucepan (3-quart capacity): A heavy-bottomed pan distributes heat evenly and prevents scorching. I use a stainless steel pan, but enameled cast iron works great too. Avoid thin pans—they’ll give you hot spots that can burn your fudge.
- Candy Thermometer: This is non-negotiable for perfect fudge. The mixture needs to reach exactly 234°F (112°C) for the right texture. I’ve ruined batches by guessing, and trust me, a $10 thermometer is worth it. Clip it to the side of the pan so it doesn’t touch the bottom.
- 8×8-Inch Baking Pan: Line this with parchment paper or aluminum foil, leaving some overhang on two sides. This makes lifting the fudge out so much easier. I use a metal pan, but glass works too—just note that glass retains heat longer, so cooling times may vary.
- Wooden Spoon or Silicone Spatula: You need something sturdy for stirring. I prefer a wooden spoon because it doesn’t conduct heat, but a heat-resistant silicone spatula works perfectly too.
- Large Mixing Bowl: You’ll need this for combining the chocolate chips and marshmallow creme while the hot sugar mixture does its work.
- Measuring Cups and Spoons: Accurate measurements are key in candy-making. Use dry measuring cups for sugar and liquid measuring cups for the evaporated milk.
If you don’t have a candy thermometer, you can use the cold water test—drop a small amount of the hot mixture into a glass of cold water and see if it forms a soft ball. But honestly, I’ve found the thermometer to be much more reliable. They’re inexpensive and save you from the anxiety of guessing.
Preparation Method
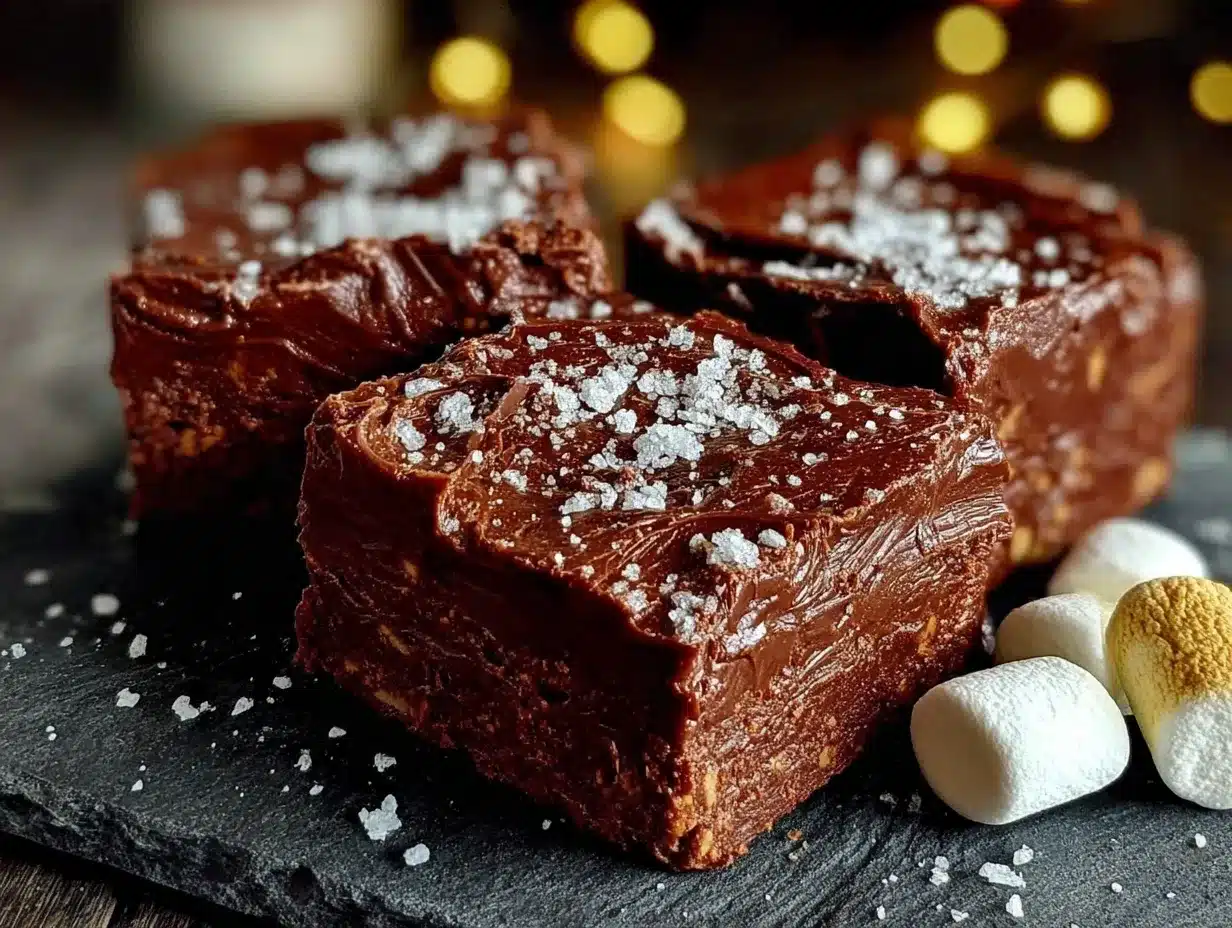
Let me walk you through this step by step. I’ve made this fudge so many times that I could do it in my sleep, but I still follow these exact steps every time. Trust the process, and you’ll get perfect fudge.
- Prepare your pan. Line an 8×8-inch baking pan with parchment paper or aluminum foil, leaving about 2 inches of overhang on two opposite sides. This creates handles that make lifting the fudge out super easy. Lightly grease the parchment with butter or non-stick spray. Set it aside.
- Combine the sugar, butter, and evaporated milk. In your medium heavy-bottomed saucepan, combine 3 cups (600g) granulated sugar, ¾ cup (170g) unsalted butter, and ⅔ cup (160ml) evaporated milk. Place the pan over medium heat and stir constantly with your wooden spoon or silicone spatula. Keep stirring until the butter is fully melted and the sugar has dissolved—you shouldn’t feel any grittiness when you rub a little of the mixture between your fingers.
- Bring to a boil. Once everything is combined and smooth, stop stirring. Yes, you read that right—stop stirring. Let the mixture come to a full rolling boil. This should take about 3-5 minutes. You’ll see big, lazy bubbles breaking the surface. Clip your candy thermometer to the side of the pan, making sure the tip is submerged in the liquid but not touching the bottom of the pan.
- Cook to the soft-ball stage. Let the mixture boil without stirring until it reaches exactly 234°F (112°C). This is the soft-ball stage. It will take about 5-7 minutes. Do not stir during this time—stirring can cause the sugar to crystallize, which gives you grainy fudge. Just let it bubble away. The mixture will look thick and syrupy. Keep a close eye on the temperature; it can climb quickly once it gets close.
- Remove from heat. As soon as the thermometer hits 234°F (112°C), remove the pan from the heat immediately. Don’t let it go even one degree higher, or your fudge will be too firm. Place the pan on a heat-safe surface.
- Add the chocolate and marshmallow creme. Working quickly, add the 12 ounces (340g) semi-sweet chocolate chips and the entire jar of marshmallow creme to the hot mixture. Do not stir yet. Let it sit for about 30 seconds to allow the heat to start melting the chocolate. This little rest makes a big difference.
- Stir until smooth. Now start stirring gently but continuously. The chocolate will melt into the hot sugar mixture, and the marshmallow creme will dissolve. Keep stirring until everything is completely smooth and uniform. This should take about 2-3 minutes. The mixture will look glossy and thick. Add the 1 teaspoon (5ml) vanilla extract and ¼ teaspoon (1.5g) salt, and stir until combined.
- Add walnuts if using. If you’re adding nuts, fold in the 1 cup (120g) chopped walnuts now. Stir just until evenly distributed. Don’t overmix at this stage.
- Pour into prepared pan. Scrape the fudge mixture into your lined baking pan. Use a spatula to spread it evenly into the corners. Don’t fuss with it too much—just get it level. The top will smooth out as it sets.
- Cool completely. Let the fudge cool at room temperature for at least 4 hours, or overnight. Do not put it in the refrigerator to speed things up—this can cause the sugar to crystallize and give you a grainy texture. I know it’s tempting, but patience pays off here. The fudge is ready when it’s firm to the touch and pulls away from the sides of the pan slightly.
- Cut and serve. Use the parchment handles to lift the fudge out of the pan. Place it on a cutting board. Use a sharp knife to cut it into 1-inch squares. For clean cuts, wipe the knife clean between cuts. I like to cut the edges off first because those are my secret snack.
Cooking Tips & Techniques
I’ve made this fudge at least twenty times, and I’ve learned a few things the hard way. Let me save you from my mistakes.
Don’t stir the boiling mixture. This is the number one mistake people make. Once the sugar, butter, and evaporated milk come to a boil, leave it alone. Stirring can cause sugar crystals to form on the sides of the pan, and those crystals can fall back into the mixture and make your fudge grainy. If you see sugar crystals forming on the sides of the pan, you can brush them down with a wet pastry brush—but honestly, I just leave it and it’s always fine.
Use a reliable candy thermometer. I ruined my first three batches of fudge because I was using a cheap thermometer that was off by 5 degrees. Test your thermometer by placing it in boiling water—it should read 212°F (100°C) at sea level. If it doesn’t, adjust your target temperature accordingly. For example, if it reads 210°F in boiling water, cook your fudge to 232°F instead of 234°F.
Work quickly at the end. Once you remove the pan from the heat, everything moves fast. Have your chocolate chips and marshmallow creme measured and ready to go. I once fumbled around looking for the vanilla extract while my mixture started cooling, and the fudge didn’t come out as smooth. Prep everything before you start cooking.
Humidity matters. Candy-making is sensitive to humidity. On a rainy or humid day, the sugar can absorb moisture from the air, which affects the final texture. If you can, make fudge on a dry day. If you can’t, don’t worry—it will still be delicious, just maybe slightly softer.
Let it cool naturally. I know it’s hard to wait, but don’t rush the cooling process. No refrigerator, no freezer, no putting the pan on a cold windowsill. Room temperature cooling allows the sugar molecules to settle into the right structure. I once put a batch in the fridge because I was in a hurry, and it came out with a weird, crumbly texture. Never again.
Variations & Adaptations
This recipe is wonderfully adaptable. Here are some variations I’ve tried and loved:
Chocolate Peanut Butter Fudge: Reduce the chocolate chips to 8 ounces (227g) and add ½ cup (130g) creamy peanut butter along with the marshmallow creme. Stir until smooth. The peanut butter adds a savory note that balances the sweetness beautifully. My kids go crazy for this version.
Mint Chocolate Fudge: Add ½ teaspoon peppermint extract along with the vanilla. Top the fudge with crushed candy canes or peppermint candies before it sets. This is my go-to for Christmas cookie platters. The red and white candies make it look so festive.
White Chocolate Fantasy Fudge: Substitute white chocolate chips for the semi-sweet chocolate chips. Add ½ cup (60g) dried cranberries and ½ cup (60g) chopped pistachios for a beautiful holiday fudge. The sweetness is more pronounced here, so I sometimes reduce the sugar to 2½ cups (500g).
Dietary Adaptations: For a dairy-free version, use vegan butter and dairy-free chocolate chips. The texture will be slightly different—a bit softer—but still delicious. For a nut-free version, simply omit the walnuts or substitute with toasted sunflower seeds or dried fruit. This fudge is naturally gluten-free, which makes it perfect for guests with celiac disease or gluten sensitivity.
Flavor Twists: Add 1 teaspoon of instant espresso powder along with the vanilla for a mocha version. The coffee doesn’t make it taste like coffee—it just deepens the chocolate flavor. You can also add a pinch of cinnamon or cayenne pepper for a subtle warmth. I tried a version with orange zest once, and it was surprisingly good—bright and festive.
Serving & Storage Suggestions
This fudge is best served at room temperature. Take it out of the fridge about 30 minutes before serving to let it soften slightly. The texture is at its peak when it’s just cool enough to hold its shape but soft enough to melt on your tongue.
For presentation, I like to arrange the fudge squares on a white platter or a wooden board. A dusting of powdered sugar or a few flaky sea salt crystals on top makes it look fancy with almost no effort. During the holidays, I layer it in a clear jar with ribbons for homemade gifts—everyone loves receiving a jar of homemade fudge.
Storage: Store the fudge in an airtight container at room temperature for up to 2 weeks. Layer the pieces between sheets of wax paper or parchment to prevent them from sticking together. Do not store it in the refrigerator—the cold temperature can cause the sugar to crystallize and the texture to become grainy. If your kitchen is very warm (above 75°F), you can refrigerate it, but let it come to room temperature before serving.
Freezing: This fudge freezes beautifully. Wrap the whole slab or individual pieces tightly in plastic wrap, then place them in a freezer-safe bag or container. Freeze for up to 3 months. To thaw, transfer the fudge to the refrigerator overnight, then let it come to room temperature before serving. I often make a double batch in early December and freeze one batch for Christmas week—it’s a lifesaver when things get hectic.
Flavor Development: Here’s something interesting—this fudge actually tastes better the next day. The flavors meld and deepen as it sits. So if you can resist eating it all on day one, you’ll be rewarded with even better fudge on day two. I’ve never been able to test day three because it’s always gone by then.
Nutritional Information & Benefits
Per 1-inch square (based on 64 pieces per batch):
- Calories: 98
- Fat: 5g
- Saturated Fat: 3g
- Carbohydrates: 14g
- Sugar: 12g
- Protein: 1g
- Sodium: 18mg
Let’s be honest—this is a treat, not a health food. But there are a few small silver linings. Dark chocolate contains antioxidants called flavonoids, which can support heart health. Walnuts are a good source of omega-3 fatty acids and protein. And making fudge from scratch means you control exactly what goes into it—no preservatives, artificial flavors, or mysterious ingredients.
This recipe contains dairy (butter, evaporated milk, chocolate chips) and may contain nuts (walnuts). It is gluten-free as written. If you have allergies, be sure to check your chocolate chip labels, as some brands process them on equipment shared with wheat products.
From a wellness perspective, I believe in balance. This fudge is part of my holiday tradition, and I enjoy it without guilt. A small piece after dinner or a square with a cup of coffee is a simple pleasure that makes life a little sweeter. And honestly, the joy of sharing homemade fudge with the people you love is a kind of nourishment that doesn’t show up on a nutrition label.
Conclusion
This homemade classic fantasy fudge has become a December tradition in my house, all because my accountant decided to share his grandmother’s recipe on a random Tuesday. It’s funny where good recipes come from sometimes—a sticky note, a worn index card, a conversation you almost didn’t have. I’ve made this fudge for holiday parties, teacher gifts, and quiet evenings when I just needed something sweet. It never disappoints.
I hope you’ll try this recipe and make it your own. Add your favorite nuts, experiment with different extracts, or keep it perfectly plain. The beauty of a classic recipe is that it’s a starting point, not a final destination. My accountant’s grandmother probably never imagined her fudge would end up in kitchens across the country, but that’s the magic of sharing food—it travels farther than you expect.
If you make this fudge, I’d love to hear about it. Drop a comment below and tell me how it turned out, or share your own variation. Did you add something unexpected? Did your kids help you stir? Did you give it as a gift? The best part of recipe sharing is the stories that come with it. Happy cooking, and here’s to finding recipes in the most unexpected places.
Frequently Asked Questions
Why did my fudge turn out grainy?
Grainy fudge is usually caused by sugar crystallization. This happens when you stir the mixture while it’s boiling, or when the temperature goes too high. To avoid this, don’t stir once the mixture comes to a boil, and remove it from heat as soon as it reaches 234°F (112°C). Also, make sure all your equipment is clean—any residue can cause crystals to form.
Can I use marshmallows instead of marshmallow creme?
I don’t recommend it. Marshmallow creme has a different consistency and dissolves more smoothly into the hot sugar mixture. Regular marshmallows contain more stabilizers and won’t give you the same creamy texture. Stick with the jarred creme for the best results.
How do I know when the fudge is done cooking without a thermometer?
You can use the cold water test. Drop a small spoonful of the hot mixture into a glass of cold water. If it forms a soft ball that flattens when you remove it from the water, it’s ready. But honestly, a candy thermometer is much more reliable and takes the guesswork out of the process.
Can I double this recipe?
Yes, but you’ll need a larger pot—at least a 5-quart capacity. The cooking time will be longer, and you’ll need to stir more carefully to ensure even heating. I’ve doubled it successfully, but I always keep a close eye on the temperature because it can climb faster than you expect.
How long does homemade fudge last?
Stored in an airtight container at room temperature, this fudge stays fresh for up to 2 weeks. It also freezes beautifully for up to 3 months. Just wrap it tightly in plastic wrap and place it in a freezer-safe bag. Thaw in the refrigerator overnight before serving.
Pin This Recipe!
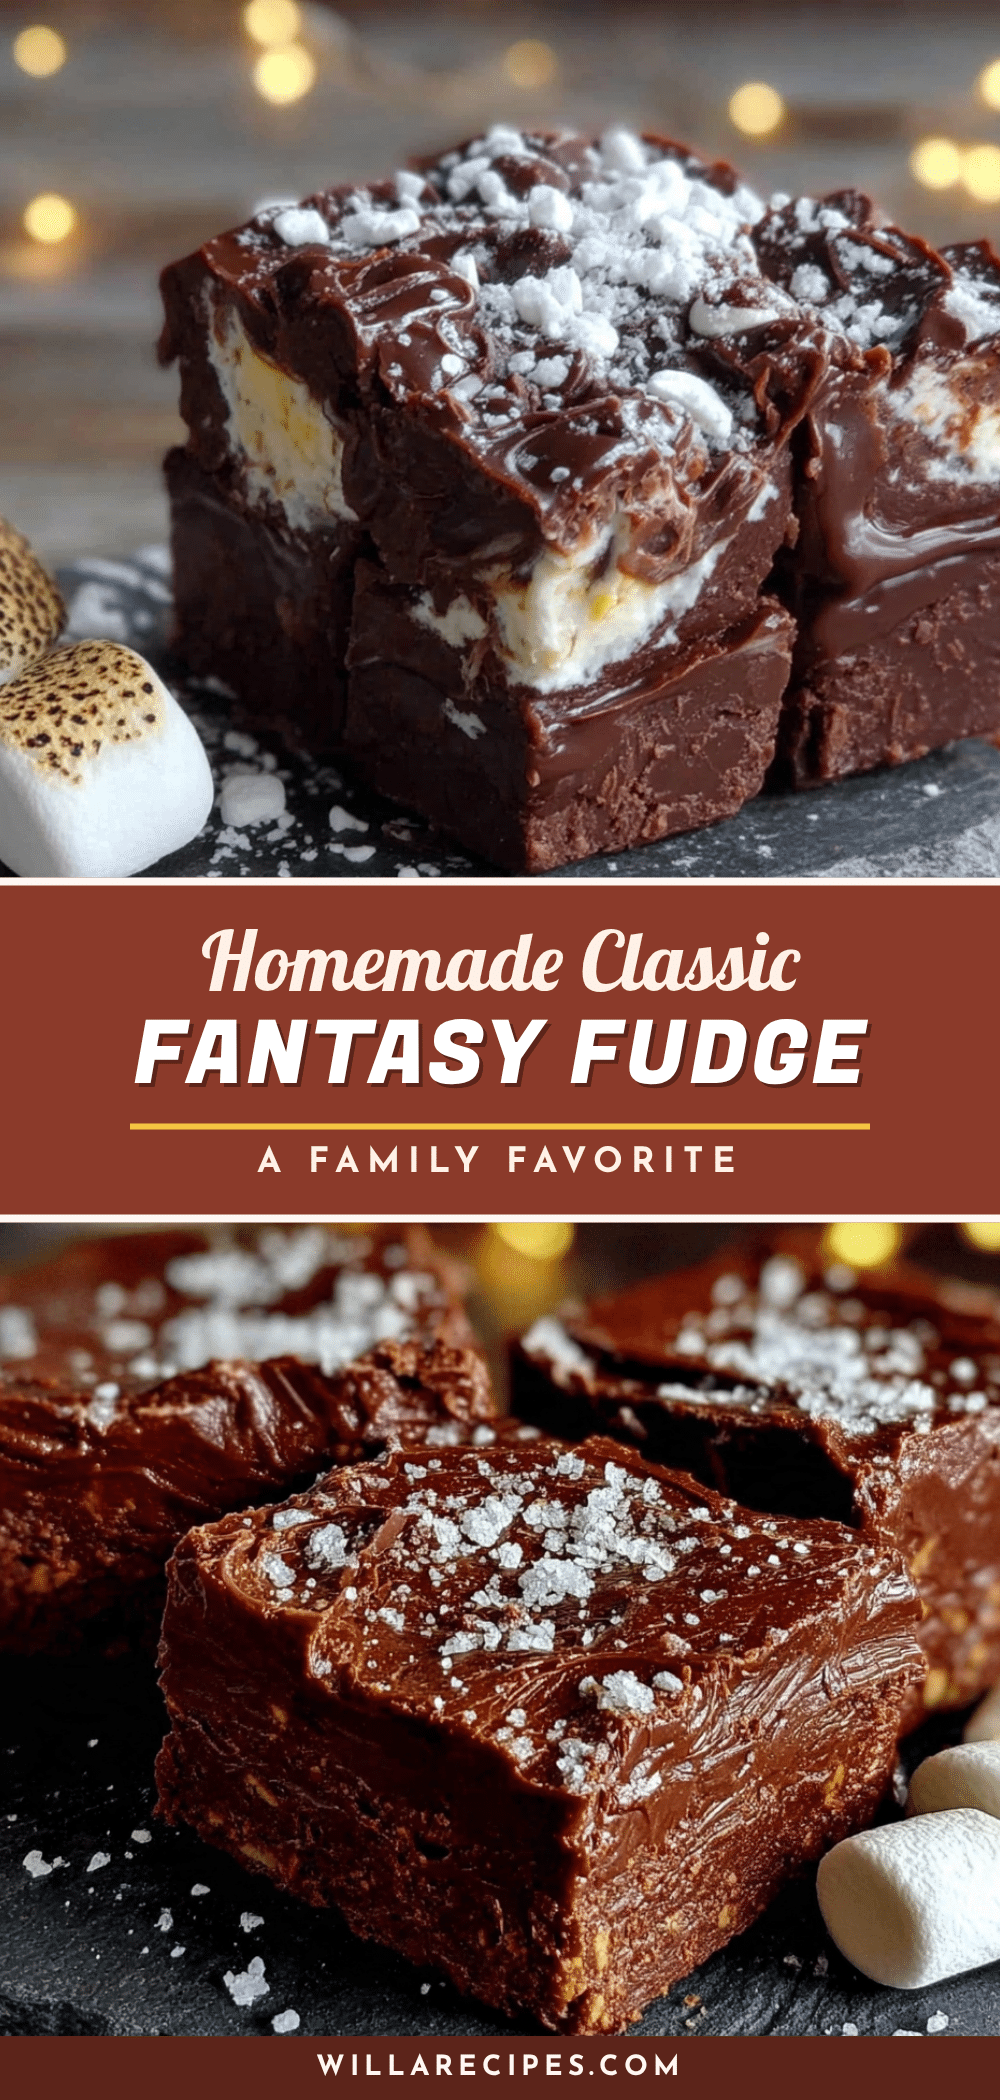
Homemade Classic Fantasy Fudge: An Easy Family Favorite

This homemade classic fantasy fudge is a creamy, melt-in-your-mouth treat that’s perfect for the holidays. Made with simple ingredients and a foolproof method, it’s a crowd-pleaser that travels well and keeps for weeks.
- Prep Time: 15 minutes
- Cook Time: 15 minutes
- Total Time: 4 hours 30 minutes (includes cooling)
- Yield: 64 pieces (1-inch squares) 1x
- Category: Dessert
- Cuisine: American
Ingredients
- 3 cups (600g) granulated sugar
- 3/4 cup (1 1/2 sticks / 170g) unsalted butter
- 2/3 cup (160ml) evaporated milk
- 12 ounces (340g) semi-sweet chocolate chips
- 1 jar (7 ounces / 198g) marshmallow creme
- 1 teaspoon (5ml) vanilla extract
- 1 cup (120g) chopped walnuts (optional)
- 1/4 teaspoon (1.5g) salt
Instructions
- Line an 8×8-inch baking pan with parchment paper or aluminum foil, leaving about 2 inches of overhang on two opposite sides. Lightly grease with butter or non-stick spray. Set aside.
- In a medium heavy-bottomed saucepan, combine 3 cups (600g) granulated sugar, 3/4 cup (170g) unsalted butter, and 2/3 cup (160ml) evaporated milk. Place over medium heat and stir constantly until butter is melted and sugar is dissolved.
- Stop stirring and let the mixture come to a full rolling boil. Clip a candy thermometer to the side of the pan, ensuring the tip is submerged but not touching the bottom.
- Let the mixture boil without stirring until it reaches exactly 234°F (112°C) (soft-ball stage), about 5-7 minutes. Do not stir.
- Remove the pan from heat immediately. Add 12 ounces (340g) semi-sweet chocolate chips and the entire jar of marshmallow creme. Let sit for 30 seconds, then stir gently until smooth and glossy.
- Stir in 1 teaspoon (5ml) vanilla extract and 1/4 teaspoon (1.5g) salt until combined. If using, fold in 1 cup (120g) chopped walnuts.
- Pour the fudge into the prepared pan and spread evenly. Let cool at room temperature for at least 4 hours or overnight. Do not refrigerate.
- Use the parchment handles to lift the fudge out of the pan. Cut into 1-inch squares with a sharp knife, wiping the knife clean between cuts.
Notes
Do not stir the mixture once it comes to a boil to prevent graininess. Use a reliable candy thermometer and test it in boiling water first. Work quickly after removing from heat. Make fudge on a dry day for best results. Let cool naturally at room temperature; do not refrigerate to speed up cooling.
Nutrition
- Serving Size: 1 piece (1-inch squa
- Calories: 98
- Sugar: 12
- Sodium: 18
- Fat: 5
- Saturated Fat: 3
- Carbohydrates: 14
- Protein: 1
Keywords: fantasy fudge, homemade fudge, classic fudge, holiday fudge, chocolate fudge, easy fudge recipe


