There used to be a tiny bakery tucked inside an old flower shop on Elm Street that made the most incredible iced spritz cookies. When they closed their doors three years ago, I honestly felt a little lost. I mean, those cookies were my go-to for every holiday party, every cookie swap, every “I need to bring something impressive” moment. They had this perfect snap when you bit into them, and the icing was never too thick or too thin—it was just right. After twelve tries—twelve, let me tell you, with some batches that looked more like abstract art than cookies—I finally got it. My kitchen was a mess of butter stains and powdered sugar clouds, but that first perfect bite made it all worth it.
This recipe brings back that bakery magic, but it’s made in your own kitchen. You know that feeling when you find a recipe that just works? The dough comes together like a dream, the icing sets with a beautiful shine, and the whole house smells like vanilla and butter. Honestly, I’ve brought these to four different gatherings this season alone, and every single time, someone asks for the recipe. Maybe you’ve been there, searching for that one cookie that steals the show without stealing all your time.
What makes these iced spritz cookies special is the texture. They’re not too soft, not too crunchy—they have that satisfying snap that makes you reach for another one. And the icing? It’s the star of the show. It dries to a smooth, glossy finish that looks like you spent hours decorating, when really, it takes minutes. I keep making these because they remind me that some things are worth recreating. That bakery may be gone, but these cookies live on, and now they’re part of my own little tradition.
Why You’ll Love This Recipe
These iced spritz cookies are the ultimate crowd-pleaser, and I say that with confidence after testing them on everyone from my picky nephew to my grandmother’s bridge club. Here’s why they work so well for hosting:
- Perfect for Parties: These cookies look like they came from a fancy bakery, but you can make a huge batch in under an hour. They’re ideal for holiday gatherings, cookie exchanges, or any occasion where you want to impress without stress.
- Simple Ingredients: No weird specialty items here. Butter, sugar, flour, eggs, vanilla—you probably have most of this in your pantry right now. The icing uses powdered sugar and milk, which are basic staples.
- Crowd-Pleaser Guaranteed: I’ve never met anyone who didn’t love these. The buttery flavor and sweet icing hit that nostalgic spot that makes everyone smile. Kids love them, adults love them, and they disappear fast.
- Make-Ahead Friendly: You can bake the cookies days in advance and ice them the day of your party. This is a lifesaver when you’re juggling multiple dishes for a gathering.
- Endless Customization: Change the icing color, add sprinkles, or drizzle with chocolate—these cookies are a blank canvas for your creativity. Your guests will think you spent hours on them.
What sets this recipe apart is the technique. I spent weeks perfecting the ratio of butter to flour so the cookies hold their shape in the cookie press but still have that delicate, melt-in-your-mouth texture. The icing recipe is my secret weapon—it sets firm enough to stack cookies for storage but stays soft and creamy when you bite into it. This isn’t just another spritz cookie recipe; it’s the one I turn to every single time I need to feed a crowd.
There’s something special about pulling a tray of these out of the oven. The smell alone gets people wandering into the kitchen. And when you add that glossy icing on top? Pure magic. These cookies make you look like a baking pro, even if you’re just starting out. They’re comfort food at its finest—buttery, sweet, and absolutely irresistible.
What Ingredients You Will Need
This recipe uses simple, wholesome ingredients to create that classic spritz cookie flavor and texture. Most of these are pantry staples, which makes this recipe perfect for last-minute baking sessions. Here’s what you’ll need:
For the Cookies
- 1 cup (226g) unsalted butter, softened – I prefer using Land O’Lakes or Kerrygold for the richest flavor. Make sure it’s truly softened to room temperature, not melted. This is crucial for getting the right dough consistency.
- ¾ cup (150g) granulated sugar – Regular white sugar works perfectly. Don’t substitute with brown sugar, as it changes the texture and the cookies won’t hold their shape as well.
- 1 large egg, room temperature – Cold eggs can make the dough seize up. Let it sit on the counter for 30 minutes before baking.
- 1 teaspoon vanilla extract – Pure vanilla extract makes a difference here. I’ve tried imitation vanilla, and the flavor just isn’t as warm and rich.
- ½ teaspoon almond extract – This is my little secret. It adds a subtle nutty flavor that makes these cookies taste extra special. You can skip it if you prefer, but I highly recommend trying it.
- 2 ¼ cups (280g) all-purpose flour – Spoon and level your flour for the most accurate measurement. Scooping directly from the bag packs in too much flour and makes the dough dry.
- ½ teaspoon salt – Fine sea salt works best. It balances the sweetness and enhances the buttery flavor.
For the Icing

- 2 cups (240g) powdered sugar – Sift it if it’s lumpy. This ensures a smooth, glossy icing without any bumps.
- 3-4 tablespoons whole milk – Whole milk gives the richest icing, but 2% works too. Add it gradually until you reach your desired consistency.
- 1 teaspoon vanilla extract – Again, pure vanilla is best. You can also use clear vanilla extract if you want a brighter white icing.
- Food coloring (optional) – Gel food coloring works best because it doesn’t thin out the icing. I love using red and green for Christmas or pastel colors for spring gatherings.
- Sprinkles or decorations (optional) – Add these while the icing is still wet so they stick. My go-to is rainbow sprinkles for a festive look.
Equipment Needed
You don’t need a ton of fancy equipment for these cookies, but a few specific tools make the process much easier. Here’s what I recommend:
- Cookie press – This is the key tool for spritz cookies. I use the Wilton Cookie Press, which is affordable and comes with multiple discs for different shapes. If you don’t have one, you can shape the dough into small balls and flatten them with a fork, but the classic spritz shape comes from the press.
- Baking sheets – Heavy-duty, light-colored baking sheets work best. Dark sheets can cause the bottoms to brown too quickly. I’ve learned this the hard way.
- Parchment paper or silicone baking mats – These prevent sticking and make cleanup a breeze. Silicone mats are my favorite because they distribute heat evenly.
- Stand mixer or hand mixer – A stand mixer makes creaming the butter and sugar effortless, but a hand mixer works just fine. You’ll need to cream for a full 3-4 minutes, so a mixer is essential.
- Piping bags or small offset spatula – For applying the icing. Piping bags give you more control for precise designs, but a small offset spatula works great for a more rustic look.
- Cooling racks – These allow air to circulate around the cookies so they cool evenly. Without them, the bottoms can get soggy.
If you’re new to using a cookie press, don’t worry. It takes a few tries to get the hang of it, but once you do, you’ll be cranking out perfect cookies in no time. I recommend practicing on a piece of parchment paper before you start baking.
Preparation Method
Follow these steps carefully, and you’ll have beautiful iced spritz cookies that look like they came from a bakery. Take your time with each step—rushing leads to mistakes.
- Preheat your oven to 375°F (190°C). Line your baking sheets with parchment paper or silicone mats. This temperature is important—too hot and the cookies spread too much, too cool and they won’t set properly.
- Cream the butter and sugar. In a large mixing bowl, beat the softened butter and granulated sugar together on medium speed for 3-4 minutes until light and fluffy. Scrape down the sides of the bowl halfway through. The mixture should look pale and airy. This step is crucial for getting that tender texture.
- Add the wet ingredients. Beat in the egg, vanilla extract, and almond extract until fully combined. The mixture might look slightly curdled at this point—that’s normal. Don’t worry.
- Mix the dry ingredients. In a separate bowl, whisk together the all-purpose flour and salt. Gradually add this to the butter mixture on low speed, mixing just until the dough comes together. Overmixing at this stage can make the cookies tough. Stop as soon as you don’t see any more streaks of flour.
- Prepare the cookie press. Fit your cookie press with the desired disc. I love using the star shape for a classic spritz look. Fill the press with the dough, following your press’s instructions. Some presses require you to pack the dough tightly to prevent air pockets.
- Press the cookies onto the baking sheets. Hold the press perpendicular to the baking sheet and press firmly. Lift straight up without twisting. Space the cookies about 1 inch apart—they don’t spread much, but they need a little room. If the dough sticks to the press, chill the dough for 10 minutes and try again.
- Bake for 8-10 minutes. The cookies should be lightly golden on the edges but still pale on top. They will look slightly underdone, but they’ll continue to set as they cool. Overbaking makes them dry and crumbly.
- Cool completely. Transfer the cookies to a wire cooling rack and let them cool completely before icing. This usually takes about 15-20 minutes. Icing warm cookies will cause the icing to melt and slide off.
- Make the icing. In a small bowl, whisk together the powdered sugar, 3 tablespoons of milk, and vanilla extract until smooth. Add more milk, 1 teaspoon at a time, until the icing is thick but pourable. It should coat the back of a spoon and slowly drip off.
- Ice the cookies. Dip the top of each cookie into the icing, letting the excess drip off. Place them back on the cooling rack. If using sprinkles, add them immediately while the icing is still wet. Let the icing set for at least 30 minutes before stacking or storing.
Cooking Tips & Techniques
After making these cookies more times than I can count, I’ve picked up a few tricks that make the process smoother and the results more consistent. Here are my best tips:
Get the butter right. This is the most important step. If your butter is too cold, the dough won’t press smoothly. If it’s too warm, the cookies will spread and lose their shape. The perfect butter should be soft enough that you can press your finger into it and leave an indent, but not so soft that it’s greasy. Leave it on the counter for about an hour before you start baking.
Chill the dough if needed. Sometimes the dough gets too warm from handling, especially if your kitchen is warm. If the dough starts sticking to the press or the cookies lose their shape, pop the filled press in the fridge for 10-15 minutes. This firms up the butter and makes the dough easier to work with.
Don’t overbake. I’ve ruined plenty of batches by leaving them in the oven too long. The cookies should look set but not browned. They’ll firm up as they cool, so resist the urge to bake them until they look “done.” Trust the 8-10 minute window.
Practice your pressing technique. The first few cookies might look wonky, and that’s okay. You’ll get the hang of it after a few tries. Press firmly and lift straight up—no twisting. If the dough sticks, wipe the press clean and try again with a slightly chilled dough.
Make the icing the right consistency. If the icing is too thick, it won’t spread smoothly. If it’s too thin, it will run off the cookies. Aim for a consistency similar to honey—thick but pourable. Add milk a teaspoon at a time until you get there.
Variations & Adaptations
One of the best things about these iced spritz cookies is how easily you can customize them. Here are some of my favorite variations:
Chocolate Spritz Cookies: Replace ¼ cup (30g) of the flour with unsweetened cocoa powder. Sift the cocoa powder with the flour to avoid lumps. The chocolate version pairs beautifully with a vanilla or peppermint icing.
Citrus Iced Spritz Cookies: Add 1 tablespoon of lemon or orange zest to the dough along with the wet ingredients. For the icing, replace the vanilla extract with lemon or orange extract. These are perfect for spring gatherings or bridal showers.
Gluten-Free Version: Substitute the all-purpose flour with a 1:1 gluten-free baking flour blend that contains xanthan gum. I’ve had great results with Bob’s Red Mill 1:1 Baking Flour. The texture is slightly more delicate, so handle the dough gently.
Vegan Spritz Cookies: Use vegan butter sticks (not spreadable margarine) and replace the egg with ¼ cup of applesauce or a flax egg (1 tablespoon ground flaxseed mixed with 3 tablespoons water). The texture won’t be exactly the same, but they’re still delicious.
Peppermint Holiday Version: Add ½ teaspoon of peppermint extract to the dough along with the vanilla. For the icing, use peppermint extract instead of vanilla and top with crushed candy canes. These are always a hit at Christmas parties.
I personally love the citrus variation for summer gatherings. The bright, fresh flavor cuts through the richness of the butter, and the colorful icing makes them look so cheerful on a dessert table.
Serving & Storage Suggestions
These cookies are best served at room temperature, which lets the butter flavor shine and the icing stay perfectly set. Arrange them on a decorative platter or tiered stand for a beautiful presentation at your next gathering.
What to Serve Alongside: These cookies pair wonderfully with a hot cup of coffee, tea, or a glass of cold milk. For a dessert spread, serve them alongside fresh fruit, chocolate truffles, or a cheese board. They’re also perfect for cookie exchanges or as part of a holiday gift basket.
Storage Instructions: Store the iced cookies in an airtight container at room temperature for up to 1 week. Layer them between sheets of parchment paper to prevent the icing from sticking together. Do not refrigerate them, as the moisture can make the cookies soft and the icing sticky.
Freezing Instructions: You can freeze the un-iced cookies for up to 3 months. Place them in a single layer in a freezer-safe container with parchment paper between layers. When you’re ready to serve, thaw them at room temperature, then ice and decorate. The icing itself doesn’t freeze well, so always add it after thawing.
Make-Ahead Tip: Bake the cookies up to 3 days in advance and store them in an airtight container. Ice them the day of your event for the freshest look and taste. The icing stays glossy and beautiful for about 24 hours, so timing matters if you want that perfect presentation.
The flavors actually deepen slightly after a day or two, which is why I love making these ahead. They somehow taste even better on day two, with the butter and vanilla flavors melding together beautifully.
Nutritional Information & Benefits
While these are definitely a treat, here’s the approximate nutritional breakdown per cookie (based on a batch of 48 cookies):
- Calories: 85-100
- Total Fat: 5g
- Saturated Fat: 3g
- Carbohydrates: 11g
- Sugar: 7g
- Protein: 1g
These values are estimates and can vary based on the specific ingredients you use. The butter provides a small amount of vitamin A, and the eggs add a bit of protein. Of course, these are meant to be enjoyed in moderation as part of a balanced diet.
Dietary Considerations: This recipe contains dairy, eggs, and gluten. For a dairy-free version, use vegan butter. For gluten-free, use a 1:1 gluten-free flour blend. The almond extract is optional for those with nut allergies—simply omit it and use extra vanilla extract instead.
I believe in enjoying treats without guilt. These cookies are made with real ingredients, and there’s something wholesome about that. They’re not processed or full of preservatives—just good, honest butter and sugar. Sometimes that’s exactly what you need.
Conclusion
These iced spritz cookies have become my signature recipe for gatherings, and for good reason. They’re beautiful, delicious, and surprisingly easy to make once you get the hang of the cookie press. Whether you’re hosting a holiday party, attending a cookie swap, or just want to treat your family to something special, these cookies deliver every time.
I love that this recipe lets me be creative with the icing colors and decorations, but it’s also reliable enough that I know exactly what I’m getting. The buttery snap of the cookie paired with the sweet, glossy icing is a combination that never gets old. It’s the kind of cookie that makes people close their eyes after the first bite and say, “Wow.”
Don’t be afraid to make these your own. Change up the shapes, experiment with different extracts, or go wild with the sprinkles. That’s the beauty of baking—you get to put your own spin on things. I’d love to hear how yours turn out! Drop a comment below and let me know what variations you tried, or share a photo of your beautiful cookies. Happy baking, friends!
Frequently Asked Questions
Can I make these cookies without a cookie press?
Yes, you can! If you don’t have a cookie press, roll the dough into small balls (about 1 inch) and place them on the baking sheet. Use a fork dipped in flour to flatten them slightly in a crisscross pattern. They won’t have the classic spritz shape, but they’ll still taste delicious.
Why did my cookies spread too much?
This usually happens when the butter is too soft or the dough is too warm. Make sure your butter is softened but not melted, and chill the dough for 10-15 minutes if your kitchen is warm. Also, check that your oven is at the correct temperature—an oven that’s too cool can cause spreading.
How do I get the icing to set firmly?
The key is getting the right consistency. The icing should be thick but pourable—like honey. If it’s too thin, add more powdered sugar. If it’s too thick, add more milk. Let the iced cookies sit at room temperature for at least 30 minutes to allow the icing to set completely before stacking or storing.
Can I freeze the baked cookies?
Absolutely! Freeze the un-iced cookies in an airtight container for up to 3 months. Thaw them at room temperature, then ice and decorate. The icing doesn’t freeze well, so always add it after thawing. This is a great way to get ahead on your holiday baking.
What’s the best way to store these cookies for a party?
Store them in an airtight container at room temperature with parchment paper between layers to prevent sticking. They’ll stay fresh for up to a week. For the best presentation, ice them the day of your party. If you’re bringing them to a gathering, arrange them on a platter and cover loosely with plastic wrap.
Pin This Recipe!
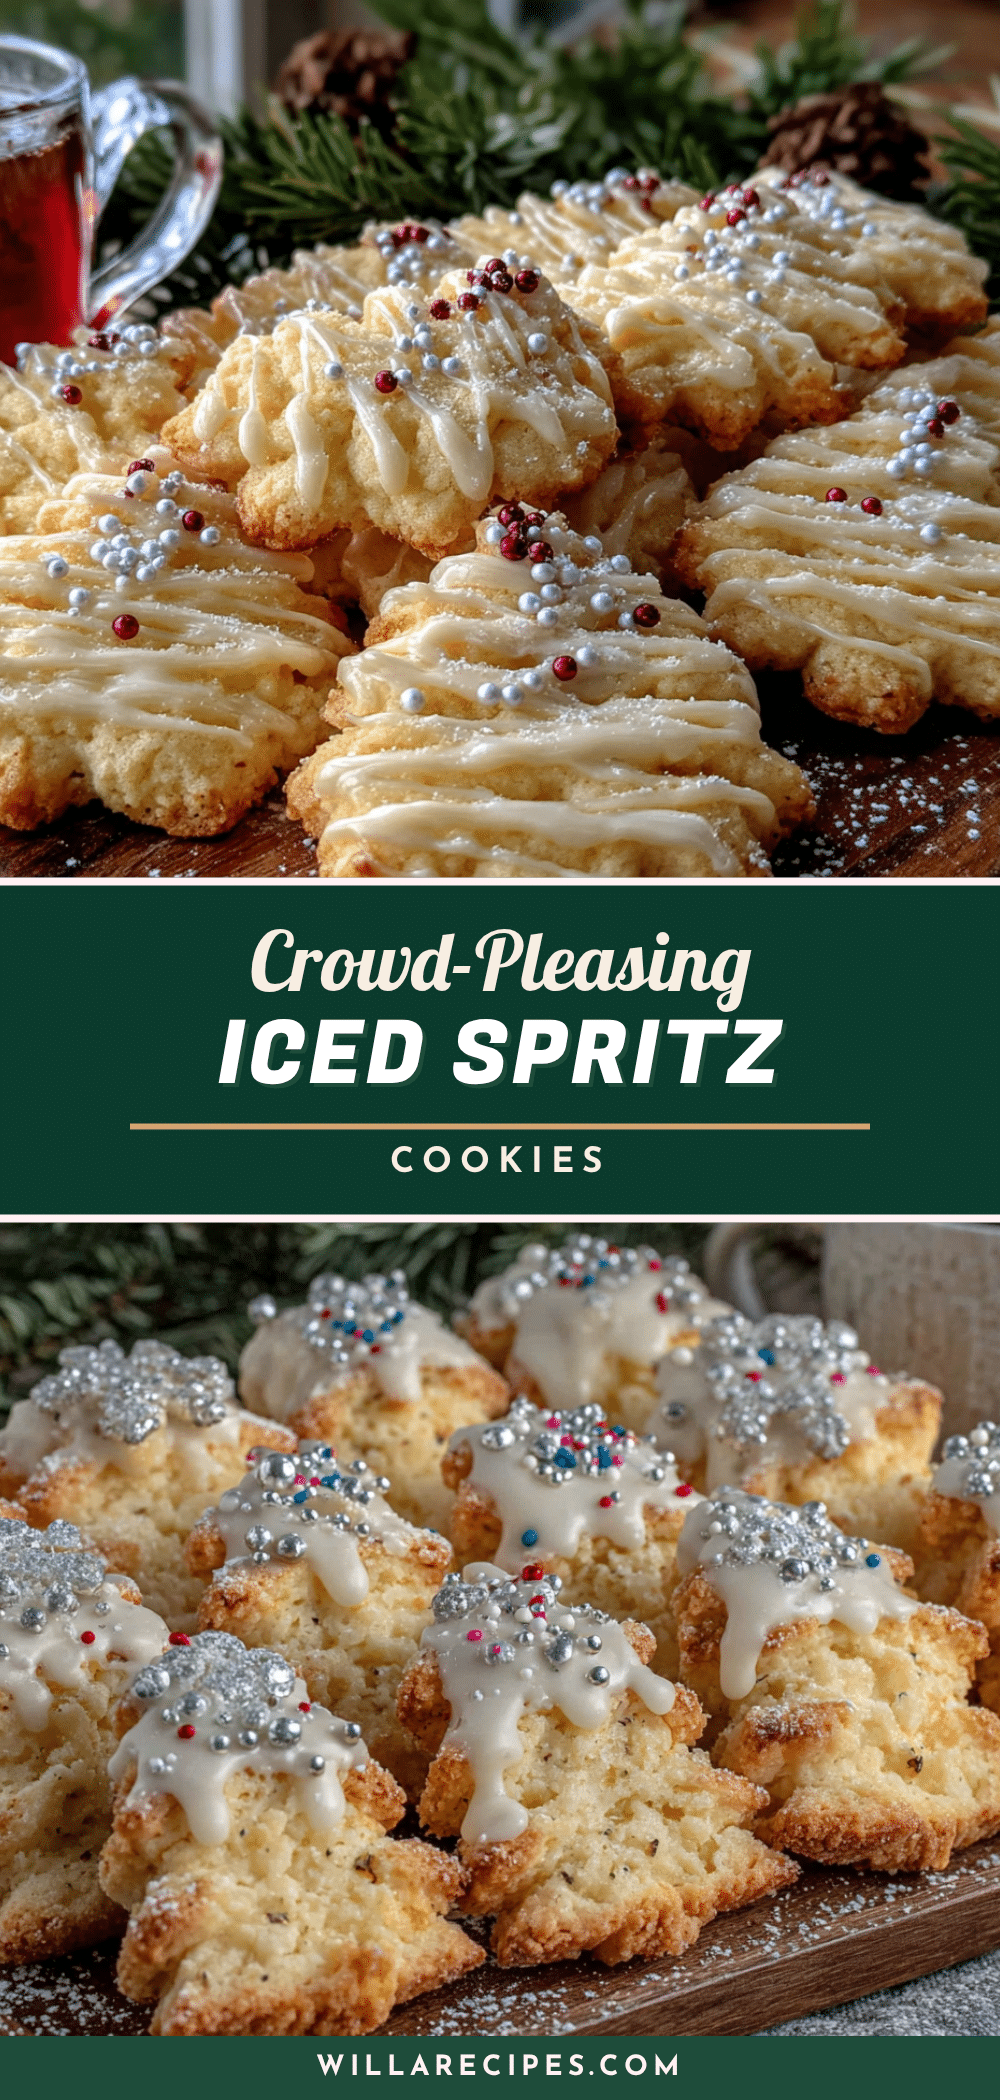
Crowd-Pleasing Iced Spritz Cookies: Easy Holiday Recipe

These iced spritz cookies have the perfect snap and a glossy, smooth icing that looks bakery-made. Made with simple ingredients, they are ideal for holiday gatherings, cookie swaps, or any occasion where you want to impress without stress.
- Prep Time: 20 minutes
- Cook Time: 10 minutes
- Total Time: 1 hour
- Yield: 48 cookies 1x
- Category: Dessert
- Cuisine: American
Ingredients
- 1 cup (226g) unsalted butter, softened
- ¾ cup (150g) granulated sugar
- 1 large egg, room temperature
- 1 teaspoon vanilla extract
- ½ teaspoon almond extract
- 2 ¼ cups (280g) all-purpose flour
- ½ teaspoon salt
- 2 cups (240g) powdered sugar
- 3–4 tablespoons whole milk
- 1 teaspoon vanilla extract
- Food coloring (optional)
- Sprinkles or decorations (optional)
Instructions
- Preheat your oven to 375°F (190°C). Line your baking sheets with parchment paper or silicone mats.
- Cream the butter and sugar. In a large mixing bowl, beat the softened butter and granulated sugar together on medium speed for 3-4 minutes until light and fluffy. Scrape down the sides of the bowl halfway through.
- Add the wet ingredients. Beat in the egg, vanilla extract, and almond extract until fully combined.
- Mix the dry ingredients. In a separate bowl, whisk together the all-purpose flour and salt. Gradually add this to the butter mixture on low speed, mixing just until the dough comes together.
- Prepare the cookie press. Fit your cookie press with the desired disc. Fill the press with the dough.
- Press the cookies onto the baking sheets. Hold the press perpendicular to the baking sheet and press firmly. Lift straight up without twisting. Space the cookies about 1 inch apart.
- Bake for 8-10 minutes. The cookies should be lightly golden on the edges but still pale on top.
- Cool completely. Transfer the cookies to a wire cooling rack and let them cool completely before icing.
- Make the icing. In a small bowl, whisk together the powdered sugar, 3 tablespoons of milk, and vanilla extract until smooth. Add more milk, 1 teaspoon at a time, until the icing is thick but pourable.
- Ice the cookies. Dip the top of each cookie into the icing, letting the excess drip off. Place them back on the cooling rack. If using sprinkles, add them immediately while the icing is still wet. Let the icing set for at least 30 minutes before stacking or storing.
Notes
Get the butter right: it should be soft enough to leave an indent when pressed but not greasy. Chill the dough if it gets too warm. Don’t overbake; cookies should look set but not browned. Practice your pressing technique on parchment paper first. Make the icing the consistency of honey.
Nutrition
- Serving Size: 1 cookie
- Calories: 90
- Sugar: 7
- Sodium: 30
- Fat: 5
- Saturated Fat: 3
- Carbohydrates: 11
- Protein: 1
Keywords: iced spritz cookies, holiday cookies, spritz cookies, easy cookie recipe, butter cookies, iced cookies, cookie press cookies


