The snow had been falling for about four hours when I realized my freezer was completely empty of anything resembling dessert. My neighbor Delores saw me staring out the window, that particular look of defeat that comes when you want something sweet but can’t muster the energy for a real baking project. She knocked on my door holding a clean mixing bowl and said, “You’re overthinking it. The dessert is falling from the sky.”
I laughed, honestly, because it seemed too simple to be true. But Delores grew up in a house where nothing went to waste and every weather event came with its own recipe. She showed me how to scoop the freshest snow from our back deck, avoiding the parts that had touched the ground, and within ten minutes we were sitting on my couch with bowls of something that tasted like childhood. I mean, it really did. That first spoonful brought me right back to being eight years old, snow days, and the pure magic of eating something made from the weather itself.
You know that feeling when a recipe is so ridiculously easy that you almost feel guilty calling it a recipe? This cozy 3-ingredient snow ice cream is exactly that. It’s not fancy, it’s not complicated, and honestly, that’s the whole point. Sometimes the best comfort food comes from looking out the window and seeing an opportunity. I’ve been making this every winter since that afternoon with Delores, and it never fails to turn a gray, snowy day into something special. Let me tell you how to make it yourself, because everyone deserves a little bit of snow magic.
Why You’ll Love This Recipe
This isn’t just another snow day activity. This cozy 3-ingredient snow ice cream has earned a permanent spot in my winter rotation for reasons that go beyond its simplicity. I’ve tested it with different types of snow, different sweeteners, and different mix-ins, and I can tell you with confidence that this version is the one that delivers every single time.
- Quick & Easy: From snow scoop to spoon in under five minutes. No cooking, no waiting, no complicated steps.
- Simple Ingredients: You literally need three things, and you probably already have two of them in your kitchen right now.
- Perfect for Snow Days: This is the ultimate cold-weather activity for kids, adults, and anyone who needs a little winter joy.
- Crowd-Pleaser: Every single person I’ve made this for has that same reaction—the surprised laugh, the nostalgic smile, the immediate request for seconds.
- Unbelievably Delicious: The texture is light and fluffy, the sweetness is perfectly balanced, and it tastes exactly like the snow ice cream you remember from childhood. Only better, because now you know the trick to getting it just right.
What makes this recipe different from all the other snow ice cream recipes out there? It’s the ratio. I spent an entire winter experimenting—too much milk and you get slush, too much sugar and it’s gritty, wrong kind of snow and it’s watery. This version uses a specific technique that gives you that creamy, scoopable texture that actually feels like real ice cream. It’s comfort food at its most honest: simple, nostalgic, and deeply satisfying. Perfect for those evenings when you need something warm in your soul, even if the bowl itself is cold.
What Ingredients You Will Need
This recipe truly lives up to its name. Only three ingredients stand between you and a bowl of winter bliss. Each one plays a specific role in creating that perfect texture and flavor, so let’s talk about what to look for and why it matters.
- Fresh, Clean Snow (about 8 cups, lightly packed): This is the star of the show, and quality matters. You want snow that has fallen recently—ideally within the last few hours. Scoop from the top layer, avoiding any snow that has touched the ground, been plowed, or collected near roads or driveways. Look for light, fluffy snow rather than the heavy, wet stuff. If your snow is too compacted or icy, the texture won’t be as creamy. I personally prefer collecting from our back deck railing or a clean picnic table. (Pro tip: if you have a stainless steel bowl, chill it outside for ten minutes before collecting—it helps keep the snow from melting too fast.)
- Sweetened Condensed Milk (1/2 cup, or about 120 ml): This is the secret weapon. Sweetened condensed milk gives you sweetness, creaminess, and that rich, velvety texture all at once. Regular milk won’t work the same way—it’s too thin and will make your ice cream watery. I recommend using a brand like Eagle Brand or Borden, but any sweetened condensed milk will do. If you’re dairy-free, there are excellent coconut-based sweetened condensed milk options available now. (I’ve tested the Nature’s Charm brand and it works beautifully.)
- Pure Vanilla Extract (1 teaspoon): That little splash makes all the difference. It rounds out the sweetness and adds that familiar ice cream flavor we all love. I use pure vanilla extract rather than imitation vanilla because the flavor is cleaner and more pronounced. But honestly, if all you have is imitation vanilla, it will still be delicious. Don’t let perfectionism stop you from making this.
That’s it. Three ingredients. No eggs, no cream, no sugar to dissolve, no complicated steps. The beauty of this recipe is that it lets the snow be the star, and the other two ingredients simply enhance what’s already there. If you want to add a pinch of salt to balance the sweetness, go for it—I sometimes do, especially if I’m using a higher-sugar condensed milk. But the recipe works perfectly without it.
Equipment Needed
You don’t need much for this recipe, which is honestly part of its charm. But having the right tools makes the process smoother and gives you better results.
- Large Mixing Bowl: A stainless steel or glass bowl works best. I prefer stainless steel because it stays cold longer. If you can, pop it in the freezer or outside for 10-15 minutes before you start.
- Measuring Cups and Spoons: You’ll need a 1/2 cup measure for the condensed milk and a teaspoon for the vanilla. Nothing fancy.
- Rubber Spatula or Wooden Spoon: A rubber spatula is ideal because it lets you fold the ingredients together gently without compressing the snow. A wooden spoon works too, just be gentle.
- Serving Bowls and Spoons: Obviously! But here’s a tip: chill your serving bowls in the freezer or snow for a few minutes. It keeps the ice cream from melting too fast.
- Optional but Helpful: A cookie sheet or tray to hold your bowls while you work, and a clean dish towel to wipe up drips. Snow ice cream is a little messy, and that’s part of the fun.
I’ve made this with nothing but a cereal bowl and a fork before, and it still worked. But having the right bowl and a good spatula makes the texture noticeably better. Worth the extra two minutes of prep.
Preparation Method

Making this cozy 3-ingredient snow ice cream is almost absurdly simple, but there are a few tricks that separate good snow ice cream from great snow ice cream. Follow these steps, and you’ll get that perfect scoopable texture every time.
- Go collect your snow. Head outside with your chilled mixing bowl. Look for the freshest, fluffiest snow you can find—the kind that falls in big, light flakes. Gently scoop the top layer, avoiding any snow that’s discolored, icy, or has touched the ground. Fill your bowl with about 8 cups of lightly packed snow. Don’t press it down; you want it light and airy. Work quickly, especially if it’s not super cold outside, because you don’t want the snow to start melting on the way in.
- Mix your liquid ingredients. In a small bowl or measuring cup, whisk together the 1/2 cup of sweetened condensed milk and 1 teaspoon of vanilla extract. Make sure they’re well combined. The condensed milk is thick, so take a moment to really stir it until the vanilla is evenly distributed. (I learned this the hard way—the first time I made this, I just poured the condensed milk over the snow and ended up with vanilla blobs. Still tasty, but not ideal.)
- Combine gently. Pour the condensed milk mixture over the snow in a thin, steady stream. Here’s the important part: do NOT stir vigorously. Use your rubber spatula to gently fold the mixture into the snow. Think of it like folding egg whites into a batter—you want to incorporate the liquid without deflating the snow. Cut through the snow, lift from the bottom, and turn. Repeat until the mixture looks uniform. You should see a creamy, pale white texture starting to form.
- Check the consistency. At this point, your snow ice cream should look like soft-serve ice cream. If it’s too dry and crumbly, add another tablespoon of condensed milk. If it’s too soupy, you either used too much liquid or your snow was too wet. Don’t panic—you can fix soupy snow ice cream by adding a little more fresh snow and folding gently. I’ve done this more times than I care to admit, and it works every time.
- Serve immediately. This is not a recipe that sits around. Snow ice cream is best enjoyed the moment it’s made. Scoop it into your chilled serving bowls and eat right away. The texture is light, fluffy, and incredibly satisfying. If you try to save it for later, it will melt into a puddle of sweet milk. Trust me, I’ve tried. Just make what you’ll eat and enjoy the fleeting magic of it.
One more thing: if you want to get fancy, you can add mix-ins at the very end. A handful of mini chocolate chips, a sprinkle of sprinkles, or a drizzle of chocolate sauce all work beautifully. But honestly, the plain version is so good that I often skip the extras.
Cooking Tips & Techniques
I’ve made this cozy 3-ingredient snow ice cream at least two dozen times over the past few winters, and I’ve learned a few things the hard way. Let me save you from my mistakes.
The biggest mistake is using old or dirty snow. Snow that’s been sitting for more than a day starts to compact and lose its fluffy texture. It also picks up debris, pollen, and who knows what else. Always use fresh snow from the current storm. If the snow has been on the ground for more than 24 hours, wait for the next storm. It’s worth it.
Temperature matters more than you think. If the temperature is hovering around freezing (32°F or 0°C), your snow will be wet and heavy, and your ice cream will turn out more like slush. The ideal snow for this recipe falls when it’s in the 20s Fahrenheit (around -5°C or colder). The snow is lighter, fluffier, and holds its structure better when mixed with the liquid. If you’re stuck with wet snow, use a little less condensed milk to compensate.
Don’t overmix. I cannot stress this enough. The more you stir, the more the snow melts. You want to fold the ingredients together in as few strokes as possible. Stop as soon as everything looks combined. A few streaks of white are fine—they’ll disappear as you eat.
Work in batches if you’re making a lot. This recipe doesn’t scale up perfectly. If you try to make a double batch in one bowl, the snow at the bottom will melt before you finish mixing. It’s better to make two separate batches. Your patience will be rewarded with better texture.
Get the kids involved. This is one of those rare recipes where children can do almost everything themselves. Let them scoop the snow, pour the condensed milk, and do the folding. The mess is part of the memory. I still remember the first time my niece made this—she got more condensed milk on the counter than in the bowl, but the look on her face when she took that first bite was priceless.
Variations & Adaptations
Once you’ve mastered the basic cozy 3-ingredient snow ice cream, the possibilities are endless. Here are some of my favorite variations, all tested and approved.
- Chocolate Snow Ice Cream: Add 2 tablespoons of unsweetened cocoa powder to the condensed milk mixture before combining. Whisk until smooth, then proceed as usual. The cocoa adds a rich, fudgy flavor that pairs beautifully with the lightness of the snow. (I like to add a handful of mini chocolate chips at the end for extra texture.)
- Dairy-Free Version: Use coconut-based sweetened condensed milk and a dairy-free vanilla extract. The coconut flavor is subtle and actually works really well with the snow. I’ve served this to dairy-free friends and they couldn’t stop raving about it. Just make sure your coconut condensed milk is at room temperature before mixing, as it can be thicker than the dairy version.
- Fruity Snow Ice Cream: Swirl in 2-3 tablespoons of fruit jam or preserves at the very end, just before serving. Strawberry, raspberry, or blueberry jam all work beautifully. Don’t stir it in completely—leave a few ribbons of jam for that marbled effect. It looks gorgeous and tastes like a snow cone, only creamier.
- Peppermint Snow Ice Cream: Add 1/4 teaspoon of peppermint extract along with the vanilla. Crush a few candy canes and sprinkle them on top. This is my go-to variation for holiday snow days. It feels festive and special without any extra effort.
- Maple Snow Ice Cream: Replace the vanilla extract with 1/2 teaspoon of maple extract, or add 1 tablespoon of pure maple syrup to the condensed milk mixture. The maple flavor is warm and cozy, perfect for a quiet winter evening. I like to top this one with a sprinkle of cinnamon.
My personal favorite? The chocolate version with a pinch of sea salt on top. Something about the salty-sweet combination against the cold, fluffy snow just hits differently. Try it and thank me later.
Serving & Storage Suggestions
Snow ice cream is a “make it and eat it immediately” kind of dessert. That’s part of its charm. But there are a few ways to make the experience even better.
Serving: Serve your snow ice cream in chilled bowls with a cold spoon. The colder your serving vessels, the longer your ice cream will hold its texture. I like to set the bowls outside for ten minutes while I’m collecting the snow. If it’s not cold enough outside, pop them in the freezer. A drizzle of chocolate sauce, a sprinkle of sprinkles, or a few fresh berries on top make it feel extra special, but the plain version is honestly perfect on its own.
Pairings: This snow ice cream pairs beautifully with warm drinks. A mug of hot chocolate, a cup of coffee, or even a warm chai latte creates a lovely temperature contrast. I also love serving it alongside a warm cookie or a slice of banana bread. The cold and warm combination is pure comfort.
Storage: I’m going to be honest with you—snow ice cream does not store well. If you try to freeze it, the texture will become icy and crystallized. The snow has already started melting during the mixing process, and refreezing it just creates a solid block of ice. Your best bet is to only make as much as you’ll eat in one sitting. If you have leftovers (which honestly never happens in my house), you can pour the melted mixture into popsicle molds and freeze it. It won’t be the same, but it makes a decent snowy milk popsicle.
Reheating: There’s no reheating here. This is a cold dessert through and through. But if you’ve stored the melted mixture as popsicles, just enjoy them straight from the freezer.
Nutritional Information & Benefits
Let’s be real—this is a treat, not a health food. But knowing what’s in your food is always a good thing, so here’s the breakdown for one serving (about 1 cup of snow ice cream, based on a recipe that serves 4).
- Calories: Approximately 130-150 per serving
- Fat: 3-4 grams (mostly from the condensed milk)
- Carbohydrates: 24-28 grams (mostly sugar)
- Protein: 3-4 grams
- Calcium: About 10% of your daily needs (thanks to the condensed milk)
Health Benefits: Okay, the snow itself is just frozen water, so it’s hydrating? That’s a stretch, I know. But the sweetened condensed milk does provide a small amount of calcium and protein. If you use the dairy-free coconut version, you’ll also get some healthy fats from the coconut. The real benefit here is emotional—this recipe brings joy, nostalgia, and a sense of playful creativity to a winter day. Sometimes that’s exactly what we need.
Dietary Considerations: This recipe is vegetarian. For a vegan version, use coconut sweetened condensed milk. It is not gluten-free in all cases (check your vanilla extract and condensed milk labels for hidden gluten, though most are safe). It contains dairy in the standard version. If you have a nut allergy, stick with the standard version and avoid any nut-based milk alternatives.
Conclusion
This cozy 3-ingredient snow ice cream is more than just a recipe. It’s a reminder that some of the best things in life are the simplest. A snow day, a clean bowl, and a few pantry staples are all it takes to create something that feels genuinely magical. Every time I make this, I think of Delores standing at my door with that mixing bowl, and I smile. That’s what food should do—connect us, comfort us, and make us feel a little bit lighter.
I hope you’ll try this recipe the next time the snow falls. Customize it, make a mess, get the kids involved, and enjoy every single spoonful. And if you come up with a variation I haven’t tried, please come back and let me know in the comments. I’m always looking for new ways to play with this recipe. Until then, stay warm, stay cozy, and keep an eye on the sky. You never know when the next batch of snow ice cream is coming.
Frequently Asked Questions
Can I use any type of snow for this recipe?
Fresh, clean snow is best. Avoid snow that has been on the ground for more than 24 hours, snow near roads or driveways, or snow that looks discolored. The fluffier and lighter the snow, the better your ice cream texture will be.
What if I don’t have sweetened condensed milk?
You can make a quick substitute by simmering 1 cup of whole milk with 1/2 cup of sugar until it reduces by about half. Let it cool completely before using. It won’t be as thick as store-bought, but it will work in a pinch.
Can I make this recipe without vanilla extract?
Yes! The vanilla adds flavor, but the snow ice cream will still be sweet and creamy without it. You can also try almond extract, maple extract, or peppermint extract for a different flavor profile.
My snow ice cream turned out soupy. What went wrong?
This usually happens when the snow is too wet or you used too much condensed milk. Next time, use lighter, fluffier snow, or reduce the condensed milk to 1/3 cup. You can also try adding a handful of fresh snow and folding gently to thicken it up.
Can I double this recipe?
It’s better to make two separate batches. Doubling the recipe in one bowl makes it hard to mix evenly, and the snow at the bottom will melt before you’re done. Making two batches takes the same amount of time and gives you much better results.
Pin This Recipe!
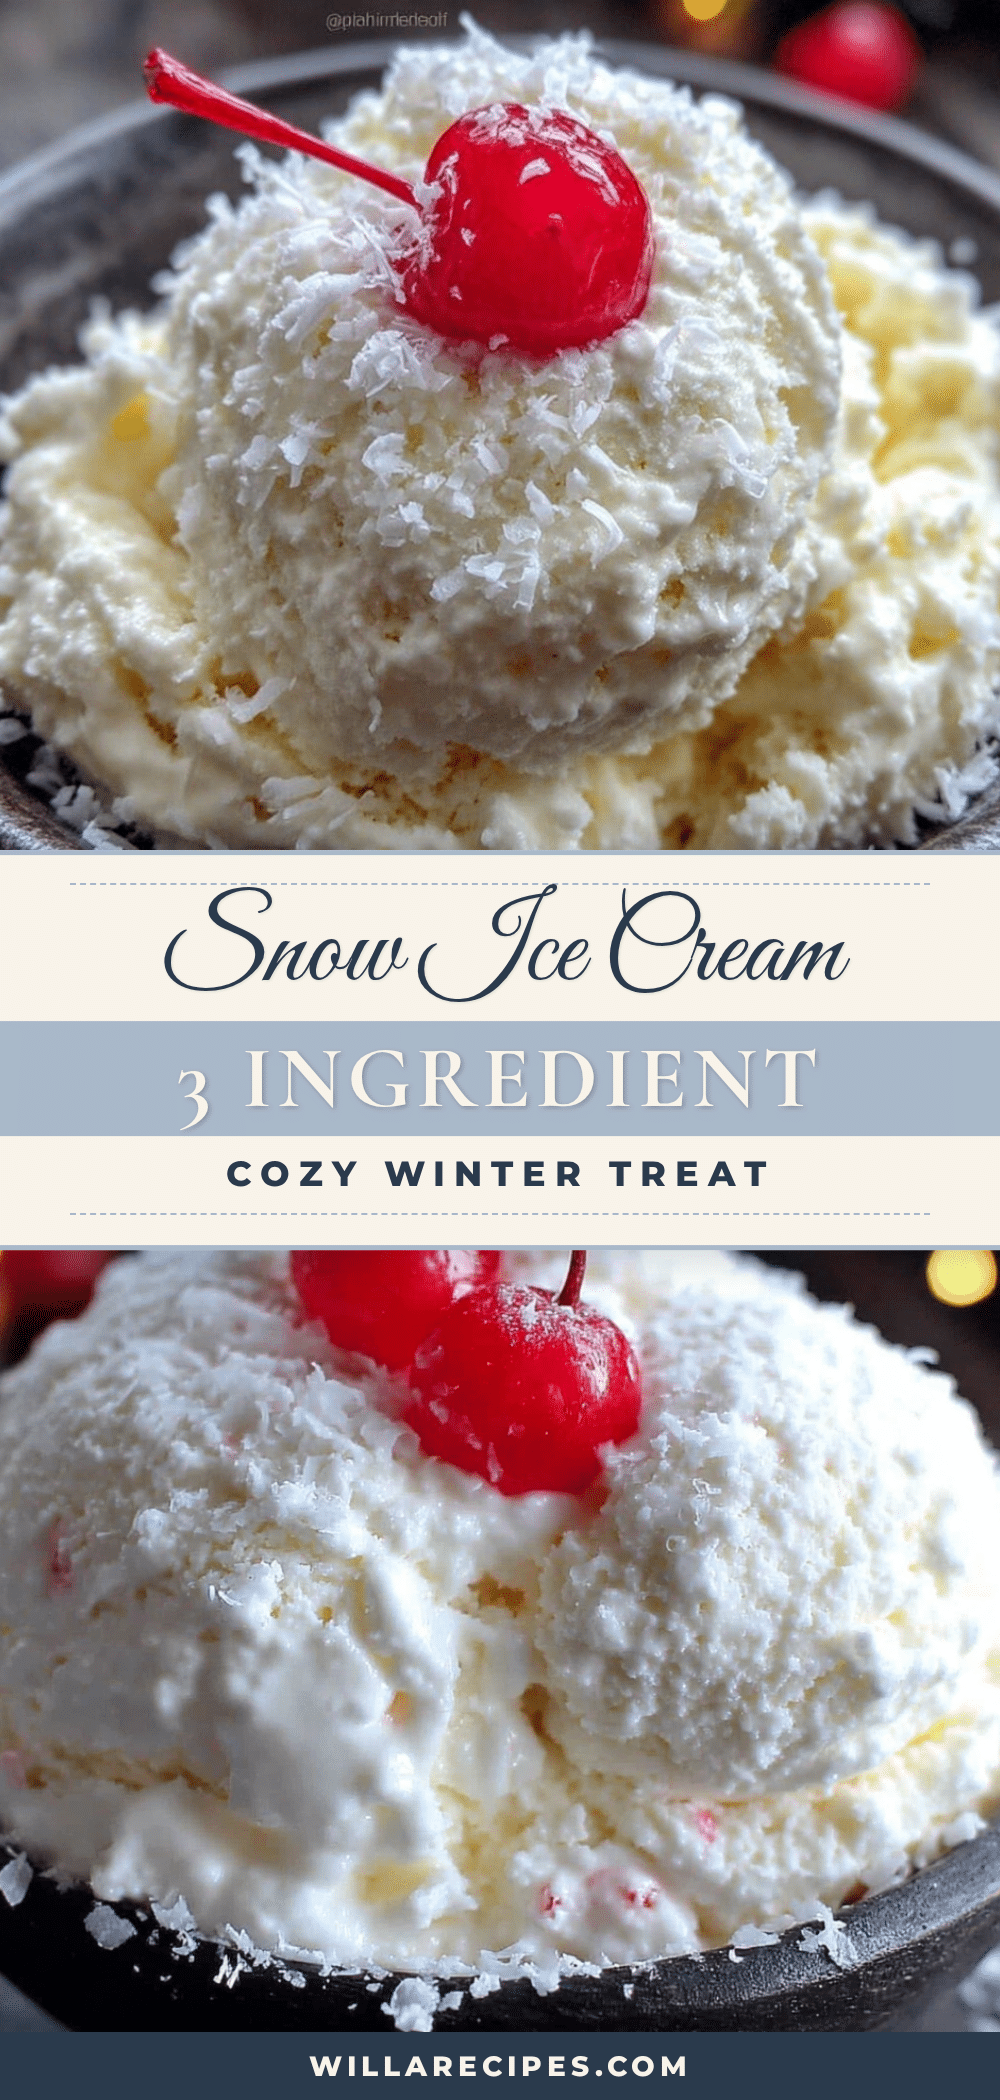
Cozy 3-Ingredient Snow Ice Cream Recipe
This incredibly easy snow ice cream uses just three ingredients and fresh snow for a light, fluffy, and nostalgic winter treat. Ready in under five minutes, it’s the perfect cold-weather activity for kids and adults alike.
- Prep Time: 5 minutes
- Cook Time: 0 minutes
- Total Time: 5 minutes
- Yield: 4 servings 1x
- Category: Dessert
- Cuisine: American
Ingredients
- 8 cups fresh, clean snow (lightly packed)
- 1/2 cup sweetened condensed milk (about 120 ml)
- 1 teaspoon pure vanilla extract
Instructions
- Head outside with a chilled mixing bowl. Gently scoop the top layer of fresh, fluffy snow, avoiding any that is discolored, icy, or has touched the ground. Fill the bowl with about 8 cups of lightly packed snow. Work quickly to prevent melting.
- In a small bowl or measuring cup, whisk together the sweetened condensed milk and vanilla extract until well combined.
- Pour the condensed milk mixture over the snow in a thin, steady stream. Using a rubber spatula, gently fold the mixture into the snow—cut through, lift from the bottom, and turn—until the mixture looks uniform and has a creamy, pale white texture. Do not overmix.
- Check the consistency: it should look like soft-serve ice cream. If too dry, add another tablespoon of condensed milk. If too soupy, add a little more fresh snow and fold gently.
- Serve immediately in chilled bowls. Enjoy right away, as snow ice cream does not store well.
Notes
Use only fresh, clean snow from the top layer, avoiding snow that has touched the ground or been plowed. For best texture, snow should be light and fluffy, ideally collected when temperatures are in the 20s Fahrenheit. Do not overmix, as this will cause the snow to melt. This recipe does not store well; make only what you will eat immediately. For a dairy-free version, use coconut-based sweetened condensed milk.
Nutrition
- Serving Size: 1 cup
- Calories: 140
- Sugar: 24
- Sodium: 50
- Fat: 3.5
- Saturated Fat: 2
- Carbohydrates: 26
- Protein: 3.5
Keywords: snow ice cream, 3-ingredient, easy dessert, winter treat, snow day recipe, homemade ice cream, no-churn ice cream


