Jen wasn’t trying to impress anyone. I’d stopped by her house on a Tuesday afternoon to pick up a book I’d lent her, and the smell of roasted peppers hit me before I even made it past the front door. She was in the kitchen, casually arranging vegetables on a black platter while her kids ran circles around the kitchen island. “Oh, this?” she said when I asked, barely looking up. “Just something quick for the school Halloween party tomorrow.” She shrugged like it was nothing. But it wasn’t nothing. It was a skull and bones veggie tray, and honestly, it was the coolest thing I’d seen all month. The skull was made from a hollowed-out bell pepper, the bones were sliced zucchini and mozzarella sticks, and the whole thing looked like it belonged at a haunted mansion buffet. I stood there, probably staring a little too long, while she casually dipped a cucumber slice into ranch. “You want the recipe?” she asked. “There’s no recipe. You just throw stuff on a tray and make it look spooky.” And that was it. That casual, no-fuss attitude is exactly why this recipe has become my go-to Halloween hack. Maybe you’ve been there—scrambling for a festive snack that doesn’t require a culinary degree or a trip to five different stores. This tray is your answer. It’s fast, it’s fun, and it’s the kind of thing that makes people think you spent hours on it when you really just raided your fridge. Let me tell you, that’s the kind of magic we all need on Halloween night.
Why You’ll Love This Recipe
This Quick Skull & Bones Veggie Tray isn’t just another Halloween snack. It’s a game-changer for anyone who wants to bring something festive to the party without spending all day in the kitchen. I’ve tested this tray at three different Halloween gatherings now, and it disappears faster than the candy bowl every single time.
- Quick & Easy: This tray comes together in under 15 minutes. Seriously, you can throw this together while your kids are still arguing over their costumes. No cooking required, just chopping and arranging.
- Simple Ingredients: You likely already have most of these vegetables in your fridge. Bell peppers, cucumbers, carrots, cherry tomatoes—these are pantry staples for most of us. No fancy grocery trips needed.
- Perfect for Halloween Parties: Whether you’re hosting a class party, a neighborhood gathering, or just want something spooky for your own family, this tray fits the bill. It’s kid-friendly, adult-approved, and totally Instagram-worthy.
- Crowd-Pleaser: I’ve watched picky eaters go back for thirds of the “bones” (mozzarella sticks) and kids who swear they hate vegetables happily munch on “skull” peppers. It’s magic, I tell you.
- Unbelievably Delicious: The combo of fresh, crunchy veggies with creamy dip is comfort food at its simplest. But the presentation? That’s what makes it next-level. The visual wow factor is huge, but the taste is what keeps people coming back.
What makes this recipe different from the rest? It’s the simplicity. I’ve seen elaborate Halloween veggie trays that require carving tools and hours of patience. This one? It’s all about clever arrangement. The skull is just a bell pepper with the top cut off and some strategic carving. The bones are literally sliced vegetables and cheese sticks. It’s not another version of a veggie tray—it’s your best version because it’s so easy to customize.
This recipe isn’t just good—it’s the kind that makes you close your eyes after the first bite of a crunchy pepper dipped in ranch. It’s Halloween fun reimagined: healthier, faster, but with the same spooky satisfaction. Perfect for impressing guests without stress, or turning a simple snack into something memorable.
What Ingredients You Will Need
This recipe uses simple, wholesome ingredients to deliver that spooky Halloween vibe without the fuss. Most of these are pantry staples or easy to find at any grocery store. Here’s what you’ll need to create your own Skull & Bones Veggie Tray.
For the Skull & Bones Design
- 1 large red or orange bell pepper – This becomes your skull. Look for a pepper that’s round and squat, not too tall or pointy. The color adds a nice contrast against the dark platter.
- 2 medium zucchini or yellow squash – Sliced into rounds, these form the “bones” of your skeleton. Yellow squash gives a slightly different color, but both work great.
- 6-8 mozzarella string cheese sticks – Cut in half crosswise, these become the long bone shapes. I recommend Polly-O or Sargento for the best texture that holds up well.
- 1 cup cherry tomatoes – These can be used as “blood drops” or just scattered around for color contrast.
- 1 large cucumber – Sliced into rounds or half-moons, cucumber adds freshness and crunch.
- 1 cup baby carrots – These work as “finger bones” or just filler veggies. You can also use carrot sticks.
- 1/2 cup black olives – Pitted black olives make great “eyes” for the skull or creepy accents scattered around the tray.
For the Dip & Garnish
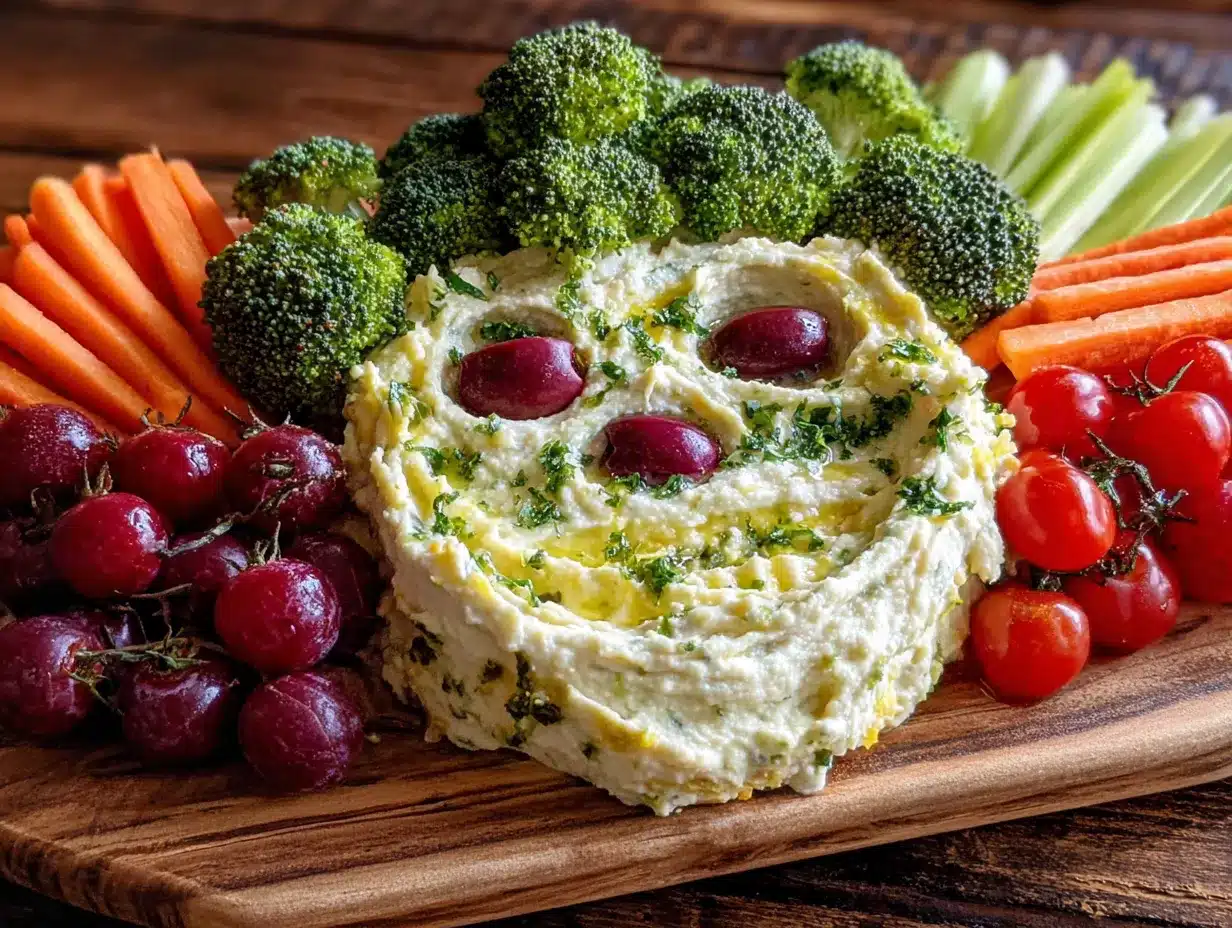
- 1 cup ranch dressing or your favorite veggie dip – This goes in a small bowl placed in the center or off to the side. I personally love Hidden Valley Ranch for its classic flavor, but any creamy dip works.
- Fresh parsley or dill – Optional, but a sprinkle of green herbs adds a nice touch and makes the tray look more intentional.
- Salt and pepper to taste – A light sprinkle enhances the natural flavors of the vegetables.
Substitution Guidance
- For the skull: If you can’t find a round bell pepper, use a small orange or even a hollowed-out apple (though it won’t be as sturdy). A small cauliflower head also works in a pinch.
- For the bones: Swap zucchini for celery sticks or even pretzel rods for a crunchier option. For a low-carb version, use cucumber sticks instead.
- For the cheese: Use dairy-free mozzarella sticks or skip the cheese altogether. The bones will still look great with just zucchini.
- For the dip: Greek yogurt mixed with ranch seasoning is a healthier option. Hummus also works well and adds protein.
Equipment Needed
You don’t need much to put this tray together. Here’s what I recommend having on hand:
- Large black platter or cutting board – The dark background makes the skull and bones pop. I use a cheap black baking sheet I picked up at a dollar store, and honestly, it works perfectly. If you don’t have black, any dark-colored platter will do.
- Sharp knife – A good chef’s knife or paring knife is essential for carving the bell pepper skull. Dull knives make the carving frustrating and less precise.
- Cutting board – A sturdy cutting board for chopping vegetables. I prefer a large wooden board because it doesn’t slip around.
- Small bowl or ramekin – For the dip. A small black or white bowl looks great against the platter.
- Vegetable peeler – Optional, but helpful if you want to create ribbon-like carrot curls for added decoration.
- Toothpicks or small skewers – Useful for securing the skull in place if it’s wobbly, or for holding olive “eyes” in position.
I’ve made this tray with just a butter knife and a plastic cutting board before, and it still turned out great. Don’t overthink the equipment. Use what you have.
Preparation Method
This is where the magic happens. Follow these steps, and you’ll have a spooky veggie tray that looks like it took hours. I promise it won’t.
- Prepare the skull (5 minutes): Take your large bell pepper and wash it thoroughly. Using a sharp knife, cut off the top quarter of the pepper (the stem end). Set the top aside—you might use it as a “hat” later. Scoop out the seeds and membranes from inside the pepper. Now, here’s the fun part: carve a face. Using the tip of your knife, cut two small triangles for eyes, a small triangle for a nose, and a jagged line for a mouth. Don’t worry about perfection. I’ve made skulls where one eye was bigger than the other, and it just looked more creepy. Pro tip: If you mess up a cut, just flip the pepper around and use the back as the face. No one will know.
- Create the bones (5 minutes): Wash your zucchini or yellow squash. Slice them into rounds about 1/4-inch thick. For the “bones” effect, you want the slices to be uniform so they look like a skeleton’s ribs. Take your mozzarella string cheese sticks and cut each one in half crosswise. If you want to get fancy, you can notch the ends of the cheese sticks with a small knife to make them look more like actual bones with knobby ends. I’ve done this, and it takes maybe an extra minute but looks really cool.
- Prepare the other veggies (5 minutes): Slice your cucumber into rounds or half-moons. If you’re using baby carrots, leave them whole. If you’re using full-sized carrots, cut them into sticks about 3 inches long. Rinse your cherry tomatoes and black olives. Pat everything dry with a paper towel—wet veggies make the platter look messy and can make the dip watery.
- Assemble the skeleton (5 minutes): Place your black platter on a flat surface. Position the bell pepper skull in the center or slightly off-center, depending on how you want the skeleton to look. Arrange the zucchini rounds and mozzarella cheese halves in two rows extending from the bottom of the skull—these are the “ribs.” Place the cucumber slices and baby carrots around the ribs to form the rest of the skeleton body. Scatter cherry tomatoes and black olives around the edges. Troubleshooting tip: If your skull keeps rolling over, cut a small flat spot on the bottom of the pepper so it sits stable.
- Add the dip (2 minutes): Pour your ranch dressing or veggie dip into a small bowl. Place the bowl near the skull, maybe where the skeleton’s “heart” would be, or off to the side. If you want to get extra creepy, add a few drops of red food coloring to the dip to make it look like blood. I tried this once, and my kids thought it was hilarious. Just don’t overdo it—you want the dip to still look appetizing.
- Final touches (2 minutes): Sprinkle a little fresh parsley or dill over the tray for color contrast. Add a pinch of salt and pepper over the vegetables if you like. Stand back and admire your work. You just made a Halloween veggie tray in under 25 minutes. Visual cue: The skull should look like it’s grinning at you from the platter. If it doesn’t, adjust the mouth cut until it does.
Cooking Tips & Techniques
I’ve made this tray about a dozen times now, and I’ve learned a few things the hard way. Let me save you some trouble.
Pick the right pepper. Not all bell peppers are created equal for skull carving. Look for one that’s as round as possible, like a small globe. The long, pointy peppers don’t work well because the face ends up looking stretched and weird. I once grabbed a poblano by accident, and the skull came out looking like a sad ghost. Learn from my mistake.
Keep your knife sharp. A dull knife will crush the pepper instead of cutting it cleanly. If you’re struggling to make the eye holes, try using a small paring knife or even a sturdy toothpick to start the cut. I’ve also used a small cookie cutter (like a star shape) to punch out the eyes, which looks surprisingly cool.
Don’t overthink the arrangement. The first time I made this, I spent 20 minutes trying to make the bones perfectly symmetrical. Guess what? Skeletons aren’t perfectly symmetrical in real life. A slightly lopsided skeleton looks more authentic and creepy. Just lay the veggies out in a general skeleton shape and call it done.
Use the dip as an anchor. If your skull keeps sliding around on the platter, put a small dab of dip on the bottom of the pepper before placing it. The dip acts like glue and keeps everything in place. This is especially helpful if you’re transporting the tray to a party.
Prep ahead of time. You can carve the skull and slice all the vegetables up to 24 hours in advance. Store everything in separate containers in the fridge. Assemble the tray about 30 minutes before serving. This is a lifesaver on Halloween when you’re juggling costumes, candy, and chaos.
Variations & Adaptations
This recipe is incredibly flexible. Here are some ways I’ve adapted it for different occasions and dietary needs.
Gluten-Free Version: This recipe is naturally gluten-free as long as you use a gluten-free dip. Most ranch dressings are gluten-free, but double-check the label. Skip any pretzel sticks or crackers you might be tempted to add.
Vegan Option: Replace the mozzarella cheese sticks with vegan cheese sticks or use extra zucchini slices for the bones. Use a vegan ranch or dairy-free dip. I’ve made this for a vegan friend’s Halloween party, and she loved it. The zucchini bones actually looked more authentic than the cheese ones.
Spooky Color Twist: Use purple cauliflower florets for an eerie look, or add black beans scattered around the tray for a “dirt” effect. I once added some roasted beet slices that looked like bloody organs, and it was a huge hit with the horror movie fans.
Kid-Friendly Version: Let the kids help with the assembly. My nephew loved placing the olive “eyes” into the skull. You can also add some candy corn or mini pumpkins around the edges for a sweeter touch. Just keep the candy separate from the veggies to avoid soggy sweets.
Low-Carb/Keto Adaptation: Focus on low-carb vegetables like cucumber, zucchini, bell peppers, and olives. Skip the carrots and cherry tomatoes if you’re watching carbs. Add some celery sticks and broccoli florets for extra crunch. The mozzarella cheese sticks are already keto-friendly.
Serving & Storage Suggestions
This tray is best served cold or at room temperature. I recommend taking it out of the fridge about 15 minutes before serving to let the flavors come to life. The vegetables taste crisper and the dip is easier to scoop.
What to serve with it: This veggie tray pairs beautifully with other Halloween snacks. I often serve it alongside a bowl of popcorn “guts” (buttered popcorn with a few drops of green food coloring) and some spider-shaped cookies. For drinks, a pitcher of “witches’ brew” (limeade with dry ice for a smoky effect) completes the theme.
Storage: If you have leftovers, store the vegetables and dip separately in airtight containers. The carved bell pepper skull will last for 2-3 days in the fridge, but it will start to soften. The mozzarella cheese sticks should be eaten within 2 days. I’ve found that the zucchini slices can get a little watery after a day, so pat them dry before storing.
Reheating: This is a cold dish, so no reheating needed. But if you want to refresh the vegetables, give them a quick rinse in cold water and pat dry before serving again. The dip might need a stir if it’s been sitting.
Flavor development: Honestly, this tray tastes best fresh. The vegetables are at their crispiest, and the dip is at its creamiest. But if you’re making it ahead, the flavors do meld a bit overnight, especially if you let the vegetables sit in the dip. It’s not bad, just different.
Nutritional Information & Benefits
This veggie tray is a healthier Halloween option compared to candy and cookies. Here’s a rough breakdown for a serving (about 1 cup of vegetables with 2 tablespoons of dip):
| Nutrient | Amount per Serving |
|---|---|
| Calories | 120-150 |
| Total Fat | 8-10g |
| Saturated Fat | 3-4g |
| Carbohydrates | 10-12g |
| Fiber | 3-4g |
| Protein | 5-7g |
| Sodium | 300-400mg |
Health benefits: Bell peppers are packed with vitamin C—one medium pepper gives you more than your daily requirement. Zucchini is low in calories but high in antioxidants like lutein, which is great for eye health. Mozzarella cheese provides calcium and protein, making this tray more satisfying than a plain veggie platter.
Dietary considerations: This recipe is naturally vegetarian and can be made vegan and gluten-free with simple substitutions. It’s low in added sugars and contains no artificial ingredients if you use homemade dip. The main allergens are dairy (from the cheese and ranch) and possibly soy (in some ranch dressings). Check labels if you’re serving guests with allergies.
I love that this snack lets you indulge in Halloween fun without the sugar crash. It’s the kind of thing you can feel good about serving to your kids—and eating yourself.
Frequently Asked Questions
Can I make this veggie tray the night before Halloween?
Yes, you can prep all the vegetables and carve the skull up to 24 hours in advance. Store everything in separate containers in the fridge. Assemble the tray about 30 minutes before serving for the freshest look. The dip can be made or bought ahead of time too.
What if I can’t find a round bell pepper for the skull?
No worries. Use a small orange, a large tomato (though it’s softer and won’t last as long), or even a hollowed-out apple. For a non-edible option, you can use a plastic skull from a craft store and arrange the veggies around it. I’ve done this for a party where I wanted the skull to last all night.
How do I keep the vegetables from drying out during a party?
Cover the tray with plastic wrap or a damp paper towel if you’re setting it out before guests arrive. You can also mist the vegetables lightly with water using a spray bottle. Just don’t spray the dip or the cheese. Another trick is to place a few ice cubes under the platter to keep everything cool.
Can I use other vegetables for the bones?
Absolutely. Celery sticks, carrot sticks, or even green beans work great as bones. For a fun twist, use pretzel rods or breadsticks for a crunchier option. I’ve also used sliced radishes for a peppery kick. The key is to cut them into similar sizes so they look like a skeleton’s ribcage.
What dips go best with this Halloween veggie tray?
Ranch dressing is the classic choice, but you can also use blue cheese dressing, hummus, guacamole, or a yogurt-based dill dip. For a spooky twist, try a “blood” dip by mixing ketchup with a little hot sauce, or a “slime” dip by adding green food coloring to sour cream. My kids love the green slime dip.
Conclusion
This Quick Skull & Bones Veggie Tray is proof that Halloween snacks don’t have to be complicated or loaded with sugar. It’s the kind of recipe that makes you look like a party planning genius without actually working that hard—and honestly, isn’t that the best kind of recipe? I keep coming back to this tray because it’s fun, it’s fast, and it actually gets my kids to eat vegetables without a fight. That’s a Halloween miracle right there.
I hope you give this recipe a try, and I hope you make it your own. Add your favorite veggies, swap in different dips, or let the kids go wild with the arrangement. The beauty of this tray is that there’s no wrong way to do it. If your skull ends up looking more like a ghost or your bones are a little lopsided, that’s okay. It’s still going to be delicious, and it’s still going to disappear.
If you make this recipe, I’d love to hear about it. Drop a comment below with your spooky creations, or tag me in your photos. Happy Halloween, and happy snacking! Remember, the scariest thing about this tray is how fast it vanishes.
Pin This Recipe!
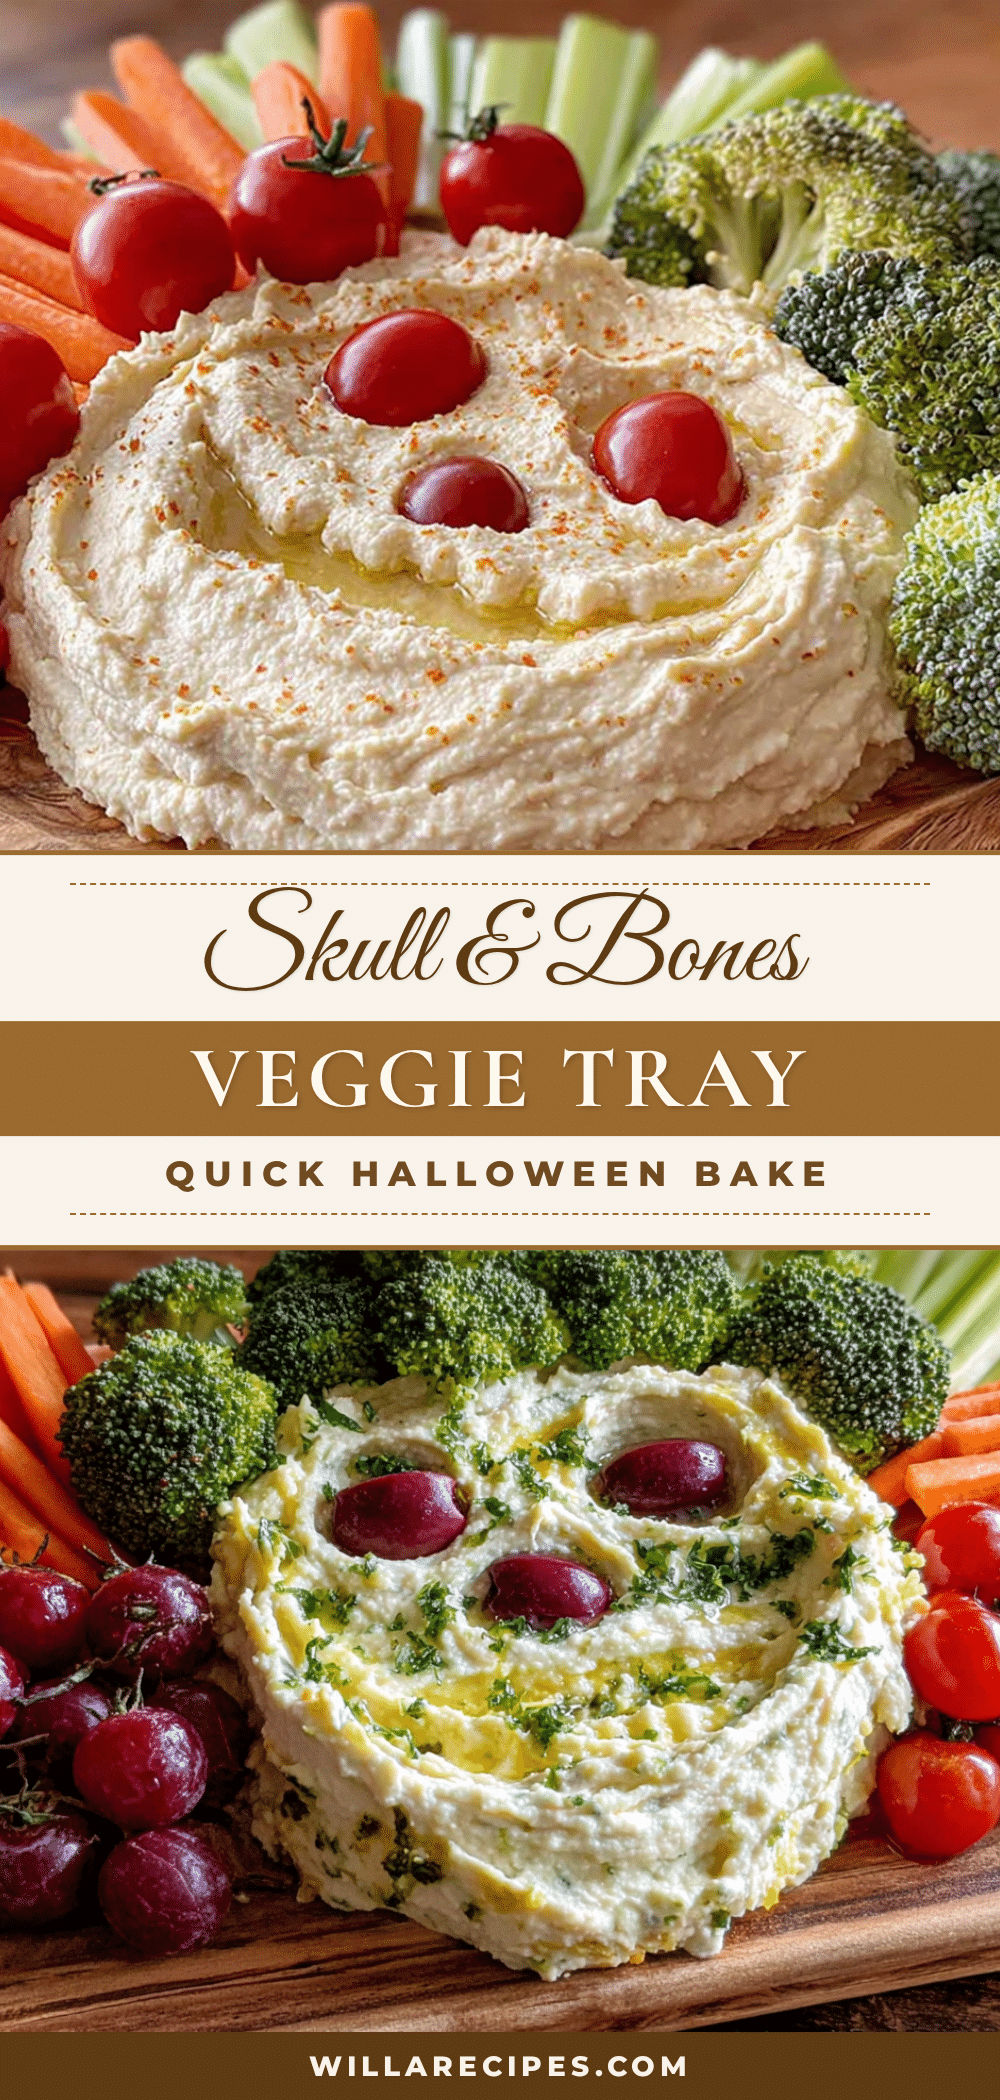
Quick Skull & Bones Veggie Tray: Easy Halloween DIY
A spooky and fun Halloween veggie tray featuring a carved bell pepper skull and veggie ‘bones’. This quick, no-cook appetizer comes together in under 25 minutes and is perfect for parties, school events, or family snacking.
- Prep Time: 15 minutes
- Cook Time: 0 minutes
- Total Time: 25 minutes
- Yield: 8 servings 1x
- Category: Appetizer
- Cuisine: American
Ingredients
- 1 large red or orange bell pepper
- 2 medium zucchini or yellow squash
- 6–8 mozzarella string cheese sticks
- 1 cup cherry tomatoes
- 1 large cucumber
- 1 cup baby carrots
- 1/2 cup black olives, pitted
- 1 cup ranch dressing or your favorite veggie dip
- Fresh parsley or dill (optional, for garnish)
- Salt and pepper to taste
Instructions
- Prepare the skull: Wash the bell pepper. Cut off the top quarter (stem end) and set aside. Scoop out seeds and membranes. Using a sharp knife, carve two small triangles for eyes, a small triangle for a nose, and a jagged line for a mouth. If you make a mistake, flip the pepper and use the back as the face.
- Create the bones: Wash zucchini or yellow squash and slice into 1/4-inch rounds. Cut mozzarella string cheese sticks in half crosswise. For a more realistic bone look, notch the ends of the cheese sticks with a small knife.
- Prepare other veggies: Slice cucumber into rounds or half-moons. Leave baby carrots whole or cut into 3-inch sticks. Rinse cherry tomatoes and black olives. Pat all vegetables dry with a paper towel.
- Assemble the skeleton: Place a large black platter on a flat surface. Position the bell pepper skull in the center or slightly off-center. Arrange zucchini rounds and mozzarella cheese halves in two rows extending from the bottom of the skull to form ‘ribs’. Place cucumber slices and baby carrots around the ribs. Scatter cherry tomatoes and black olives around the edges. If the skull is unstable, cut a small flat spot on the bottom of the pepper.
- Add the dip: Pour ranch dressing or veggie dip into a small bowl. Place the bowl near the skull, such as where the skeleton’s ‘heart’ would be, or off to the side.
- Final touches: Sprinkle fresh parsley or dill over the tray for color. Add a pinch of salt and pepper over the vegetables if desired. Adjust the skull’s mouth cut until it looks like it’s grinning.
Notes
Pick a round, squat bell pepper for the best skull shape. A dull knife will crush the pepper, so keep your knife sharp. Don’t worry about perfect symmetry—a slightly lopsided skeleton looks more authentic. Use a small dab of dip on the bottom of the pepper to keep it from sliding. You can prep the vegetables and carve the skull up to 24 hours in advance; assemble 30 minutes before serving. For a vegan version, replace mozzarella with vegan cheese sticks or extra zucchini, and use a dairy-free dip.
Nutrition
- Serving Size: 1 cup of vegetables
- Calories: 120150
- Sugar: 57
- Sodium: 300400
- Fat: 810
- Saturated Fat: 34
- Carbohydrates: 1012
- Fiber: 34
- Protein: 57
Keywords: Halloween veggie tray, skull and bones, spooky snack, healthy Halloween, vegetable platter, party appetizer, no-cook recipe


