My brother-in-law Mark had sworn off themed food for years. “It’s gimmicky,” he’d say, crossing his arms at every Halloween party. “Food should just taste good.” For five Halloweens straight, he’d stand in the corner with a plain beer and a store-bought chip, judging my spiderweb dip and my ghost-shaped cookies from across the room. Then last October, I made these Mummy Meatball Sub Bites just for my kids—little toasted rolls wrapped in strips of provolone, peeking out like tiny bandaged faces. I set the tray down on the coffee table and went to grab napkins. When I came back, Mark was on his third one, cheese dangling from his chin, muttering something about the “structural integrity of the bread.” I didn’t say a word. I just smiled.
Honestly, that moment made my whole night. And it made me realize something: the best Halloween food isn’t about being scary. It’s about being clever in a way that makes people smile—and then go back for seconds. These Mummy Meatball Sub Bites are exactly that. They’re cute without being fussy, indulgent without being heavy, and they come together in under 30 minutes. You know that feeling when you want to bring something impressive to a party but you also want to actually enjoy the party? That’s this recipe.
I’ve tested this version about six times now, tweaking the cheese-to-meatball ratio and the bake time until the bread stays crunchy and the meatball stays juicy. Maybe you’ve been there—spending an hour on something that looks cool but tastes dry or falls apart the second you pick it up. These little guys hold together beautifully. They’re the kind of appetizer that makes you look like a Halloween hero without the stress. And honestly? Watching someone take that first bite and realize it’s a real, honest-to-goodness meatball sub in miniature form is just pure joy.
Why You’ll Love These Mummy Meatball Sub Bites
I’ve made a lot of Halloween appetizers over the years, and these Mummy Meatball Sub Bites have become the one I come back to every single time. Here is why they work so well:
- Quick & Easy: From start to table in about 25 minutes. No complicated shaping, no fancy tools—just assembly and a quick bake.
- Simple Ingredients: Frozen meatballs, slider rolls, jarred marinara, and provolone cheese. You probably have most of this in your kitchen right now.
- Perfect for Parties: These are ideal for Halloween gatherings, spooky movie nights, or even a fun dinner for the kids before trick-or-treating.
- Crowd-Pleaser: I’ve served these to kids, adults, and that one friend who “doesn’t do themed food.” Everyone eats them. Everyone.
- Unbelievably Delicious: The combination of a juicy meatball, melty cheese, and a toasty, buttery roll is pure comfort food magic.
What makes these different from other Halloween recipes is the texture. The key is slicing the rolls without cutting all the way through—that way, the meatball stays cradled in the bread while the cheese strips wrap around like bandages. It’s a small technique, but it makes all the difference between a bite that holds together and one that falls apart. Plus, using provolone instead of mozzarella gives you that perfect, slightly salty chew that doesn’t get too stringy.
This recipe isn’t just good for a Halloween appetizer—it’s the kind of food that makes you close your eyes after the first bite. It’s comfort food with a costume on, but the flavor is 100% real. Perfect for impressing party guests without spending your whole evening in the kitchen.
What Ingredients You Will Need
This recipe uses simple, everyday ingredients to create something that looks way more complicated than it actually is. Most of these are pantry staples or easy to find at any grocery store.
- Frozen fully cooked meatballs (about 12-16): I prefer the homestyle or Italian-style variety for the best flavor. Rosina or Aidells are my go-to brands. No need to thaw them first—they’ll cook through in the oven.
- 1 package (12-count) slider rolls or small hoagie rolls: Look for rolls that are soft but sturdy enough to hold a meatball. King’s Hawaiian rolls work great for a slightly sweet contrast, or use classic white slider rolls for a more traditional sub feel.
- 8 slices provolone cheese: Provolone gives you that perfect melt without becoming a gooey mess. You could use mozzarella, but provolone has a better texture for wrapping and a slightly sharper taste that stands up to the marinara.
- 1 cup marinara sauce: Use your favorite jarred sauce. I like Rao’s or Victoria for a clean, not-too-sweet flavor. You’ll use some for dipping and a little to brush on the meatballs.
- 2 tablespoons unsalted butter, melted: This gets brushed on the rolls before baking for that golden, crispy top. Add a pinch of garlic powder and dried parsley to the butter for extra flavor.
- 24 candy eyeballs (optional but highly recommended): These are the star of the show for the mummy look. You can find them at most grocery stores in the baking aisle or online. They’re technically edible, but honestly, most people pick them off and eat them separately.
- Garlic powder and dried parsley (optional): For brushing on the rolls. Adds a savory note that makes these feel like real sub sandwiches, not just party food.
Substitution Guidance: For a gluten-free version, use gluten-free slider rolls and ensure your meatballs are gluten-free. For a lower-carb option, you can serve the meatballs and cheese on their own with toothpicks—they won’t look like mummies, but they’ll still taste great. If you’re vegetarian, use plant-based meatballs and dairy-free provolone or mozzarella. Just note that plant-based meatballs can be softer, so handle them gently.
Equipment Needed
You don’t need anything fancy to make these Mummy Meatball Sub Bites. Here is what you’ll need:
- Baking sheet or sheet pan: A rimmed baking sheet works best to catch any drips from the butter and sauce. Line it with parchment paper for easy cleanup.
- Sharp knife: You’ll need this to split the rolls and slice the cheese into strips. A serrated bread knife works great for the rolls without squishing them.
- Pastry brush: For brushing the melted butter onto the rolls. If you don’t have one, you can use the back of a spoon.
- Small bowl: For mixing the melted butter with garlic powder and parsley.
- Toothpicks (optional): If your meatballs are on the larger side, a toothpick through each bite can help hold everything together while baking. Just remember to remove them before serving.
I’ve made these with both a full-size baking sheet and a smaller toaster oven tray—both work fine. The key is giving the rolls enough space so they get crispy on all sides, not steamed. If you’re making a double batch, use two sheets and rotate them halfway through baking.
Preparation Method
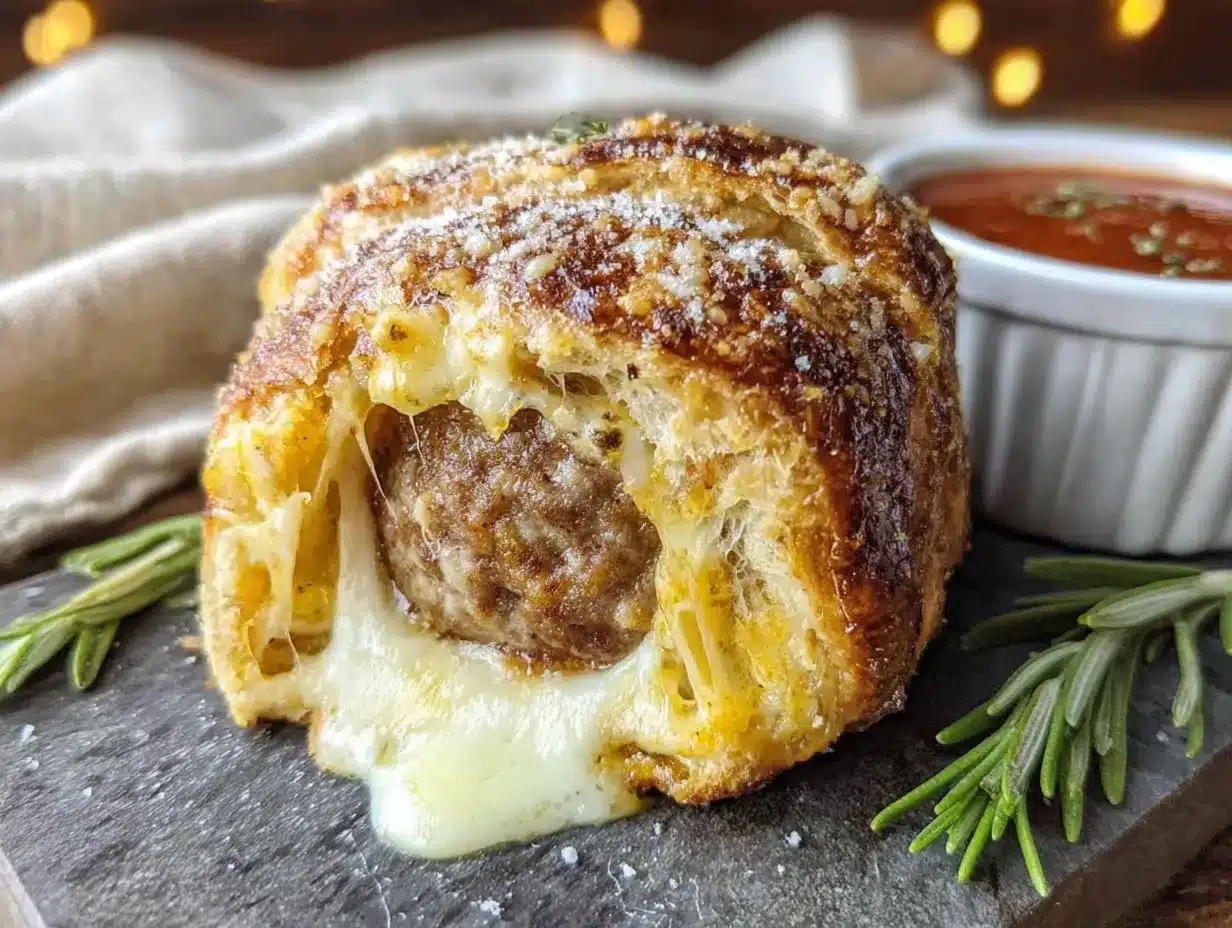
Let’s get these little mummies on the table. Follow these steps, and you’ll have a platter of adorable, delicious bites in under 30 minutes.
- Preheat your oven to 375°F (190°C). Line a baking sheet with parchment paper for easy cleanup. While the oven heats, take your frozen meatballs out of the freezer—no need to thaw them.
- Prepare the rolls. Take your package of 12 slider rolls and carefully slice them in half horizontally, keeping the top and bottom connected on one side if possible (like a clamshell). If your rolls are individual, just slice them open. Place the bottom halves on the prepared baking sheet, cut side up.
- Warm the meatballs. Place your frozen meatballs in a microwave-safe bowl and microwave for 1-2 minutes, just until they’re slightly thawed on the outside but still cold in the center. This makes them easier to handle and helps them cook evenly. If you prefer, you can skip this step and bake them a few minutes longer.
- Assemble the bites. Spoon about 1 tablespoon of marinara sauce onto each roll bottom. Place one meatball on top of the sauce. The sauce helps keep the meatball from drying out and adds moisture to the bread.
- Create the mummy wraps. Take your provolone slices and cut each one into 4-5 strips, about 1/2 inch wide. You want them thin enough to look like bandages but thick enough to hold their shape. Wrap 2-3 strips around each meatball, crossing them over the top like you’re wrapping a mummy. Leave a small gap near the front so you can see the “face.”
- Add the top rolls. Place the top half of each roll over the wrapped meatball. Don’t press down—just let it rest gently on top. Brush the tops of the rolls with the melted butter mixture (butter, garlic powder, and parsley). This gives them that gorgeous golden color.
- Bake for 10-12 minutes. Place the baking sheet in the preheated oven and bake until the rolls are golden and crispy, the cheese is melted and bubbly, and the meatballs are heated through. If your meatballs were fully frozen, you might need 13-14 minutes. The cheese should be lightly browned in spots but not burnt.
- Add the eyes. Remove the baking sheet from the oven and let the bites cool for 2-3 minutes. While they’re still warm but not hot, gently press two candy eyeballs into the exposed gap on each mummy’s “face.” The residual heat from the cheese will help them stick.
- Serve immediately. Transfer the Mummy Meatball Sub Bites to a serving platter. Serve with extra marinara sauce on the side for dipping. Watch them disappear.
Pro tip: If you’re making these for a party, you can assemble them completely (minus the eyes) up to 2 hours ahead and keep them covered in the fridge. Then just pop them in the oven when guests arrive. Add the eyes after baking so they don’t melt or slide off.
Cooking Tips & Techniques
After testing these Mummy Meatball Sub Bites several times, I’ve learned a few things that make the difference between good and great. Here are my best tips:
- Don’t overbake the rolls. The butter makes them golden quickly, and you want them crispy on the outside but still soft inside. Keep an eye on them after the 10-minute mark. If the tops are browning too fast, tent loosely with foil.
- Use room-temperature cheese for wrapping. Cold provolone is brittle and tends to crack when you try to wrap it around the meatball. Let the slices sit out for 10 minutes before cutting—they’ll be much more pliable and cooperative.
- Watch your meatball size. Standard frozen meatballs (about 1 ounce each) are perfect for slider rolls. If your meatballs are larger, you might need to cut them in half or use bigger rolls. The ratio of bread to meatball matters for both flavor and structural integrity.
- Make extra garlic butter. I always double the butter mixture. It’s great for brushing on the rolls, and if you have any left, you can brush it on the inside of the rolls for even more flavor. Plus, it makes the kitchen smell incredible.
- Don’t skip the cooling time. I know it’s tempting to serve these right away, but letting them rest for 2-3 minutes allows the cheese to set slightly. If you serve them piping hot, the cheese will slide right off and your mummies will look like they’ve been in a windstorm.
One mistake I made the first time was using too much sauce inside the roll. The bread got soggy and the whole thing fell apart. Now I use just a tablespoon—enough to add moisture and flavor without turning the roll into a sponge. Trust me on this one.
Variations & Adaptations
These Mummy Meatball Sub Bites are easy to customize based on what you have on hand or who you’re serving. Here are some of my favorite variations:
- Spicy Mummies: Add a few dashes of red pepper flakes to the marinara sauce before spooning it onto the rolls. You can also use spicy Italian-style meatballs for extra heat. My husband loves this version, and it’s great for an adults-only party.
- Turkey or Chicken Meatballs: Swap the beef or pork meatballs for turkey or chicken meatballs for a lighter option. They’re just as tasty, though they can be a little drier—so don’t skip the sauce inside the roll. I’ve used Trader Joe’s turkey meatballs with great success.
- Pesto Mummies: Replace the marinara with pesto for a completely different flavor profile. Use fresh mozzarella slices instead of provolone for a more Italian-inspired bite. This version is especially good if you’re serving these as a main dish rather than an appetizer.
- Mini Mummies: Use cocktail-size meatballs and mini slider rolls for an even smaller, poppable version. These are perfect for parties where people want to graze. You’ll need to adjust the bake time down to 7-8 minutes.
- Vegetarian Mummies: Use plant-based meatballs and dairy-free cheese. I’ve tried this with Impossible meatballs and Violife provolone-style slices, and honestly, even the meat-eaters in my house didn’t complain. The texture is slightly softer, so handle them gently.
I once made a batch with pepperoni slices tucked under the cheese for extra flavor. It was a happy accident—I was out of provolone and used pepperoni instead. The result was like a meatball-pepperoni hybrid that disappeared before the plain ones. Sometimes the best variations come from necessity.
Serving & Storage Suggestions
These Mummy Meatball Sub Bites are best served warm, right after baking. The rolls are crispy, the cheese is melty, and the meatballs are juicy—that’s the sweet spot. Arrange them on a platter with a small bowl of extra marinara sauce in the center for dipping. The contrast of the red sauce against the golden rolls and white cheese bandages is very Halloween-appropriate.
For a full Halloween spread, pair these with spiderweb dip, ghost-shaped veggie platters, or pumpkin-shaped cheese balls. They also go great with a simple green salad if you’re serving them as a main dish for a Halloween dinner before trick-or-treating. For drinks, apple cider or a dark beer like a stout complements the savory flavors nicely.
Storage: If you have leftovers (unlikely, but possible), store them in an airtight container in the refrigerator for up to 3 days. The rolls will soften, but the flavor will still be good. To reheat, place them on a baking sheet in a 350°F oven for 5-7 minutes. The microwave will make the rolls soggy, so I don’t recommend it.
Freezer instructions: You can freeze the assembled but unbaked bites (without the eyes) for up to 1 month. Place them on a baking sheet and freeze until solid, then transfer to a freezer bag. Bake from frozen, adding 3-4 minutes to the bake time. Add the eyes after baking.
One thing I love about these is that they actually taste better after sitting for a few minutes. The flavors meld together, and the cheese sets just enough that each bite is perfectly cohesive. So if you’re making them for a party, don’t stress about serving them the second they come out of the oven—a 5-minute rest on the counter won’t hurt a thing.
Nutritional Information & Benefits
Each Mummy Meatball Sub Bite (based on 12 servings, one bite per serving) contains approximately:
- Calories: 210
- Protein: 12g
- Fat: 10g
- Carbohydrates: 18g
- Fiber: 1g
- Sugar: 3g
- Sodium: 480mg
These numbers will vary based on the specific brands you use and the size of your meatballs. The protein from the meatballs and cheese makes this a satisfying bite that will keep hunger at bay during a long night of trick-or-treating. The marinara sauce provides a small dose of lycopene, an antioxidant found in tomatoes. And honestly? The biggest benefit is the joy factor—these make people smile, and that counts for something.
Dietary considerations: This recipe contains gluten (rolls) and dairy (cheese). For a gluten-free version, use gluten-free rolls. For a dairy-free version, use dairy-free cheese and ensure your meatballs are dairy-free. The candy eyeballs are typically made from sugar and starch, but check the label if you have specific dietary concerns.
I’m not here to tell you that these are a health food. They’re a fun, indulgent Halloween treat. But they’re made with real ingredients, and when you’re feeding a crowd, that’s a win in my book.
Conclusion
These Mummy Meatball Sub Bites are proof that Halloween food can be fun without being fussy, and delicious without being complicated. They come together in under 30 minutes, use ingredients you can find at any grocery store, and deliver that perfect combination of juicy meatball, melty cheese, and crispy bread. Plus, they’re just so darn cute—those little candy eyes staring up from the platter never get old.
I love this recipe because it brings people together. Whether it’s my brother-in-law who finally admitted themed food can be good, or my kids who insist on making these for every Halloween party, these little mummies have become a tradition in our house. And traditions, even silly ones, are what make holidays special.
So go ahead—make a batch for your next Halloween gathering. Customize them however you like, add extra eyes, double the cheese, or throw in some red pepper flakes for heat. Then watch them disappear and wait for the compliments to roll in. And if you come up with your own variation, I’d love to hear about it. Drop a comment below or tag me in your photos—I’m always looking for new ideas.
Happy Halloween, and happy eating!
Frequently Asked Questions
Can I make these Mummy Meatball Sub Bites ahead of time?
Yes, you can assemble them completely (without the candy eyes) up to 2 hours ahead and keep them covered in the refrigerator. Bake them just before serving, then add the eyes after they come out of the oven. This makes party prep much easier.
What if I can’t find candy eyeballs?
No problem at all. You can use small dots of black olive slices, capers, or even black sesame seeds to create the eyes. The mummies will still look cute without the traditional candy eyes—just a little less cartoonish.
Can I use homemade meatballs instead of frozen?
Absolutely. If you have a favorite meatball recipe, go for it. Just make sure the meatballs are fully cooked before assembling the bites. You can bake them at 375°F for 15-18 minutes, then let them cool slightly before wrapping with cheese.
How do I keep the rolls from getting soggy?
The key is not over-saucing. Use just 1 tablespoon of marinara per roll, and make sure your meatballs aren’t dripping with liquid when you place them on the bread. Also, brushing the rolls with butter helps create a barrier that reduces sogginess.
Can I make these in an air fryer?
Yes! Preheat your air fryer to 350°F. Place the assembled bites in the basket in a single layer (you may need to work in batches). Cook for 6-8 minutes, until the rolls are golden and the cheese is melted. The air fryer gives an extra-crispy result that I actually prefer to the oven.
Pin This Recipe!
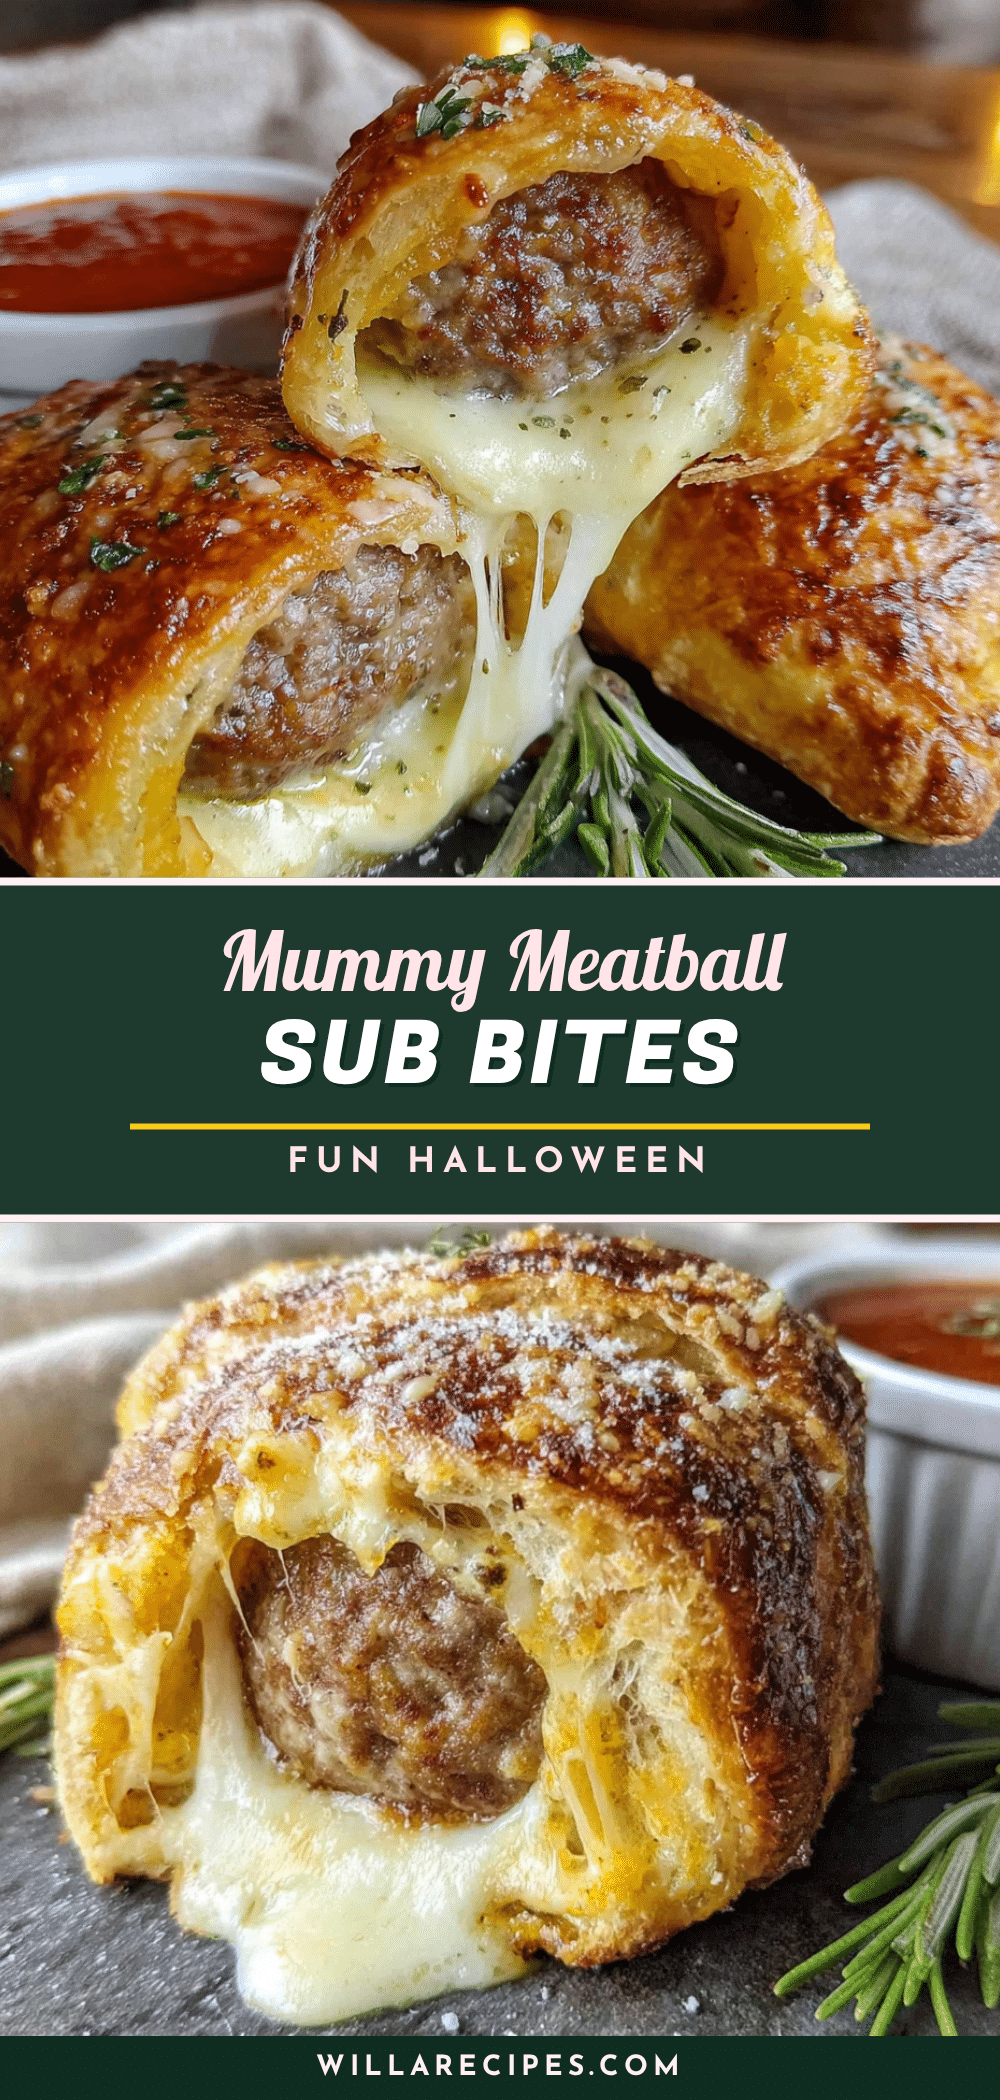
Easy Mummy Meatball Sub Bites: Perfect Halloween Appetizer

These Mummy Meatball Sub Bites are cute, clever, and come together in under 30 minutes. They feature juicy meatballs wrapped in provolone cheese on toasted slider rolls, perfect for Halloween parties or spooky movie nights.
- Prep Time: 10 minutes
- Cook Time: 12 minutes
- Total Time: 22 minutes
- Yield: 12 servings 1x
- Category: Appetizer
- Cuisine: American
Ingredients
- 12–16 frozen fully cooked meatballs (homestyle or Italian-style)
- 1 package (12-count) slider rolls or small hoagie rolls
- 8 slices provolone cheese
- 1 cup marinara sauce
- 2 tablespoons unsalted butter, melted
- 1/4 teaspoon garlic powder (optional)
- 1/4 teaspoon dried parsley (optional)
- 24 candy eyeballs (optional)
Instructions
- Preheat your oven to 375°F (190°C). Line a baking sheet with parchment paper.
- Take the frozen meatballs out of the freezer. No need to thaw them.
- Carefully slice the slider rolls in half horizontally, keeping the top and bottom connected on one side if possible (like a clamshell). Place the bottom halves on the prepared baking sheet, cut side up.
- Place the frozen meatballs in a microwave-safe bowl and microwave for 1-2 minutes, just until slightly thawed on the outside but still cold in the center.
- Spoon about 1 tablespoon of marinara sauce onto each roll bottom. Place one meatball on top of the sauce.
- Cut each provolone slice into 4-5 strips, about 1/2 inch wide. Wrap 2-3 strips around each meatball, crossing them over the top like bandages. Leave a small gap near the front for the face.
- Place the top half of each roll over the wrapped meatball. Brush the tops of the rolls with the melted butter mixture (butter, garlic powder, and parsley).
- Bake for 10-12 minutes, until the rolls are golden and crispy, the cheese is melted and bubbly, and the meatballs are heated through.
- Remove from the oven and let cool for 2-3 minutes. Gently press two candy eyeballs into the exposed gap on each mummy’s face.
- Serve immediately with extra marinara sauce for dipping.
Notes
For a gluten-free version, use gluten-free slider rolls and ensure meatballs are gluten-free. For a lower-carb option, serve meatballs and cheese on their own with toothpicks. If vegetarian, use plant-based meatballs and dairy-free provolone. Assemble bites (minus eyes) up to 2 hours ahead and refrigerate; bake just before serving. Add eyes after baking so they don’t melt. Use room-temperature cheese for easier wrapping. Don’t overbake the rolls; tent with foil if browning too fast. Let bites rest 2-3 minutes after baking to allow cheese to set.
Nutrition
- Serving Size: 1 bite
- Calories: 210
- Sugar: 3
- Sodium: 480
- Fat: 10
- Saturated Fat: 5
- Carbohydrates: 18
- Fiber: 1
- Protein: 12
Keywords: Halloween appetizer, mummy meatball sub bites, easy Halloween recipe, meatball sub bites, party appetizer


