This was supposed to be a classic cheese ball. You know, the kind you roll in nuts and serve with crackers at holiday parties. I had all the ingredients laid out on the counter—cream cheese softening, cheddar waiting to be shredded, and a bag of pecans I was ready to chop. But then my three-year-old walked in, took one look at the cream cheese block, and asked, “Mommy, is that a ghost?” I looked at the pale, round blob on the plate. Honestly? It kind of looked like one. And just like that, the plan went sideways.
I couldn’t stop thinking about it. A ghost-shaped cheese ball for Halloween? That could be cute. But as I started shaping it, things got… messy. The cheese ball was too soft, my hands were too warm, and it looked less like a ghost and more like a sad, lumpy potato. I was already running late for a playdate, and I almost tossed the whole thing in the trash. Instead, I grabbed a package of string cheese from the fridge—a last-ditch effort to salvage something. I peeled the strings apart, laid them over the cheese ball, and realized I had accidentally made a mummy. A cozy, delicious, wrapped-up-for-winter mummy. That was five Halloweens ago, and I haven’t made a normal cheese ball since.
That accidental mummy is now my most-requested Halloween dish. It’s the thing people ask about when October rolls around. Maybe you’ve been there—staring at a recipe that just wasn’t working, ready to give up, when a weird idea saves the day. That’s this recipe. It’s not fancy. It’s not complicated. But it’s the kind of thing that makes people smile before they even take a bite. And that first bite? Creamy, savory, with a little bit of crunch from the crackers. It’s pure comfort in the shape of a friendly little monster.
Why You’ll Love This Recipe
Let me tell you why this little mummy has become a staple in my kitchen every October. It’s not just because it’s cute—though, honestly, that helps. It’s because this recipe delivers on every level without making you work for it.
- Quick & Easy: You can throw this together in about 20 minutes of active time. The hardest part is waiting for it to chill. Perfect for those nights when you need a Halloween treat but don’t want to spend hours in the kitchen.
- Simple Ingredients: Cream cheese, cheddar, a few seasonings, and string cheese. That’s it. No weird specialty items or trips to three different stores.
- Perfect for Halloween Parties: Whether it’s a school potluck, a neighborhood gathering, or just a cozy night in with the kids, this cheese ball steals the show. It’s festive without being over-the-top.
- Crowd-Pleaser: I’ve served this to kids who swear they hate cheese balls and adults who are picky about appetizers. It disappears every single time. The combination of creamy filling and salty, cheesy “bandages” is just irresistible.
- Unbelievably Delicious: This isn’t just a gimmick. The flavor is legit. The ranch seasoning and garlic powder give it a savory punch, while the cheddar adds sharpness. It’s the kind of cheese ball you’ll want to make even when it’s not Halloween.
What makes this recipe different from the hundreds of other cheese balls out there? It’s the texture. By mixing the cream cheese with shredded cheddar and letting it chill properly, you get a filling that’s firm enough to hold its shape but still creamy and spreadable. And the string cheese “bandages” add a fun, chewy layer that contrasts beautifully with the smooth interior. It’s comfort food reimagined—faster, cuter, and with the same soul-soothing satisfaction as the classic version.
What Ingredients You Will Need
This recipe uses simple, pantry-friendly ingredients to create something that looks way more complicated than it actually is. Here’s what you’ll need to grab:
For the Cheese Ball Filling
- 16 ounces cream cheese, softened to room temperature (I prefer Philadelphia for the smoothest texture, but any block-style cream cheese works)
- 1 ½ cups sharp cheddar cheese, finely shredded (shred it yourself from a block—the pre-shredded stuff has anti-caking agents that can make the filling grainy)
- 1 packet (1 ounce) dry ranch dressing mix (Hidden Valley is my go-to, but store brands work fine too)
- ½ teaspoon garlic powder (adds a subtle savory depth)
- ¼ teaspoon black pepper, freshly ground
- Pinch of salt (optional—the ranch mix is already salty, so taste before adding)
For the Mummy Wrap & Decorations
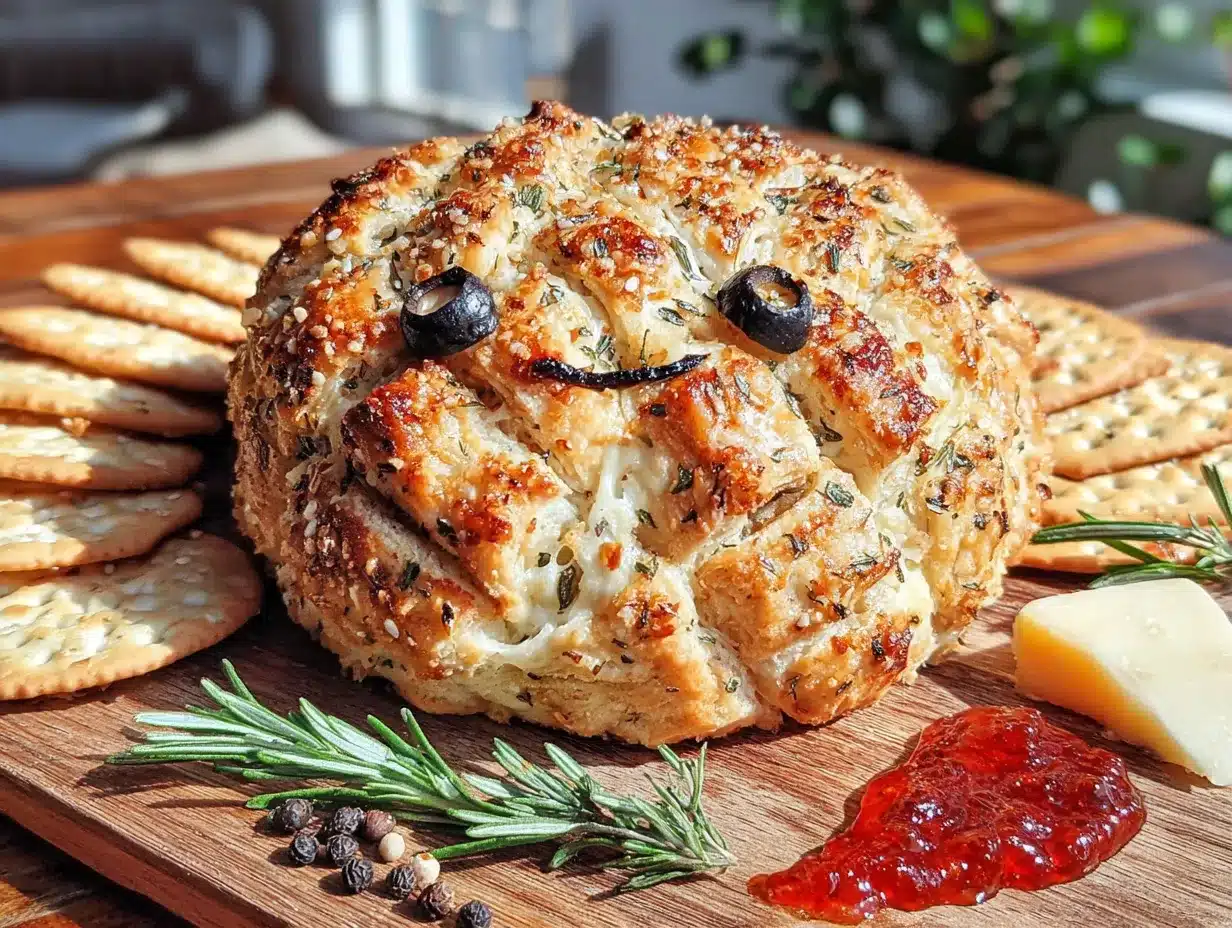
- 8 to 10 sticks string cheese (mozzarella string cheese works best—it peels easily and has a mild flavor that doesn’t overpower the filling)
- 2 candy eyes (you can find these at any grocery store in the baking aisle, or make your own with black and white frosting)
- Small pretzel sticks (optional—for arms or legs if you want to get fancy)
For Serving
- Assorted crackers (I like a mix of buttery Ritz, sturdy wheat crackers, and pretzel crisps for variety)
- Fresh vegetable sticks (carrot sticks, celery, and bell pepper strips add color and crunch)
A few notes on ingredient selection: Make sure your cream cheese is truly softened—not cold, not melted. If it’s too cold, you’ll end up with lumps. If it’s too warm, the cheese ball won’t hold its shape. Let it sit on the counter for about 30 minutes before you start. For the cheddar, I recommend a sharp or extra-sharp variety. The stronger flavor balances the richness of the cream cheese beautifully. And don’t skip the ranch mix—it’s the secret weapon that makes everyone ask, “What’s in this?”
Equipment Needed
You don’t need a lot of fancy tools for this recipe, which is part of the charm. Here’s what you’ll want to have on hand:
- Large mixing bowl (a standard 4-quart bowl works fine)
- Hand mixer or stand mixer (you can do this by hand with a wooden spoon, but a mixer makes it much easier to get the filling smooth)
- Rubber spatula (for scraping down the sides of the bowl)
- Plastic wrap (to wrap the cheese ball while it chills)
- Parchment paper or wax paper (makes rolling and shaping much less messy)
- Small offset spatula or butter knife (for smoothing the filling)
- Serving platter or board (something with a little lip to keep the crackers from sliding off)
If you don’t have a hand mixer, you can absolutely mix this by hand. Just make sure your cream cheese is very soft, and be prepared to put a little muscle into it. I’ve done it both ways, and honestly, the hand-mixed version has a slightly more rustic texture that some people prefer. For the string cheese peeling, no special tools needed—just your fingers. It’s oddly satisfying work.
Preparation Method
Let’s walk through this step by step. I’ve made this cheese ball more times than I can count, and these are the little tricks I’ve picked up along the way.
- Soften the cream cheese. Take the cream cheese out of the fridge about 30 minutes before you start. Cut it into cubes to speed up the process. You want it soft enough that you can easily press your finger into it, but not so soft that it’s runny. Trust me on this—cold cream cheese leads to lumpy filling, and nobody wants that.
- Mix the filling. In your large mixing bowl, combine the softened cream cheese, shredded cheddar, ranch dressing mix, garlic powder, and black pepper. Beat with your hand mixer on medium speed until everything is well combined and smooth. Stop and scrape down the sides of the bowl at least once. The mixture should be thick, creamy, and slightly stiff. Taste it now—this is your chance to adjust the seasoning. I usually add a tiny pinch of salt, but you might find the ranch mix is enough.
- Shape the cheese ball. Lay a large piece of plastic wrap on your work surface. Scrape the cheese mixture onto the center of the plastic wrap. Use the plastic wrap to help you form the mixture into a ball—bring the corners up and twist to compact it. Then, using your hands (still through the plastic), shape it into a smooth, round ball. Don’t worry if it’s not perfect; the mummy wrap will cover any imperfections. Wrap it tightly and refrigerate for at least 2 hours, or overnight. This step is non-negotiable. The filling needs to firm up so it holds its shape when you add the string cheese.
- Prepare the string cheese. About 15 minutes before you’re ready to assemble, take the string cheese out of the fridge. Peel each stick into thin strips. Some sticks will peel easily into long, even strips; others will break into shorter pieces. That’s fine—you can overlap them on the cheese ball. You want a mix of lengths for a more realistic mummy look. Set the strips aside on a plate.
- Wrap the mummy. Take the chilled cheese ball out of the fridge and unwrap it. Place it on your serving platter or a piece of parchment paper. Start wrapping the string cheese strips around the ball, overlapping them slightly. I like to start at the bottom and work my way up, leaving a small gap at the top for the “face.” Don’t wrap too tightly—you want the strips to have a little movement, like loose bandages. Press the ends gently into the cheese ball to secure them.
- Add the eyes. Place two candy eyes in the gap you left at the top. Press them gently into the filling so they stay put. If you don’t have candy eyes, you can use two small dots of black frosting or even two olive slices. I’ve done all three, and the candy eyes are definitely the cutest.
- Chill again (optional but recommended). Once the mummy is assembled, pop it back in the fridge for another 20-30 minutes. This helps the string cheese strips adhere to the filling and makes the whole thing easier to serve. If you’re in a rush, you can skip this step, but the mummy will be a little messier when you cut into it.
- Serve with crackers. Arrange your crackers around the mummy on the serving platter. I like to create a little “graveyard” scene with the crackers acting as tombstones. It’s a small touch that makes the presentation even more fun.
Cooking Tips & Techniques
After making this cheese ball for five Halloweens straight, I’ve learned a few things the hard way. Here are my best tips for getting it right every time.
Don’t skip the chilling step. I know it’s tempting to rush, especially if you’re making this the day of a party. But a warm cheese ball is a messy cheese ball. The filling needs to be firm enough to hold the weight of the string cheese strips. If you’re really short on time, you can pop the shaped cheese ball in the freezer for 20 minutes instead of the fridge for 2 hours. Just watch it carefully—you don’t want it frozen solid.
Peel the string cheese while it’s cold. Cold string cheese peels much more cleanly than warm string cheese. If the strips are breaking or sticking together, put them back in the fridge for a few minutes. And don’t stress about perfection—some strips will be thicker, some thinner. That variety actually makes the mummy look more authentic.
Use your hands to warm the cream cheese. If you forgot to take the cream cheese out of the fridge ahead of time (which, let’s be honest, happens to all of us), you can warm it up by kneading it in the package with your hands for a few minutes. The heat from your hands will soften it enough to mix. It’s not ideal, but it works in a pinch.
Make it ahead of time. This cheese ball actually gets better after a day in the fridge. The flavors meld together, and the filling becomes even creamier. You can make the filling and shape the ball up to 3 days in advance. Just wrap it tightly and refrigerate. Add the string cheese wrap and eyes on the day you’re serving it.
One mistake I made early on: I used pre-shredded cheddar cheese the first time I made this. The filling turned out grainy and dry. I thought I had done something wrong, but it was the anti-caking agents in the pre-shredded cheese. Shredding your own cheddar takes an extra 2 minutes and makes a huge difference. Don’t skip it.
Variations & Adaptations
This recipe is super flexible, and I’ve tried quite a few variations over the years. Here are some of my favorites:
- Spicy Mummy: Add 1 tablespoon of chopped pickled jalapeños or a teaspoon of cayenne pepper to the filling. The heat pairs surprisingly well with the cool, creamy cheese. I made this version for a Halloween party last year, and it was gone in 20 minutes.
- Herb & Garlic Mummy: Swap the ranch dressing mix for 1 tablespoon of dried parsley, 1 teaspoon of dried dill, and an extra teaspoon of garlic powder. This gives the cheese ball a fresher, more garden-like flavor. It’s especially good if you’re serving it with vegetable sticks.
- Bacon Cheddar Mummy: Add ½ cup of cooked, crumbled bacon to the filling. Because everything is better with bacon, right? I recommend using thick-cut bacon and cooking it until it’s very crispy so it doesn’t make the filling soggy.
- Gluten-Free Version: This recipe is naturally gluten-free as long as you use a gluten-free ranch dressing mix. Serve it with gluten-free crackers or vegetable sticks. I’ve tested this with several gluten-free cracker brands, and Simple Mills almond flour crackers are my favorite.
- Dairy-Free Version: Use dairy-free cream cheese and shredded dairy-free cheddar. The texture will be slightly different—dairy-free cream cheese is usually softer—but the flavor is still great. I recommend chilling the filling for an extra hour to help it firm up.
One variation I tried that didn’t work: I attempted to make a “double-wrapped” mummy by using two layers of string cheese. It looked cool, but it was way too much cheese. The filling got lost under all those bandages. Stick with a single layer.
Serving & Storage Suggestions
This mummy cheese ball is best served cold or at cool room temperature. If it sits out for more than an hour, the string cheese strips can start to slide around. I usually take it out of the fridge about 15 minutes before serving so the filling softens just enough to be spreadable.
For the best presentation, arrange the crackers in a circle around the mummy, leaving a little space between each one. I like to add a few sprigs of fresh rosemary around the edges to look like little “trees” in a spooky forest. It’s a simple touch that makes the whole platter look intentional and festive.
As for drinks, this cheese ball pairs beautifully with a crisp white wine like Sauvignon Blanc or a light beer like a pilsner. For a non-alcoholic option, sparkling apple cider is a great choice—the bubbles cut through the richness of the cheese.
Storage: Leftover cheese ball (if you have any!) can be wrapped tightly in plastic wrap and stored in the refrigerator for up to 5 days. The string cheese strips might get a little dry, but the filling stays creamy. To refresh it, you can peel a few new string cheese strips and re-wrap it.
Freezing: You can freeze the cheese ball filling (without the string cheese wrap) for up to 2 months. Wrap it tightly in plastic wrap and then in foil. Thaw it in the refrigerator overnight, then shape and wrap it as directed. I’ve done this several times, and the texture is nearly identical to fresh.
Nutritional Information & Benefits
Let’s be real—this is an indulgent appetizer, not a health food. But that doesn’t mean it can’t fit into a balanced diet. Here’s a rough breakdown per serving (based on 12 servings):
- Calories: 210
- Fat: 17g
- Carbohydrates: 4g
- Protein: 9g
- Calcium: 15% of the Daily Value
The cream cheese and cheddar provide a good amount of calcium and protein, which can help keep you feeling full and satisfied. If you’re watching your sodium intake, you can use a low-sodium ranch dressing mix or make your own seasoning blend. I’ve done that before, and while the flavor is slightly different, it’s still delicious.
For those with dietary restrictions, this recipe can be adapted as noted in the variations section. Just be aware that dairy-free versions will have less protein and calcium. And if you’re serving this to kids, it’s a fun way to get them to eat a little protein before the candy rush of Halloween night.
Conclusion
This cozy mummy cheese ball is proof that the best recipes often come from happy accidents. What started as a failed attempt at a classic appetizer turned into a Halloween tradition that my family looks forward to every year. It’s silly, it’s simple, and it’s absolutely delicious. I love that I can make it ahead of time, that it uses ingredients I usually have on hand, and that it never fails to make people smile.
I hope you give this recipe a try, whether it’s for a Halloween party, a cozy night in, or just because you want something fun and different. Feel free to make it your own—add different seasonings, change up the decorations, or serve it with your favorite crackers. The beauty of this recipe is how forgiving it is.
If you make this mummy cheese ball, I’d love to hear about it! Leave a comment below and let me know how it turned out. Did you add any fun twists? Did your kids help with the wrapping? Share your photos and tag me on social media—I love seeing your creations. Happy Halloween, and happy snacking!
Frequently Asked Questions
Can I make this cheese ball without ranch dressing mix?
Absolutely. You can substitute the ranch mix with a blend of dried herbs like parsley, dill, chives, and garlic powder. Start with 1 teaspoon each and adjust to taste. The flavor will be different—more herbal and less tangy—but it’s still delicious.
How far in advance can I make this mummy cheese ball?
You can make the filling and shape the cheese ball up to 3 days in advance. Keep it tightly wrapped in the refrigerator. Add the string cheese wrap and candy eyes on the day you plan to serve it for the freshest look.
My string cheese strips keep breaking. What am I doing wrong?
This usually happens when the string cheese is too warm. Make sure it’s cold from the fridge when you peel it. If it’s still breaking, try peeling it more slowly or using a different brand. Some brands peel more easily than others.
Can I use a different type of cheese for the filling?
Yes! While sharp cheddar is my favorite, you can use Monterey Jack, pepper jack, or even a smoked gouda for a different flavor profile. Just make sure to shred it yourself for the best texture.
How do I keep the candy eyes from falling off?
Press the eyes gently but firmly into the cheese filling. If they’re still loose, you can use a tiny dab of cream cheese as “glue” to hold them in place. This works especially well if the cheese ball has been sitting out for a while and the surface has started to dry slightly.
Pin This Recipe!
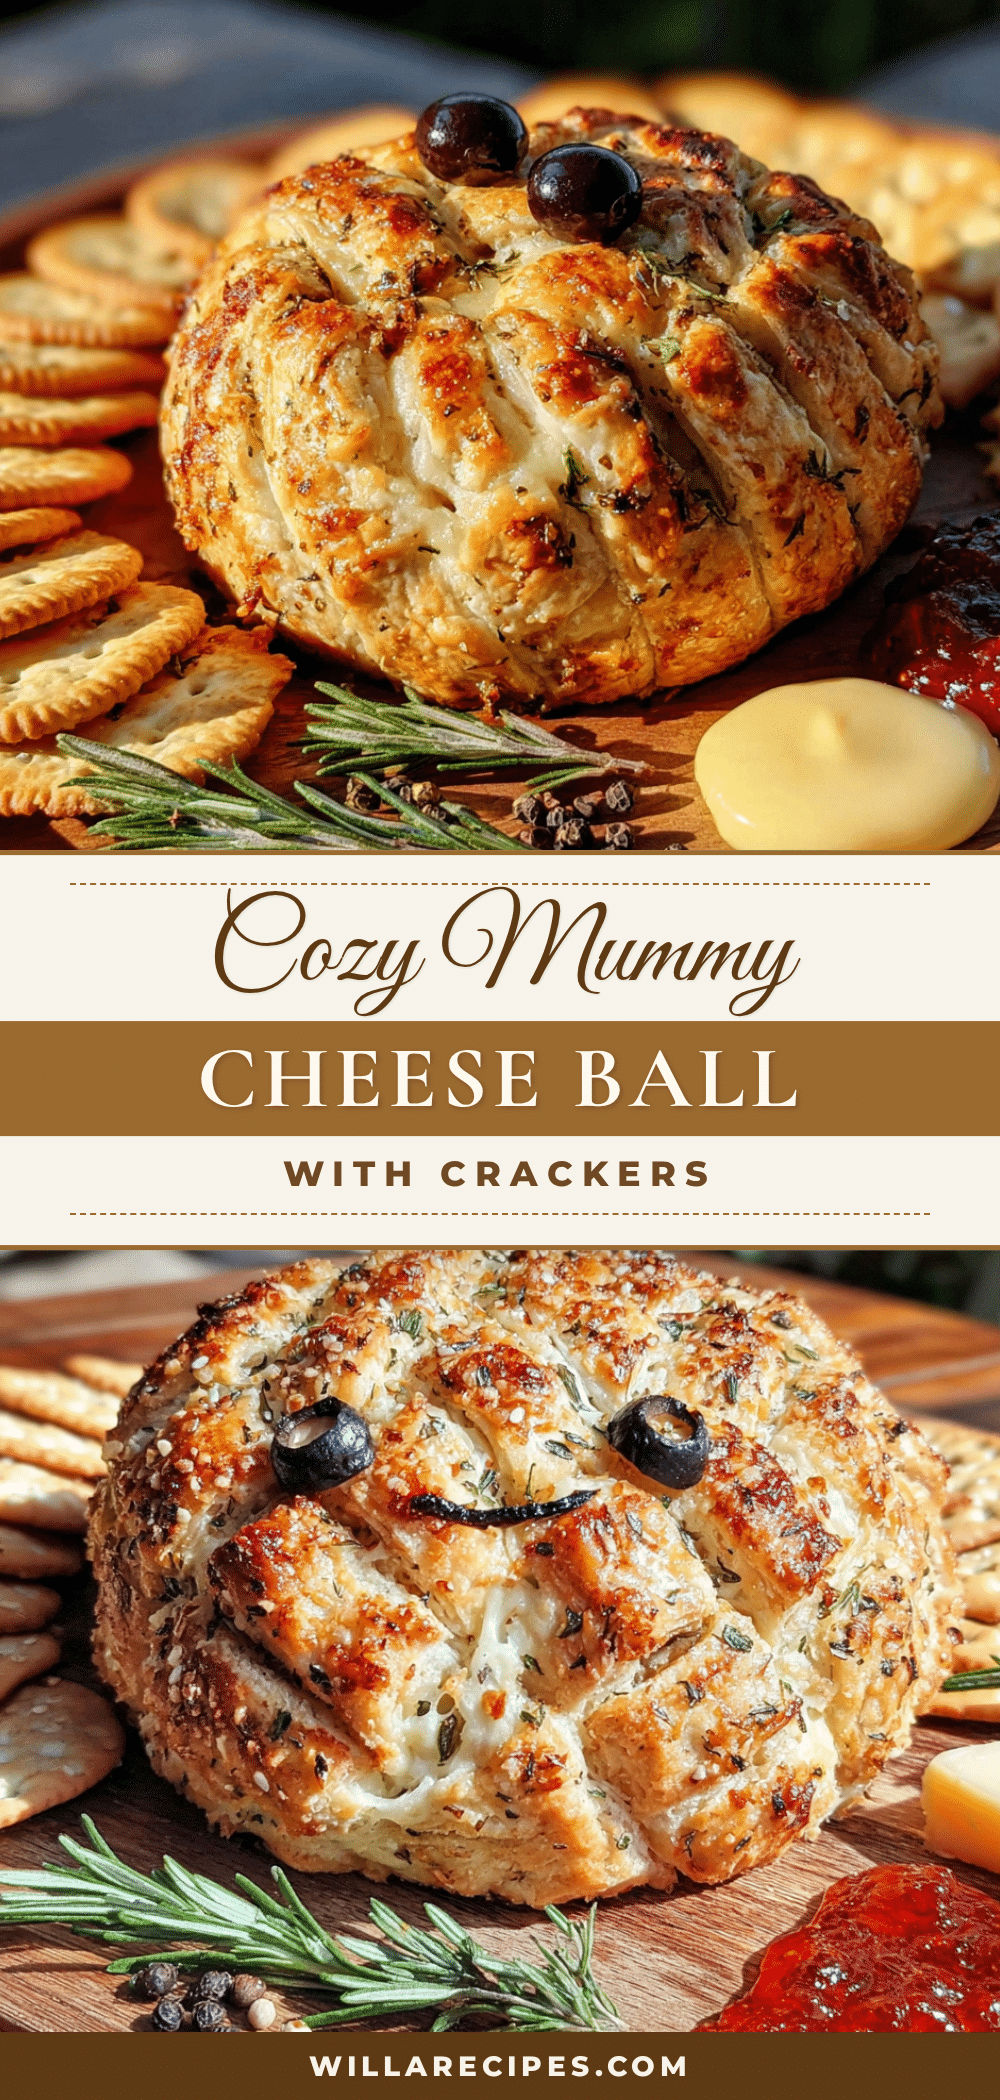
Cozy Mummy Wrapped Cheese Ball: Easy Halloween Appetizer

A creamy, savory cheese ball wrapped in string cheese bandages to look like a mummy. Perfect for Halloween parties, this easy appetizer is quick to make and always a crowd-pleaser.
- Prep Time: 20 minutes
- Cook Time: 0 minutes
- Total Time: 2 hours 20 minutes (includes chilling)
- Yield: 12 servings 1x
- Category: Appetizer
- Cuisine: American
Ingredients
- 16 ounces cream cheese, softened to room temperature
- 1 ½ cups sharp cheddar cheese, finely shredded
- 1 packet (1 ounce) dry ranch dressing mix
- ½ teaspoon garlic powder
- ¼ teaspoon black pepper, freshly ground
- Pinch of salt (optional)
- 8 to 10 sticks string cheese (mozzarella)
- 2 candy eyes
- Small pretzel sticks (optional)
- Assorted crackers for serving
- Fresh vegetable sticks for serving (optional)
Instructions
- Soften the cream cheese: Take the cream cheese out of the fridge about 30 minutes before starting. Cut into cubes to speed up softening.
- Mix the filling: In a large mixing bowl, combine softened cream cheese, shredded cheddar, ranch dressing mix, garlic powder, and black pepper. Beat with a hand mixer on medium speed until smooth and well combined. Taste and adjust seasoning if needed.
- Shape the cheese ball: Lay a large piece of plastic wrap on your work surface. Scrape the cheese mixture onto the center. Use the plastic wrap to form the mixture into a smooth, round ball. Wrap tightly and refrigerate for at least 2 hours, or overnight.
- Prepare the string cheese: About 15 minutes before assembling, take the string cheese out of the fridge. Peel each stick into thin strips. Set aside.
- Wrap the mummy: Take the chilled cheese ball out of the fridge and unwrap it. Place on a serving platter or parchment paper. Start wrapping the string cheese strips around the ball, overlapping slightly, leaving a small gap at the top for the face. Press ends gently into the cheese ball.
- Add the eyes: Place two candy eyes in the gap at the top. Press gently into the filling.
- Chill again (optional but recommended): Refrigerate for another 20-30 minutes to help the strips adhere.
- Serve: Arrange crackers around the mummy on the serving platter.
Notes
Make sure cream cheese is truly softened but not melted. Shred cheddar from a block for best texture. Chill the cheese ball thoroughly before wrapping. String cheese peels best when cold. Can be made up to 3 days in advance (add wrap and eyes on serving day).
Nutrition
- Serving Size: 1 serving (based on
- Calories: 210
- Sugar: 2
- Sodium: 380
- Fat: 17
- Saturated Fat: 10
- Carbohydrates: 4
- Protein: 9
Keywords: Halloween appetizer, cheese ball, mummy cheese ball, easy appetizer, party food, cream cheese, string cheese, no-bake


