There used to be a tiny bakery tucked between a laundromat and a vintage shop on Grand Avenue that made the most hauntingly beautiful meringue ghosts you’d ever see. When they closed their doors three summers ago, I honestly felt a little lost. Every Halloween after that, I’d find myself searching for that same light-as-air, perfectly spooky cookie—and coming up empty. After twelve attempts—some that collapsed, some that wept sugary tears, and one that looked more like a blob than a boo—I finally cracked the code. Let me tell you, the victory dance in my kitchen was real.
These Easy Spooky Ghost Meringue Cookies are my little tribute to that lost bakery. They’re crisp on the outside, melt-in-your-mouth soft on the inside, and absolutely perfect for Halloween gatherings. I mean, what’s better than a treat that looks like it floated straight out of a haunted house? You know that feeling when you bring a dessert to a party and everyone goes quiet for a second? That’s what happens with these ghosts. They’re simple enough to whip up on a Tuesday night but impressive enough to steal the show at any spooky soiree. I keep making them because they remind me that sometimes the best recipes come from a little bit of obsession and a whole lot of trial and error.
Why You’ll Love This Recipe
Let’s be real for a second—Halloween treats can be a hassle. Between melting chocolate, sticky caramel, and complicated decorating, it’s easy to get overwhelmed. These ghost meringues are the opposite of that. They’re the kind of recipe that makes you look like a kitchen wizard without breaking a sweat.
- Quick & Easy: From start to finish, you’re looking at about 2 hours total—but most of that is hands-off baking time. The actual prep takes maybe 15 minutes.
- Simple Ingredients: You probably have everything in your pantry right now. Egg whites, sugar, vanilla, and a pinch of cream of tartar. That’s it. No fancy grocery runs required.
- Perfect for Halloween Parties: These ghosts are the life of the party. They’re gluten-free, dairy-free, and basically guilt-free—so everyone can enjoy them.
- Crowd-Pleaser: I’ve brought these to potlucks, neighborhood gatherings, and family dinners. Kids think they’re adorable, and adults appreciate the light, not-too-sweet finish after a heavy meal.
- Unbelievably Delicious: The texture is pure magic. Crisp on the outside, airy and marshmallowy on the inside. It’s like biting into a sweet little cloud.
What makes these different from other meringue recipes? It’s the technique. I’ve tested this one over and over to get that perfect ghost shape without any cracking or weeping. Plus, the tiny chocolate chip eyes give them just the right amount of personality. Honestly, this isn’t just another Halloween cookie—it’s the one that’ll have people asking for the recipe before the night’s over.
What Ingredients You Will Need
This recipe uses simple, humble ingredients to create something truly special. The magic is in how they come together, not in fancy add-ons. Here’s what you’ll need to gather before you start.
- 4 large egg whites, room temperature (this is crucial—cold eggs won’t whip up as high)
- 1 cup (200g) granulated sugar (I prefer Domino or C&H for consistent results)
- 1/2 teaspoon cream of tartar (stabilizes the meringue and helps prevent weeping)
- 1 teaspoon vanilla extract (pure, not imitation—the flavor difference is real)
- Pinch of salt (a tiny pinch balances the sweetness)
- 1/4 cup miniature chocolate chips (for the ghost eyes—regular size works too, but minis look cuter)
- Optional: 1-2 drops black gel food coloring (for a spookier mouth, though I prefer the classic plain ghost look)
A quick note on egg whites: Make sure no yolk gets in there. Even a speck of yolk can prevent your meringue from whipping up properly. If you’re nervous, separate each egg into a small bowl first, then add the whites to your mixing bowl. I learned that one the hard way after ruining a whole batch.
For the sugar, I’ve tried both superfine and regular granulated. Regular works fine as long as you give it enough time to dissolve. If you’re feeling fancy, you can pulse your sugar in a food processor for a few seconds to make it superfine—it’ll dissolve faster and give you a silkier meringue.
And here’s a little substitution tip: If you don’t have cream of tartar, you can use 1 teaspoon of lemon juice or white vinegar instead. It does the same job of stabilizing those delicate egg white bubbles.
Equipment Needed
You don’t need a professional bakery setup for these ghosts. Most of this stuff is probably already in your kitchen drawers.
- Electric stand mixer or hand mixer: Whipping meringue by hand is possible, but your arm will hate you. A stand mixer with the whisk attachment is my go-to.
- Large mixing bowl: Make sure it’s spotless—any grease can ruin your meringue.
- Piping bag with a large round tip: I use a Wilton 1A tip. No piping bag? A zip-top bag with the corner snipped off works just fine.
- Baking sheets lined with parchment paper: Silicone mats work too, but parchment is easier to peel off.
- Small cookie scoop or spoon: For portioning if you’re not piping.
- Cooling rack: Essential for letting the ghosts cool completely without getting soggy.
I’ve made these with a cheap hand mixer from the grocery store and they turned out great. Don’t stress about having fancy equipment. The one thing I wouldn’t skip is the parchment paper—meringues stick like crazy to unlined pans.
Preparation Method
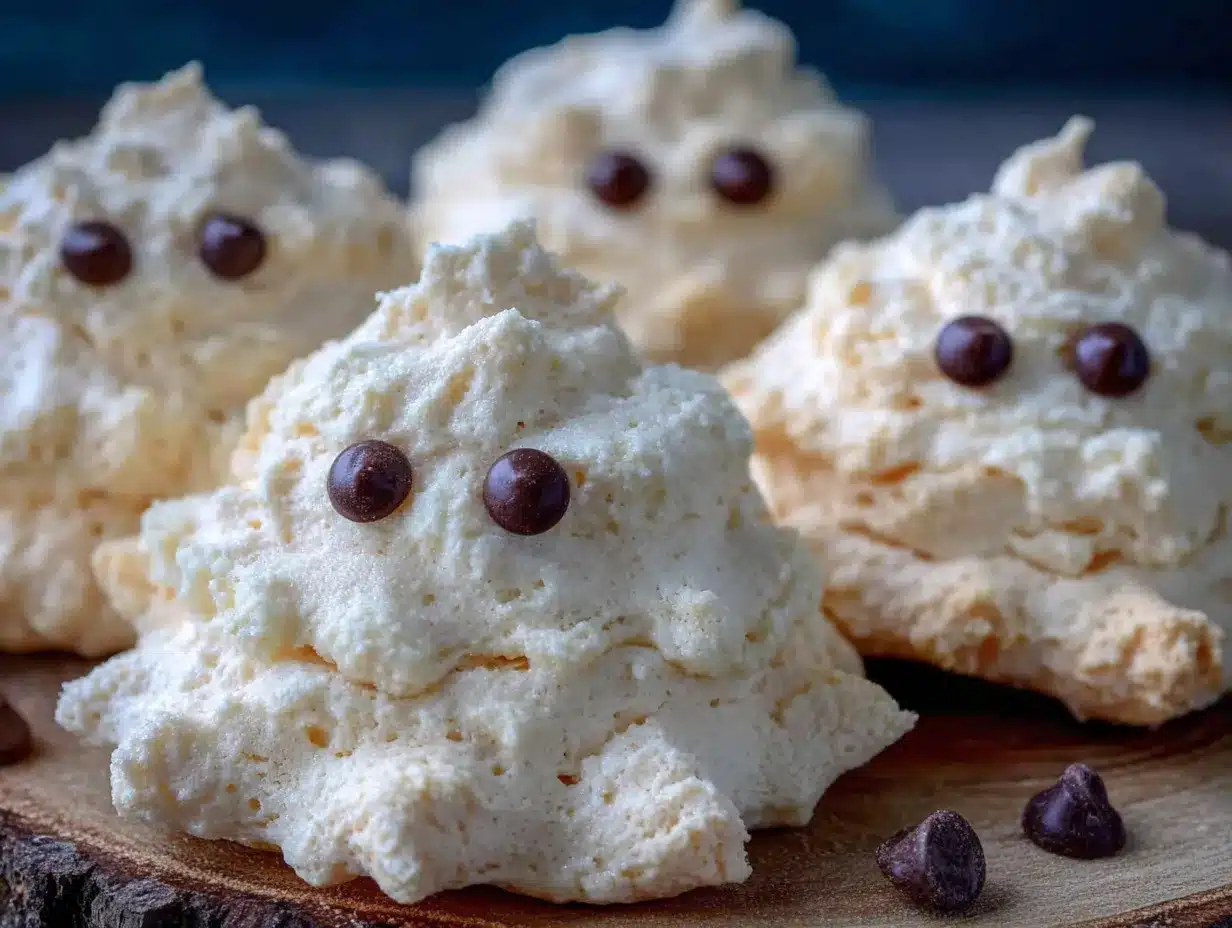
Alright, let’s make some ghosts. Take your time with the first few steps—rushing is the enemy of good meringue.
- Preheat your oven to 200°F (93°C). Line two baking sheets with parchment paper. Set them aside for now.
- Separate your eggs while they’re cold—it’s easier. Then let the whites come to room temperature in your mixing bowl. This takes about 30 minutes. Don’t skip this step. Cold whites don’t whip as high, and you want these ghosts tall and proud.
- Wipe down your bowl and whisk attachment with a little lemon juice or vinegar on a paper towel. This removes any trace of grease. I know it sounds fussy, but trust me—one greasy spot and your meringue won’t stiffen.
- Start whipping the egg whites on medium speed until they become frothy and bubbly. This takes about 1-2 minutes. You’ll see lots of tiny white bubbles forming.
- Add the cream of tartar and salt. Continue whipping on medium-high speed until soft peaks form. This means when you lift the whisk, the meringue droops down in a soft curl. About 2-3 minutes more.
- Start adding the sugar, one tablespoon at a time, with the mixer running on medium speed. This is the most important part. If you dump all the sugar in at once, your meringue will deflate. Go slow. Let each addition dissolve before adding the next. It should take about 5 minutes to add all the sugar.
- Once all the sugar is in, add the vanilla extract. Then crank the speed to high and whip until stiff, glossy peaks form. The meringue should be thick, shiny, and hold its shape when you lift the whisk. Rub a little between your fingers—if it feels gritty, keep whipping. You want it completely smooth. This takes about 5-7 minutes total from when you started adding sugar.
- Test for doneness: The bowl should feel cool to the touch, and the meringue should be so stiff it doesn’t move when you tilt the bowl. If it slides around, keep whipping.
- Transfer the meringue to a piping bag fitted with a large round tip. If you’re using a zip-top bag, snip about 1/2 inch off the corner.
- Pipe your ghosts: Hold the bag straight up and down, about 1/2 inch above the parchment. Squeeze gently to create a round base, then lift straight up while continuing to squeeze. As you lift, reduce pressure and pull up to create a little peak at the top. Think of it like making a soft-serve ice cream cone shape. Leave about 2 inches between each ghost—they don’t spread much, but you want air to circulate.
- Add the eyes: Before the meringue starts to dry, gently press two miniature chocolate chips into each ghost for eyes. Don’t push too deep or they’ll disappear inside. Just nestle them in.
- Bake for 60-75 minutes at 200°F (93°C). The ghosts should be firm to the touch and easily peel off the parchment. They shouldn’t be brown at all—if they start to color, your oven is too hot. Every oven is different, so check at 60 minutes.
- Turn off the oven and leave the ghosts inside for another 30 minutes to dry out completely. This step gives them that perfect crisp texture.
- Cool completely on a wire rack before storing. Don’t skip this—trapped steam will make them chewy instead of crisp.
Cooking Tips & Techniques
I’ve made these ghosts more times than I care to count, and I’ve picked up a few tricks along the way. Let me save you some trouble.
Humidity is the enemy. Seriously, don’t make meringues on a rainy day. The sugar absorbs moisture from the air and your cookies will end up sticky and sad. Pick a dry day or crank up your air conditioning.
Room temperature eggs are non-negotiable. I know I said it already, but I’m saying it again because it matters that much. Cold egg whites don’t trap air as well, and you’ll end up with flat, dense ghosts instead of tall, fluffy ones. If you forgot to take your eggs out early, place them in a bowl of warm water for 5 minutes.
Don’t overbake. Meringues are done when they’re dry and firm, not when they’re brown. If your ghosts start turning tan, your oven is too hot. I had one batch that looked like little toasted marshmallows—still tasty, but not very spooky.
Pipe with confidence. Your first few ghosts might look a little wonky. That’s okay. I promise they’ll still taste amazing. If you really mess one up, just scrape it back into the bag and try again. The meringue doesn’t mind being re-piped.
Multitask wisely. While your ghosts are baking, you can clean up the kitchen or start on other Halloween treats. Just don’t open the oven door too often—temperature fluctuations can cause cracking.
Variations & Adaptations
Once you’ve mastered the basic ghost, the possibilities are endless. Here are a few ways to switch things up.
Chocolate Ghosts: Replace 2 tablespoons of sugar with 2 tablespoons of unsweetened cocoa powder. Sift it into the sugar before adding to the egg whites. You’ll get chocolate ghosts that taste like light, airy brownies.
Peppermint Spirits: Add 1/4 teaspoon of peppermint extract along with the vanilla. Crush a candy cane and sprinkle the pieces on top before baking. These are perfect for a Halloween-Christmas crossover party.
Vegan Version: Use aquafaba (the liquid from a can of chickpeas) instead of egg whites. 3 tablespoons of aquafaba equals one egg white. You’ll need to whip it a bit longer, but it works surprisingly well. I tested this for a friend with egg allergies and it was a hit.
Spooky Colors: Add a drop of gel food coloring to the meringue before piping. Purple ghosts, green ghosts, orange ghosts—go wild. Just use gel coloring, not liquid, because liquid will deflate your meringue.
Gluten-Free Note: These are naturally gluten-free, so no substitutions needed. Just double-check that your vanilla extract and chocolate chips are certified gluten-free if that’s a concern.
Serving & Storage Suggestions
These ghosts are best served at room temperature, and they look absolutely adorable piled on a cake stand or arranged on a platter with some fake spiderwebs. For a Halloween party, I like to set them out on a black platter with a few candy eyeballs scattered around for extra creep factor.
They pair beautifully with hot apple cider, pumpkin spice lattes, or even a glass of cold milk. If you’re serving them after a heavy meal, they’re the perfect light finish—like a little sweet whisper instead of a shout.
For storage, keep your ghosts in an airtight container at room temperature. Don’t refrigerate them—the moisture will ruin their texture. They’ll stay crisp for about 2 weeks, though honestly, they never last that long in my house.
You can also freeze them! Place them in a single layer in a freezer-safe container with parchment between layers. They’ll keep for up to 3 months. Thaw at room temperature for about 15 minutes before serving. The texture stays perfect.
One thing to note: These ghosts are sensitive to humidity even after baking. If you live in a humid climate, store them with a silica gel packet (like the ones in shoe boxes) to keep them crisp. I know that sounds weird, but it works.
Nutritional Information & Benefits
Per ghost (based on 24 cookies): approximately 45 calories, 0g fat, 10g carbohydrates, 1g protein. These are a lighter Halloween treat compared to traditional cookies loaded with butter and sugar.
The main ingredient—egg whites—are pure protein and contain no fat or cholesterol. They’re also a good source of selenium and riboflavin. Of course, there’s plenty of sugar here, so they’re still a treat, but they won’t weigh you down like a dense brownie or cookie might.
These ghosts are naturally gluten-free, dairy-free, and nut-free, making them a safe option for many dietary restrictions. Just be sure to check your chocolate chips for any cross-contamination warnings if allergies are a concern.
Honestly, I love that I can serve these at a party and not worry about half the guests being unable to eat them. It’s a small thing, but it makes hosting so much easier.
Conclusion
These Easy Spooky Ghost Meringue Cookies are the Halloween treat you didn’t know you needed. They’re simple enough for a beginner baker but impressive enough to make you look like a pro. The best part? You can customize them however you want—different colors, flavors, or decorations. Make them your own.
For me, these ghosts will always remind me of that little bakery on Grand Avenue and the joy of finally cracking a recipe that seemed impossible. Every time I pipe a little ghost, I smile. And when I see the look on people’s faces when they bite into one—that moment of surprise and delight—I know all those failed attempts were worth it.
I’d love to see your ghost creations! Tag me in your photos, leave a comment below with your favorite variation, or share this recipe with a friend who loves Halloween as much as you do. Happy haunting, and happy baking!
Frequently Asked Questions
Can I make these without a piping bag?
Absolutely. Just use a zip-top bag with the corner snipped off, or even a small spoon to dollop the meringue into ghost-like shapes. They won’t look as uniform, but they’ll taste just as good.
Why did my meringue turn out flat?
This usually happens when the egg whites aren’t whipped enough, or if there was any grease on your equipment. Make sure your bowl and whisk are spotless, and whip until the meringue is stiff and glossy.
Can I use liquid food coloring?
I wouldn’t recommend it. Liquid food coloring adds moisture that can deflate your meringue. Stick with gel or powder colors for the best results.
How do I know when the meringue is done whipping?
Rub a tiny bit between your fingers. If it feels smooth and not gritty, it’s done. You should also be able to hold the bowl upside down without the meringue sliding out—but don’t actually do that unless you’re feeling brave!
Can I double this recipe?
Yes, but you’ll need to use a larger bowl and be prepared for a longer whipping time. I also recommend baking one batch at a time to ensure even airflow in the oven.
Pin This Recipe!
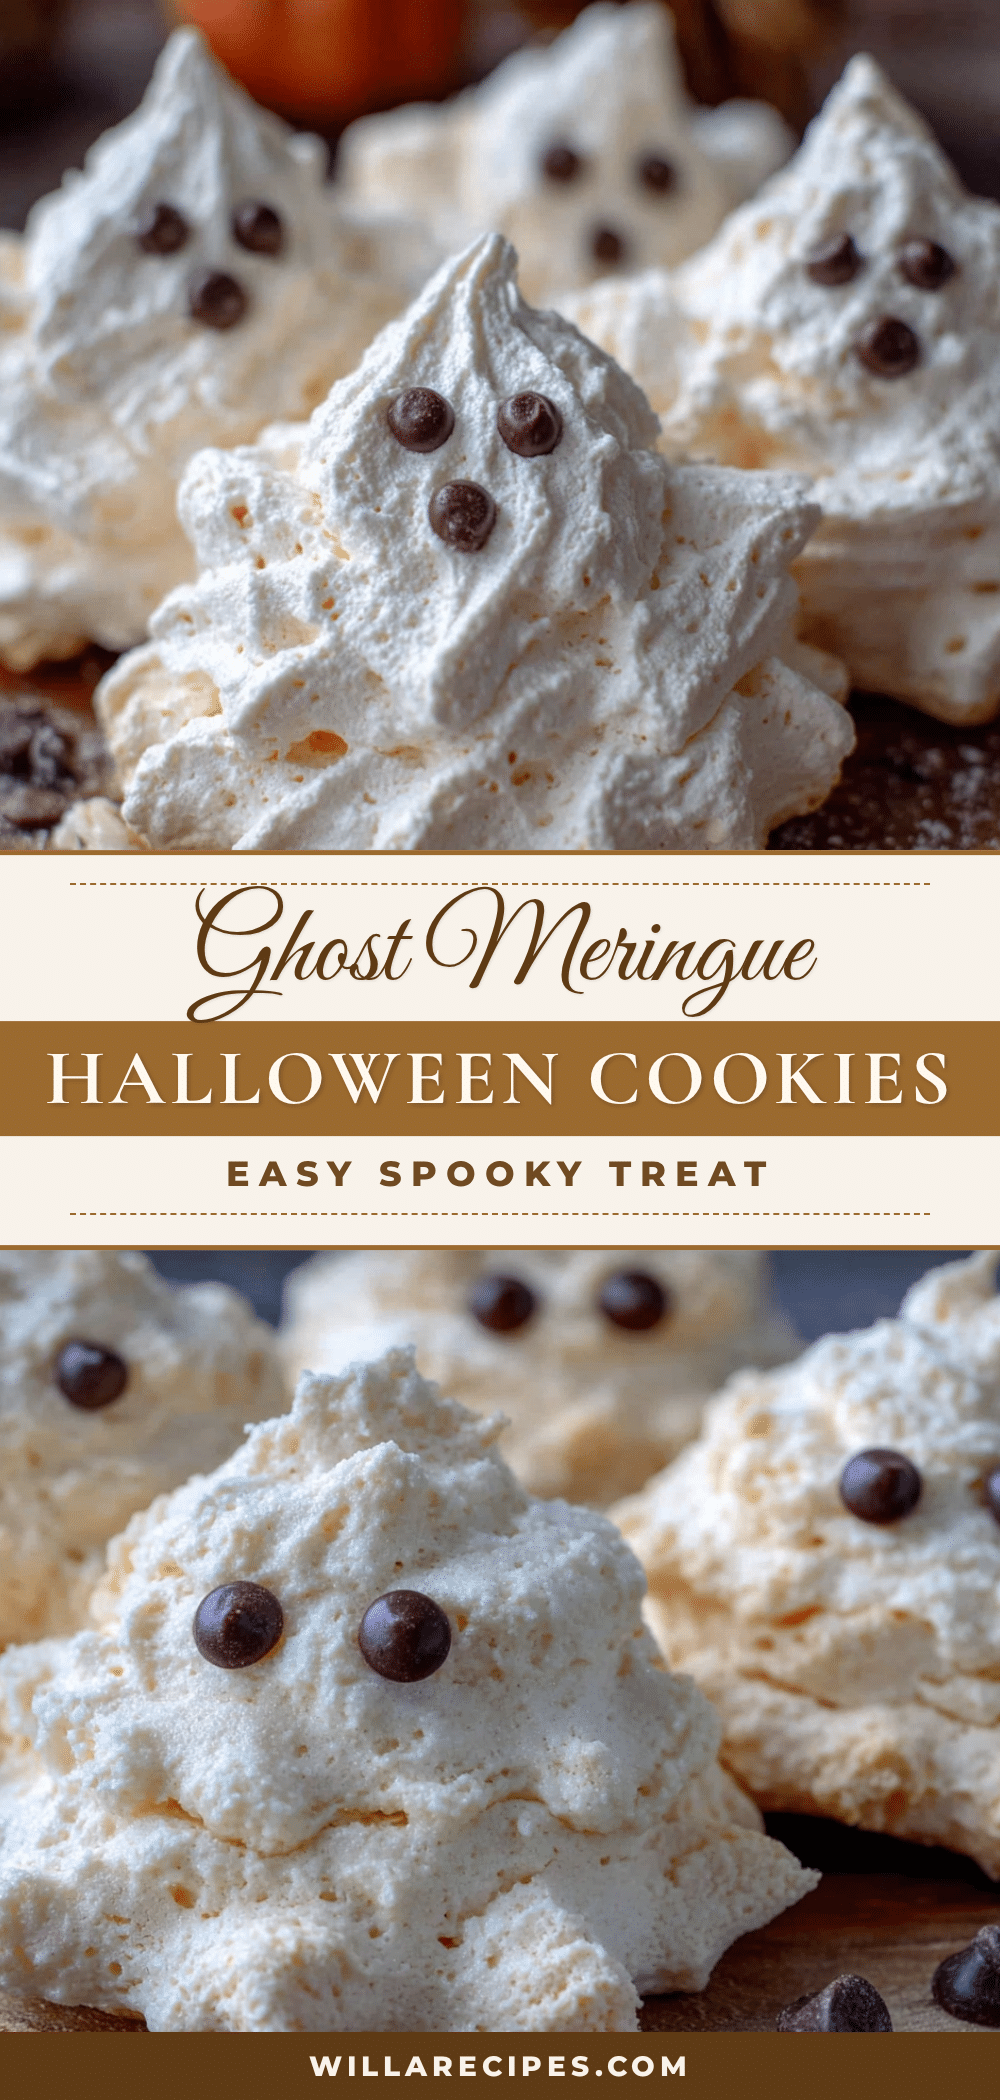
Easy Spooky Ghost Meringue Cookies: Best Halloween Treat
These light-as-air ghost meringue cookies are crisp on the outside, melt-in-your-mouth soft on the inside, and perfect for Halloween gatherings. They’re simple to make with basic pantry ingredients and are naturally gluten-free and dairy-free.
- Prep Time: 15 minutes
- Cook Time: 60-75 minutes
- Total Time: 2 hours
- Yield: 24 cookies 1x
- Category: Dessert
- Cuisine: American
Ingredients
- 4 large egg whites, room temperature
- 1 cup (200g) granulated sugar
- 1/2 teaspoon cream of tartar
- 1 teaspoon vanilla extract (pure)
- Pinch of salt
- 1/4 cup miniature chocolate chips
- Optional: 1-2 drops black gel food coloring
Instructions
- Preheat your oven to 200°F (93°C). Line two baking sheets with parchment paper.
- Separate your eggs while cold, then let the whites come to room temperature in your mixing bowl (about 30 minutes).
- Wipe down your bowl and whisk attachment with a little lemon juice or vinegar on a paper towel to remove any grease.
- Start whipping the egg whites on medium speed until frothy and bubbly, about 1-2 minutes.
- Add the cream of tartar and salt. Continue whipping on medium-high speed until soft peaks form, about 2-3 minutes.
- Add the sugar one tablespoon at a time with the mixer running on medium speed, letting each addition dissolve before adding the next (about 5 minutes total).
- Add the vanilla extract, then increase speed to high and whip until stiff, glossy peaks form, about 5-7 minutes. The meringue should be thick, shiny, and hold its shape.
- Test for doneness: the bowl should feel cool to the touch, and the meringue should not move when you tilt the bowl.
- Transfer the meringue to a piping bag fitted with a large round tip (or a zip-top bag with the corner snipped off).
- Pipe ghosts: hold the bag straight up and down, squeeze gently to create a round base, then lift straight up while continuing to squeeze, reducing pressure to create a peak. Leave about 2 inches between each ghost.
- Before the meringue dries, gently press two miniature chocolate chips into each ghost for eyes.
- Bake for 60-75 minutes at 200°F (93°C) until firm to the touch and easily peel off the parchment.
- Turn off the oven and leave the ghosts inside for another 30 minutes to dry out completely.
- Cool completely on a wire rack before storing.
Notes
Humidity is the enemy—don’t make meringues on a rainy day. Room temperature eggs are non-negotiable. Don’t overbake; meringues are done when dry and firm, not brown. Pipe with confidence; if you mess up, scrape back into the bag and try again. Store in an airtight container at room temperature for up to 2 weeks, or freeze for up to 3 months.
Nutrition
- Serving Size: 1 cookie
- Calories: 45
- Sugar: 10
- Sodium: 10
- Carbohydrates: 10
- Protein: 1
Keywords: Halloween cookies, meringue cookies, ghost cookies, easy Halloween treat, gluten-free cookies, dairy-free cookies


