My neighbor Mrs. Kowalski watched me wrestling with a piping bag on my front porch last October. I was trying to get the filling into these tiny little eggs without making a mess, and honestly, I was losing the battle. She didn’t say anything at first. Then she just walked over with this old, chipped ceramic plate covered in plastic wrap. “For the kids,” she said, and walked back inside. Under the wrap were these little spider-looking things made out of eggs. I mean, they were cute and creepy at the same time—perfect for Halloween.
I had been trying to come up with something fun for the neighborhood kids that didn’t involve handing out another bag of candy. You know, something that felt a little more personal. But every recipe I found online looked way too complicated or used ingredients I’d never heard of. Mrs. Kowalski’s version was different. She used basic stuff from the fridge—eggs, mayo, a little mustard, and black olives. That’s it. She told me later that her daughter used to beg for these every Halloween, and she’d been making them for thirty years.
I tweaked her method a bit over the years. I use a little more paprika now, and I found that chilling the eggs before piping makes the filling hold its shape better. But the spirit of the recipe is still hers. These Cozy Halloween Deviled Egg Spiders are the kind of thing that makes people stop and smile. They’re not fancy, but they’re fun. And honestly, isn’t that what Halloween is supposed to be about? Maybe you’ve been there—standing in the kitchen, wondering what to make that feels special but doesn’t take all day. This is it.
Why You’ll Love This Recipe
Let me tell you why these little guys have become my go-to for Halloween gatherings. I tested this recipe about six times before I got the texture just right. The filling needs to be creamy enough to pipe smoothly but firm enough to hold up the olive legs. After a few batches that were either too runny or too stiff, I finally nailed it. Here’s what makes these spiders stand out:
- Quick & Easy: You can make these in under 30 minutes, and most of that time is just boiling eggs. Perfect for last-minute Halloween plans or when the kids suddenly announce they want to bring something to the school party.
- Simple Ingredients: Eggs, mayonnaise, mustard, paprika, and black olives. Chances are you already have everything in your kitchen right now. No weird grocery store trips required.
- Perfect for Halloween Parties: Whether it’s a spooky dinner, a potluck, or just a fun snack for the kids before trick-or-treating, these fit right in.
- Crowd-Pleaser: I’ve brought these to three different Halloween parties now, and they disappear every single time. Kids love the spider look, and adults appreciate that it’s not another sugary treat.
- Unbelievably Delicious: The combination of creamy, tangy filling with the briny olive legs is honestly addictive. It’s comfort food with a creepy twist.
What makes this version different from the rest? It’s the little details. I add a tiny pinch of garlic powder to the filling that most recipes skip. It’s not enough to be obvious, but it adds this subtle depth that makes people go, “What’s in this?” Also, I’ve figured out the perfect technique for cutting the olive legs so they look like actual spider legs instead of just random olive pieces. This isn’t just another deviled egg recipe—it’s the one that will have people asking for the recipe before the party’s over.
This recipe is the kind that makes you feel good. It’s not stressful to make, it looks impressive, and it brings a little joy to a spooky night. Honestly, it’s comfort food reimagined for Halloween.
What Ingredients You Will Need
This recipe uses simple, everyday ingredients to create something that looks way more complicated than it actually is. Most of these are pantry staples, so you probably don’t need to buy anything special.
- Large eggs (12 eggs) – Make sure they’re not too fresh. Eggs that are about a week old peel much easier after boiling. I’ve learned this the hard way.
- Mayonnaise (1/3 cup) – I prefer Hellmann’s or Duke’s for the creamiest texture. Avoid using low-fat mayo here—it makes the filling too runny.
- Yellow mustard (1 tablespoon) – This adds that classic tangy flavor. You can use Dijon if you want a slightly sharper taste.
- White vinegar (1 teaspoon) – Just a splash to brighten the flavors. Don’t skip this—it makes a difference.
- Paprika (1/2 teaspoon, plus more for garnish) – Smoked paprika works great here too. It adds a little warmth that regular paprika doesn’t.
- Salt (1/4 teaspoon) – Fine salt works best so it dissolves evenly into the filling.
- Black pepper (1/8 teaspoon) – Freshly ground if you have it.
- Garlic powder (1/8 teaspoon) – This is my secret ingredient. It’s subtle but adds a nice savory note.
- Large black olives (1 can, about 24 olives) – You need the pitted ones. I use the jumbo size because they’re easier to cut into legs. Look for ones that are firm, not mushy.
For the garnish, you’ll also need a little extra paprika to sprinkle on top. Some people like to add a tiny piece of red bell pepper for the spider’s eyes, but I usually just leave them plain. The olive legs are creepy enough on their own.
If you’re making these for someone with dietary restrictions, you can swap the mayo for a vegan version. Just make sure it’s thick and creamy, not the watery kind. Also, you can use Dijon mustard instead of yellow if that’s what you have. It changes the flavor a little, but it’s still delicious.
Equipment Needed
You don’t need any fancy gadgets for this recipe, which is part of what makes it so great. Here’s what you’ll need:
- Large pot – For boiling the eggs. Make sure it’s big enough that the eggs aren’t crowded.
- Mixing bowl – Medium size is fine.
- Fork or potato masher – For mashing the egg yolks. A fork works perfectly.
- Piping bag or zip-top bag – I use a zip-top bag with the corner snipped off. It’s easier to clean than a piping bag, and honestly, it works just as well.
- Sharp knife – For cutting the olives into legs. A dull knife will just squish them.
- Cutting board – Small one is fine.
- Serving platter – Something that fits in the fridge for chilling.
If you don’t have a piping bag, don’t worry. A zip-top bag is my go-to. Just fill it with the yolk mixture, squeeze out the air, and snip a small corner. Start with a tiny cut—you can always make it bigger if needed. I learned this after making a huge cut and ending up with a mess of filling everywhere. Not my finest moment.
A tip for the cutting board: use a smaller one so you’re not reaching across a big surface. It makes cutting the olives much easier and less messy.
Preparation Method
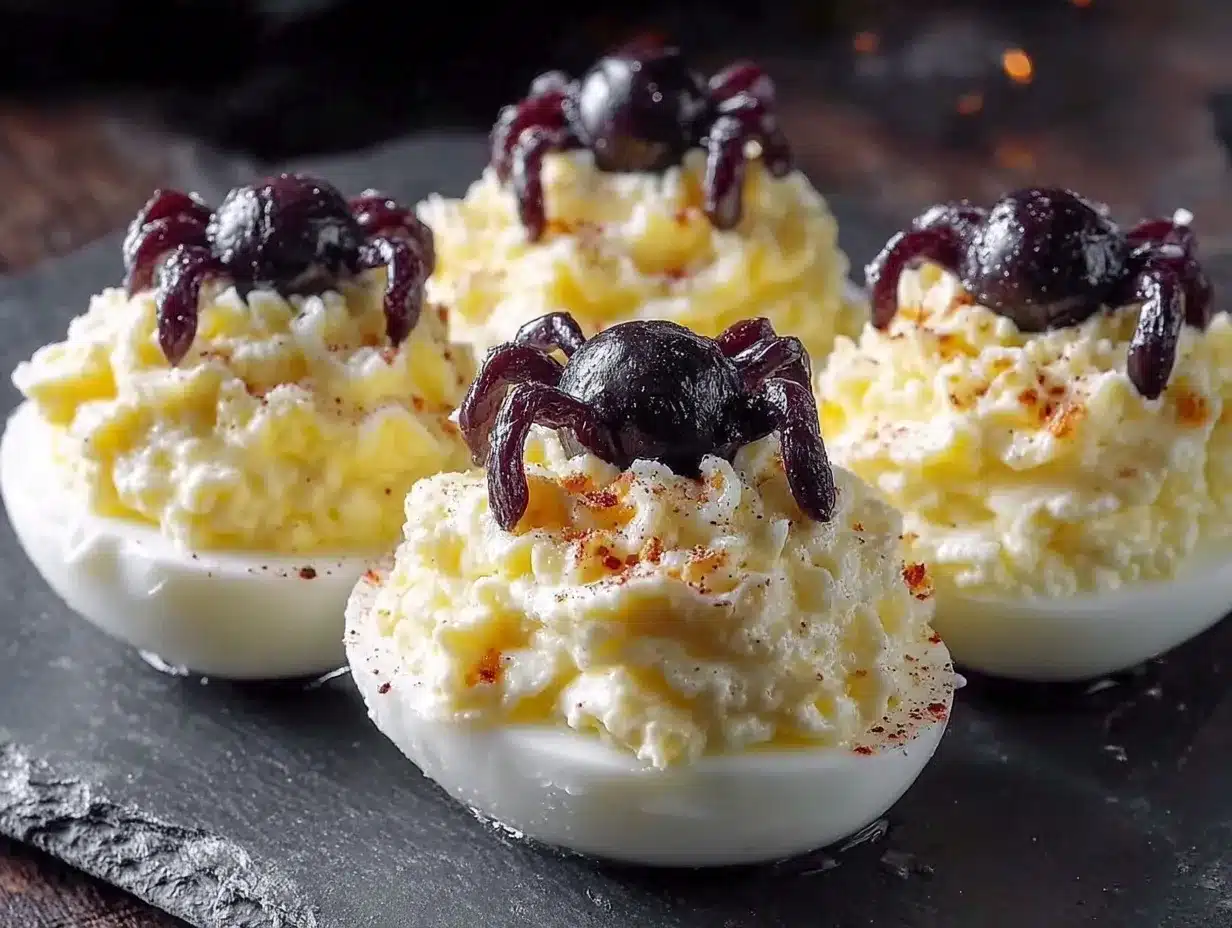
Let me walk you through this step by step. I’ve made these so many times that I’ve got the process down to a science.
- Boil the eggs – Place 12 eggs in a large pot and cover them with cold water by about an inch. Bring the water to a boil over high heat. Once it’s boiling, turn off the heat, cover the pot, and let it sit for 12 minutes. This gives you perfectly hard-boiled eggs without that green ring around the yolk. After 12 minutes, drain the hot water and fill the pot with ice water. Let the eggs sit in the ice bath for at least 10 minutes. This stops the cooking and makes them easier to peel.
- Peel the eggs – Gently tap each egg on the counter to crack the shell all over. Start peeling from the wider end where the air pocket is. I find that peeling under running cold water helps remove the shell more easily. Be patient here—rushing leads to torn egg whites.
- Cut the eggs – Slice each egg in half lengthwise. Carefully pop out the yolks into a medium mixing bowl. Arrange the egg white halves on your serving platter, cut side up. I like to put them close together so they look like a little spider colony.
- Make the filling – Add 1/3 cup mayonnaise, 1 tablespoon yellow mustard, 1 teaspoon white vinegar, 1/2 teaspoon paprika, 1/4 teaspoon salt, 1/8 teaspoon black pepper, and 1/8 teaspoon garlic powder to the bowl with the yolks. Mash everything together with a fork until smooth. You want it creamy with no lumps. Taste it and adjust the seasoning if needed. Sometimes I add a little more mustard if I want it tangier.
- Pipe the filling – Spoon the yolk mixture into a zip-top bag. Squeeze out the air and seal the bag. Snip a small corner off the bag—about 1/4 inch wide. Pipe the filling into each egg white half, swirling slightly to make a nice mound. Don’t overfill them, but don’t be too skimpy either. You want them to look generous.
- Prepare the olive spiders – Drain the can of black olives and pat them dry with a paper towel. For each spider, you need one olive for the body and one olive cut into legs. Take one olive and slice it lengthwise to get two halves—each half will be the spider’s body. For the legs, take another olive and cut it into thin strips lengthwise. You want 6 to 8 thin strips per spider. It sounds fiddly, but it goes fast once you get the hang of it.
- Assemble the spiders – Place one olive half on top of each deviled egg. Then arrange 4 olive strips on each side of the olive body to look like spider legs. Gently press them into the filling so they stay in place. Sprinkle a little extra paprika over the top for color.
- Chill before serving – Refrigerate the platter for at least 30 minutes before serving. This helps the filling firm up and makes the spiders easier to handle. You can make them up to 24 hours ahead.
A quick note: if the filling seems too stiff, add a tiny splash of milk or pickle juice. If it’s too runny, add a little more mashed yolk or a pinch of breadcrumbs. I’ve had to adjust both ways, and it always works out.
Cooking Tips & Techniques
Over the years, I’ve made every mistake you can imagine with deviled eggs. I’ve had eggs that wouldn’t peel, filling that was too salty, and spiders that looked more like blobs than creepy crawlies. Here’s what I’ve learned:
Perfect hard-boiled eggs every time – The key is not to overcook them. Twelve minutes off the heat is the sweet spot. If you cook them longer, the yolks get that gray-green ring and turn crumbly. Also, older eggs peel better than fresh ones. If your eggs are super fresh, add a teaspoon of baking soda to the water—it helps loosen the shells.
Getting the filling smooth – Mash the yolks while they’re still warm. Cold yolks don’t mash as smoothly. Also, add the mayo gradually. If you dump it all in at once, you might end up with lumps. Start with half, mix, then add the rest.
Cutting olive legs without squishing them – Use a sharp knife and cut slowly. If the olives are too soft, chill them in the fridge for 10 minutes first. I keep my olives in the fridge anyway, and they’re much easier to work with cold.
Making the spiders look good – Don’t worry if the legs aren’t perfectly even. Real spiders aren’t symmetrical either. A little imperfection makes them look more natural. Also, place the legs slightly angled backward so they look like the spider is crawling.
Timing your prep – Boil the eggs the day before and keep them in the fridge unpeeled. Then on party day, you just peel, fill, and assemble. It cuts the work time in half. I do this every time now.
One thing I messed up early on: I tried to make the spiders too early and the olive legs slid off because the filling wasn’t chilled enough. Now I always chill the filled eggs for 15 minutes before adding the olive legs. It makes a huge difference.
Variations & Adaptations
These spiders are pretty flexible. Here are some ways I’ve changed them up depending on the occasion or what I had in the fridge:
- Spicy version – Add a dash of hot sauce or a pinch of cayenne pepper to the filling. I did this for a Halloween party with friends who like heat, and they disappeared fast. The spicy kick contrasts nicely with the cool olive legs.
- Herb version – Mix in a tablespoon of fresh chopped dill or chives. It gives the filling a fresh, bright flavor that’s perfect if you’re serving these alongside other appetizers. I tried this once when I had leftover herbs from another recipe, and it worked surprisingly well.
- Smoky version – Use smoked paprika instead of regular. It adds a deeper, richer flavor that feels more autumnal. I actually prefer this version now for fall gatherings.
- Dairy-free adaptation – Use vegan mayo and skip the mustard if it contains any dairy. The rest of the ingredients are naturally dairy-free, so this is an easy swap.
- Different spider bodies – Instead of olive halves, you can use small cherry tomato halves or even pieces of roasted red pepper. I tried tomato once, and it looked pretty cool, though the olive is still my favorite.
- Color variation – Add a drop of food coloring to the filling for a green or purple spider. I did this for a kids’ party, and they thought it was hilarious. Just don’t add too much or it will affect the taste.
I once made a version with curry powder mixed into the filling because I had a jar that was about to expire. Honestly, it was weird but not bad. The curry flavor clashed a little with the olives, but some people actually liked it. So feel free to experiment—you might discover something great.
Serving & Storage Suggestions
These spiders are best served cold, straight from the fridge. I like to arrange them on a dark platter or a black serving board to make the white eggs and black olives pop. A little fake spider web decoration around the platter adds to the Halloween vibe without being over the top.
For a party, I usually set them out about 15 minutes before guests arrive so they’re not ice-cold but still cool. They pair well with other finger foods like veggie sticks, cheese cubes, or mini sandwiches. If you’re serving drinks, these go great with a crisp white wine or a light beer. For kids, apple cider or sparkling water works perfectly.
Storage – Leftover deviled egg spiders can be stored in an airtight container in the refrigerator for up to 2 days. But honestly, they’re best the day you make them. The olive legs can get a little soft after sitting overnight. If you’re making them ahead, I recommend assembling the spiders no more than 6 hours before serving. The filling can be made a day ahead and stored separately in the fridge.
Reheating – Don’t. These are served cold. If they’ve been in the fridge too long and seem dry, you can let them sit at room temperature for 10 minutes before serving. That usually helps.
The flavors actually get a little better after a few hours in the fridge as the seasoning melds together. So if you’re making them for a party, assemble them in the morning and let them chill until party time. They’ll be perfect.
Nutritional Information & Benefits
Per serving (2 deviled egg spiders): approximately 140 calories, 12g fat, 2g carbohydrates, 6g protein. These numbers will vary depending on the exact ingredients you use, especially the type of mayo.
Eggs are a great source of high-quality protein and contain important nutrients like vitamin D, B12, and choline, which is good for brain health. The olives provide healthy monounsaturated fats and a little bit of iron. So while these are definitely a treat, they’re not empty calories.
If you’re watching your cholesterol, you can use just the egg whites for the filling and skip the yolks. The texture won’t be as creamy, but it still works. I’ve done this for a friend who was on a restricted diet, and she said they were still good.
These are naturally gluten-free and low-carb, so they fit into a lot of different eating plans. Just double-check your mayo and mustard labels if you have specific dietary concerns. Most brands are gluten-free, but it’s always good to verify.
Conclusion
These Cozy Halloween Deviled Egg Spiders are the kind of recipe that makes you look like a kitchen genius without actually having to work that hard. They’re fun, they’re cute in a creepy way, and they taste great. What more could you want from a Halloween appetizer?
I love that this recipe came from a simple conversation with a neighbor. It reminds me that the best recipes aren’t always the ones with fancy techniques or exotic ingredients. Sometimes they’re just something someone made for their kids thirty years ago, and it stuck because it was good. That’s what this is.
I hope you give these a try. Customize them however you like—add more spice, change up the herbs, or experiment with different toppings. The base recipe is solid, but there’s plenty of room to make it your own. And when you bring them to your Halloween party, watch people’s faces light up. That’s the best part.
If you make these, I’d love to hear how they turned out. Drop a comment below or tag me in your photos. Happy Halloween, and happy cooking!
Frequently Asked Questions
Can I make these deviled egg spiders ahead of time?
Yes, you can make the filling up to 24 hours ahead and store it in the fridge. Assemble the spiders no more than 6 hours before serving for the best appearance.
How do I get the eggs to peel easily?
Use eggs that are about a week old, not fresh. After boiling, plunge them into an ice bath immediately. Peeling under running cold water also helps remove the shell more easily.
Can I use a different type of olive?
You can use green olives, but the color won’t look as spider-like. Black olives give the best visual effect. If you use green olives, stuff them with pimento for a pop of color.
How long do these keep in the fridge?
They’re best eaten within 2 days. Store them in an airtight container in the refrigerator. The olive legs may soften over time, so they’re best fresh.
Can I make these without a piping bag?
Absolutely. You can use a zip-top bag with the corner snipped off, or simply spoon the filling into the eggs. A piping bag just makes it look a little neater, but it’s not necessary.
Pin This Recipe!
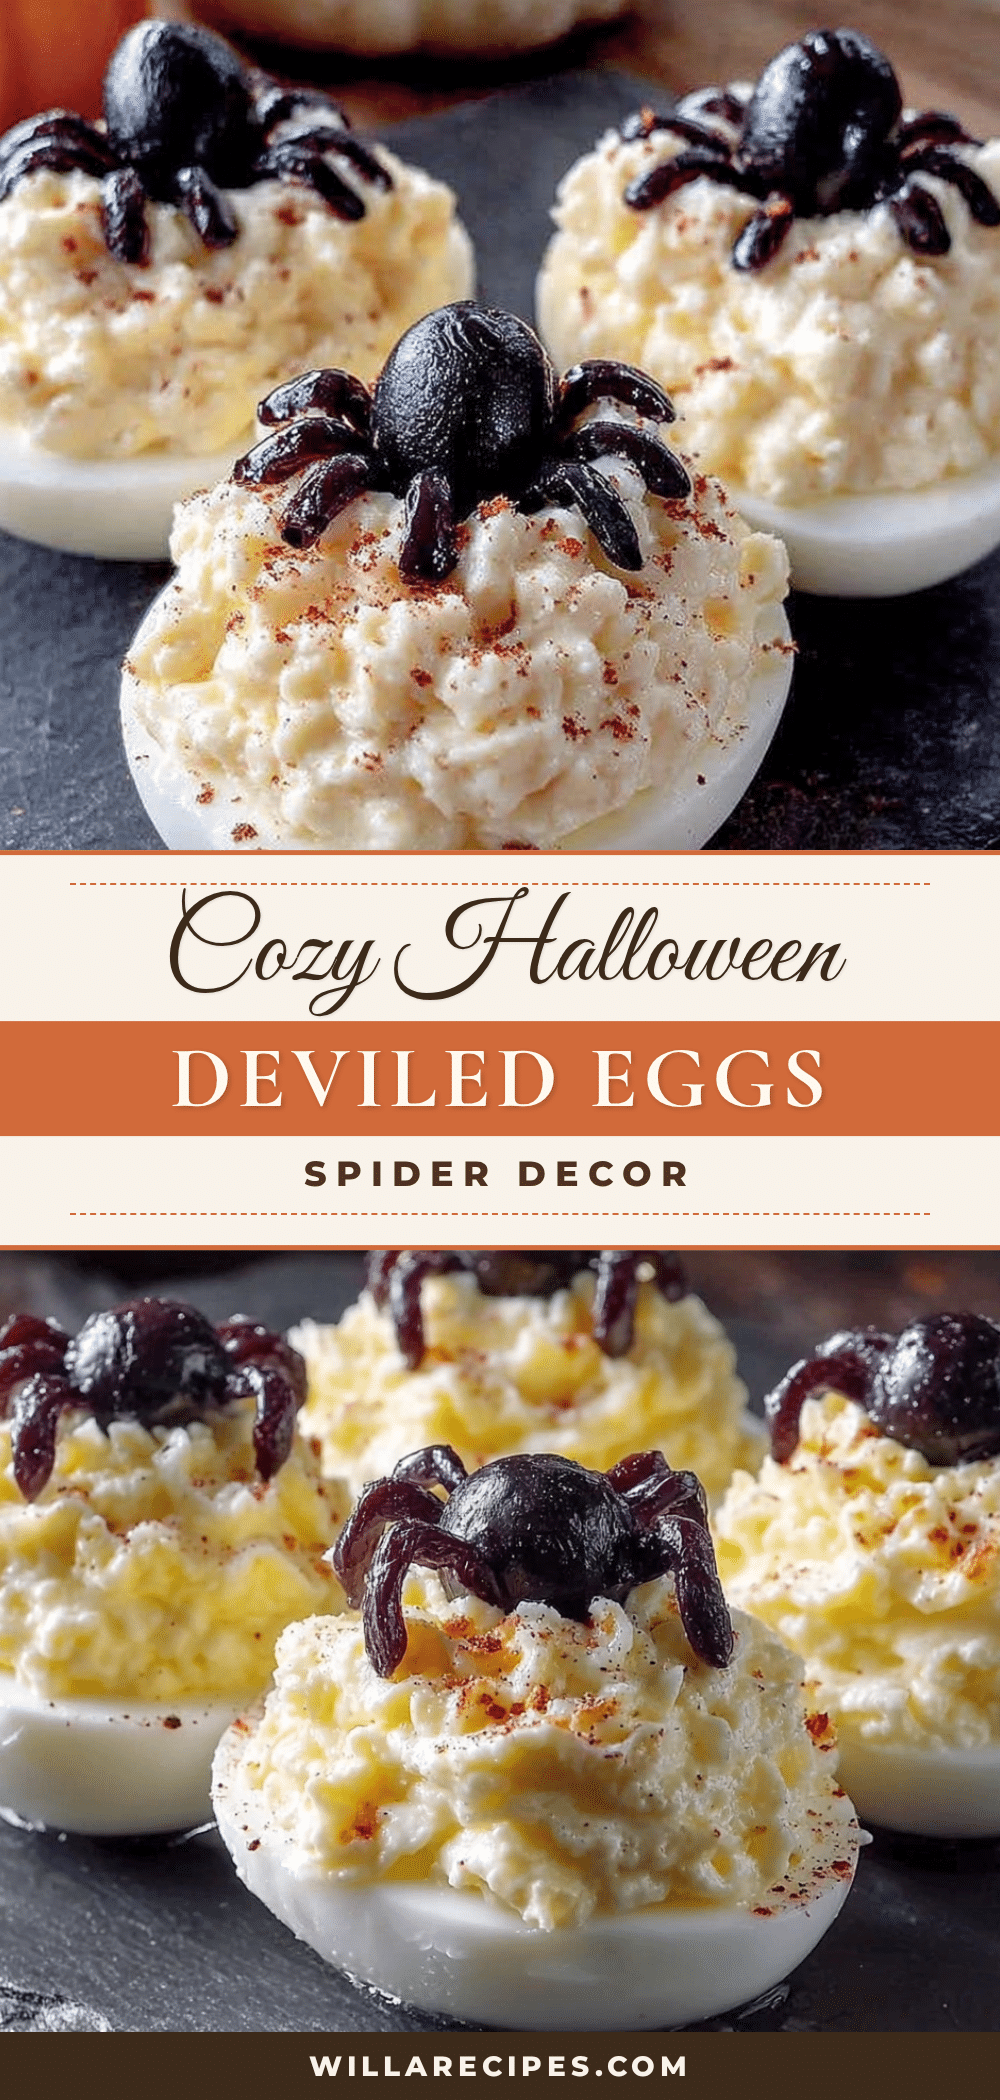
Cozy Halloween Deviled Egg Spiders
These creepy-cute deviled egg spiders are the perfect Halloween appetizer. Made with simple ingredients like eggs, mayo, and black olives, they’re quick to make and always a crowd-pleaser.
- Prep Time: 20 minutes
- Cook Time: 12 minutes
- Total Time: 32 minutes
- Yield: 24 deviled egg spiders (12 servings of 2 each) 1x
- Category: Appetizer
- Cuisine: American
Ingredients
- 12 large eggs
- 1/3 cup mayonnaise
- 1 tablespoon yellow mustard
- 1 teaspoon white vinegar
- 1/2 teaspoon paprika, plus more for garnish
- 1/4 teaspoon salt
- 1/8 teaspoon black pepper
- 1/8 teaspoon garlic powder
- 1 can large black olives (about 24 olives), pitted
Instructions
- Place 12 eggs in a large pot and cover with cold water by about an inch. Bring to a boil over high heat. Once boiling, turn off heat, cover, and let sit for 12 minutes. Drain hot water and fill pot with ice water. Let eggs sit in ice bath for at least 10 minutes.
- Gently tap each egg on the counter to crack the shell all over. Peel starting from the wider end. Peel under running cold water for easier removal.
- Slice each egg in half lengthwise. Pop out yolks into a medium mixing bowl. Arrange egg white halves on a serving platter, cut side up.
- Add mayonnaise, yellow mustard, white vinegar, paprika, salt, black pepper, and garlic powder to the bowl with yolks. Mash together with a fork until smooth and creamy. Taste and adjust seasoning if needed.
- Spoon yolk mixture into a zip-top bag. Squeeze out air and seal. Snip a small corner (about 1/4 inch wide). Pipe filling into each egg white half, swirling slightly to make a nice mound.
- Drain black olives and pat dry. For each spider, slice one olive lengthwise to get two halves (these are the bodies). Cut another olive into thin strips lengthwise (6 to 8 strips per spider for legs).
- Place one olive half on top of each deviled egg. Arrange 4 olive strips on each side of the olive body to look like spider legs. Gently press into filling. Sprinkle extra paprika on top.
- Refrigerate platter for at least 30 minutes before serving. Can be made up to 24 hours ahead.
Notes
Use eggs that are about a week old for easier peeling. Chill the filled eggs for 15 minutes before adding olive legs to prevent them from sliding off. For a spicier version, add a dash of hot sauce or cayenne pepper to the filling. The filling can be made a day ahead and stored separately.
Nutrition
- Serving Size: 2 deviled egg spider
- Calories: 140
- Sugar: 1
- Sodium: 320
- Fat: 12
- Saturated Fat: 3
- Carbohydrates: 2
- Protein: 6
Keywords: Halloween deviled eggs, spider deviled eggs, Halloween appetizer, easy Halloween recipe, deviled egg spiders


