I was standing in the parking lot of a hardware store last November when it hit me. Not the smell of pine needles or damp earth, but something else — something sharp and sweet and utterly specific. Someone nearby was carrying a bag of fresh sage, and the second that herbal, almost peppery scent cut through the cold air, I was eight years old again, sitting on the floor of my aunt Carol’s farmhouse kitchen.
She wasn’t really my aunt — she was my mom’s college roommate, the kind of family you choose. Her kitchen had these yellow curtains that never quite matched, and a dented stockpot that she claimed had “soup magic” baked into the metal. I remember watching her hands, rough from gardening, as she peeled a butternut squash with this intense focus, like she was carving something precious. She’d catch me staring and wink, then toss a sage leaf my way. “Smell that,” she’d say. “That’s what autumn tastes like.”
I honestly didn’t think about that afternoon for years. But there I was, frozen between the lumber aisle and the garden center, suddenly desperate for that soup. The one with the brown butter that turned everything nutty and golden, and the sage that crackled in the pan like tiny applause. I drove straight to the grocery store — forgot all about the lightbulbs I needed — and bought a squash, a bundle of sage, and a stick of the good butter.
Let me tell you, recreating a memory is tricky business. The first batch I made was too thin. The second had way too much sage — I mean, it was basically a liquid Christmas tree. But the third? That was the one. The soup came out velvety and rich, with that brown butter sage situation on top that honestly makes everything worth it. I sat there eating it straight from the bowl, no fancy garnish, just a spoon and a quiet kitchen, and I swear I could hear Aunt Carol’s voice saying “Told you so.”
Maybe you’ve got a memory like that — a taste you’ve been chasing. Or maybe you just want a really good bowl of soup. Either way, this roasted butternut squash soup with brown butter sage is the one. It’s the kind of recipe that makes you slow down, breathe deep, and remember what comfort really feels like.
Why You’ll Love This Recipe
Look, I’ve tested a lot of squash soups over the years. Some were bland, some were watery, and some tried way too hard with exotic spices. This one is different. It’s the Goldilocks of butternut squash soups — everything is just right.
- Roasting Changes Everything : Instead of boiling the squash (which just makes it sad and watery), we roast it until the edges caramelize. That extra step unlocks a deep, almost nutty sweetness you just can’t get any other way.
- Simple Ingredients, Big Flavor : You don’t need a pantry full of exotic spices. Onion, garlic, broth, and cream — plus that showstopper brown butter sage topping. Chances are you already have most of this stuff on hand.
- Perfect for Cozy Season : Whether it’s a chilly Tuesday night, a Thanksgiving starter, or a lazy Sunday meal prep session, this soup fits the occasion. It’s fancy enough for guests but easy enough for a regular weeknight.
- Crowd-Pleaser Status : I’ve served this to picky kids, vegetarian friends, and serious foodies. Everyone goes quiet after the first spoonful. That’s the sign.
- Unbelievably Satisfying : The texture is what gets me every time. Silky smooth, velvety, with that rich brown butter sage drizzle cutting through the sweetness. It’s comfort in a bowl, no question.
What makes this version stand out from the dozens of other squash soup recipes out there? It’s the technique. Roasting the squash with a little olive oil and salt until it’s practically caramelized, then blending it with just enough cream to make it luxurious without being heavy. And that brown butter sage topping? It’s not just decoration — it adds a nutty, savory depth that balances the sweetness perfectly. This isn’t just another soup recipe. It’s the one you’ll come back to all season long.
What Ingredients You Will Need
This recipe uses simple, wholesome ingredients to deliver bold flavor and satisfying texture without any fuss. Most of these are pantry staples or easy to find at any grocery store. Here’s what you’ll need and why each one matters.
For the Soup Base
- 1 medium butternut squash (about 3 pounds) — peeled, seeded, and cut into 1-inch cubes. Look for one that feels heavy for its size with a firm, tan skin. No green streaks, no soft spots. I prefer using whole squash over pre-cut cubes because they’re fresher and roast better, but pre-cut works in a pinch (just reduce roasting time by 5-10 minutes).
- 2 tablespoons olive oil — for roasting the squash and veggies. Use a good quality extra virgin for more flavor, or a light olive oil if that’s what you have.
- 1 medium yellow onion — roughly chopped. Yellow onions have the right balance of sweetness and sharpness for this soup. White or sweet onions work too, but red onions will change the color.
- 3 cloves garlic — smashed. Whole cloves are fine since we’re blending everything anyway. No need to mince perfectly.
- 3 cups vegetable broth — use low-sodium so you can control the salt. I like Pacific Foods or Imagine brand for clean flavor. Chicken broth works too if you’re not keeping it vegetarian.
- 1/2 cup heavy cream — adds richness and that velvety texture. For a lighter version, use half-and-half or full-fat coconut milk (the canned kind, not the carton).
- 1/2 teaspoon salt — plus more to taste. I use fine sea salt for even seasoning.
- 1/4 teaspoon black pepper — freshly ground if possible.
- Pinch of nutmeg — freshly grated if you have it. It’s subtle but makes everything taste warmer and cozier.
For the Brown Butter Sage Topping

- 4 tablespoons unsalted butter — this is where the magic happens. Don’t use salted butter here because the salt concentrates as the butter browns and can get too salty. Kerrygold or any European-style butter works beautifully.
- 12-15 fresh sage leaves — look for leaves that are vibrant green and not wilted. Dried sage won’t work here — you need fresh for that crackly texture and bright flavor.
- Flaky sea salt — optional but lovely for finishing. Try Maldon or any flaky sea salt you like.
Optional Garnishes
- Toasted pumpkin seeds — for crunch.
- A drizzle of balsamic glaze — sounds weird but trust me, it works.
- Extra cracked black pepper — because why not?
Substitution Tips: For a dairy-free version, use full-fat canned coconut milk instead of heavy cream and vegan butter for the brown butter. The flavor will be slightly different but still delicious. For a lower-carb option, this soup is naturally pretty low in carbs compared to creamy potato soups — just watch the portion size if you’re tracking.
Equipment Needed
You don’t need a fancy kitchen to make this soup, but a few key tools make the process smoother. Here’s what I use and what you can substitute if needed.
- Baking sheet — a half-sheet pan works perfectly. If you don’t have one, any rimmed baking sheet will do. Line it with parchment paper for easier cleanup.
- Chef’s knife — a sharp one makes peeling and cubing the squash so much easier. I use a Victorinox 8-inch chef’s knife — it’s affordable and stays sharp. A vegetable peeler also helps with the squash skin.
- Large pot or Dutch oven — a 5-6 quart pot is ideal. I love my Le Creuset Dutch oven for even heating, but any heavy-bottomed pot works. A stockpot is fine too.
- Immersion blender — this is my preferred method for smooth soup. It’s easier and less messy than transferring hot liquid to a blender. I use a Cuisinart immersion blender and it’s held up for years. If you don’t have one, a regular blender works — just work in batches and don’t fill it more than halfway with hot liquid.
- Small skillet — for browning the butter and crisping the sage. A light-colored skillet helps you see when the butter turns golden. Stainless steel or nonstick both work.
- Measuring cups and spoons — nothing fancy needed.
Budget-Friendly Tips: An immersion blender is nice to have but not essential. A regular blender works perfectly — just let the soup cool slightly before blending and hold the lid down with a towel. If you’re buying a new chef’s knife, you don’t need to spend a fortune. A $20 Kiwi brand knife from an Asian market is surprisingly good.
Preparation Method
Let’s get cooking. I’ve broken this down into clear steps with time estimates and sensory cues so you know exactly what to look for. Take your time — the roasting step is where the magic happens.
- Preheat your oven to 400°F (200°C). While it heats up, grab your butternut squash. Cut off both ends, then use a sharp vegetable peeler or chef’s knife to remove the skin. Be careful — squash is tough and the knife can slip. Cut the squash in half lengthwise, scoop out the seeds with a spoon, and cut the flesh into 1-inch cubes. You should have about 5-6 cups of cubed squash. (Sensory cue: The squash should feel firm and slightly waxy after peeling. The flesh is bright orange.)
- Toss the squash with olive oil and a pinch of salt. Spread it in a single layer on your baking sheet. Don’t overcrowd — if the pieces are touching too much, they’ll steam instead of roast. Add the smashed garlic cloves to the pan too. Roast for 25-30 minutes, flipping halfway through. (Sensory cue: The squash is done when the edges are golden brown and caramelized. A fork should slide in easily. Your kitchen will smell sweet and nutty.)
- While the squash roasts, start the base. In your large pot, heat 1 tablespoon of olive oil over medium heat. Add the chopped onion and cook for 5-7 minutes, stirring occasionally, until the onion is soft and translucent. Don’t rush this step — browning the onion adds depth. (Sensory cue: The onion should look glassy and smell sweet, not sharp.)
- Add the roasted squash and garlic to the pot. Pour in the vegetable broth and bring everything to a gentle boil. Reduce the heat to low and let it simmer for 10 minutes. This lets all the flavors meld together. (Sensory cue: The soup should look thick and chunky at this point, with the squash starting to break apart.)
- Blend until smooth. If using an immersion blender, blend directly in the pot until the soup is silky. If using a regular blender, let the soup cool for 5 minutes, then blend in batches — fill the blender no more than halfway, hold the lid down with a folded towel, and blend until smooth. Return the blended soup to the pot. (Sensory cue: The soup should be completely smooth with no lumps. It should coat the back of a spoon.)
- Stir in the heavy cream, salt, pepper, and nutmeg. Taste and adjust seasoning. You might want more salt or a touch more nutmeg. Keep the soup on low heat while you make the topping. (Sensory cue: The color should turn a slightly paler orange from the cream. The texture should feel velvety when you stir.)
- Make the brown butter sage. In your small skillet, melt the butter over medium heat. Swirl the pan occasionally. After about 2-3 minutes, the butter will start to foam and turn golden. Watch carefully — once you see brown specks forming at the bottom, immediately add the sage leaves. They’ll sizzle and crisp up in about 30 seconds. Remove from heat right away. (Sensory cue: The butter should smell nutty and toasty, not burnt. The sage leaves will darken slightly and become brittle. If the butter smells acrid, you went too far.)
- Ladle the soup into bowls. Drizzle the brown butter over the top and arrange a few crispy sage leaves on each serving. Sprinkle with flaky sea salt if you’re using it. Serve immediately.
Pro tip for efficiency: While the squash roasts, you can chop the onion and measure out your other ingredients. That way everything’s ready when you need it. And don’t wash the blender right away — fill it with warm water and a drop of soap, then blend for 10 seconds. Rinses clean every time.
Cooking Tips & Techniques
I’ve made this soup more times than I can count, and I’ve made every mistake in the book. Here’s what I’ve learned so you don’t have to repeat my failures.
The biggest mistake people make is skipping the roasting step. I know, it adds an extra 30 minutes. But boiling squash makes it watery and bland. Roasting concentrates the flavor and brings out natural sugars. Trust me on this — don’t skip it. One time I was in a hurry and tried to speed things up by microwaving the squash. The soup was thin, pale, and honestly depressing. Never again.
Watch the brown butter like a hawk. Brown butter goes from perfect to burnt in about 15 seconds. The first time I made this, I got distracted by a phone call and came back to black butter and smoke. It smelled like regret. Keep your eyes on the pan, swirl it constantly, and pull it off the heat the second you see golden brown specks. The residual heat will continue cooking it slightly.
For the silkiest texture, blend longer than you think. I blend for a full 60-90 seconds. That extra time breaks down the fibers completely and gives you that velvety restaurant-quality texture. If you’re using a regular blender, blend in batches and let it run for a full minute each batch.
Season in layers. Add salt at the roasting stage, a little more when you add the broth, and adjust at the end. Seasoning in layers builds more complex flavor than dumping it all in at the end. I learned this from a chef friend who said “salt is like a staircase, not an elevator.”
If your soup is too thick, thin it with extra broth or water. If it’s too thin, let it simmer uncovered for 5-10 minutes to reduce. Easy fix either way. Don’t stress about consistency — you can always adjust.
Variations & Adaptations
This soup is a great base for customization. Here are some variations I’ve tried and loved.
Vegan Version: Swap the heavy cream for full-fat canned coconut milk. The coconut flavor is subtle and actually pairs beautifully with the squash and sage. Use vegan butter for the brown butter — Miyoko’s brand works best because it has the right fat content for browning. The texture will be slightly less rich but still delicious.
Spicy Kick: Add 1/2 teaspoon of smoked paprika and a pinch of cayenne pepper when you add the broth. The smokiness complements the roasted squash, and the heat cuts through the richness. I made this version for a football party and it disappeared fast.
Apple Squash Fusion: Roast one peeled and cubed apple (Honeycrisp or Fuji work great) along with the squash. The apple adds natural sweetness and a subtle fruity note that’s gorgeous with the sage. This is my favorite fall variation.
Curried Butternut Soup: Add 1 tablespoon of curry powder when you sauté the onion. The warm spices — turmeric, cumin, coriander — pair surprisingly well with the brown butter sage topping. It’s like a fusion of comfort food worlds.
Low-Fat Option: Skip the cream entirely and use an extra 1/2 cup of broth instead. The soup won’t be as velvety, but it’ll still be flavorful. For the topping, use just 2 tablespoons of butter instead of 4. You’ll still get that sage flavor without as much richness.
Different Squash: Kabocha, acorn, or even pumpkin work well here. Kabocha has a naturally sweeter, denser flesh that makes an incredibly creamy soup. Just adjust roasting time based on the squash variety — harder squashes need a few extra minutes.
Serving & Storage Suggestions
This soup is best served hot, right after you’ve added the brown butter sage topping. The contrast between the warm, velvety soup and the crispy sage leaves is pure magic. But it’s also great at room temperature on a busy day — don’t judge me, I’ve eaten it cold straight from the fridge and it’s still good.
What to serve alongside: A crusty bread like sourdough or a warm baguette is perfect for dipping. A simple green salad with a lemony vinaigrette balances the richness. For a heartier meal, serve it with a grilled cheese sandwich — the classic combo works beautifully here. If you’re feeling fancy, try my crispy garlic chicken on the side for a complete autumn dinner.
Storage: Let the soup cool completely before storing. Transfer it to an airtight container and refrigerate for up to 5 days. The flavors actually deepen and meld overnight — day two soup is even better than day one. Store the brown butter sage topping separately in a small jar at room temperature for up to 2 days. The sage leaves will lose their crispness, but the flavor is still wonderful.
Freezing: This soup freezes beautifully. Pour cooled soup into freezer-safe containers or zip-top bags, leaving an inch of headroom for expansion. Freeze for up to 3 months. Thaw overnight in the refrigerator, then reheat gently on the stove. Make fresh brown butter sage topping after thawing — the frozen topping won’t have the same texture.
Reheating: Reheat on the stovetop over medium-low heat, stirring occasionally. Add a splash of broth or water if it’s too thick after refrigeration. You can microwave individual portions in 30-second bursts, stirring between each. Don’t boil it — that can make the cream separate and turn grainy.
Nutritional Information & Benefits
Here’s the thing about this soup — it feels indulgent, but it’s actually pretty good for you. One serving (about 1.5 cups) contains approximately:
- Calories: 280
- Fat: 18g (mostly from healthy olive oil and butter)
- Carbohydrates: 28g
- Fiber: 6g
- Protein: 4g
- Vitamin A: 350% of daily value (that’s the squash!)
- Vitamin C: 35% of daily value
Butternut squash is packed with vitamin A in the form of beta-carotene, which supports eye health and immune function. It’s also a good source of fiber, which keeps you full and supports digestion. Sage has anti-inflammatory properties — my grandmother used to say “eat sage in autumn to keep the winter colds away.” She wasn’t wrong. The olive oil provides healthy monounsaturated fats, and the cream adds a touch of calcium.
Dietary Notes: This recipe is naturally gluten-free and vegetarian. For a vegan version, use the substitutions listed above. It’s not low-fat, but the fats come from whole food sources. If you’re watching sodium, use low-sodium broth and go easy on the finishing salt.
I love that this soup feels like a treat but doesn’t leave me feeling heavy or guilty. It’s the kind of meal that nourishes you from the inside out — comfort food that actually does some good.
Frequently Asked Questions
Can I use pre-cut butternut squash from the store?
Absolutely. Pre-cut squash saves time and works perfectly. Just keep in mind that pre-cut cubes are often smaller and may roast 5-10 minutes faster, so check them early. They also tend to be slightly drier than fresh-cut squash, so you might need an extra splash of broth when blending.
Can I make this soup in a slow cooker or Instant Pot?
Yes, with adjustments. For a slow cooker, roast the squash first (don’t skip this), then add it to the slow cooker with the sautéed onion, garlic, and broth. Cook on low for 4-6 hours or high for 2-3 hours. Blend and add cream at the end. For an Instant Pot, use the sauté function for the onion, then add roasted squash and broth. Pressure cook on high for 5 minutes, quick release, blend, and stir in cream.
Why did my brown butter burn?
It happens to the best of us. Brown butter burns when the milk solids get too dark. The key is to use medium heat, swirl the pan constantly, and remove it from the heat the second you see golden brown specks. The butter continues to cook from residual heat, so pulling it early is better than late. If it smells nutty, you’re good. If it smells like burnt popcorn, start over.
Can I use dried sage instead of fresh?
I wouldn’t recommend it for the topping. Dried sage won’t crisp up the same way, and it can taste dusty and bitter when browned. For the soup itself, you can add 1 teaspoon of dried rubbed sage when you sauté the onion, but you’ll miss that fresh, bright flavor. Fresh sage is worth seeking out for this recipe.
How can I make this soup thicker or thinner?
For a thicker soup, use less broth (start with 2 cups instead of 3) and blend longer to break down the fibers. You can also add a peeled, diced potato when you simmer the soup — it adds starch and body. For a thinner soup, add more broth or a splash of milk until it reaches your desired consistency. Remember that the soup thickens as it cools, so err on the slightly thinner side if you’re serving it warm.
Conclusion
This roasted butternut squash soup with brown butter sage is more than just a recipe — it’s a moment of quiet in a busy world. It’s the smell that stops you in your tracks, the taste that brings you back to a memory, the warmth that settles deep in your bones. I’ve made it for holiday dinners, lazy Sundays, and Tuesday nights when I needed a little extra comfort. It never disappoints.
I hope you’ll make it your own. Add a little extra sage if you’re feeling bold. Skip the cream if you’re keeping it light. Serve it with a grilled cheese or eat it straight from the bowl with a spoon — no judgment here. The best recipes are the ones that bend to fit your life, and this one does exactly that.
When you make it — and I really hope you do — come back and let me know how it turned out. Did you add a twist? Did your family love it? Did you burn the butter and have to start over like I did the first time? I want to hear about all of it. Drop a comment below, share a photo, or tag me on social media. Let’s keep this soup tradition alive, one bowl at a time.
Now go roast that squash. Your cozy bowl is waiting.
Pin This Recipe!
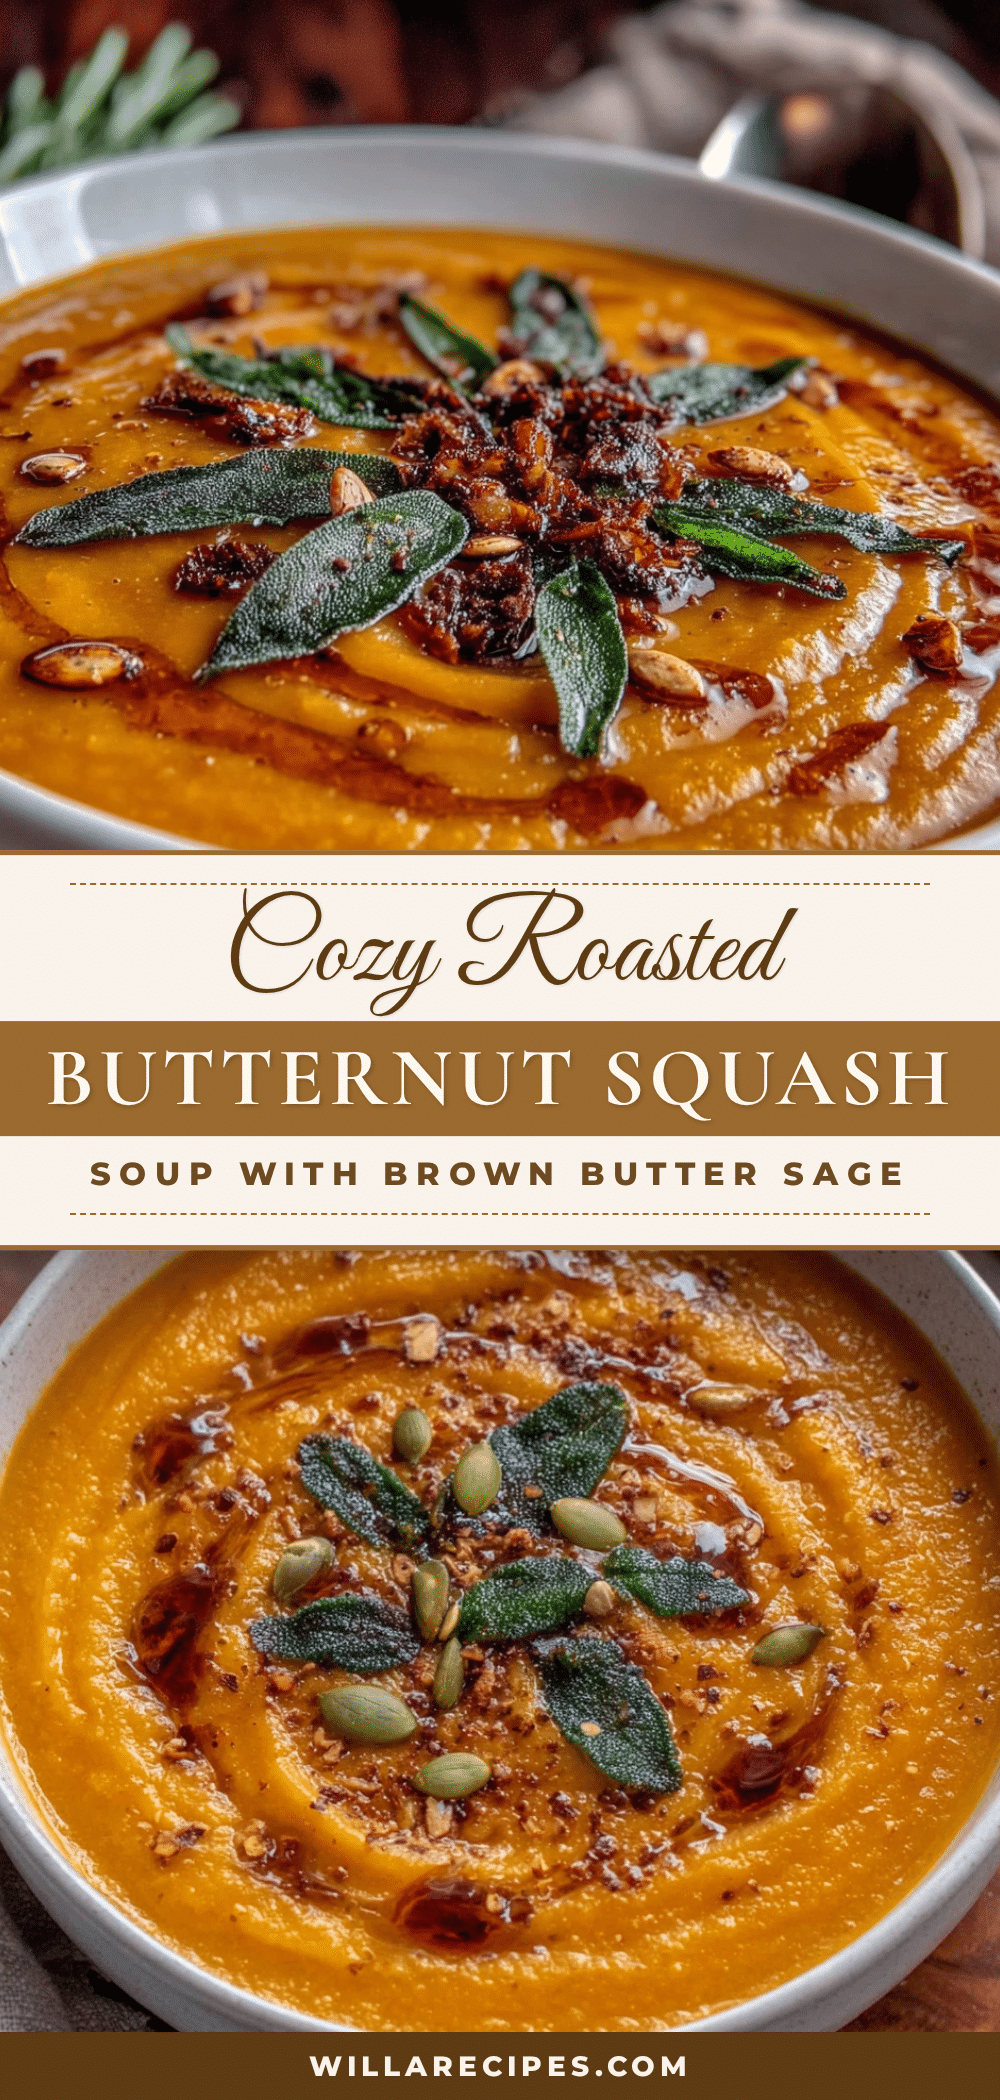
Best Easy Roasted Butternut Squash Soup with Brown Butter

This velvety roasted butternut squash soup is elevated with a nutty brown butter and crispy sage topping. Roasting the squash brings out its natural sweetness, while simple ingredients create a deeply comforting bowl that’s perfect for fall and winter.
- Prep Time: 15 minutes
- Cook Time: 40 minutes
- Total Time: 55 minutes
- Yield: 4 servings 1x
- Category: Soup
- Cuisine: American
Ingredients
- 1 medium butternut squash (about 3 pounds), peeled, seeded, and cut into 1-inch cubes
- 2 tablespoons olive oil
- 1 medium yellow onion, roughly chopped
- 3 cloves garlic, smashed
- 3 cups low-sodium vegetable broth
- 1/2 cup heavy cream
- 1/2 teaspoon fine sea salt, plus more to taste
- 1/4 teaspoon freshly ground black pepper
- Pinch of freshly grated nutmeg
- 4 tablespoons unsalted butter
- 12–15 fresh sage leaves
- Flaky sea salt (optional, for finishing)
- Toasted pumpkin seeds (optional garnish)
- Balsamic glaze (optional garnish)
- Extra cracked black pepper (optional garnish)
Instructions
- Preheat your oven to 400°F (200°C). Cut off both ends of the butternut squash, then use a sharp vegetable peeler or chef’s knife to remove the skin. Cut the squash in half lengthwise, scoop out the seeds, and cut the flesh into 1-inch cubes (about 5-6 cups).
- Toss the squash cubes with olive oil and a pinch of salt. Spread in a single layer on a baking sheet. Add the smashed garlic cloves to the pan. Roast for 25-30 minutes, flipping halfway through, until the edges are golden brown and caramelized and a fork slides in easily.
- While the squash roasts, heat 1 tablespoon of olive oil in a large pot or Dutch oven over medium heat. Add the chopped onion and cook for 5-7 minutes, stirring occasionally, until soft and translucent.
- Add the roasted squash and garlic to the pot. Pour in the vegetable broth and bring to a gentle boil. Reduce heat to low and simmer for 10 minutes to meld flavors.
- Blend the soup until smooth using an immersion blender directly in the pot, or let cool for 5 minutes and blend in batches in a regular blender (fill no more than halfway, hold lid down with a towel). Return blended soup to the pot.
- Stir in the heavy cream, salt, pepper, and nutmeg. Taste and adjust seasoning. Keep warm on low heat while making the topping.
- In a small skillet, melt the butter over medium heat. Swirl the pan occasionally. After 2-3 minutes, the butter will foam and turn golden. Once you see brown specks forming at the bottom, immediately add the sage leaves. They will sizzle and crisp in about 30 seconds. Remove from heat right away.
- Ladle the soup into bowls. Drizzle the brown butter over the top and arrange a few crispy sage leaves on each serving. Sprinkle with flaky sea salt if desired. Serve immediately.
Notes
For a dairy-free version, use full-fat canned coconut milk instead of heavy cream and vegan butter for the brown butter. For a vegan version, also use vegetable broth. To make it lower in fat, skip the cream and use an extra 1/2 cup of broth, and use only 2 tablespoons of butter for the topping. The soup can be stored in an airtight container in the refrigerator for up to 5 days, or frozen for up to 3 months. Make fresh brown butter sage topping after thawing.
Nutrition
- Serving Size: 1.5 cups
- Calories: 280
- Sugar: 8
- Sodium: 480
- Fat: 18
- Saturated Fat: 9
- Carbohydrates: 28
- Fiber: 6
- Protein: 4
Keywords: butternut squash soup, roasted butternut squash soup, brown butter sage soup, fall soup, easy soup recipe, vegetarian soup, gluten-free soup


