This was supposed to be a completely different pie. I had this grand vision—a triple-layer pumpkin cheesecake situation with a brownie crust and caramel drizzle. I mean, it was going to be spectacular. I’d prepped everything the night before Thanksgiving, feeling pretty proud of myself for being so organized for once. But then morning came, and so did the chaos. The dog ran through the kitchen with muddy paws, I realized I was out of cream cheese, and somehow the brownie mix I swore I bought was nowhere to be found. Honestly, I stood there staring into the open fridge, feeling that familiar pre-holiday panic creeping up my spine.
But here’s the thing about Thanksgiving morning—there’s no time to start over. So I grabbed what I had: a can of pumpkin puree, some evaporated milk I’d bought by accident (I meant to grab sweetened condensed milk, let me tell you), and a half-used container of Greek yogurt that was about to expire. I threw out the original plan completely. No cheesecake, no brownie layer, just a simple pumpkin pie. But I swapped the heavy cream for that Greek yogurt, cut the sugar by a third, and used a store-bought crust because honestly, who has the energy for homemade pastry on a holiday morning?
The pie came out of the oven looking humble. No dramatic cracks, no fancy swirls—just a simple, golden-brown surface with that classic pumpkin pie aroma filling the kitchen. I figured it would be fine. Edible, at least. But then I took a bite, and I actually laughed out loud. It was better than the cheesecake I’d planned. So much better. The texture was silky without being heavy, the pumpkin flavor actually came through instead of drowning in sugar, and that little tang from the yogurt made it taste more interesting than any traditional pumpkin pie I’d ever made. Maybe you’ve been there—when your biggest kitchen failure turns into your most-requested recipe. That’s this pie. I haven’t made a full-fat version since, and I don’t plan to.
Why You’ll Love This Lighter Classic Pumpkin Pie with Maple Whipped Cream
This isn’t just another pumpkin pie recipe that promises to be “healthy” but tastes like cardboard. I tested this version at three different holiday gatherings before I felt confident sharing it, and every single time, people asked for seconds before I even mentioned it was lighter. That’s the kind of recipe this is—the one that makes you feel good about eating pie for breakfast the next morning.
- Surprisingly Light, Still Indulgent: By swapping heavy cream for Greek yogurt and cutting the sugar, this pie has about 40% fewer calories than traditional versions. But you would never guess it from the taste. The texture is just as creamy, the flavor is actually more pronounced, and that maple whipped cream on top makes it feel like a total splurge.
- Simple Ingredients, No Fuss: You probably have most of these ingredients in your kitchen right now. No obscure health food store finds, no expensive alternative sweeteners. Just real food made a little smarter.
- Perfect for Holiday Tables: Whether you’re hosting Thanksgiving, bringing dessert to a Friendsgiving, or just craving autumn flavors on a random Tuesday, this pie fits. It’s elegant enough for company but simple enough for a weeknight treat.
- Crowd-Pleaser Across the Board: I’ve served this to kids who normally pick at desserts, to my dad who swears he doesn’t like “healthy” food, and to my friend who’s a pastry chef. Everyone loved it. The maple whipped cream is honestly the secret weapon here—it adds just enough richness that nobody misses the extra fat in the pie itself.
- The Best Leftover Pie Ever: Here’s something I discovered by accident: this pie actually tastes better the next day. The flavors meld together overnight, the texture firms up perfectly, and a cold slice straight from the fridge with a dollop of that maple cream is basically my idea of breakfast heaven.
What makes this version different from all the other “light” pumpkin pies out there is the technique. Most recipes just swap out ingredients and hope for the best, but I spent time figuring out the right ratio of yogurt to eggs, the perfect baking temperature to prevent cracking, and the exact amount of maple syrup in the cream so it complements the pie without overwhelming it. This isn’t just a healthier version—it’s genuinely the best pumpkin pie I’ve ever made, full stop.
What Ingredients You Will Need
This recipe uses simple, wholesome ingredients that work together to create a pie that tastes rich and decadent without the heavy calories. Most of these are pantry staples, especially if you do any fall baking, and I’ve included notes on substitutions so you can adapt based on what you have.
For the Pumpkin Pie Filling
- 1 can (15 oz) pumpkin puree (not pumpkin pie filling—make sure you grab the plain stuff. I prefer Libby’s for consistent texture, but any brand works as long as it’s 100% pumpkin)
- 3/4 cup granulated sugar (I cut this from the standard 1 cup, and honestly, you won’t miss it. The pumpkin and spices shine through more)
- 2 large eggs (room temperature, so they incorporate smoothly into the filling)
- 1 cup plain Greek yogurt (full-fat or 2% works best for texture. I’ve used non-fat in a pinch, and it’s fine, but the filling is noticeably less creamy. Fage or Chobani are my go-to brands)
- 1/2 cup evaporated milk (this adds richness without the fat of heavy cream. I accidentally bought this instead of sweetened condensed milk that first time, and it was honestly a happy mistake)
- 1 teaspoon vanilla extract (pure vanilla, not imitation—it makes a difference in the final flavor)
- 2 teaspoons pumpkin pie spice (store-bought is fine, but I’ll share my homemade blend in the tips section if you want to make your own)
- 1/2 teaspoon ground cinnamon (I add extra because I love cinnamon, but adjust to your taste)
- 1/4 teaspoon salt (don’t skip this—it balances the sweetness and brings out the pumpkin flavor)
For the Maple Whipped Cream
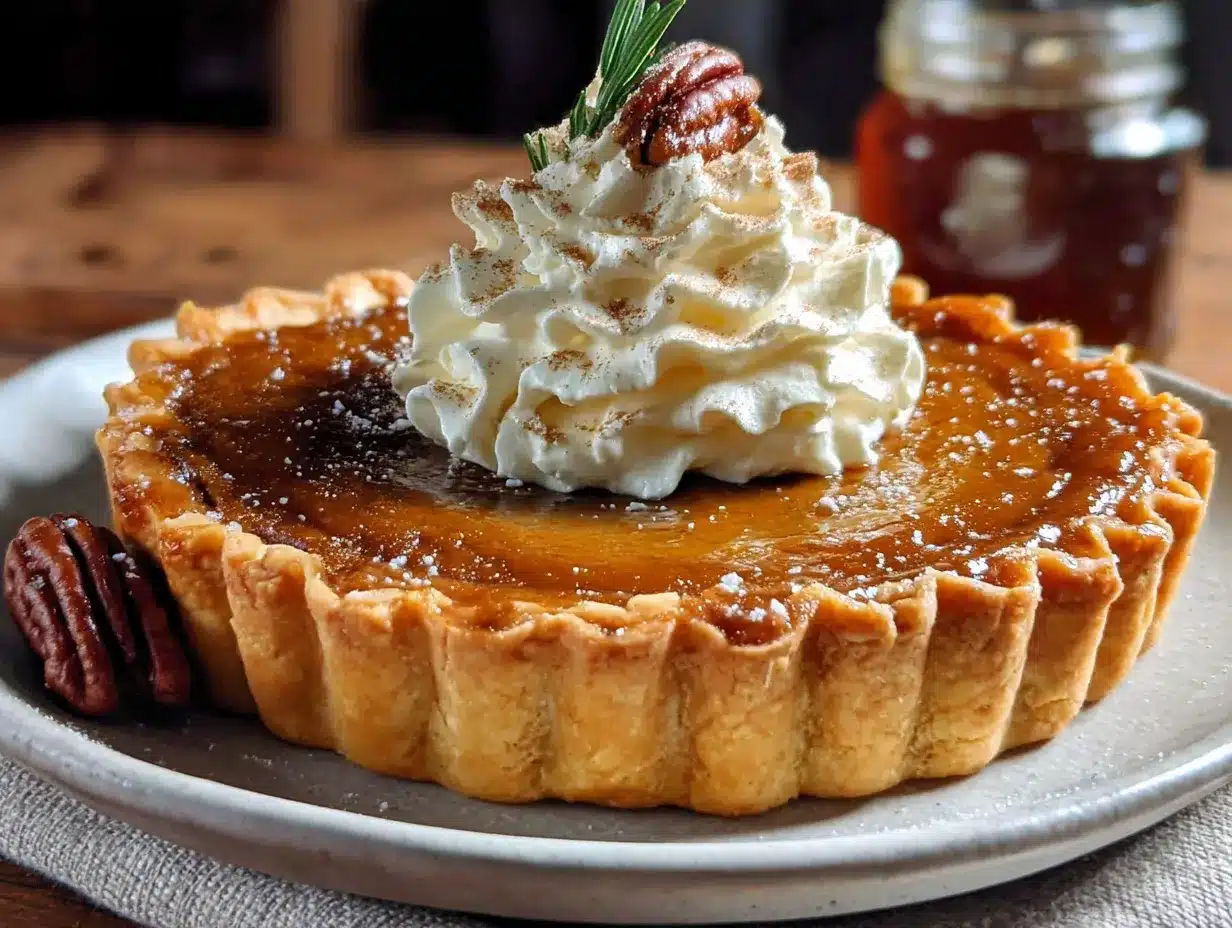
- 1 cup heavy whipping cream (yes, this is full-fat, but a little goes a long way. You can also use coconut cream for a dairy-free option, but the texture is slightly different)
- 2 tablespoons pure maple syrup (real maple syrup, not pancake syrup. Grade A dark amber has the strongest flavor and works beautifully here)
- 1/2 teaspoon vanilla extract (optional, but I like the extra layer of flavor)
For the Crust
- 1 unbaked 9-inch pie crust (store-bought or homemade. I’ve used Pillsbury refrigerated crusts, Wholly Wholly’s frozen shells, and my own butter crust—they all work. If you’re making your own, I recommend a simple oil-based crust to keep things lighter, but a traditional butter crust is also amazing)
A quick note on ingredient selection: look for Greek yogurt that’s thick and creamy, not watery. If your yogurt has liquid on top, drain it off before measuring. And for the pumpkin puree, I’ve tested this with both canned and fresh roasted pumpkin, and honestly, canned is more consistent. Fresh pumpkin can be watery and requires extra draining. Save yourself the trouble and use canned for this recipe.
Equipment Needed
- 9-inch pie dish (glass or ceramic works best for even baking. I use a Pyrex glass dish and love how I can see the crust browning through the bottom)
- Large mixing bowl (for the filling)
- Medium mixing bowl (for the whipped cream)
- Whisk (a hand whisk is fine, but an electric hand mixer makes the whipped cream much easier)
- Rubber spatula (for scraping down the bowl and smoothing the filling)
- Measuring cups and spoons
- Parchment paper and pie weights (or dried beans) for blind baking the crust
- Cooling rack (essential for letting the pie cool properly without a soggy bottom)
If you don’t have pie weights, don’t worry. I’ve used dried beans, uncooked rice, and even a stack of clean coins wrapped in foil. The point is just to keep the crust from puffing up while it blind bakes. Also, a good quality hand mixer makes the whipped cream come together in about 2 minutes, but you can absolutely whisk it by hand—just expect a good arm workout and about 8 minutes of whisking.
Preparation Method
Let me walk you through this step by step. I’ve included all the little details I wish someone had told me the first time I made this pie.
- Preheat your oven to 375°F (190°C). Position the rack in the lower third of the oven. This helps the bottom crust cook through before the filling sets.
- Blind bake your pie crust. Roll out your crust and press it into the pie dish, crimping the edges however you like. Line the crust with parchment paper, making sure it goes up the sides, then fill with pie weights or dried beans. Bake for 15 minutes. Remove the parchment and weights, then bake for another 5-7 minutes until the bottom looks dry and lightly golden. Set aside to cool slightly while you make the filling. Pro tip: if you see any cracks forming, brush them with a little beaten egg white before adding the filling—this seals them and prevents a soggy bottom.
- Make the filling. In a large mixing bowl, whisk together the pumpkin puree and sugar until smooth. Add the eggs one at a time, whisking well after each addition. The mixture should look glossy and uniform.
- Add the yogurt and evaporated milk. Whisk in the Greek yogurt until completely smooth—no streaks of white remaining. Then add the evaporated milk, vanilla, pumpkin pie spice, cinnamon, and salt. Whisk until everything is well combined. The filling should be smooth and pourable, like a thick milkshake. If you see any lumps, keep whisking. I’ve found that room temperature ingredients blend much more smoothly, so take the eggs and yogurt out of the fridge about 30 minutes before you start.
- Pour the filling into the crust. Place the blind-baked crust on the oven rack, then carefully pour the filling in. This prevents sloshing and spilling. Fill to about 1/4 inch below the rim—the filling will puff up slightly as it bakes but shouldn’t overflow.
- Bake the pie. Bake at 375°F for 15 minutes. Then reduce the oven temperature to 350°F (175°C) and continue baking for 35-40 minutes. The pie is done when the edges are set and slightly puffed, but the center still jiggles slightly when you gently shake the pan. It will continue to set as it cools. I’ve learned the hard way that overbaking leads to cracks, so don’t wait for the center to be completely firm.
- Cool completely. Transfer the pie to a cooling rack and let it cool to room temperature, about 2 hours. Then refrigerate for at least 4 hours, preferably overnight. This step is non-negotiable—the pie needs time to set properly. I know it’s tempting to slice into it warm, but trust me, the texture is so much better after it’s chilled.
- Make the maple whipped cream. Just before serving, pour the heavy cream into a chilled medium bowl. Add the maple syrup and vanilla. Using an electric hand mixer, beat on medium-high speed until soft peaks form—about 2-3 minutes. Be careful not to overbeat, or you’ll end up with butter. The cream should be light and fluffy, holding its shape but still soft enough to dollop.
- Serve and enjoy. Slice the chilled pie, top each slice with a generous dollop of maple whipped cream, and maybe a light dusting of cinnamon on top. The contrast between the cool, creamy pie and the slightly sweet, maple-infused cream is absolutely perfect.
Cooking Tips & Techniques
I’ve made this pie at least a dozen times now, and I’ve learned a few things the hard way. Let me save you some trouble.
Watch your baking time. Every oven runs differently. My first attempt at this recipe came out slightly overbaked because I trusted the timer instead of my eyes. Start checking the pie at the 30-minute mark of the second bake. The edges should be set and slightly puffed, but the center should have a gentle jiggle—like Jell-O that’s just set. If the center is completely still, you’ve gone too far. Also, if the crust edges are browning too quickly, tent them with foil or a pie shield ring about halfway through baking.
Room temperature ingredients matter. I know it’s annoying to wait for ingredients to come to room temperature, but it genuinely makes a difference. Cold yogurt and eggs can seize up when mixed, leaving you with a lumpy filling that won’t bake evenly. Take everything out of the fridge 30 minutes before you start. Set a timer if you’re forgetful like me.
Don’t skip the blind bake. I tried skipping this step once because I was in a hurry. The bottom crust came out soggy and undercooked, and the whole pie suffered for it. Blind baking ensures the crust is fully cooked and stays crisp, even with the moist filling on top. It adds maybe 20 minutes to the process, but it’s absolutely worth it.
Make your own pumpkin pie spice. If you have the spices on hand, homemade is so much more flavorful. Mix 1 tablespoon cinnamon, 1 teaspoon ginger, 1/2 teaspoon nutmeg, 1/2 teaspoon allspice, and 1/4 teaspoon cloves. Store in a small jar, and you’ll have enough for multiple pies. The smell alone is worth it.
Chill your bowl for the whipped cream. Pop your mixing bowl and beaters in the freezer for 10 minutes before making the whipped cream. The cold helps the cream whip up faster and hold its shape longer. I learned this from a pastry chef friend, and it’s been a game-changer.
Variations & Adaptations
One of the things I love about this recipe is how flexible it is. Here are some variations I’ve tried and loved.
Gluten-Free Version: Use a gluten-free pie crust. I’ve had great results with both store-bought gluten-free crusts and homemade versions using almond flour or a gluten-free flour blend. Just make sure to blind bake it a few minutes longer, as gluten-free crusts tend to need extra time to crisp up.
Dairy-Free Option: Swap the Greek yogurt for a thick coconut yogurt (like CocoJune or So Delicious plain), use full-fat coconut milk instead of evaporated milk, and make the whipped cream with chilled coconut cream. The texture will be slightly different—a bit more dense—but the flavor is still fantastic. I’ve served this to dairy-free friends who had no idea it wasn’t the original.
Extra Spiced Version: If you love warm spices like I do, add an extra teaspoon of cinnamon and a pinch of cayenne pepper to the filling. The cayenne doesn’t make it spicy, just adds a subtle warmth that complements the pumpkin beautifully. I made this version for a fall dinner party, and it was the first thing to disappear from the dessert table.
Maple Bourbon Whipped Cream: For an adult twist, replace 1 tablespoon of the maple syrup with bourbon. The smoky, vanilla notes of bourbon pair incredibly well with the pumpkin and maple. Just be careful not to add too much, or the cream won’t whip properly. I’ve made this mistake—trust me, a little goes a long way.
Individual Mini Pies: Use a muffin tin and mini pie crusts (you can cut larger crusts into circles and press them into the muffin wells). Reduce the baking time to about 20-25 minutes at 350°F. These are perfect for portion control and make the cutest presentation at parties.
Serving & Storage Suggestions
This pie is best served cold, straight from the refrigerator. I know some people prefer warm pumpkin pie, but the texture of this lighter version really shines when it’s chilled. The filling firms up beautifully, and the flavors have time to meld together. If you want to serve it slightly warm, let it sit at room temperature for about 15 minutes after slicing—but don’t microwave it, or the crust will get soggy.
For presentation, I like to dollop the maple whipped cream on each slice individually rather than covering the whole pie. This keeps the cream from getting weepy and lets people add as much or as little as they want. A light dusting of cinnamon or a few candied pecans on top adds a nice finishing touch.
Storage is straightforward: cover the pie loosely with plastic wrap or foil and refrigerate for up to 4 days. The flavors actually improve after a day or two, so don’t hesitate to make this ahead. I often make it two days before Thanksgiving, and it’s always perfect. The maple whipped cream is best made fresh, but you can make it up to 4 hours ahead and keep it refrigerated. Just give it a quick whisk before serving if it’s separated slightly.
You can also freeze the baked pie (without the whipped cream) for up to 2 months. Wrap it tightly in plastic wrap, then foil, and thaw overnight in the refrigerator before serving. The texture holds up surprisingly well. I’ve done this for multiple holidays when I needed to get ahead on cooking.
Leftover pie is amazing cold for breakfast—I won’t judge you. And if you have extra maple whipped cream, it’s fantastic on coffee, hot chocolate, or even spread on toast with a drizzle of extra maple syrup.
Nutritional Information & Benefits
Here’s the approximate nutritional breakdown per slice (1/8 of the pie, without whipped cream):
- Calories: 220
- Fat: 9g
- Carbohydrates: 30g
- Fiber: 2g
- Sugar: 18g
- Protein: 6g
Compared to a traditional pumpkin pie, this version saves you about 150 calories and 8 grams of fat per slice. The Greek yogurt adds protein and calcium while keeping the texture creamy, and the reduced sugar means you’re getting more actual pumpkin flavor instead of just sweetness. Pumpkin itself is packed with vitamin A (over 200% of your daily needs per slice), fiber, and antioxidants like beta-carotene. It’s actually one of the most nutrient-dense foods you can eat, which makes this pie feel a little less indulgent and a little more like self-care.
This recipe is naturally vegetarian and can be made gluten-free and dairy-free with the substitutions I mentioned. It does contain dairy and gluten in the standard version, so be mindful if you’re cooking for someone with allergies. The maple whipped cream adds about 50 calories and 5g of fat per generous dollop, but honestly, it’s worth it for the flavor and texture it brings.
Conclusion
This lighter classic pumpkin pie with maple whipped cream has become my go-to dessert for every fall gathering, and I don’t see that changing anytime soon. It started as a kitchen accident—a moment of panic and improvisation—and turned into something I genuinely look forward to making every year. The fact that it’s lighter is almost a bonus at this point. The real story is that it’s just a really, really good pie.
I’d love for you to try this recipe and make it your own. Maybe you’ll add extra cinnamon like I do, or swap in a different crust, or experiment with the maple bourbon whipped cream for a grown-up twist. Whatever you do, let me know how it turns out. Drop a comment below, share a photo of your pie, or tag me on social media—I genuinely love seeing your creations. And if you have a kitchen disaster story of your own that turned into something amazing, I’d love to hear that too. Sometimes the best recipes come from the moments when everything goes wrong, and this pie is proof of that.
Happy baking, friends. Your Thanksgiving table is about to get a whole lot lighter—and a whole lot more delicious.
Frequently Asked Questions
Can I use fresh pumpkin instead of canned?
Yes, you can, but I recommend canned for this recipe. Fresh pumpkin has a higher water content, which can make the filling runny. If you want to use fresh, roast and puree the pumpkin, then drain it in a cheesecloth-lined strainer for at least an hour to remove excess moisture. You’ll need about 1.5 cups of fresh puree to equal one 15-ounce can.
Why did my pie crack on top?
Cracks usually happen from overbaking or sudden temperature changes. Make sure you take the pie out when the center still has a slight jiggle—it will continue to set as it cools. Also, let the pie cool gradually on a rack instead of putting it straight in the refrigerator. If cracks do appear, don’t worry—the maple whipped cream covers them beautifully.
Can I make this pie ahead of time?
Absolutely. In fact, I recommend it. The pie actually tastes better after a day or two in the refrigerator because the flavors have time to meld. You can bake it up to 2 days ahead, cool it completely, and store it covered in the fridge. Just add the whipped cream right before serving.
Can I use non-fat Greek yogurt?
You can, but the texture won’t be as creamy. Non-fat yogurt has more water content, which can make the filling slightly less rich. If you’re watching calories, 2% Greek yogurt is a good compromise—it’s still lighter than full-fat but gives you a much better texture than non-fat.
How do I know when the pie is done baking?
The edges should be set and slightly puffed, but the center should still jiggle when you gently shake the pan. Think of it like Jell-O that’s just set—it should wobble but not be liquid. If you insert a knife near the center, it should come out mostly clean with just a little moisture. The internal temperature should be around 175°F when done.
Pin This Recipe!
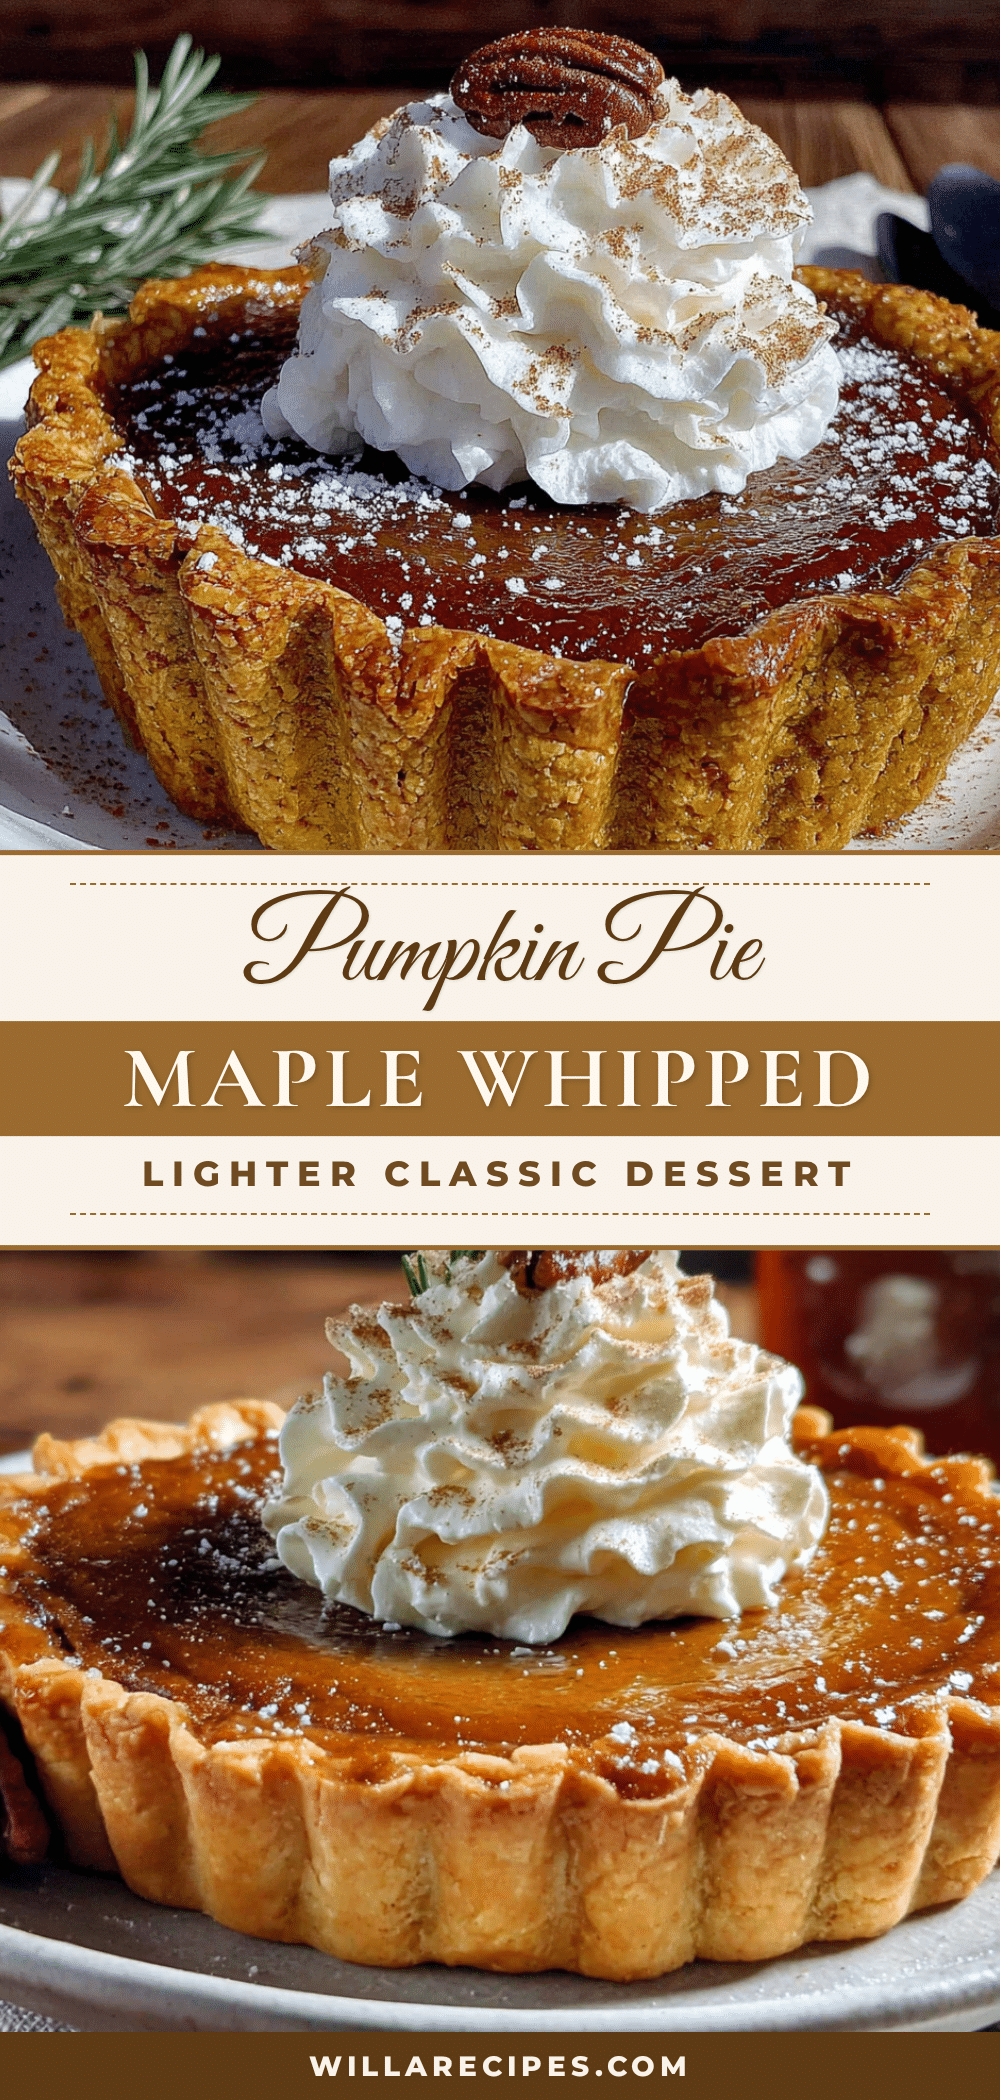
Lighter Classic Pumpkin Pie with Maple Whipped Cream
A lighter version of classic pumpkin pie made with Greek yogurt and reduced sugar, topped with maple whipped cream. This recipe started as a kitchen accident and became a holiday favorite.
- Prep Time: 30 minutes
- Cook Time: 55 minutes
- Total Time: 1 hour 25 minutes (plus cooling and chilling time)
- Yield: 8 servings 1x
- Category: Dessert
- Cuisine: American
Ingredients
- 1 can (15 oz) pumpkin puree (not pumpkin pie filling)
- 3/4 cup granulated sugar
- 2 large eggs (room temperature)
- 1 cup plain Greek yogurt (full-fat or 2%)
- 1/2 cup evaporated milk
- 1 teaspoon vanilla extract
- 2 teaspoons pumpkin pie spice
- 1/2 teaspoon ground cinnamon
- 1/4 teaspoon salt
- 1 unbaked 9-inch pie crust (store-bought or homemade)
- 1 cup heavy whipping cream
- 2 tablespoons pure maple syrup
- 1/2 teaspoon vanilla extract (optional)
Instructions
- Preheat your oven to 375°F (190°C). Position the rack in the lower third of the oven.
- Blind bake your pie crust: Roll out crust and press into pie dish, crimping edges. Line with parchment paper and fill with pie weights or dried beans. Bake for 15 minutes. Remove parchment and weights, then bake for another 5-7 minutes until bottom looks dry and lightly golden. Set aside to cool slightly.
- Make the filling: In a large mixing bowl, whisk together pumpkin puree and sugar until smooth. Add eggs one at a time, whisking well after each addition.
- Whisk in Greek yogurt until completely smooth. Add evaporated milk, vanilla, pumpkin pie spice, cinnamon, and salt. Whisk until well combined. The filling should be smooth and pourable.
- Pour the filling into the crust: Place blind-baked crust on oven rack, then carefully pour filling in, filling to about 1/4 inch below the rim.
- Bake at 375°F for 15 minutes. Reduce oven temperature to 350°F (175°C) and continue baking for 35-40 minutes. Pie is done when edges are set and slightly puffed, but center still jiggles slightly when gently shaken.
- Cool completely on a cooling rack to room temperature, about 2 hours. Then refrigerate for at least 4 hours, preferably overnight.
- Make the maple whipped cream: Just before serving, pour heavy cream into a chilled medium bowl. Add maple syrup and vanilla. Using an electric hand mixer, beat on medium-high speed until soft peaks form, about 2-3 minutes.
- Serve: Slice chilled pie, top each slice with a generous dollop of maple whipped cream. Optionally dust with cinnamon.
Notes
Room temperature ingredients blend more smoothly. Blind baking is essential to prevent a soggy bottom. The pie is best served cold; flavors improve after a day or two. For gluten-free, use a gluten-free pie crust. For dairy-free, use coconut yogurt and coconut milk. The maple whipped cream can be made up to 4 hours ahead.
Nutrition
- Serving Size: 1 slice (1/8 of pie)
- Calories: 220
- Sugar: 18
- Sodium: 200
- Fat: 9
- Saturated Fat: 5
- Carbohydrates: 30
- Fiber: 2
- Protein: 6
Keywords: pumpkin pie, lighter pumpkin pie, Greek yogurt pumpkin pie, maple whipped cream, Thanksgiving dessert, fall dessert, healthy pumpkin pie


