My neighbor wasn’t trying to impress anyone. I’d stopped by to borrow a lug wrench—my car had made a concerning noise on the way home from the grocery store—and the smell of rosemary and roasted garlic hit me before I even made it past her front door. She was standing in her kitchen, half-listening to an old folk album, casually shaping what I would later learn was the most incredible turkey-shaped cheese ball I’d ever seen. She wasn’t hosting a party. It was a Tuesday. She just felt like making one.
“Oh, this old thing?” she said when I asked, wiping her hands on her jeans. She shrugged like it was no big deal, like she hadn’t just created a centerpiece that looked like it belonged on the cover of a magazine. I stood there, lug wrench forgotten, watching her arrange crackers and grapes around this little turkey made of cheese. She didn’t even have a plan for it—she was just going to snack on it while watching a movie. That casualness, that complete lack of performance, is exactly what stuck with me. It wasn’t about showing off. It was about making something that felt good to eat.
I went home that night, car still making that noise, and couldn’t stop thinking about it. Not the turkey design specifically, but the whole vibe of it. The way a simple cheese ball, dressed up with a few clever touches, could turn an ordinary evening into something that felt like a celebration. Honestly, I think that’s what Thanksgiving appetizers should be—something that feels special but doesn’t require you to break a sweat. This Cozy Thanksgiving Charcuterie Board with Turkey Cheese Ball is exactly that. It’s the kind of thing you put out while the turkey roasts, the kind that makes people gather around the kitchen island and start talking. Maybe you’ve been there—standing in your own kitchen, wondering how to keep guests happy without burning dinner. This board is your answer.
It’s funny how the best recipes come from moments like that. Someone just making something because they felt like it, no pressure, no audience. That’s the energy I try to bring to every Thanksgiving now. And let me tell you, this turkey cheese ball? It’s the star of the show before the main event even starts.
Why You’ll Love This Recipe
Let’s be honest—Thanksgiving prep can get overwhelming. Between the turkey, the sides, and the pies, the last thing you need is a complicated appetizer. That’s where this board comes in. It’s designed to be stress-free, beautiful, and absolutely delicious, all at the same time. Here’s why it works:
- Quick & Easy: The cheese ball comes together in about 20 minutes of active time. After that, it just chills in the fridge while you focus on everything else. Perfect for busy Thanksgiving mornings.
- Simple Ingredients: You probably already have most of these in your fridge. Cream cheese, cheddar, a few seasonings, and some pantry staples. No fancy grocery store runs required.
- Perfect for Thanksgiving: This board acts as a gorgeous centerpiece that keeps guests happily munching while the turkey finishes roasting. It’s the ultimate “hold them over” snack.
- Crowd-Pleaser: I’ve served this at three different Thanksgivings now, and every single time, someone asks for the recipe. Kids love the turkey shape, adults love the creamy, savory flavor.
- Unbelievably Delicious: The texture of this cheese ball is next-level. It’s creamy but firm enough to hold its shape, with a perfect balance of sharp cheddar and subtle herbs. Pair it with crisp crackers and sweet grapes, and you’ve got a flavor combo that’s pure comfort.
What makes this recipe different from all the other cheese balls out there? It’s the attention to detail. I’ve tested this version multiple times to get the seasoning just right—not too salty, not too bland. The blend of garlic powder, onion powder, and a touch of Worcestershire sauce gives it a savory depth that keeps you coming back for more. Plus, the turkey shape is genuinely fun to make. It’s not complicated, but it looks impressive enough that people will think you spent hours on it. That’s my favorite kind of recipe—one that makes you look like a hero without the effort.
This isn’t just good—it’s the kind of appetizer that makes you close your eyes after the first bite. It’s comfort food reimagined for the holiday season. Perfect for impressing guests without stress, or turning a simple pre-dinner snack into something memorable.
What Ingredients You Will Need
This recipe uses simple, wholesome ingredients to deliver bold flavor and satisfying texture without the fuss. Most of these are pantry staples or easy to find at any grocery store. Here’s what you’ll need:
For the Turkey Cheese Ball
- 16 oz cream cheese, softened – This is the base of your cheese ball. Make sure it’s at room temperature for easy mixing. I prefer Philadelphia brand for the creamiest texture.
- 2 cups sharp cheddar cheese, shredded – Sharp cheddar gives the ball its bold, savory flavor. Pre-shredded cheese works in a pinch, but freshly shredded melts and blends better (look for block cheddar and shred it yourself for best results).
- 1 packet (1 oz) ranch seasoning mix – This adds a classic savory flavor with herbs and a hint of buttermilk. It’s the shortcut that makes this recipe so easy.
- 1 teaspoon garlic powder – For a subtle, warm garlic note. Don’t skip this—it balances the richness of the cream cheese.
- 1 teaspoon onion powder – Adds depth without being overpowering.
- 1 tablespoon Worcestershire sauce – This is my secret ingredient. It adds a savory, slightly tangy umami flavor that makes the cheese ball taste like it’s been aged for hours.
- Salt and black pepper to taste – Go easy on the salt since the ranch mix and cheddar already have plenty.
For the Turkey Decoration
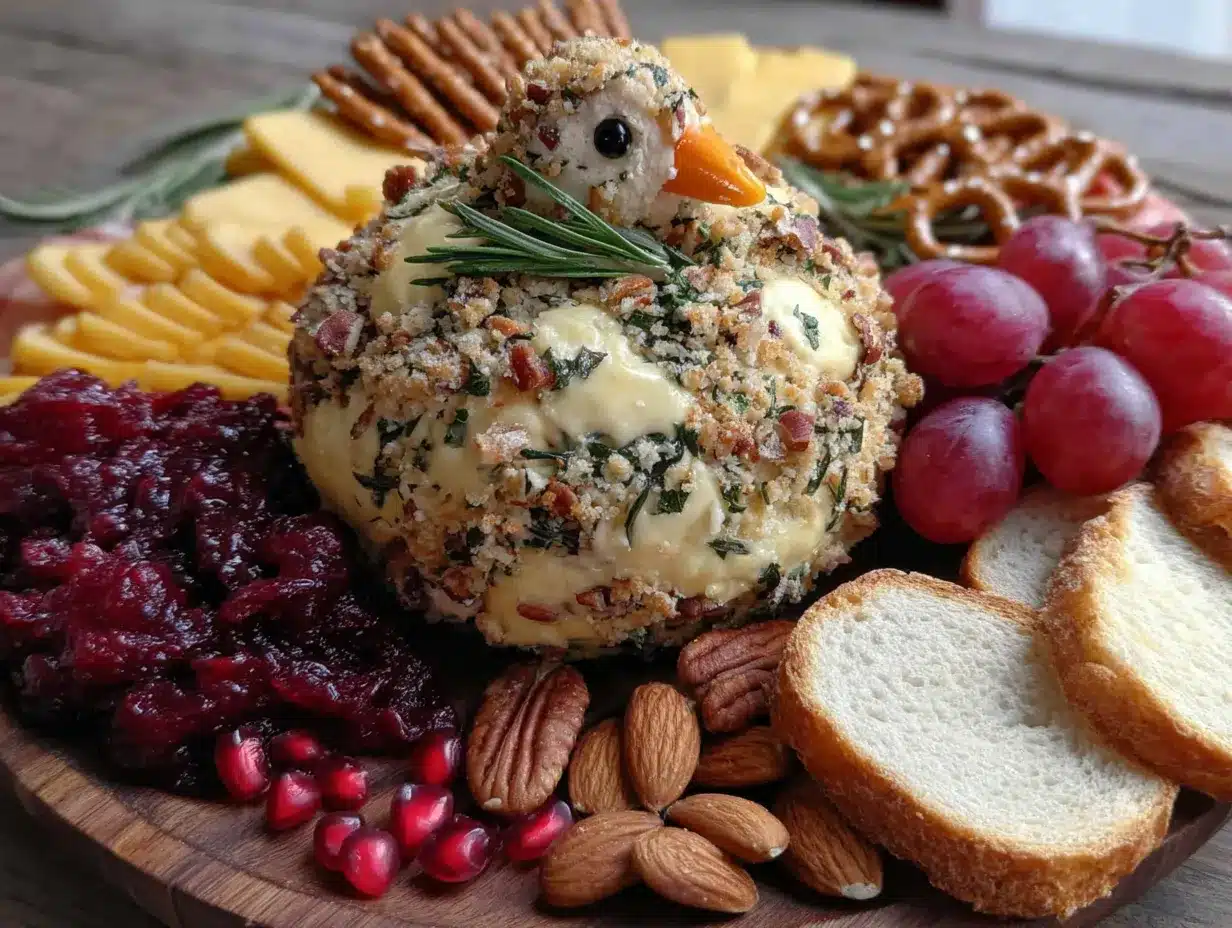
- 1 cup pecan halves – These form the turkey’s “feathers.” Arrange them in a fan shape behind the cheese ball. Toasted pecans add extra crunch and flavor.
- 1 small carrot, peeled – Used for the turkey’s beak and wattle (the red dangly bit). A small piece of red bell pepper works too if you don’t have a carrot.
- 2 candy eyes or black olive slices – For the turkey’s eyes. Candy eyes are fun and easy, but olive slices give it a more savory look.
- Fresh parsley or rosemary sprigs – Optional, but adds a nice touch of greenery around the board for a festive look.
For the Charcuterie Board
- Assorted crackers – Go with a mix of textures: buttery rounds, crispy water crackers, and whole wheat. I love using a variety pack for visual interest.
- Sliced baguette or crostini – Adds a rustic, hearty element. Toast them lightly for extra crunch.
- Fresh fruit – Red and green grapes, apple slices, and dried figs add sweetness and color. Grapes are a must—they contrast perfectly with the savory cheese.
- Vegetables – Carrot sticks, celery, and cucumber rounds add freshness and crunch. They also balance out the richness of the cheese.
- Meats (optional) – Thinly sliced turkey breast, prosciutto, or salami. I like to add a few slices of smoked turkey for a Thanksgiving-themed touch.
- Nuts and dried fruit – Almonds, walnuts, dried cranberries, and apricots add texture and a touch of sweetness.
- Olives and pickles – Cornichons, Kalamata olives, or pickled okra add a briny pop that cuts through the cheese’s richness.
- Dips and spreads – A small bowl of honey, fig jam, or whole-grain mustard for extra flavor variety.
Ingredient Tips: For the best texture, use full-fat cream cheese. Low-fat versions can make the cheese ball too soft and difficult to shape. If you’re dairy-sensitive, you can use dairy-free cream cheese and cheddar-style shreds—just note that the texture will be slightly different. For a gluten-free option, serve with gluten-free crackers or vegetable slices. The ranch seasoning mix is typically gluten-free, but double-check the label if that’s a concern.
Equipment Needed
You don’t need anything fancy to pull this off. Here’s what you’ll need:
- Large mixing bowl – For combining the cheese ball ingredients. A glass or stainless steel bowl works best.
- Hand mixer or stand mixer – Makes blending the cream cheese and cheddar much easier. A wooden spoon works too, but it’ll take some elbow grease.
- Plastic wrap – Essential for shaping the cheese ball and keeping it from sticking to your hands.
- Spatula – For scraping every last bit of cheese mixture out of the bowl.
- Serving platter or large wooden board – This is where your charcuterie board comes to life. A large wooden cutting board or a marble slab works beautifully.
- Small bowls – For holding dips, spreads, olives, or nuts. I use ramekins or small ceramic bowls.
- Sharp knife and cutting board – For slicing fruits, vegetables, and baguette.
- Toothpicks or small skewers – Optional, for easy grabbing of olives or cheese cubes.
If you don’t have a hand mixer, no worries. Just let the cream cheese soften completely and mix by hand with a sturdy spoon. It’ll take a few extra minutes, but the result is the same. For the board, a large baking sheet lined with parchment paper works in a pinch if you don’t have a wooden board. I’ve done it before—it’s not as pretty, but it gets the job done.
Preparation Method
Alright, let’s get to the fun part. Here’s how to make your Cozy Thanksgiving Charcuterie Board with Turkey Cheese Ball, step by step.
- Soften the cream cheese. Take your cream cheese out of the fridge about 30 minutes before you start. It should be soft enough to easily press your finger into. If you’re in a rush, you can microwave it in 10-second bursts, but be careful not to melt it—just soften it.
- Mix the cheese ball base. In your large mixing bowl, combine the softened cream cheese, shredded sharp cheddar, ranch seasoning mix, garlic powder, onion powder, and Worcestershire sauce. Using your hand mixer on low speed, blend everything together until it’s smooth and well-combined. Scrape down the sides of the bowl with your spatula halfway through. Taste the mixture—adjust salt and pepper if needed. Remember, the crackers and meats will add salt too, so go easy.
- Shape the cheese ball. Lay a large piece of plastic wrap on your counter. Spoon the cheese mixture onto the center of the plastic wrap. Gather the edges of the wrap and twist them together, forming the mixture into a ball. Now here’s the trick: shape it into a slightly elongated oval, like a turkey body. Don’t make it perfectly round—turkeys have a bit of an oblong shape. Twist the plastic wrap tightly to secure it, then refrigerate for at least 2 hours, or overnight. This step is crucial—the cheese ball needs to firm up so it holds its shape when you decorate it.
- Prepare your board. While the cheese ball chills, get your charcuterie board ready. Arrange your small bowls for dips, olives, or nuts. Wash and slice your fruits and vegetables. Slice your baguette into thin rounds and toast them lightly if desired. Having everything prepped makes assembly a breeze.
- Decorate the turkey cheese ball. Once the cheese ball is firm, unwrap it and place it on your serving board. This is where the magic happens. Start with the “feathers”: arrange the pecan halves in a fan shape behind the cheese ball, with the pointed ends facing outward. Overlap them slightly for a full, textured look. For the turkey’s head: use a small piece of carrot to form a triangle-shaped beak, and a smaller piece for the wattle (the red dangly bit under the beak). Press them gently into the front of the cheese ball. Add the candy eyes or olive slices just above the beak. If you’re using olives, slice them into small rounds and press them in.
- Assemble the board. Now, fill in the rest of your board around the turkey. Start with the crackers and baguette slices, placing them in small clusters. Add your fresh fruit—grapes look beautiful in small bunches. Arrange the vegetables, meats, and nuts in separate sections. Fill any gaps with dried fruit or fresh herbs like rosemary sprigs. The goal is to make it look abundant and inviting, with lots of color and texture.
- Add the finishing touches. Place your small bowls of dips or spreads on the board. Drizzle a little honey over the cheese ball if you like—it adds a touch of sweetness that pairs beautifully with the savory cheese. Garnish with a few extra pecan halves or a sprig of rosemary on top of the cheese ball for a festive look.
And there you have it—a show-stopping Thanksgiving appetizer that looks like you spent all day on it, but really came together in under 30 minutes of active work. The hardest part is waiting for the cheese ball to chill!
Cooking Tips & Techniques
I’ve made this board enough times to learn a few things the hard way. Here are my best tips to make sure yours turns out perfectly:
Don’t skip the chilling time. I know it’s tempting to rush this step, but a properly chilled cheese ball is much easier to shape and decorate. If it’s too soft, the pecans won’t stay in place, and the whole thing might lose its form. I once tried to speed things up by only chilling it for 30 minutes—let’s just say my turkey looked more like a melted blob. Give it at least 2 hours, or even better, make it the night before.
Use your hands for shaping. The plastic wrap method works great, but don’t be afraid to get your hands in there. Lightly wet your hands with cold water to prevent sticking, then gently mold the cheese mixture into the perfect oval shape. It gives you more control than the wrap alone.
Toast your pecans first. For extra flavor, spread the pecan halves on a baking sheet and toast them at 350°F for 5-7 minutes until they’re fragrant. Let them cool completely before using. Toasted pecans add a nutty, warm flavor that takes the whole board up a notch.
Balance your board. A good charcuterie board has a mix of textures, flavors, and colors. Aim for a balance of creamy (cheese ball), crunchy (crackers, nuts), sweet (fruit, honey), salty (meats, olives), and fresh (vegetables, herbs). Don’t overcrowd the board—leave a little space so people can easily grab what they want.
Keep it cold until serving. Cheese balls and charcuterie boards are best served chilled, but not ice-cold. Take the board out of the fridge about 15 minutes before serving to let the flavors come to room temperature. If you’re serving outdoors or in a warm room, consider placing the cheese ball on a smaller plate set on top of a larger board filled with ice (covered with a cloth) to keep it cool.
Make it ahead. This is one of those recipes that actually gets better with time. You can prepare the cheese ball up to 3 days in advance and keep it wrapped in the fridge. Assemble the board itself up to 2 hours before serving—just cover it with plastic wrap and refrigerate until it’s time to eat.
Variations & Adaptations
One of the best things about this board is how easy it is to customize. Here are some variations I’ve tried and loved:
Dietary Adaptations: For a dairy-free version, use dairy-free cream cheese and cheddar-style shreds. The texture will be slightly softer, so chill it for an extra hour. For a gluten-free board, swap crackers for gluten-free varieties or use sliced cucumber and bell pepper rounds as dippers. The ranch seasoning mix is typically gluten-free, but always check the label.
Flavor Twists: Swap the sharp cheddar for smoked gouda or pepper jack for a different flavor profile. Add a tablespoon of chopped fresh herbs like chives, dill, or parsley to the cheese mixture for a fresh, garden-inspired taste. For a spicy kick, mix in a teaspoon of cayenne pepper or a few dashes of hot sauce.
Seasonal Variations: In the fall, add roasted butternut squash cubes, pomegranate seeds, and apple slices to your board. In the winter, swap the grapes for dried cranberries and add a few sprigs of fresh thyme. In the summer, use fresh berries, melon balls, and edible flowers for a lighter, brighter board.
Different Shapes: Not feeling the turkey? Shape the cheese ball into a pumpkin by rolling it in paprika or crushed tortilla chips for a “rind.” Or make a simple round ball and decorate it with a sprig of rosemary and a few cranberries for a festive holiday look. I’ve even made a Christmas tree version by shaping the cheese into a cone and decorating it with fresh herbs and pomegranate seeds.
Personal Variation: My favorite twist is adding a tablespoon of truffle oil to the cheese mixture. It sounds fancy, but it’s actually super easy and adds this incredible earthy, luxurious flavor that pairs perfectly with the sharp cheddar. I first tried this for a Friendsgiving potluck, and it was gone within 10 minutes. Just be careful—truffle oil is potent, so start with a little and taste as you go.
Serving & Storage Suggestions
This board is designed to be served at room temperature, which makes it perfect for Thanksgiving. Here’s how to make the most of it:
Serving Temperature: Take the board out of the fridge about 15-20 minutes before serving. This allows the cheese to soften slightly, which makes it easier to spread on crackers. The fruits and vegetables will still be crisp and refreshing.
Presentation Tips: Arrange the turkey cheese ball slightly off-center on the board to create visual interest. Place the crackers and bread in small clusters rather than lining them up in rows—it looks more organic and inviting. Use the fresh herbs as a garnish around the edges of the board for a pop of green. I like to add a few small bowls for dips and spreads to break up the visual space.
Complementary Dishes: This board pairs beautifully with a glass of crisp white wine like Sauvignon Blanc or a light red like Pinot Noir. For a non-alcoholic option, serve with sparkling apple cider or a cranberry spritzer. It also works great alongside other Thanksgiving appetizers like stuffed mushrooms or butternut squash soup shooters.
Storage Instructions: If you have leftovers (which is rare, but possible), wrap the cheese ball tightly in plastic wrap and store it in the fridge for up to 5 days. The rest of the board components should be stored separately: crackers in an airtight container, fruits and vegetables in the fridge, and meats wrapped in parchment paper. The cheese ball actually gets better after a day or two as the flavors meld together.
Reheating: You don’t need to reheat the cheese ball—just let it come to room temperature before serving. If you have leftover baguette slices, you can toast them again in the oven at 350°F for a few minutes to crisp them up.
Flavor Development: The cheese ball’s flavor deepens over time. I actually prefer it on day two—the garlic and onion powders have had time to fully infuse the cream cheese, and the Worcestershire sauce adds a subtle complexity that’s even more pronounced. This is one of those rare recipes that’s just as good, if not better, the next day.
Nutritional Information & Benefits
While this board is definitely a treat, it does offer some nutritional benefits worth noting. Here’s a rough estimate per serving (assuming 12 servings):
- Calories: Approximately 350-400 calories per serving (varies based on board components)
- Protein: 12-15g from the cheese, meats, and nuts
- Fat: 25-30g (mostly from cream cheese, cheddar, and nuts)
- Carbohydrates: 20-25g (from crackers, fruit, and vegetables)
- Fiber: 3-5g from vegetables, nuts, and whole-grain crackers
Health Benefits: Cream cheese and cheddar provide calcium and protein, which support bone health and muscle function. Pecans are rich in healthy monounsaturated fats and antioxidants, which are great for heart health. Fresh fruits and vegetables add vitamins, minerals, and fiber. If you’re watching your sodium, go easy on the meats and olives, and choose low-sodium crackers.
Dietary Considerations: This recipe contains dairy and gluten (from crackers and bread). For a dairy-free option, use dairy-free cheese alternatives. For a gluten-free option, serve with gluten-free crackers or vegetable slices. The cheese ball itself is naturally gluten-free if you check your ranch seasoning label. This board is not suitable for a vegan diet unless you use vegan cheese alternatives and skip the meats.
Personal Wellness Perspective: I believe in balance, especially during the holidays. This board is meant to be enjoyed as part of a larger meal, not as a standalone dish. Pair it with plenty of vegetables and lighter options to round out your Thanksgiving spread. And honestly, a little indulgence is good for the soul—especially when it tastes this good.
Conclusion
This Cozy Thanksgiving Charcuterie Board with Turkey Cheese Ball has become a staple in my holiday rotation, and I think it deserves a spot in yours too. It’s the kind of recipe that brings people together—not just because it’s delicious, but because it’s fun. The turkey shape makes people smile, the board invites grazing and conversation, and the whole thing feels like a celebration without the stress.
I love this recipe because it’s forgiving. You can tweak it, add your own touches, and it still turns out beautiful. Whether you’re hosting a big Thanksgiving dinner or just having a cozy night in with a few friends, this board sets the tone. It says, “I’m glad you’re here. Let’s eat something good.”
So go ahead—give it a try. Make the turkey cheese ball your own. Swap in your favorite crackers, add that dip you love, arrange it in a way that feels right to you. And when someone asks where you got the recipe, just smile and say it’s an old family secret. Or tell them the truth—that you saw a neighbor make it on a random Tuesday and couldn’t stop thinking about it. Either way, I’d love to hear how it turns out. Drop a comment below and let me know what variations you tried, or tag me in your photos. Happy Thanksgiving, friend. You’ve got this.
Frequently Asked Questions
Can I make the cheese ball ahead of time?
Absolutely! In fact, I recommend it. You can prepare the cheese ball up to 3 days in advance and keep it wrapped tightly in plastic wrap in the refrigerator. The flavors actually meld and deepen over time, making it even more delicious. Just let it come to room temperature for about 15-20 minutes before serving.
What if I don’t have ranch seasoning mix?
No problem! You can make your own by combining 1 tablespoon dried parsley, 1 teaspoon dried dill, 1 teaspoon garlic powder, 1 teaspoon onion powder, 1/2 teaspoon dried chives, and 1/2 teaspoon salt. Mix it together and use it just like the packet. It’s actually fresher and lets you control the sodium level.
How do I keep the turkey shape from falling apart?
The key is chilling time. Make sure the cheese ball is thoroughly chilled—at least 2 hours, but overnight is even better. If the mixture feels too soft when you’re shaping it, pop it back in the fridge for 15 minutes before decorating. Also, don’t press the pecans in too deep; just nestle them gently into the surface.
Can I use a different type of cheese?
Definitely! Sharp cheddar is classic, but you can experiment with smoked gouda for a smoky flavor, pepper jack for some heat, or a blend of cheddar and Monterey Jack for extra creaminess. Just make sure whatever cheese you use is finely shredded so it blends smoothly into the cream cheese.
What are the best crackers for this board?
I like to use a mix of textures and flavors. Buttery round crackers, crispy water crackers, whole wheat crackers, and even pretzel crisps all work well. The key is to have a variety so there’s something for everyone. Avoid crackers that are heavily flavored (like barbecue or sour cream and onion) as they can compete with the cheese ball’s savory notes.
Pin This Recipe!
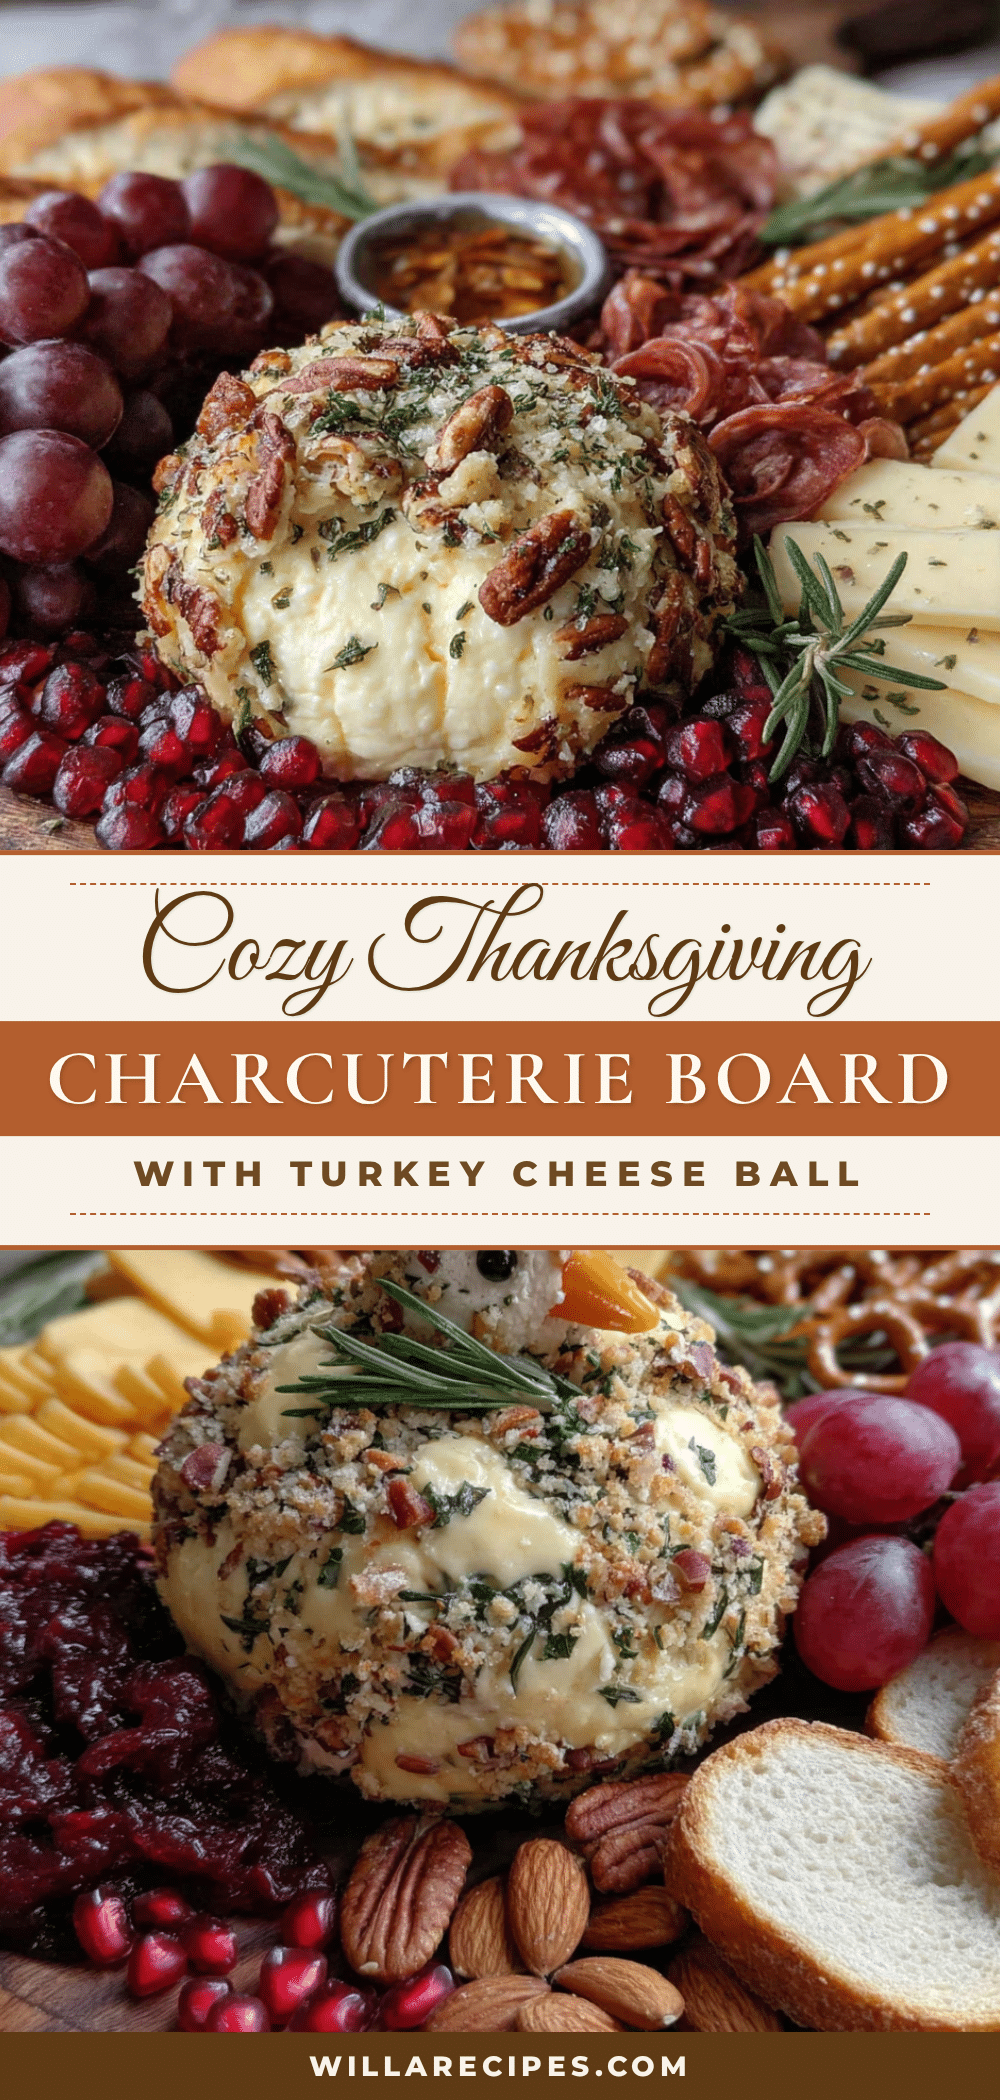
Cozy Thanksgiving Charcuterie Board with Turkey Cheese Ball

A stress-free, beautiful Thanksgiving appetizer featuring a turkey-shaped cheese ball surrounded by an abundant charcuterie board. Perfect for keeping guests happy while the turkey roasts.
- Prep Time: 20 minutes
- Cook Time: 0 minutes
- Total Time: 2 hours 20 minutes (includes chilling)
- Yield: 12 servings 1x
- Category: Appetizer
- Cuisine: American
Ingredients
- 16 oz cream cheese, softened
- 2 cups sharp cheddar cheese, shredded
- 1 packet (1 oz) ranch seasoning mix
- 1 teaspoon garlic powder
- 1 teaspoon onion powder
- 1 tablespoon Worcestershire sauce
- Salt and black pepper to taste
- 1 cup pecan halves
- 1 small carrot, peeled
- 2 candy eyes or black olive slices
- Fresh parsley or rosemary sprigs (optional)
- Assorted crackers
- Sliced baguette or crostini
- Fresh fruit (red and green grapes, apple slices, dried figs)
- Vegetables (carrot sticks, celery, cucumber rounds)
- Meats (optional: thinly sliced turkey breast, prosciutto, or salami)
- Nuts and dried fruit (almonds, walnuts, dried cranberries, apricots)
- Olives and pickles (cornichons, Kalamata olives, or pickled okra)
- Dips and spreads (honey, fig jam, or whole-grain mustard)
Instructions
- Soften the cream cheese: Take cream cheese out of fridge 30 minutes before starting, or microwave in 10-second bursts until soft but not melted.
- Mix the cheese ball base: In a large bowl, combine softened cream cheese, shredded cheddar, ranch seasoning, garlic powder, onion powder, and Worcestershire sauce. Blend with a hand mixer until smooth. Adjust salt and pepper to taste.
- Shape the cheese ball: Place cheese mixture on plastic wrap, gather edges, and twist to form an elongated oval shape (like a turkey body). Refrigerate for at least 2 hours or overnight.
- Prepare the board: While cheese ball chills, arrange small bowls for dips, wash and slice fruits/vegetables, and slice baguette into thin rounds (toast if desired).
- Decorate the turkey cheese ball: Unwrap firm cheese ball and place on serving board. Arrange pecan halves in a fan shape behind it for feathers. Use carrot pieces for beak and wattle. Add candy eyes or olive slices for eyes.
- Assemble the board: Fill board around turkey with crackers, baguette slices, fruit, vegetables, meats, nuts, and dried fruit in separate clusters. Add olives and pickles.
- Add finishing touches: Place small bowls of dips/spreads on board. Drizzle honey over cheese ball if desired. Garnish with extra pecans or rosemary sprigs.
Notes
Chill cheese ball at least 2 hours for best shape. Toast pecans at 350°F for 5-7 minutes for extra flavor. Make cheese ball up to 3 days ahead. For dairy-free, use dairy-free cream cheese and cheddar-style shreds. For gluten-free, use gluten-free crackers or vegetable slices.
Nutrition
- Serving Size: 1 serving (approx. 1
- Calories: 375
- Sugar: 8
- Sodium: 520
- Fat: 28
- Saturated Fat: 14
- Carbohydrates: 22
- Fiber: 4
- Protein: 13
Keywords: Thanksgiving appetizer, charcuterie board, turkey cheese ball, holiday appetizer, easy appetizer, cheese ball, Thanksgiving charcuterie


