Mrs. Gable, my neighbor from two houses down, watched me wrestling a massive, unwieldy turkey onto a platter last Thanksgiving. She didn’t say anything at first. She just stood there on her porch, sipping tea, a little smile on her face. Then she called over, “You know, dear, I stopped wrestling with that bird years ago. I just make the good part—the stuffing—and shape it into balls.” She walked over and told me about this recipe her own mother had brought over from the old country, a way to get all the crispy, savory edges of stuffing without the hassle. Honestly, it was the kind of kitchen wisdom you can’t buy. I tweaked her method just a little, swapping in a milder sausage for my crew, but the heart of it—that perfect, sage-scented, golden-brown bite—is all her. This is the recipe that saved my Thanksgiving sanity, and maybe it’ll save yours, too.
Why You’ll Love This Recipe
Let me tell you, these stuffing balls are a game-changer for anyone feeding a family on a budget. You get all the cozy, comforting flavor of a traditional stuffing, but in a fun, portable shape that kids actually get excited about. No more fighting over the last crispy corner of the baking dish—everyone gets their own perfect, golden sphere.
- Quick & Easy: These come together in about 45 minutes, with only 15 minutes of hands-on prep. Perfect for a busy weeknight or a stress-free holiday side.
- Simple Ingredients: You likely have most of these pantry staples on hand. No fancy grocery trips needed, which is a huge win for the weekly budget.
- Perfect for Family Meals: They’re great for Thanksgiving, but honestly, we make them all year round. They’re a fantastic side for roast chicken, pork chops, or even a simple weeknight soup.
- Crowd-Pleaser: Kids love the “meatball” shape, and adults love the deep, savory flavor. I’ve never seen a plate come back with leftovers.
- Unbelievably Delicious: The outside gets perfectly crispy and golden, while the inside stays soft, moist, and packed with sage and sausage flavor. It’s next-level comfort food.
What makes this recipe different from the rest? It’s the perfect balance of moisture and structure. I’ve found that using panko breadcrumbs instead of traditional cubes gives a lighter, less dense texture that holds its shape beautifully without being heavy. Plus, the trick of browning the sausage first—not just mixing it in raw—adds a layer of deep, savory flavor you just can’t get any other way. This isn’t just another stuffing recipe; it’s the one you’ll come back to again and again.
This recipe is the kind that makes you close your eyes after the first bite. It’s comfort food reimagined—faster, easier, but with the same soul-soothing satisfaction. Perfect for impressing guests without stress, or turning a simple family dinner into something memorable.
What Ingredients You Will Need
This recipe uses simple, wholesome ingredients to deliver bold flavor and satisfying texture without the fuss. Most of these are pantry staples, making it easy to whip up anytime the craving hits.
For the Stuffing Balls
- 1 pound mild Italian sausage, casings removed (I prefer Johnsonville for consistent flavor, but any brand works fine)
- 1 medium yellow onion, finely diced (about 1 cup)
- 2 celery stalks, finely diced (about 1/2 cup)
- 3 cloves garlic, minced
- 1 (14-ounce) bag herb-seasoned stuffing mix (like Pepperidge Farm) (or 6 cups dry bread cubes)
- 1 1/2 cups low-sodium chicken broth (adds richness without making it too salty)
- 2 large eggs, lightly beaten (the binder that holds everything together)
- 2 tablespoons fresh sage, finely chopped (or 2 teaspoons dried sage) (this is the star of the show!)
- 1/2 teaspoon black pepper
- 1/4 teaspoon salt (go easy, the sausage and stuffing mix are already salty)
- 3 tablespoons unsalted butter, melted (for brushing on top—this is the secret to that golden crust)
Ingredient Tips & Substitutions
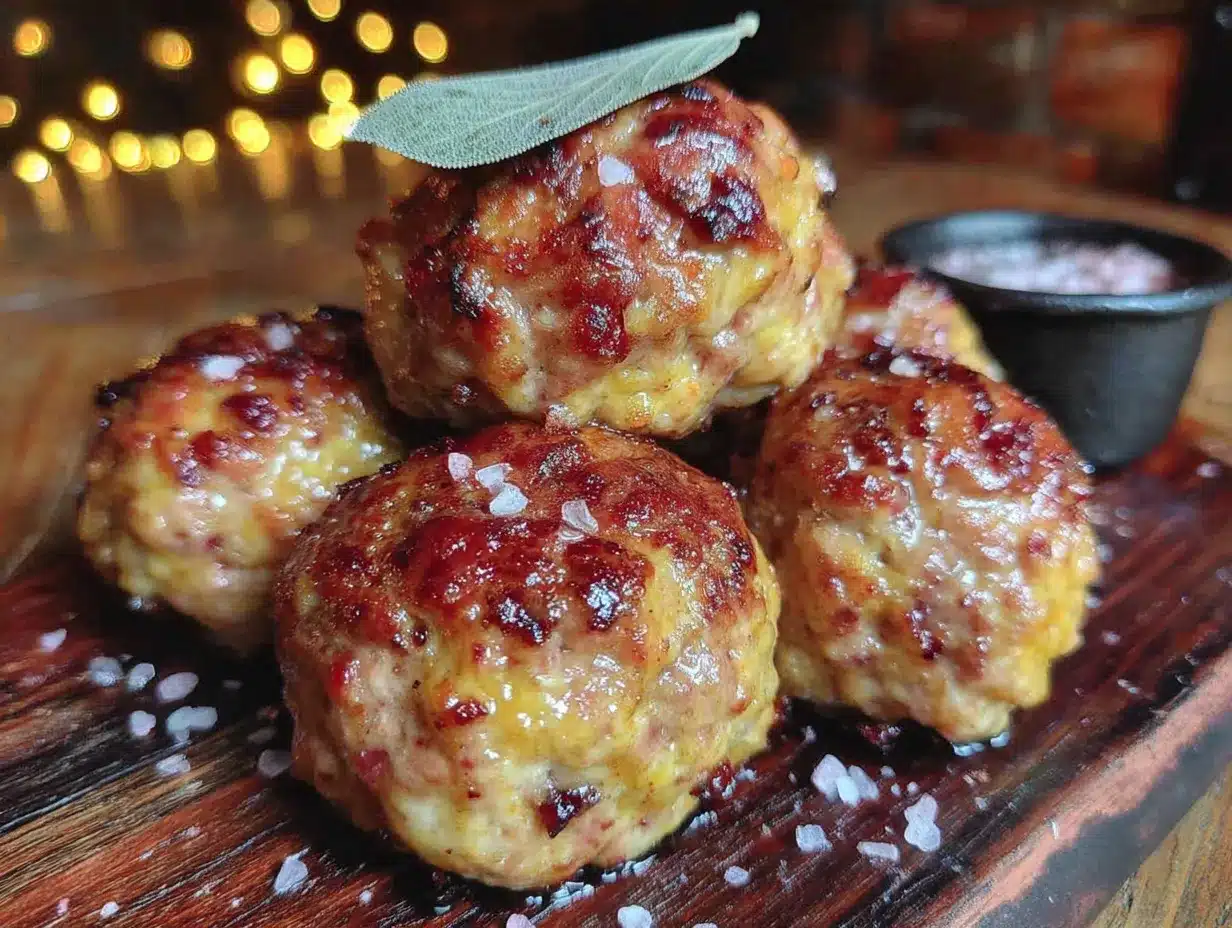
- Sausage: For a milder flavor that kids love, stick with mild Italian. If your family likes a little heat, use hot Italian sausage. You can also use ground pork and add an extra teaspoon of fennel seeds for a similar flavor profile.
- Stuffing Mix: I use the herb-seasoned kind because it’s already loaded with flavor. If you’re using plain bread cubes, add an extra teaspoon of dried thyme and a teaspoon of dried parsley.
- Chicken Broth: Use a good quality broth—it makes a difference. I like Swanson or Kitchen Basics. For a vegetarian version, use vegetable broth.
- Sage: Fresh sage is amazing if you can find it, but dried works perfectly in a pinch. Just remember, dried herbs are more potent, so use about one-third of the amount.
- Gluten-Free Option: Use a gluten-free stuffing mix or gluten-free bread cubes. The texture will be slightly different, but still delicious.
Equipment Needed
You don’t need a fancy kitchen to pull these off. Here’s what you’ll need:
- Large skillet: For browning the sausage and vegetables. A 12-inch skillet is ideal.
- Large mixing bowl: Big enough to hold all the ingredients comfortably.
- Baking sheet: A rimmed baking sheet works best to catch any drips. I use a half-sheet pan.
- Parchment paper: This makes cleanup a breeze and prevents sticking. I’ve forgotten it before and regretted it—trust me on this one.
- Cookie scoop or spoon: A 2-tablespoon cookie scoop makes perfectly uniform balls. If you don’t have one, just use a spoon and your hands.
- Pastry brush: For brushing on that melted butter. A silicone brush is my favorite—it doesn’t shed bristles.
If you don’t have a cookie scoop, just wet your hands slightly before shaping the balls—it keeps the mixture from sticking to your fingers. And if you don’t have parchment paper, you can grease the baking sheet well with butter or non-stick spray.
Preparation Method
Alright, let’s get cooking! This is where the magic happens. Follow these steps, and you’ll have perfect stuffing balls every time.
- Preheat your oven to 375°F (190°C). Line a rimmed baking sheet with parchment paper. This is a small step that makes a big difference—no stuck-on mess later.
- Brown the sausage. Place your large skillet over medium-high heat. Add the sausage, breaking it up with a wooden spoon as it cooks. You want it nicely browned, not just gray—this takes about 5-7 minutes. The browning is where the flavor lives, so don’t rush it. Once it’s cooked through, use a slotted spoon to transfer the sausage to a plate. Leave about 2 tablespoons of the rendered fat in the pan (if there’s not enough, add a little olive oil).
- Sauté the aromatics. Reduce the heat to medium. Add the diced onion and celery to the pan. Cook for about 4-5 minutes, stirring occasionally, until they’re soft and translucent. The onions should look like they’re sweating, not browning. Add the minced garlic and cook for another 30 seconds, until it’s fragrant. Your kitchen is going to smell amazing right now.
- Combine the dry ingredients. In your large mixing bowl, add the bag of stuffing mix, the browned sausage, and the cooked onion-celery mixture. Sprinkle in the fresh sage, black pepper, and salt. Toss everything together with a fork to distribute the ingredients evenly.
- Add the wet ingredients. In a small bowl or measuring cup, whisk together the chicken broth and the beaten eggs. Pour this mixture over the dry ingredients. Use a large spatula or your hands (I use my hands—it’s faster and more thorough) to mix everything together until it’s evenly moistened. The mixture should hold together when you squeeze a bit in your hand. If it seems dry, add another tablespoon or two of broth. If it seems too wet, add a handful more stuffing mix.
- Let it rest. This is a step I learned the hard way. Let the mixture sit for about 5 minutes. This gives the bread time to absorb all that flavorful liquid. Trust me, this makes a huge difference in texture.
- Shape the balls. Using your cookie scoop or a spoon, portion out the mixture and roll it into 1.5-inch balls. You should get about 20-24 balls. Place them on the prepared baking sheet, leaving about an inch of space between each one. Don’t pack them too tightly—you want them to brown on all sides.
- Brush with butter. Using your pastry brush, brush the top of each ball with the melted butter. This is what gives them that beautiful golden crust. Don’t skip this step—I did once and they were pale and sad.
- Bake. Place the baking sheet in the preheated oven and bake for 20-25 minutes, or until the stuffing balls are golden brown and crispy on the outside. Halfway through, rotate the pan for even browning. You’ll know they’re done when they’re firm to the touch and the edges are nicely browned.
- Cool slightly and serve. Let them rest on the baking sheet for about 5 minutes before serving. This helps them set and makes them easier to handle. Serve warm, and watch them disappear!
Cooking Tips & Techniques
Over the years, I’ve made these stuffing balls more times than I can count, and I’ve learned a few things along the way. Let me share some of my hard-won wisdom.
Don’t overmix. I know it’s tempting to keep stirring, but overmixing can make the stuffing balls dense and tough. Mix just until everything is combined, and no more. You want them light and tender, not like hockey pucks.
Check your moisture level. The amount of liquid you need can vary depending on the type of bread you use. If your mixture seems dry, add a little more broth. If it’s too wet, add a bit more stuffing mix. The texture should be like slightly damp sand—it should hold together when you squeeze it, but not be soggy.
Use a thermometer. The internal temperature of the stuffing balls should reach 165°F (74°C) to be safe. I’ve gotten lazy and skipped this step, and honestly, it’s not worth the risk. A simple instant-read thermometer is your best friend here.
Make ahead. These are perfect for meal prep. You can assemble the balls, place them on the baking sheet, and refrigerate for up to 24 hours before baking. Just add an extra 5 minutes to the baking time if they’re going in cold. I’ve done this for Thanksgiving morning, and it’s a lifesaver.
Don’t crowd the pan. Give each stuffing ball a little breathing room. If they’re too close together, they’ll steam instead of brown, and you’ll lose that crispy exterior. Use two baking sheets if you need to.
My biggest failure? I once forgot to add the eggs. The balls fell apart into a sad, crumbly mess. The eggs are the glue that holds everything together. Don’t skip them!
Variations & Adaptations
One of the best things about this recipe is how adaptable it is. Here are some of my favorite variations:
- Vegetarian Version: Skip the sausage and add an extra cup of finely chopped mushrooms (cremini or button work great). Sauté them with the onions and celery until they release their liquid and start to brown. The umami flavor is incredible.
- Apple & Cranberry Twist: Add 1/2 cup of dried cranberries and 1/2 cup of finely diced apple (like Granny Smith) to the mixture. The sweetness plays beautifully against the savory sage and sausage. This is my go-to for holiday gatherings.
- Cheesy Goodness: Fold in 1/2 cup of grated Parmesan cheese or 3/4 cup of shredded sharp cheddar cheese along with the other ingredients. The cheese adds a lovely richness and helps with browning. My kids go absolutely crazy for this version.
- Herb Swap: Not a sage fan? Substitute with fresh thyme, rosemary, or a combination of both. I’ve made a “Thanksgiving herb” version with a mix of sage, thyme, and a pinch of marjoram that was absolutely divine.
- Gluten-Free Adaptation: Use a gluten-free stuffing mix or gluten-free bread cubes. I’ve tested this with a few different brands, and it works well. Just keep an eye on the moisture level, as gluten-free bread absorbs liquid differently.
Serving & Storage Suggestions
These stuffing balls are incredibly versatile when it comes to serving. Here’s how I like to do it:
Serving Temperature: Serve them warm, right out of the oven. The contrast between the crispy exterior and the soft, flavorful interior is at its peak when they’re fresh. If you’re serving them as part of a larger meal, I recommend putting them in the oven for the last 20 minutes of cooking time so everything comes together at once.
Presentation: Arrange them on a platter with a sprinkle of fresh parsley or a few sage leaves for a pop of color. They look beautiful piled up on a wooden board or a simple white platter.
Complementary Dishes: These are a natural fit alongside roast turkey or chicken, but don’t stop there. They’re fantastic with pork chops, roasted vegetables, or even a simple green salad. For a cozy weeknight meal, I serve them with a side of cranberry sauce and some steamed green beans.
Storage: Leftover stuffing balls can be stored in an airtight container in the refrigerator for up to 4 days. The flavors actually meld together even more overnight, so they’re often even better the next day.
Reheating: To bring back that crispy exterior, reheat them in a 350°F (175°C) oven for about 10 minutes. You can also use an air fryer at 350°F for 5-7 minutes. I don’t recommend the microwave—it makes them soggy.
Freezing: These freeze beautifully. Place the baked and cooled stuffing balls in a single layer on a baking sheet and freeze until solid. Then transfer them to a freezer-safe bag or container. They’ll keep for up to 3 months. To reheat, bake from frozen at 350°F for 15-20 minutes, or until heated through.
Nutritional Information & Benefits
While these stuffing balls are definitely a comfort food, they do offer some nutritional benefits. Here’s a rough estimate per serving (3 stuffing balls):
- Calories: 285
- Fat: 16g
- Saturated Fat: 6g
- Cholesterol: 65mg
- Sodium: 580mg
- Carbohydrates: 24g
- Fiber: 2g
- Sugar: 3g
- Protein: 12g
Health Benefits: The sage in this recipe isn’t just for flavor—it’s also known for its antioxidant properties and has been used traditionally to support digestion. The celery adds a small amount of fiber and vitamins, and the onions provide prebiotics that support gut health. By using lean sausage and controlling the salt, you can make this a slightly lighter option compared to traditional stuffing.
Dietary Considerations: This recipe can be adapted for gluten-free diets (as mentioned above). To reduce sodium, use low-sodium broth and sausage. For a lower-fat version, use turkey sausage and reduce the butter brushed on top.
Potential Allergens: This recipe contains gluten (from the bread), dairy (from the butter), and eggs. Be sure to check your sausage for any additional allergens.
Conclusion
Honestly, these Sausage and Sage Stuffing Balls have become a staple in my kitchen, and I think they’ll become one in yours, too. They’re the perfect blend of convenience and comfort—easy enough for a weeknight, but special enough for a holiday table. The way the crispy outside gives way to that soft, savory inside is just pure magic.
I love how this recipe brings people together. There’s something about the smell of sage and sausage baking in the oven that just feels like home. And the fact that it’s budget-friendly and kid-approved? That’s a win in my book.
I’d love to hear how these turn out for you! Drop a comment below and let me know if your family loved them as much as mine does. Did you try any of the variations? Have a twist of your own? Share it—I’m always looking for new ideas. And if you found this recipe helpful, please share it with a friend who needs a little comfort food in their life.
Happy cooking, friends. You’ve got this.
Frequently Asked Questions
Can I make these stuffing balls ahead of time?
Absolutely! You can assemble the balls, place them on the baking sheet, and refrigerate for up to 24 hours before baking. Just add about 5 minutes to the baking time if they’re going in cold. You can also bake them fully, cool them, and reheat them later.
Can I use a different type of sausage?
Yes, you can! Mild Italian is my go-to for a kid-friendly version, but you can use hot Italian for a spicy kick, breakfast sausage for a different flavor profile, or even turkey or chicken sausage for a lighter option. Just make sure to remove the casings first.
How do I keep the stuffing balls from falling apart?
The eggs are the key binder here—don’t skip them. Also, make sure your mixture isn’t too dry. It should hold together when you squeeze a bit in your hand. If it’s crumbly, add a little more broth. Letting the mixture rest for 5 minutes before shaping also helps the bread absorb the liquid.
Can I freeze these stuffing balls?
Yes, they freeze beautifully. Bake them fully, let them cool completely, then freeze them in a single layer on a baking sheet. Once frozen, transfer to a freezer-safe bag or container. They’ll keep for up to 3 months. Reheat from frozen at 350°F for 15-20 minutes.
What can I serve with these stuffing balls?
They’re incredibly versatile! Serve them with roast turkey or chicken for a classic pairing, or alongside pork chops, roasted vegetables, or a simple green salad. They’re also great as a snack with cranberry sauce for dipping. For a complete meal, add some steamed green beans or a side of mashed potatoes.
Pin This Recipe!
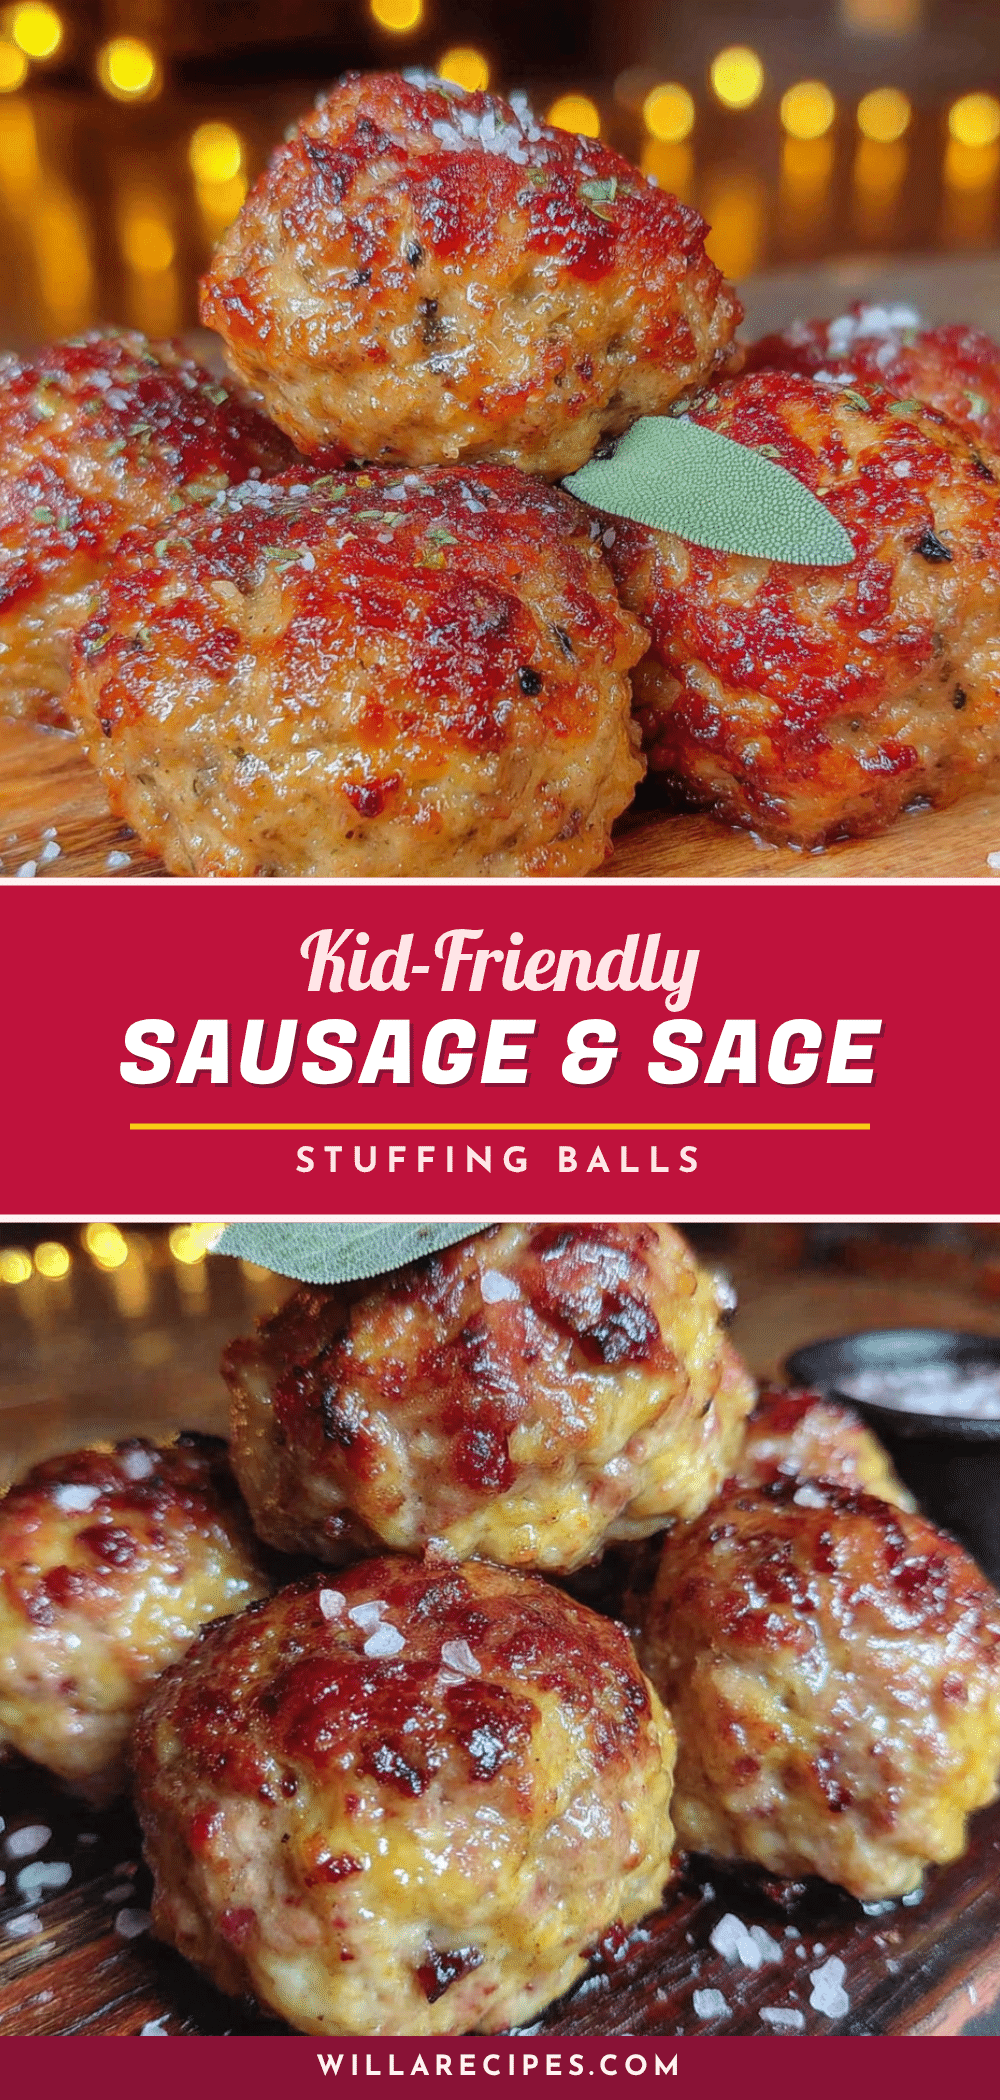
Best Easy Sausage and Sage Stuffing Balls Recipe

These Sausage and Sage Stuffing Balls are a game-changer for any holiday or weeknight meal. They offer all the cozy, comforting flavor of traditional stuffing in a fun, portable shape that kids love, with a perfectly crispy exterior and soft, savory interior.
- Prep Time: 15 minutes
- Cook Time: 25 minutes
- Total Time: 40 minutes
- Yield: 4 servings 1x
- Category: Side Dish
- Cuisine: American
Ingredients
- 1 pound mild Italian sausage, casings removed
- 1 medium yellow onion, finely diced (about 1 cup)
- 2 celery stalks, finely diced (about 1/2 cup)
- 3 cloves garlic, minced
- 1 (14-ounce) bag herb-seasoned stuffing mix (or 6 cups dry bread cubes)
- 1 1/2 cups low-sodium chicken broth
- 2 large eggs, lightly beaten
- 2 tablespoons fresh sage, finely chopped (or 2 teaspoons dried sage)
- 1/2 teaspoon black pepper
- 1/4 teaspoon salt
- 3 tablespoons unsalted butter, melted
Instructions
- Preheat your oven to 375°F (190°C). Line a rimmed baking sheet with parchment paper.
- Brown the sausage: Place your large skillet over medium-high heat. Add the sausage, breaking it up with a wooden spoon as it cooks. Cook until nicely browned, about 5-7 minutes. Use a slotted spoon to transfer the sausage to a plate. Leave about 2 tablespoons of the rendered fat in the pan.
- Sauté the aromatics: Reduce the heat to medium. Add the diced onion and celery to the pan. Cook for about 4-5 minutes, stirring occasionally, until soft and translucent. Add the minced garlic and cook for another 30 seconds until fragrant.
- Combine the dry ingredients: In a large mixing bowl, add the stuffing mix, browned sausage, and cooked onion-celery mixture. Sprinkle in the fresh sage, black pepper, and salt. Toss together with a fork.
- Add the wet ingredients: In a small bowl, whisk together the chicken broth and beaten eggs. Pour over the dry ingredients. Mix with a spatula or your hands until evenly moistened. The mixture should hold together when squeezed.
- Let it rest: Let the mixture sit for about 5 minutes to allow the bread to absorb the liquid.
- Shape the balls: Using a cookie scoop or spoon, portion out the mixture and roll into 1.5-inch balls. You should get about 20-24 balls. Place them on the prepared baking sheet, leaving about an inch of space between each.
- Brush with butter: Using a pastry brush, brush the top of each ball with the melted butter.
- Bake: Place the baking sheet in the preheated oven and bake for 20-25 minutes, or until golden brown and crispy on the outside. Halfway through, rotate the pan for even browning.
- Cool slightly and serve: Let them rest on the baking sheet for about 5 minutes before serving. Serve warm.
Notes
Don’t overmix the stuffing mixture to keep the balls light and tender. Check moisture level: mixture should be like slightly damp sand. Use a thermometer to ensure internal temperature reaches 165°F (74°C). For make-ahead, assemble balls and refrigerate up to 24 hours before baking; add 5 minutes to baking time. Don’t crowd the pan to ensure browning. Eggs are essential as a binder.
Nutrition
- Serving Size: 3 stuffing balls
- Calories: 285
- Sugar: 3
- Sodium: 580
- Fat: 16
- Saturated Fat: 6
- Carbohydrates: 24
- Fiber: 2
- Protein: 12
Keywords: stuffing balls, sausage stuffing, sage stuffing, Thanksgiving side, easy stuffing recipe, holiday side dish


