Sarah wasn’t trying to impress anyone. I’d stopped by her place on a gloomy Tuesday afternoon to pick up a book I’d lent her, and the smell of sugar hit me before I even got through the front door. It was that unmistakable, sweet-and-slightly-vanilla scent that only comes from one thing—royal icing. I found her in the kitchen, flour on her jeans, a tiny piping bag in her hand, and three slightly lopsided gingerbread walls propped up on the counter. She looked up, shrugged, and said, “Oh, this? It’s just the glue for the house. I mess it up every year, honestly.”
But here’s the thing—she didn’t mess it up. That gingerbread house stood like a fortress. The icing held every single candy cane in place, and the roof didn’t slide off even when her toddler bumped the table. I stood there, holding my book, completely distracted by the sheer perfection of it all. “What’s your secret?” I asked. She laughed and handed me a crumpled index card with measurements scribbled on it in pencil. “It’s the only recipe that’s never failed me,” she said. “And I’ve tried, like, a dozen.”
You know that feeling when you stumble onto something so simple and so reliable that you almost don’t believe it? That was this royal icing. I’ve been making it ever since, and I mean it when I say it’s the best no-fail gingerbread house royal icing out there. No cracking, no runny mess, no last-minute panic because your walls won’t stick together. It’s the kind of recipe that makes you look like a holiday hero, even if you’re just a regular person with a piping bag and a dream. Let me tell you—this one’s a keeper.
Why You’ll Love This Recipe
I’ve tested more royal icing recipes than I care to count, and honestly, most of them are finicky. Too thin and your gingerbread house collapses like a house of cards. Too thick and you can’t pipe a straight line to save your life. This recipe? It’s the Goldilocks of icings—just right every single time. Here’s why it works so beautifully for holiday hosting:
- Quick & Easy: Comes together in under 10 minutes with just four ingredients. No heating, no candy thermometer, no stress.
- Simple Ingredients: You probably already have powdered sugar, meringue powder, water, and vanilla extract in your pantry. No fancy grocery trips needed.
- Perfect for Hosting: This icing sets up firm enough to hold heavy candy decorations, making it ideal for gingerbread house parties where guests are building and decorating together.
- Crowd-Pleaser: Kids and adults both love working with this icing. It’s forgiving, easy to pipe, and dries with a beautiful matte finish that looks professional.
- Unbelievably Reliable: I’ve made this in humid weather, dry weather, and everything in between. It always behaves. That’s not a claim I can make for most royal icings.
What makes this recipe different from the rest? It’s the perfect balance of meringue powder and water. Too much meringue powder gives you a stiff, chalky icing that’s hard to work with. Too little, and you’re chasing runny puddles across your counter. This recipe hits that sweet spot where the icing is thick enough to hold its shape but soft enough to pipe smoothly. I’ve had professional bakers ask me for this recipe after seeing my gingerbread houses at holiday parties. It’s that good.
This isn’t just any royal icing—it’s the kind that makes you feel like you actually know what you’re doing. Perfect for impressing your holiday guests without breaking a sweat, or turning a simple gingerbread house into a showstopping centerpiece that everyone will remember.
What Ingredients You Will Need
This recipe uses simple, pantry-friendly ingredients to deliver a reliable, sturdy royal icing that works every time. No weird additives or hard-to-find specialty items here—just honest ingredients that do exactly what they’re supposed to do.
For the Royal Icing
- 4 cups powdered sugar, sifted (I prefer C&H or Domino for the smoothest texture—trust me, sifting is worth the extra 30 seconds)
- 3 tablespoons meringue powder (I recommend Wilton brand for consistent results; it’s widely available at craft stores and online)
- 1/3 cup warm water, plus more as needed (tap water is fine, just make sure it’s not hot—you don’t want to cook the meringue powder)
- 1 teaspoon vanilla extract (use clear vanilla if you want pure white icing, but regular works great too)
Ingredient Selection Tips

Meringue powder is the secret weapon here. It’s made from dried egg whites, sugar, and stabilizers, and it gives royal icing that perfect structure without the risk of raw eggs. Look for it in the baking aisle of most grocery stores or online. If you’re in a pinch, you can substitute 3 large egg whites for the meringue powder and water, but I don’t recommend it for gingerbread houses—the texture isn’t as consistent, and you lose the food safety advantage.
For the powdered sugar, avoid brands that contain cornstarch as a primary ingredient. Some cheaper brands have more cornstarch than sugar, which can affect the icing’s texture. Stick with trusted names and you’ll be golden.
If you’re hosting a gingerbread house decorating party, double or triple this recipe without any issues. It scales beautifully, and any leftover icing can be stored in the fridge for up to two weeks. Just give it a good stir before using it again.
Substitution Guidance
For a dairy-free version, you’re already good—this recipe contains no dairy. For a gluten-free option, just make sure your powdered sugar is certified gluten-free (most are, but check the label). If you want to skip the vanilla extract for a pure white icing, use clear vanilla extract or simply omit it altogether—the icing will still taste sweet and work perfectly.
Equipment Needed
You don’t need a professional bakery setup for this recipe. Here’s what you’ll actually use:
- Stand mixer or hand mixer: A stand mixer makes this effortless, but a hand mixer works just fine. I’ve made this with a whisk and a strong arm before—doable, but not recommended for a big batch.
- Large mixing bowl: Glass or stainless steel works best. Plastic bowls can sometimes hold onto grease, which is the enemy of royal icing.
- Sifter or fine-mesh strainer: For sifting the powdered sugar. This step prevents lumps that can clog your piping tips.
- Rubber spatula: For scraping down the sides of the bowl. A good spatula is worth its weight in gold here.
- Piping bags and tips: I use disposable piping bags with a small round tip (size #2 or #3) for fine details and a slightly larger tip (size #5) for gluing walls together. You can also use a zip-top bag with the corner snipped off in a pinch.
- Small bowls or cups: For portioning out icing if you’re coloring it. I use little glass custard cups.
- Gel food coloring: Liquid food coloring will thin out your icing. Gel colors are concentrated and won’t affect the consistency.
If you don’t have piping bags, don’t stress. I’ve used sandwich bags with a tiny hole cut in the corner more times than I can count. Just make sure the hole is small—you can always make it bigger, but you can’t undo a cut that’s too large.
Preparation Method
This recipe takes about 10 minutes of active time. The key is to follow the steps in order and pay attention to the texture. Here’s how to nail it every single time:
- Sift the powdered sugar into your large mixing bowl. Yes, sifting matters. Lumps in your powdered sugar will turn into lumps in your icing, and nobody wants that. Take the extra 30 seconds—I promise it’s worth it.
- Add the meringue powder to the sifted sugar and whisk them together briefly with a fork. This distributes the meringue powder evenly so it doesn’t clump when you add the water.
- Add the warm water and vanilla extract. Start with 1/3 cup of water—you can always add more later, but you can’t take it out. Trust me on this one. I’ve ruined batches by being too generous with the water.
- Mix on low speed for about 30 seconds to combine the ingredients without creating a cloud of powdered sugar. Then increase to medium speed and beat for 4-5 minutes. The icing will go from runny to thick and glossy. You’re looking for stiff peaks—when you lift the beater, the icing should form a peak that holds its shape without drooping.
- Check the consistency. For gingerbread houses, you want a stiff icing that holds its shape. If it’s too thick to pipe, add water one teaspoon at a time and mix for 10 seconds between additions. If it’s too thin, add sifted powdered sugar one tablespoon at a time. The perfect texture is like toothpaste—firm but spreadable.
- Color your icing if desired. Divide the icing into small bowls and add gel food coloring a tiny bit at a time. Stir well with a toothpick or small spatula. Remember that colors darken slightly as the icing dries, so go a shade lighter than your target.
- Fill your piping bags. Fit the bag with your tip, then fold the top of the bag over your hand to create a cuff. Spoon the icing in, being careful not to overfill. Twist the top of the bag closed and squeeze a small amount out to test the flow.
Pro tip from someone who learned the hard way: Keep a damp paper towel over the bowl of icing while you’re piping. Royal icing dries out fast, and a crusty top layer is frustrating to work with. The damp towel keeps it fresh.
For assembling your gingerbread house, use the stiff icing to glue the walls together. Pipe a thick line along the bottom and side edges of each wall, press them together, and hold for 30 seconds. Let the structure dry for at least 30 minutes before adding the roof. This waiting period is crucial—I’ve rushed it and watched roofs slide off like they were on skates.
Cooking Tips & Techniques
I’ve made every mistake in the book with royal icing, so you don’t have to. Here’s what I’ve learned:
The humidity factor: Royal icing hates humidity. If you’re making this on a rainy day, your icing might take longer to set. I once made a gingerbread house during a summer thunderstorm, and the roof didn’t fully harden for almost 24 hours. If you’re hosting a decorating party on a humid day, build the house a day ahead and let it dry overnight before guests arrive.
The overmixing trap: Yes, you need to beat the icing for 4-5 minutes to develop stiffness. But if you keep mixing beyond that, you can actually break down the structure and end up with runny icing. Set a timer. When the peaks are stiff and glossy, stop.
Piping technique: Hold the piping bag at a 45-degree angle to your work surface. Squeeze from the top of the bag, not the middle—this gives you more control. Practice on a piece of parchment paper before you start on your gingerbread house. I still do this every time, and I’ve been making these houses for years.
The crusting problem: Royal icing crusts over quickly, which is great for building but tricky for decorating. If you’re applying multiple colors or doing detailed work, work in small batches and keep the rest covered. I’ve lost count of how many times I’ve had to re-mix icing because it crusted over while I was distracted by a conversation at a party.
Timing for hosting: If you’re having people over to decorate gingerbread houses, make the icing a day ahead and store it in the fridge. Let it come to room temperature for about 30 minutes before using, then give it a good stir. This takes the pressure off your party day and lets you focus on actually enjoying the time with your guests.
Variations & Adaptations
One of the best things about this recipe is how adaptable it is. Here are some variations I’ve tried and loved:
Flavor Variations
Almond Royal Icing: Replace the vanilla extract with 1/2 teaspoon of almond extract. The flavor is subtle but adds a lovely nutty note that pairs beautifully with gingerbread. I used this for a Christmas party last year, and three people asked for the recipe.
Lemon Royal Icing: Add 1 tablespoon of fresh lemon juice and reduce the water by 1 tablespoon. The acidity brightens the flavor and cuts through the sweetness of the gingerbread. This is my go-to for spring gingerbread houses.
Peppermint Royal Icing: Replace the vanilla with 1/2 teaspoon of peppermint extract. This is absolutely perfect for holiday houses. Just be careful—a little peppermint goes a long way. I once added a full teaspoon and it tasted like toothpaste.
Dietary Adaptations
Egg-Free Version: This recipe already uses meringue powder instead of fresh egg whites, so it’s safe for those avoiding raw eggs. If you need a completely egg-free version, look for egg-free meringue powder or use aquafaba (the liquid from canned chickpeas) as a substitute. I’ve tested aquafaba royal icing, and it works—but it’s not quite as sturdy for gingerbread houses.
Color Variations: For a natural approach, use beet powder for pink, matcha for green, and turmeric for yellow. The colors are softer than gel food coloring, but they’re completely natural and add a lovely earthy quality.
Consistency Variations
If you’re using this icing for cookies instead of gingerbread houses, thin it slightly by adding water a teaspoon at a time until it reaches a “flood” consistency—when a ribbon of icing disappears back into the surface within 10 seconds. For gingerbread houses, stick with the stiff consistency described above.
Serving & Storage Suggestions
This royal icing is designed to work hard for your gingerbread house, but it also looks beautiful when presented well. Here’s how to make the most of it:
Serving Temperature: Royal icing sets best at room temperature. Don’t refrigerate your finished gingerbread house—the humidity in the fridge can cause the icing to soften and the structure to weaken. Keep it at cool room temperature for the best results.
Presentation Tips: Place your finished gingerbread house on a sturdy cake board or serving platter. I like to dust the base with a little powdered sugar to look like snow, then arrange extra candies around the edges. For a dinner party, set the house on a mirrored tray with tea lights around it (at a safe distance!) for a magical glow.
Storage Instructions: A fully decorated gingerbread house made with this royal icing will last for weeks at room temperature. Store it in a cool, dry place away from direct sunlight. If you need to move it, handle it from the base—the walls are sturdy, but the roof can be delicate.
Freezing: You can freeze undecorated gingerbread house pieces for up to 3 months. Wrap them tightly in plastic wrap and then foil. When you’re ready to assemble, let them come to room temperature before icing. I do this every year—I bake the gingerbread in November and freeze it, then assemble and decorate in December with friends.
Reheating: If your royal icing gets too stiff from sitting, add a drop or two of water and stir vigorously. If it gets too thin from sitting out too long, add a little sifted powdered sugar. The icing is very forgiving as long as you adjust slowly.
Flavor Development: Royal icing actually tastes better after it’s been sitting for a day or two. The flavors meld together and the sweetness mellows slightly. If you’re building a house for a party, assemble it a day ahead for the best flavor and sturdiest structure.
Nutritional Information & Benefits
Let’s be honest—royal icing is a treat, not a health food. But here’s what you’re working with per tablespoon (approximately 15g):
| Nutrient | Amount per tbsp |
|---|---|
| Calories | 60 |
| Total Fat | 0g |
| Sodium | 5mg |
| Total Carbohydrates | 15g |
| Sugars | 15g |
| Protein | 0.5g |
Health Benefits: On the bright side, this royal icing contains no dairy, no gluten (if your powdered sugar is certified gluten-free), and no artificial preservatives. The meringue powder adds a tiny bit of protein, and if you use clear vanilla extract, there are no artificial colors either. It’s also naturally low in sodium and fat-free.
Dietary Considerations: This recipe is vegetarian, dairy-free, and can be made gluten-free with certified gluten-free powdered sugar. It’s not vegan due to the meringue powder (which contains dried egg whites), but you can find vegan meringue powder alternatives if needed.
Allergen Note: Meringue powder is made from dried egg whites, so this recipe is not suitable for those with egg allergies. Always check your meringue powder label for potential cross-contamination warnings if you’re serving someone with severe allergies.
From a wellness perspective, I think of royal icing as a special-occasion ingredient. It’s not something you eat by the spoonful (though I won’t judge if you do), but when used to create beautiful, memorable gingerbread houses for holiday gatherings, it adds joy and tradition to the season. And honestly, that’s a pretty good trade-off.
Conclusion
This no-fail royal icing has been my secret weapon for gingerbread houses for years, and I’m so happy to share it with you. It’s the recipe that turned me from someone who dreaded gingerbread house season into someone who genuinely looks forward to it. There’s something magical about watching a handful of simple ingredients transform into a sturdy, beautiful structure that brings joy to everyone who sees it.
I hope you’ll try this recipe for your next holiday gathering or gingerbread house party. Customize it with different flavors, colors, and decorations—make it your own. That’s the beauty of a reliable base recipe: it gives you the freedom to get creative without worrying about whether the fundamentals will hold up.
I’d love to hear how your gingerbread house turns out! Drop a comment below and tell me about your decorating adventures—did you try a flavor variation? Did your house survive the big reveal? Share your photos and stories. And if you have a friend who’s always struggled with royal icing, send them this recipe. Trust me, they’ll thank you.
Happy building, and may your walls always stay standing!
Frequently Asked Questions
Can I make this royal icing without a mixer?
Yes, absolutely. You can whisk it by hand, but it will take about 8-10 minutes of vigorous stirring to reach stiff peaks. A whisk works better than a spoon for incorporating air. Your arm might get tired, but the icing will turn out just fine.
Why is my royal icing not getting stiff?
This usually happens for one of three reasons: too much water was added, the meringue powder is old, or it wasn’t beaten long enough. Try adding a tablespoon of sifted powdered sugar and beating for another 2 minutes. If that doesn’t work, the meringue powder might need replacing.
How long does royal icing take to dry on a gingerbread house?
At room temperature with normal humidity, royal icing sets enough to hold structure within 30 minutes. Full drying takes about 2-4 hours. In humid conditions, it can take up to 24 hours. Patience is key—don’t rush the drying process or your house might collapse.
Can I use liquid food coloring instead of gel?
You can, but I don’t recommend it. Liquid food coloring adds extra moisture that can thin out your icing and affect its structure. If you must use liquid coloring, reduce your water by the same amount of coloring you add, and be prepared to add a little extra powdered sugar to maintain stiffness.
How do I fix royal icing that’s too thick?
Add water one drop at a time and stir thoroughly between each addition. Royal icing is surprisingly sensitive to small amounts of liquid, so go slowly. If you accidentally make it too thin, add sifted powdered sugar one tablespoon at a time until it reaches the right consistency. It’s a forgiving recipe—just adjust in small increments.
Pin This Recipe!
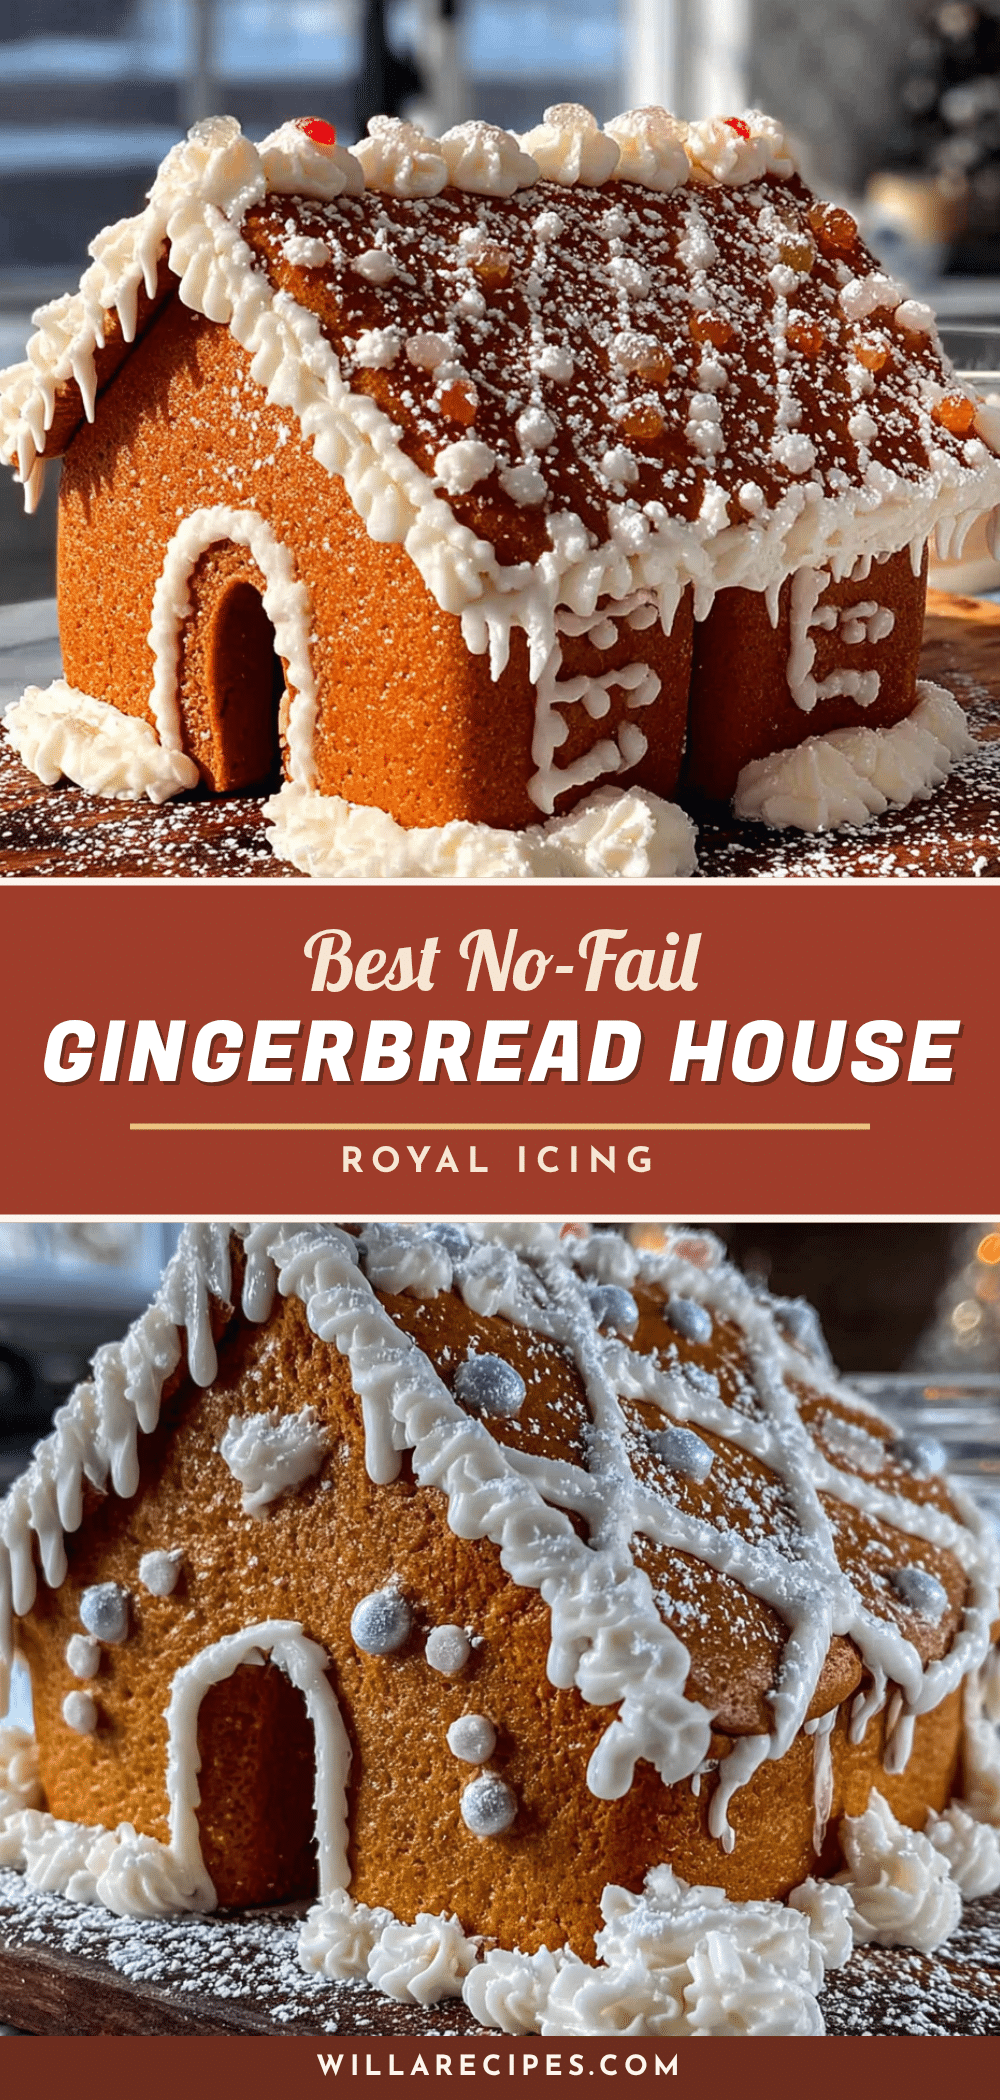
Easy No-Fail Royal Icing for Gingerbread Houses

This no-fail royal icing recipe is the secret to building sturdy, beautiful gingerbread houses that hold together perfectly. Made with just four simple ingredients, it sets up firm enough to hold heavy candy decorations and dries with a beautiful matte finish.
- Prep Time: 10 minutes
- Cook Time: 0 minutes
- Total Time: 10 minutes
- Yield: About 2 cups of icing 1x
- Category: Dessert
- Cuisine: American
Ingredients
- 4 cups powdered sugar, sifted
- 3 tablespoons meringue powder
- 1/3 cup warm water, plus more as needed
- 1 teaspoon vanilla extract
Instructions
- Sift the powdered sugar into your large mixing bowl.
- Add the meringue powder to the sifted sugar and whisk them together briefly with a fork.
- Add the warm water and vanilla extract. Start with 1/3 cup of water.
- Mix on low speed for about 30 seconds to combine, then increase to medium speed and beat for 4-5 minutes until stiff peaks form.
- Check the consistency. For gingerbread houses, you want a stiff icing that holds its shape like toothpaste. If too thick, add water one teaspoon at a time. If too thin, add sifted powdered sugar one tablespoon at a time.
- Color your icing if desired by dividing into small bowls and adding gel food coloring a tiny bit at a time.
- Fill your piping bags with the icing and test the flow before decorating.
Notes
Keep a damp paper towel over the bowl of icing while piping to prevent crusting. For assembling gingerbread houses, use stiff icing to glue walls together and let dry for at least 30 minutes before adding the roof. Royal icing hates humidity – on humid days, it may take longer to set. This icing can be stored in the fridge for up to two weeks.
Nutrition
- Serving Size: 1 tablespoon (approx
- Calories: 60
- Sugar: 15
- Sodium: 5
- Carbohydrates: 15
- Protein: 0.5
Keywords: royal icing, gingerbread house icing, no-fail royal icing, holiday icing, gingerbread house glue, easy royal icing


