It was 11:47 PM on a drizzly Tuesday in March, and I had a very specific, almost irrational craving for something pink, something cakey, and something on a stick. I didn’t have a box of red velvet mix (the ‘real’ way to make these), but I had a half-used bottle of neon pink food coloring from a disastrous unicorn cake attempt last summer and the idea that maybe, just maybe, I could make a velvet cake without the cocoa powder. Let me tell you, the weird hours matter. Something about the rain tapping on the window and the quiet house loosened the usual rules in my head. I wasn’t following a recipe; I was chasing a feeling. A cozy, pink, slightly ridiculous feeling.
I pulled out my favorite mixing bowl—the one with the chip in the rim from when I dropped it two years ago—and started throwing things together. Butter, sugar, a splash of vanilla, and way more pink dye than I’d ever admit to using in daylight. I was half-asleep, honestly, just letting my hands do the work. The batter was a shocking, vibrant pink, the kind of color that makes you smile before you even taste it. I mean, who needs a reason to make cake pops at midnight? You know that feeling when you just need to create something pretty and delicious, even if no one else is around to see it?
This recipe stayed with me because it wasn’t about perfection. It was about the process—the quiet joy of mixing, the satisfaction of rolling those little cake balls, and the weirdly meditative act of dipping them in melted candy melts. The first bite was this unexpected burst of sweet, buttery cake with a creamy, dreamy center. It was comfort in a bite-sized form. And honestly, it was the best decision I made all week. So, if you’ve ever had a late-night craving that just won’t quit, this one’s for you.
Why You’ll Love This Recipe
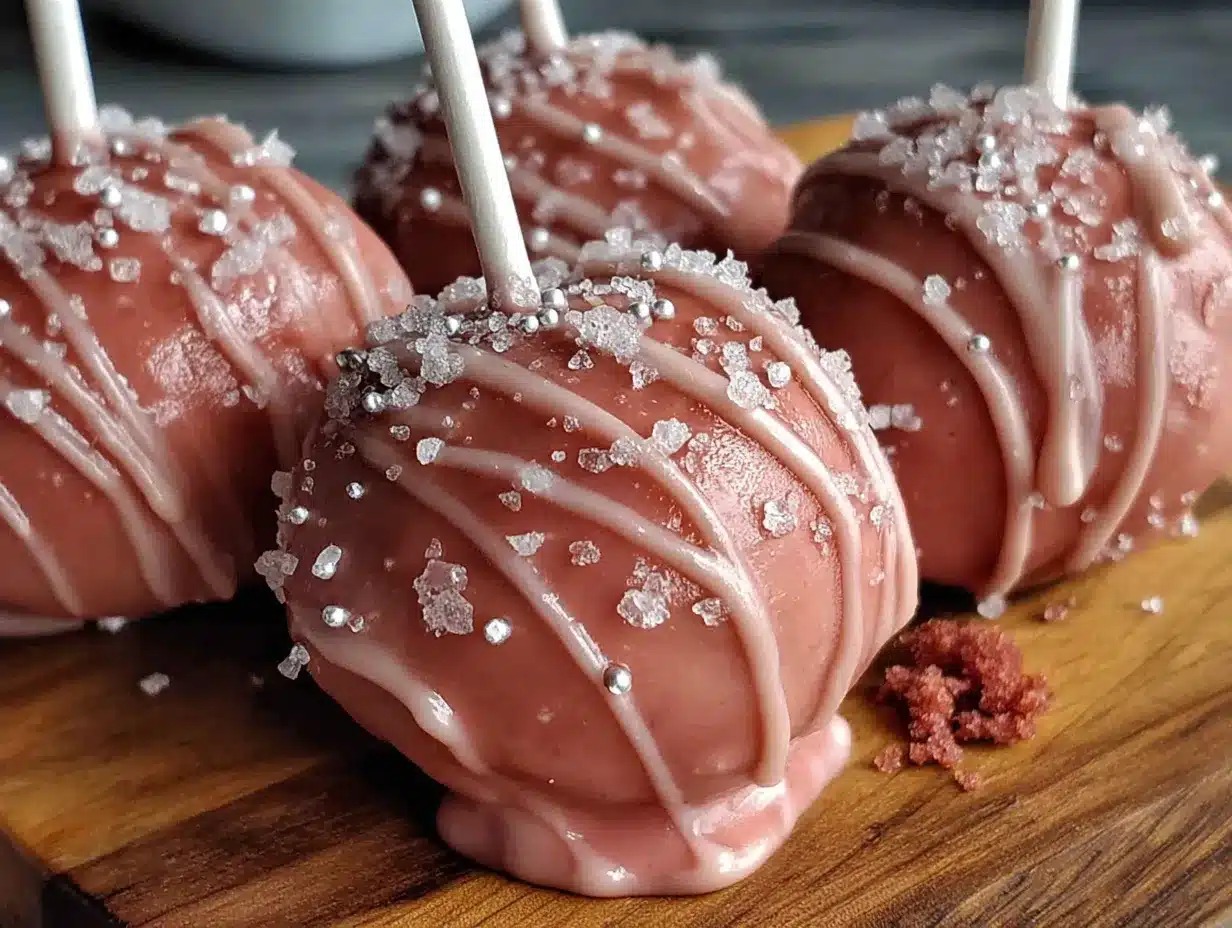
These Cozy Pink Velvet Cake Pops aren’t just another dessert; they are a little piece of joy on a stick. I’ve tested this recipe at least five times, tweaking the moisture level and the frosting ratio to make sure they hold together perfectly without being dry or too dense. This is my best version, and here is why I think you’ll absolutely adore it.
- Quick & Easy: From start to finish, you can have these ready in about 90 minutes, with most of that being chill time. Perfect for when you want a showstopper without spending all day in the kitchen.
- Simple Ingredients: You probably have most of these in your pantry right now. No fancy cake mix or hard-to-find extracts. Just good, basic baking staples.
- Perfect for Cozy Nights: Whether it’s a movie night, a girls’ night in, or just a Tuesday that needs a little pink pick-me-up, these cake pops are the ultimate comfort food.
- Crowd-Pleaser: I’ve brought these to potlucks and family gatherings, and they disappear faster than anything else. Kids love the color, and adults love the nostalgic, creamy texture.
- Unbelievably Delicious: The texture is what gets me every time. A soft, tender crumb wrapped in a velvety cream cheese frosting, all coated in a snappy candy shell. It’s next-level comfort food.
What makes this recipe different from the rest? It’s the perfect balance of moisture and structure. I use a little buttermilk in the cake to keep it incredibly tender, and I don’t skimp on the cream cheese frosting. This isn’t just another cake pop recipe—it’s the one that makes you close your eyes after the first bite. It’s comfort food reimagined: homemade, beautiful, and with the same soul-soothing satisfaction as a slice of your favorite cake, but way more fun to eat.
What Ingredients You Will Need
This recipe uses simple, wholesome ingredients to deliver that signature pink velvet flavor and a texture that’s soft, creamy, and utterly addictive. Most of these are pantry staples, but I’ve included a few notes to help you pick the best ones.
For the Pink Velvet Cake
- 1 ½ cups all-purpose flour (spooned and leveled for accuracy)
- 1 cup granulated sugar
- ½ cup unsalted butter, softened (I always use Kerrygold for the best flavor)
- 2 large eggs, room temperature
- 1 teaspoon vanilla extract
- 1 cup buttermilk (adds incredible tenderness; see substitution below)
- 1 ½ teaspoons baking powder
- ¼ teaspoon baking soda
- ½ teaspoon salt
- 1-2 tablespoons pink gel food coloring (liquid will work, but gel gives a more vibrant color without thinning the batter)
- 1 teaspoon white vinegar (helps activate the baking soda and keeps the cake tender)
For the Cream Cheese Frosting (Binder)
- 4 oz cream cheese, softened (full-fat is best for stability)
- 2 tablespoons unsalted butter, softened
- 1 ½ cups powdered sugar, sifted
- ½ teaspoon vanilla extract
For the Coating & Decoration
- 12 oz pink candy melts (I recommend Wilton for smooth melting)
- 2 tablespoons coconut oil or shortening (to thin the candy melts for dipping)
- Lollipop sticks (about 20-24)
- Optional sprinkles: Pink sanding sugar, white nonpareils, or heart-shaped sprinkles
Substitution Guidance: If you don’t have buttermilk, you can make a quick version by adding 1 tablespoon of lemon juice or white vinegar to 1 cup of whole milk. Let it sit for 5 minutes before using. For a dairy-free option, use a plant-based butter and cream cheese, and swap the buttermilk for almond milk with a splash of lemon juice. The texture will be slightly different, but still delicious.
Equipment Needed
You don’t need a ton of fancy gadgets for this recipe, but a few key tools will make the process much smoother.
- 9×13-inch baking pan or two 8-inch round pans
- Electric hand mixer or stand mixer (a whisk and some elbow grease will work, but a mixer makes the frosting silky smooth)
- Large mixing bowls
- Rubber spatula
- Cookie scoop or small ice cream scoop (for uniform cake balls)
- Baking sheet lined with parchment paper
- Microwave-safe bowl (for melting candy melts)
- Styrofoam block or a cardboard box (to hold the cake pops upright while they set—I’ve used an old egg carton in a pinch!)
- Lollipop sticks (available at craft stores or online)
I’ve tried using a cake pop maker before, but honestly, I prefer the baked cake method. The texture is so much better, and you don’t have to worry about the pops being undercooked in the middle. A simple baking sheet and a good spatula are all you really need.
Preparation Method
Making cake pops from scratch is easier than you think. Follow these steps, and you’ll have a batch of perfectly round, beautifully coated treats.
Step 1: Bake the Cake
Preheat your oven to 350°F (175°C). Grease and flour your 9×13-inch baking pan. In a large bowl, cream together the softened butter and granulated sugar until light and fluffy, about 3-4 minutes. Add the eggs one at a time, beating well after each addition. Stir in the vanilla extract and the pink gel food coloring. The batter should be a vibrant, cheerful pink.
In a separate bowl, whisk together the flour, baking powder, baking soda, and salt. Gradually add the dry ingredients to the wet ingredients, alternating with the buttermilk. Start and end with the flour mixture. Finally, stir in the white vinegar. Pour the batter into the prepared pan and bake for 25-30 minutes, or until a toothpick inserted into the center comes out clean. Let the cake cool completely in the pan. This is crucial—if the cake is even slightly warm, it will crumble when you try to mix it with the frosting.
Step 2: Make the Frosting & Crumble the Cake
While the cake cools, make the cream cheese frosting. In a medium bowl, beat the softened cream cheese and butter together until smooth. Gradually add the sifted powdered sugar, beating on low speed until combined. Stir in the vanilla extract. The frosting should be thick and creamy, not runny.
Once the cake is completely cool, use your hands or a fork to crumble it into fine crumbs in a large bowl. You want a texture that resembles wet sand. There should be no large chunks of cake left.
Step 3: Form the Cake Balls
Add about ¾ of the cream cheese frosting to the crumbled cake. Use your hands to mix it together until the mixture holds together when pressed. If it feels too dry, add a little more frosting, a tablespoon at a time. The mixture should be moist and pliable, but not greasy.
Using a small cookie scoop or your hands, roll the mixture into 1-inch balls. Place them on the parchment-lined baking sheet. You should get about 20-24 cake balls. Refrigerate them for at least 30 minutes, or until they are firm to the touch. This is non-negotiable—cold cake balls are much easier to dip.
Step 4: Melt the Candy Melts & Dip
Place the pink candy melts and 1 tablespoon of coconut oil in a microwave-safe bowl. Microwave in 30-second intervals, stirring well after each, until completely smooth. Don’t overheat, or the candy will seize. Transfer the melted candy to a tall, narrow glass—this makes dipping much easier.
Remove the cake balls from the refrigerator. Dip the tip of a lollipop stick into the melted candy, then insert it about halfway into a cake ball. This acts as glue and prevents the pop from sliding off. Repeat with all the cake balls, then return them to the fridge for 10 minutes to set the ‘glue.’
Now, dip each cake pop into the melted candy, covering it completely. Gently tap the stick on the edge of the glass to let the excess drip off. Decorate with sprinkles immediately, before the coating sets. Stick the pops into your Styrofoam block to dry. Let them set completely, about 30 minutes at room temperature.
Cooking Tips & Techniques
I’ve made a lot of cake pops in my day, and I’ve learned a few things the hard way. Here are my best tips to help you avoid the same pitfalls.
- Don’t skip the chill time. I once tried to rush the process and dipped warm cake balls. The coating cracked, and the cake started falling apart in the melted candy. Trust me, cold cake balls are your best friend.
- Thin your candy melts. Candy melts straight out of the bag are often too thick for dipping. Adding a little coconut oil or shortening makes them silky smooth and gives you a thinner, more even coating. It also helps prevent those annoying streaks.
- Tap off the excess. After dipping, hold the cake pop over the glass and gently tap the stick against the rim. This helps the excess candy drip off and prevents a big, heavy bottom. You can also use a toothpick to pop any air bubbles.
- Work in small batches. If you’re making a lot of cake pops, keep the ones you’re not currently dipping in the fridge. The candy coating sets quickly, so you want to work with cold pops for the best results.
- Use a deep container for dipping. A tall, narrow glass is much better than a wide bowl. It allows you to submerge the entire cake pop in one smooth motion, which gives you a cleaner finish.
Variations & Adaptations
One of the best things about this recipe is how easy it is to adapt. Here are a few ways to make it your own.
- Chocolate Velvet Cake Pops: Swap 2 tablespoons of the flour for unsweetened cocoa powder. Use red food coloring instead of pink for a classic red velvet vibe, or leave it out for a brown velvet pop. The chocolate flavor pairs beautifully with the cream cheese frosting.
- Lemon Velvet Cake Pops: Replace the buttermilk with lemon juice and milk (same method as the buttermilk substitute). Add 1 tablespoon of lemon zest to the batter and use a lemon cream cheese frosting. These are bright, tangy, and perfect for spring.
- Vegan Pink Velvet Cake Pops: Use a flax egg (1 tablespoon flaxseed meal + 3 tablespoons water) in place of the eggs, and swap the butter and cream cheese for vegan versions. Use a plant-based milk with lemon juice for the buttermilk. The texture will be a little denser, but still delicious.
- Gluten-Free Option: Substitute the all-purpose flour with a 1:1 gluten-free baking flour blend. Be sure to add ¼ teaspoon of xanthan gum if your blend doesn’t already include it. The cake might be a bit more delicate, so handle it gently.
I once made a batch with a splash of almond extract in the frosting, and it was incredible. It gave the pops a subtle, nutty flavor that everyone loved. Don’t be afraid to experiment!
Serving & Storage Suggestions
These cake pops are best served at room temperature. The coating will be snappy, and the cake inside will be soft and creamy. They make a beautiful addition to a dessert table, a birthday party, or a cozy night in with a good movie.
Storage: Store the cake pops in an airtight container in the refrigerator for up to 5 days. Let them sit at room temperature for about 15 minutes before serving. You can also freeze the undipped cake balls for up to 3 months. Just wrap them tightly in plastic wrap and place them in a freezer bag. When you’re ready to dip, thaw them in the refrigerator overnight, then proceed with the dipping process.
Reheating: You don’t really need to reheat these, but if you want a slightly softer center, you can microwave a cake pop for about 5 seconds. The flavors actually develop and deepen over time, so they might taste even better on day two!
Nutritional Information & Benefits
While these are definitely a treat, there are a few redeeming qualities. The cream cheese adds a small amount of protein and calcium, and the buttermilk provides probiotics that are good for gut health. Plus, a little bit of pink happiness goes a long way in boosting your mood!
Estimated Nutritional Information (per cake pop):
- Calories: 180-220
- Fat: 9-12g
- Carbohydrates: 25-30g
- Sugar: 18-22g
- Protein: 2-3g
Dietary Considerations: This recipe contains gluten, dairy, and eggs. For a gluten-free or vegan option, please see the variations section above. Always check your candy melts for any potential allergens, as some brands may contain soy or dairy.
Conclusion
These Cozy Pink Velvet Cake Pops are more than just a recipe; they are a little moment of joy. They are the perfect way to brighten a gloomy day, celebrate a small victory, or simply treat yourself to something beautiful and delicious. I love how they bring a smile to everyone’s face, from the first bite to the last crumb.
I encourage you to make them your own. Add your favorite sprinkles, try a different extract, or even make them for a special occasion. The beauty of this recipe is its simplicity and its ability to adapt to whatever you’re craving. So, go ahead—get a little messy, have fun, and enjoy every single bite.
If you make these, I’d love to hear about it! Leave a comment below and tell me how they turned out, or share a photo on social media. Don’t forget to tag me so I can see your beautiful creations. Happy baking, my friend!
Frequently Asked Questions (FAQs)
Can I use a boxed cake mix for these cake pops?
Absolutely! If you’re short on time, a box of white or strawberry cake mix works perfectly. Just bake it according to the package directions, let it cool, and follow the rest of the recipe as written. The flavor will be slightly different, but the texture will be just as good.
Why are my cake pops falling off the sticks?
This usually happens if the cake balls are too warm or if the ‘glue’ step is skipped. Make sure your cake balls are very cold before dipping. Also, dip the tip of the stick in melted candy before inserting it into the cake ball—this acts as a strong adhesive.
Can I use white chocolate chips instead of candy melts?
You can, but white chocolate chips are trickier to work with. They don’t thin out as easily and can seize if overheated. If you use white chocolate, add a little coconut oil or shortening to help thin it, and be very careful not to overheat it. Candy melts are formulated to be more stable for dipping.
How do I get a smooth, streak-free coating?
The key is thinning your candy melts with a little coconut oil or shortening. This makes the coating more fluid and helps it flow smoothly over the cake pop. Also, make sure your cake pops are completely dry from the refrigerator—any condensation will cause streaks in the coating.
Can I make these cake pops ahead of time?
Yes! You can make the cake balls up to 3 days in advance and store them in the refrigerator. Dip them on the day you plan to serve them for the freshest look and taste. You can also freeze the undipped cake balls for up to 3 months.
Pin This Recipe!

Cozy Pink Velvet Cake Pops: Easy Homemade Recipe

These Cozy Pink Velvet Cake Pops are a little piece of joy on a stick. A soft, tender crumb wrapped in a velvety cream cheese frosting, all coated in a snappy candy shell, perfect for cozy nights or any celebration.
- Prep Time: 30 minutes
- Cook Time: 30 minutes
- Total Time: 90 minutes
- Yield: 20-24 servings 1x
- Category: Dessert
- Cuisine: American
Ingredients
- 1 ½ cups all-purpose flour
- 1 cup granulated sugar
- ½ cup unsalted butter, softened
- 2 large eggs, room temperature
- 1 teaspoon vanilla extract
- 1 cup buttermilk
- 1 ½ teaspoons baking powder
- ¼ teaspoon baking soda
- ½ teaspoon salt
- 1–2 tablespoons pink gel food coloring
- 1 teaspoon white vinegar
- 4 oz cream cheese, softened
- 2 tablespoons unsalted butter, softened
- 1 ½ cups powdered sugar, sifted
- ½ teaspoon vanilla extract
- 12 oz pink candy melts
- 2 tablespoons coconut oil or shortening
- Lollipop sticks (about 20-24)
- Optional sprinkles: pink sanding sugar, white nonpareils, or heart-shaped sprinkles
Instructions
- Preheat oven to 350°F (175°C). Grease and flour a 9×13-inch baking pan.
- In a large bowl, cream together softened butter and granulated sugar until light and fluffy, about 3-4 minutes. Add eggs one at a time, beating well after each. Stir in vanilla extract and pink gel food coloring until batter is vibrant pink.
- In a separate bowl, whisk together flour, baking powder, baking soda, and salt. Gradually add dry ingredients to wet ingredients, alternating with buttermilk, starting and ending with flour mixture. Stir in white vinegar.
- Pour batter into prepared pan and bake for 25-30 minutes, or until a toothpick inserted into the center comes out clean. Cool completely in pan.
- While cake cools, make cream cheese frosting: In a medium bowl, beat softened cream cheese and butter until smooth. Gradually add sifted powdered sugar, beating on low speed until combined. Stir in vanilla extract. Frosting should be thick and creamy.
- Once cake is completely cool, crumble it into fine crumbs in a large bowl (texture like wet sand).
- Add about ¾ of the cream cheese frosting to crumbled cake. Mix with hands until mixture holds together when pressed. Add more frosting if needed, a tablespoon at a time.
- Roll mixture into 1-inch balls (about 20-24). Place on parchment-lined baking sheet. Refrigerate for at least 30 minutes until firm.
- Place pink candy melts and 1 tablespoon coconut oil in a microwave-safe bowl. Microwave in 30-second intervals, stirring well after each, until completely smooth. Transfer to a tall, narrow glass.
- Remove cake balls from refrigerator. Dip tip of a lollipop stick into melted candy, then insert about halfway into a cake ball. Repeat with all cake balls, then return to fridge for 10 minutes to set the ‘glue’.
- Dip each cake pop into melted candy, covering completely. Gently tap stick on edge of glass to let excess drip off. Decorate with sprinkles immediately. Stick pops into a Styrofoam block to dry. Let set completely, about 30 minutes at room temperature.
Notes
Don’t skip the chill time—cold cake balls are easier to dip. Thin candy melts with coconut oil for a smoother coating. Work in small batches, keeping unused cake balls in the fridge. Use a tall, narrow glass for dipping for a cleaner finish.
Nutrition
- Serving Size: 1 cake pop
- Calories: 200
- Sugar: 20
- Sodium: 150
- Fat: 10
- Saturated Fat: 6
- Carbohydrates: 28
- Protein: 2
Keywords: pink velvet cake pops, homemade cake pops, easy cake pops, pink velvet, cake pops recipe, cream cheese frosting, pink dessert


