My youngest swore she hated “fancy desserts” for a solid two years. She’d push aside any plate with a swirl, a crumble, or anything that looked like it came from a bakery case. Then, last Thanksgiving, I made these cranberry orange cheesecake bars just for the adults. I found her standing on a stool at the counter, fingers covered in the crumb topping, with that look of pure, caught-in-the-act guilt. “These aren’t fancy,” she mumbled through a mouthful. “These are just… good.”
And honestly, she was right. These aren’t fussy or complicated. They’re a simple, honest dessert that happens to look stunning. The tart pop of cranberry against the creamy, sweet cheesecake, all sitting on a buttery shortbread crust—it’s a combination that works on every level. I wasn’t trying to change her mind, but I’m so glad she proved herself wrong. If you’ve got a picky eater at your table, or you just need a dessert that feels special without a ton of work, maybe you’ve been there.
These bars have become my secret weapon for everything from school bake sales to quiet Sunday afternoons. They’re the recipe that keeps me coming back, and I have a feeling they’ll do the same for you.
Why You’ll Love This Recipe
I’ve tested this recipe more times than I can count, tweaking the crust-to-filling ratio and the amount of orange zest until it was just right. Here’s why I keep making it, and why I think you will too:
- Quick & Easy: The whole thing comes together in about 30 minutes of active time. The oven does the rest of the work, making it perfect for a busy weeknight or a last-minute holiday treat.
- Simple Ingredients: You probably have most of these in your pantry right now. No fancy grocery store trips required—just butter, sugar, cream cheese, eggs, and fresh or frozen cranberries.
- Perfect for Any Occasion: They’re fancy enough for a Christmas dinner table but simple enough for an after-school snack. They travel well, too, which makes them great for potlucks and bake sales.
- Crowd-Pleaser: This is the dessert that disappears first. The tangy cranberries cut through the richness of the cheesecake, so even people who claim they don’t like cheesecake end up going back for seconds.
- Unbelievably Delicious: The texture is what gets me. You get that crunchy, buttery crust, the silky smooth cheesecake layer, and then that tart, jammy cranberry swirl on top. It’s a party in your mouth, and everyone’s invited.
What makes this different from other cheesecake bar recipes is the double-crust method. By pressing some of the dough into the bottom and reserving the rest for a crumb topping, you get that perfect textural contrast in every single bite. It’s not just another version—it’s my best version.
What Ingredients You Will Need
This recipe relies on a handful of pantry staples to create something truly special. The ingredients are simple, but each one plays a key role in building flavor and texture.
- For the Crust & Topping:
- 1 ½ cups (190g) all-purpose flour – The base of our buttery crust. Spoon and level it for the best results.
- ½ cup (100g) granulated sugar – Adds just the right amount of sweetness to balance the tart cranberries.
- ½ cup (113g) cold unsalted butter, cubed – Use cold butter straight from the fridge. It creates a flakier, more tender crust. I prefer unsalted to control the salt level.
- ¼ teaspoon salt – Enhances all the flavors and balances the sweetness.
- For the Cheesecake Filling:
- 16 oz (452g) cream cheese, softened – This is non-negotiable. Use full-fat, block-style cream cheese for the creamiest, richest filling. Let it sit on the counter for at least 30 minutes before you start.
- ½ cup (100g) granulated sugar – Sweetens the tangy cream cheese perfectly.
- 2 large eggs, room temperature – Room temperature eggs blend into the filling more smoothly, preventing lumps. (Place them in a bowl of warm water for 5 minutes if you’re in a hurry.)
- 1 teaspoon vanilla extract – Pure vanilla extract makes a real difference here. It rounds out the flavors beautifully.
- 1 tablespoon orange zest – From about one large orange. This is where the bright, fresh flavor comes from. Zest it before you juice it!
- 2 tablespoons fresh orange juice – Adds a subtle citrus note that pairs perfectly with the cranberries.
- For the Cranberry Swirl:
- 1 ½ cups (170g) fresh or frozen cranberries – No need to thaw if using frozen. They cook down just the same.
- ¼ cup (50g) granulated sugar – Tames the tartness of the cranberries.
- 2 tablespoons water – Helps the cranberries soften and release their juices.
- 1 teaspoon orange zest – A second hit of orange for a deeper, more complex flavor.
Equipment Needed
You don’t need a professional kitchen to make these bars, but having the right tools makes the process so much smoother.
- 9×9-inch baking pan – This is the perfect size for getting thick, satisfying bars. If you only have an 8×8 pan, your bars will be a bit taller and you’ll need to add 5-7 minutes to the bake time.
- Parchment paper – A total lifesaver. It creates a sling that lets you lift the entire block of bars out of the pan for clean, easy cutting. I never skip this step.
- Electric hand mixer or stand mixer – You can mix the filling by hand with some serious elbow grease, but a mixer makes it silky smooth in under a minute. I use my trusty hand mixer for this—it’s easier to clean.
- Food processor or pastry cutter – For making the crust. A food processor is the fastest method, but a pastry cutter and a bowl work just fine. My grandmother used two forks, and her crusts were legendary.
- Medium saucepan – For cooking down the cranberry swirl. A non-stick one is nice, but any saucepan will do.
- Citrus zester or microplane – For getting that fine, fragrant orange zest without any bitter white pith.
Preparation Method
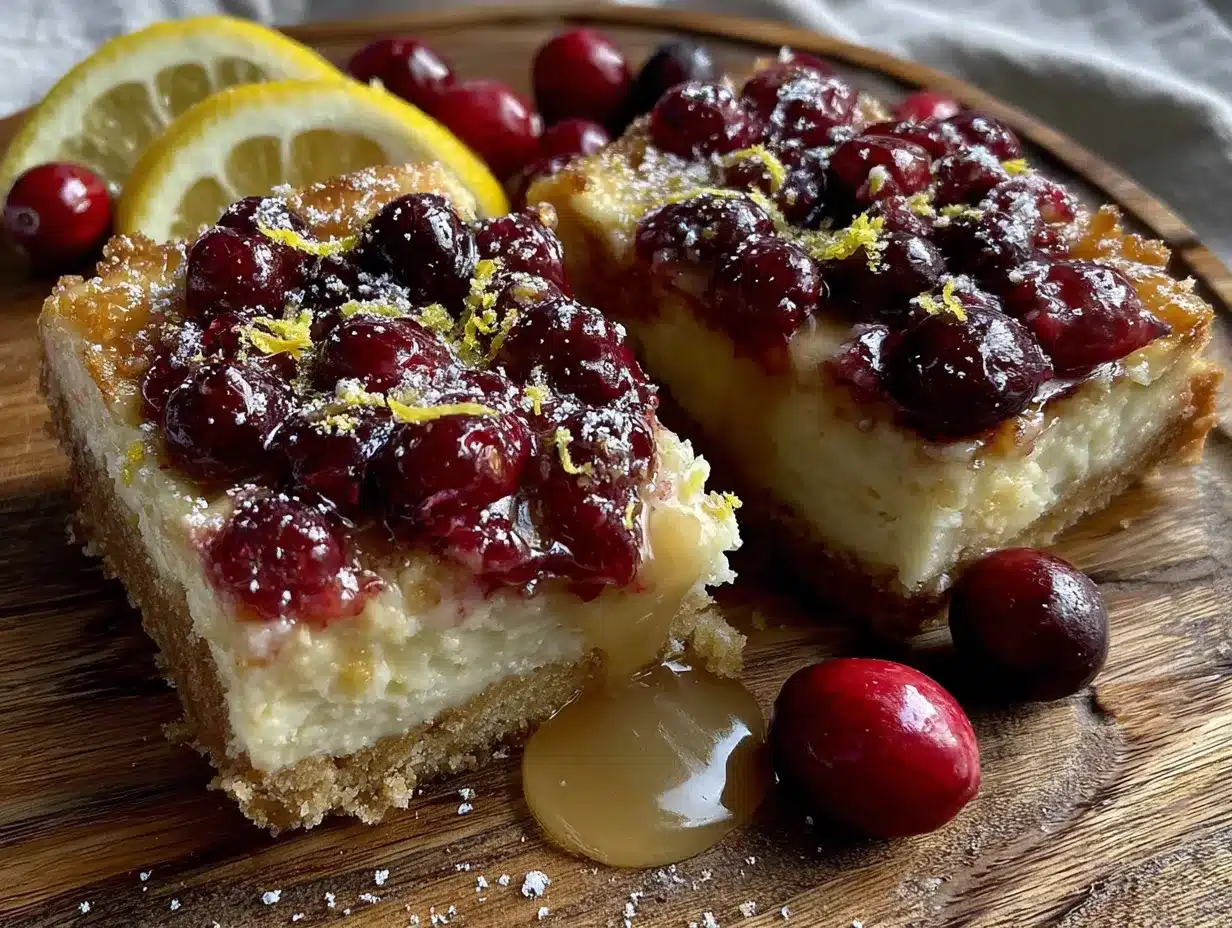
Let’s get baking. Follow these steps, and you’ll have a pan of beautiful, delicious bars in no time.
- Preheat and Prep: Preheat your oven to 350°F (175°C). Line your 9×9-inch baking pan with a long strip of parchment paper, leaving an overhang on two opposite sides. This creates your “sling” for lifting the bars out later. Lightly grease the parchment with a little butter or non-stick spray.
- Make the Crust: In a food processor, combine the flour, ½ cup sugar, and salt. Pulse a few times to mix. Add the cold, cubed butter and pulse until the mixture looks like coarse meal with some pea-sized butter pieces remaining. (If using a pastry cutter, cut the butter into the dry ingredients in a bowl until you get the same texture.)
- Press and Bake: Press about 2 cups of the crumb mixture firmly and evenly into the bottom of your prepared pan. Set the remaining crumb mixture aside for the topping. Bake the crust for 15-18 minutes, until it’s just lightly golden around the edges. Let it cool on a wire rack for at least 10 minutes while you prepare the filling. The smell is going to be incredible.
- Make the Cranberry Swirl: While the crust bakes, combine the cranberries, ¼ cup sugar, 2 tablespoons water, and 1 teaspoon orange zest in a medium saucepan. Bring to a simmer over medium heat, then reduce the heat to low. Cook for 8-10 minutes, stirring occasionally, until the cranberries have burst and the mixture has thickened into a jammy sauce. Remove from heat and let it cool slightly. It will continue to thicken as it cools.
- Make the Cheesecake Filling: In a large bowl, beat the softened cream cheese and ½ cup sugar with an electric mixer on medium speed until smooth and creamy, about 2 minutes. Scrape down the sides of the bowl. Add the eggs one at a time, beating on low speed after each addition until just combined. Don’t overmix! Then, mix in the vanilla extract, 1 tablespoon orange zest, and 2 tablespoons orange juice until just incorporated. The filling should be silky and smooth.
- Assemble: Pour the cheesecake filling over the cooled crust and spread it into an even layer. Drop spoonfuls of the cooled cranberry sauce over the top of the filling. Use a butter knife or a skewer to gently swirl the cranberry sauce into the cheesecake, creating a beautiful marbled pattern. Don’t over-swirl, or you’ll lose the distinct pockets of tart fruit.
- Add the Topping: Sprinkle the reserved crumb mixture evenly over the top of the cheesecake layer. This will create that wonderful, buttery crumb topping.
- Bake: Bake for 35-40 minutes, or until the edges are set and the center is just slightly jiggly (like set Jell-O). A toothpick inserted into the center should come out mostly clean, with a few moist crumbs. If the top is browning too quickly, loosely tent the pan with aluminum foil for the last 10-15 minutes of baking.
- Cool Completely: This is the hardest part. Let the bars cool completely in the pan on a wire rack. Then, refrigerate them for at least 4 hours, or preferably overnight. This chilling step is crucial for clean, sharp slices. The flavors also meld together beautifully as they rest.
- Slice and Serve: Once fully chilled, use the parchment sling to lift the entire block of bars out of the pan. Place it on a cutting board and use a sharp knife to cut into 16 even squares. For the cleanest cuts, wipe the knife clean between each slice.
Cooking Tips & Techniques
I’ve made this recipe enough times to learn a few things the hard way. Here are my best tips to make sure your bars turn out perfect every time.
- Room Temperature is Real: I know it’s tempting to use cold cream cheese straight from the fridge, but don’t do it. It will result in a lumpy filling that’s impossible to get smooth. Let your cream cheese and eggs sit on the counter for at least 30 minutes. Your mixer will thank you, and your filling will be silky.
- Don’t Overmix the Filling: Once you add the eggs, mix on low speed and stop as soon as they’re incorporated. Overmixing incorporates too much air, which can cause the cheesecake to puff up and then crack as it cools.
- The Water Bath Shortcut: Traditional cheesecakes use a water bath to prevent cracking, but for these bars, it’s not necessary. The short bake time and the crumb topping help prevent major cracks. If you’re worried, place a shallow pan of hot water on the oven rack below the baking pan to create some steam.
- Patience with Chilling: I know you want to dig in right away, but trust me on this one. Chilling for at least 4 hours (overnight is best) allows the cheesecake to set completely. If you try to cut them too soon, you’ll end up with a gooey mess. I once made that mistake, and I ended up eating the evidence straight from the pan with a spoon. Not my finest moment.
- Sharp Knife, Clean Cuts: Use a long, sharp chef’s knife to cut your bars. Dip the blade in hot water, wipe it dry, and then make a clean cut. Wipe the blade clean between each cut. This gives you those beautiful, bakery-style edges.
Variations & Adaptations
This recipe is a fantastic base for experimentation. Here are a few ways I’ve adapted it over the years, all of which have been crowd-pleasers.
- Gluten-Free Version: I’ve made this with a 1:1 gluten-free all-purpose flour blend (like Bob’s Red Mill or King Arthur) with excellent results. The crust will be a little more delicate, but the flavor is spot on. Just make sure your blend contains xanthan gum.
- Lemon-Blueberry Twist: Swap the orange zest and juice for lemon zest and juice, and replace the cranberries with fresh or frozen blueberries. The lemon-blueberry combination is just as bright and delicious, and it’s perfect for spring and summer.
- White Chocolate Drizzle: For an extra touch of indulgence, melt about ½ cup of white chocolate chips with 1 teaspoon of coconut oil and drizzle it over the cooled bars. The sweetness of the white chocolate is a beautiful counterpoint to the tart cranberries.
- Spiced Cranberry Swirl: Add a ¼ teaspoon of cinnamon and a pinch of ground ginger to the cranberry mixture as it cooks. The warm spices add a cozy, holiday-inspired flavor that’s absolutely wonderful in the fall and winter.
- Make it a Brunch Bar: Leave out the cranberry swirl and instead press fresh or frozen raspberries into the top of the cheesecake filling before baking. The raspberries burst and create little pockets of jammy fruit. It’s a beautiful, simple variation that feels a little more breakfast-appropriate.
Serving & Storage Suggestions
These bars are incredibly versatile when it comes to serving. Here’s how I like to enjoy them and how to keep them fresh.
- Serving Temperature: I prefer these bars served cold, straight from the refrigerator. The filling is firm and creamy, and the flavors are perfectly balanced. You can also let them sit at room temperature for about 10 minutes to take the chill off if you prefer a softer texture.
- Presentation: For a simple but elegant presentation, arrange a few bars on a platter and dust them lightly with powdered sugar. A few fresh cranberries and a sprig of rosemary add a beautiful holiday touch.
- Complementary Dishes: These bars are fantastic on their own, but they also pair beautifully with a dollop of lightly sweetened whipped cream or a scoop of vanilla ice cream. For a festive drink, serve them with a warm cup of spiced apple cider or a cranberry mimosa.
- Storage: Store any leftover bars in an airtight container in the refrigerator. They will stay fresh for up to 5 days. In fact, the flavors continue to develop over the first day or two, so they might even be better on day two.
- Freezing: These bars freeze like a dream. Once they are fully chilled and cut, place them in a single layer on a baking sheet and freeze for 1-2 hours, or until solid. Then, transfer the frozen bars to a freezer-safe container or zip-top bag, separating layers with parchment paper. They will keep for up to 3 months. To thaw, simply transfer them to the refrigerator overnight.
- Reheating: I don’t recommend reheating these bars. They are best enjoyed cold or at room temperature. The texture of the crust and the creamy filling is at its peak when served chilled.
Nutritional Information & Benefits
While these are an indulgent treat, they do offer a few surprising benefits. Here’s a quick look at the estimated nutritional values per bar (based on 16 servings) and some notes on the ingredients.
| Nutrient | Amount per Bar (approx.) |
|---|---|
| Calories | 320 |
| Fat | 19g |
| Saturated Fat | 11g |
| Carbohydrates | 35g |
| Sugar | 22g |
| Protein | 5g |
- Cranberries: These little red gems are packed with antioxidants and vitamin C. They’re known for their anti-inflammatory properties and can help support a healthy immune system.
- Oranges: The zest and juice provide a generous dose of vitamin C and fiber. The bright, fresh flavor also means you can use less sugar overall.
- Cream Cheese: While high in fat, cream cheese is a good source of calcium and protein. Using full-fat cream cheese is key for the best texture and flavor in this recipe.
- Dietary Considerations: This recipe is naturally vegetarian. For a gluten-free option, simply use a 1:1 gluten-free flour blend as mentioned in the variations section. It is not suitable for a low-carb or keto diet due to the sugar and flour.
- Personal Perspective: I believe in balance. These bars are a treat, and they are meant to be enjoyed. By using fresh, whole ingredients and controlling the sugar myself, I feel good about serving them to my family. A little indulgence now and then is good for the soul.
Conclusion
These Kid-Approved Cranberry Orange Cheesecake Bars are more than just a recipe; they’re a little slice of joy. They’re the kind of dessert that makes a regular Tuesday feel like a celebration, and they have a way of bringing people together. The tart cranberries, the bright orange, the creamy cheesecake, and the buttery crust—it’s a combination that’s hard to beat.
I love this recipe because it’s forgiving, adaptable, and always delivers. It’s the one I turn to when I need a guaranteed crowd-pleaser, and it’s the one I make just for myself on a quiet afternoon. I hope you’ll make it your own. Maybe you’ll add a little more orange zest, or swap in blueberries, or drizzle it with white chocolate. Whatever you do, I’d love to hear about it.
So go ahead, give these a try. Get your kids involved in the kitchen—they’ll love swirling the cranberry sauce into the filling. And when you take that first bite, with the perfect combination of textures and flavors, I think you’ll understand exactly why this recipe has a permanent spot in my baking rotation. Happy baking!
Frequently Asked Questions
Can I use frozen cranberries instead of fresh?
Absolutely! You can use frozen cranberries straight from the bag. No need to thaw them first. Just add them to the saucepan with the sugar and water, and cook as directed. They may take an extra minute or two to break down.
Why did my cheesecake filling crack?
A few things can cause cracking. Overmixing the filling after adding the eggs is the most common culprit, as it incorporates too much air. Also, baking at too high a temperature or overbaking can cause cracks. Make sure your oven is properly calibrated and pull the bars out when the center is just slightly jiggly.
Can I make these bars in a different size pan?
Yes, you can. If you use an 8×8-inch pan, your bars will be thicker and you’ll need to add about 5-10 minutes to the bake time. If you use a 9×13-inch pan, the bars will be thinner and you’ll need to reduce the bake time by about 5-8 minutes. Keep a close eye on them.
How do I get clean, sharp slices?
The key is patience and a sharp knife. Make sure the bars are fully chilled (at least 4 hours, ideally overnight). Use a long, sharp chef’s knife, and dip it in hot water, wiping it dry between each cut. This will give you those beautiful, clean edges.
Can I leave out the orange zest?
You can, but I wouldn’t recommend it. The orange zest is what gives these bars their bright, fresh flavor. It perfectly balances the sweetness of the cheesecake and the tartness of the cranberries. If you don’t have an orange, you could substitute with lemon zest for a different but equally delicious flavor profile.
Pin This Recipe!
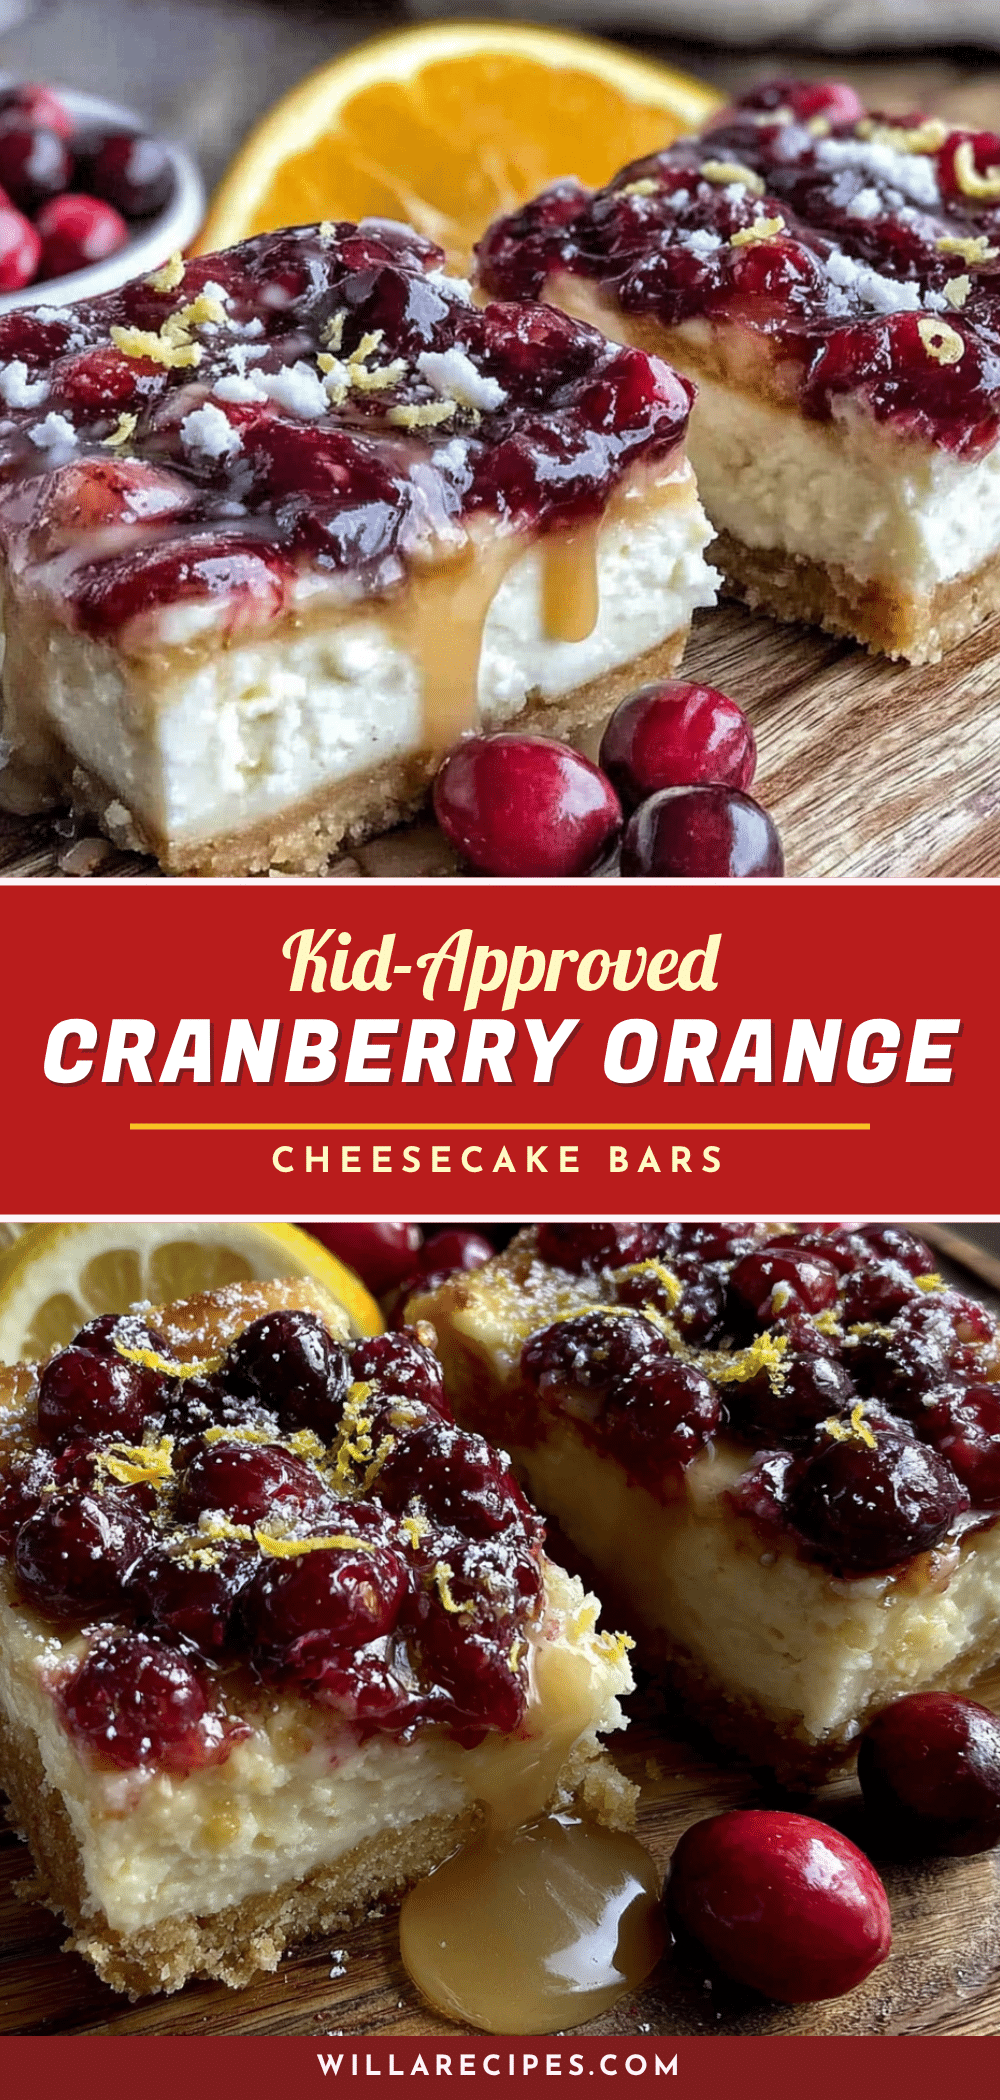
Kid-Approved Cranberry Orange Cheesecake Bars: Easy 9×9 Dessert
These cranberry orange cheesecake bars feature a buttery shortbread crust, creamy cheesecake filling, and a tart cranberry swirl. They’re simple to make, perfect for any occasion, and a guaranteed crowd-pleaser.
- Prep Time: 30 minutes
- Cook Time: 35-40 minutes
- Total Time: 4 hours 35 minutes (includes chilling)
- Yield: 16 bars 1x
- Category: Dessert
- Cuisine: American
Ingredients
- 1 ½ cups (190g) all-purpose flour
- ½ cup (100g) granulated sugar
- ½ cup (113g) cold unsalted butter, cubed
- ¼ teaspoon salt
- 16 oz (452g) cream cheese, softened
- ½ cup (100g) granulated sugar
- 2 large eggs, room temperature
- 1 teaspoon vanilla extract
- 1 tablespoon orange zest
- 2 tablespoons fresh orange juice
- 1 ½ cups (170g) fresh or frozen cranberries
- ¼ cup (50g) granulated sugar
- 2 tablespoons water
- 1 teaspoon orange zest
Instructions
- Preheat oven to 350°F (175°C). Line a 9×9-inch baking pan with parchment paper, leaving an overhang on two sides. Lightly grease the parchment.
- Make the crust: In a food processor, combine flour, ½ cup sugar, and salt. Pulse to mix. Add cold cubed butter and pulse until mixture resembles coarse meal with some pea-sized butter pieces. (Alternatively, use a pastry cutter.)
- Press about 2 cups of the crumb mixture firmly into the bottom of the prepared pan. Set remaining mixture aside for topping. Bake crust for 15-18 minutes until lightly golden around edges. Cool on a wire rack for at least 10 minutes.
- Make the cranberry swirl: In a medium saucepan, combine cranberries, ¼ cup sugar, water, and 1 teaspoon orange zest. Bring to a simmer over medium heat, then reduce to low. Cook for 8-10 minutes, stirring occasionally, until cranberries have burst and mixture thickens. Remove from heat and let cool slightly.
- Make the cheesecake filling: In a large bowl, beat softened cream cheese and ½ cup sugar with an electric mixer on medium speed until smooth, about 2 minutes. Scrape down sides. Add eggs one at a time, beating on low after each addition until just combined. Mix in vanilla, 1 tablespoon orange zest, and 2 tablespoons orange juice until just incorporated.
- Assemble: Pour cheesecake filling over cooled crust and spread evenly. Drop spoonfuls of cooled cranberry sauce over the filling. Gently swirl with a knife or skewer to create a marbled pattern.
- Sprinkle reserved crumb mixture evenly over the top.
- Bake for 35-40 minutes, until edges are set and center is slightly jiggly. If top browns too quickly, tent with foil for the last 10-15 minutes.
- Cool completely in the pan on a wire rack. Refrigerate for at least 4 hours, preferably overnight.
- Use parchment sling to lift bars out of pan. Cut into 16 squares with a sharp knife, wiping blade clean between cuts.
Notes
Use full-fat block-style cream cheese for best results. Let cream cheese and eggs come to room temperature before mixing. Do not overmix the filling after adding eggs. Chilling for at least 4 hours (overnight is best) is essential for clean slices. For gluten-free, use a 1:1 gluten-free flour blend containing xanthan gum.
Nutrition
- Serving Size: 1 bar
- Calories: 320
- Sugar: 22
- Sodium: 180
- Fat: 19
- Saturated Fat: 11
- Carbohydrates: 35
- Fiber: 1
- Protein: 5
Keywords: cranberry orange cheesecake bars, easy cheesecake bars, 9x9 dessert, holiday dessert, cranberry dessert, cheesecake bars, kid-friendly dessert


