Best DIY Hot Cocoa Bar for Parties (Easy Toppings)
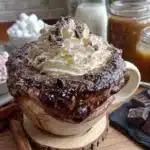
Create a joyful, interactive hot cocoa bar with a rich chocolate base and a curated toppings station. Perfect for holiday parties, this setup lets guests build their own mug of happiness while you relax and enjoy the company.
- Prep Time: 30 minutes
- Cook Time: 15 minutes
- Total Time: 45 minutes
- Yield: 20 servings 1x
- Category: Dessert
- Cuisine: American
Ingredients
- 1 gallon whole milk
- 1 cup heavy cream
- 1/2 cup unsweetened cocoa powder (preferably Dutch-processed)
- 1/2 cup granulated sugar (or to taste)
- 1/2 cup semi-sweet chocolate chips
- 2 teaspoons vanilla extract (pure)
- Pinch of sea salt
- 2–3 varieties of marshmallows (e.g., classic mini, toasted coconut, strawberry)
- 1 cup crushed candy canes
- 1/2 cup chocolate shavings or curls (dark, milk, or white)
- 1/2 cup caramel sauce (salted preferred)
- 1 can or batch of whipped cream
- 1/4 cup each of 2-3 varieties of sprinkles (e.g., holiday-themed, rainbow jimmies)
- 1/2 cup toasted coconut flakes
- 1/2 cup chopped nuts (toasted almonds or hazelnuts)
- 1/4 cup mini chocolate chips
- 1 tablespoon sea salt flakes
- 1/4 cup bacon bits (optional)
Instructions
- Make the hot chocolate base: In a large pot, combine 8 cups of whole milk and 1 cup of heavy cream. Heat over medium heat until steaming but not boiling. Whisk in 1/2 cup unsweetened cocoa powder and 1/2 cup granulated sugar until smooth. Add 1/2 cup semi-sweet chocolate chips and whisk until melted. Stir in 2 teaspoons vanilla extract and a generous pinch of sea salt. Taste and adjust sweetness. Transfer to a slow cooker set to ‘warm’ if desired.
- Prepare the toppings: Crush candy canes in a zip-top bag with a rolling pin. Toast coconut flakes in a dry skillet over medium heat for 2-3 minutes until golden. Make chocolate shavings with a vegetable peeler. Chop nuts if using. Place each topping in its own small bowl or ramekin.
- Set up the station: Choose a flat surface. Place the slow cooker or pot of hot chocolate at one end. Arrange topping bowls in a logical order: basics first (marshmallows, whipped cream), then crunchy items (candy canes, nuts, coconut), then drizzles (caramel sauce, chocolate shavings). Add a small spoon or tongs to each bowl. Label each topping clearly.
- Add finishing touches: Stack mugs near the hot chocolate. Place napkins and a small trash bowl nearby. Optionally, add a decorative sign like ‘Build Your Own Cocoa’ and a sprig of rosemary or cinnamon stick for a seasonal touch.
- Serve and enjoy: Let guests ladle hot chocolate into mugs and then choose their toppings. Encourage experimentation. Keep whipped cream refrigerated until just before serving and refill as needed.
Notes
The hot chocolate base can be made up to 2 days ahead and stored in the fridge. Reheat gently before serving. Toppings can be prepped the night before and kept in airtight containers. Don’t put whipped cream out too early—keep it refrigerated until the last minute. For a dairy-free version, use full-fat oat milk or canned coconut milk and dairy-free chocolate chips. For an adult version, set out small bottles of Baileys, Kahlúa, peppermint schnapps, or bourbon. Bloom the cocoa powder by whisking it with a few tablespoons of hot water before adding milk for a deeper flavor. Keep the base warm (around 140-160°F) and avoid boiling to prevent scalding.
Nutrition
- Serving Size: 1 cup (8 ounces)
- Calories: 300
- Sugar: 26
- Sodium: 180
- Fat: 20
- Saturated Fat: 12
- Carbohydrates: 31
- Fiber: 2
- Protein: 9
Keywords: hot cocoa bar, DIY hot chocolate bar, party toppings, holiday dessert bar, hot chocolate station, winter party ideas, build your own cocoa