My sister-in-law Jen wasn’t trying to impress anyone that December afternoon. I’d stopped by to drop off a Christmas gift and borrow a cookie sheet, and the smell hit me before I even got through the doorway. It wasn’t the usual pine-scented candle or cinnamon-apples thing. It was chocolate—deep, warm, almost smoky—with a hint of something boozy and a thread of vanilla that wrapped around you like a blanket. I found her in the kitchen, a whisk in one hand and a toddler clinging to her leg, completely unbothered by the chaos. She pointed to a corner of her counter where she’d set up this spread of little bowls filled with things I never would have thought to put in hot chocolate. Crushed candy canes. Tiny marshmallows in three colors. Something that looked suspiciously like bacon bits. “It’s just for the kids’ playdate,” she said, shrugging. “Grab a mug.” And honestly, that moment changed my entire approach to hosting. Because this wasn’t a fussy, staged dessert bar. It was a messy, joyful, everyone-helps-themselves kind of setup that made every single person—kids and adults alike—light up like they’d just won something. That’s the thing about the best DIY hot cocoa bar with toppings station for parties. It doesn’t need to be perfect. It just needs to feel like an invitation.
Maybe you’ve been there—staring down a holiday guest list and realizing you need something that feels special but doesn’t chain you to the stove. Something that lets people build their own mug of happiness while you actually get to sit down and talk. That’s the magic here. You set out the hot chocolate base, line up the toppings, and let your guests become their own baristas. It’s interactive, it’s forgiving, and it somehow makes everyone feel like a kid again. I mean, let’s face it, there’s no better party trick than watching a grown adult get genuinely excited about sprinkles.
So here it is. My version of Jen’s casual counter setup, refined through a few too many dinner parties and one very memorable New Year’s Eve. It’s the kind of thing that looks like you spent hours planning, but really, you just bought smart and arranged things with a little love. And honestly, that’s the best kind of party food.
Why You’ll Love This Recipe
I’ve tested this DIY hot cocoa bar setup at everything from a casual Sunday brunch to a full-blown holiday open house. It works every single time. Here’s why this particular approach stands out from the endless Pinterest boards you’ve probably scrolled through.
- Completely Customizable: Everyone gets exactly what they want. No more fielding complaints about too much peppermint or not enough chocolate. Your guests become the creators.
- Prep-Ahead Friendly: This is a host’s dream. You can chop, pour, and arrange everything hours before anyone rings the doorbell. No last-minute scrambling, no burnt saucepans.
- Naturally Crowd-Pleasing: I’ve watched kids pile on the marshmallows and adults sneak extra spoonfuls of salted caramel sauce. There’s something for every palate, and everyone leaves happy.
- Visually Stunning with Minimal Effort: A few colorful bowls, some mismatched mugs, and a handful of toppings create a spread that photographs beautifully and feels effortlessly festive. Your guests will think you’re a styling genius.
- Budget-Friendly: You don’t need expensive ingredients. Quality cocoa powder, a few pantry staples, and creative toppings make for an impressive display without breaking the bank.
What makes this different from every other hot cocoa bar you’ve seen? It’s the attention to texture and balance. I don’t just throw out a bag of marshmallows and call it done. I think about crunch versus cream, sweet versus salty, warm versus cool. The result is a toppings station that feels curated, not chaotic. And that little touch of intention? It’s what turns a simple drink into a memorable party moment.
This isn’t just about hot chocolate. It’s about giving people permission to play with their food, to experiment, to laugh at a weird combination that actually works. It’s the kind of setup that makes your kitchen the heart of the party, and honestly, that’s exactly where you want to be.
What Ingredients You Will Need
Building the best DIY hot cocoa bar with toppings station for parties starts with two key components: the base and the toppings. Let’s break down each one so you know exactly what to buy and why it matters.
For the Hot Chocolate Base
- Whole milk (1 gallon): This gives you the creamiest, most luxurious texture. You can use 2% or oat milk in a pinch, but whole milk really makes a difference. (I recommend organic if your budget allows—the flavor is noticeably cleaner.)
- Heavy cream (1 cup): This is my secret weapon. Adding a splash of heavy cream to the pot makes the cocoa taste like it came from a fancy café. Don’t skip it.
- Unsweetened cocoa powder (1/2 cup): Go for a high-quality brand like Ghirardelli or Valrhona. The deeper the cocoa, the richer the drink. Dutch-processed cocoa gives a smoother, less acidic flavor.
- Granulated sugar (1/2 cup, or to taste): You can adjust this based on your crowd. Some people like it sweeter, some prefer a darker, more bitter chocolate.
- Semi-sweet chocolate chips (1/2 cup): These add body and a glossy finish. They melt into the milk and create that velvety mouthfeel.
- Vanilla extract (2 teaspoons): Pure vanilla, not imitation. It rounds out the chocolate flavor and adds a warm, aromatic note.
- Pinch of sea salt: This is non-negotiable. Salt enhances the chocolate and balances the sweetness. It’s the difference between flat cocoa and complex cocoa.
- Optional add-ins for the base: A cinnamon stick, a pinch of cayenne pepper, or a drop of peppermint extract can be stirred into the pot for a flavored base. Just be sure to label it clearly so guests know what they’re getting.
For the Toppings Station
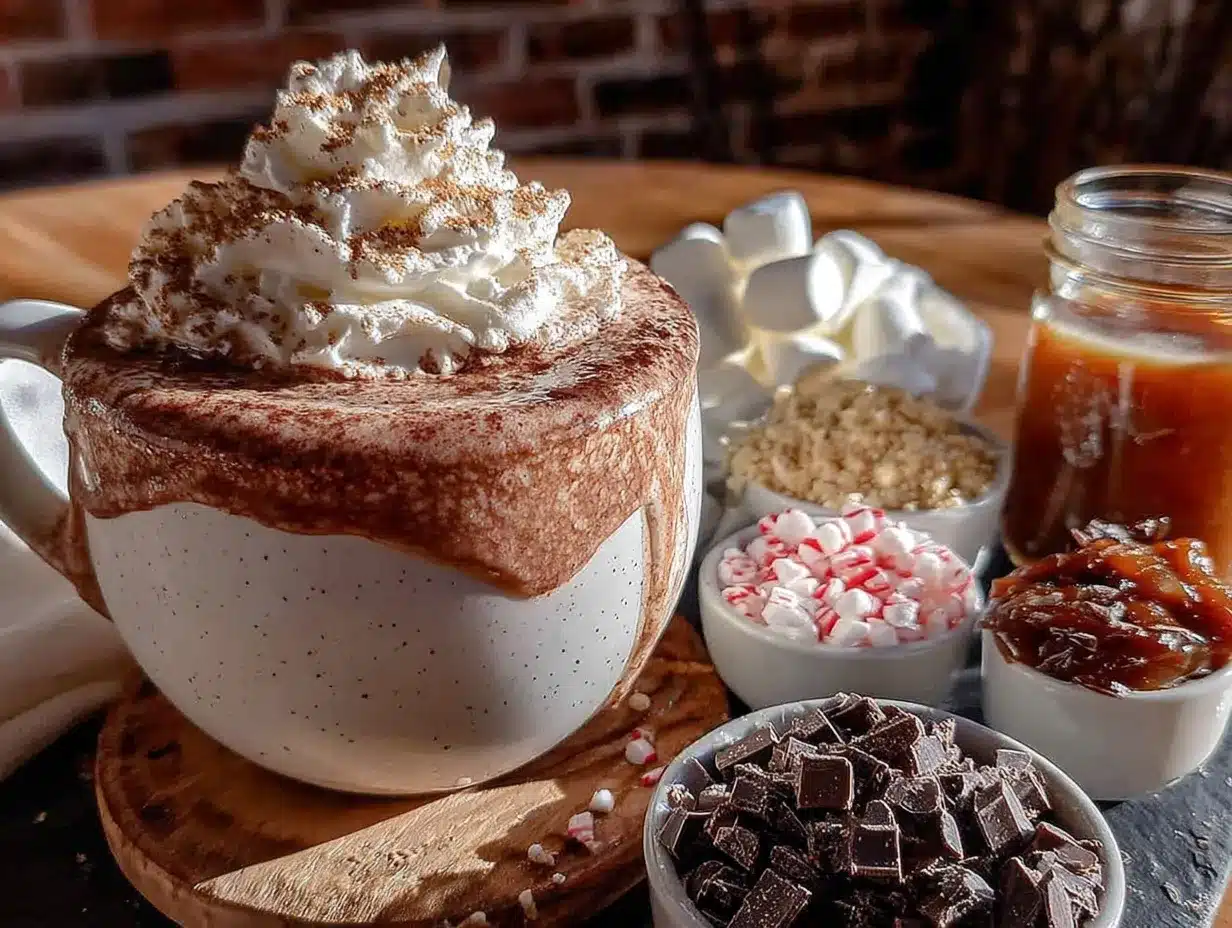
- Marshmallows (2-3 varieties): Classic mini marshmallows are a must. Then add something unexpected—toasted coconut marshmallows, strawberry marshmallows, or giant gourmet marshmallows cut into chunks. (I found an amazing brand called SmashMallow that makes flavored marshmallows perfect for this.)
- Crushed candy canes (1 cup): This is the quintessential winter topping. Crush them yourself for the best texture and freshest flavor. A rolling pin and a zip-top bag work perfectly.
- Chocolate shavings or curls (1/2 cup): Use a vegetable peeler on a good-quality chocolate bar. Dark, milk, or white—each adds a different visual and flavor note.
- Caramel sauce (1/2 cup): A drizzle of good salted caramel takes hot chocolate to another level. Homemade is wonderful, but a jar from the store works just fine.
- Whipped cream (1 can or homemade batch): Real whipped cream is a showstopper, but canned is perfectly acceptable for a party. Just get the good stuff—Reddi-wip original, not the lite version.
- Sprinkles (1/4 cup each of 2-3 varieties): Holiday-themed sprinkles, rainbow jimmies, or even gold luster dust. Kids and adults alike can’t resist a sprinkle-topped mug.
- Toasted coconut flakes (1/2 cup): This adds a tropical twist and a lovely crunch. Toast them in a dry pan until golden—it takes about 3 minutes.
- Chopped nuts (1/2 cup): Toasted almonds or hazelnuts add a sophisticated crunch. Make sure to label them if you have guests with allergies.
- Mini chocolate chips (1/4 cup): These are a simple but effective topping. They melt slightly into the hot cocoa and create little pockets of chocolate.
- Sea salt flakes (1 tablespoon): A tiny pinch of flaky sea salt on top of whipped cream is a chef’s trick that will blow your guests’ minds. Trust me on this one.
- Bacon bits (optional, 1/4 cup): I know, I know. But crispy, salty bacon on top of rich hot chocolate? It’s weirdly incredible. Try it on a small batch first if you’re skeptical.
For the base, I recommend making a big batch on the stove or in a slow cooker. The slow cooker method is especially great for parties because it keeps the cocoa warm and ready to serve for hours without any effort on your part.
Equipment Needed
You don’t need a ton of specialized gear for this setup, but a few key pieces will make your life much easier and your display much prettier.
- A large pot (6-8 quarts) or a slow cooker: For making and holding the hot chocolate base. A slow cooker is ideal for parties because it keeps everything warm without scorching.
- A whisk: A good, sturdy whisk is essential for getting the cocoa powder to dissolve smoothly. No one wants lumpy hot chocolate.
- Small bowls and ramekins (at least 6-8): For holding the individual toppings. Mix and match sizes and shapes for visual interest. I love using a mix of ceramic and glass.
- Small spoons or tongs for each topping: This prevents cross-contamination and keeps things tidy. Tiny tongs from a party supply store are perfect.
- Mugs (assorted sizes and styles): The more mismatched, the better. It adds to the cozy, casual vibe. Look for them at thrift stores for a budget-friendly collection.
- A ladle: For serving the hot chocolate from the pot or slow cooker.
- A large serving tray or a section of counter space: To arrange all your toppings. A wooden cutting board or a marble slab makes a beautiful base.
- Labels or small chalkboard signs: To identify each topping. This is especially important for guests with dietary restrictions or allergies.
- Napkins and a small trash bowl: For inevitable spills and discarded candy cane wrappers. Trust me, you’ll thank me later.
My personal recommendation? Invest in a good slow cooker if you don’t already have one. I use a 6-quart Cuisinart, and it’s been a game-changer for parties. It keeps the cocoa at the perfect temperature for hours without any babysitting. I’ve also used a cheap one from a discount store, and honestly, it worked just fine. You don’t need to spend a fortune.
Preparation Method
Here’s how to put together the best DIY hot cocoa bar with toppings station for parties. I’ve broken it down into clear steps so you can work through it without stress.
- Make the hot chocolate base (15 minutes active time, then keep warm): In your large pot, combine 8 cups of whole milk and 1 cup of heavy cream. Heat over medium heat until it’s steaming but not boiling—you want it hot, not scalded. Whisk in 1/2 cup of unsweetened cocoa powder and 1/2 cup of granulated sugar until completely smooth. Add 1/2 cup of semi-sweet chocolate chips and whisk until melted and incorporated. Stir in 2 teaspoons of vanilla extract and a generous pinch of sea salt. Taste and adjust sweetness. If you’re using a slow cooker, transfer the mixture to the slow cooker now and set it to warm. If you’re serving immediately, keep it on low heat, stirring occasionally.
- Prepare the toppings (20-30 minutes): While the base is heating, get your toppings ready. Crush the candy canes by placing them in a zip-top bag and smashing them with a rolling pin. Toast the coconut flakes in a dry skillet over medium heat for 2-3 minutes, stirring constantly, until golden and fragrant. Make chocolate shavings by running a vegetable peeler along the edge of a chocolate bar. Chop any nuts you’re using. Transfer each topping to its own small bowl or ramekin.
- Set up the station (10 minutes): Choose a flat surface—a counter, a large table, or even a sideboard. Place your slow cooker or pot of hot chocolate at one end. Arrange the topping bowls in a logical order: start with the basics (marshmallows, whipped cream), move to the crunchy items (candy canes, nuts, coconut), and end with the drizzles (caramel sauce, chocolate shavings). Place a small spoon or pair of tongs in each bowl. Add your labels so guests know what’s what.
- Add the finishing touches (5 minutes): Stack your mugs near the hot chocolate pot. Place napkins and the small trash bowl nearby. If you want to get fancy, add a small sign that says “Build Your Own Cocoa” or something playful. A sprig of rosemary or a cinnamon stick tucked into the display adds a nice seasonal touch.
- Serve and enjoy: Let guests ladle their own hot chocolate into mugs and then wander down the line of toppings. Encourage them to be adventurous. I always make a point of trying a weird combination myself—it gets people laughing and experimenting.
A quick note on timing: The base can be made up to 2 days ahead and stored in the fridge. Just reheat it gently on the stove or in the slow cooker before the party. The toppings can be prepped the night before—just keep everything in airtight containers until you’re ready to set up. This is a lifesaver when you’re hosting a party after a full workday.
One thing I learned the hard way: don’t put the whipped cream out too early. It deflates and gets sad. Keep it in the fridge until the last minute, and only set out a small bowl at a time. You can always refill it.
Cooking Tips & Techniques
After setting up this bar for more parties than I can count, I’ve collected a few tricks that make the whole thing run smoother. Here are the ones I swear by.
Don’t let the milk boil. This is the most common mistake I see. Boiling milk causes it to scald, which gives it a cooked, unpleasant flavor. You want it steaming hot—around 160°F—but not bubbling. If you see small bubbles forming around the edge of the pot, you’re at the perfect temperature. Turn the heat down or switch the slow cooker to warm.
Bloom your cocoa powder. This is a professional baker’s trick that makes a huge difference. Before adding the milk, whisk the cocoa powder with a few tablespoons of hot water to form a paste. Let it sit for a minute. This “blooms” the cocoa, releasing its full flavor. Then add the milk and proceed as usual. The result is a deeper, more chocolatey base.
Think about texture contrast. A great toppings station isn’t just about flavors—it’s about how things feel in your mouth. Pair creamy toppings (whipped cream, marshmallows) with crunchy ones (candy canes, nuts, toasted coconut). Add something chewy (dried cherries or chopped dates) for another layer. The interplay of textures is what makes each sip interesting.
Label everything clearly. I once forgot to label a bowl of cayenne-spiced cocoa mix, and a guest accidentally added it to her mug thinking it was cinnamon. The look on her face was unforgettable—and not in a good way. Use small chalkboard signs or simple handwritten labels. It’s a small step that prevents big mishaps.
Keep the base warm, not hot. If you’re using a slow cooker, set it to the “warm” setting, not “low” or “high.” The warm setting maintains a steady temperature without cooking the milk further. If the cocoa gets too hot, the milk proteins can separate, leaving you with a grainy, unappealing texture. I’ve ruined a batch this way, and it was heartbreaking.
Prep for the crowd size. A good rule of thumb is 1 cup of hot chocolate per person. For a party of 20, that means a full gallon of milk. It’s better to have a little extra than to run out halfway through the evening. Leftover hot chocolate can be refrigerated and reheated for a cozy night in the next day.
One last thing: don’t stress about perfection. The first time I set this up, I forgot the spoons for the toppings and everyone just used their fingers. It was messy and hilarious and nobody cared. Your guests are there to have fun, not to judge your bowl arrangement.
Variations & Adaptations
One of the best things about this DIY hot cocoa bar with toppings station for parties is how easily it adapts to different tastes and dietary needs. Here are some variations I’ve tried and loved.
Dairy-Free / Vegan Version: Swap the whole milk and heavy cream for full-fat oat milk or canned coconut milk. Oat milk gives the creamiest texture, while coconut milk adds a subtle tropical note that pairs beautifully with the toasted coconut topping. Use dairy-free chocolate chips and a vegan whipped cream. I’ve served this at a party with a mix of dairy and non-dairy guests, and nobody could tell the difference.
Spiked Hot Cocoa Bar for Adults: This is a huge hit at grown-up gatherings. Set out small bottles of Baileys Irish Cream, Kahlúa, peppermint schnapps, and bourbon. Label them clearly and let guests add a splash to their mug. The salted caramel sauce and a shot of bourbon is a combination I discovered by accident and now make on purpose. Just be sure to keep the adult add-ins separate from the kids’ toppings.
White Hot Chocolate Option: Some people aren’t dark chocolate fans. Make a separate batch of white hot chocolate using white chocolate chips and milk. It’s sweeter and creamier, and it pairs beautifully with toppings like crushed freeze-dried strawberries, lemon zest, or pistachios. I’ve found that kids gravitate toward this version, while adults tend to prefer the classic dark cocoa.
Spiced Mexican Hot Chocolate: Add a cinnamon stick, a pinch of cayenne pepper, and a dash of nutmeg to the base while it heats. The warmth of the spices is incredible on a cold winter night. For the toppings, include a bowl of ground cinnamon and a small dish of ancho chili powder for the adventurous. This version is a conversation starter, I promise.
Low-Sugar Version: Use unsweetened cocoa powder and a sugar substitute like monk fruit or stevia in the base. Skip the chocolate chips or use a sugar-free brand. For toppings, focus on unsweetened coconut flakes, chopped nuts, and a sugar-free caramel sauce. I’ve made this for a friend who’s diabetic, and she was thrilled to have a dessert option that felt indulgent without the sugar spike.
My personal favorite variation? The salted caramel and bacon version. I make the classic dark chocolate base, then set out bowls of crispy bacon bits, flaky sea salt, and a good-quality salted caramel sauce. The combination of salty, sweet, smoky, and rich is absolutely addictive. I first tried it at a friend’s birthday party, and I’ve been obsessed ever since.
Serving & Storage Suggestions
Getting the serving details right can make your hot cocoa bar feel polished and intentional. Here’s what I’ve learned about presentation and leftovers.
Serving Temperature and Presentation: Serve the hot chocolate base at a warm, drinkable temperature—around 140°F to 150°F. If it’s too hot, guests will burn their tongues and won’t be able to taste the toppings. If it’s too cool, the marshmallows won’t melt and the whipped cream will just float sadly on top. The slow cooker on “warm” is your best friend here. For presentation, I like to arrange the toppings in a rainbow order—reds and pinks (crushed candy canes, strawberry marshmallows) on one end, through yellows and greens (toasted coconut, pistachios) to browns and whites (chocolate shavings, marshmallows) on the other. It’s visually satisfying and makes the station feel intentional.
What to Serve Alongside: A hot cocoa bar pairs beautifully with a few simple snacks. Think about things that complement the chocolate without competing with it. Shortbread cookies, gingerbread men, biscotti for dipping, or a plate of fresh fruit (strawberries, apple slices) are all excellent choices. I always put out a bowl of popcorn—the saltiness is a perfect counterpoint to the sweet cocoa. If you’re hosting a brunch, add a plate of mini donuts or muffins.
Storage Instructions: Leftover hot chocolate base can be cooled and stored in an airtight container in the refrigerator for up to 4 days. Reheat it gently on the stove or in the microwave, stirring frequently. The texture might change slightly upon reheating—a quick whisk usually brings it back. Toppings should be stored separately. Crushed candy canes and chocolate shavings can go in zip-top bags at room temperature. Whipped cream should be used up or discarded—it doesn’t re-whip well. Caramel sauce keeps in the fridge for weeks.
Reheating Tips: The best way to reheat the cocoa is on the stovetop over low heat, whisking constantly. If you’re in a hurry, the microwave works, but stop and stir every 30 seconds to prevent scorching. Add a splash of fresh milk if the cocoa has thickened in the fridge.
How Flavors Develop: Here’s a little secret: the hot chocolate base actually tastes better the next day. The flavors meld together overnight, and the chocolate becomes deeper and more rounded. I’ve started making my base a day ahead on purpose. It’s one less thing to do on party day, and the end result is better. Just don’t tell your guests—let them think you whipped it up fresh.
Nutritional Information & Benefits
Let’s be real: this is a treat, not a health food. But that doesn’t mean it can’t have some redeeming qualities. Here’s a rough breakdown for a standard 8-ounce serving of the classic hot chocolate base (without toppings).
- Calories: Approximately 280-320 (varies based on milk fat and chocolate chips used)
- Fat: 18-22 grams (mostly from the milk, cream, and chocolate)
- Carbohydrates: 28-34 grams (from the sugar and natural milk sugars)
- Protein: 8-10 grams (from the milk)
- Calcium: About 30% of your daily value (from the milk)
- Iron: About 15% of your daily value (from the cocoa powder)
Health Benefits of Key Ingredients: Cocoa powder is actually a surprising source of antioxidants, specifically flavonoids, which can support heart health by improving blood flow and lowering blood pressure. The milk provides calcium and vitamin D for bone health. Even the sugar serves a purpose—it makes the drink palatable and helps you actually absorb the nutrients. A small amount of dark chocolate has been linked to improved mood and cognitive function, which is good news for anyone hosting a party.
Dietary Considerations: This recipe contains dairy and gluten (check your toppings—some candy canes and caramel sauces may contain wheat). For a gluten-free version, use certified gluten-free toppings. For a dairy-free version, use oat milk and dairy-free chocolate. The sugar content is moderate, but you can reduce it by using a sugar substitute or skipping the chocolate chips. As always, check your specific toppings for potential allergens, especially nuts and soy.
My Personal Perspective: I’m not a nutritionist, but I believe in balance. This hot cocoa bar is a celebration. It’s not something you eat every day, and that’s exactly why it feels so special. I’d rather serve a full-fat, real-sugar version that tastes incredible than a watered-down “healthy” version that leaves everyone disappointed. If you’re concerned about sugar, offer the low-sugar variation alongside the classic. But honestly? A few nights a year, let yourself have the real thing.
Conclusion
Here’s the thing about the best DIY hot cocoa bar with toppings station for parties: it’s not really about the chocolate. It’s about the moment when your friend piles three different kinds of marshmallows onto her mug and laughs at how ridiculous it looks. It’s about the kid who discovers that sprinkles and caramel sauce are a perfect combination. It’s about the quiet guest who adds a pinch of sea salt and suddenly looks like they’ve unlocked a secret of the universe.
This setup has become my go-to for everything from holiday gatherings to birthday brunches to lazy Sunday afternoons when friends drop by. It’s flexible, forgiving, and genuinely fun. And the best part? You get to enjoy it too. While your guests are busy building their perfect mugs, you can pour yourself a cup, add a generous swirl of whipped cream, and actually sit down.
I’d love to hear how your hot cocoa bar turns out. What toppings did your guests go crazy for? Did anyone try a combination that surprised you? Drop a comment below and share your setup—I’m always looking for new ideas to steal. And if you snap a photo of your toppings station, tag me on Pinterest. There’s nothing I love more than seeing a messy, joyful, sprinkle-covered counter that started with a simple pot of cocoa.
Now go make some hot chocolate. You’ve got a party to host.
Frequently Asked Questions
Can I make the hot chocolate base in advance?
Absolutely. You can make the base up to 2 days ahead. Let it cool completely, then store it in an airtight container in the fridge. Reheat gently on the stove or in a slow cooker before serving. The flavor actually gets better after a day in the fridge.
How do I keep the hot chocolate warm during a party?
A slow cooker is your best option. Transfer the hot chocolate to the slow cooker and set it to the “warm” setting. It will stay at the perfect drinking temperature for hours without scorching. If you don’t have a slow cooker, a large thermos works well for smaller gatherings.
What are the best toppings for a crowd?
Stick with a mix of textures and flavors. Mini marshmallows, crushed candy canes, chocolate shavings, and caramel sauce are universally loved. Add one or two unexpected options like toasted coconut or sea salt flakes to keep things interesting. Aim for 6-8 toppings total—any more can be overwhelming.
Can I make this dairy-free or vegan?
Yes! Use full-fat oat milk or canned coconut milk instead of dairy milk and cream. Choose dairy-free chocolate chips and a vegan whipped cream. Most candy canes and sprinkles are naturally vegan, but check the labels. The setup works exactly the same way.
How much hot chocolate do I need per person?
Plan for about 1 cup per person. For a party of 20, that means a full gallon of milk. It’s always better to have extra—leftover hot chocolate is a wonderful treat the next day. If you’re also serving other drinks, you can scale back slightly to 3/4 cup per person.
Pin This Recipe!
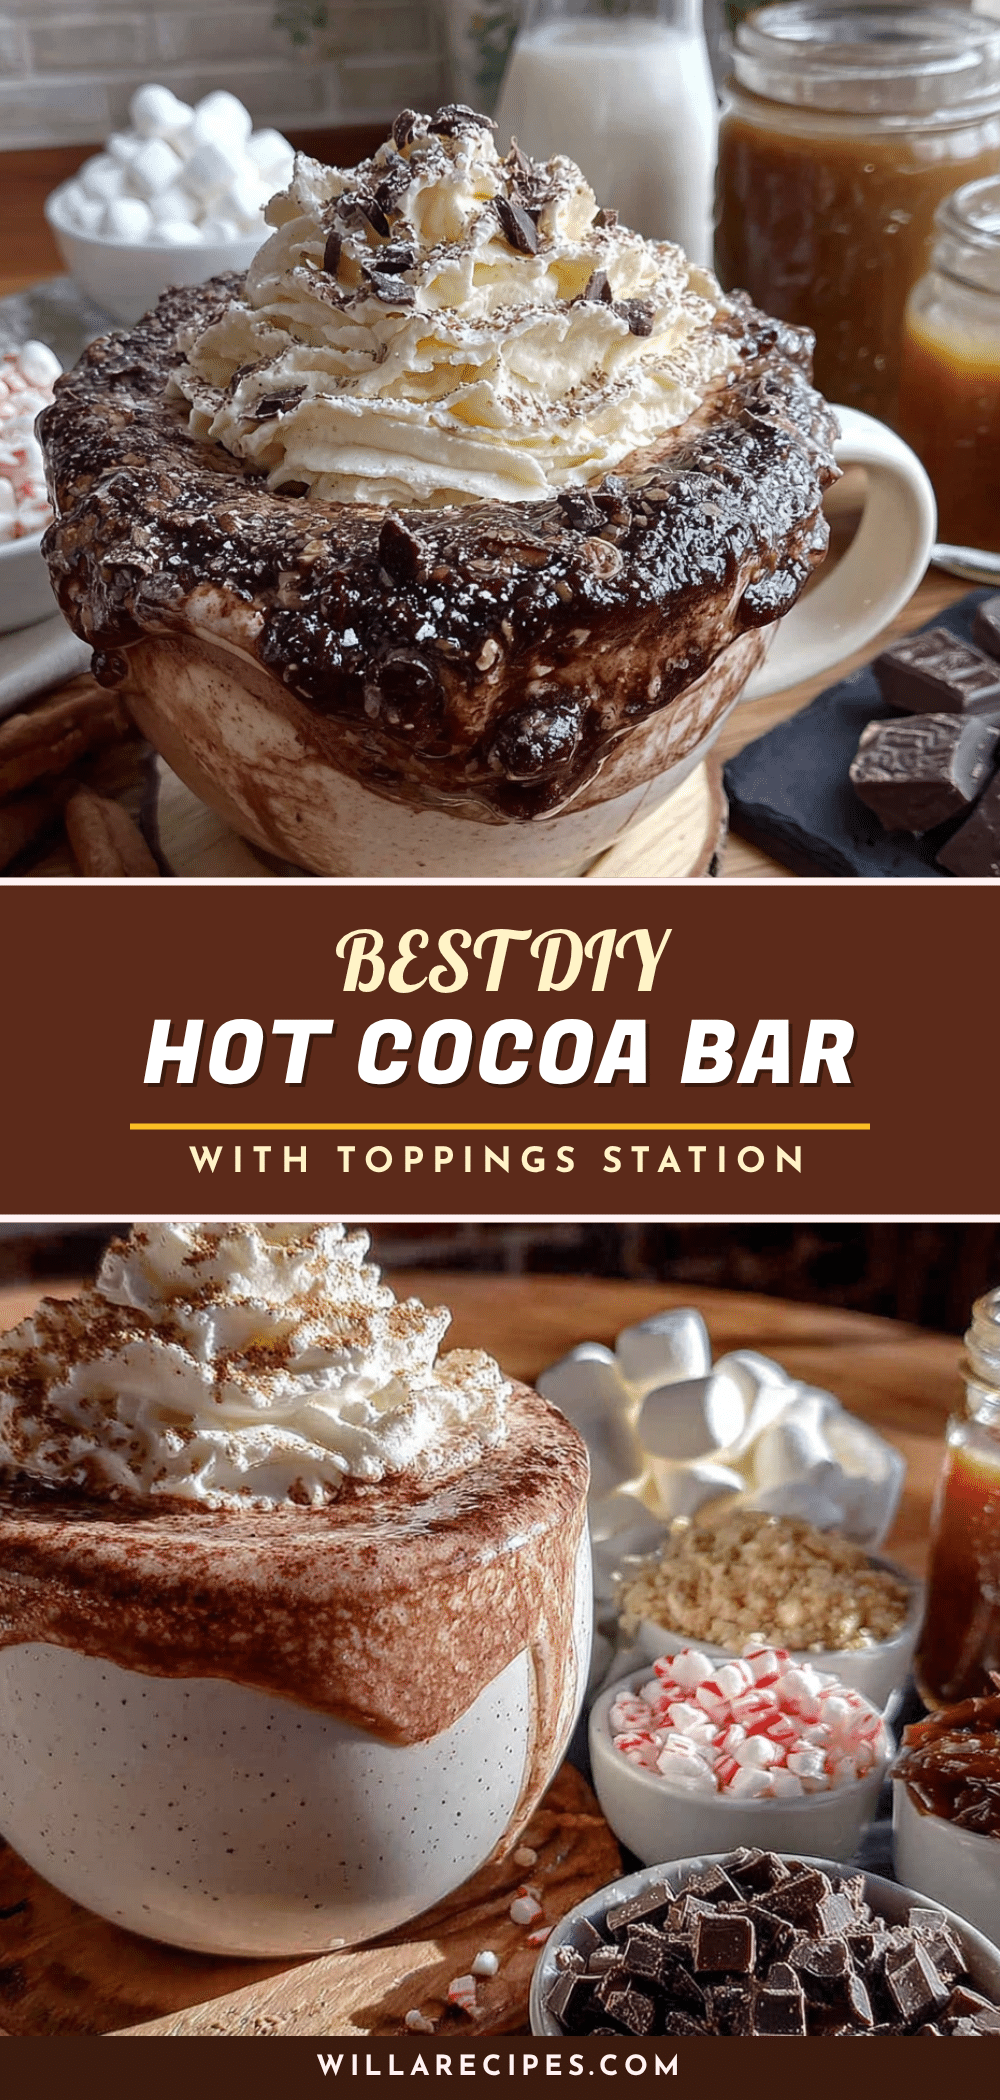
Best DIY Hot Cocoa Bar for Parties (Easy Toppings)
Create a joyful, interactive hot cocoa bar with a rich chocolate base and a curated toppings station. Perfect for holiday parties, this setup lets guests build their own mug of happiness while you relax and enjoy the company.
- Prep Time: 30 minutes
- Cook Time: 15 minutes
- Total Time: 45 minutes
- Yield: 20 servings 1x
- Category: Dessert
- Cuisine: American
Ingredients
- 1 gallon whole milk
- 1 cup heavy cream
- 1/2 cup unsweetened cocoa powder (preferably Dutch-processed)
- 1/2 cup granulated sugar (or to taste)
- 1/2 cup semi-sweet chocolate chips
- 2 teaspoons vanilla extract (pure)
- Pinch of sea salt
- 2–3 varieties of marshmallows (e.g., classic mini, toasted coconut, strawberry)
- 1 cup crushed candy canes
- 1/2 cup chocolate shavings or curls (dark, milk, or white)
- 1/2 cup caramel sauce (salted preferred)
- 1 can or batch of whipped cream
- 1/4 cup each of 2-3 varieties of sprinkles (e.g., holiday-themed, rainbow jimmies)
- 1/2 cup toasted coconut flakes
- 1/2 cup chopped nuts (toasted almonds or hazelnuts)
- 1/4 cup mini chocolate chips
- 1 tablespoon sea salt flakes
- 1/4 cup bacon bits (optional)
Instructions
- Make the hot chocolate base: In a large pot, combine 8 cups of whole milk and 1 cup of heavy cream. Heat over medium heat until steaming but not boiling. Whisk in 1/2 cup unsweetened cocoa powder and 1/2 cup granulated sugar until smooth. Add 1/2 cup semi-sweet chocolate chips and whisk until melted. Stir in 2 teaspoons vanilla extract and a generous pinch of sea salt. Taste and adjust sweetness. Transfer to a slow cooker set to ‘warm’ if desired.
- Prepare the toppings: Crush candy canes in a zip-top bag with a rolling pin. Toast coconut flakes in a dry skillet over medium heat for 2-3 minutes until golden. Make chocolate shavings with a vegetable peeler. Chop nuts if using. Place each topping in its own small bowl or ramekin.
- Set up the station: Choose a flat surface. Place the slow cooker or pot of hot chocolate at one end. Arrange topping bowls in a logical order: basics first (marshmallows, whipped cream), then crunchy items (candy canes, nuts, coconut), then drizzles (caramel sauce, chocolate shavings). Add a small spoon or tongs to each bowl. Label each topping clearly.
- Add finishing touches: Stack mugs near the hot chocolate. Place napkins and a small trash bowl nearby. Optionally, add a decorative sign like ‘Build Your Own Cocoa’ and a sprig of rosemary or cinnamon stick for a seasonal touch.
- Serve and enjoy: Let guests ladle hot chocolate into mugs and then choose their toppings. Encourage experimentation. Keep whipped cream refrigerated until just before serving and refill as needed.
Notes
The hot chocolate base can be made up to 2 days ahead and stored in the fridge. Reheat gently before serving. Toppings can be prepped the night before and kept in airtight containers. Don’t put whipped cream out too early—keep it refrigerated until the last minute. For a dairy-free version, use full-fat oat milk or canned coconut milk and dairy-free chocolate chips. For an adult version, set out small bottles of Baileys, Kahlúa, peppermint schnapps, or bourbon. Bloom the cocoa powder by whisking it with a few tablespoons of hot water before adding milk for a deeper flavor. Keep the base warm (around 140-160°F) and avoid boiling to prevent scalding.
Nutrition
- Serving Size: 1 cup (8 ounces)
- Calories: 300
- Sugar: 26
- Sodium: 180
- Fat: 20
- Saturated Fat: 12
- Carbohydrates: 31
- Fiber: 2
- Protein: 9
Keywords: hot cocoa bar, DIY hot chocolate bar, party toppings, holiday dessert bar, hot chocolate station, winter party ideas, build your own cocoa


