Lena wasn’t trying to impress anyone. I’d stopped by to borrow a car seat—mine had mysteriously disappeared into the void of my brother’s garage—and the smell hit me before I even made it past her screen door. Something warm, toasty, and just a little bit spicy. It smelled like a snack you’d pay too much for at a fancy farmers market, but it was coming from her regular kitchen on a regular Tuesday afternoon.
She was standing at the counter, pulling a baking sheet out of the oven with a dish towel wrapped around her hand, and she barely looked up. “Oh, those? I had a pumpkin from last week and I was bored.” That was it. Bored. Meanwhile, I was practically drooling on her doormat. The seeds were golden brown, flecked with something red and green, and they gave off this incredible tangy-smoky scent that made my stomach actually growl. Loudly. She laughed and shoved the whole sheet toward me. “Here, you’re doing me a favor. I’ll eat the whole batch if you don’t take them.”
I grabbed a handful while they were still warm, and honestly? I almost dropped them because they were that good. The crunch was perfect—not too hard, not chewy—and the chili-lime thing hit every single part of my tongue at once. I asked her what she did, and she just shrugged and said, “Tossed them with stuff. Baked them. It’s not a big deal.” But it was. And now I make these quick chili lime baked pumpkin seeds every single time I carve a pumpkin, roast a squash, or even just see a bag of raw seeds at the store. Maybe you’ve been there—where someone makes something so simple you almost don’t believe it, and then you can’t stop thinking about it. That’s this recipe.
Why You’ll Love This Recipe
Let me tell you, I’ve tested a lot of pumpkin seed recipes over the years. Some were too salty. Some were burnt on the outside and soft in the middle. Some required soaking overnight, which—come on, who has time for that on a weeknight? This one is different. These 15-minute chili lime baked pumpkin seeds are the real deal. They’re the kind of snack that makes you look like you put in way more effort than you actually did. And for a busy weeknight when you’re just trying to survive until bedtime, that’s a win.
- Quick & Easy: From start to finish, we’re talking 15 minutes. That’s less time than it takes to decide what to watch on Netflix. Perfect for those evenings when a craving hits out of nowhere.
- Simple Ingredients: You probably have chili powder and lime in your kitchen right now. If you don’t, they’re cheap and easy to find. No weird health food store runs required.
- Perfect for Snacking: These are great for lunchboxes, movie nights, or just standing in front of the pantry eating them by the handful. No judgment here.
- Crowd-Pleaser: I brought a bag to a potluck last month, and three people asked for the recipe before I even sat down. Kids like them. Adults love them. They’re just good.
- Unbelievably Delicious: The combination of tangy lime, smoky chili, and that perfect roasted crunch is honestly addictive. I’m not exaggerating when I say I’ve eaten an entire batch in one sitting.
What makes this recipe different from all the other pumpkin seed recipes out there? It’s the ratio. I spent way too many batches figuring out the exact amount of oil, lime, and chili powder so the seeds are coated but not soggy, crispy but not burnt. Plus, the quick boil step—trust me on this one—makes the seeds crunchy all the way through instead of just on the outside. It’s a tiny extra step that makes a huge difference. This isn’t just another version of roasted seeds. It’s the best version.
And honestly? There’s something about that first bite. The crunch, the heat, the citrus. It’s comfort food in snack form. It’s the kind of thing that makes you close your eyes for a second and just enjoy it. And on a busy weeknight when you’re tired and hungry and just need something good? That’s exactly what you deserve.
What Ingredients You Will Need
This recipe uses simple, everyday ingredients to create something that tastes surprisingly complex. The magic is in how they work together. Most of these are probably already in your pantry, which makes this recipe even better for those last-minute snack emergencies.
- Pumpkin seeds (raw, unshelled): You need 1 cup of raw pumpkin seeds, also called pepitas if you’re buying them shelled. If you’re scooping them fresh from a pumpkin, rinse them well and pat them dry. I’ve used both fresh and store-bought, and both work great. Just make sure they’re raw—not roasted or salted already, or the seasoning will be off.
- Olive oil (or avocado oil): 1 tablespoon. This helps the seasoning stick and helps the seeds get golden and crispy. I prefer olive oil for flavor, but avocado oil works if that’s what you have. Coconut oil would also work, though it adds a slight sweetness.
- Fresh lime juice: 1 tablespoon, which is about half a lime. Please use fresh lime juice here—the bottled stuff has a weird chemically taste that doesn’t do these seeds any favors. Roll the lime on the counter before cutting it to get more juice out.
- Chili powder: 1 teaspoon. This is your standard chili powder blend, not pure cayenne. It adds warmth and smokiness without being too spicy. If you want more heat, you can add a pinch of cayenne later, but start with this.
- Ground cumin: ½ teaspoon. This is my secret weapon. Cumin adds this earthy, almost nutty depth that makes the seeds taste more complex. Don’t skip it—it really rounds out the flavor.
- Garlic powder: ½ teaspoon. Not garlic salt. Garlic powder gives you that savory punch without adding extra moisture. I’ve made the mistake of using fresh garlic before, and it just made the seeds soggy. Learn from my failures.
- Salt: ½ teaspoon, or to taste. I use fine sea salt. If you’re using kosher salt, you might need a bit more. Start with ½ teaspoon and add more after baking if needed.
- Optional: Cayenne pepper: ⅛ teaspoon for extra heat. This is totally optional. I add it when I’m making these for myself, but I leave it out when I’m sharing with my kids or bringing them to a gathering where I don’t know everyone’s spice tolerance.
A quick note on pumpkin seeds: If you’re scooping them fresh from a pumpkin, don’t skip the rinsing step. Pumpkin guts are stringy and sticky, and they’ll make your seeds clump together. Rinse them in a colander under cold water, picking out the biggest pieces of pulp, then spread them on a towel to dry. Pat them as dry as you can—wet seeds won’t get crispy. I usually let them sit for about 10 minutes while I preheat the oven.
For the chili powder, I really like the McCormick brand for its consistent flavor, but any standard grocery store brand works. If you have a specialty spice shop near you, their chili powder might be more potent, so start with a little less and adjust. The same goes for the cumin—fresh cumin smells stronger and more aromatic than old cumin that’s been sitting in your cabinet for two years. If your spices are old, they won’t have as much flavor, and your seeds will taste flat. Trust your nose on this one.
If you’re out of fresh limes, bottled lime juice is better than nothing, but honestly, the flavor difference is noticeable. Fresh lime has a brightness that bottled juice just can’t replicate. Same goes for lemon—don’t substitute lemon for lime here. The flavor profile is different, and you’ll end up with chili lemon seeds, which are fine but not the same thing.
Equipment Needed
You don’t need much fancy equipment for this recipe, which is part of why I love it. Here’s what you’ll need:
- Baking sheet: A standard half-sheet pan works perfectly. No need for anything special, but make sure it’s not warped or the seeds might slide to one side and cook unevenly.
- Parchment paper (optional but helpful): Lining your baking sheet makes cleanup a breeze. The seeds won’t stick, and you can just toss the paper when you’re done. I use it every time.
- Small saucepan: For the quick boil step. Any small pot works. You just need enough water to cover the seeds.
- Colander or fine-mesh strainer: For draining the seeds after boiling. A fine-mesh strainer is better because the seeds are small and might fall through a regular colander.
- Mixing bowl: Medium-sized, for tossing the seeds with oil and seasoning. I use a glass bowl, but any bowl works.
- Spatula or wooden spoon: For stirring. A rubber spatula is nice for scraping every bit of seasoning onto the seeds.
- Measuring spoons: For accuracy. I’ve eyeballed the seasoning before, and it never turns out as good. Just use the spoons.
- Knife and cutting board: For cutting the lime. Basic stuff.
- Kitchen towel or paper towels: For drying the seeds after rinsing. A clean dish towel works, but paper towels are faster and less likely to leave lint on the seeds.
If you don’t have a baking sheet, you can use a cast iron skillet or even a cake pan. Just keep an eye on the seeds because they might cook faster or slower depending on the material. I’ve used a cast iron pan before, and the seeds got extra crispy on the bottom—which was actually pretty good, but not what I was going for. Stick with a baking sheet if you can.
Preparation Method
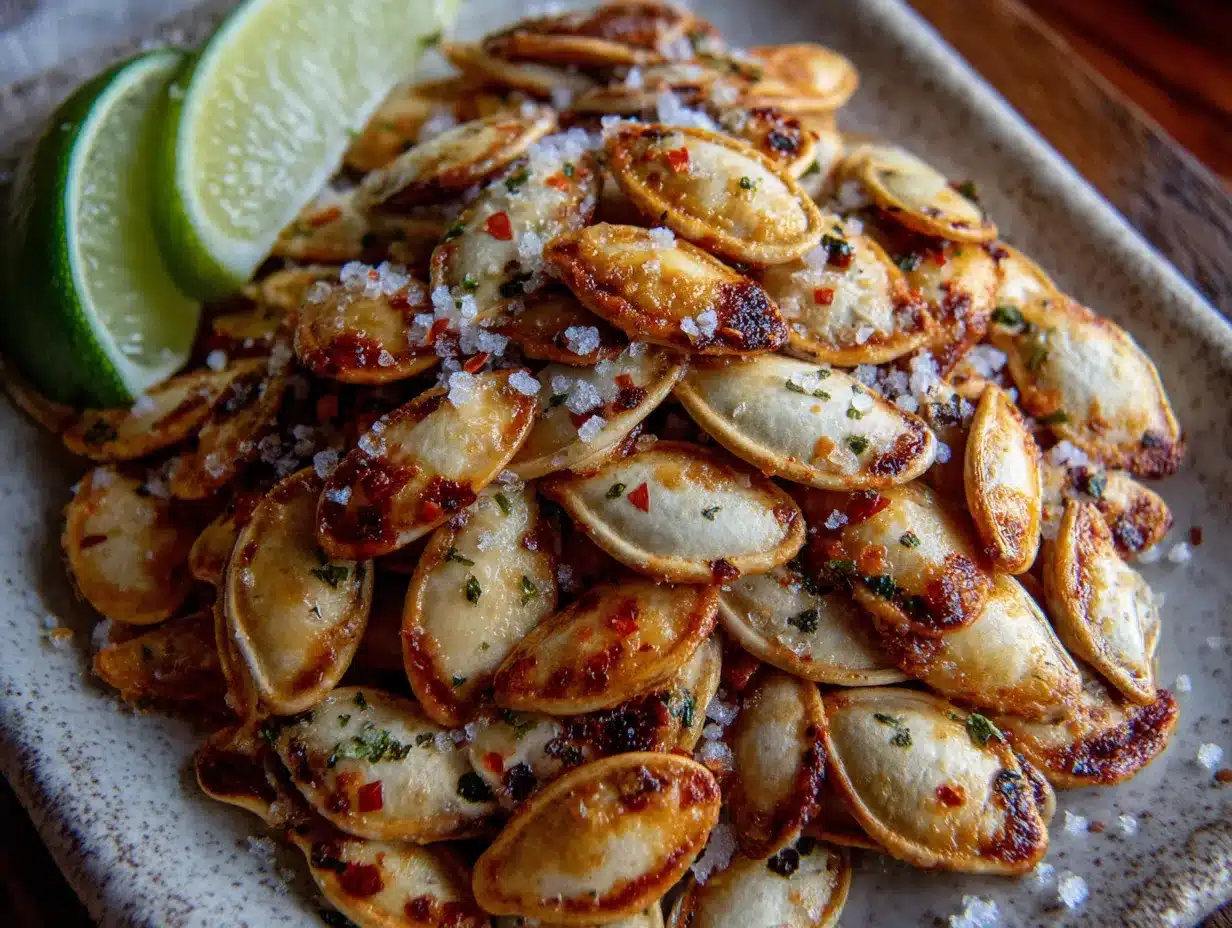
Alright, let’s get into it. This whole process takes about 15 minutes, and most of that is hands-off oven time. Here’s exactly how to do it:
- Preheat your oven to 375°F (190°C). Give it a good 5-10 minutes to come to temperature. While it’s heating, line your baking sheet with parchment paper if you’re using it. This step is simple but important—a hot oven ensures the seeds start crisping immediately.
- Rinse the pumpkin seeds. If you’re using fresh seeds from a pumpkin, place them in a colander and rinse them under cold water. Use your fingers to break up any clumps of pumpkin guts. Pick out any big pieces of pulp or stringy bits. If you’re using store-bought raw seeds, you can skip this step, but give them a quick rinse anyway just to remove any dust.
- Boil the seeds for 5 minutes. This is the step that makes all the difference. Place the rinsed seeds in a small saucepan and cover them with water. Add about ½ teaspoon of salt to the water. Bring it to a boil over high heat, then reduce the heat to medium and let them boil for exactly 5 minutes. Don’t skip this! The boiling helps the seeds cook evenly from the inside out, so they’re crunchy all the way through instead of just on the outside. It also helps the seasoning stick better. I learned this trick from a chef friend, and honestly, it’s a game-changer.
- Drain and dry the seeds. Pour the seeds into your colander or fine-mesh strainer and let them drain. Shake off as much water as you can. Then spread them out on a clean kitchen towel or paper towels and pat them dry. You want them as dry as possible before they go in the oven. Wet seeds will steam instead of roast, and you’ll end up with chewy seeds instead of crispy ones. Let them sit for a couple of minutes while you get the seasoning ready.
- Mix the seasoning. In a small bowl, combine the chili powder, cumin, garlic powder, salt, and cayenne if you’re using it. Stir them together with a fork so everything is evenly distributed. This is your flavor bomb.
- Toss the seeds with oil and lime juice. Place the dried seeds in a medium mixing bowl. Drizzle the olive oil and lime juice over them. Use a spatula or spoon to stir until every seed is coated. The seeds should look shiny but not wet. If there’s extra liquid pooling at the bottom of the bowl, you’ve used too much oil or juice—add a few more seeds if you have them, or just drain off the excess.
- Add the seasoning. Sprinkle the seasoning mixture over the oiled seeds. Stir vigorously until every seed is coated. You’ll see the seeds turn a beautiful reddish-brown color. Make sure there are no white spots where the seasoning missed. I usually use my hands for this step—it’s faster and more thorough than a spoon. Just wash your hands first!
- Spread the seeds on the baking sheet. Pour the seasoned seeds onto your lined baking sheet. Spread them out in a single layer. Make sure they’re not overlapping or clumped together, or they won’t cook evenly. If some seeds are stacked on top of others, they’ll steam instead of roast. Take a minute to spread them out properly—it’s worth it.
- Bake for 10-12 minutes. Place the baking sheet in the preheated oven. Set a timer for 10 minutes. At the 5-minute mark, pull the sheet out and give the seeds a quick stir with a spatula. This helps them cook evenly. Put them back in and let them finish. At 10 minutes, check them. They should be golden brown and smell incredibly toasty. If they’re not quite there, give them another 1-2 minutes. Watch them carefully—seeds can go from perfect to burnt in about 30 seconds.
- Cool completely before eating. This is the hardest part. Pull the baking sheet out of the oven and let the seeds cool right on the sheet. They’ll continue to crisp up as they cool. Don’t try to eat them right away—they’ll be soft and a little chewy straight out of the oven. Give them at least 5-10 minutes. I know it’s torture, but patience pays off here.
Sensory cues to watch for: When the seeds are done, they’ll be a deep golden brown and you’ll hear a slight crackle when you stir them. The kitchen will smell like a Mexican restaurant crossed with a fall festival. If you see any dark brown or black spots on the seeds, pull them out immediately—they’re starting to burn. If the seeds look pale and smell more like raw pumpkin than toasted spices, give them another minute or two.
Troubleshooting tip: If your seeds come out chewy instead of crispy, they either weren’t dry enough before baking, or they needed more time in the oven. Next time, pat them extra dry and add 2 more minutes to the bake time. If they come out burnt on the edges but soft in the middle, your oven runs hot or the seeds were too close together. Spread them out more and check them earlier next time.
Cooking Tips & Techniques
I’ve made this recipe probably two dozen times at this point, and I’ve learned a few things the hard way. Let me save you some trouble.
Don’t skip the boil. I know it seems like an extra step, and on a busy weeknight, every minute counts. But trust me on this one. The first time I made these, I skipped the boil because I was impatient, and the seeds were chewy and unevenly cooked. The second time, I did the boil, and they came out perfectly crispy all the way through. The boil hydrates the seeds just enough that they cook evenly in the oven. It’s a 5-minute step that makes a huge difference.
Dry the seeds really well. After boiling, those seeds are waterlogged. If you put them in the oven wet, they’ll steam instead of roast, and you’ll end up with soft, sad seeds. I spread them on a towel and roll them up, then press gently to absorb the moisture. Then I let them sit for a few minutes while I mix the seasoning. The drier they are going into the oven, the crispier they’ll come out.
Watch the oven like a hawk. Pumpkin seeds go from perfectly golden to burnt black in about 45 seconds. I’m not exaggerating. Set a timer for 10 minutes and check them. If they’re not done, check again every 60 seconds. Do not walk away and forget about them. I’ve done that. It’s sad. Learn from my mistakes.
Let them cool completely. I know you want to eat them immediately. I get it. But if you eat them hot, they’ll taste soft and a little flat. As they cool, they crisp up and the flavors settle. Give them at least 10 minutes. I usually make these while I’m doing something else—folding laundry, packing lunches for the next day—so I’m not tempted to eat them straight away.
Double the batch. Seriously. These disappear fast. If you’re making them for a party or just for yourself to snack on all week, double the recipe. They store well, and you’ll thank yourself later. Just make sure you have a second baking sheet so the seeds have enough room to spread out.
Use room-temperature lime. Cold limes are harder to juice. Roll the lime on the counter before cutting it, or microwave it for 10 seconds. You’ll get way more juice, and your seeds will be more flavorful.
Variations & Adaptations
One of the best things about this recipe is how easy it is to change up. Here are a few variations I’ve tried and loved:
Spicy Honey Version: Add 1 tablespoon of honey to the oil and lime mixture before tossing with the seeds. The honey will caramelize in the oven and give you a sweet-and-spicy combo that’s absolutely addictive. Just keep an eye on them because honey can burn faster. I’d check them at 8 minutes instead of 10.
Smoky Paprika Version: Swap the chili powder for 1 teaspoon of smoked paprika. This gives the seeds a deeper, smokier flavor that’s amazing on salads or soups. I make this version when I’m meal-prepping for the week. It’s less spicy but just as flavorful.
Everything Bagel Version: After tossing the seeds with oil and lime, sprinkle them with 1 tablespoon of everything bagel seasoning (poppy seeds, sesame seeds, garlic flakes, onion flakes, salt). Skip the chili powder and cumin for this one. These are great for snacking or crushing over avocado toast.
Dairy-Free and Vegan: This recipe is already dairy-free and vegan as written, so no changes needed. Just make sure your chili powder doesn’t contain any weird additives.
Gluten-Free: All the ingredients here are naturally gluten-free. Just double-check your chili powder and cumin to make sure they weren’t processed in a facility that handles wheat. Most brands are fine, but it’s worth checking if you’re sensitive.
Air Fryer Method: If you don’t want to heat up your whole oven, you can make these in an air fryer. Set it to 350°F (175°C) and cook for 6-8 minutes, shaking the basket halfway through. Check them at 6 minutes and add time as needed. The air fryer makes them extra crispy, which I actually prefer. Just don’t overcrowd the basket—work in batches if you’re making a double batch.
Less Spicy for Kids: Cut the chili powder in half and skip the cayenne entirely. Add a pinch of sugar to balance the lime. My kids love this version, and it’s mild enough that even picky eaters will try it.
Extra Spicy for Adults: Double the chili powder, add ¼ teaspoon of cayenne, and throw in a pinch of chipotle powder if you have it. These are not for the faint of heart. I make these when I’m watching a movie by myself and want something that’ll wake me up.
Serving & Storage Suggestions
These seeds are incredibly versatile. Here’s how I like to serve and store them:
Serving temperature: Room temperature is best. The flavors are brightest and the crunch is most satisfying. If you’ve stored them in the fridge, let them sit out for 10 minutes before serving.
Presentation ideas: Serve them in a small bowl or mason jar. They look great on a charcuterie board alongside cheese, dried fruit, and nuts. I also love sprinkling them over soups—especially butternut squash or black bean soup—for a crunchy topping. They’re amazing on salads too, in place of croutons. My favorite is a simple spinach salad with goat cheese, dried cranberries, and these seeds.
Complementary dishes: These seeds pair beautifully with margaritas (obviously), but also with beer, wine, or even just a cold glass of water. They’re great alongside tacos, enchiladas, or any Mexican-inspired meal. I also love them as a topping for avocado toast or roasted vegetables.
Storage instructions: Store the cooled seeds in an airtight container at room temperature for up to 2 weeks. Do not refrigerate them—the moisture in the fridge will make them soft. If you live in a humid climate, add a silica gel packet (the kind that comes in beef jerky bags) to the container to keep them crispy. I keep mine in a glass jar with a tight lid on the counter, and they stay crunchy for at least a week.
Freezer instructions: You can freeze these seeds for up to 3 months. Place them in a freezer-safe bag or container, squeeze out as much air as possible, and freeze. To serve, let them thaw at room temperature for about 15 minutes. They might lose a tiny bit of crunch, but they’ll still be delicious. I wouldn’t recommend reheating them—just eat them as is.
How flavors develop over time: Honestly, these are best within the first 3 days. The lime flavor fades a bit after that, and the seeds start to lose their edge. If you’re making them for a party, make them no more than 2 days ahead. If you’re making them just for yourself, eat them within the first week. They won’t go bad, but they won’t be as good.
Nutritional Information & Benefits
Let’s talk about why these little seeds are actually good for you, not just delicious.
Estimated nutrition per serving (¼ cup):
- Calories: 180
- Fat: 15g (mostly healthy unsaturated fats)
- Protein: 8g
- Carbohydrates: 6g
- Fiber: 3g
- Sugar: 1g
- Sodium: 200mg (varies with salt)
Health benefits: Pumpkin seeds are packed with magnesium, which is great for muscle function and sleep quality. They’re also a good source of zinc, which supports your immune system—especially important during cold and flu season. The healthy fats in the seeds and olive oil are good for your heart and brain. Plus, the fiber helps keep you full and satisfied between meals.
Dietary considerations: This recipe is naturally gluten-free, dairy-free, vegan, and paleo-friendly. It’s also low in sugar and can be made low-sodium by reducing the salt. The only potential allergen is the seeds themselves—pumpkin seeds are tree nut-free, so they’re safe for most nut allergy sufferers, but always check with your doctor if you’re unsure.
My personal take: I love that this snack feels indulgent but is actually pretty healthy. When I’m craving something crunchy and salty, these hit the spot without the guilt. I don’t count calories or anything, but it’s nice to know that something this tasty isn’t terrible for you. Plus, making them myself means I control the salt and oil, which is way better than buying the pre-packaged stuff at the store.
Conclusion
Look, I know it’s just pumpkin seeds. But these quick chili lime baked pumpkin seeds are something special. They’re the kind of snack that makes you wonder why you ever bought the boring, plain ones from the store. They’re tangy, smoky, a little spicy, and perfectly crunchy. And they come together in 15 minutes flat.
I love that this recipe is flexible. You can make it as spicy or as mild as you want. You can add honey for sweetness or smoked paprika for depth. You can make a big batch for a party or a small batch just for yourself. And no matter what you do, they’re going to be good. They’re going to be the kind of good that makes you reach for “just one more” until the bowl is empty.
So go ahead and give these a try. Carve a pumpkin and save the seeds. Or just grab a bag of raw pepitas from the store—no judgment here. Toss them with some lime and chili, pop them in the oven, and in 15 minutes, you’ll have a snack that’ll make your whole kitchen smell amazing. And when you take that first crunchy, tangy bite? You’ll understand why Lena was so casual about it. Because once you know how easy it is to make something this good, you’ll never go back to store-bought again.
I’d love to hear how yours turn out! Did you add extra cayenne? Try the honey version? Sprinkle them over a salad? Drop a comment below and let me know. And if you’re looking for more quick snack ideas, check out my spicy roasted chickpeas or these garlic herb cashews—they’re just as easy and just as addictive. Happy snacking!
Frequently Asked Questions
Can I use salted pumpkin seeds for this recipe?
You can, but you’ll want to adjust the salt in the recipe. If you’re using salted seeds, skip the salt in the seasoning mix and add it to taste after baking. The seeds might also be a little less crispy because they’ve already been processed. Raw seeds work best.
Why did my pumpkin seeds turn out chewy instead of crunchy?
This usually happens for one of two reasons: either the seeds weren’t dry enough before baking, or they needed more time in the oven. Make sure you pat them really dry after boiling, and spread them in a single layer so they roast instead of steam. If they’re still chewy after 12 minutes, give them 2 more minutes and check again.
Can I make these in a microwave?
I wouldn’t recommend it. The microwave will steam the seeds instead of roasting them, and you’ll end up with soft, chewy seeds that lack the toasty flavor. Stick with the oven or an air fryer for the best results.
How do I get the seasoning to stick better?
The oil and lime juice mixture is what helps the seasoning stick. Make sure you toss the seeds thoroughly so every seed is coated. If you’re still having trouble, try adding a tiny bit more oil—just a teaspoon at a time. You don’t want them greasy, just lightly coated.
Can I use lemon instead of lime?
You can, but the flavor will be different. Lemon is more floral and less tangy than lime, so you’ll end up with chili lemon seeds instead of chili lime. It’s still tasty, but it’s not the same recipe. If you’re out of limes, go for it. Just know that the flavor profile shifts.
Pin This Recipe!
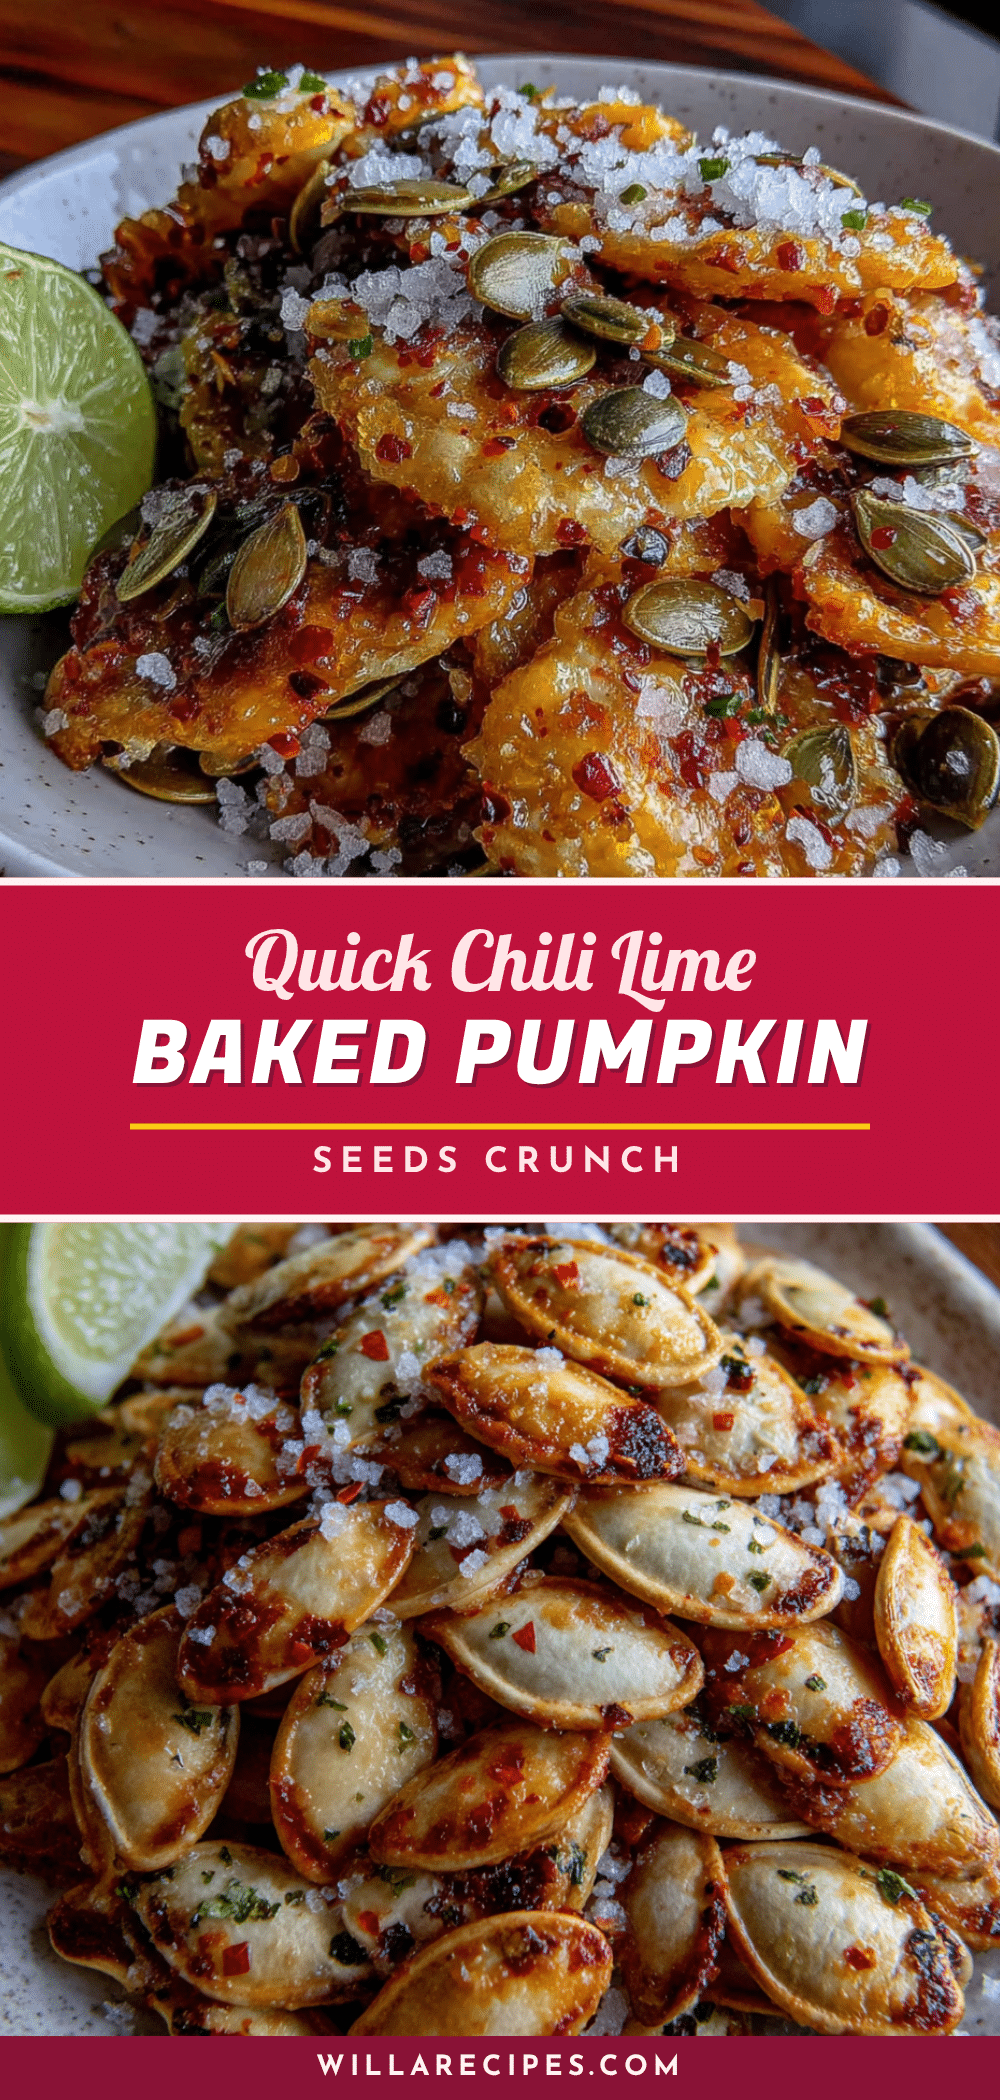
15-Minute Chili Lime Baked Pumpkin Seeds

These quick and easy chili lime baked pumpkin seeds are perfectly crunchy, tangy, and smoky. Ready in just 15 minutes, they make an irresistible snack for any occasion.
- Prep Time: 5 minutes
- Cook Time: 10 minutes
- Total Time: 15 minutes
- Yield: 4 servings 1x
- Category: Snack
- Cuisine: Mexican-inspired
Ingredients
- 1 cup raw pumpkin seeds (unshelled pepitas)
- 1 tablespoon olive oil (or avocado oil)
- 1 tablespoon fresh lime juice (about half a lime)
- 1 teaspoon chili powder
- ½ teaspoon ground cumin
- ½ teaspoon garlic powder
- ½ teaspoon fine sea salt (or to taste)
- ⅛ teaspoon cayenne pepper (optional, for extra heat)
Instructions
- Preheat your oven to 375°F (190°C). Line a baking sheet with parchment paper if desired.
- Rinse the pumpkin seeds in a colander under cold water. If using fresh seeds, remove any pumpkin pulp.
- Place the rinsed seeds in a small saucepan and cover with water. Add ½ teaspoon salt to the water. Bring to a boil over high heat, then reduce to medium and boil for exactly 5 minutes.
- Drain the seeds in a colander or fine-mesh strainer. Spread them on a clean kitchen towel or paper towels and pat dry thoroughly.
- In a small bowl, combine the chili powder, cumin, garlic powder, salt, and cayenne (if using). Stir to mix.
- Place the dried seeds in a medium mixing bowl. Drizzle with olive oil and lime juice. Stir until every seed is coated.
- Sprinkle the seasoning mixture over the oiled seeds and stir vigorously until all seeds are evenly coated.
- Spread the seasoned seeds in a single layer on the prepared baking sheet, ensuring they are not overlapping.
- Bake for 10-12 minutes, stirring halfway through at the 5-minute mark. The seeds should be golden brown and fragrant when done.
- Remove from the oven and let the seeds cool completely on the baking sheet for at least 5-10 minutes before serving. They will crisp up as they cool.
Notes
Don’t skip the boiling step—it ensures the seeds are crunchy all the way through. Dry the seeds thoroughly after boiling to prevent steaming. Watch the oven closely as seeds can burn quickly. Let them cool completely for maximum crunch. Store in an airtight container at room temperature for up to 2 weeks.
Nutrition
- Serving Size: ¼ cup
- Calories: 180
- Sugar: 1
- Sodium: 200
- Fat: 15
- Saturated Fat: 2
- Carbohydrates: 6
- Fiber: 3
- Protein: 8
Keywords: pumpkin seeds, chili lime, baked snack, easy snack, healthy snack, 15-minute recipe, pepitas


