My brother-in-law, Mark, had claimed to hate Oreo truffles for years. “Too sweet,” he’d say, waving a dismissive hand at the dessert table every single Christmas. “They’re just… a mess.” For a solid five years, I believed him. I’d make my other holiday treats—the fudge, the cookies—and leave these off the list, respecting his vocal, annual disdain. Then, last December, I caught him. I had made a test batch of these Holiday White Chocolate Oreo Balls, just for myself, honestly, as a little afternoon pick-me-up while wrapping presents. I stepped away to answer the phone, and when I came back, Mark was standing at the kitchen counter, a guilty look on his face and a crumb on his sweater. He had eaten three. Three! He didn’t even say anything. He just shrugged, grabbed a fourth, and mumbled something about “the white chocolate being different.” That was the moment I knew I had finally cracked the code. This recipe isn’t just easy; it’s the version that converts the skeptics, and it has become my non-negotiable holiday shortcut.
Why You’ll Love This Recipe
Let’s be real for a second. The holidays are chaotic. You have parties to attend, gifts to wrap, and a thousand other things on your to-do list. The last thing you need is a complicated, multi-step dessert that requires a culinary degree. That’s where these Holiday White Chocolate Oreo Balls come in. They are the ultimate stress-free treat, and I say that after years of testing and tweaking.
- Quick & Easy: With just three main ingredients and about 20 minutes of active prep time, these come together faster than you can say “Happy Holidays.” They are perfect for those last-minute cookie exchanges or when you realize you need a hostess gift in an hour.
- Simple Ingredients: No fancy grocery trips or obscure ingredients. You likely have everything in your pantry right now. It’s the kind of recipe you can make on a whim, even in your pajamas.
- Perfect for Gifting: These little balls of joy are the ideal homemade gift. Pop them in a festive tin, and you have a present that looks like you spent hours on it, even though it took you less than thirty minutes.
- Crowd-Pleaser: I have brought these to potlucks, office parties, and family dinners. They disappear every single time. Kids love them, adults sneak them, and even my brother-in-law, the self-proclaimed Oreo ball hater, now asks for them by name.
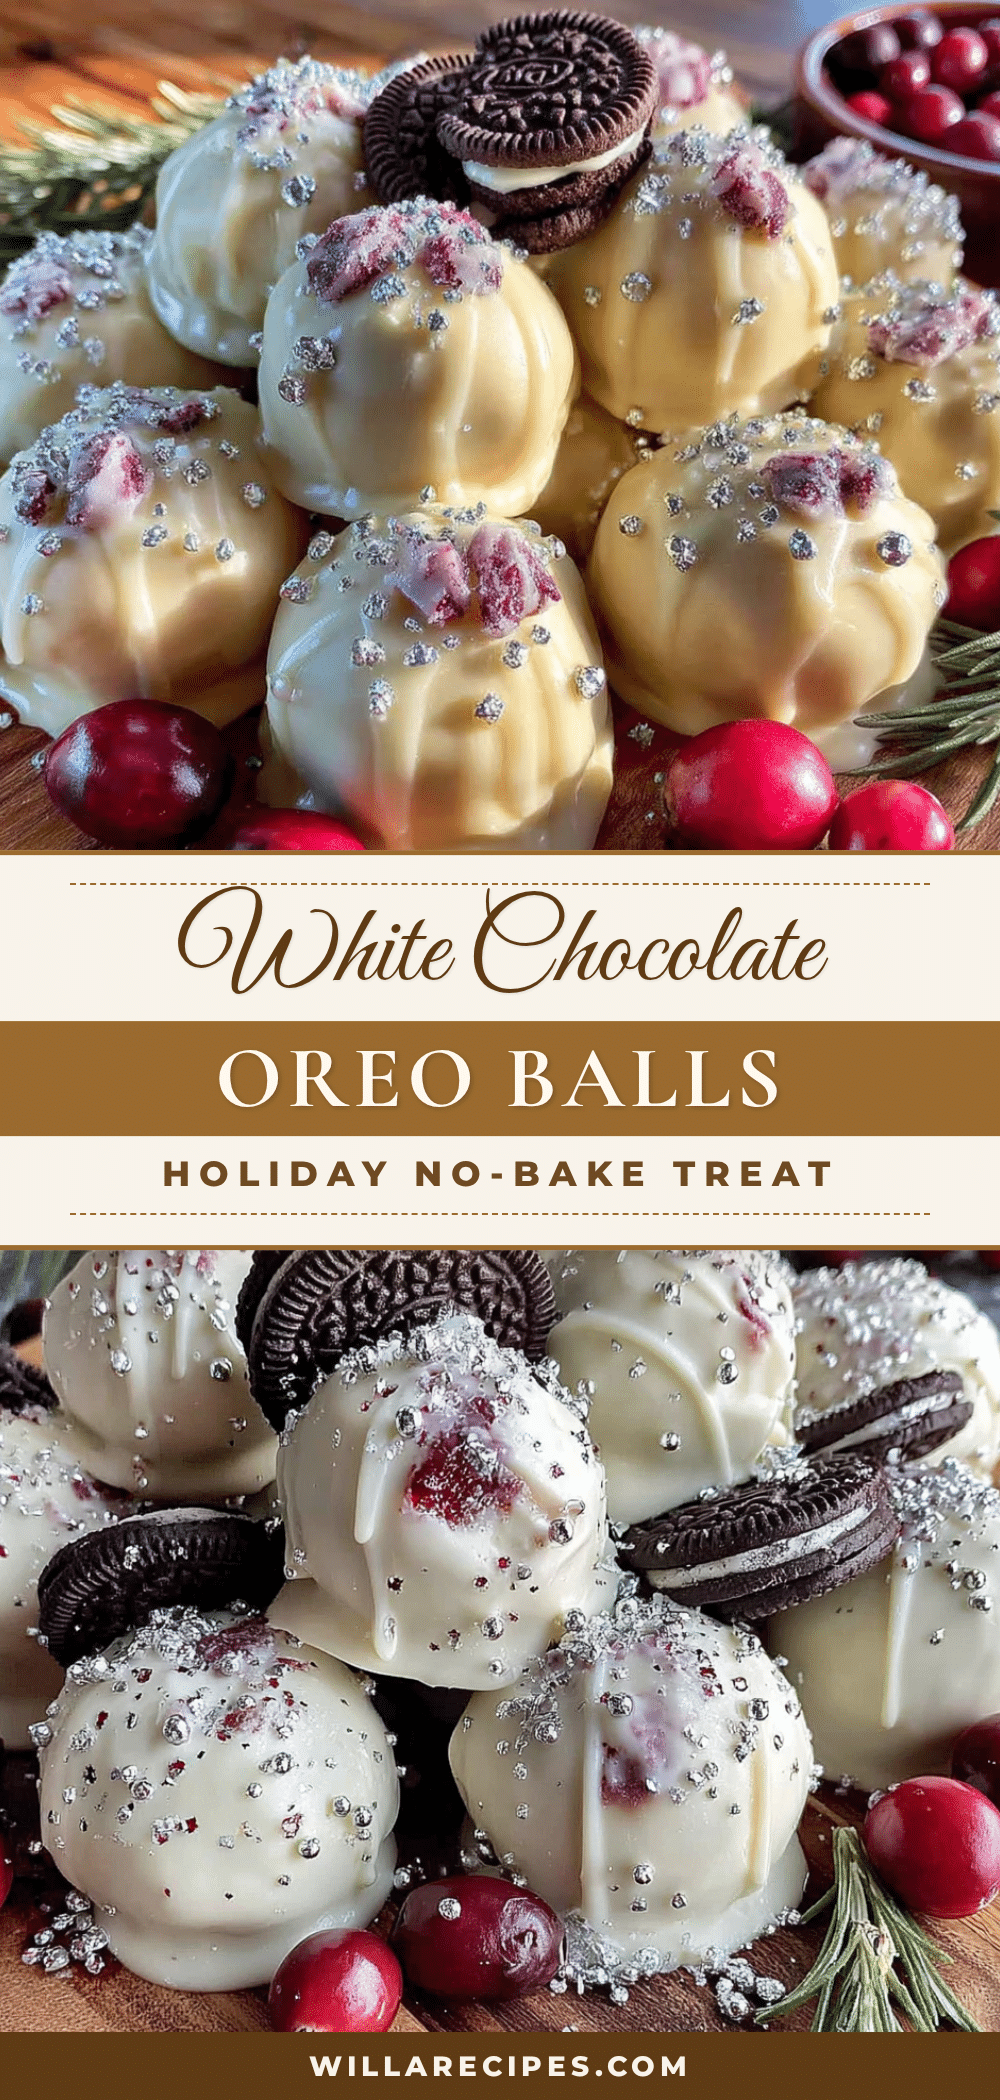
- Unbelievably Delicious: The combination of the dark, crumbly Oreo center with the sweet, creamy white chocolate shell is pure magic. It’s a texture and flavor bomb that feels way more luxurious than it has any right to be.
What makes this version different? It’s the texture. I have a specific technique for crushing the Oreos that avoids that pasty, gluey mess some recipes create. The filling stays light and fudgy, not heavy. Plus, the white chocolate coating is tempered just right—not too thick, not too thin—giving you that perfect snap when you bite into it. This isn’t just another recipe; it’s the one you will come back to year after year.
What Ingredients You Will Need
This recipe uses incredibly simple, pantry-friendly ingredients to deliver a surprisingly sophisticated treat. The magic is all in the proportions and the technique, not a long list of exotic items. You might even have everything you need right now.
- 1 (14.3-ounce) package Oreo cookies (regular, not Double Stuf): This is the foundation. I strongly recommend using the classic, original Oreos. The Double Stuf variety has too much cream filling, which can make your truffle mixture too soft and sticky. You want that perfect 2:1 cookie-to-creme ratio for the best texture. I’ve tested this with generic store brands, and honestly, stick with the name brand for the most reliable results—the cookie crumb texture is just better.
- 8 ounces (226g) cream cheese, softened to room temperature: This is the secret to the fudgy, truffle-like center. Do not skip this, and do not use cold cream cheese. It must be soft so it blends seamlessly into the Oreo crumbs. If you try to mix it cold, you will end up with lumpy balls. Let it sit on the counter for at least 30 minutes. Full-fat cream cheese gives the best flavor and texture, but a block of reduced-fat will work in a pinch (just expect a slightly less rich result).
- 12 ounces (340g) white chocolate melting wafers or high-quality white chocolate chips: This is where the “holiday” magic happens. I prefer using Ghirardelli or Wilton brand white melting wafers. They melt smoothly, require no tempering, and set with a beautiful, glossy finish. Regular white chocolate chips can be finicky—they often contain stabilizers that prevent them from melting into a smooth, dippable consistency. If you only have chips, add a teaspoon of coconut oil or vegetable shortening to help thin them out.
- Optional: Holiday sprinkles, crushed candy canes, or a drizzle of dark chocolate: This is for decoration, but it’s a non-negotiable for the look. The red and green sprinkles instantly make these feel festive. Crushed candy canes add a nice peppermint crunch that contrasts beautifully with the sweet white chocolate.
That’s it. Three core ingredients plus your choice of toppings. It’s a testament to how a few quality components can come together to create something truly special.
Equipment Needed
You don’t need a professional pastry kitchen to make these. A few basic tools you probably already own will do the trick perfectly.
- Food Processor: This is your best friend for this recipe. It turns the Oreos into fine, uniform crumbs in seconds. You can absolutely crush them by hand in a zip-top bag with a rolling pin, but I find it’s harder to get a consistent crumb that way, which can affect the final texture. A food processor is a worthwhile investment for this alone.
- Large Mixing Bowl: For combining your Oreo crumbs and cream cheese. A glass or stainless steel bowl works best.
- Electric Hand Mixer or Stand Mixer: While you can mix by hand with a sturdy spatula, a mixer makes incorporating the cream cheese into the crumbs infinitely easier and faster, resulting in a smoother dough. I’ve definitely done it with just a wooden spoon, but be prepared for a bit of an arm workout.
- Small Cookie Scoop or Melon Baller: This is my secret to perfectly uniform balls. It makes the process so much faster and ensures each truffle is the same size, which means they will chill and dip evenly. If you don’t have one, just use a teaspoon and roll them by hand.
- Baking Sheet and Parchment Paper: For chilling the truffles. The parchment paper is essential so the frozen balls don’t stick.
- Double Boiler or Microwave-Safe Bowl: For melting the white chocolate. A double boiler gives you the most control and prevents scorching, but a microwave is much faster. I use a microwave-safe Pyrex bowl and melt in 30-second bursts.
- Dipping Fork or Two Forks: For coating the truffles in chocolate. A dipping fork is designed for this, but two regular forks work just as well. You use one to lift the ball and the other to help slide it off.
Preparation Method

Okay, let’s get to the fun part. The process is simple, but following these steps carefully is the key to getting that perfect, professional-looking finish. Trust me on this—I’ve learned the hard way.
- Crush the Oreos. Place the entire package of Oreos (filling and all) into the bowl of your food processor. Pulse until you have fine, sand-like crumbs. No large chunks should remain. This should take about 30-45 seconds. If you don’t have a food processor, place the Oreos in a large zip-top bag and crush them with a rolling pin until very fine.
- Mix the filling. Transfer the Oreo crumbs to your large mixing bowl. Add the softened cream cheese. Using your hand mixer on low speed (or a sturdy spatula), beat the mixture until it is completely combined and forms a cohesive, dark dough. It should look like a thick, fudgy paste. Scrape down the sides of the bowl to make sure everything is incorporated. This is the moment where you want to be thorough—no streaks of white cream cheese should remain.
- Roll into balls. Line your baking sheet with parchment paper. Using your cookie scoop or a teaspoon, portion out the Oreo mixture. Roll each portion firmly between your palms into a smooth ball about 1 inch in diameter. This is a great job for sticky hands—keep a small bowl of water nearby to wet your fingers slightly if the mixture starts to stick to you too much. Place the balls on the prepared baking sheet, leaving a little space between each one.
- Chill the truffles. This step is non-negotiable. Place the baking sheet of rolled Oreo balls in the freezer for at least 30 minutes, or in the refrigerator for 1-2 hours. They need to be very firm before dipping. If they are even slightly soft, they will fall apart in the warm white chocolate. I usually pop them in the freezer while I clean up and get the chocolate ready. It’s the perfect timing.
- Melt the white chocolate. Place your white chocolate wafers in a microwave-safe bowl. Microwave in 30-second intervals, stirring thoroughly after each interval, until the chocolate is completely smooth and melted. Be careful not to overheat it—white chocolate burns easily and will become thick and grainy. It should be warm, not hot, to the touch. If it seems too thick, stir in 1 teaspoon of coconut oil or shortening to thin it out.
- Dip the chilled truffles. Remove the Oreo balls from the freezer. Working with one ball at a time, drop it into the melted white chocolate. Use your dipping fork or two forks to gently turn it and coat it completely. Lift the truffle out of the chocolate, letting the excess drip back into the bowl. Gently tap the fork on the edge of the bowl to help remove any excess. Transfer the coated truffle back to the parchment-lined baking sheet.
- Add your toppings immediately. While the white chocolate is still wet, sprinkle your holiday sprinkles or crushed candy canes on top. If you wait even 30 seconds, the chocolate will start to set, and the toppings won’t stick. Work quickly, or do a few balls at a time before adding the sprinkles.
- Set the chocolate. Once all the truffles are dipped and decorated, place the baking sheet back in the refrigerator for about 15-20 minutes, or until the white chocolate is completely firm and set.
Cooking Tips & Techniques
Making these Holiday White Chocolate Oreo Balls is easy, but a few small tricks can make the difference between a good batch and a great one. I’ve made every mistake in the book so you don’t have to.
The Biggest Mistake: Not Chilling Enough. I cannot stress this enough. If you try to dip a room-temperature or even slightly soft Oreo ball into warm chocolate, it will disintegrate. You will end up with a chocolate soup full of Oreo chunks. It’s a sad, messy situation. Always err on the side of chilling them longer. An hour in the freezer is perfect.
The Texture Trap. If your Oreo mixture feels too dry and crumbly when you’re rolling the balls, it means your cream cheese wasn’t soft enough or you need a touch more moisture. Add one teaspoon of milk or heavy cream and mix again. If it’s too sticky and wet, you may have used Double Stuf Oreos or too much cream cheese. Just add a few more crushed Oreo cookies to balance it out.
Melting Chocolate Like a Pro. White chocolate is a diva. It hates moisture and heat. Make sure every tool you use is completely dry—even a drop of water can cause it to seize into a stiff, grainy mess. Also, don’t rush the melting. Low and slow is the way to go. If you see any lumps forming, stop microwaving and stir vigorously. The residual heat will often smooth it out.
My Favorite Multitasking Strategy. I always make the Oreo mixture and roll the balls the night before. I leave them in the freezer overnight. The next day, when I’m ready to assemble, I just melt the chocolate and dip. It breaks the work into two very manageable chunks, which makes the whole process feel effortless. It’s a game-changer for holiday baking.
Variations & Adaptations
One of the best things about this recipe is how easy it is to adapt. You can completely change the flavor profile with a simple swap or two. Here are a few of my favorite ways to mix it up.
- Mint Chocolate Chip: This is my personal favorite holiday twist. Before mixing the Oreo crumbs and cream cheese, add 1/2 teaspoon of peppermint extract to the cream cheese. Then, after dipping in white chocolate, top with crushed candy canes or a sprinkle of green sanding sugar. It tastes just like a Thin Mint, but better.
- Dark Chocolate Lovers: If white chocolate isn’t your thing, swap it out for high-quality dark or semi-sweet chocolate. The bitter notes of the dark chocolate pair incredibly well with the sweet Oreo filling. You can even add a sprinkle of flaky sea salt on top for a sweet-and-salty finish that is absolutely divine.
- Peanut Butter Dream: For a richer, nuttier flavor, replace 2 ounces of the cream cheese with creamy peanut butter. The peanut butter adds a savory depth that balances the sweetness perfectly. Use milk chocolate for the coating, and you have a treat that tastes like a Reese’s peanut butter cup in truffle form.
- Gluten-Free Adaptation: This is an easy fix. Simply use gluten-free Oreo-style cookies. I’ve tested this with the Glutino brand, and it works beautifully. The rest of the ingredients (cream cheese and white chocolate) are naturally gluten-free, so just swap the cookie, and you’re good to go.
- Vegan Version: To make this vegan, use a vegan cream cheese (like Kite Hill or Tofutti) and a vegan Oreo-style cookie. For the coating, look for a dairy-free white chocolate bar or melting wafers. The texture will be slightly different, but the flavor is still incredible.
Serving & Storage Suggestions
These truffles are best served cold, straight from the refrigerator. The firm, fudgy center and the snappy chocolate shell create the perfect texture contrast. I like to arrange them on a festive platter or a tiered cake stand for holiday parties. They look gorgeous just as they are, especially with the colorful sprinkles.
For gifting, place them in a paper-lined tin or a clear cellophane bag tied with a ribbon. They make a stunning and thoughtful homemade present that anyone would be thrilled to receive.
Storage: Store your Holiday White Chocolate Oreo Balls in an airtight container in the refrigerator. They will stay fresh and delicious for up to 2 weeks. I find they actually taste better after a day or two, as the flavors have a chance to meld together.
Freezing: These freeze beautifully! Place the finished, set truffles in a single layer in a freezer-safe container, separating layers with parchment paper. They will keep for up to 3 months. To thaw, simply transfer them to the refrigerator overnight. You can also eat them straight from the freezer—they have a wonderful, almost ice-cream-like texture when frozen.
Reheating: You don’t need to reheat these! Just take them out of the fridge about 5-10 minutes before serving to take the chill off, if you prefer a slightly softer center. But honestly, I love them cold.
Flavor Development: I’ve noticed that the Oreo flavor deepens and the truffle becomes even more fudgy after a day or two in the fridge. So don’t be afraid to make them ahead of time. They are a perfect make-ahead dessert for the busy holiday season.
Nutritional Information & Benefits
Let’s be honest: these are a treat, not a health food. But knowing a little about what’s in them can help you enjoy them mindfully. The following values are estimates for one truffle (based on a batch of 24).
| Nutrient | Amount per Truffle |
|---|---|
| Calories | ~150-180 |
| Total Fat | ~10g |
| Carbohydrates | ~18g |
| Protein | ~2g |
| Sugar | ~14g |
Key Ingredients & Their Benefits: The cream cheese provides a small amount of calcium and protein. The Oreos, well, they provide happiness. The white chocolate contains some calcium and a little bit of iron, but it’s mostly a source of sugar and fat. Moderation is key here!
Dietary Considerations: This recipe is not suitable for vegans or those with dairy allergies without the substitutions mentioned above. It contains gluten (from the Oreos) and is high in sugar. If you are watching your sugar intake, consider making a smaller batch or using a sugar-free white chocolate alternative.
Frequently Asked Questions
Can I use Double Stuf Oreos?
I don’t recommend it. The extra creme filling makes the mixture too soft and sticky, which makes it very difficult to roll into balls and dip without them falling apart. Stick with the regular Oreos for the best texture.
Why did my white chocolate seize up?
White chocolate is very sensitive to heat and moisture. If it seizes (turns into a thick, grainy paste), it likely got too hot or a drop of water got into the bowl. Always melt it slowly in 30-second bursts and make sure all your utensils are bone-dry. If it does seize, you can sometimes save it by stirring in a teaspoon of warm coconut oil or heavy cream, but it’s often best to start over.
Can I make these without a food processor?
Absolutely! Place the Oreos in a large, heavy-duty zip-top bag. Seal it, removing as much air as possible, and crush them with a rolling pin or the bottom of a heavy skillet until you have fine crumbs. It takes a little more elbow grease, but it works perfectly.
How far in advance can I make these?
You can make the entire batch up to 2 weeks in advance if stored in an airtight container in the refrigerator. They also freeze beautifully for up to 3 months. They are the perfect make-ahead holiday dessert.
My truffle mixture is too sticky to roll. What do I do?
If your mixture is too sticky, it likely has too much moisture. This can happen if the cream cheese was too warm or if you used Double Stuf Oreos. Try adding a few more finely crushed Oreo cookies to the mixture, one tablespoon at a time, until it becomes firm enough to roll. Chilling the mixture for 30 minutes before rolling can also help.
Conclusion
These Holiday White Chocolate Oreo Balls are more than just a recipe; they are a little piece of edible holiday magic. They are the perfect blend of simplicity and indulgence, a treat that looks like you fussed but takes almost no time at all. I love that they bring people together, that they convert the skeptics, and that they make the season feel a little bit sweeter without adding any stress.
I really encourage you to make these your own. Play with the toppings, try a different chocolate coating, or add a splash of your favorite extract. The possibilities are endless. When you make them—and I hope you do—I would love to hear about it. Leave a comment below and tell me how they turned out. Did you try a fun variation? Did your brother-in-law eat four of them? Share your story! Happy Holidays, and happy baking!
Pin This Recipe!
Holiday White Chocolate Oreo Balls: Easy 3-Ingredient Recipe

These Holiday White Chocolate Oreo Balls are the ultimate stress-free treat with just three main ingredients and about 20 minutes of active prep time. The combination of the dark, crumbly Oreo center with the sweet, creamy white chocolate shell is pure magic.
- Prep Time: 20 minutes
- Cook Time: 0 minutes
- Total Time: 1 hour 10 minutes (including chilling)
- Yield: 24 servings 1x
- Category: Dessert
- Cuisine: American
Ingredients
- 1 (14.3-ounce) package Oreo cookies (regular, not Double Stuf)
- 8 ounces (226g) cream cheese, softened to room temperature
- 12 ounces (340g) white chocolate melting wafers or high-quality white chocolate chips
- Optional: Holiday sprinkles, crushed candy canes, or a drizzle of dark chocolate
Instructions
- Crush the Oreos: Place the entire package of Oreos (filling and all) into the bowl of your food processor. Pulse until you have fine, sand-like crumbs. No large chunks should remain. This should take about 30-45 seconds.
- Mix the filling: Transfer the Oreo crumbs to your large mixing bowl. Add the softened cream cheese. Using your hand mixer on low speed (or a sturdy spatula), beat the mixture until it is completely combined and forms a cohesive, dark dough. It should look like a thick, fudgy paste. Scrape down the sides of the bowl to make sure everything is incorporated.
- Roll into balls: Line your baking sheet with parchment paper. Using your cookie scoop or a teaspoon, portion out the Oreo mixture. Roll each portion firmly between your palms into a smooth ball about 1 inch in diameter. Place the balls on the prepared baking sheet, leaving a little space between each one.
- Chill the truffles: Place the baking sheet of rolled Oreo balls in the freezer for at least 30 minutes, or in the refrigerator for 1-2 hours. They need to be very firm before dipping.
- Melt the white chocolate: Place your white chocolate wafers in a microwave-safe bowl. Microwave in 30-second intervals, stirring thoroughly after each interval, until the chocolate is completely smooth and melted. Be careful not to overheat it.
- Dip the chilled truffles: Remove the Oreo balls from the freezer. Working with one ball at a time, drop it into the melted white chocolate. Use your dipping fork or two forks to gently turn it and coat it completely. Lift the truffle out of the chocolate, letting the excess drip back into the bowl. Transfer the coated truffle back to the parchment-lined baking sheet.
- Add your toppings immediately: While the white chocolate is still wet, sprinkle your holiday sprinkles or crushed candy canes on top.
- Set the chocolate: Once all the truffles are dipped and decorated, place the baking sheet back in the refrigerator for about 15-20 minutes, or until the white chocolate is completely firm and set.
Notes
Chill the truffles thoroughly before dipping to prevent them from falling apart. White chocolate is sensitive to heat and moisture; melt slowly and ensure all utensils are dry. For best results, use regular Oreos, not Double Stuf. The truffles can be stored in the refrigerator for up to 2 weeks or frozen for up to 3 months.
Nutrition
- Serving Size: 1 truffle
- Calories: 165
- Sugar: 14
- Sodium: 120
- Fat: 10
- Saturated Fat: 6
- Carbohydrates: 18
- Protein: 2
Keywords: Oreo balls, white chocolate Oreo balls, holiday dessert, no-bake dessert, easy truffles, Christmas treats, 3-ingredient recipe


