My neighbor’s daughter, who is maybe eight years old, asked me why I couldn’t just melt white chocolate chips in the microwave instead of using a double boiler. I started to explain why that wouldn’t work—something about seizing and scorching and all the things I’d learned in culinary school. Then I stopped. Honestly, I had no good reason except that I’d been taught to do it the “right” way. So I handed her the bag of chips, set the microwave for thirty seconds, and braced myself for a disaster.
It worked perfectly. Of course it did. The chips melted smooth and glossy without a single lump, and the whole process took about ninety seconds. I stood there holding a rubber spatula, feeling a little silly and a lot impressed. She just shrugged and went back to sorting sprinkles by color on the counter—pink ones in one pile, yellow in another, the tiniest green ones off to the side. That moment, right there, is how this spring sugar cookie fudge recipe was born. Not from a chef’s notebook or a tested formula, but from a kid who didn’t know she wasn’t supposed to try the easy way.
This spring sugar cookie fudge with sprinkles is exactly what it sounds like: a creamy, sweet, melt-in-your-mouth fudge that tastes just like a soft sugar cookie, studded with colorful sprinkles and perfect for all those spring celebrations popping up on the calendar. It comes together in about five minutes of active work, requires no candy thermometer or special equipment, and honestly, it’s the kind of recipe that makes you wonder why you ever did it the hard way. Maybe you’ve been there—standing in your kitchen, holding a whisk, realizing that the simplest method was right in front of you the whole time. That’s this fudge. Simple, straightforward, and absolutely delicious.
Why You’ll Love This Spring Sugar Cookie Fudge
Let me tell you why this spring sugar cookie fudge has become my go-to recipe for everything from Easter brunch to baby showers to “it’s Tuesday and I need something pretty.” I’ve tested this recipe at least seven times—three times for myself, twice for neighbors, once for a church potluck, and once because I accidentally left a batch in the car and had to start over. Each time, it came out perfect. That’s not bragging; that’s just how forgiving this recipe is.
- Quick & Easy: Five minutes of prep time, that’s it. No boiling sugar, no candy thermometer, no stress. You can make this while waiting for coffee to brew.
- Simple Ingredients: You need white chocolate chips, sweetened condensed milk, butter, vanilla extract, almond extract, and sprinkles. That’s six things, and you probably have most of them already.
- Perfect for Spring Celebrations: Easter baskets, spring brunches, bridal showers, garden parties—this fudge fits right in with its pastel sprinkles and cheerful look.
- Crowd-Pleaser: I’ve watched grown adults fight over the last piece at a potluck. Kids love it, grandparents love it, everyone loves it.
- Unbelievably Delicious: The texture is creamy and dense, like a soft sugar cookie in fudge form. The almond extract gives it that classic bakery taste that makes people ask for the recipe.
What makes this version different from other fudge recipes? It’s the combination of melted white chocolate and sweetened condensed milk that creates an ultra-smooth, sliceable texture without any grainy sugar crystals. Plus, the almond extract is my secret weapon—it’s what gives this fudge that unmistakable sugar cookie flavor. I’ve tried making it without, and honestly, it just tastes like sweet white chocolate. The almond extract is non-negotiable.
This recipe isn’t just good—it’s the kind that makes you close your eyes after the first bite. It’s comfort food dressed up in spring colors, perfect for impressing guests without any stress. You’ll look like a hero with almost zero effort.
What Ingredients You Will Need
This spring sugar cookie fudge uses simple, wholesome ingredients to deliver that classic sugar cookie taste in a creamy, sliceable form. Most of these are pantry staples, though you might need to grab the almond extract if you don’t keep it on hand. Here’s what you’ll need:
For the Fudge Base
- 3 cups (510g) white chocolate chips – I prefer Ghirardelli or Guittard for the smoothest melt. Avoid white chips labeled “white morsels” as they often contain stabilizers that don’t melt as well.
- 1 can (14 ounces or 397g) sweetened condensed milk – This is the key to the creamy texture. Don’t substitute evaporated milk; they’re not the same thing.
- 2 tablespoons (28g) unsalted butter – Adds richness and helps the fudge set up with a silky texture. Use salted butter if that’s all you have, just reduce any added salt.
- 1 teaspoon vanilla extract – Pure vanilla extract gives the best flavor, but imitation vanilla works in a pinch.
- ½ teaspoon almond extract – This is the magic ingredient that makes it taste like a sugar cookie. Don’t skip it.
- ⅓ cup (about 60g) spring-colored sprinkles – Use jimmies or confetti sprinkles, not nonpareils (the tiny round ones), as those can bleed color into the fudge.
Optional Add-Ins
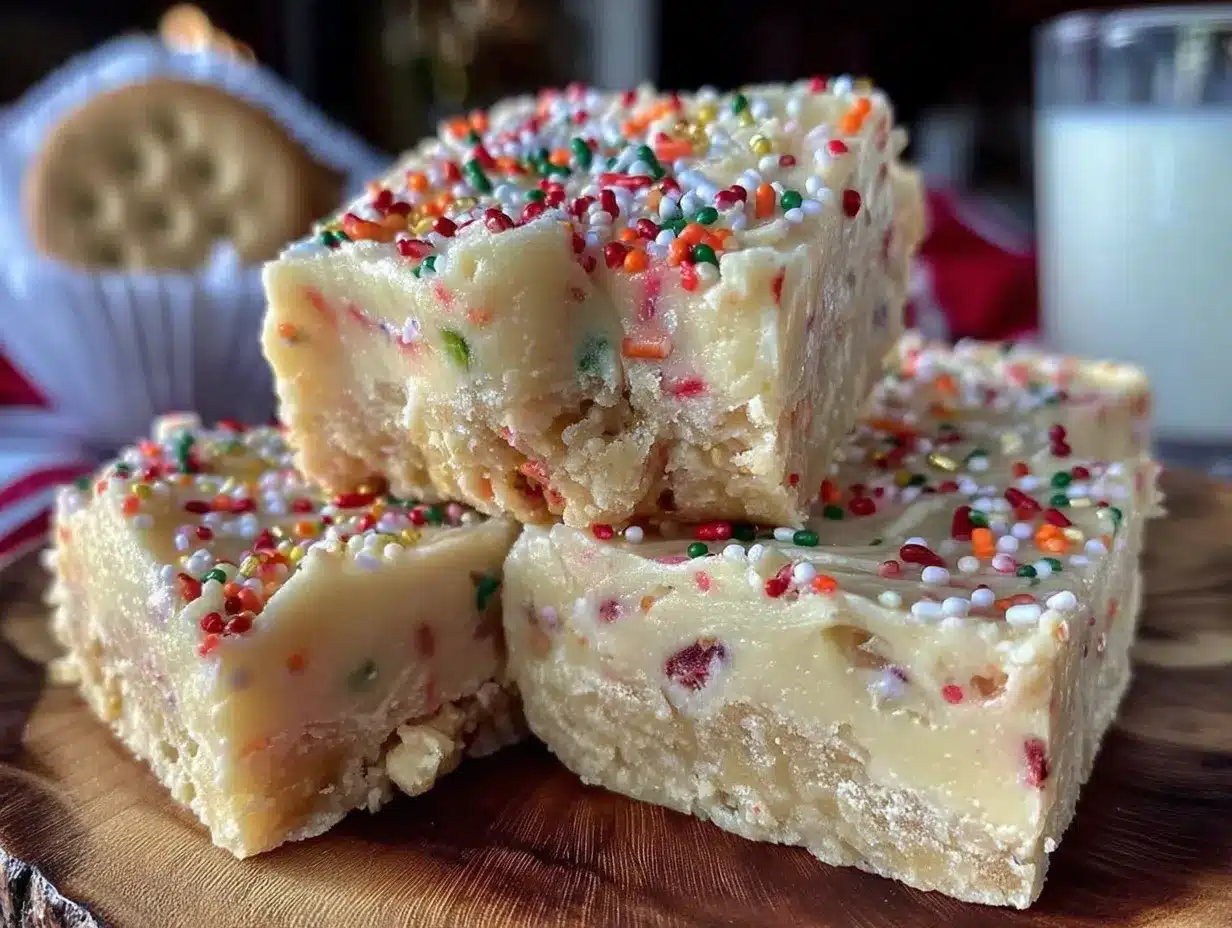
- Additional sprinkles for topping – Press a few extra sprinkles on top before the fudge sets for a prettier presentation.
- Pinch of salt – A tiny pinch of flaky sea salt on top can balance the sweetness if you like that sweet-salty combo.
Ingredient Selection Tips: For the best texture, look for white chocolate chips that list cocoa butter as an ingredient, not just palm oil or vegetable fats. The quality of your white chocolate directly affects how smooth your fudge turns out. I’ve learned this the hard way—cheap white chocolate chips can turn grainy when melted.
Substitution Guidance: For a dairy-free version, use dairy-free white chocolate chips and sweetened condensed coconut milk. The texture will be slightly softer but still delicious. For a gluten-free option, just check your sprinkles label—most are gluten-free, but some brands use wheat starch as a binder.
Equipment Needed
You don’t need much for this spring sugar cookie fudge, which is part of why I love it so much. Here’s what you’ll need:
- Microwave-safe mixing bowl – A large glass or ceramic bowl works best. I use a 4-cup Pyrex measuring cup because the spout makes pouring easier.
- Rubber spatula – For stirring and scraping every last bit of fudge into the pan. A silicone spatula is ideal because it won’t scratch your bowl.
- 8×8-inch baking pan – This is the perfect size for a thick, sliceable fudge. If you only have a 9×9-inch pan, your fudge will be thinner but still delicious.
- Parchment paper – Line your pan with parchment paper, leaving some overhang on two sides. This makes lifting the fudge out so much easier.
- Sharp knife – For cutting clean slices once the fudge is set. A chef’s knife or a long serrated knife both work well.
Budget-Friendly Alternatives: If you don’t have an 8×8-inch pan, a loaf pan works too—your fudge will just be thicker and take a bit longer to set. No microwave? Use a double boiler on the stovetop over low heat. It takes a few minutes longer but works just as well.
Personal Experience: I once tried making this in a metal bowl in the microwave, and the bowl got way too hot to handle. Stick with glass or ceramic—trust me on this one. Also, don’t skip the parchment paper. I thought I could just grease the pan, and spent fifteen minutes wrestling the fudge out with a butter knife. Lesson learned.
Preparation Method
This spring sugar cookie fudge comes together in about five minutes of active work, plus a couple of hours for setting. Let me walk you through it step by step.
- Prepare your pan. Line an 8×8-inch baking pan with parchment paper, leaving about 2 inches of overhang on two opposite sides. This creates little handles that make lifting the fudge out super easy later. Set the pan aside.
- Combine the base ingredients. In a large microwave-safe bowl, add the white chocolate chips, sweetened condensed milk, and butter. Don’t stir yet—just pile everything in there together. The butter can be cold from the fridge; it’ll melt fine.
- Melt in the microwave. Microwave the mixture in 30-second intervals, stirring well after each interval. This usually takes about 90 seconds total—three rounds of 30 seconds. After the first interval, the chips will look mostly unmelted, but keep stirring. After the second interval, the mixture will start coming together. After the third, stir until completely smooth. Important: Don’t overheat! If the mixture starts to bubble or look greasy, you’ve gone too far. Stop microwaving as soon as most of the chips are melted and stir until the residual heat finishes the job.
- Add the flavorings. Stir in the vanilla extract and almond extract until fully incorporated. The mixture will smell amazing at this point—like sugar cookie batter, honestly. Give it a taste if you want (careful, it’s hot!). This is your chance to adjust if you want a stronger almond flavor, though I find ½ teaspoon is just right.
- Fold in the sprinkles. Gently fold in the spring-colored sprinkles using your rubber spatula. Don’t overmix, or the colors might start to bleed. A few folds until they’re evenly distributed is perfect. If you want to reserve some sprinkles for the top, set aside about a tablespoon before folding.
- Pour into the pan. Scrape the fudge mixture into your prepared pan. Use the spatula to spread it evenly into all corners. It will be thick and slightly sticky—that’s normal. If you reserved sprinkles for the top, sprinkle them on now and gently press them in with your fingers or the back of a spoon.
- Smooth the top. For a perfectly smooth top, lay a piece of parchment paper over the fudge and gently press down with your hands or a flat-bottomed measuring cup. Then peel off the parchment carefully. This step is optional but gives you a beautiful, even surface.
- Chill until set. Place the pan in the refrigerator for at least 2 hours, or until the fudge is firm to the touch. If you’re in a hurry, 1 hour in the freezer works too—just check it after 45 minutes. The fudge should be solid and easy to lift out of the pan.
- Slice and serve. Once set, lift the fudge out of the pan using the parchment overhang. Place it on a cutting board and use a sharp knife to cut into squares. For clean cuts, wipe the knife clean between slices. I usually cut mine into 1-inch squares, which gives about 64 pieces from one batch.
Sensory Cue: When you stir the melted mixture, it should be thick and glossy, like warm caramel sauce. If it looks thin or oily, you might have overheated it. The fudge should smell sweet and buttery with that distinct almond note—that’s how you know you’ve nailed it.
Cooking Tips & Techniques
After making this spring sugar cookie fudge more times than I care to count, I’ve picked up a few tricks that make a real difference. Let me share them with you.
Don’t overheat the white chocolate. This is the number one mistake people make. White chocolate is more delicate than dark or milk chocolate because it contains milk solids that can scorch easily. If you see any brown specks in your melted mixture, you’ve burned it. Always microwave in short bursts and stir thoroughly between each one. The residual heat will melt any remaining chips.
Room temperature ingredients aren’t necessary. Unlike baking cookies or cakes, this fudge recipe doesn’t require your ingredients to be at room temperature. Cold butter works fine because it melts completely. This makes the recipe even more forgiving and quick—you can literally pull everything straight from the fridge and start.
Let the fudge set properly. I know it’s tempting to cut into it after an hour, but patience pays off here. Fully set fudge cuts cleanly and has that perfect creamy texture. If you slice it too early, it will be soft and sticky, and the pieces won’t hold their shape. Two hours in the fridge is the minimum; overnight is even better.
Use a hot knife for cleaner cuts. Run your knife under hot water, dry it off, then slice. The heat helps the knife glide through the fudge without sticking or cracking. Wipe the blade clean between each cut for the prettiest squares.
My biggest failure: The first time I made this, I used rainbow sprinkles from a generic brand, and they bled purple and blue streaks into my beautiful white fudge. It looked like a tie-dye disaster. Now I always use high-quality sprinkles—the kind that are colored with natural dyes and hold their shape when mixed into warm mixtures. Wilton and Sweetapolita are my go-to brands.
Variations & Adaptations
This spring sugar cookie fudge is wonderfully adaptable. Here are some of my favorite variations:
Seasonal Variations
- Easter Version: Use pastel sprinkles in pink, yellow, lavender, and mint green. Top with mini Cadbury eggs or pastel M&Ms for extra crunch.
- Summer Version: Swap the spring sprinkles for red, white, and blue jimmies for the Fourth of July. Add a drop of lemon extract along with the vanilla for a citrusy twist.
- Christmas Version: Use red and green sprinkles and add ½ teaspoon of peppermint extract instead of almond extract. Crush a candy cane on top for festive flair.
Dietary Adaptations
- Dairy-Free: Use dairy-free white chocolate chips (Enjoy Life makes a good one) and sweetened condensed coconut milk. The texture will be slightly softer, so chill for an extra hour.
- Lower Sugar: Use sugar-free white chocolate chips and a can of reduced-sugar sweetened condensed milk. The texture will be a bit less creamy, but it still satisfies that sweet craving.
- Gluten-Free: Most white chocolate chips and sweetened condensed milk are naturally gluten-free. Just double-check your sprinkles label—some brands use wheat as an anti-caking agent.
Flavor Twists
- Birthday Cake Fudge: Add 2 tablespoons of funfetti cake mix (dry) along with the sprinkles for an extra bakery flavor. I tried this on a whim for my niece’s birthday, and it was a huge hit.
- Lemon Sugar Cookie Fudge: Replace the almond extract with 1 teaspoon of lemon extract and add 1 tablespoon of lemon zest. The bright citrus flavor is perfect for spring.
- Cookies and Cream: Crush 6-8 Oreos and fold them in along with the sprinkles. The chocolate bits contrast beautifully with the white fudge.
Serving & Storage Suggestions
This spring sugar cookie fudge is best served chilled or at room temperature, depending on your preference. I like it straight from the fridge because the texture is firmer and almost fudge-like, but my husband prefers it at room temperature where it’s softer and creamier. Try both and see which you like.
Presentation Ideas: Arrange the fudge squares on a white platter or cake stand for a beautiful spring display. For gift-giving, stack 5-6 pieces in a small cellophane bag tied with a pastel ribbon. It makes a lovely hostess gift or Easter basket addition.
Complementary Dishes: This fudge pairs beautifully with fresh strawberries, a cup of hot tea, or a tall glass of cold milk. For a dessert board, arrange the fudge alongside fresh berries, shortbread cookies, and chocolate-covered pretzels for a sweet and salty combo.
Storage Instructions: Store leftover fudge in an airtight container in the refrigerator for up to 2 weeks. Layer pieces between sheets of parchment paper to prevent sticking. If your kitchen is warm, keep the fudge refrigerated until just before serving to maintain its shape.
Freezing Instructions: This fudge freezes beautifully! Place the squares in a single layer on a baking sheet and freeze for 1 hour, then transfer to a freezer-safe container or zip-top bag. It will keep for up to 3 months. Thaw in the refrigerator overnight before serving.
Flavor Development: The flavors actually deepen after a day or two in the fridge. The almond extract mellows out and blends with the vanilla, creating an even more authentic sugar cookie taste. I honestly think day-old fudge is better than fresh—if you can wait that long.
Nutritional Information & Benefits
Let’s be real—this spring sugar cookie fudge is a treat, not a health food. But here’s the estimated nutritional information for one 1-inch square (based on 64 pieces per batch):
| Nutrient | Amount Per Serving |
|---|---|
| Calories | 85 |
| Total Fat | 4.5g |
| Saturated Fat | 3g |
| Cholesterol | 8mg |
| Sodium | 25mg |
| Total Carbohydrates | 11g |
| Sugars | 10g |
| Protein | 1g |
Health Benefits of Key Ingredients: White chocolate contains calcium and a small amount of antioxidants from cocoa butter. Sweetened condensed milk provides calcium and vitamin D. And honestly? Sometimes the best thing for your mental health is a little square of something sweet and pretty. This fudge brings joy, and that counts for something.
Dietary Considerations: This recipe contains dairy and may contain gluten depending on your sprinkle choice. It is not suitable for vegans unless you use the dairy-free adaptations mentioned above. Each serving is small enough to fit into most balanced diets as an occasional treat.
Conclusion
This spring sugar cookie fudge with sprinkles is one of those recipes that proves simple can be spectacular. It takes five minutes, uses basic ingredients, and delivers that nostalgic sugar cookie taste in a creamy, sliceable form that’s perfect for spring celebrations. Whether you’re making it for Easter, a baby shower, or just because you want something pretty and delicious on your counter, this fudge delivers every time.
I love this recipe because it reminds me that sometimes the best methods are the simplest ones. That little girl who asked me to microwave the chocolate chips? She was right. And now every time I make this fudge, I think of her standing there sorting sprinkles, completely confident that her way would work. I hope this recipe brings you that same kind of joyful confidence in your kitchen.
I’d love to hear how yours turns out! Leave a comment below with your favorite sprinkle combination or any twists you tried. Did you add lemon zest? Use different colored sprinkles for a holiday? Share your creations—I read every comment and honestly, your ideas often inspire my next batch. Happy spring cooking, friends!
Frequently Asked Questions
Can I use white chocolate bars instead of chips?
Yes, absolutely! Chop the white chocolate into small, even pieces so they melt uniformly. Use about 17 ounces (480g) of chopped white chocolate to replace the 3 cups of chips. The texture will be even creamier since high-quality white chocolate bars often have more cocoa butter.
Why did my fudge turn out grainy?
Grainy fudge usually happens when the white chocolate overheats or when moisture gets into the mixture. Make sure your bowl and utensils are completely dry, and microwave in short bursts. If your fudge is already grainy, you can try melting it again with a tablespoon of vegetable oil and re-chilling, though the texture won’t be quite as smooth.
How long does this fudge last?
Stored in an airtight container in the refrigerator, this fudge stays fresh for up to 2 weeks. It also freezes beautifully for up to 3 months. Just make sure the container is well-sealed to prevent the fudge from absorbing other flavors from your fridge or freezer.
Can I make this without a microwave?
Definitely! Use a double boiler or a heatproof bowl set over a pot of simmering water. Stir the white chocolate chips, sweetened condensed milk, and butter together until melted and smooth. This method takes about 5-7 minutes and gives you more control over the heat, making it harder to scorch the chocolate.
What if I don’t have almond extract?
You can substitute the almond extract with an equal amount of vanilla extract or butter extract. The fudge will still taste delicious, but it won’t have that distinct sugar cookie flavor. If you want to mimic the bakery taste, add ¼ teaspoon of vanilla bean paste along with the vanilla extract for extra depth.
Pin This Recipe!
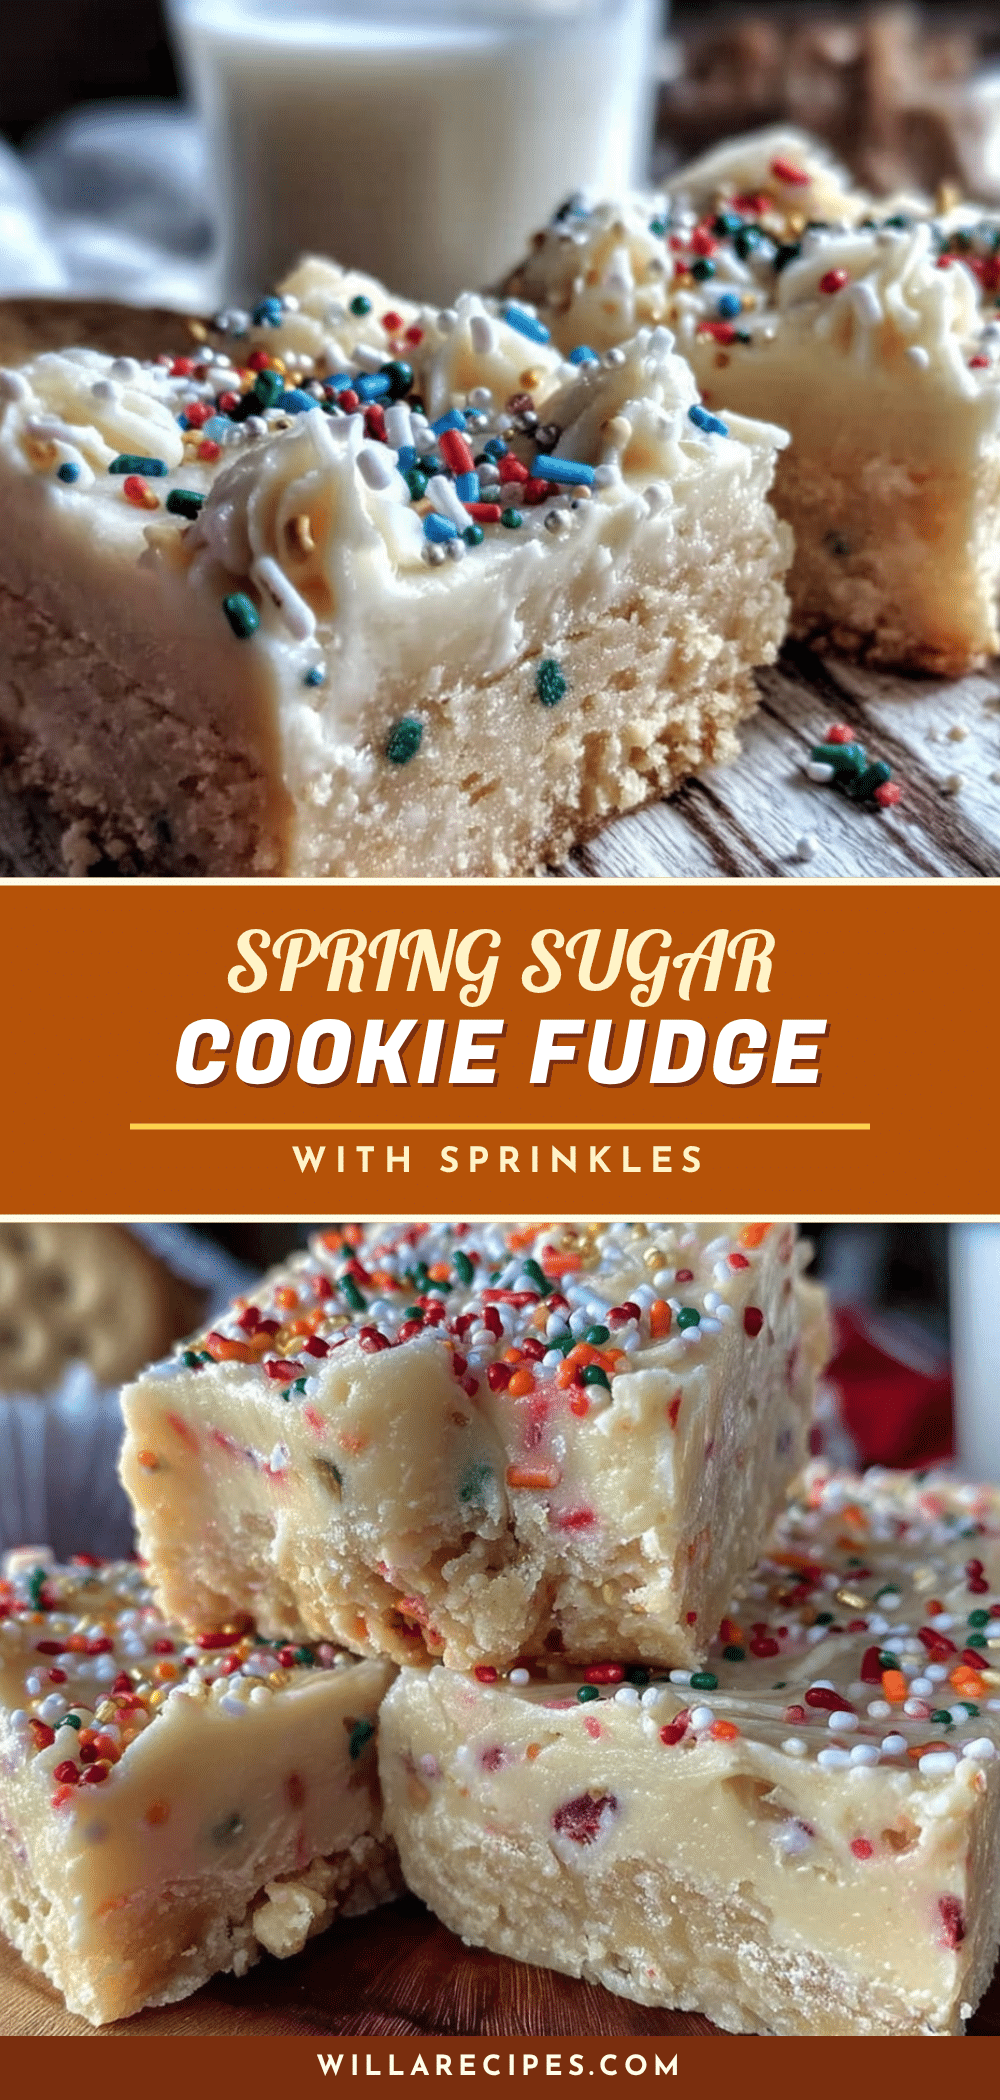
Spring Sugar Cookie Fudge: Easy 5-Minute Recipe

A creamy, sweet, melt-in-your-mouth fudge that tastes just like a soft sugar cookie, studded with colorful sprinkles and perfect for spring celebrations. It comes together in about five minutes of active work with no candy thermometer or special equipment.
- Prep Time: 5 minutes
- Cook Time: 2 hours (chilling time)
- Total Time: 2 hours 5 minutes
- Yield: 64 servings 1x
- Category: Dessert
- Cuisine: American
Ingredients
- 3 cups (510g) white chocolate chips
- 1 can (14 ounces or 397g) sweetened condensed milk
- 2 tablespoons (28g) unsalted butter
- 1 teaspoon vanilla extract
- ½ teaspoon almond extract
- ⅓ cup (about 60g) spring-colored sprinkles
- Additional sprinkles for topping (optional)
- Pinch of flaky sea salt (optional)
Instructions
- Line an 8×8-inch baking pan with parchment paper, leaving about 2 inches of overhang on two opposite sides. Set aside.
- In a large microwave-safe bowl, combine white chocolate chips, sweetened condensed milk, and butter.
- Microwave in 30-second intervals, stirring well after each, until melted and smooth (about 90 seconds total). Do not overheat.
- Stir in vanilla extract and almond extract until fully incorporated.
- Gently fold in spring-colored sprinkles until evenly distributed. Reserve some sprinkles for topping if desired.
- Pour mixture into prepared pan and spread evenly. If using reserved sprinkles, sprinkle on top and gently press in.
- For a smooth top, lay a piece of parchment over the fudge and press gently with a flat-bottomed measuring cup, then peel off.
- Refrigerate for at least 2 hours, or until firm.
- Lift fudge out using parchment overhang, place on cutting board, and cut into 1-inch squares with a sharp knife. Wipe knife clean between cuts.
Notes
Don’t overheat white chocolate; microwave in short bursts. Use high-quality sprinkles to prevent color bleeding. For clean cuts, use a hot knife. Fudge can be stored in the refrigerator for up to 2 weeks or frozen for up to 3 months.
Nutrition
- Serving Size: 1 square (1-inch)
- Calories: 85
- Sugar: 10
- Sodium: 25
- Fat: 4.5
- Saturated Fat: 3
- Carbohydrates: 11
- Protein: 1
Keywords: spring sugar cookie fudge, easy fudge recipe, 5-minute fudge, white chocolate fudge, sprinkle fudge, Easter fudge, no-bake dessert


