It was 10:47 PM on a very ordinary Tuesday, and I had a sudden, almost aggressive craving for stuffing. Not the kind you wait all year for at Thanksgiving—I wanted it then, and I wanted it with the kind of crispy edges and deep, nutty flavor that only comes from brown butter. The problem? My pantry was a sad landscape of half-empty bags and forgotten odds and ends. I didn’t have the fancy loaf of brioche a normal stuffing recipe would call for, but I had a slightly stale sourdough boule that was past its prime and a stick of butter that was begging to be pushed past its usual limits. The idea that arrived, somewhere between the second and third yawn, was simple: brown the butter first, let the sage get crispy in it, and use that glorious, nutty fat to soak into every single crumb of that sourdough. It felt a little reckless—a weeknight stuffing experiment at nearly 11 PM—but honestly, those late-night kitchen adventures often turn out to be the best ones.
I mean, let me tell you, the smell alone was worth the late hour. That butter, foaming and turning the color of hazelnuts, with fresh sage leaves crackling in the pan—it filled my tiny kitchen with something that felt deeply comforting. I made a bit of a mess, of course. There were butter splatters on the stove, and I definitely used a spatula that I had to wash mid-process because I forgot I needed it for the next step. You know that feeling when you’re cooking on autopilot, and your brain is half asleep, but your hands just know what to do? That was this recipe. It came together in the time it takes to listen to three songs, and when I pulled that baking dish out of the oven, the top was golden and craggy, and the edges were all dark and crunchy. It was a late-night victory, and it completely changed how I think about stuffing.
Why You’ll Love This Recipe
This isn’t just another stuffing recipe you’ll bookmark and forget about. This is the one that will earn a permanent spot in your weeknight dinner rotation, and here’s exactly why it works so hard for you:
- Quick & Easy: From start to finish, this comes together in about 45 minutes. No overnight drying of bread, no complicated steps—just one skillet and a baking dish. It’s perfect for a busy Tuesday when you want something that feels special without the all-day commitment.
- Simple Ingredients: You likely have sourdough bread sitting on your counter, a stick of butter in the fridge, and some sage in your crisper drawer. There’s no long list of specialty items here. It’s pantry-friendly cooking at its finest.
- Perfect for Weeknights & Holidays: I’ve made this for a random Wednesday dinner alongside roast chicken, and I’ve also doubled it for a Friendsgiving potluck. It’s versatile enough for a casual meal yet impressive enough for a celebration.
- Crowd-Pleaser: The nutty, savory flavor of brown butter combined with the earthy sage and chewy sourdough is a combination that gets rave reviews from everyone. I’ve watched people go back for thirds, scraping the crispy bits from the corners of the dish.
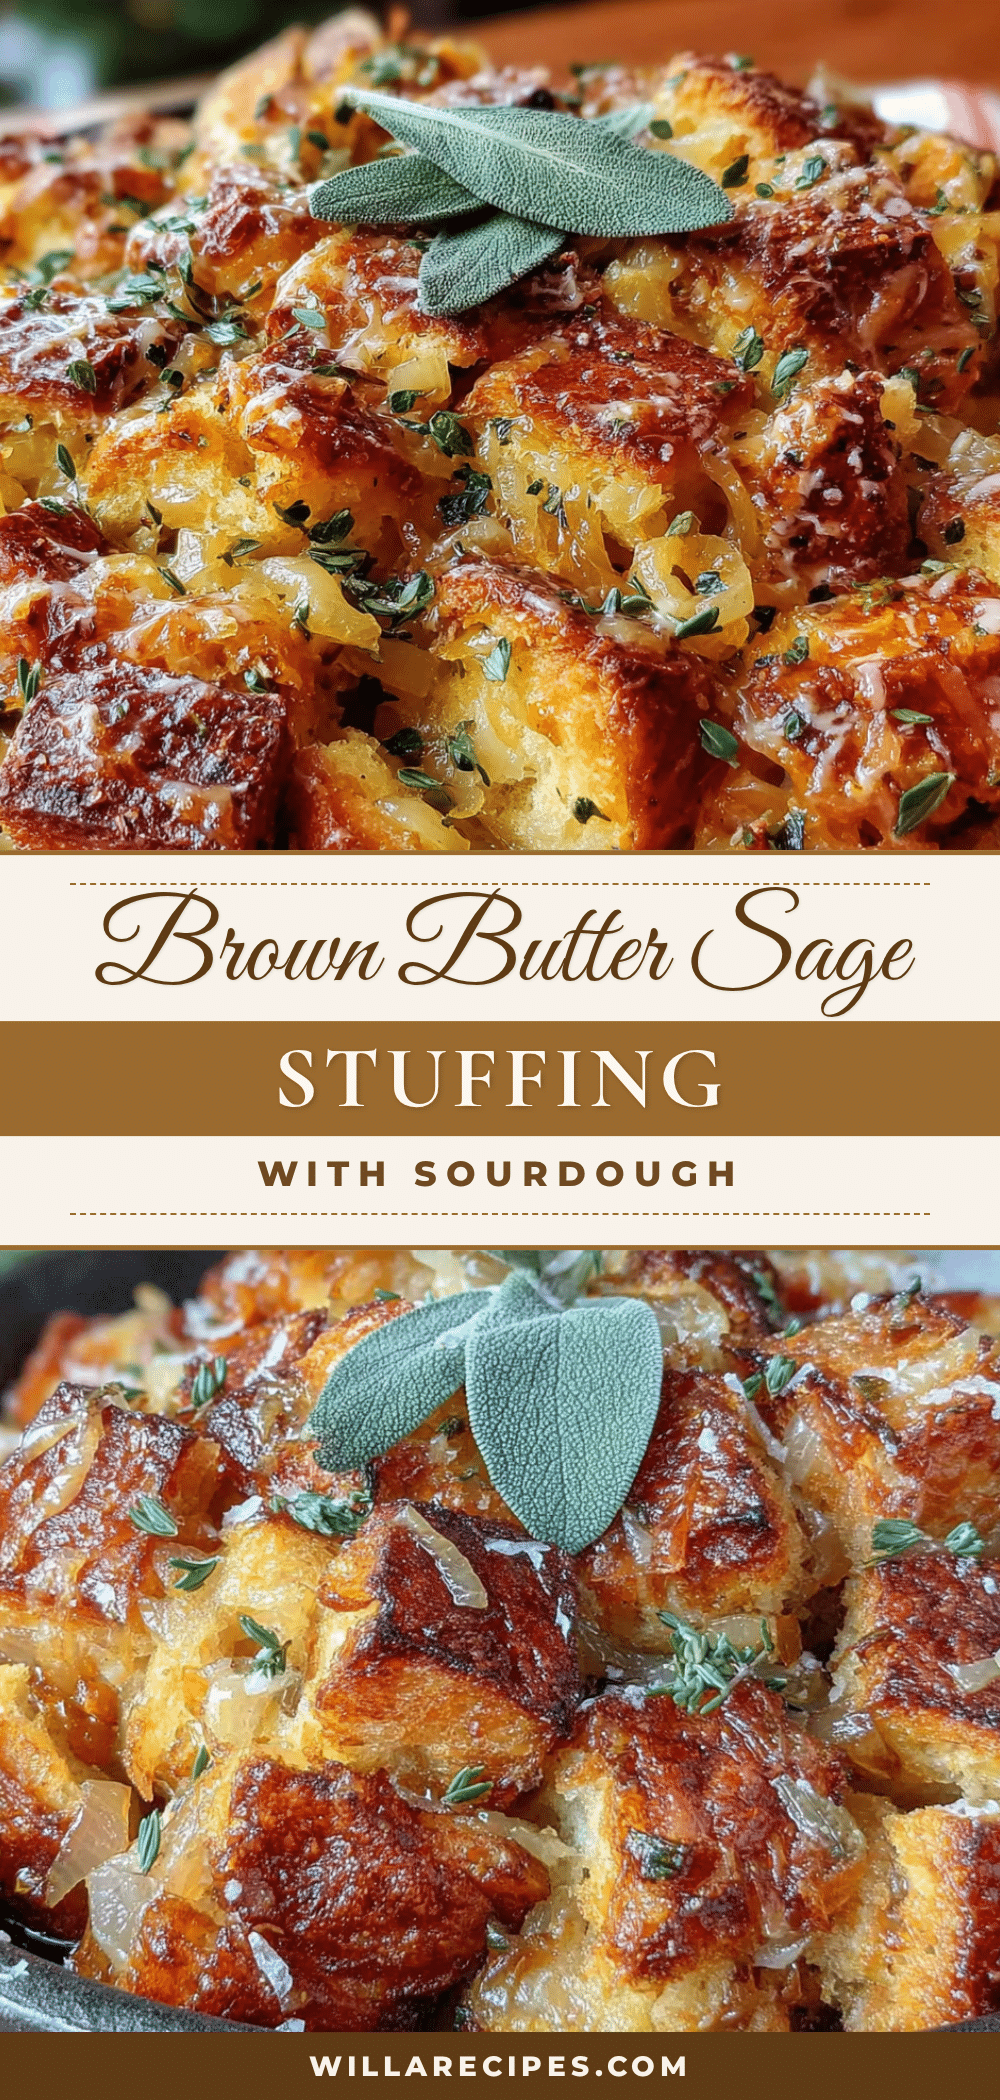
- Unbelievably Delicious: The texture is what gets me every time. The sourdough holds its shape beautifully—chewy on the inside, shatteringly crisp on the top and edges. The brown butter adds a depth of flavor that makes you wonder why you ever made stuffing any other way.
What makes this recipe different from the rest is the technique. Most stuffing recipes rely on stale bread and a simple pour of melted butter. By browning the butter first, you’re unlocking a whole new layer of flavor—nutty, toasty, almost caramel-like—that infuses every single cube of bread. It’s not just another version of stuffing; it’s the best version, born from a late-night craving and a willingness to break the rules a little.
What Ingredients You Will Need
This recipe uses simple, honest ingredients to create something truly special. You don’t need a grocery store run or a specialty shop—just a few key players that work together beautifully.
- Sourdough bread, cut into 1-inch cubes (about 8 cups): I use a standard sourdough boule from the bakery section. Day-old or slightly stale bread works best here because it holds its shape and soaks up the butter without turning to mush. If your bread is fresh, spread the cubes on a baking sheet and let them sit out for an hour or two to dry out a bit.
- Unsalted butter (6 tablespoons): This is the star of the show. I prefer unsalted so I can control the salt level. The browning process is where the magic happens—the milk solids toast and turn golden, creating that signature nutty flavor. I recommend using a good-quality butter like Kerrygold for the richest result.
- Fresh sage leaves (about 15-20 leaves): Fresh sage is non-negotiable here. Dried sage just doesn’t have the same aromatic punch. You’ll use some of the leaves whole for browning in the butter, and you’ll chop the rest to fold into the stuffing. Look for leaves that are vibrant green and fragrant—that’s the sign of freshness.
- Yellow onion, diced (1 medium): A standard yellow onion provides the savory backbone. It softens and sweetens as it cooks, blending seamlessly with the brown butter. You could use a sweet onion if you prefer a milder flavor.
- Celery stalks, diced (2 large): Celery adds that classic stuffing crunch and a subtle freshness. Make sure to dice it into small, even pieces so it cooks through properly without being crunchy in the final dish.
- Low-sodium chicken or vegetable broth (1 ½ cups): This provides the moisture that brings everything together. Low-sodium is key here because you’ll be adding salt separately, and you want to control the final seasoning. I’ve used both chicken and vegetable broth with great results—use whatever you have on hand.
- Large eggs, lightly beaten (2): The eggs act as a binder, helping the stuffing hold together rather than falling apart into a pile of loose bread cubes. Make sure they’re lightly beaten before you add them so they incorporate evenly.
- Salt and freshly ground black pepper (to taste): Don’t be shy with the seasoning. Bread loves salt, and the black pepper adds a gentle warmth that complements the sage. I start with ½ teaspoon of salt and ¼ teaspoon of pepper, then adjust at the end.
Ingredient Selection Tip: If you can find it, look for a sourdough with a good crust—the chewier the better. The crust adds wonderful texture and helps the bread cubes hold their shape during baking. For the sage, avoid any leaves that look wilted or have dark spots. Fresh, vibrant sage makes all the difference.
Equipment Needed
You don’t need a fancy kitchen to pull this off. Here’s what you’ll need, along with a few tips I’ve learned from making this recipe more times than I can count.
- Large skillet or sauté pan: A 10- or 12-inch skillet is perfect for browning the butter and sautéing the aromatics. I prefer a stainless steel or light-colored pan because it makes it easier to see when the butter turns that perfect golden-brown color. If all you have is non-stick, that works too—just keep a close eye on the color.
- Large mixing bowl: You’ll need a big bowl to toss the bread cubes with the butter mixture and broth. A standard 4-quart mixing bowl does the job nicely.
- 9×13-inch baking dish: This is the perfect size for a single batch of stuffing. It allows for plenty of surface area, which means more crispy edges—and honestly, those crispy edges are the best part. A glass or ceramic dish works well.
- Wooden spoon or spatula: For stirring the butter as it browns and for mixing everything together. A wooden spoon is gentle on your pans and gives you good control.
- Chef’s knife and cutting board: For dicing the onion, celery, and chopping the sage. A sharp knife makes the prep work go much faster.
- Measuring cups and spoons: Accurate measurements matter here, especially for the broth and butter. I use dry measuring cups for the bread cubes and liquid measuring cups for the broth.
Budget-Friendly Tip: If you don’t have a 9×13-inch baking dish, you can use a large cast-iron skillet instead. The cast iron holds heat beautifully and gives you even more crispy edges. Just make sure it’s at least 10 inches in diameter.
Preparation Method

Let’s get into the nitty-gritty. This recipe moves quickly, so I recommend reading through the steps once before you start. Trust me—it makes everything smoother.
- Preheat your oven to 375°F (190°C). Position a rack in the middle of the oven. While the oven heats, spread your sourdough cubes on a large baking sheet in a single layer. If your bread is fresh, let it dry out in the oven for about 5-7 minutes while it preheats. If it’s already stale, skip this step. You want the cubes to be dry but not toasted all the way through.
- Brown the butter. Place your large skillet over medium heat and add the 6 tablespoons of unsalted butter. Let it melt completely, swirling the pan occasionally. Once melted, the butter will begin to foam and bubble. This is normal—don’t panic. Keep a close eye on it. After about 3-4 minutes, the foam will subside, and you’ll see tiny brown specks forming at the bottom of the pan. The butter will smell nutty and amazing. As soon as it turns a light amber color—think the color of a hazelnut—remove the pan from the heat immediately. Burnt butter happens fast, so don’t walk away.
- Crisp the sage leaves. While the butter is still hot, drop in about 10 whole sage leaves. They’ll sizzle and crisp up in about 15-20 seconds. Use a fork or slotted spoon to transfer them to a paper towel-lined plate. They’ll continue to crisp as they cool. Reserve these for garnish later.
- Sauté the aromatics. Return the skillet with the brown butter to medium heat. Add the diced onion and celery. Cook, stirring occasionally, for about 5-6 minutes, until the vegetables are softened and the onion is translucent. The edges should be just starting to turn golden. Add the remaining chopped sage leaves and cook for another minute until fragrant. The smell at this point is absolutely intoxicating.
- Combine the bread and butter mixture. Place your dried sourdough cubes in a large mixing bowl. Pour the hot brown butter mixture over the bread cubes, including all the browned bits from the bottom of the pan. Toss everything together gently but thoroughly with a wooden spoon or your hands. Every cube should be lightly coated in that nutty, herby butter.
- Add the broth and eggs. In a separate small bowl or liquid measuring cup, whisk together the 1 ½ cups of low-sodium broth and the 2 lightly beaten eggs. Pour this mixture evenly over the buttered bread cubes. Toss again until everything is evenly moistened. The bread should be wet but not swimming in liquid—think of a very wet bread salad. Season with ½ teaspoon of salt and ¼ teaspoon of black pepper, then toss once more.
- Transfer to the baking dish. Pour the stuffing mixture into your greased 9×13-inch baking dish. Spread it into an even layer. Don’t press it down too firmly—you want some air pockets for those crispy edges to form. If you like a very crispy top, leave the surface a little uneven with some bread cubes sticking up.
- Bake to perfection. Place the dish in the preheated oven and bake for 25-30 minutes, until the top is golden brown and the edges are crispy and dark. The center should be set but still slightly soft. If you want extra browning on top, switch the oven to broil for the last 1-2 minutes—but watch it like a hawk to prevent burning.
- Garnish and rest. Remove the stuffing from the oven and let it rest for 5 minutes. This allows the structure to set so it holds together better when you serve it. Just before serving, crumble the reserved crispy sage leaves over the top. They add a beautiful texture and a concentrated sage flavor that ties everything together.
Sensory Cue: When the stuffing is done, you should hear a faint sizzle when you pull it from the oven. The top will be a deep golden brown, and the edges will look almost caramelized. If you poke the center with a fork, it should feel firm but give slightly. That’s your sign that it’s ready.
Cooking Tips & Techniques
I’ve made this recipe more times than I can count, and I’ve learned a few things the hard way. Here are my best tips to ensure your stuffing turns out perfect every single time.
Don’t rush the browning process. The first time I made this, I cranked the heat to high thinking it would speed things up. Big mistake. The butter burned before the milk solids had a chance to toast properly, and the whole thing tasted bitter. Keep the heat at medium, and be patient. The butter will go through stages—melting, foaming, subsiding, and finally browning. Each stage takes about a minute, so give yourself a full 4-5 minutes. Swirl the pan occasionally to ensure even browning.
Use day-old bread for the best texture. Fresh bread is too soft and will turn into a pasty mess when you add the broth. I’ve learned this from experience. If your bread is fresh, cut it into cubes and spread it on a baking sheet overnight. If you’re in a hurry, you can dry it in a 300°F oven for 10-15 minutes. The goal is to remove surface moisture so the bread can absorb the butter and broth without disintegrating.
Season in layers. This is a tip I picked up from a chef friend, and it makes a noticeable difference. Season the vegetables as they cook with a pinch of salt. Season the broth mixture before adding it to the bread. And then season the entire mixture again before baking. This layering ensures that every component is flavorful, not just the surface.
Watch the liquid ratio. Different breads absorb liquid at different rates. Sourdough tends to be a bit more absorbent than softer white breads. If your mixture looks dry after adding the broth and eggs, add an extra ¼ cup of broth. If it looks soupy, add a handful more bread cubes. The mixture should look moist but not wet, with no standing liquid at the bottom of the bowl.
My biggest failure: I once forgot to beat the eggs before adding them to the mixture. I cracked them directly into the bowl and then tried to mix them in. The result was a stuffing with occasional pockets of cooked egg white—not great. Always beat the eggs in a separate bowl first. It takes 30 seconds and makes a world of difference.
Variations & Adaptations
This recipe is wonderfully flexible. Here are a few ways I’ve adapted it depending on what I have on hand or who I’m cooking for.
Gluten-Free Version: Swap the sourdough for a good-quality gluten-free bread. Look for one that’s sturdy—soft gluten-free breads tend to fall apart. I’ve had great results with a crusty gluten-free sourdough from a local bakery. The rest of the ingredients are naturally gluten-free, so it’s an easy swap. Just be aware that gluten-free bread absorbs liquid faster, so you may need slightly less broth.
Add Some Meat: For a heartier version, cook ½ pound of Italian sausage or diced bacon before sautéing the onions and celery. Remove the meat from the pan, then proceed with the recipe as written, stirring the cooked meat back in when you combine the bread and butter mixture. The rendered fat adds another layer of savory flavor. I’ve done this for a holiday brunch, and it was a huge hit.
Seasonal Twist: In the fall, I love adding ½ cup of dried cranberries and ¼ cup of toasted pecans to the mix. The sweetness of the cranberries plays beautifully against the nutty brown butter, and the pecans add a wonderful crunch. In the spring, try adding ½ cup of sautéed mushrooms and a handful of fresh parsley for an earthier flavor profile.
Dairy-Free Option: Use a high-quality vegan butter for the browning process. I’ve tested this with a few brands, and Miyoko’s European Style Cultured Vegan Butter works exceptionally well. It browns beautifully and has a rich, buttery flavor. The texture of the final dish is slightly less crisp on the edges, but the flavor is still outstanding.
Spice It Up: If you like a little heat, add ½ teaspoon of red pepper flakes when you sauté the onions and celery. The warmth builds slowly and complements the sage without overpowering it. I did this on a whim one night, and now it’s my preferred way to make it when I’m cooking just for myself.
Serving & Storage Suggestions
This stuffing is best served hot, straight from the oven, with those crispy edges still crackling. But here’s how to make the most of it, whether you’re eating it right away or saving some for later.
Serving Temperature: Serve the stuffing hot, ideally within 10 minutes of coming out of the oven. The texture is at its peak when the top is crispy and the inside is tender and steaming. If you let it sit too long, the crispy edges will soften. I like to transfer it to a warm serving platter if I’m not serving it straight from the baking dish.
What to Serve With It: This stuffing is incredibly versatile. It’s a natural side for roast chicken, turkey, or pork chops. I’ve also served it alongside a simple green salad with a lemon vinaigrette for a lighter meal. For a cozy weeknight dinner, pair it with a pan-seared chicken breast and a drizzle of pan juices. If you’re feeling indulgent, a dollop of cranberry sauce on the side is never a bad idea.
Storage Instructions: Leftover stuffing keeps well in the refrigerator for up to 4 days. Store it in an airtight container. The flavors actually meld and deepen overnight, so leftovers can be even better than the first serving. I’ve been known to eat cold stuffing straight from the fridge as a midnight snack—don’t judge.
Reheating Tips: To reheat, place the stuffing in a 350°F oven for 10-15 minutes, until heated through and the top crisps up again. You can also reheat individual portions in a skillet over medium heat, stirring occasionally, for about 5 minutes. Avoid the microwave if you can—it makes the bread soggy and the crispy edges disappear. If you’re in a rush, the microwave works in a pinch, but the texture won’t be the same.
Freezer-Friendly: This stuffing freezes beautifully. Let it cool completely, then transfer it to a freezer-safe container or zip-top bag. It will keep for up to 3 months. To serve, thaw overnight in the refrigerator, then reheat in a 350°F oven until hot and crispy on top. I often make a double batch and freeze one for a busy weeknight down the road.
Nutritional Information & Benefits
While this is comfort food at its finest, it also offers some surprising nutritional benefits worth noting.
Estimated Nutritional Values (per serving, based on 8 servings):
- Calories: 285
- Total Fat: 12g
- Saturated Fat: 7g
- Cholesterol: 65mg
- Sodium: 480mg
- Total Carbohydrates: 34g
- Dietary Fiber: 2g
- Sugars: 4g
- Protein: 8g
Health Benefits of Key Ingredients: Sourdough bread is naturally fermented, which can make it easier to digest for some people compared to conventional bread. The fermentation process also reduces the bread’s glycemic index, meaning it has a less dramatic impact on blood sugar levels. Sage is packed with antioxidants and has anti-inflammatory properties—it’s been used in traditional medicine for centuries. Brown butter, while indulgent, contains conjugated linoleic acid, which has been linked to various health benefits when consumed in moderation.
Dietary Considerations: This recipe can be made gluten-free with a simple bread swap. It’s vegetarian as written, and can be made vegan with a dairy-free butter alternative and a flax egg substitute (1 tablespoon ground flaxseed mixed with 3 tablespoons water per egg). It contains dairy and gluten in its standard form, so be mindful if you’re cooking for someone with allergies.
My Personal Wellness Perspective: I believe in enjoying food that nourishes both body and soul. This stuffing isn’t an everyday meal, but it’s a wonderful way to bring comfort and joy to a weeknight dinner. The combination of whole-food ingredients—real butter, fresh herbs, and quality bread—makes it a far better choice than anything from a box. It’s about balance, not perfection.
Conclusion
This quick brown butter sage stuffing with sourdough has become my go-to for those nights when I need something that feels special but doesn’t require a whole day in the kitchen. It’s proof that the best recipes often come from late-night cravings and a willingness to improvise with what you have. The nutty depth of the brown butter, the earthy fragrance of the sage, and the satisfying chew of the sourdough come together in a way that makes you wonder why you ever bothered with the boxed stuff.
I love this recipe because it’s forgiving. You can tweak it, adapt it, and make it your own without worrying about ruining it. Add some sausage, throw in some cranberries, or keep it simple—it works every time. It’s the kind of dish that makes you feel like a good cook, even on a tired Tuesday night.
So go ahead—give it a try. Brown that butter, crisp those sage leaves, and let the smell fill your kitchen. And when you take that first bite, with the crispy edges and the soft, savory center, come back and tell me about it. I’d love to hear how it turned out for you. Drop a comment below or tag me in your photos—I’m always looking for new twists on an old favorite. Happy cooking!
Frequently Asked Questions
Can I make this stuffing ahead of time?
Absolutely. You can assemble the stuffing completely (through step 7) up to 24 hours in advance. Cover the dish tightly with foil and refrigerate. When you’re ready to bake, add about 10 minutes to the baking time since you’re starting from cold. This makes it a fantastic option for holiday meals when oven space is at a premium.
Can I use dried sage instead of fresh?
You can, but I really recommend fresh sage for this recipe. Fresh sage has a more vibrant, aromatic flavor that stands up to the nutty brown butter. If you must use dried, use about 1 tablespoon of dried sage, crumbled, and add it with the onions and celery so it has time to rehydrate and soften. The texture and flavor won’t be quite the same, but it will still be tasty.
Why did my stuffing turn out soggy?
Soggy stuffing usually happens for one of two reasons: your bread was too fresh and soft, or you added too much liquid. Make sure your bread cubes are thoroughly dried before you start—stale or oven-dried bread is essential. Also, be careful not to oversaturate the bread. The mixture should look moist but not wet, with no standing liquid in the bowl. If you’re unsure, err on the side of less broth. You can always add more, but you can’t take it out.
Can I use a different type of bread?
Yes, but the texture will vary. A sturdy, crusty bread like ciabatta or a French boule works well. Avoid soft sandwich bread or brioche unless you want a very tender, almost pudding-like texture. The sourdough is ideal because it’s dense and chewy, so it holds its shape even after absorbing all that buttery goodness. If you use a softer bread, reduce the broth by about ¼ cup to prevent sogginess.
How do I get more crispy edges?
For maximum crispiness, spread the stuffing in a thinner layer in the baking dish. A 9×13-inch dish is perfect for one batch. You can also use a larger dish or a rimmed baking sheet for even more surface area. Don’t press the stuffing down—leave it loose and uneven so the exposed bread cubes get golden and crunchy. And if you really want to go for it, broil the top for the last minute or two of baking. Just watch it carefully to avoid burning.
Pin This Recipe!
Easy Sourdough Brown Butter Sage Stuffing Recipe

A quick and easy stuffing recipe made with sourdough bread, brown butter, and fresh sage. Perfect for weeknights or holidays, this dish delivers crispy edges and deep, nutty flavor in about 45 minutes.
- Prep Time: 15 minutes
- Cook Time: 30 minutes
- Total Time: 45 minutes
- Yield: 8 servings
- Category: Side Dish
- Cuisine: American
Ingredients
- Sourdough bread, cut into 1-inch cubes (about 8 cups)
- Unsalted butter (6 tablespoons)
- Fresh sage leaves (about 15-20 leaves)
- Yellow onion, diced (1 medium)
- Celery stalks, diced (2 large)
- Low-sodium chicken or vegetable broth (1 ½ cups)
- Large eggs, lightly beaten (2)
- Salt and freshly ground black pepper (to taste)
Instructions
- Preheat your oven to 375°F (190°C). Spread sourdough cubes on a baking sheet; if fresh, dry in oven for 5-7 minutes.
- In a large skillet over medium heat, melt 6 tablespoons unsalted butter. Cook until it foams, subsides, and turns light amber (about 3-4 minutes). Remove from heat immediately.
- Drop about 10 whole sage leaves into the hot brown butter; they will crisp in 15-20 seconds. Transfer to a paper towel-lined plate for garnish.
- Return skillet to medium heat. Add diced onion and celery; cook 5-6 minutes until softened and translucent. Add remaining chopped sage leaves; cook 1 minute more.
- Place dried sourdough cubes in a large bowl. Pour hot brown butter mixture over cubes; toss gently to coat evenly.
- In a small bowl, whisk together 1 ½ cups broth and 2 lightly beaten eggs. Pour over buttered bread cubes; toss until evenly moistened. Season with ½ teaspoon salt and ¼ teaspoon pepper; toss again.
- Transfer mixture to a greased 9×13-inch baking dish; spread evenly without pressing down.
- Bake for 25-30 minutes until top is golden brown and edges are crispy. For extra browning, broil 1-2 minutes at the end.
- Remove from oven; let rest 5 minutes. Crumble reserved crispy sage leaves over top before serving.
Notes
Use day-old or slightly stale sourdough for best texture. Brown butter over medium heat to avoid burning. Season in layers for maximum flavor. If mixture looks dry, add extra ¼ cup broth; if soupy, add more bread cubes. Always beat eggs before adding.
Nutrition
- Serving Size: 1 serving (about 1 c
- Calories: 285
- Sugar: 4
- Sodium: 480
- Fat: 12
- Saturated Fat: 7
- Carbohydrates: 34
- Fiber: 2
- Protein: 8
Keywords: stuffing, sourdough, brown butter, sage, Thanksgiving, side dish, easy, quick


